
Bucketing Fields
What's on this page
About Bucketing Fields
You can “bucket” answers to questions into new groups. As soon as a bucketed field is created, it’s applied to existing data, and applied to all new responses going forward. Creating a bucketed field can be a great way to split out your data in different ways for reports and filters without having to make edits to an active survey.
This support page covers how to create a bucketed field. If you’d like to edit an existing bucket field, see Editing Custom Fields.
Example: Let’s say you distribute a survey internationally, asking what country each respondent lives in. Halfway through data collection, you realize you don’t just want to do analyses on the countries, but the whole continents. It’s too late to add a new question or an embedded data element that captures this information, so you bucket countries into regions.
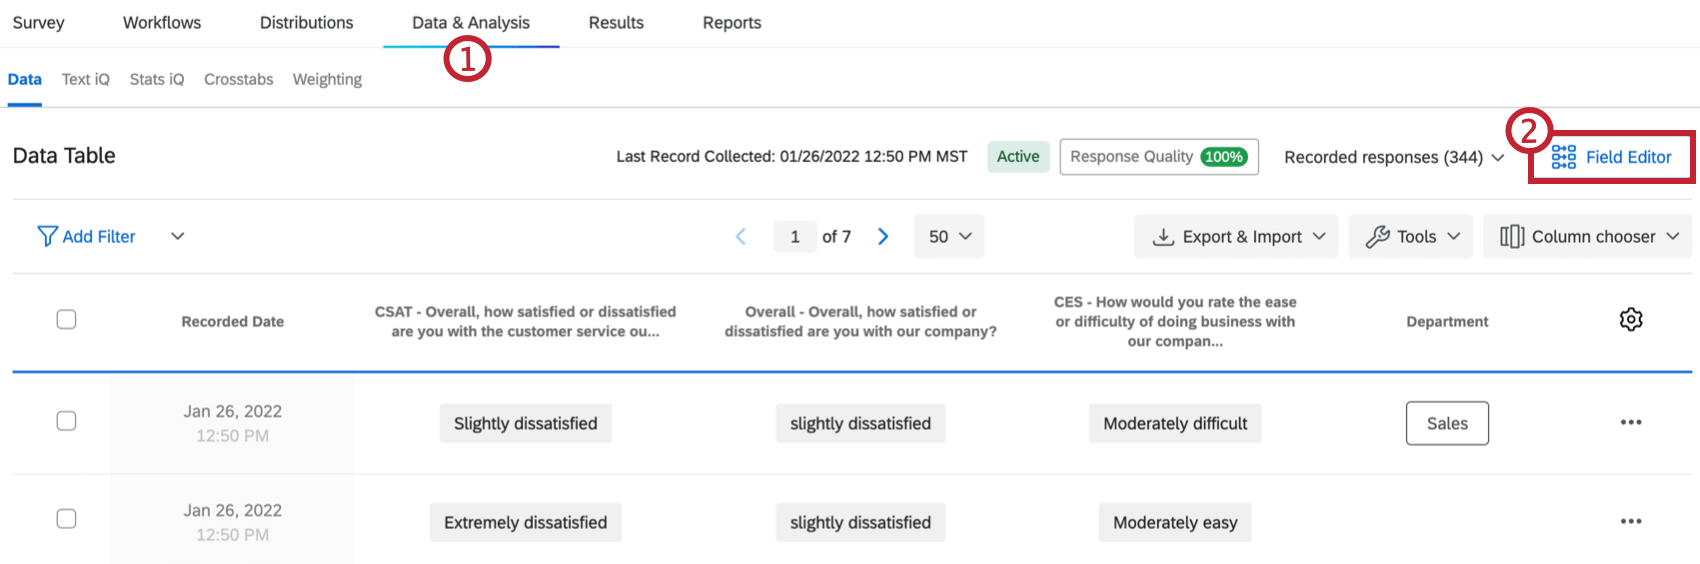
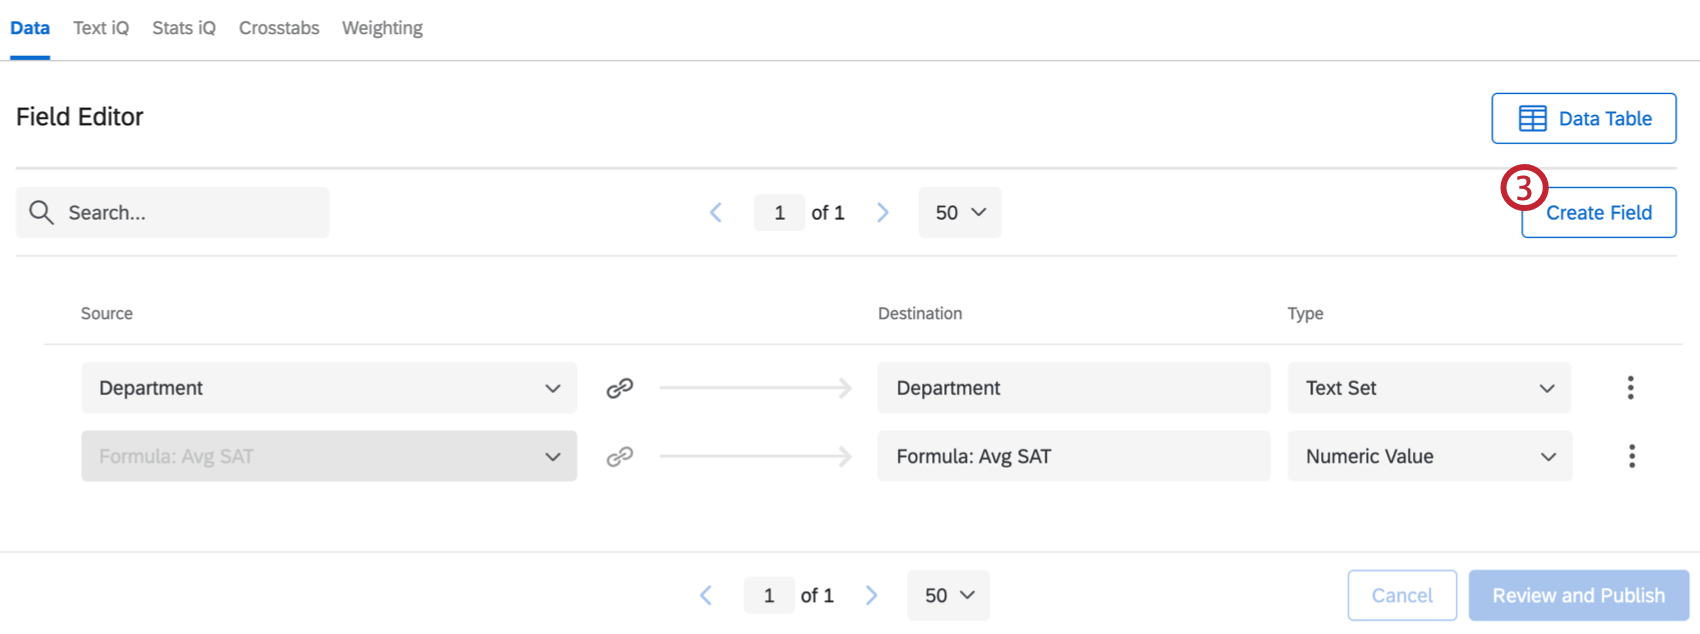
Creating a Bucketing Field
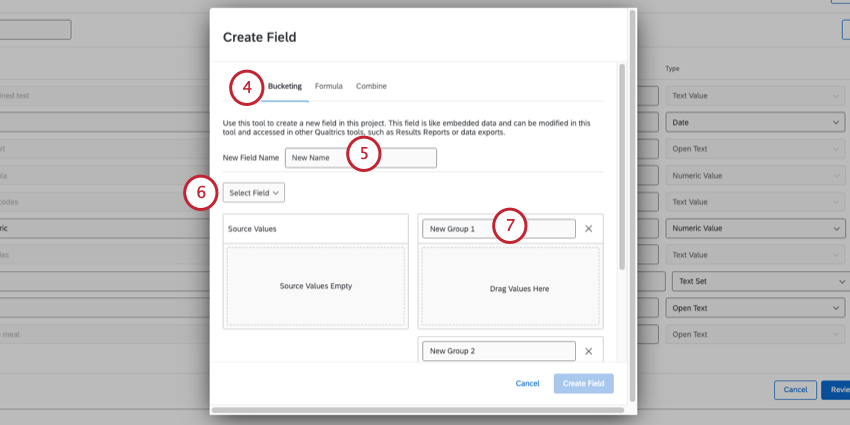
Qtip: You can bucket any multiple choice or numeric data. You cannot bucket other custom fields or open text data (like a standard text entry).
Qtip: The selected field must have 200 or fewer unique values. (I.e., questions cannot have 200+ answer choices.) If the field exceeds this amount, you’ll see the message “Too Many Source Values” in the Source Values box.
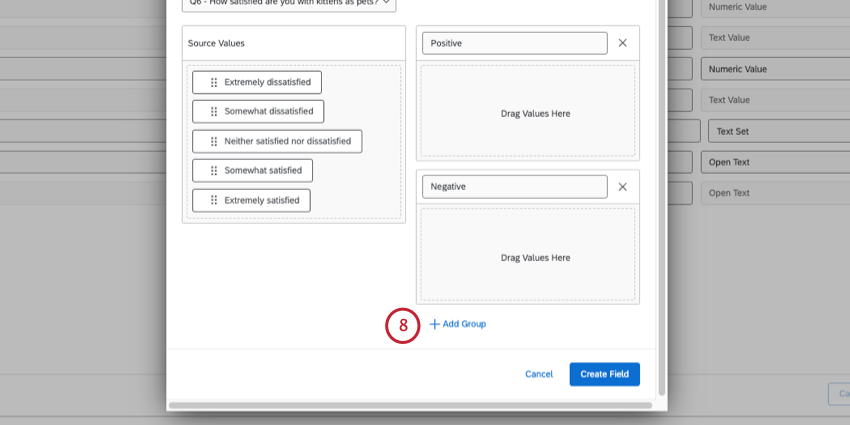
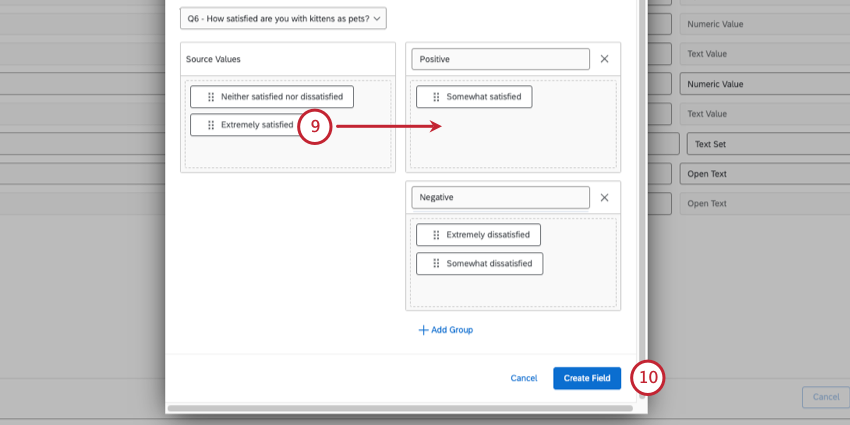
Qtip: Note that you don’t need to have every field sorted into a group. Whenever a value isn’t sorted into a group, it’s marked Uncategorized within your new bucketed field.
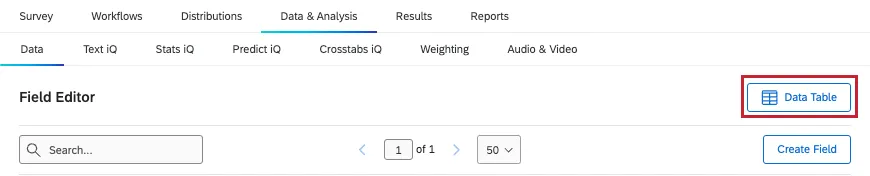
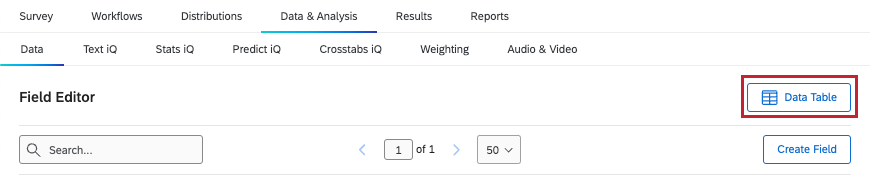
Qtip: Click Data Table to return to your response data.
Attention: Bucketing is compatible with multiple answer questions. However, only 1 group can be assigned per response. For example, if you allow respondents to choose multiple countries where they’ve lived, a field that bucketed countries into continents would only assign them the continent of their first selected answer.
Bucketing Numeric Ranges
When the field you’re trying to bucket is numeric in format, you divide your buckets into numeric ranges instead of the categorical groups described in the previous section.
Example: You want to create buckets for a range of answers to your slider or numeric text entry.

Qtip: Even if an embedded data field is saved in a numeric format, it will always behave like a categorical bucket instead. Multiple choice questions will also always behave as categorical buckets, even if they’re recoded.
Projects Where You Can Bucket Fields
Depending on your license, you may have access to several different types of projects that have a Data & Analysis tab. The options described on this page are available in:
- Survey projects
- XM Solutions
- Imported data projects
- 360 projects Qtip: See Creating New Fields (360) for more details.

- Conjoint / MaxDiff Qtip: While you can bucket Conjoint and MaxDiff-specific fields, the data may not make sense and cannot be recoded. We recommend only bucketing survey fields.
- CX Dashboards
Qtip: When custom fields are added to a CX Dashboard, they become derived data. Although supported, they behave a little differently than other survey fields do. See Derived Data for more details.
While the functionality is technically available, we do not recommend using these custom fields with other types of Employee Experience projects. See Creating New Fields (EX) for more details.
Qtip: While other areas of the platform (like dashboards, Stats iQ, and directories) may also allow you to create new fields, this support page is solely focused on how to create new custom fields in Data & Analysis. For steps on creating other kinds of fields across the XM platform, try narrowing your support site search.
FAQs
How do I edit my custom fields?
How do I edit my custom fields?
Can I edit or add information to a response after it has been submitted?
Can I edit or add information to a response after it has been submitted?
If you would like an individual to retake their response instead, you can find instructions for this on the Retake Survey Link support page.
What AI Model does Qualtrics Assist use?
What AI Model does Qualtrics Assist use?
That's great! Thank you for your feedback!
Thank you for your feedback!