Alerts Basic Overview (Studio)
About Alerts
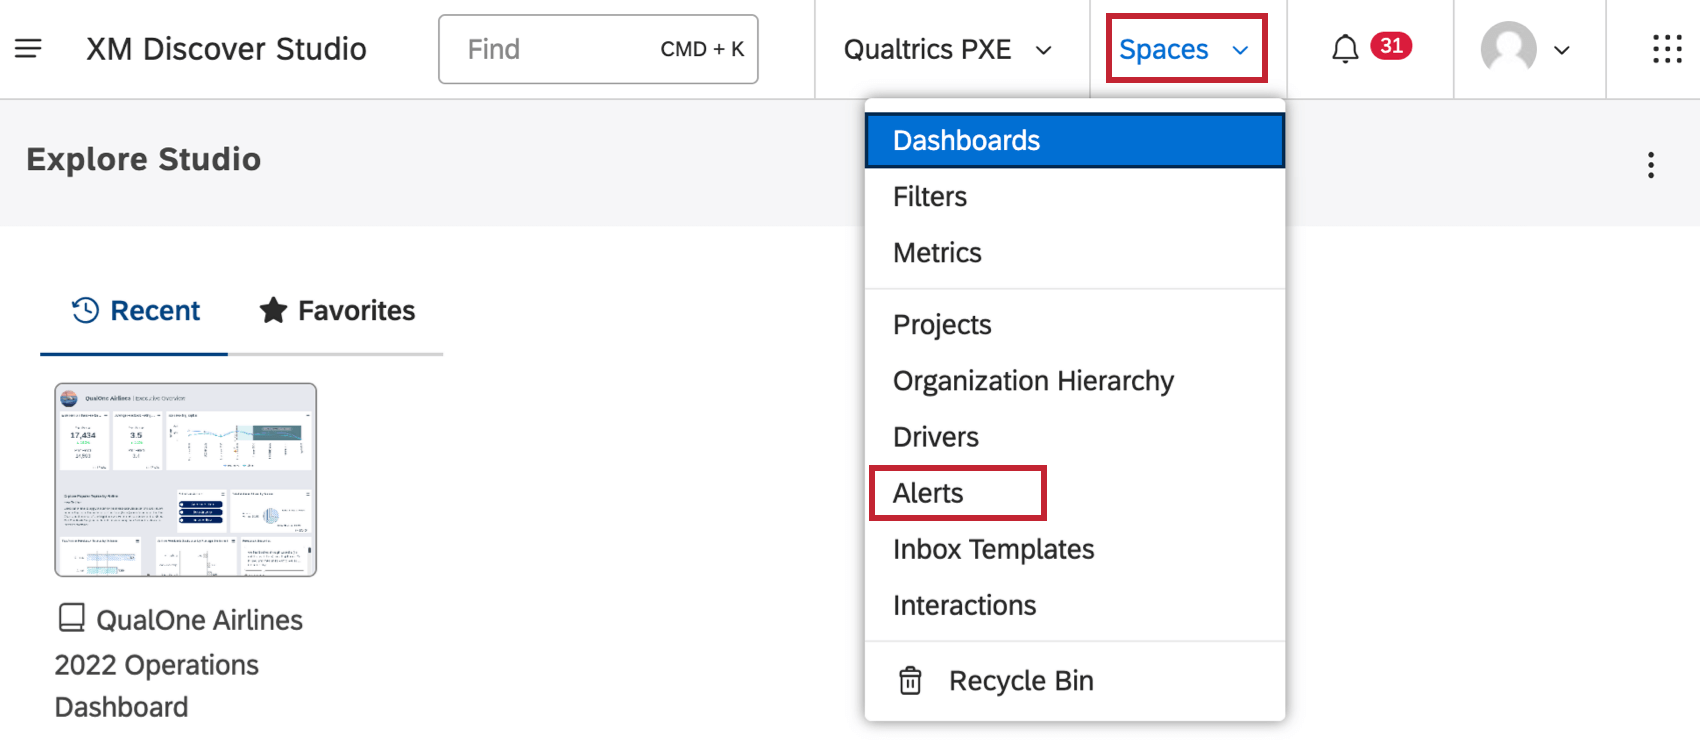
You can create alerts in Discover that let you know and other users know when certain events happen with your data. If you want to create or manage alerts, click the profile icon and select Alerts.
There are 2 kinds of alerts you can create: verbatim and metric.
Verbatim Alerts
Verbatim alerts let you decide which topics you want to be notified about. Every time a certain topic is mentioned in customer feedback, an alert is triggered, letting you investigate the issue and act on it.
- Creating verbatim alerts: A new verbatim alert is created in Designer. It defines topics to be monitored for new feedback. Refer to Designer Help to learn more about creating new verbatim alerts.
- Subscribing: A group in Studio is subscribed to one or more alerts. See Subscribing to Verbatim Alerts.
- Notifications: As new data is loaded into Designer, XM Discover monitors it and, when alert conditions are met, generates an alert. It then becomes available to all group members in Studio in the Alerts menu. Depending on settings, it may also be sent via email.
- Document explorer: Each alert can be opened and examined in document explorer. See Viewing Verbatim Alerts
Interaction Alerts
Interaction alerts are the same as verbatim alerts, but they are created and managed in Studio.
- Login to your Studio account.
- Navigate to the Alerts page.
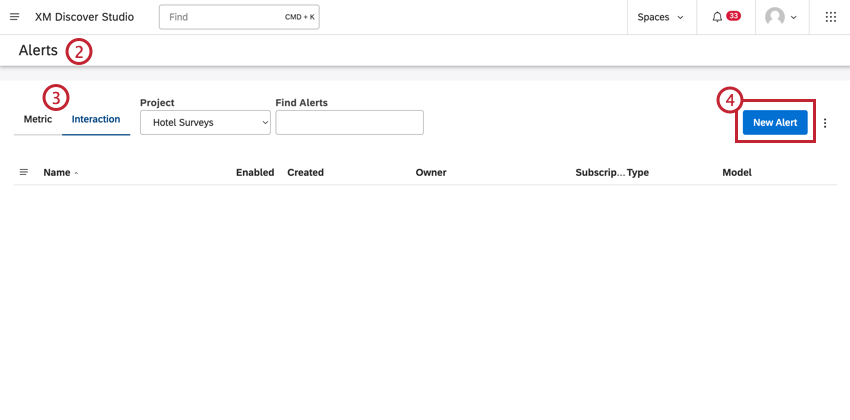
- Make sure the Interaction tab is selected.
- Click New Alert.
- Name the alert.
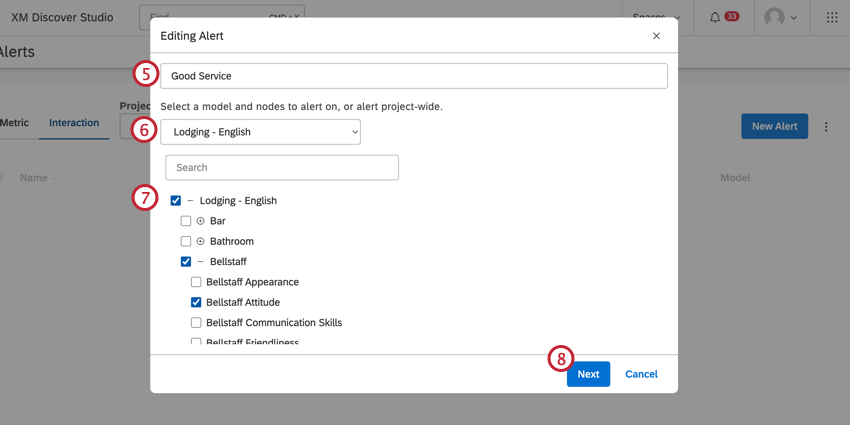
- Choose a category model from the drop-down menu to set the scope. Alternatively, you can alert project-wide.
- Select the relevant categories (nodes) by clicking the category name. Click the plus sign ( + ) next to parent categories to expand them.
- Click Next.
- Select an attribute, then click the arrow pointing right to move them into the selection box. You can choose up to 3 attributes.
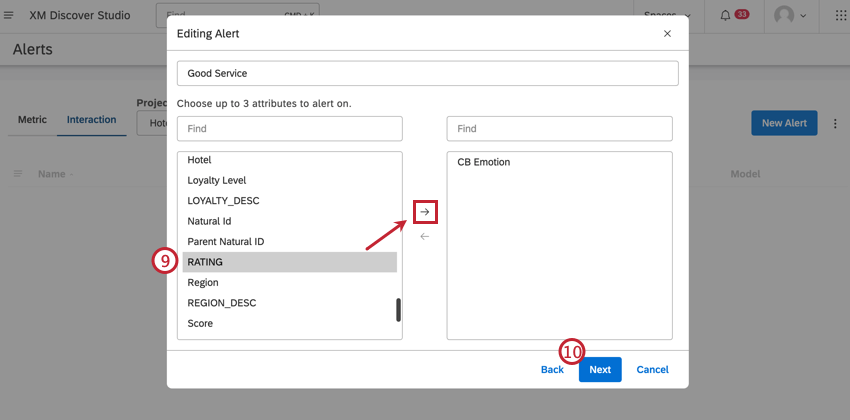 Qtip: Attributes act as filters for the alert conditions. The alert will not fire unless the selected attributes are populated in the relevant document.
 - Click Next.
- Select the filters you would like to apply to the alert, then click the arrow pointing right to move them into the selection box.
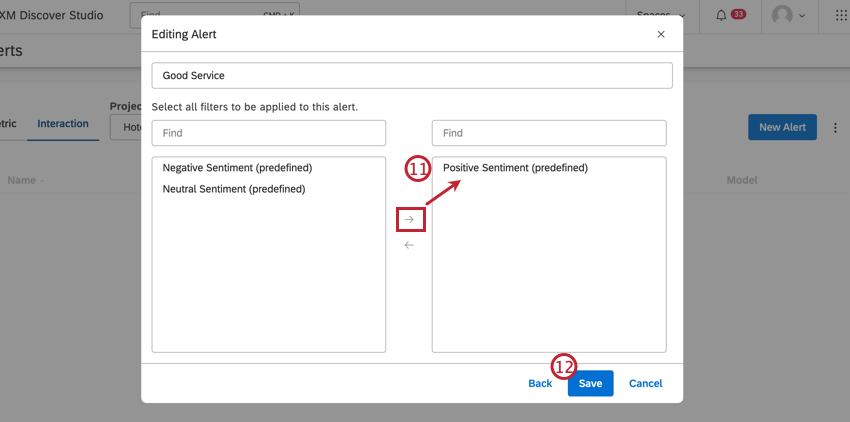
- Click Save.
MANAGING INTERACTION ALERTS
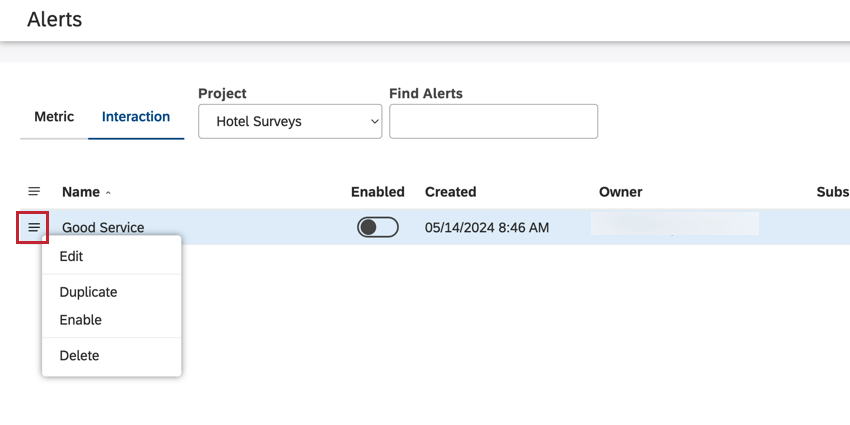
Click the menu icon to the right of your interaction alerts to manage them. You can edit, duplicate, enable, or delete alerts.
Metric Alerts
You can create an alert that sends out whenever a certain threshold is met by one of your metrics. These alerts can be in-app or over email. Set up metric alerts to keep informed on emerging trends, positive and negative spikes, and key goals to help stakeholders make decisions quickly.
See Creating Metric Alerts or Managing Metric Alerts for more.
