
Managing Studio Homepages
What's on this page
About Managing Studio Homepages
Attention: To perform the actions on this page, you must have the Manage Settings permission enabled.

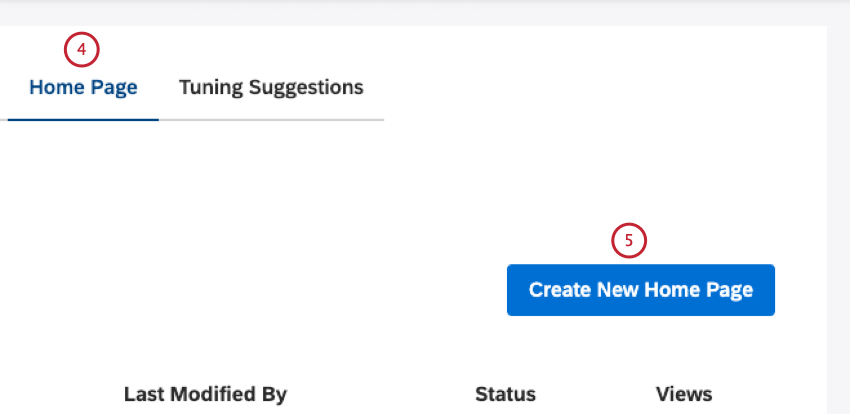
The Home Page tab of Account Settings is where you manage homepages created in Studio. On this page you can do the following:
- Filter homepages by name
- Create a new homepage
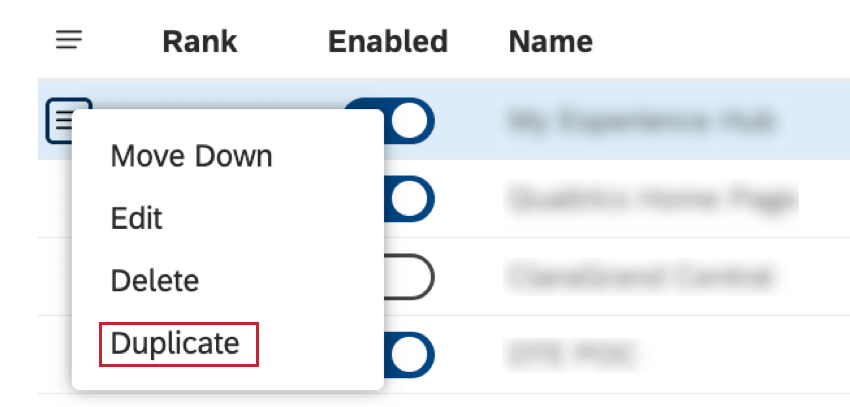
- Use the actions menu to manage homepages:
- Enable or disable homepages
- Duplicate homepages
- Change homepage ranking
- Delete homepages
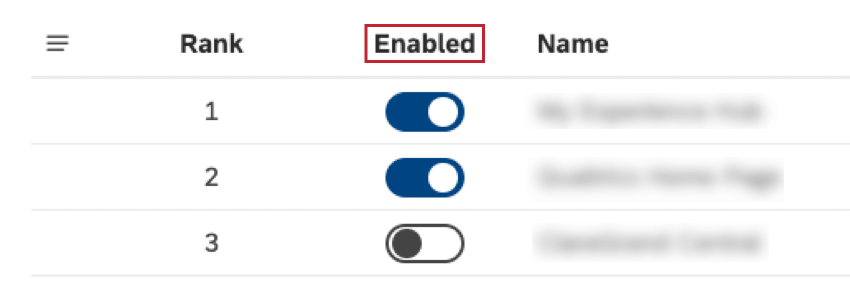
- View homepages’ rank
Viewing Homepage Information
The Studio homepages table provides the following information:

Accessing the Studio Homepage Management Tab


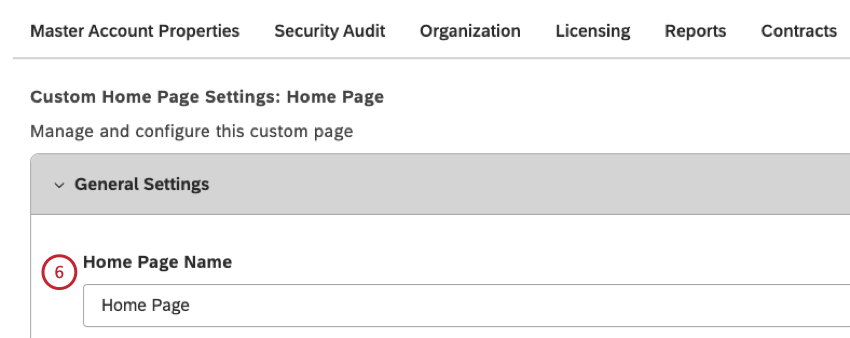
Creating a Homepage in Studio
Attention: This action requires a Manage Settings permission.
Studio homepages enable you to create and configure multiple custom landing pages for specific users and groups, each with customizable content. Homepages can include XM Discover search, What to Watch insights, and a Dashboard Explorer carousel.
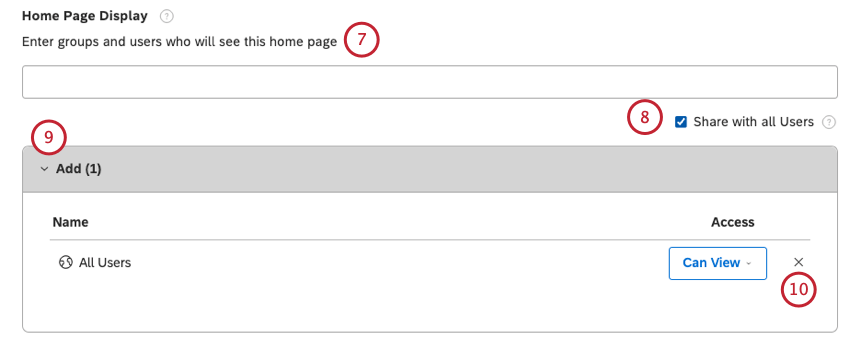
Qtip: Type your email in the Home Page Display box to be able to view the homepage live in Dashboard Explorer.
Qtip: Leave this section empty if you don’t wish to show this homepage to anyone yet, including yourself.
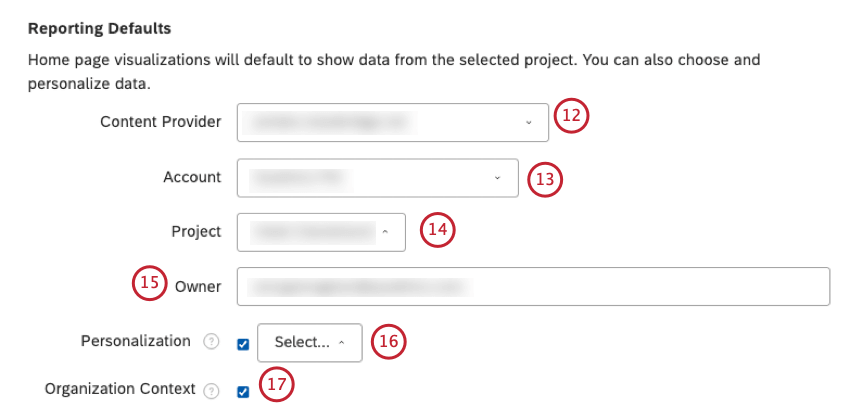
Qtip: Homepage personalization ensures that all content and data is automatically filtered based on each viewer’s position and access in the organization hierarchy.

- Select the Inherit From Home Page Reporting Defaults checkbox to use the Content Provider, Account, Project, and Owner defined in the Reporting Defaults
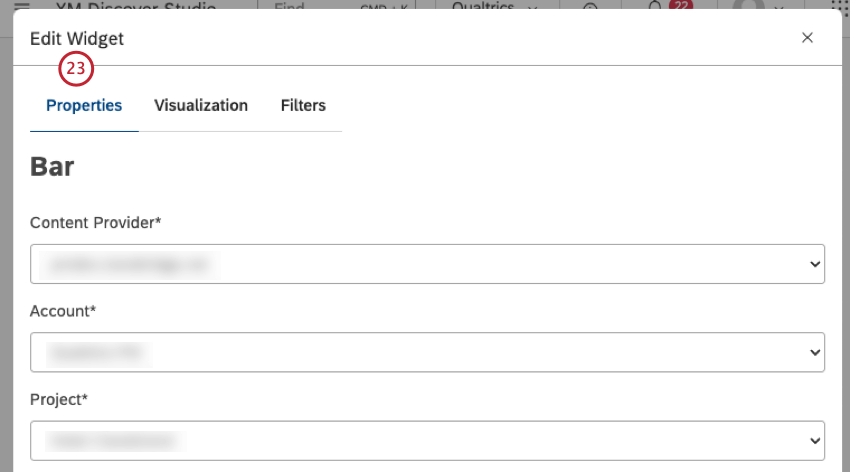
- Deselect the Inherit From Home Page Reporting Defaults checkbox to specify a different source and owner of data. Qtip: Quick Insights widgets will display data on behalf of the user specified as the owner here (or in the Reporting Defaults section if Inherit From Home Page Reporting Defaults option is enabled).

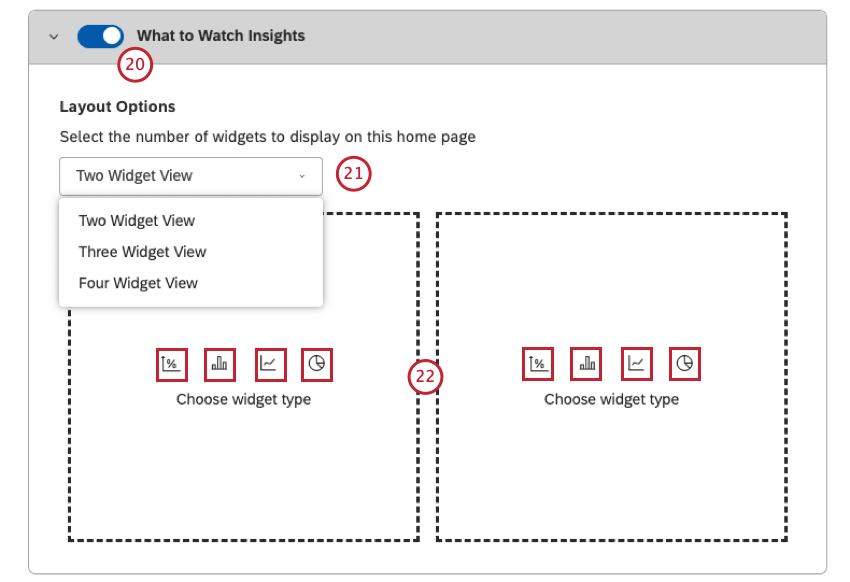
- Two Widget View
- Three Widget View
- Four Widget View
Qtip: What to Watch Insights widgets will display data on behalf of the user who configures them.
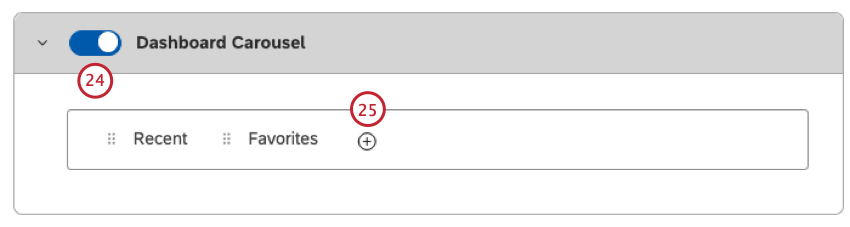
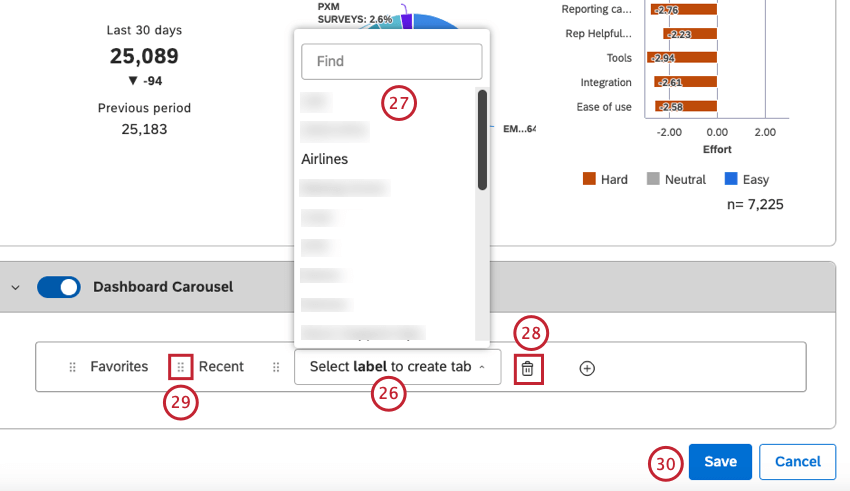
Qtip: Each tab can be linked to only one label.
Attention: System tabs (Recent and Favorites) cannot be deleted.
Dashboard Explorer Carousel
You can use the Dashboard Explorer carousel to:
- Promote dashboard and book labels.
- Make dashboards and books easier to find.
- Provide additional context to dashboards’ and books’ purpose.
You can customize the Dashboard Explorer Carousel page by adding, removing, or reordering tabs in the thumbnail carousel that appears on top of the dashboards and books table. For information on adding, deleting and rearranging tabs, please see the Creating a Home Page in Studio section.
In addition to standard tabs that present recently viewed and favorite items, you can add custom tabs that display dashboards and books based on their labels.
Carousel Tab Visibility
Carousel tabs are visible to all users in your Master Account, regardless of their permissions and dashboard access. Dashboards and books inside the tabs are only visible to those who have access to them.
Qtip: Curated carousel tabs works best with public dashboards and books.
For information on labeling dashboards and books, please see Labeling Dashboards and Books.
Using XM Discover Search
Attention: XM Discover search is not enabled out-of-the-box; you can add it as part of a custom homepage.
XM Discover search is an intelligent search assistant designed to help you find quick XM Insights without building dashboards and setting up widgets. When enabled, XM Discover search appears as a search bar at the top of the Studio homepage.

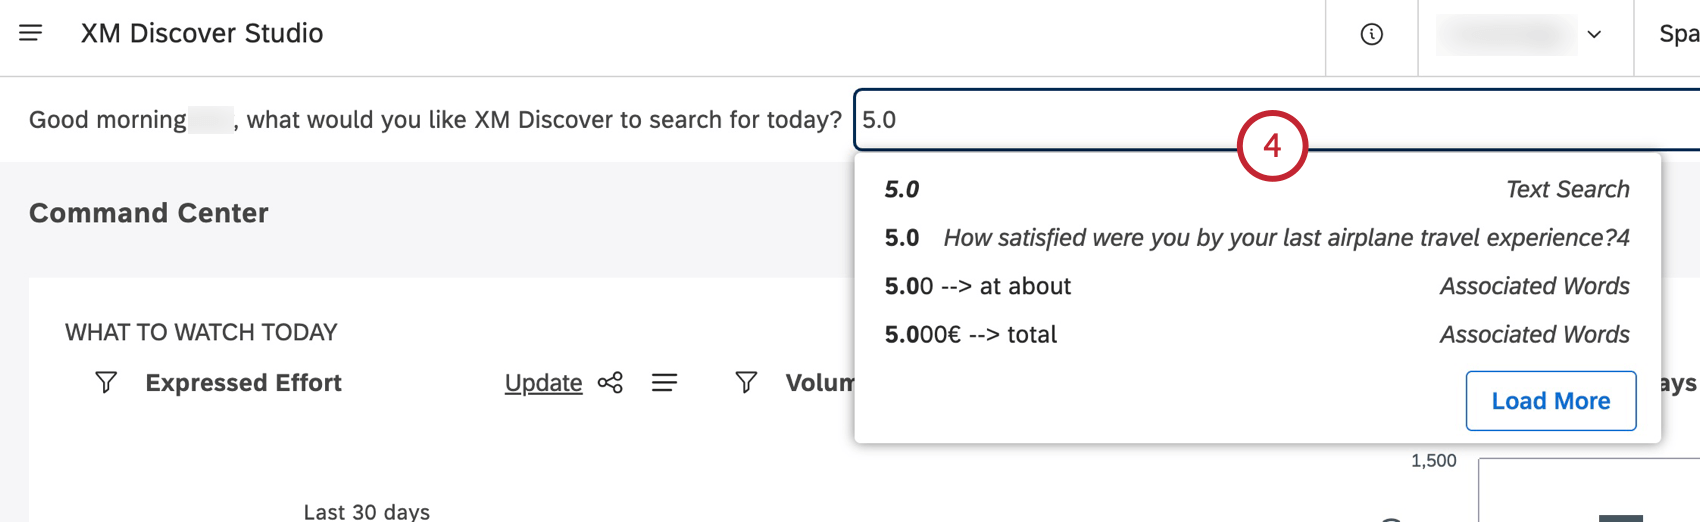
- Text Search: Suggestions tagged as “Text Search” run a keyword search across your data. To learn how text search works, please see About Text Filter.
- Numeric and Text Attribute Value: Suggestions tagged with an attribute name are specific values of an attribute. Attention: Attributes need to be explicitly included in XM Discover search to appear among suggestions.

Qtip: Like other Studio widgets, you can drill into data points for details or to link to or share individual records.
Enabling and Disabling a Homepage
Attention: This action requires a Manage Settings permission.
After you create a homepage, you need to enable it.
Attention: There is no limit to the number of homepages you can create, but you can enable up to 10 of them.
Once 10 homepages are enabled, enabling new homepages will require disabling a previous one first. The default homepage does not count toward this limit.
Duplicating a Homepage
Attention: This action requires a Manage Settings permission.
You can duplicate homepages. When you duplicate a homepage, Reporting Defaults, Quick Insights settings and Dashboard Carousel settings are copied. Sharing settings and What to Watch Insights widgets are not copied.
Changing Homepage’s Rank
Attention: This action requires a Manage Settings permission.
A homepage’s rank determines which homepage to display in case a user has access to more than one homepage and has not set a favorite homepage. The page with the highest rank (for example, 1 is higher than 2) is shown first.
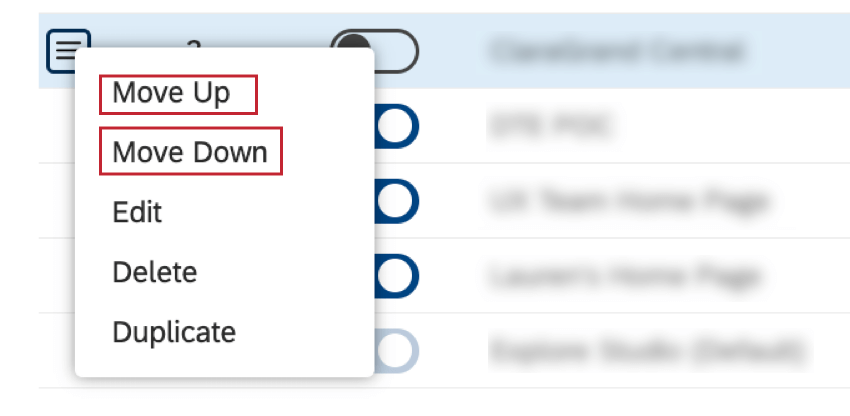
- Move Up: To increase the rank.
- Move Down: To decrease the rank. Qtip: The default homepage always has the lowest rank.
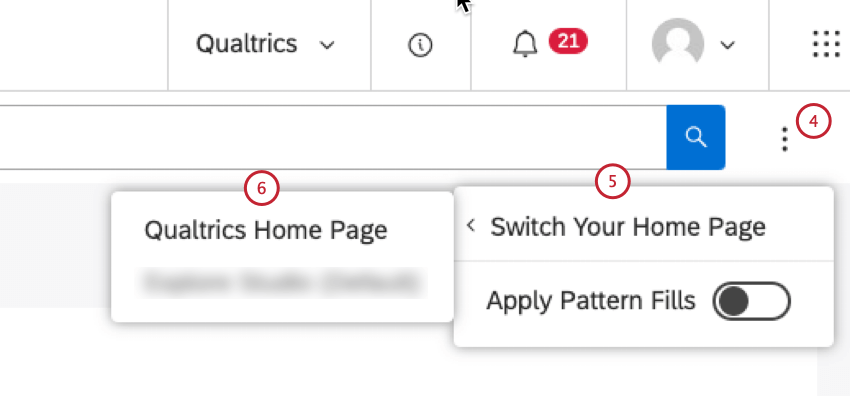
Switching Your Homepage
If you have access to several homepages, you can switch between them manually.
Qtip: The homepage you switch to manually is displayed until the end of your current user session. To permanently change which homepage you see by default, set a favorite homepage or adjust their rank.
Setting a Favorite Homepage
Attention: The Favorite Studio Home Page setting is only available in user preferences if you have access to more than one homepage.
If you have access to several homepages, you can set a favorite homepage to open by default.
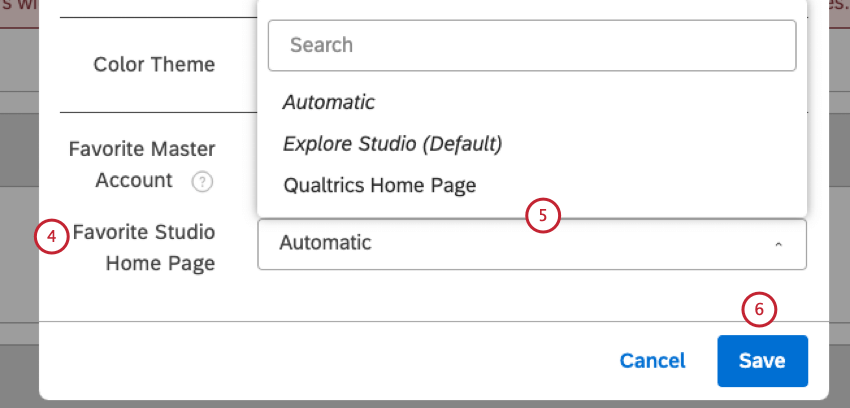
- Automatic: Always show the highest ranked homepage available to you.
- Default: Always start with the system’s default homepage.
- Any specific homepage: Pick a homepage to show by default. Qtip: This setting overrides homepage rankings.
Deleting a Homepage
Attention: This action requires a Manage Settings permission.
You can delete homepages if you no longer need them. When a user’s default homepage is deleted, Studio displays the next-in-rank homepage. When a user’s favorite homepage is deleted, Studio sets this user preference to Automatic.

Restoring a Deleted Homepage
Attention: Unless you restore an object, it gets deleted permanently once the holding period is over.
After you delete an object, it goes into the recycling bin. Deleted objects remain in the recycling bin for 30 days. During this period you can restore a deleted object.
For information on restoring a deleted object, please see Using the Recycle Bin (Studio).
That's great! Thank you for your feedback!
Thank you for your feedback!