Importing and Exporting Sentiment (Designer)
About Importing and Exporting Sentiments
XM Discover allows you to export your custom sentiment tunings as a Microsoft Excel file. You can modify this file to enable or disable sentiment exception rules, or change sentiment values.
This file can then be imported into your Designer project to update your sentiment, or you can import it into a different Designer project to quickly share rules across projects.
Exporting Sentiment Tunings
You can export your custom sentiment tunings by following the steps below.
- In your Designer project, go to the Sentiment tab.
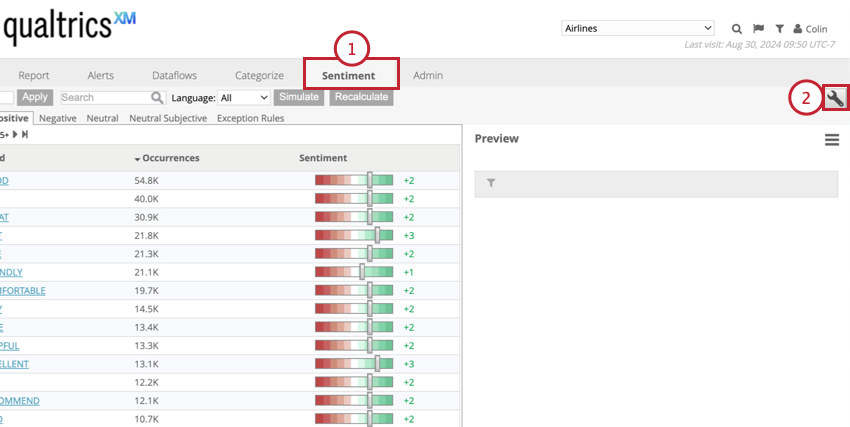
- Click the Sentiment Transfer button (wrench icon).
- Select Export current sentiment to your computer.
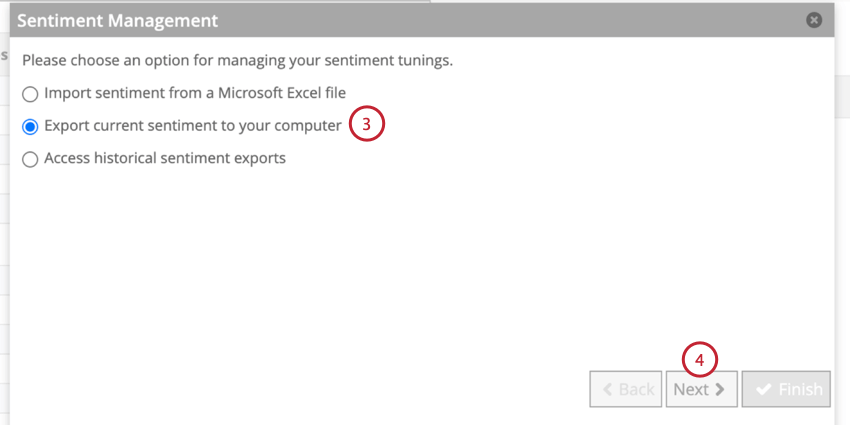
- Click Next.
- Enter an Export Name which will be added to the exported file name.
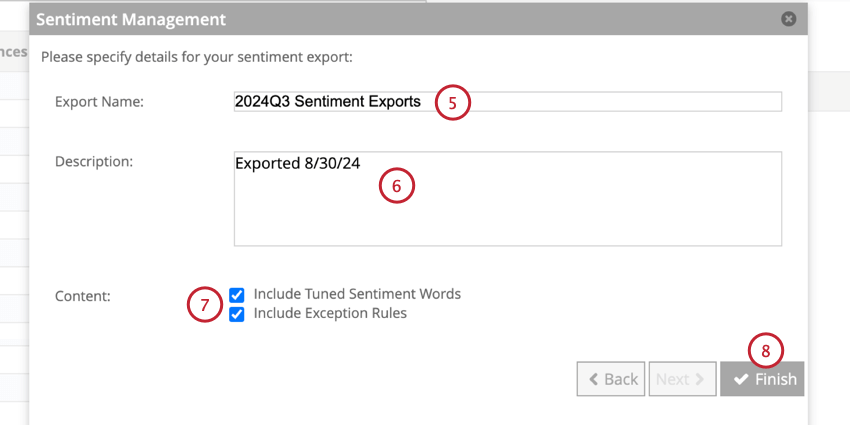
- If desired, enter a description of what’s included in the export.
- Select the Content you’d like included in the export:
- Include Tuned Sentiment Words: Export words with sentiment values different from the default Designer values.
- Include Exception Rules: Export exception rules
- All custom rules are fully exported.
- For standard rules (with a CB or CBCONCEPT prefix) only ID, language, and status are exported.
Qtip: Please reach out to the Discover support team or to one of your Discover representatives for more information about exception rules.
- Click Finish.
Sentiment File Format
The following sheets are in the exported sentiment file:
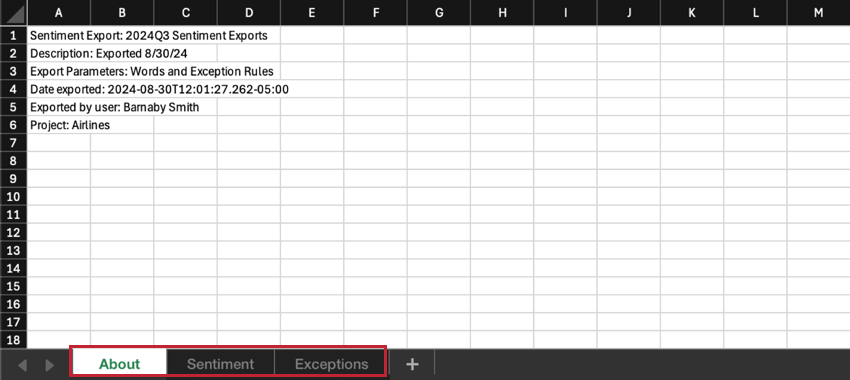
- About: Contains the export overview, including its name and description, export parameters, date of export, user who ran the export, and the name of the project.
- Sentiment: Stores tuned words with their new sentiment values.
- Exceptions: Contains custom and standard Designer exception rules, defined by the following columns:
- CB_ID: This is a text field that contains the readable name of the exception rule. Standard Designer exception rules start with a CB or CBCONCEPT prefix.
- LANGUAGE: This is a text field that contains the language code. Language codes are 2 lower-case letters (for example, “en” for English or “@a” for all languages).
- RULE: This is a text field that contains the custom exception rule conditions.
Example: M1 IN (‘TO’) AND CENTER IN (‘DIE’) AND P1 IN (‘FOR’).
- BINARY_SENTIMENT: This field has been deprecated.
- BINARY_NEGATION: This field has been deprecated.
- DEGREE_SENTIMENT: This is a numeric field that contains the sentiment. This ranges from -5 to +5.
- DEGREE_RELATIVE_SENTIMENT: This is a numeric field that contains the sentiment modifier that was caused by a rule. For example, if a rule raises sentiment by 2 points, set this field to “2.”
- DEGREE_NEGATION: This is a text field that indicates if the rule negates sentiment. If this column contains “NEGATED,” then sentiment was negated. If this column is empty, then it was not negated.
- PRIORITY: This is a numeric field that contains the rule priority. This ranges from 0 to 500.
- STATUS: This is a text field that can be used to enable and disable rules. Enter ENABLED to turn a rule on or DISABLED to turn it off.
Qtip: These values are case sensitive.
- RULE_TYPE: This is a text field that describes the type of rule. Enter NGRAM for N-GRAM (positional) rules or CONCEPT for concept rules.
- FILTER: This is a text field. Use this field to specify shared filters applied to a rule. Separate multiple filters with commas.
Importing Sentiment Tunings
After exporting a sentiment file, you can adjust the file and reimport it back into Designer to update your sentiment rules. You can also import the file into a different Designer project to change the rules there instead.
- Navigate to the Sentiment tab.

- Click the Sentiment Transfer button (wrench icon).
- Select Import sentiment from a Microsoft Excel file.
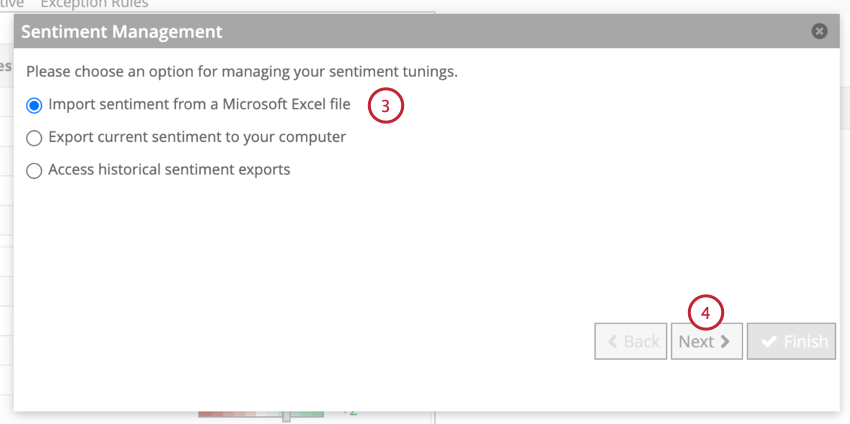
- Click Next.
- Click Choose File and select the sentiment file saved on your computer.
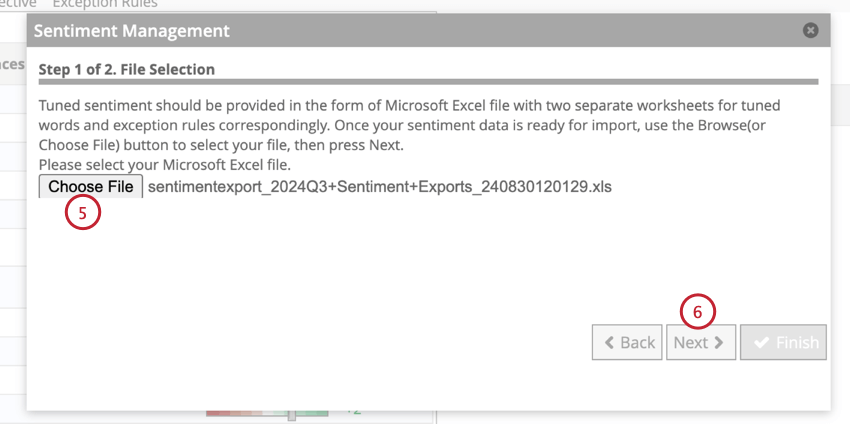
- Click Next.
- Choose your upload settings:
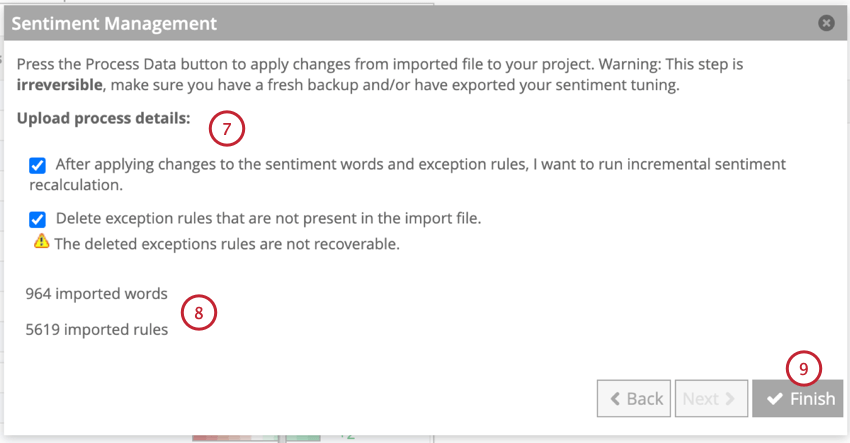
- After applying changes to the sentiment words and exception rules, I want to run incremental sentiment recalculation: Select this option to run incremental sentiment recalculation as soon as the import finishes.
Qtip: You can run sentiment recalculation later, but until you do, imported changes will not take effect.
- Delete exception rules that are not present in the import file: Select this option to completely replace the current custom exception rules with the ones present in the import file.
Attention: Deleted rules cannot be restored.
- After applying changes to the sentiment words and exception rules, I want to run incremental sentiment recalculation: Select this option to run incremental sentiment recalculation as soon as the import finishes.
- You will see how many words and exception rules will be imported.
- Click Finish.
After you click Finish, the following changes will take effect:
- Word sentiment values in your project will be substituted with those explicitly defined in the import file.
- Default Designer exception rules will be turned on or off according to their values in the STATUS column in the import file.
- Custom exception rules will be replaced with those in the import file.
Viewing Past Exports
Designer keeps a record of the 15 most recent sentiment exports in your project. To view these exports:
- Navigate to the Sentiment tab.

- Click the Sentiment Transfer button (wrench icon).
- Select Access historical sentiment exports.
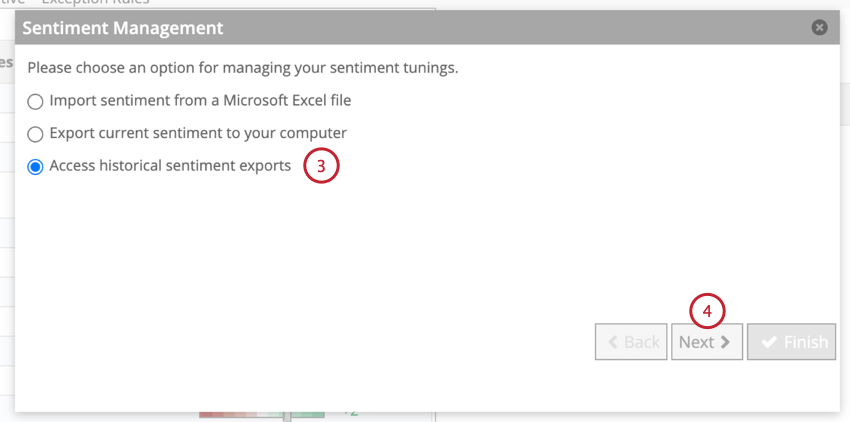
- Click Next.
- You can view the export name, timestamp, and parameters for the most 15 recent exports. Click Download to download that export to your computer.
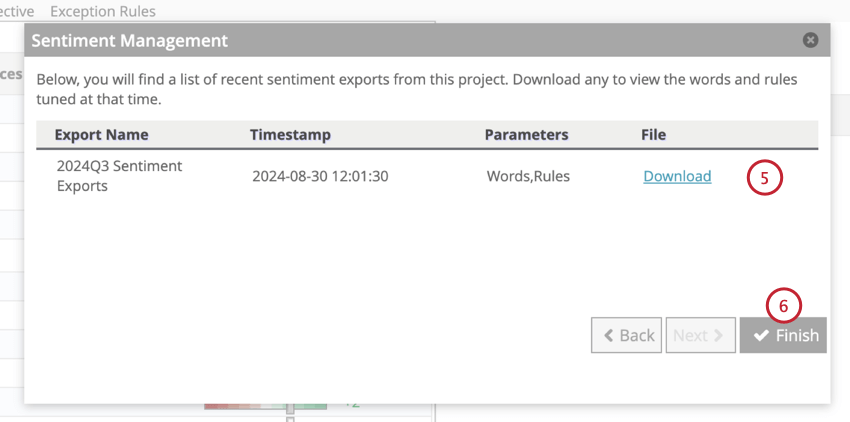
- Click Finish when done.