
Taxonomies
What's on this page
About Taxonomies in XM Discover
Taxonomies are sets of linguistically related words and phrases that you can use in exception rules to assign sentiment.
Example: Let’s say you’re collecting feedback about a hotel you own. The concept of a “big room” is positive, but a customer could express this idea in many different ways, such as:
- “The room was large.”
- “I was given a big room.”
- “The bedroom was unbelievably humongous.”
By default, “big” and “room” are neutral words. You could use exception rules to assign positive sentiment for these words. However, you’d need to create many different rules to account for all the possible variations.
Instead of creating these rules, you can use taxonomies to introduce two concepts:
- “Physical space” which would include words like “room,” “bedroom,” and “suite.”
- “Large size” which would include words like “big,” “large,” and “huge.”
You can then create a single exception rule that will assign positive sentiment when “physical space” is linguistically related to “large size.”
Qtip: You must have the Taxonomy user permission enabled to work with taxonomies.
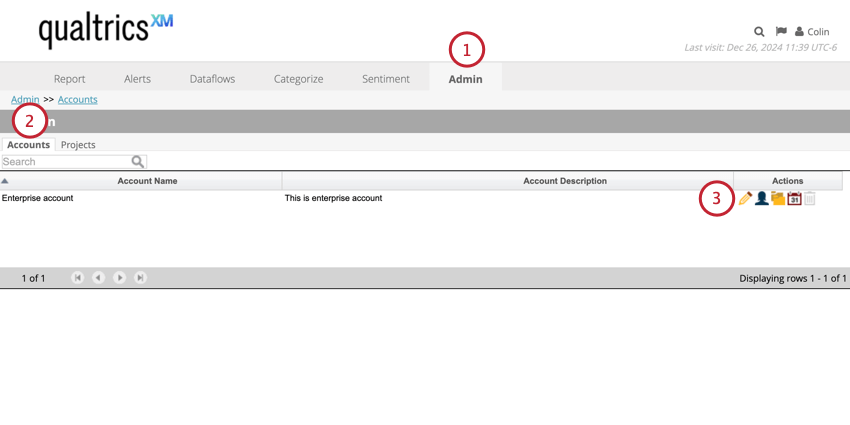
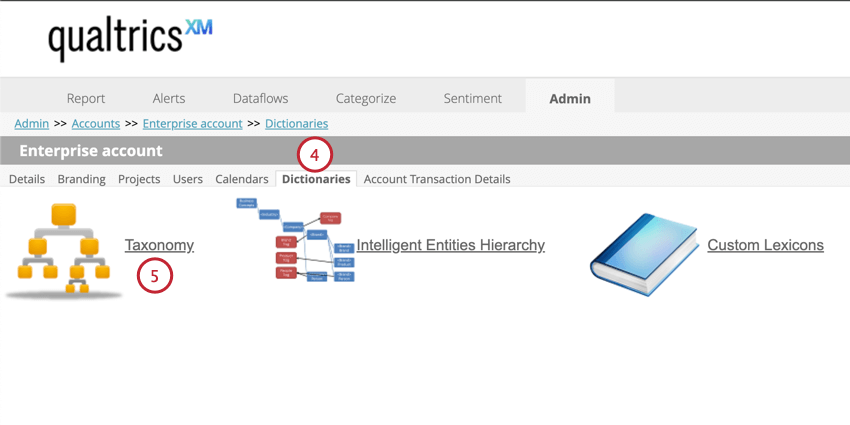
Viewing Taxonomies
Follow the steps in this section to view the taxonomies available in your account.
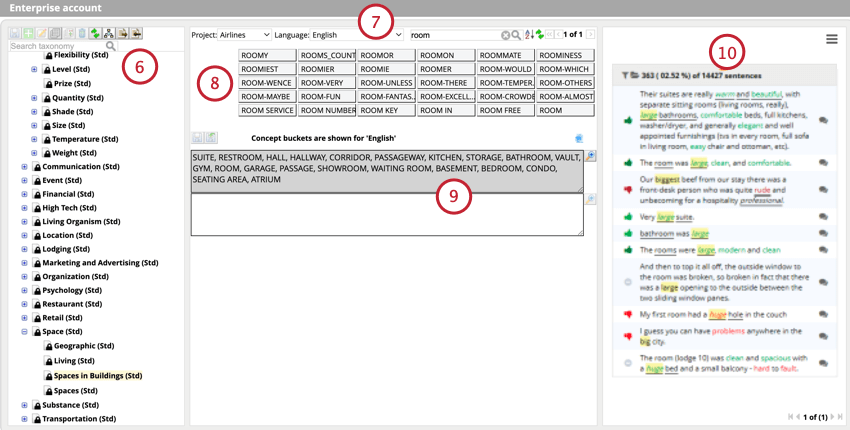
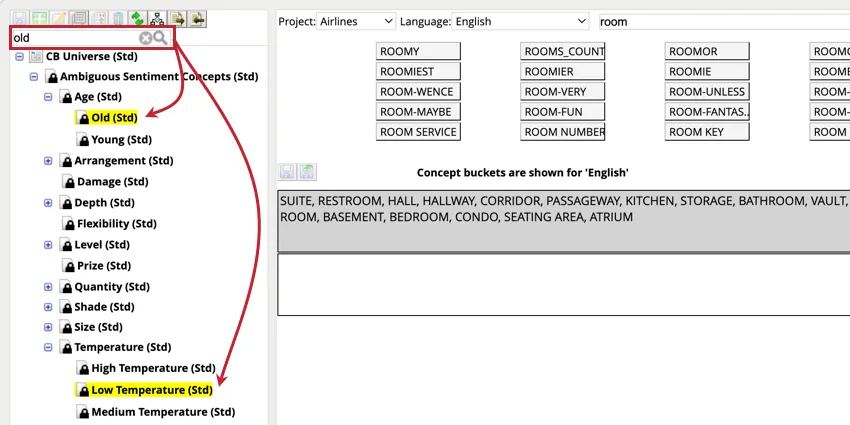
Types of Taxonomies
There are 3 different types of taxonomies:
Creating a Custom Taxonomy Node
Qtip: Before creating a custom taxonomy node, make sure to search the taxonomy tree to check if an existing concept already exists. If it does, you can add additional words instead of creating an entirely new taxonomy node.

You can create custom taxonomies to cover concepts that aren’t included XM Discover by default.
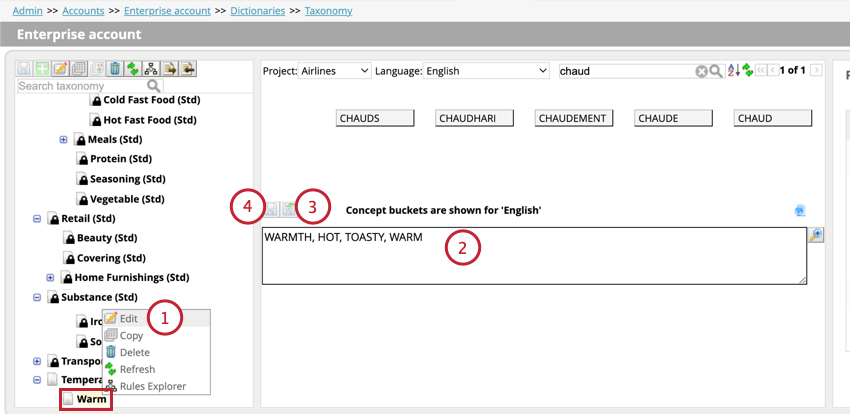
As an example, these steps will cover creating a custom taxonomy node called “Warm” and placing it inside a grouping node called “Temperature.” Then, it’s possible to define related terms for multiple languages.
The process to create a custom taxonomy node can be broken down to the following steps:
Read the subsections below for detailed instructions for each of these steps.
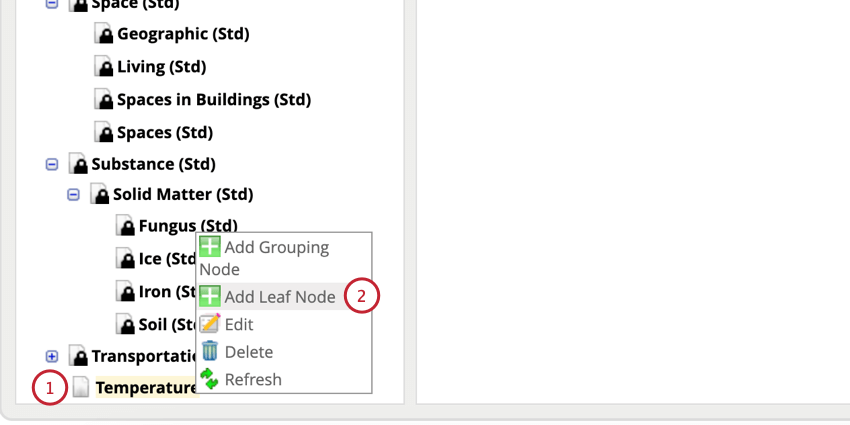
Creating a Grouping Node

Qtip: You can add further groupings within your original groping node. A taxonomy hierarchy may be any number of levels deep.
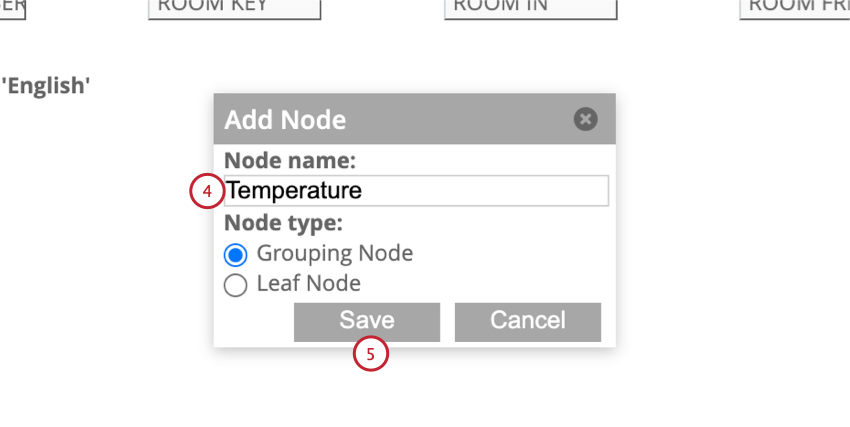
Creating a Concept Node
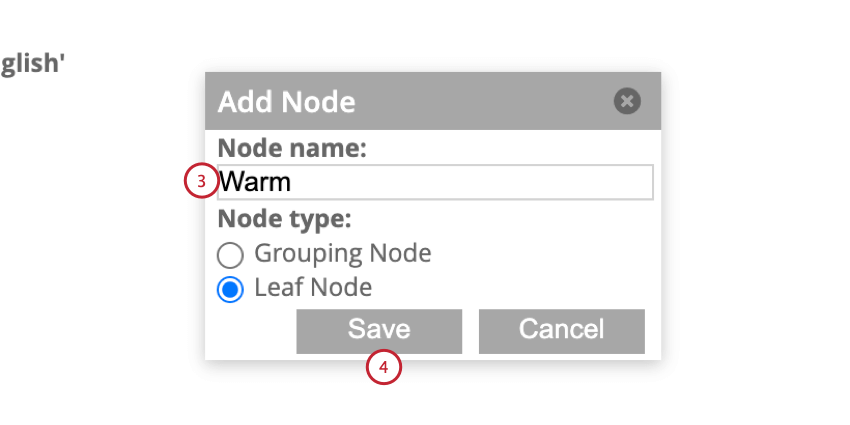
Defining Concept Terms
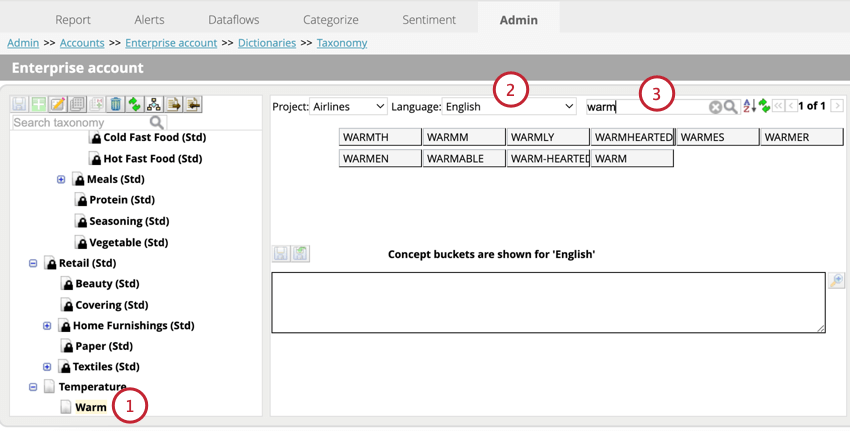
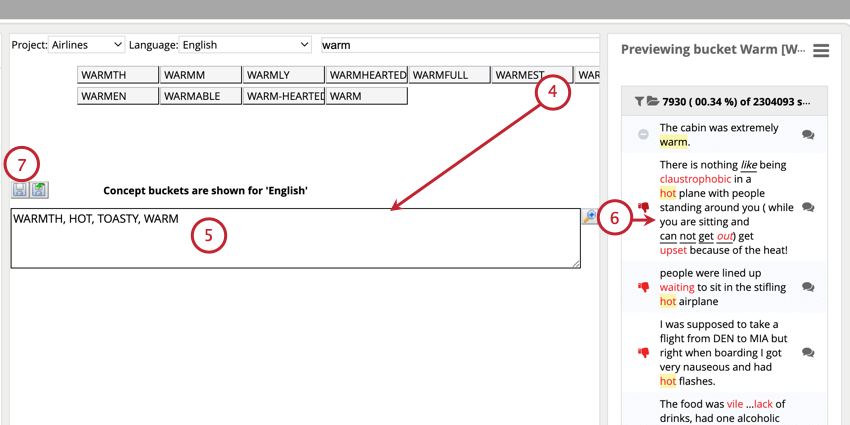
Qtip: To define terms in multiple languages, use the language dropdown to select your desired language. Nodes containing concepts in multiple languages are marked with an icon above the rule box.
Editing Custom Taxonomies
You can customize a custom taxonomy after you’ve created it:
Deleting Custom Taxonomies
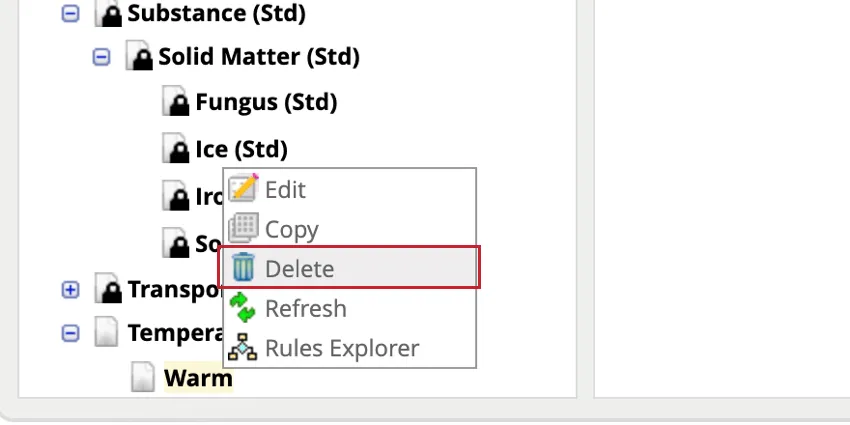
Attention: Deleting a taxonomy node is irreversible.
You can delete any custom taxonomies that are not actively being used in sentiment exception rules. To delete the node, right click it and select Delete.
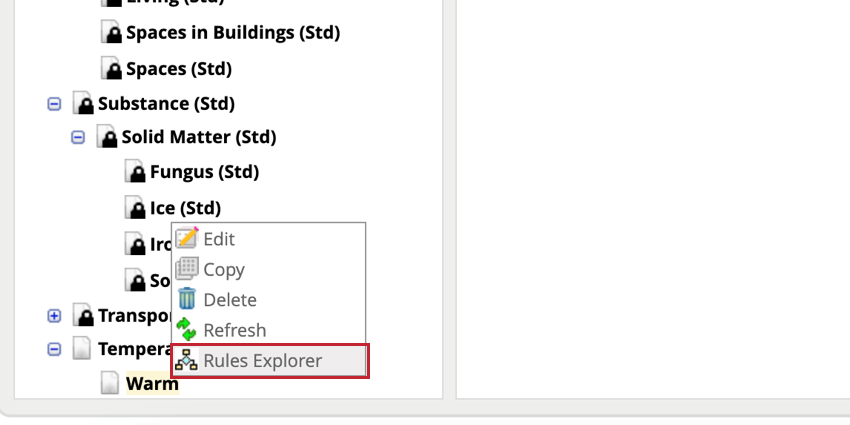
Qtip: If you can’t delete the node, navigate to the Rules Explorer to see what sentiment exception rules the node is used in.
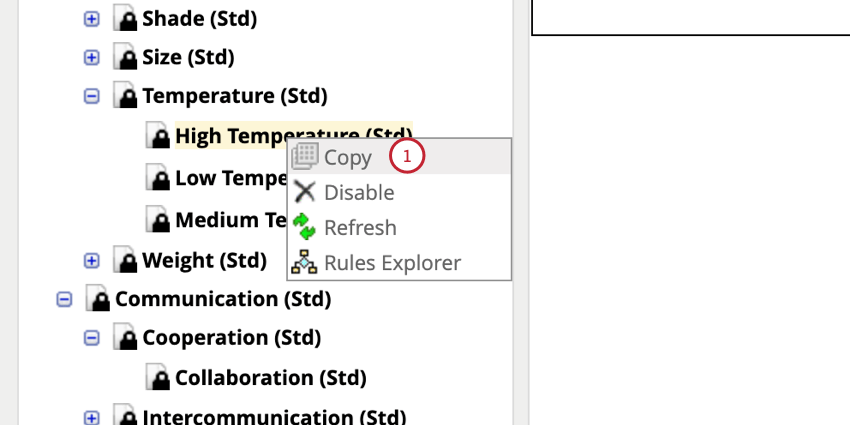
Copying Taxonomies
You can reuse standard or custom concept nodes by copying them. When copying taxonomy nodes, keep in mind the following:
- Rules for all languages are copied.
- When copying a standard concept node, predefined rules from the top rule lane become editable. If the node also contains extended rules, then they will be combined with the predefined rules and become editable.
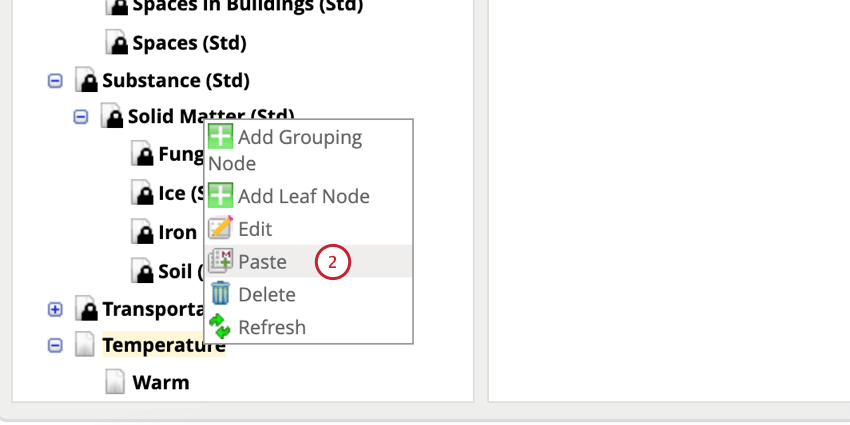
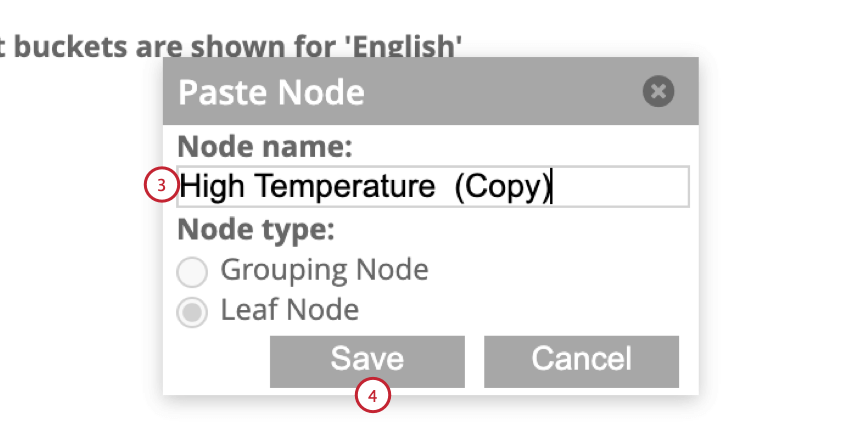
To copy a node:
Managing Standard Taxonomies
Standard taxonomies are included with XM Discover by default and have (Std) at the end of their name. Standard taxonomies cannot be deleted. However, you can extend them to include additional terms, or disable them to prevent them from being used in exception rules.
Extending Standard Taxonomies

Qtip: Extended standard taxonomies will have an asterisk (*) next to their names.
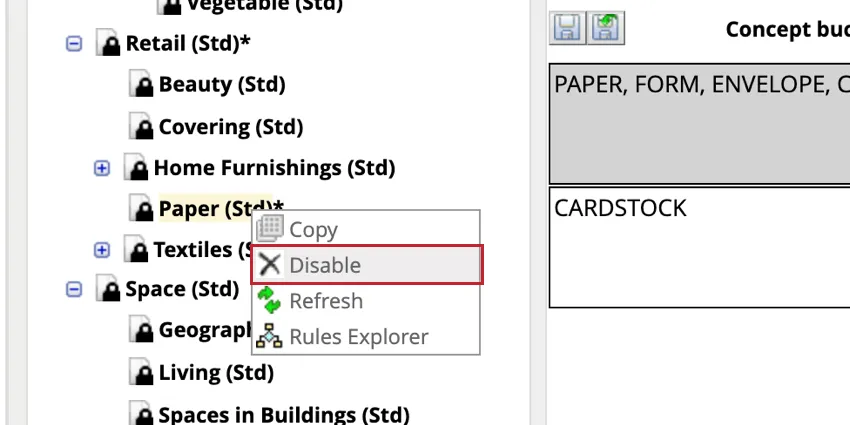
Disabling Standard Taxonomies
You can disable standard taxonomy nodes. Disabled taxonomies do not show up in a taxonomy tree when users create concept exception rules.
Qtip: You can’t disable a rule if it’s actively used in a sentiment exception rule. Navigate to the Rules Explorer to see what sentiment exception rules the node is used in.
To disable the standard node, right click the node and select Disable.
Once disabled, the node will appear crossed off when editing the taxonomy tree. To re-enable the node, right click it and select Enable.
Importing and Exporting Taxonomies
You can export and import taxonomies via an Excel file. This allows you to reuse taxonomies easily across projects.
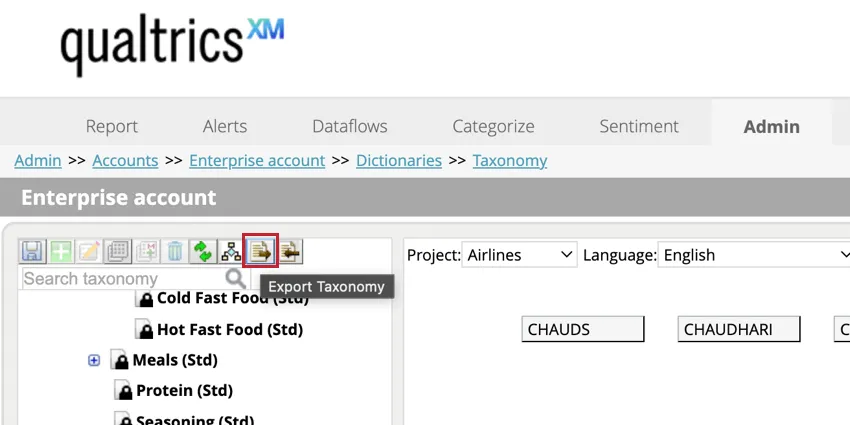
Exporting Taxonomies
To export a taxonomy, click the Export Taxonomy button.
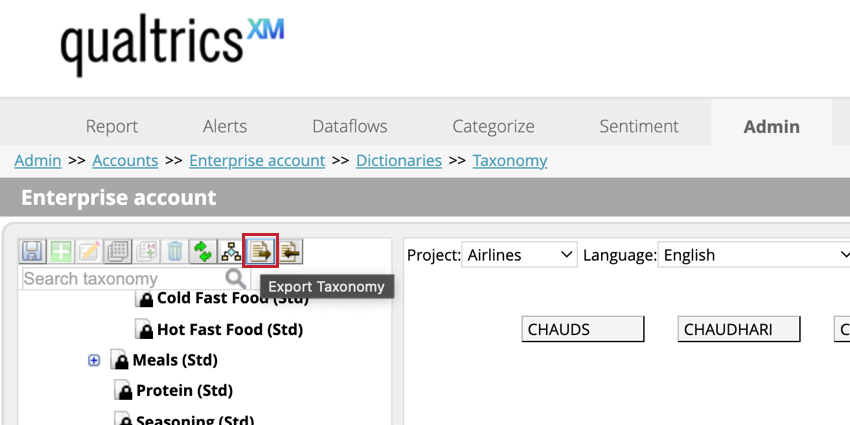
This file contains the following columns:

- Node Id: The unique ID of a taxonomy node.
- Node Name: The name of a node.
- Parent Node Name: The name of a parent node, if any.
- Language: Language code used in rules. Note that when taxonomy contains terms in multiple languages, they are exported as multiple rows (one row per language).
- Prebuilt Rule: Predefined keywords that are shipped with Designer.
- Custom Rule: Custom keywords defined by users.
- Disabled: Indicates if the node is disabled or enabled.
- N: Enabled node
- Y: Disabled node
- Prebuilt: Indicates if the node is a standard node or a custom node.
- N: Custom node
- Y: Standard or extended node
- Leaf: Indicates if the node is a grouping node or leaf node.
- N: Grouping node
- Y: Leaf node
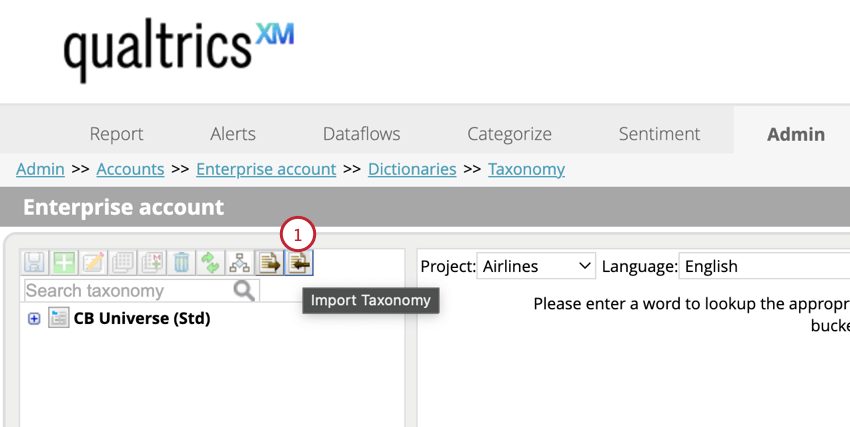
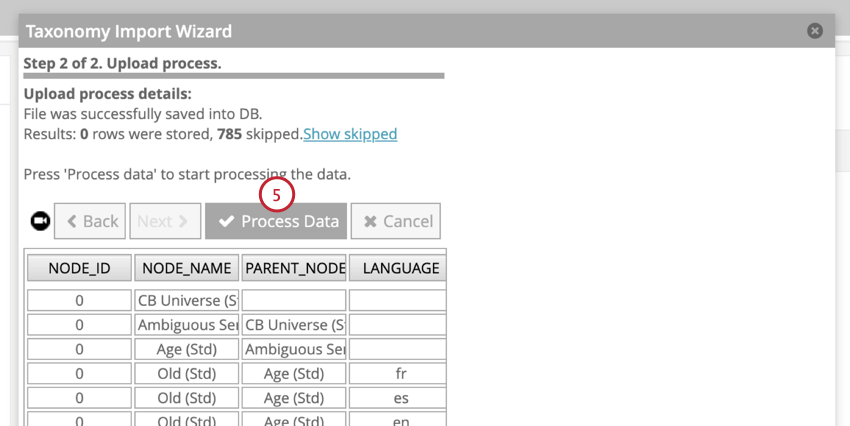
Importing Taxonomies
When importing taxonomies, keep in mind the following:
- For existing taxonomies, only custom keywords (from the “Custom Rule” column in the Excel file) are imported. Any predefined keywords (from the “Prebuilt Rule” column) are assumed to already be a part of the taxonomy and are not imported—even if you modify them in the Excel file.
- For existing taxonomies, custom keywords from the Excel file overwrite any existing custom keywords in Designer.
To import a taxonomy file:

That's great! Thank you for your feedback!
Thank you for your feedback!