Date Time Conditions
About Date Time Conditions
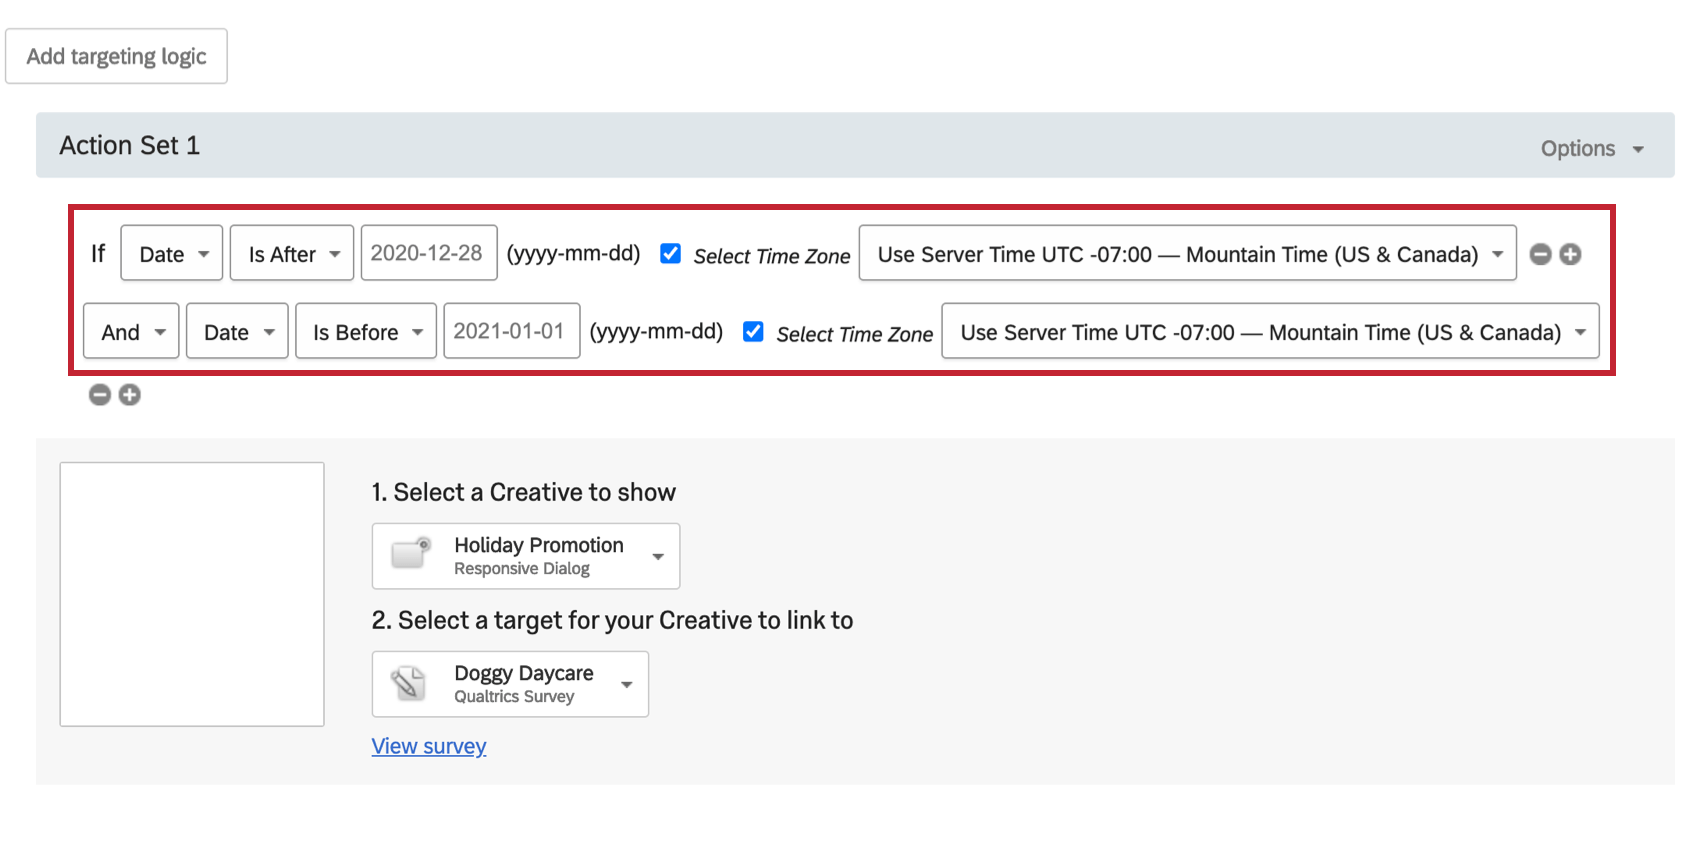
With Date/Time conditions, you can set your intercepts to automatically run at specific times, saving you the hassle of manually activating and deactivating them. For example, for a holiday promotion, you could set the intercept to run between December 12 and December 26.
Date
With a Date condition, you can set specific dates for when your creatives will show. For a project with a specific start and end date, two Date logic statements are used in conjunction.
To Create a Date Condition
- On either the intercept targeting-level or the action set-level, add logic.
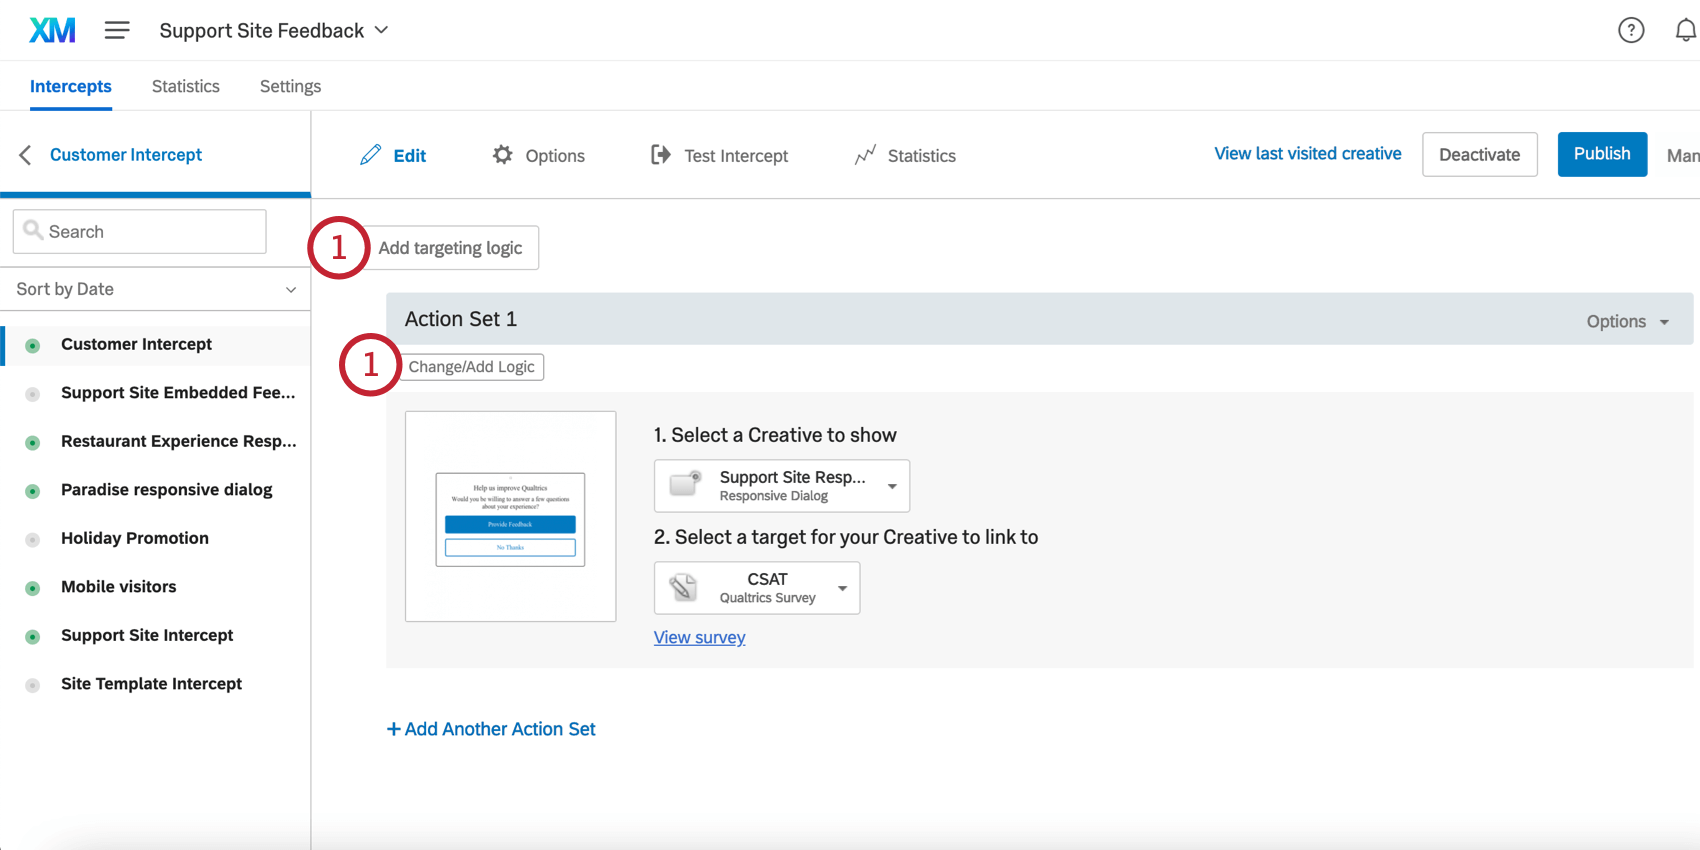
- Drop the first field down.
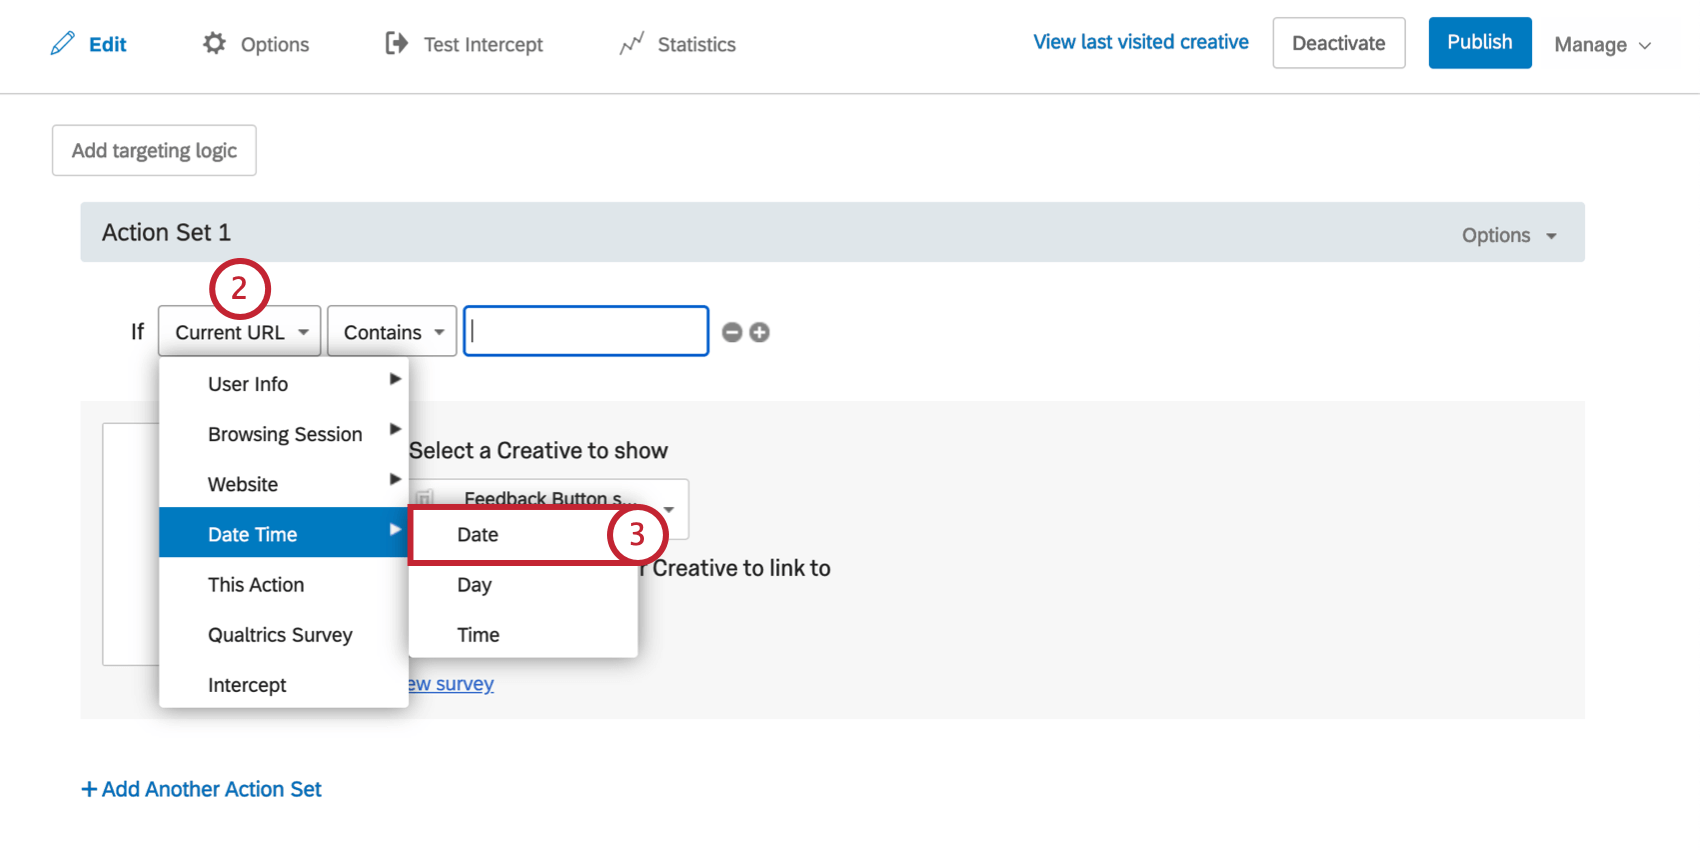
- Select Date Time, and then select Date.
- Select whether you want the Intercept to run on, after, before, or not on that date at all.
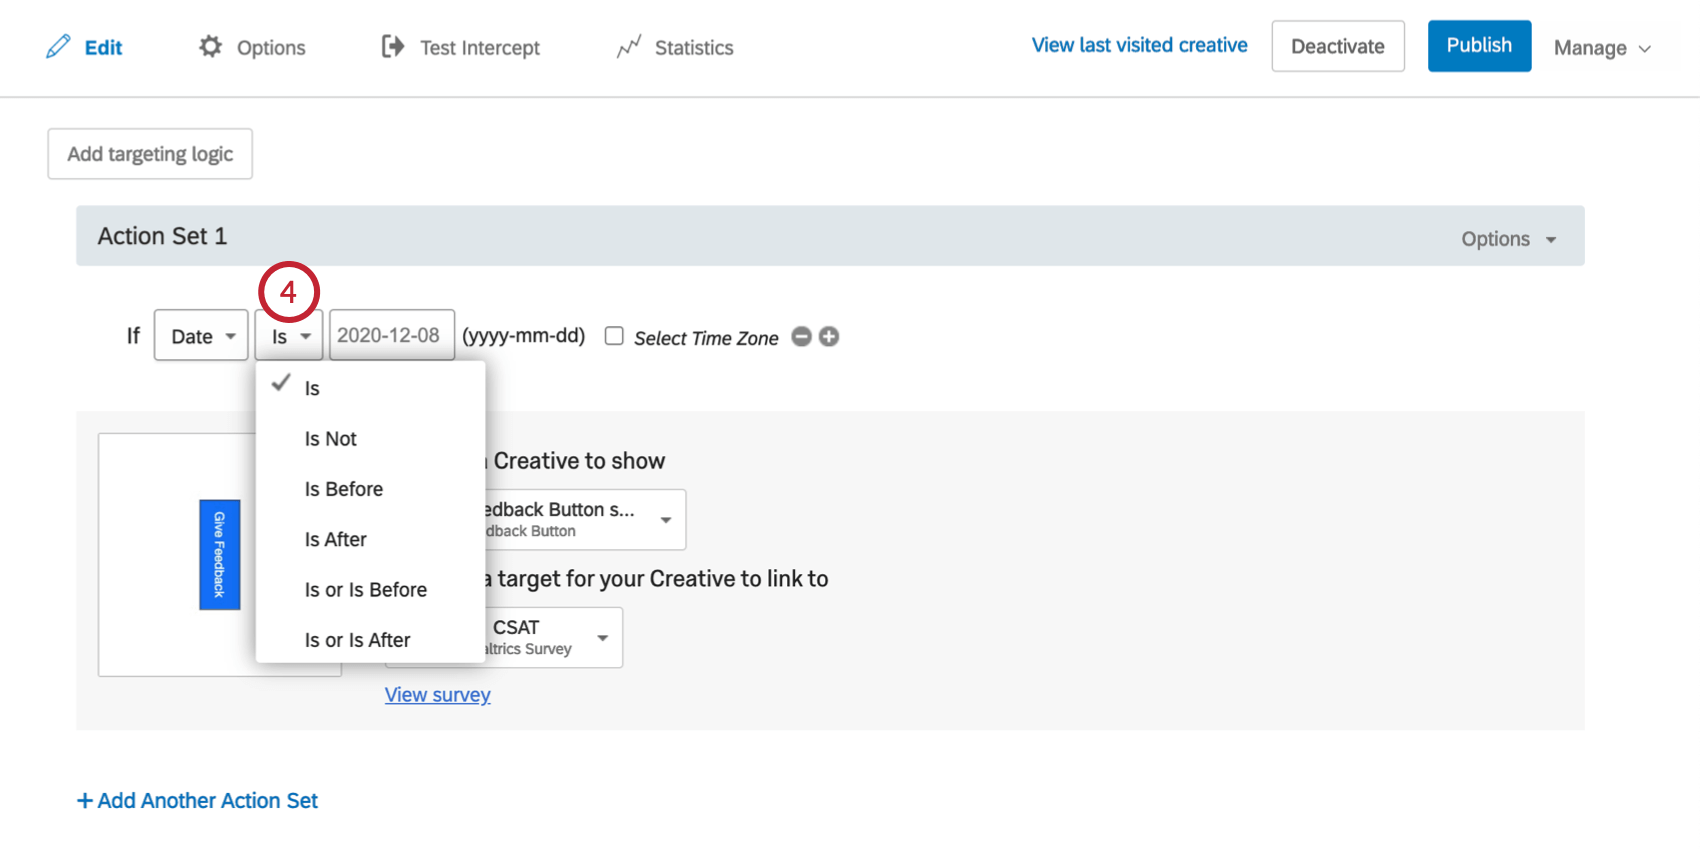
- Click on the date text box to select a date from the calendar.
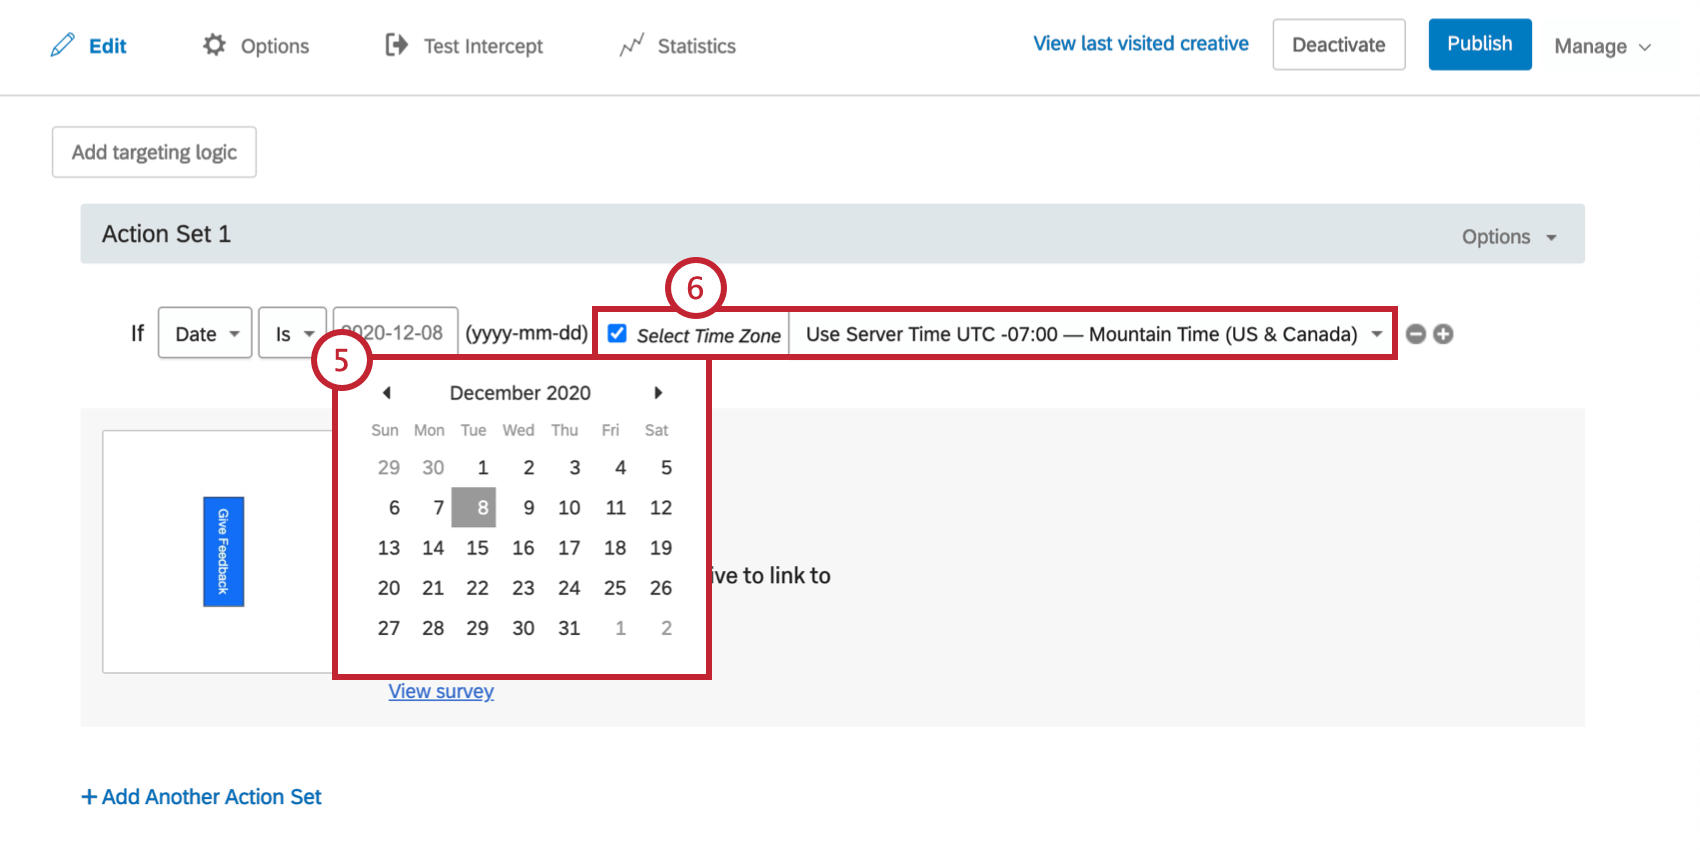
- Optionally, you can specify the time zone by checking Select Time Zone. If no time zone is selected, logic will run based off of the visitor’s time zone.
Day
With a Day condition, you can set your intercept to run just on specific days of the week. For instance, you might set up a weekend promotion that automatically shows creatives on the weekends so that you don’t have to activate and deactivate the intercept manually every week.
To Create a Day Condition
- On either the intercept targeting-level or the action set-level, add logic.

- Drop the first field down.
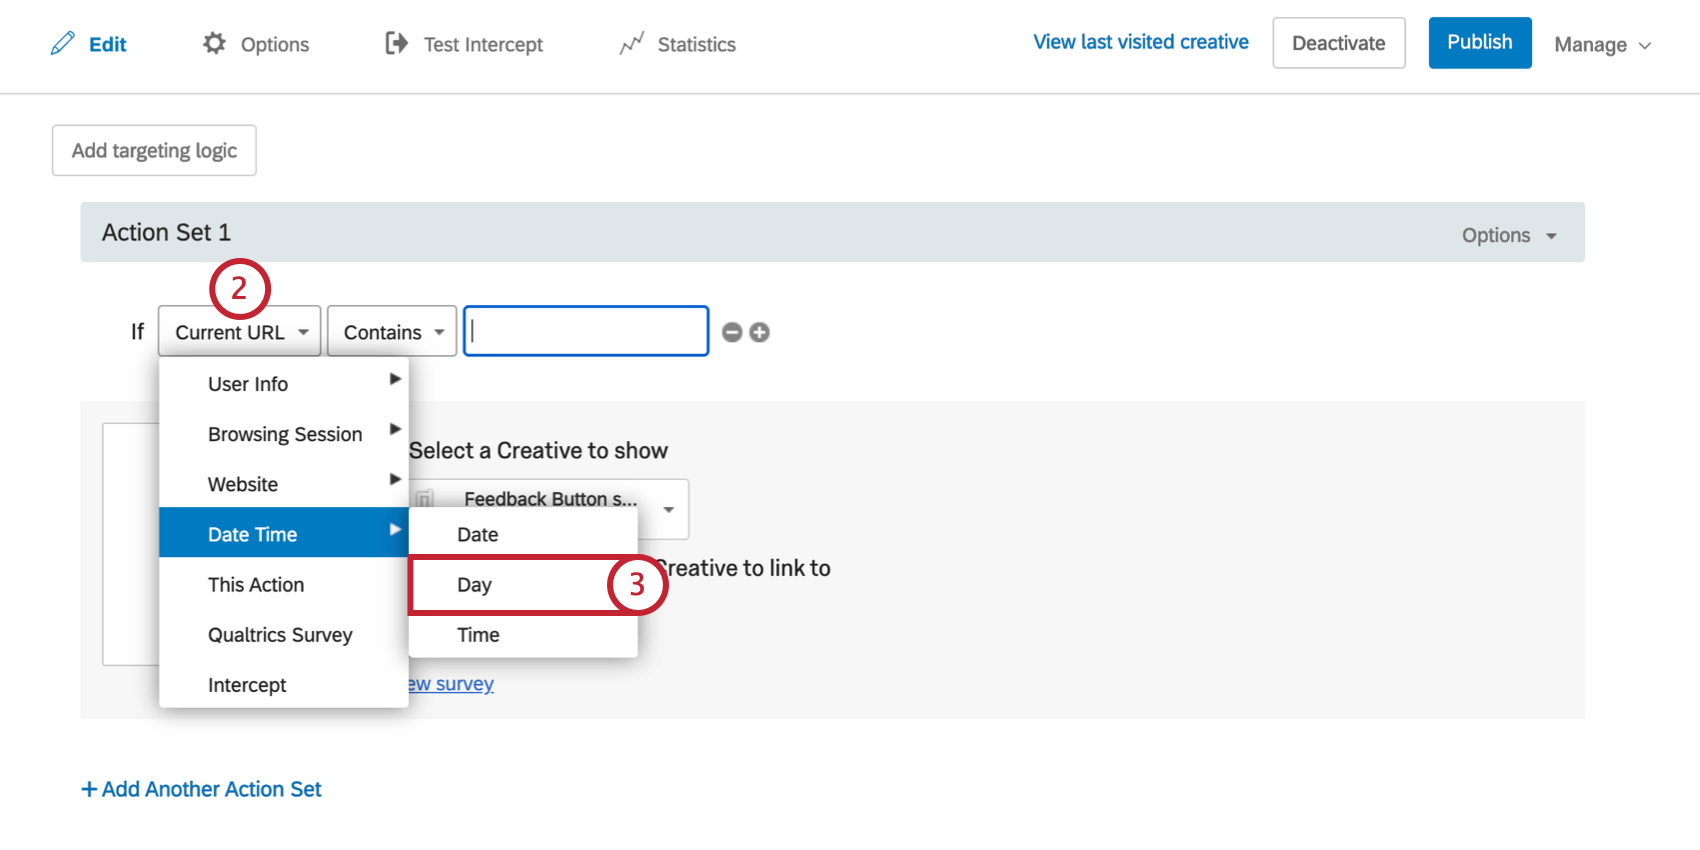
- Select Date Time, and then select Day.
- With the Is and Is Not options, specify whether you would like to target visitors on that day of the week or to exclude that day of the week.
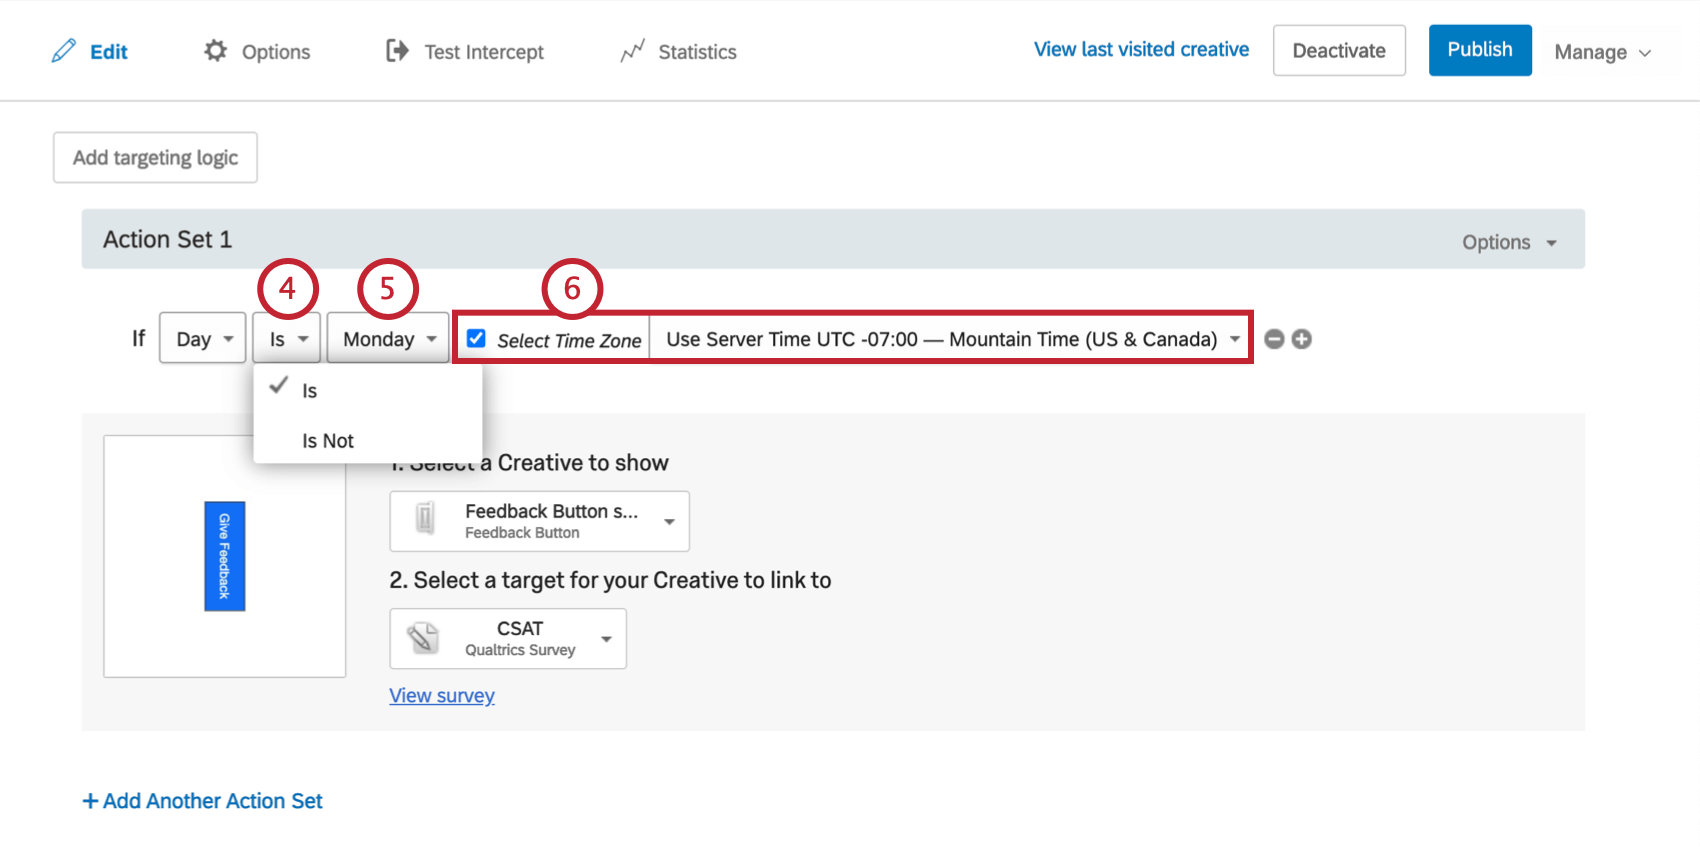
- Select the day of the week you would like to target.
- Optionally, select the Time Zone to be used for the logic evaluation. If no time zone is selected, logic will run based off of the visitor’s time zone.
Time
The Time condition is appropriate when you want to pinpoint a specific time of day for your creatives to show. For a project with a specific start and end time, two Time logic statements are used in conjunction.
To Create a Time Condition
- On either the intercept targeting-level or the action set-level, add logic.

- Drop the first field down.
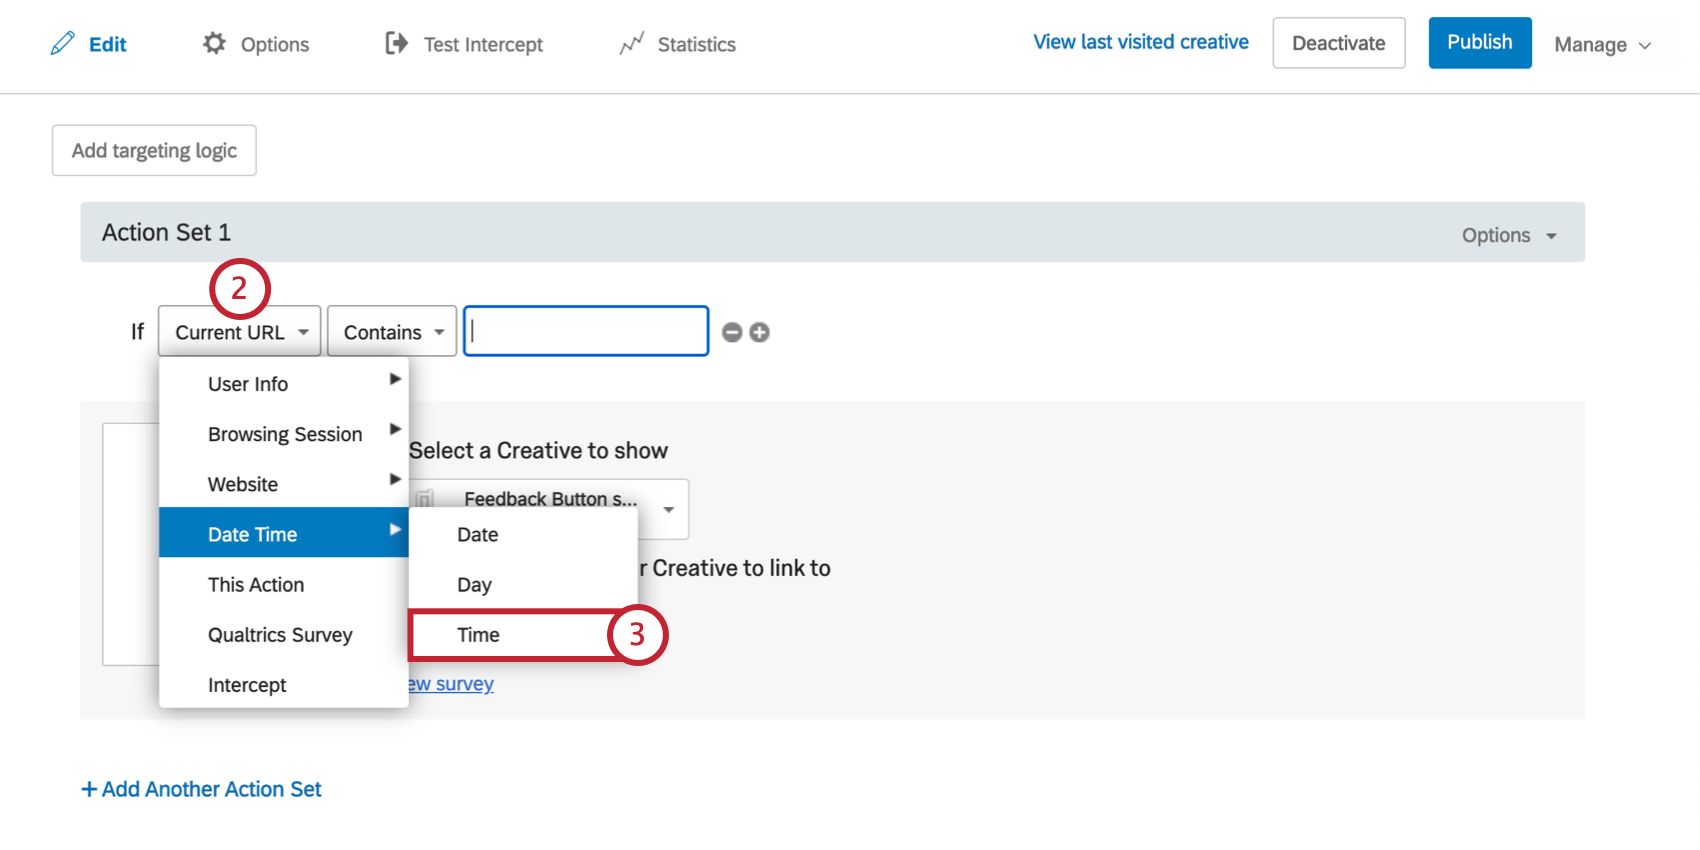
- Select Date Time, and then select Time.
- With the Is Before or Is After options, specify whether you would like to target visitors before or after the time you will specify.
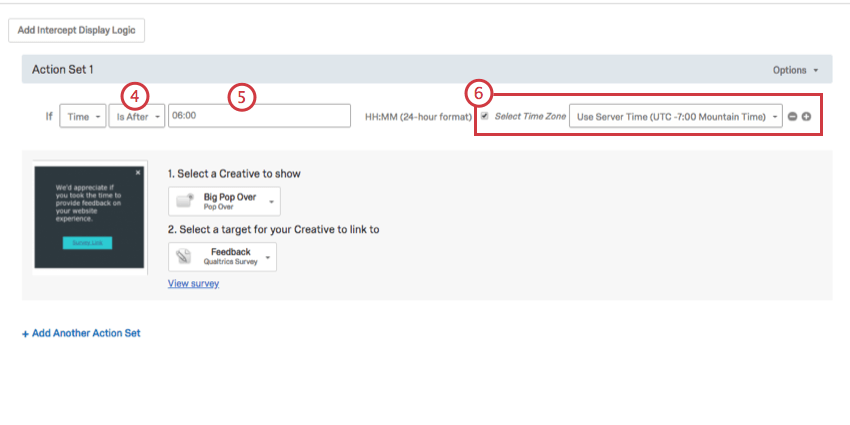
- Input a time in HH:MM 24-hour format.
- Optionally, select the Time Zone to be used for the logic evaluation.
