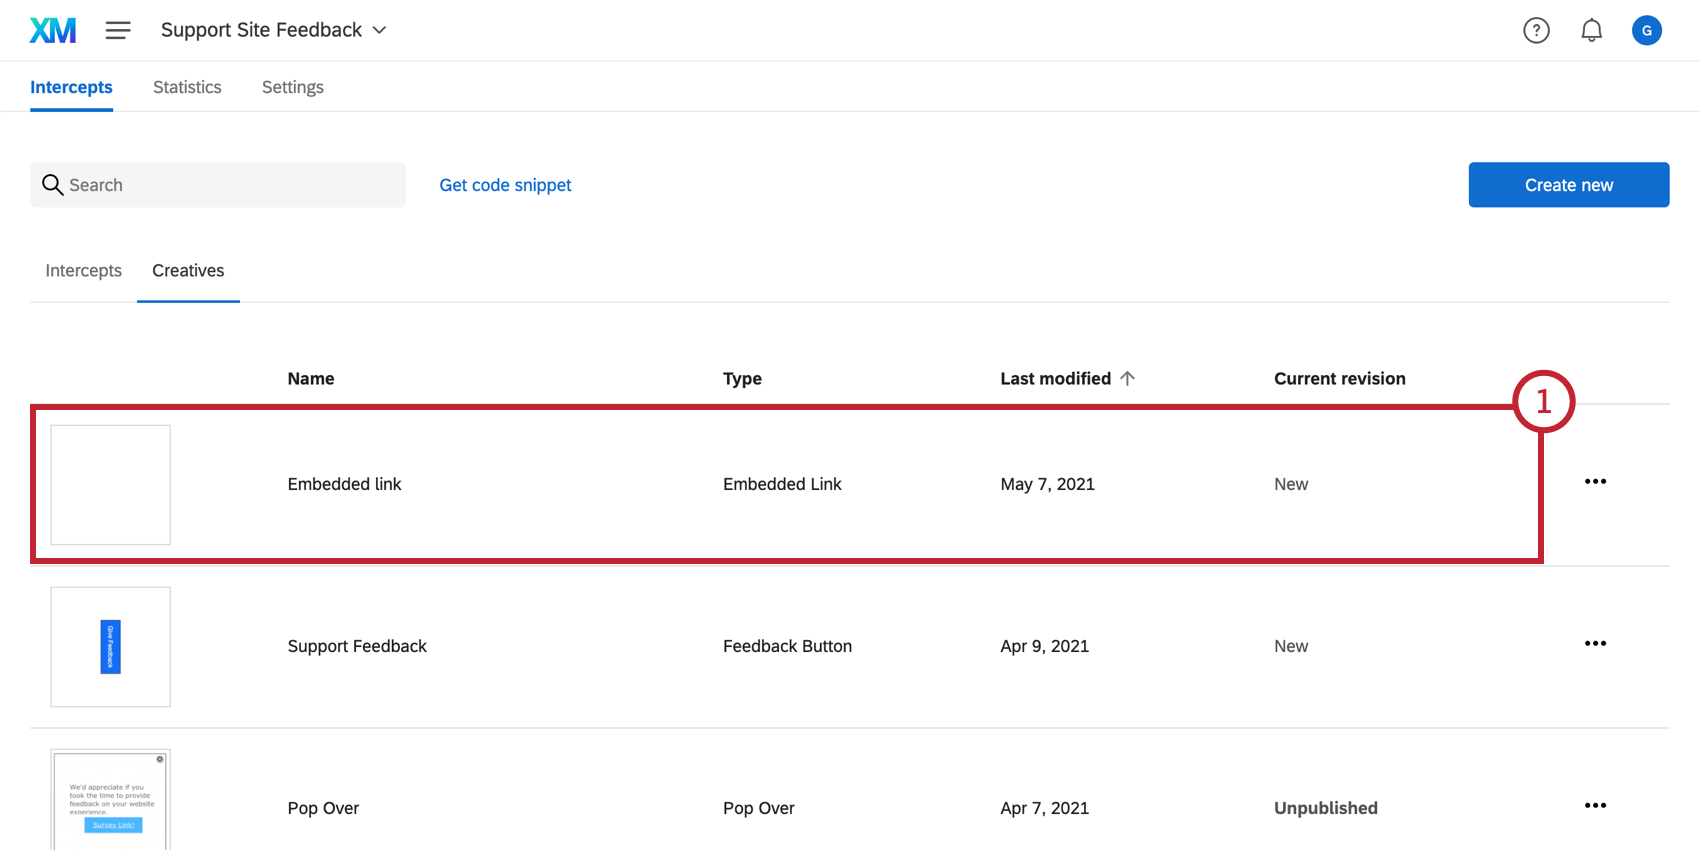
Embedded Link Creative
About Embedded Link Creatives
The embedded link allows you to place a link on your website that will direct visitors to different destinations depending on criteria you set. This can be useful for A/B testing. For example, you could send 50% of your visitors to a different version of your page in order to determine which layout or version converts more customers. Or for promotional material, you could link visitors from certain geographic regions to special landing pages specific to those regions.
Setting Up the Embedded Link
The embedded link does not have the editing options that most creatives have. Instead, most of the setup actually happens in the Intercept tab, when you use the intercept to decide where the embedded link should take visitors, and when.
To Implement an Embedded Link
- Create or navigate to your embedded link creative.
- Type the text you would like displayed for your link.
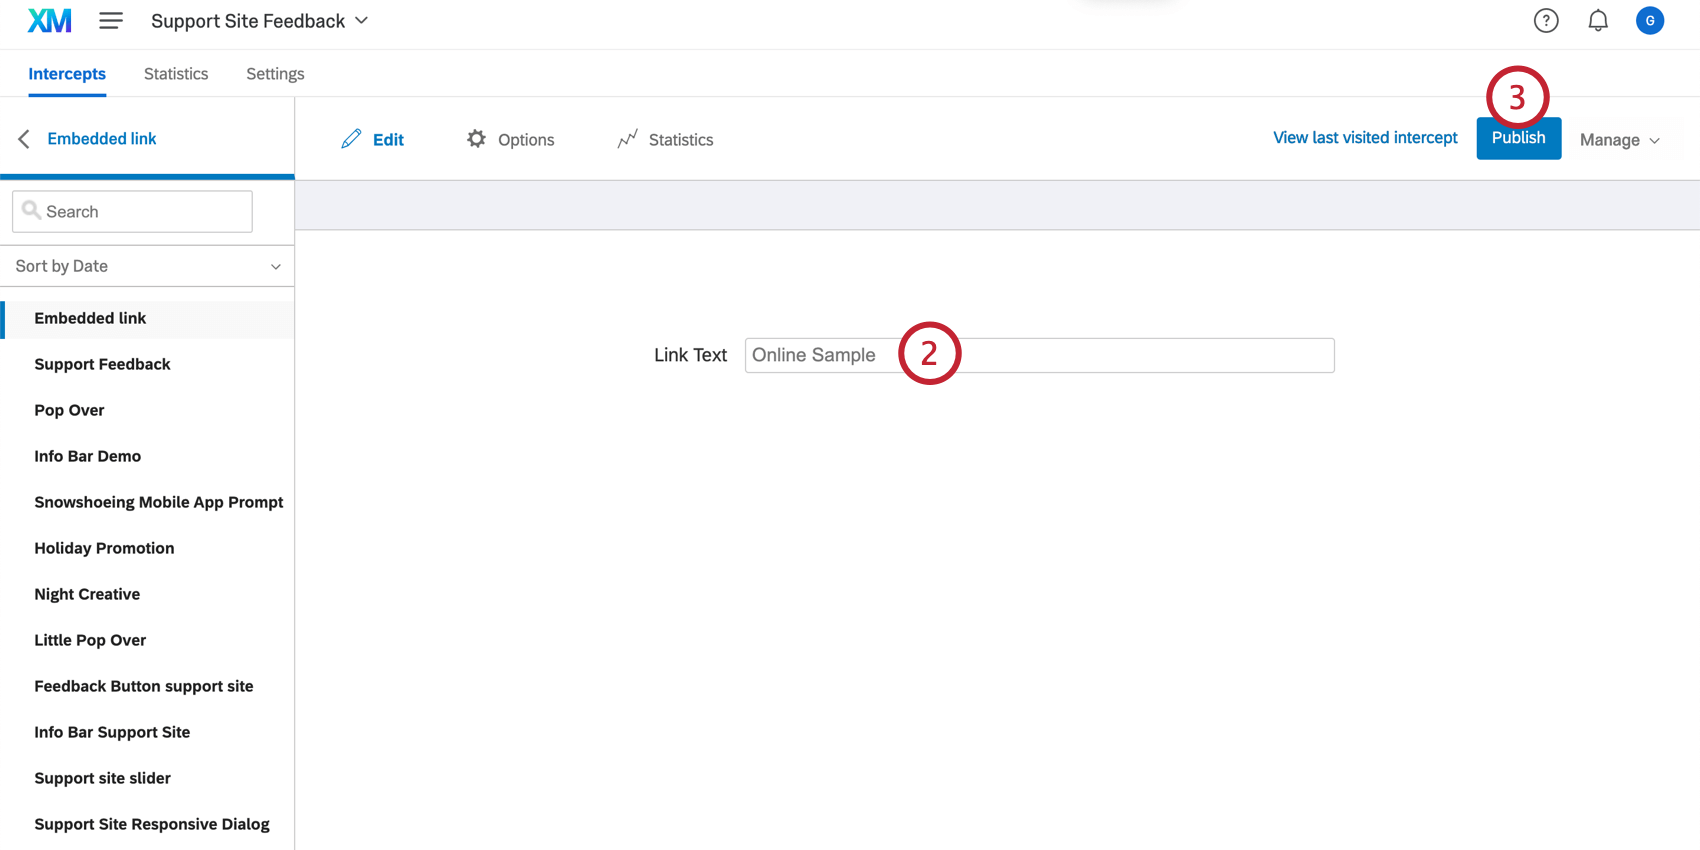
- Select Publish.
- Navigate to the Intercepts tab.
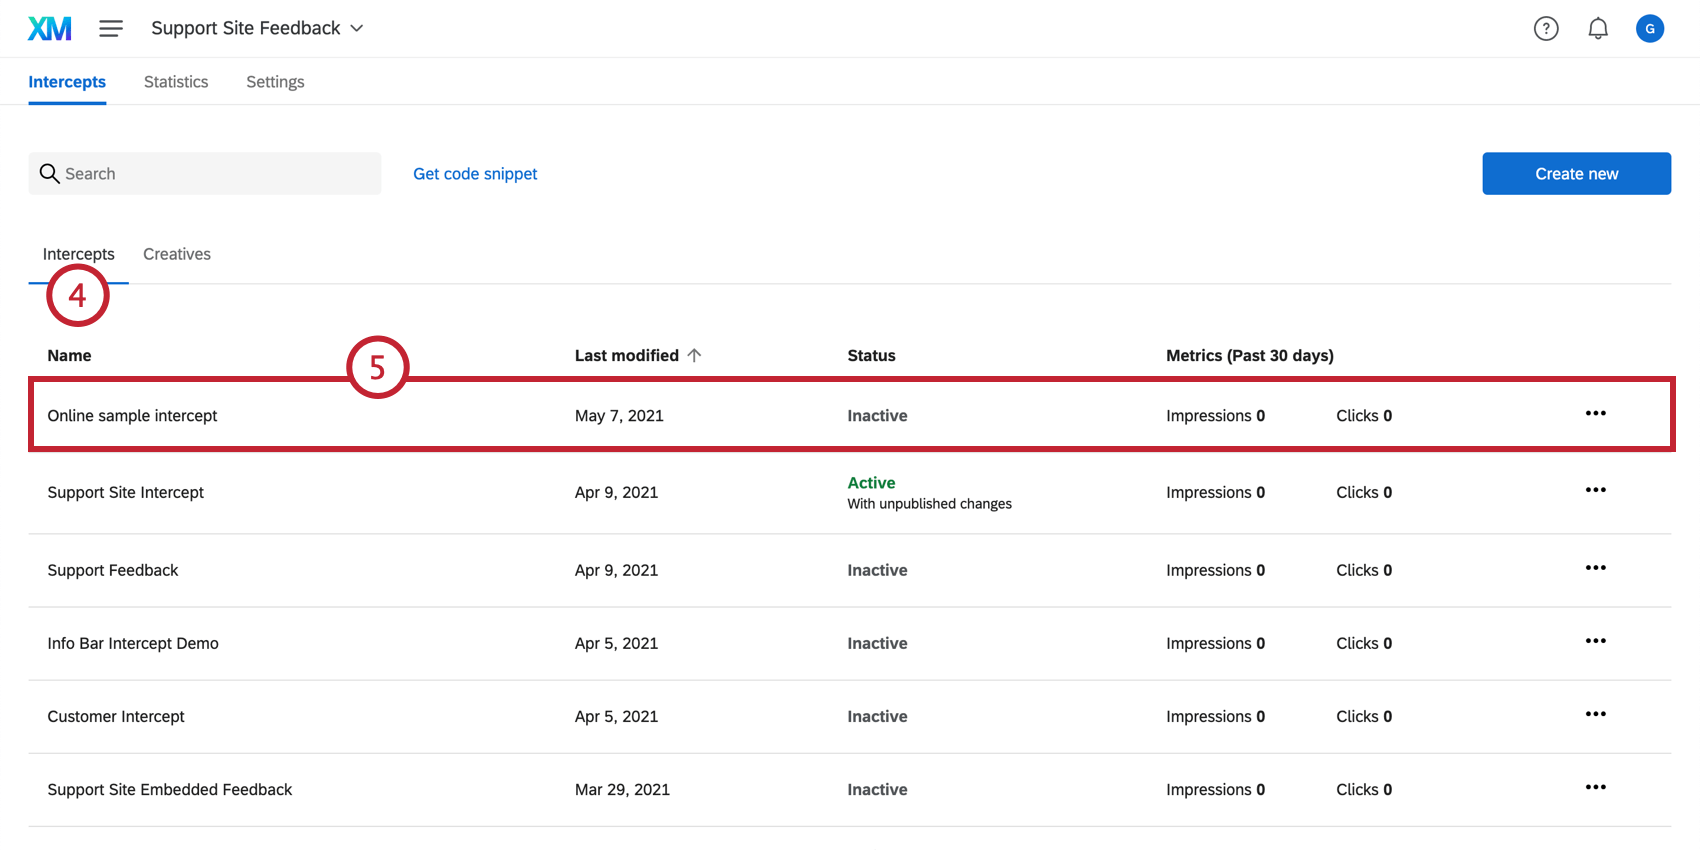
- Create an intercept or navigate to an existing intercept.
- Under “Select a Creative to show,” choose your embedded link creative.
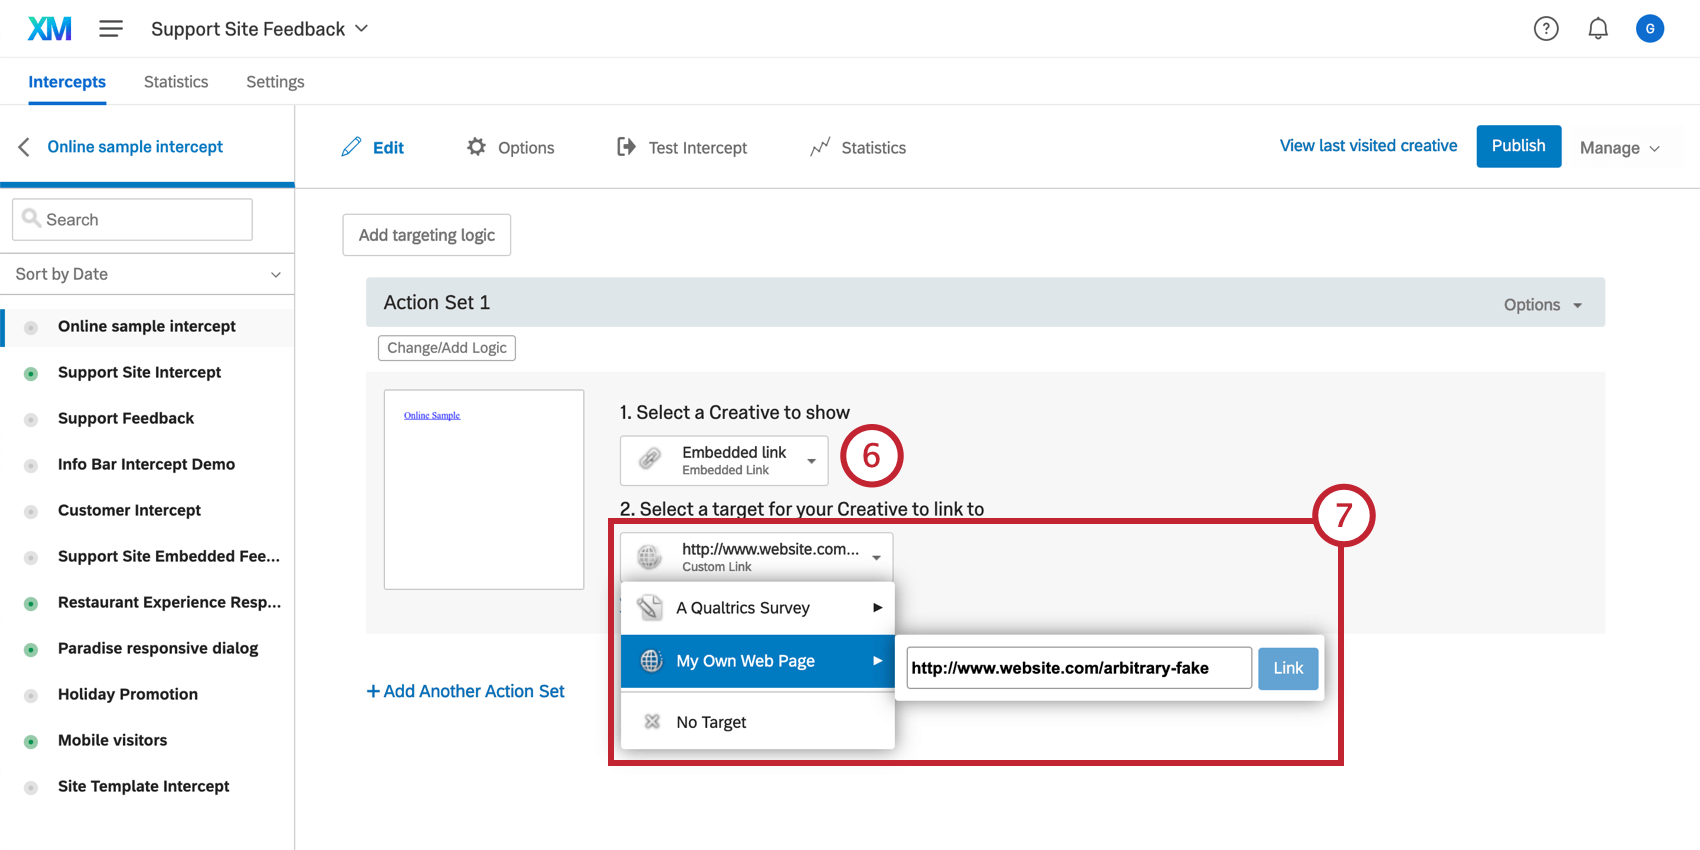
- Specify the target survey or website.
- Click Change/Add Logic to determine the conditions under which your creative leads to this target.
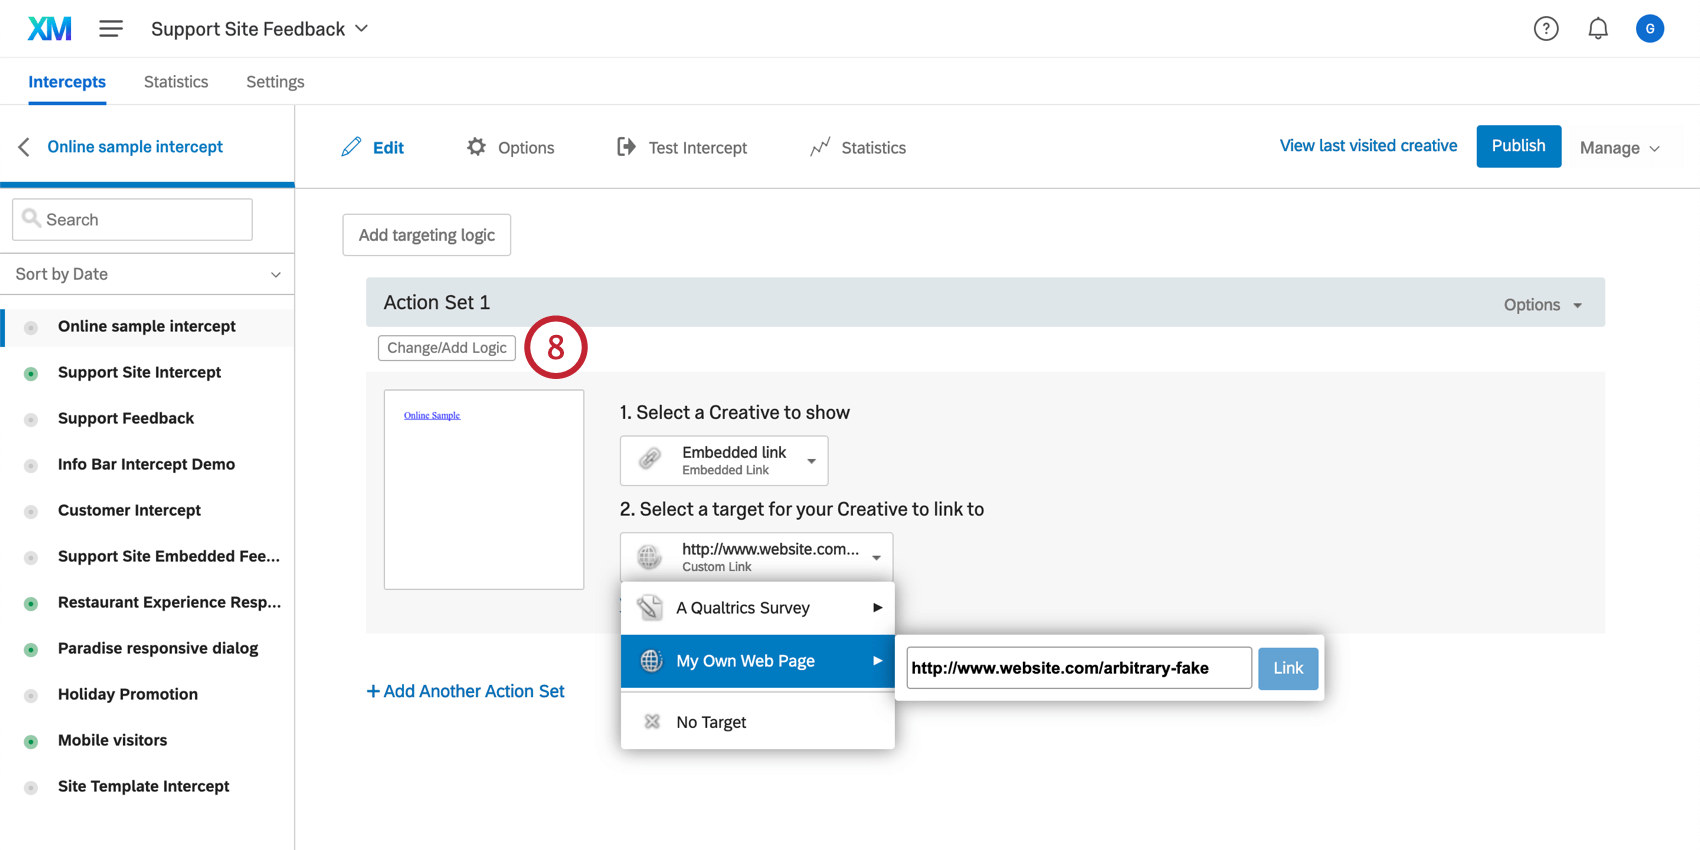 Qtip: To add additional action sets (conditions under which the embedded link goes to different webpages), see our page on Action Sets.
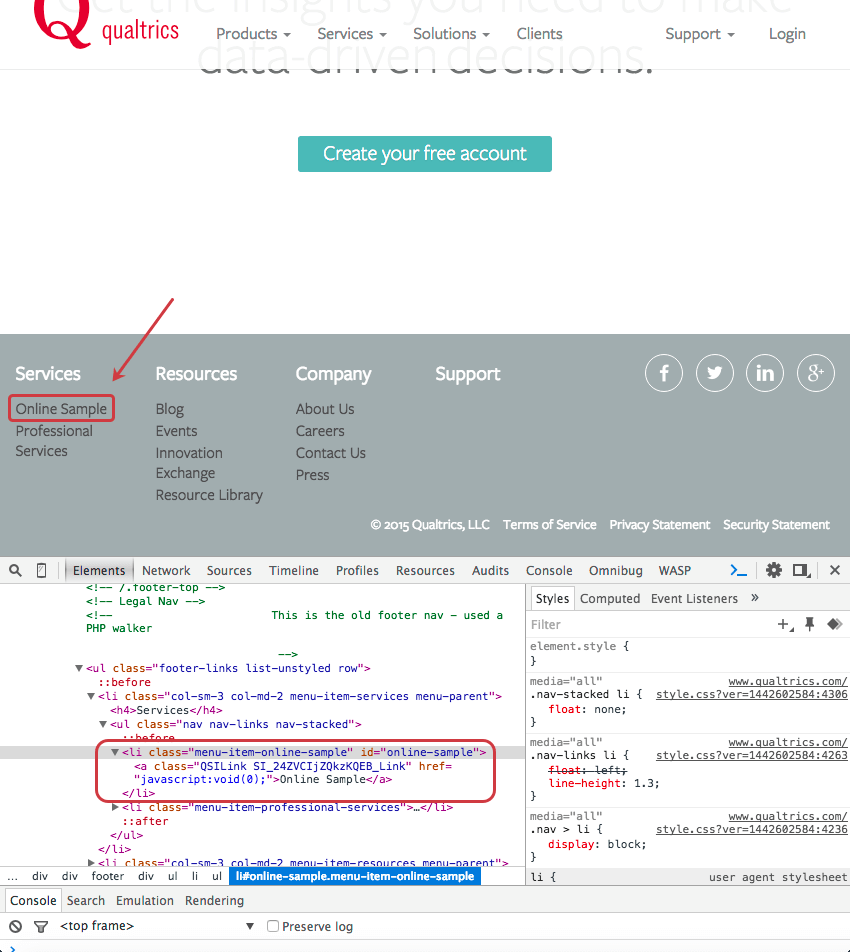
 - Have your web team designate space on your website where your embedded link will be inserted. This space should include an HTML element with an ID attribute. Identify and copy the HTML ID between the quotation marks as shown below.
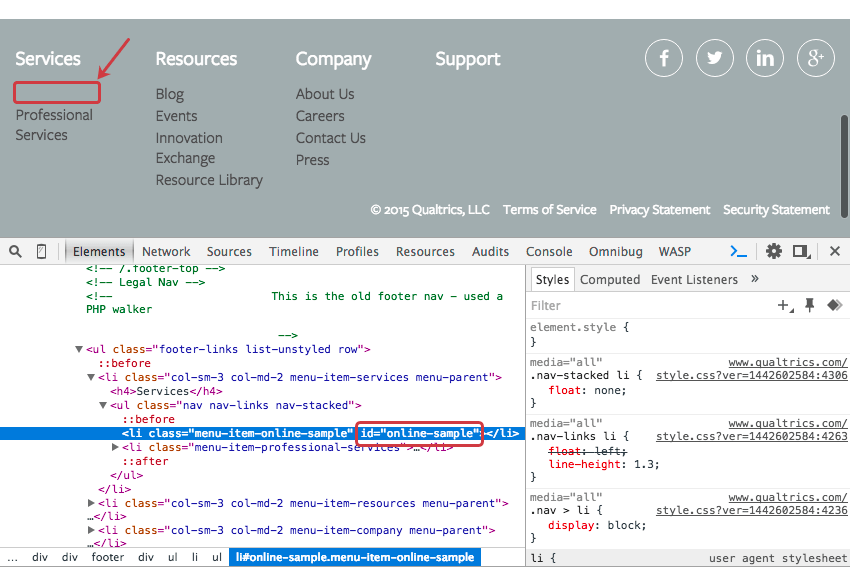 In many cases, an HTML tag with an ID already exists in the proper location, and no site modifications are needed.
Qtip: Use your browser’s Inspect Element function to determine the HTML ID of an element. In most browsers, simply right-click on the portion of the page you would like to inspect, and select Inspect Element.
 - Make sure you have your intercept open in the Intercepts tab.
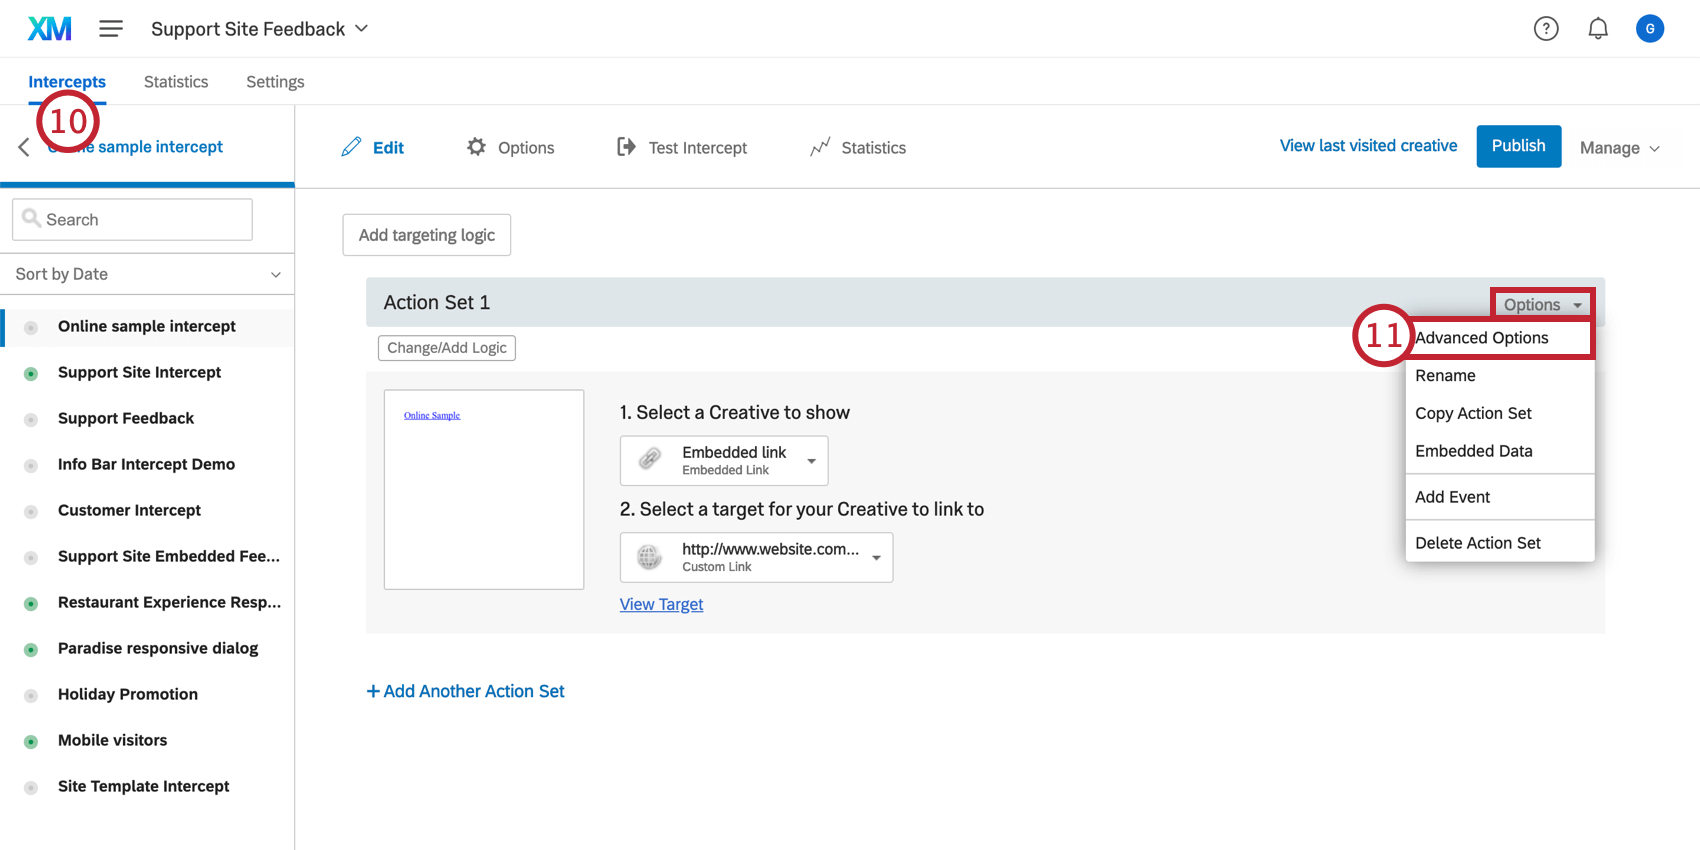
- In the Options menu of your intercept’s action, select Advanced Options.
Qtip: If you’re curious, see our page on Action Set Advanced Options for a deeper explanation of each of these options!
- Paste the HTML ID of your target container into the Creative Insertion Point field.
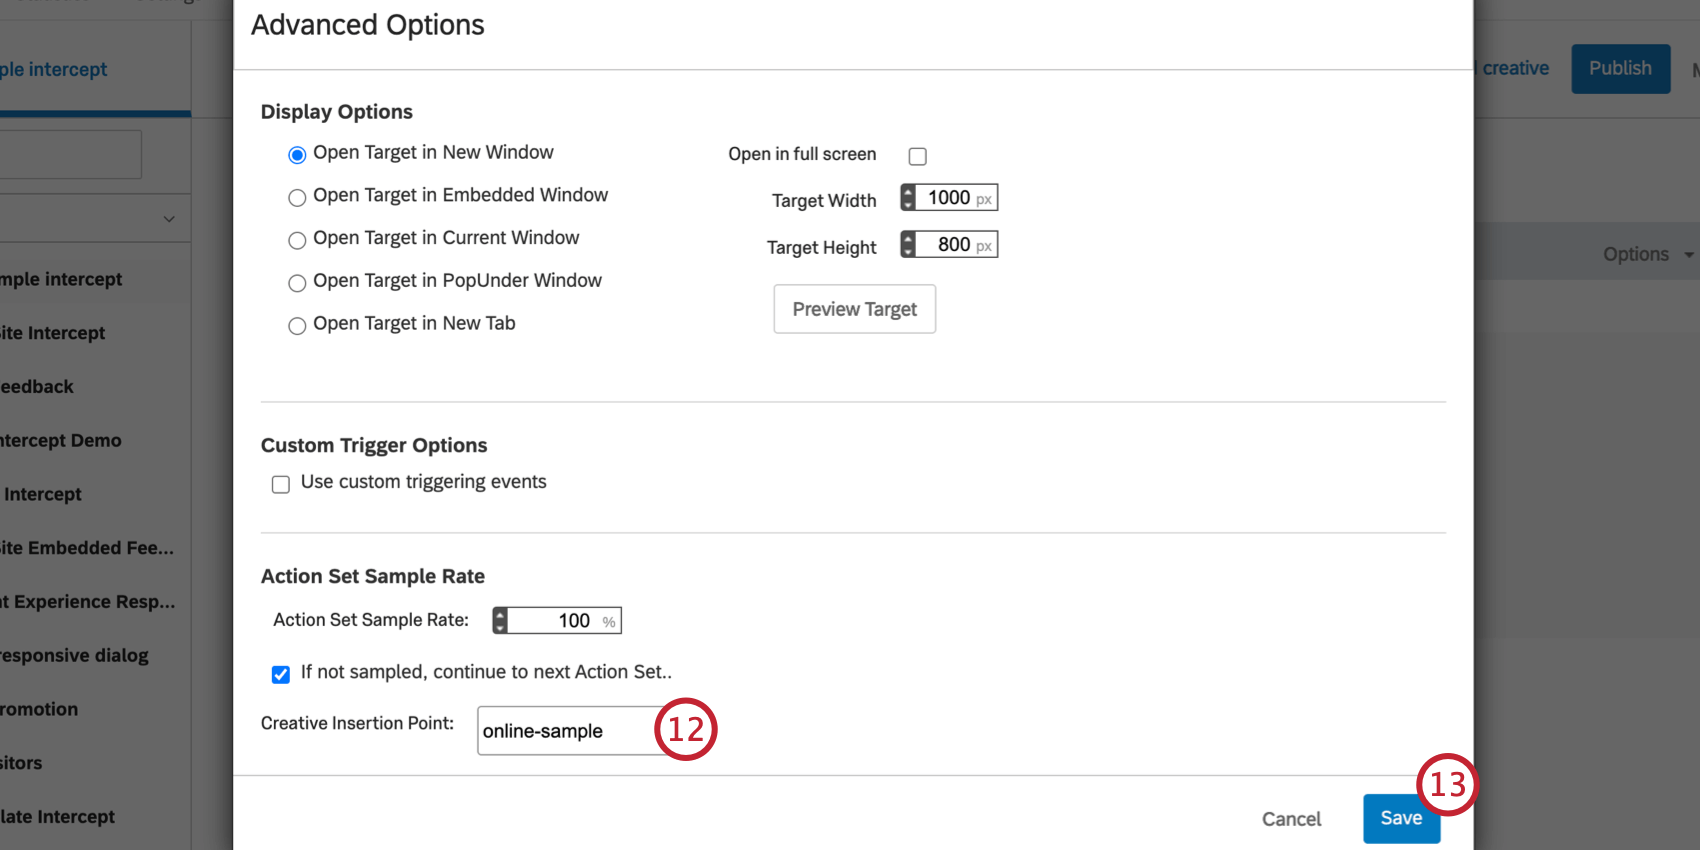 Attention: If you have multiple action sets, be sure to do step 11 and 12 for each action set!
 - Click Save.
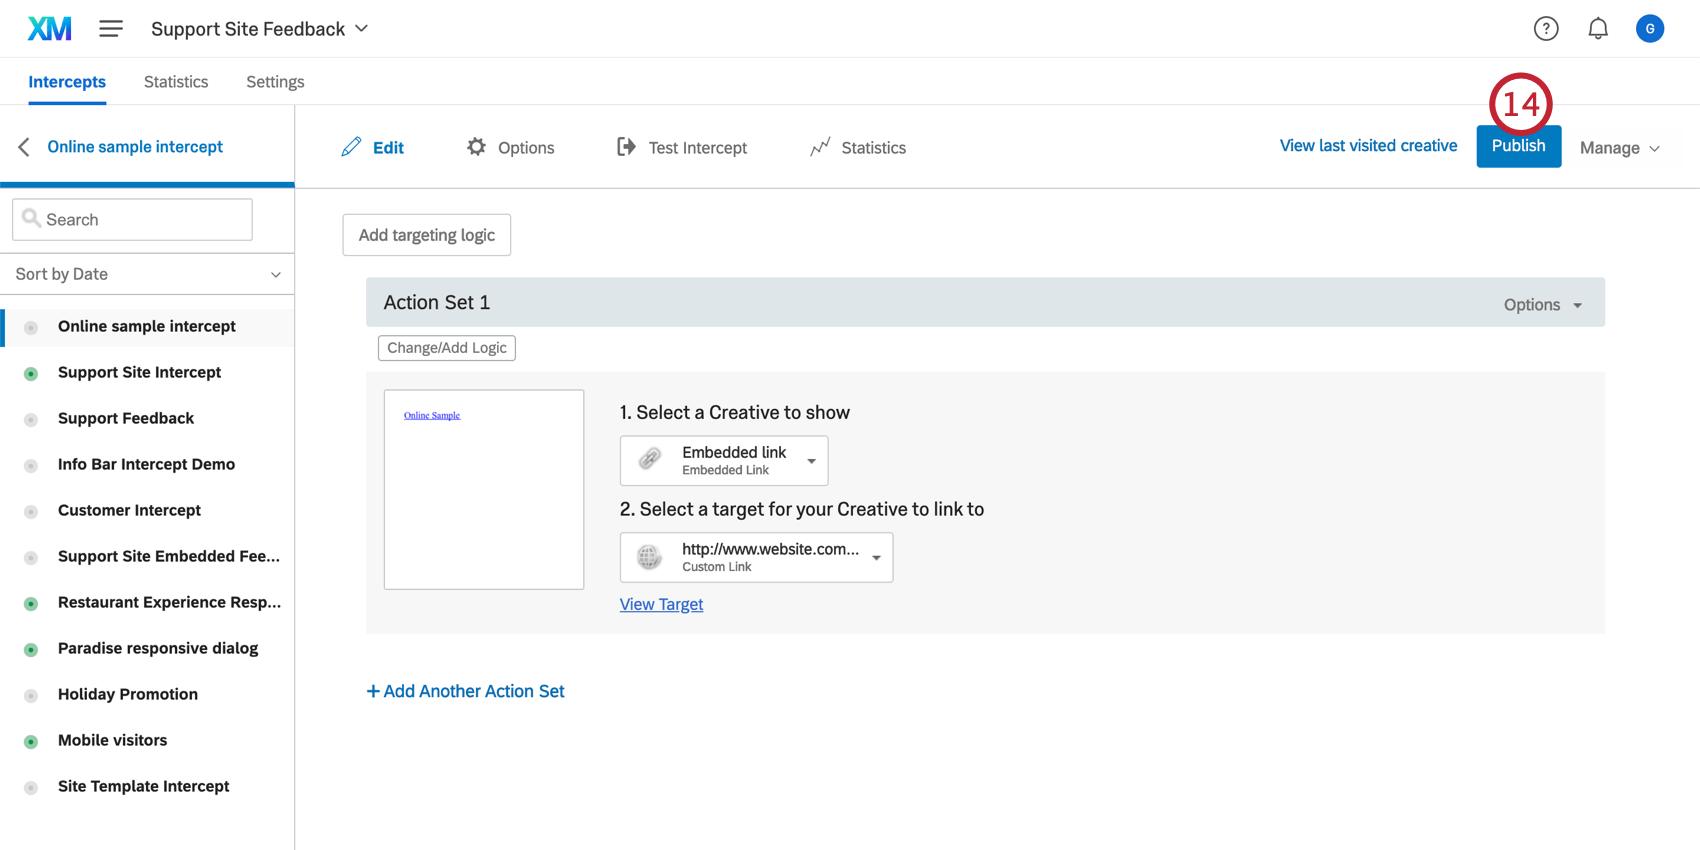
- Publish your intercept.
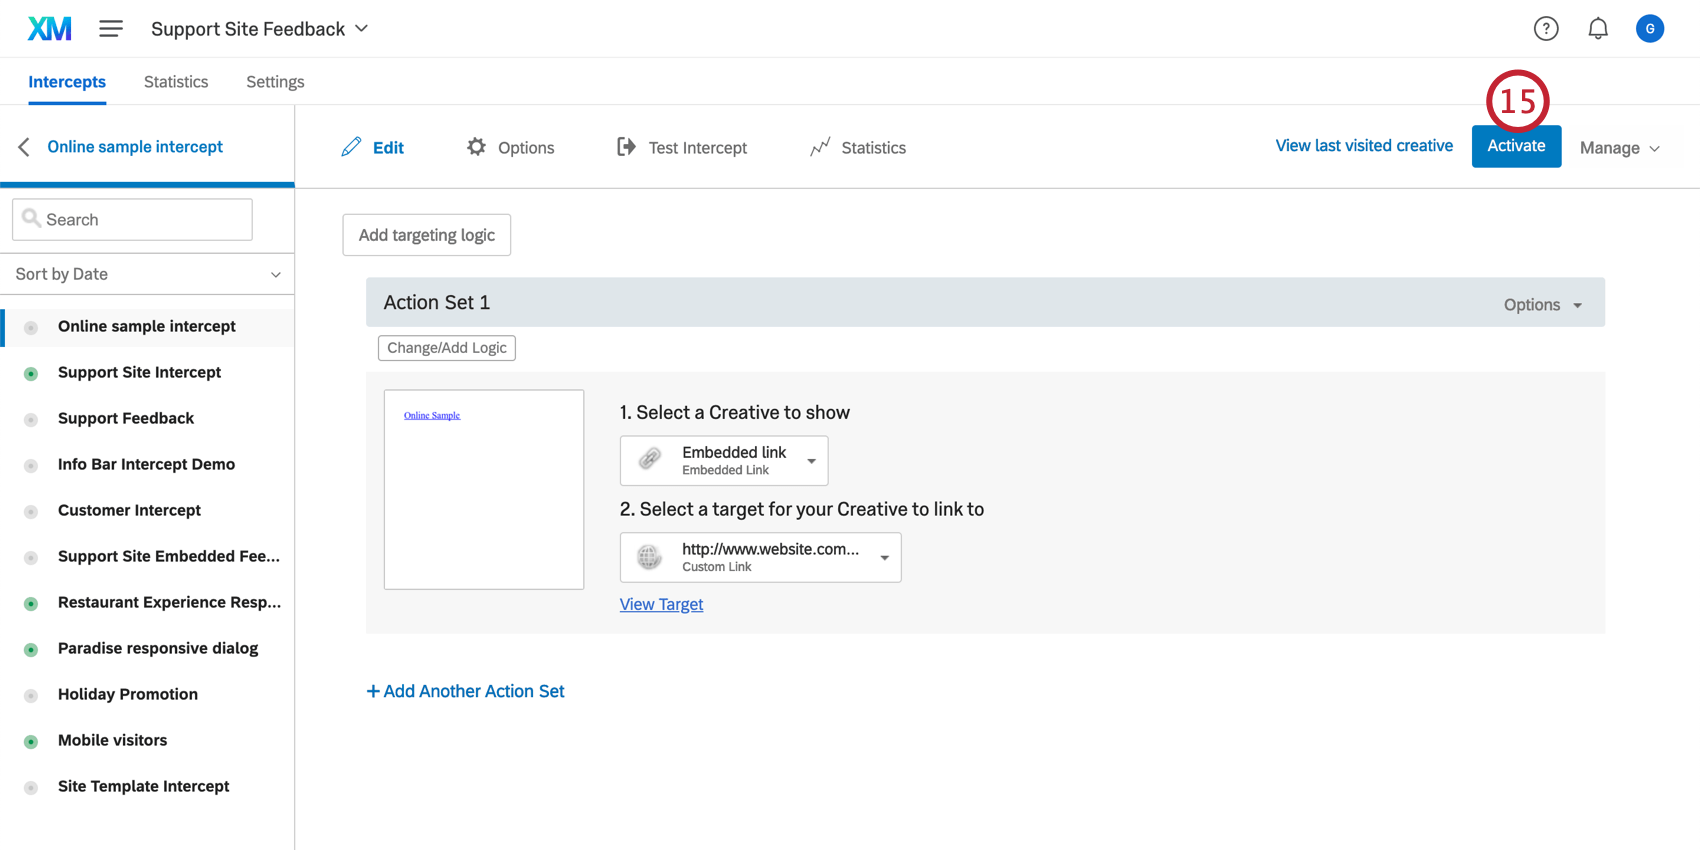
- If you haven’t already, click Activate.
- When a visitor comes to this page on your website, Website Feedback will find the target container with the HTML ID you specified and insert the creative there.
