
Mobile App Feedback Project
What's on this page
Qtip: If you don’t have access to any of the features described on this page, reach out to your Account Executive. For more information about the differences between Digital Feedback and CustomerXM for Digital, see Digital Feedback vs. CustomerXM for Digital.
Attention: Mobile App Feedback Projects require the use of the Mobile App SDK, which is set up with specific code created by Qualtrics. Qualtrics can only troubleshoot this code, not any custom code you add. Custom coding features are provided as-is and may require programming knowledge to implement. Our support team does not offer assistance or consultation on custom coding. You can always try asking our community of dedicated users instead. If you’d like to know more about our custom coding services, please contact your Qualtrics Account Executive.
About Mobile App Feedback Projects
To design the best digital experience possible, it’s important to collect feedback on mobile experiences, not just desktop ones. A crucial part of the mobile experience includes mobile apps. By collaborating with your IT team, you can implement Qualtrics intercepts onto your mobile app in order to collect feedback and analyze browsing behavior.
Setting Up a Mobile App Feedback Project
Qtip: Even if you already have a project for your website, you’ll want to make a new, separate one for your mobile app.
- Guided setup: With a guided setup, we’ll walk you through the steps to get started. Fewer but more refined options are available through a guided setup, designed with user friendliness, flexibility for mobile screens, easy translation, and accessibility in mind.
- Piece-by-piece: A more manual setup gives you the freedom to combine different display criteria and graphics.
- Follow these steps to set up the Embedded App Feedback. This option displays an embedded survey for conversational listening within your app.
- See additional information on Guided Setup.
Designing the Mobile Creative
There are three ways you can embed creatives into your mobile app. Click the links to see step-by-step setup for each option.
- Mobile App Prompt: Display a prompt similar to a Pop Over in your mobile app.
- Mobile Notification: Display native “heads up” notifications, i.e., banners.
- Embedded App Feedback: Display an embedded survey for conversational listening within your app. We recommend using this option for a more guided and intuitive setup.
Qtip: Embedded App Feedback is best used with an intuitive, guided setup. If you’ve like to build your mobile app experience piece-by-piece with the Embedded App Feedback, try making it a creative instead.
Save and Publish
Attention: Mobile App Prompts, Mobile Notifications, and Embedded App Feedbacks are the only creatives that don’t save your changes automatically. When you have made changes and want to leave the page, always click Save and close.
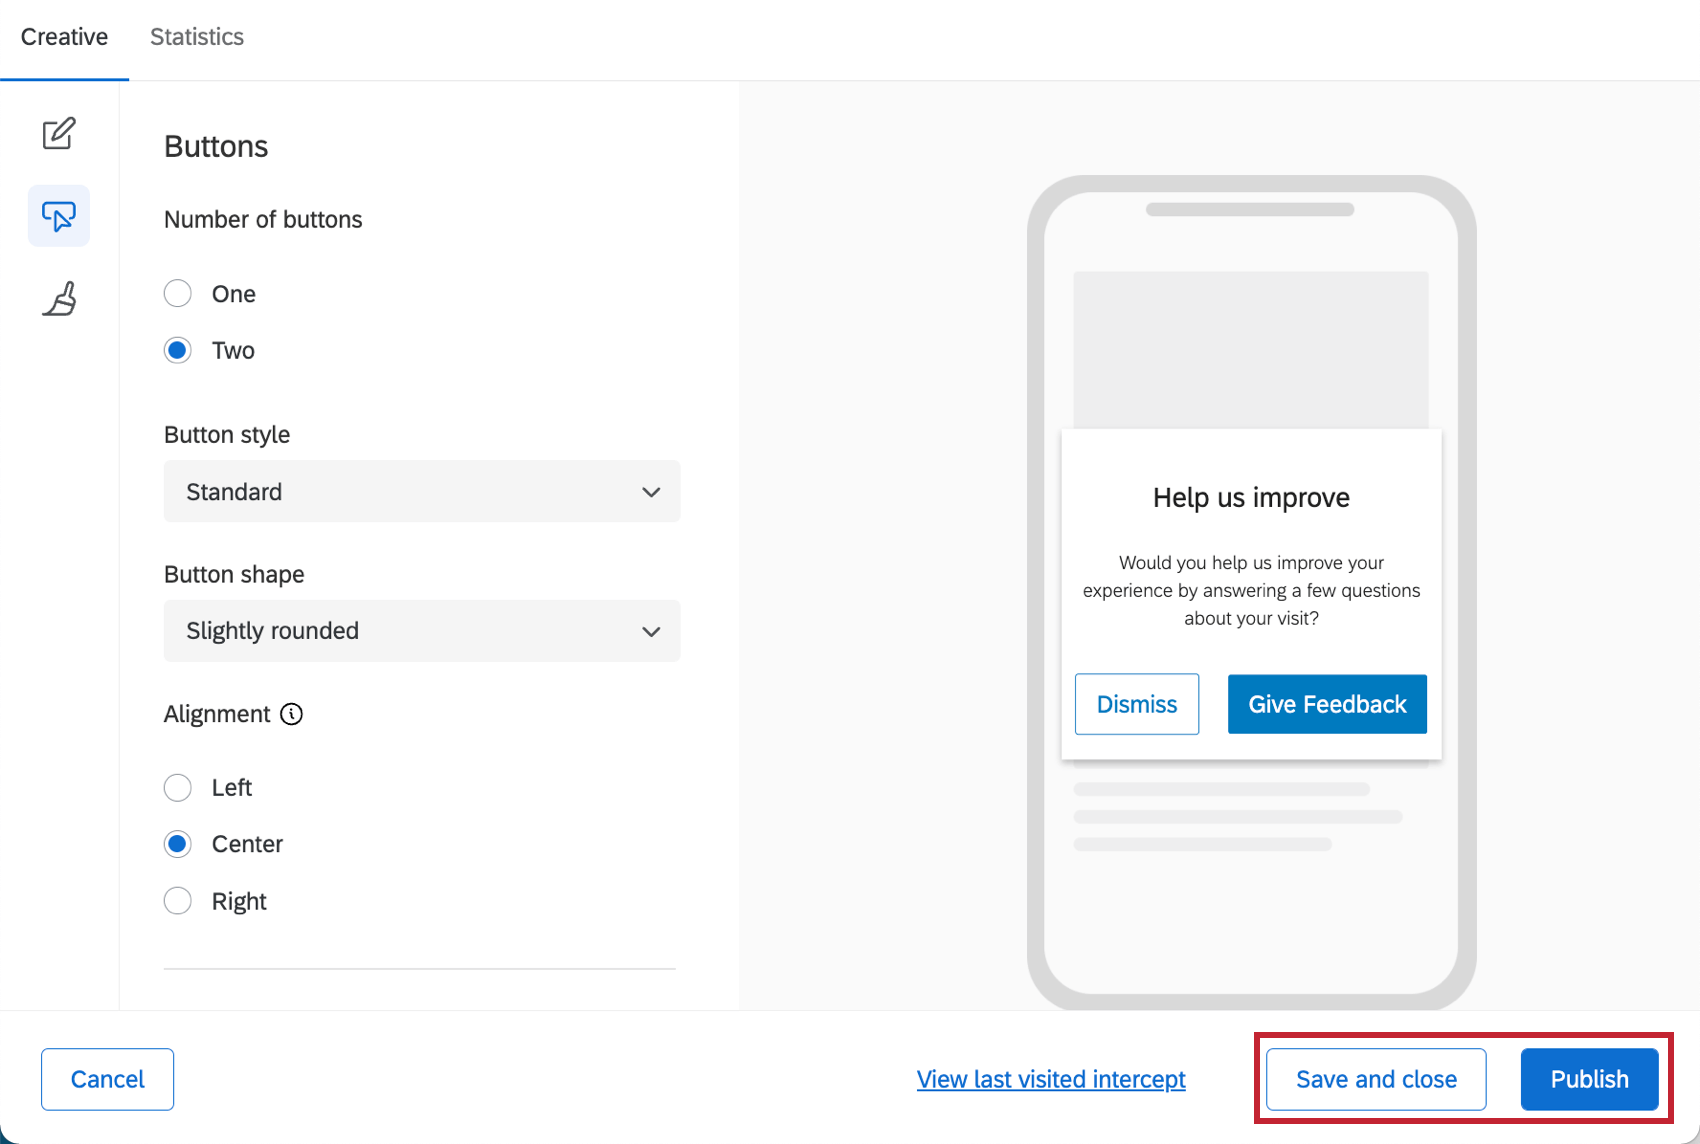

When you’re finished editing and would like your changes to appear on the app, click Publish in the bottom-right.
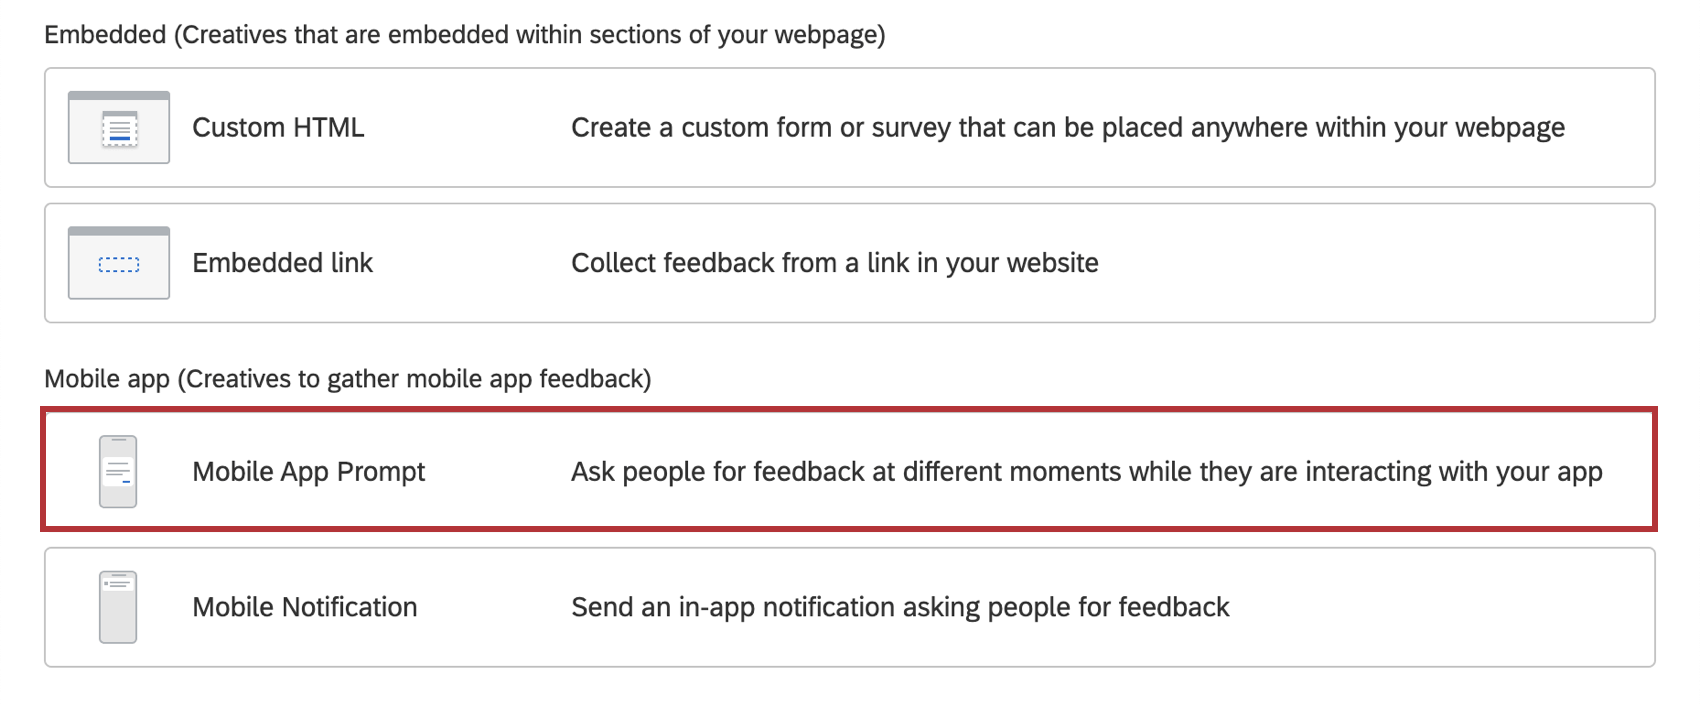
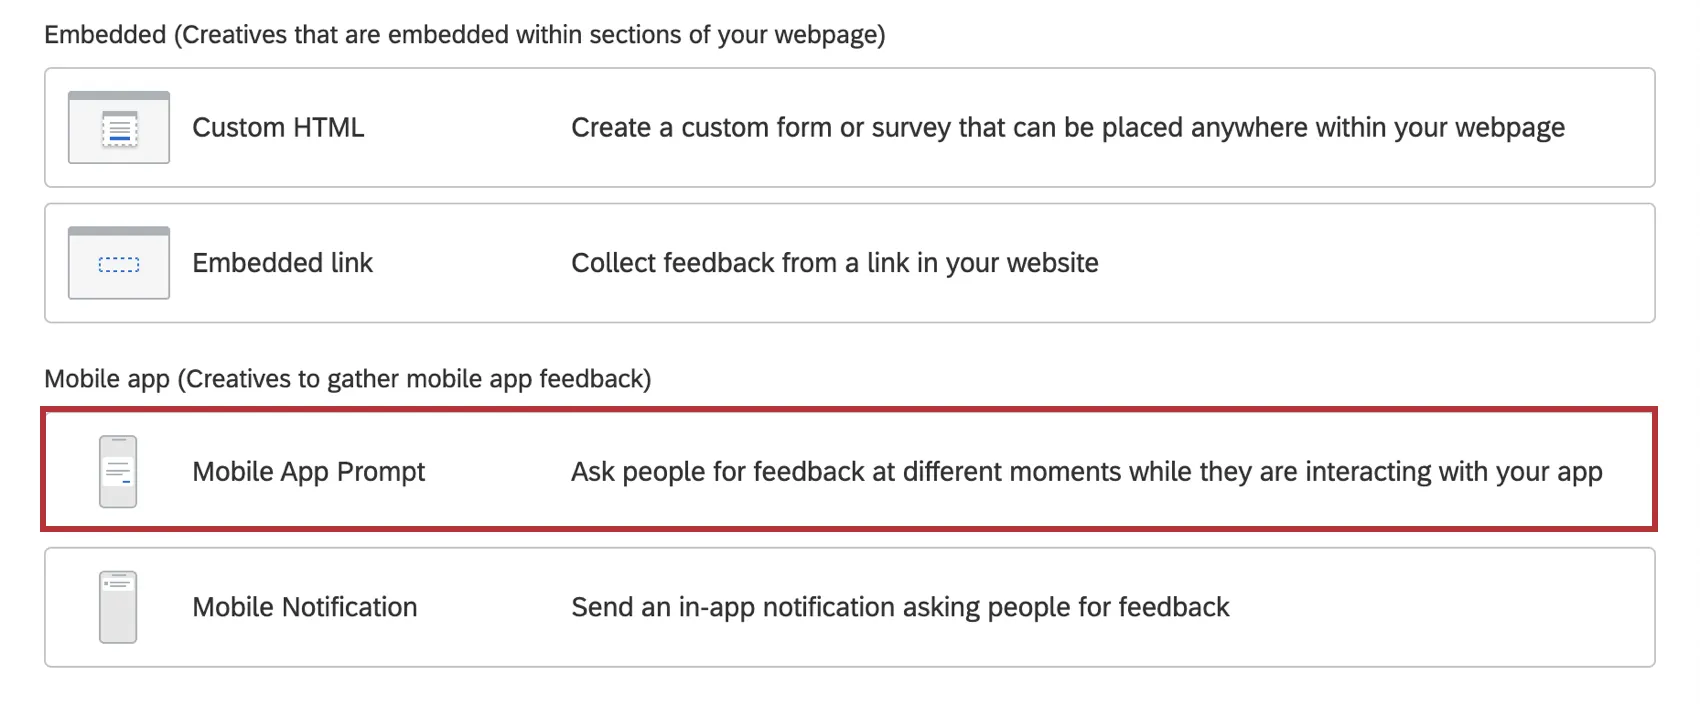
Setting up the Intercept
A Mobile App creative should be paired with a Mobile App Intercept! Select Mobile App Prompt from the menu. Then click Create Intercept.
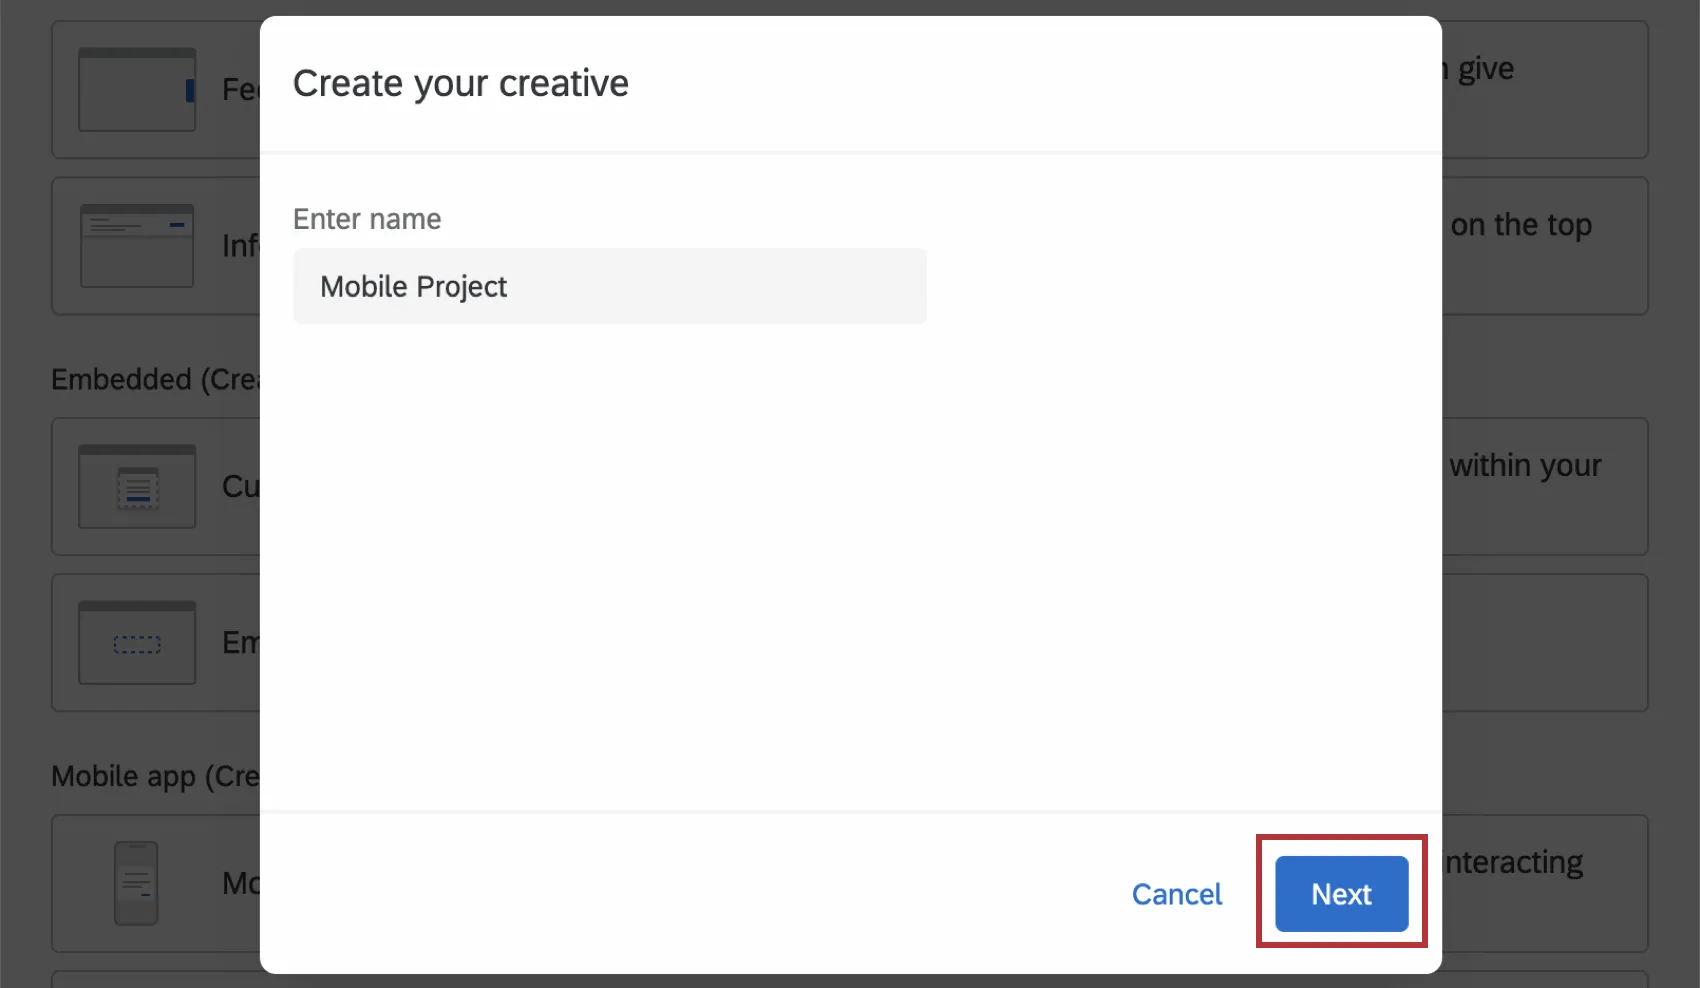
Enter a name for your creative, then click Next.
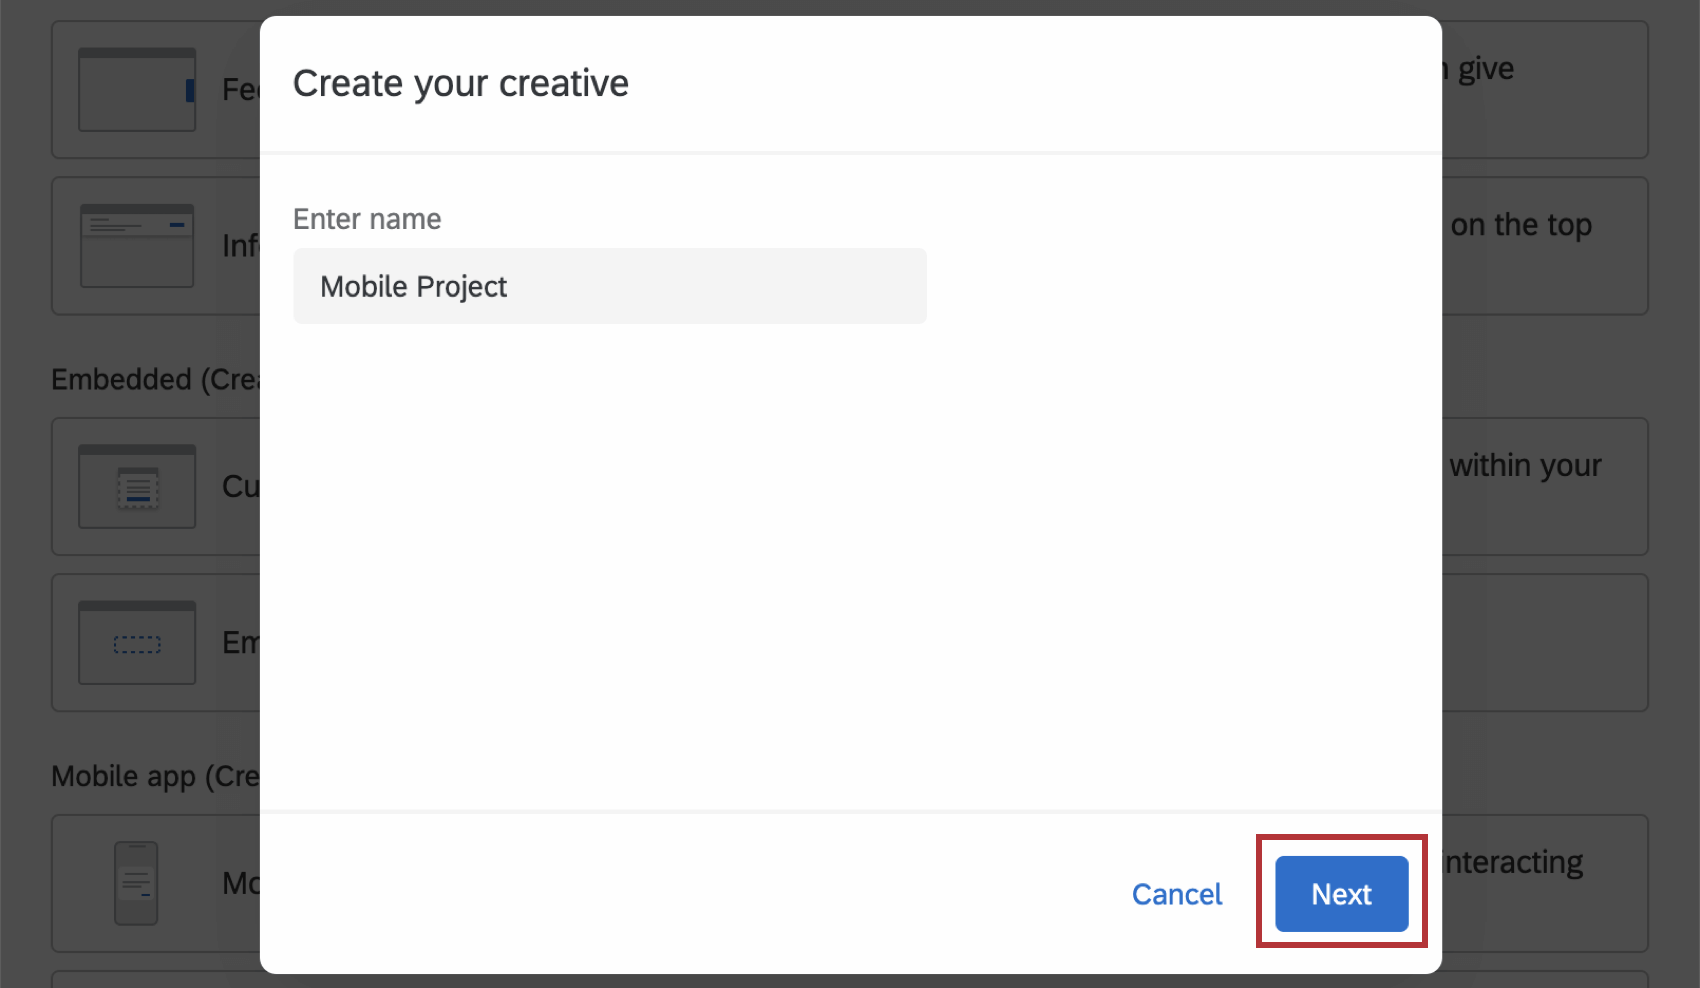
Setting the Creative & Target
On the Edit section, set the Creative to your Mobile App Prompt, then set your Target. The Target is where the button whose action is set to Use as intercept target is linked.
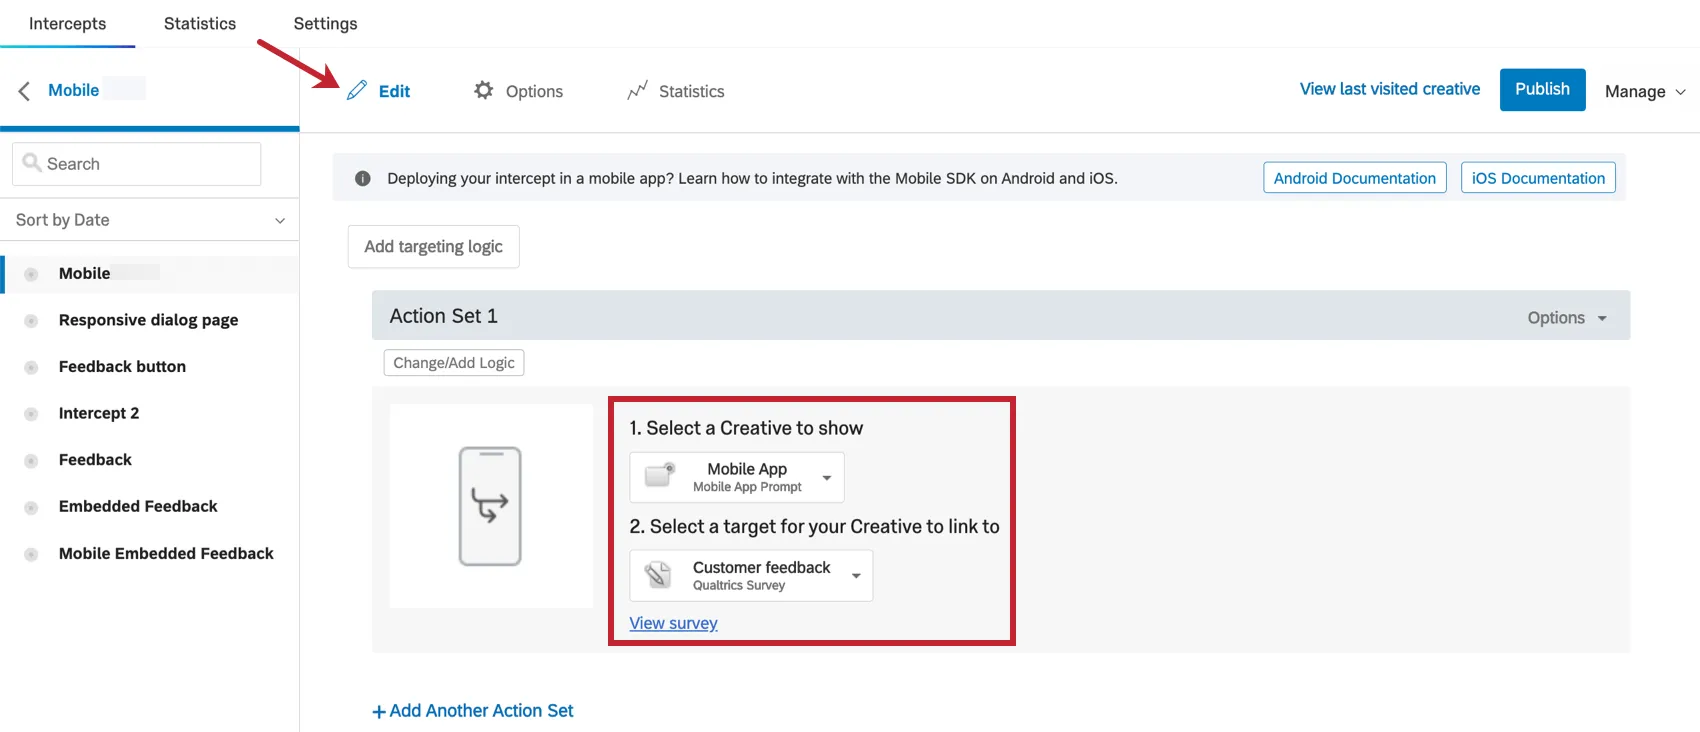
Qtip: If you have only one button on your creative and it closes the intercept, the Target can be set to No Target instead.
By default, the target you set opens in a new window in the visitor’s mobile browser. However, you can modify this to open in your app or adjust additional settings when completing the Mobile App SDK implementation.
Intercept display logic
Once you’ve set the creative and target, you will be able to determine the conditions under which the intercept appears on your app by clicking Change/Add Logic. The Mobile App intercept supports the following display logic condition types:

- App Session: View Count: This setting allows you to control the display of the intercept based on a specific number of pages that have been viewed. Total Views refers to logic based on a the total number of views in the app. Basing logic on Unique Views takes into account the unique views encountered by the app user. Qtip: You will need to work with your mobile app development team to ensure that views are properly recorded via the SDK.

- App Session: Time Spent in App: This setting allows you to control the display of the intercept based on the time that the app user has spent within the app. Qtip: You will need to work with your mobile app development team to ensure that time spent in app is properly recorded via the SDK.
- App Session: Custom Property: This setting allows you to control the display of the intercept based on whether a custom property has been set to a particular value. Custom properties are unique fields that can be passed over from the Mobile App. These custom properties are usually assigned to specific views/pages of the app, but can also include user information or events in the app like usernames, cart size, or other data points. Qtip: You will need to work with your mobile app development team to ensure that the custom property and its values are set on the specific pages/views of your mobile app.
- Date Time: Date, Day, Time: This setting allows you to control the specific date and time on which the intercept is displayed.
- Qualtrics Survey: Determine whether the intercept will be displayed based on whether the visitor has or has not taken a survey. You may select any survey on your account.
Embedded Data
If you’re connecting your intercept to a Qualtrics survey, you can save visitor data and information about their session by using Embedded Data.
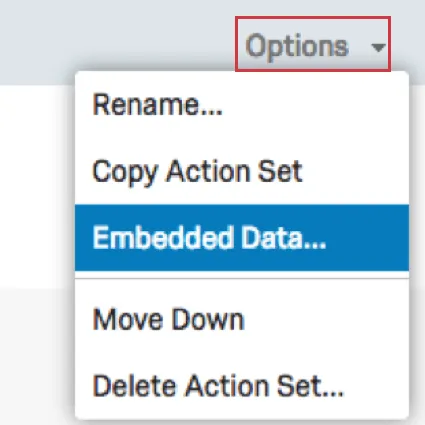
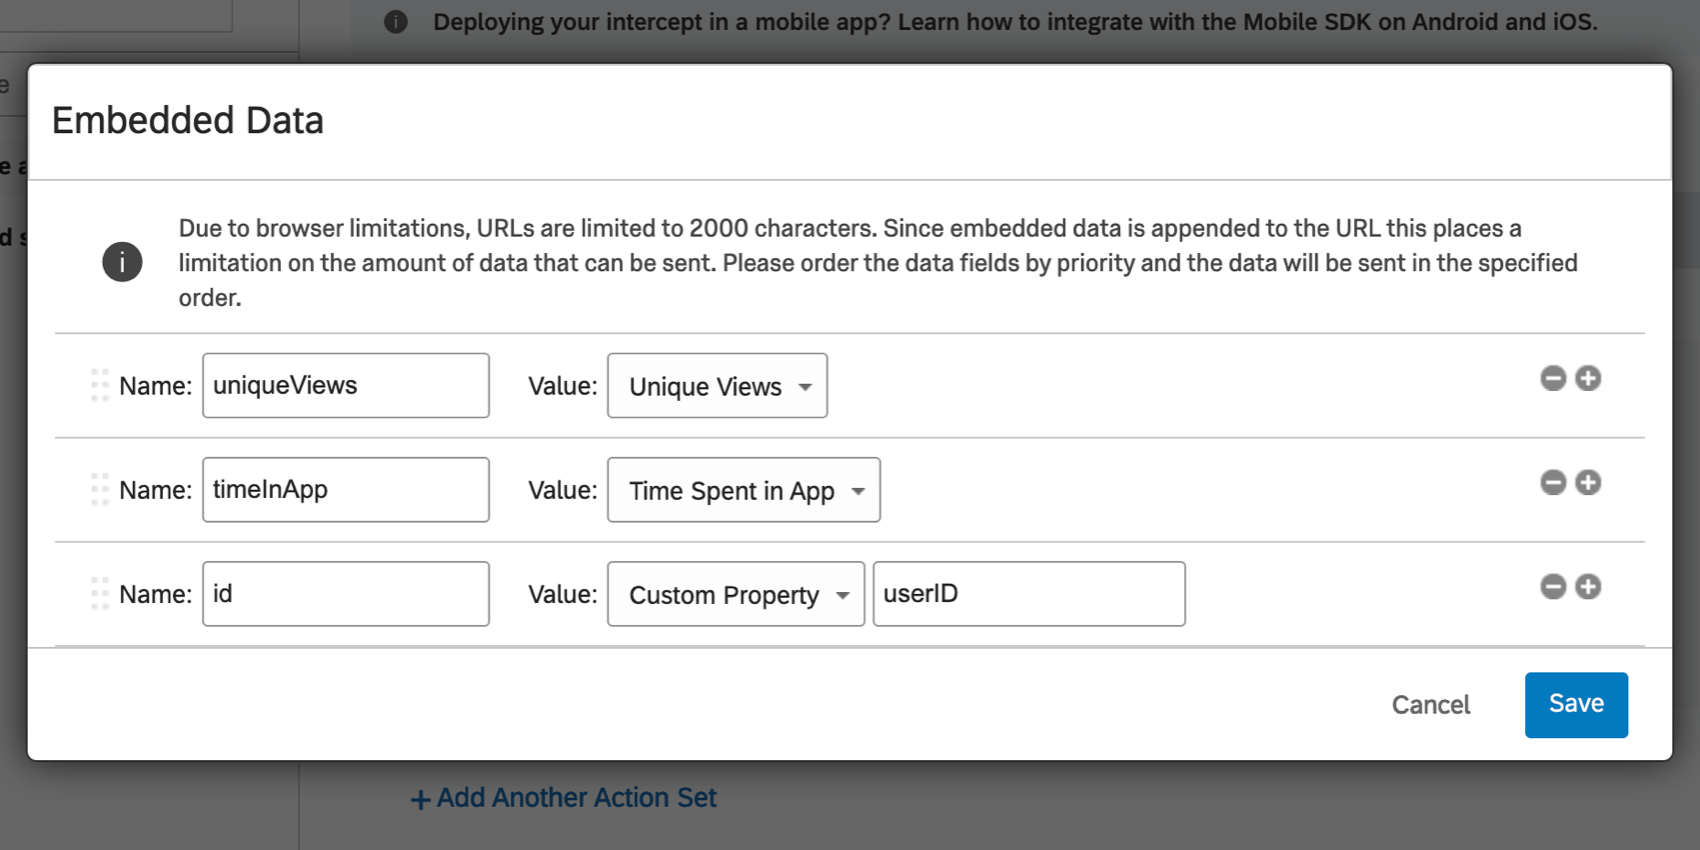
Click Options and then select Embedded Data. In the ensuing dialog, you can select which Embedded Data values you would like to pass to your survey.
Qtip: Your survey will have to set these Embedded Data values through the survey URL and in the Survey Flow.
You can pass in Embedded Data related to the number of views visited within the app, the time spent in the app (in seconds) and custom properties. Custom properties are values that the app provides to the SDK to be used in targeting and embedded data. Metadata about the user or their experience in the app can be included in the survey response through the Embedded Data feature.
Example: In the screenshot below, the Embedded Data named uniqueViews will be saved in your survey data. It will record Unique Views.
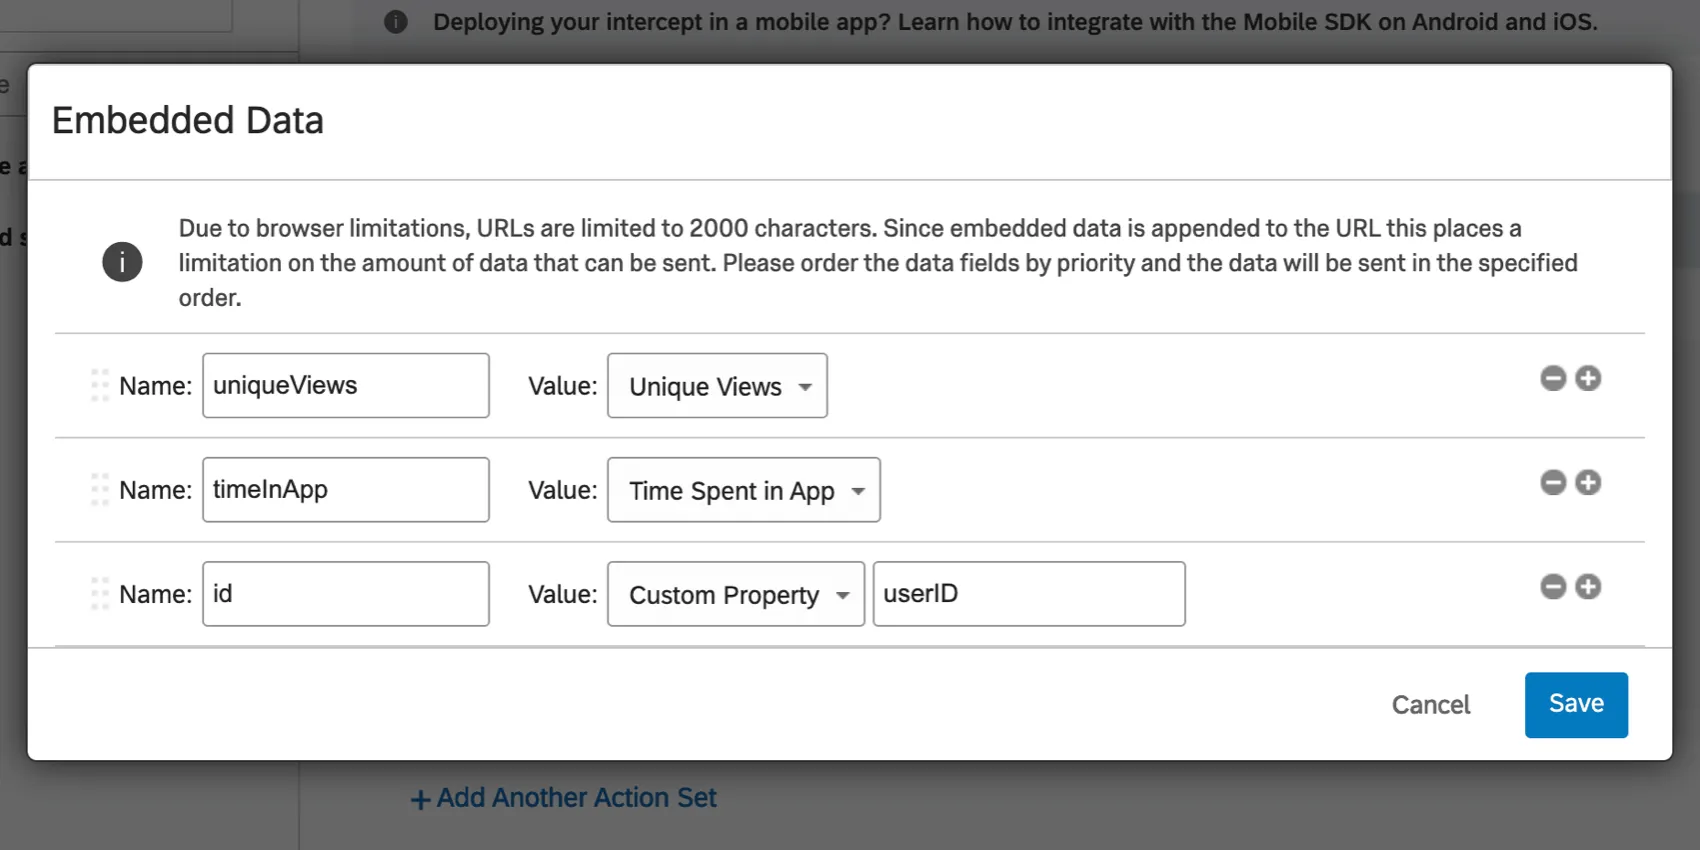
Qtip: You will need to work with your mobile app development team to ensure that the custom property and its values are set correctly by your mobile app.
Change Mobile Intercept Options
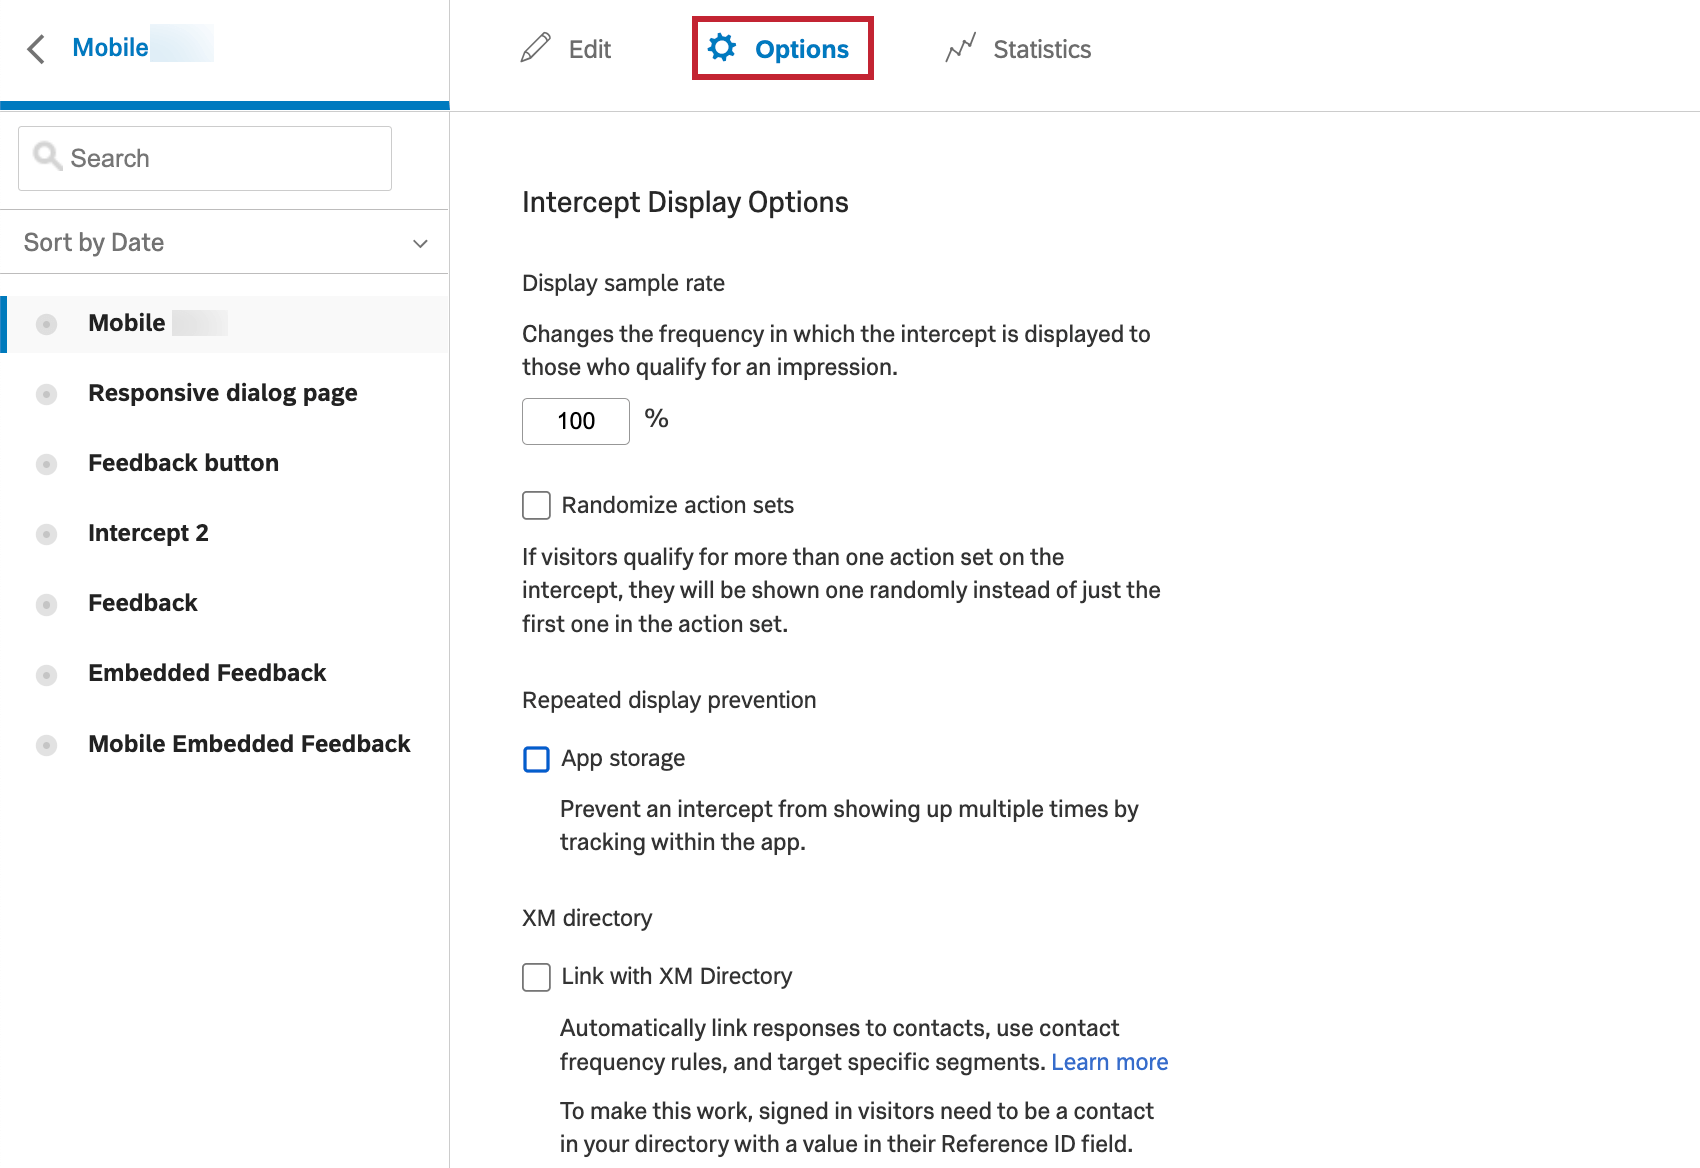
Navigate to the Options section to edit the following:

Prevent Repeated Display
This setting allows you to prevent the repeated display of the intercepts for your app users. For example, you can specify that the intercept should only be shown to users once a month.
Display Sampling Rate
This setting allows you to control the sampling rate for intercept display.
Randomized Action Sets
If your intercept has multiple action sets, and more than one applies to your visitor, an action set will be randomly assigned to them, instead of them receiving the first action set in the list.
Publishing and Activating your Intercept
After you have configured your intercept rules, be sure to Publish and Activate your intercept in order for it to be displayed for your mobile app users.
Intercept ID, Project ID, and Brand ID
You will be required to share the Intercept ID, Project ID, and Brand ID for the intercept you create with your mobile app development team. These IDs are available on the intercepts list page by selecting Copy Intercept ID’s in the Actions dropdown menu.
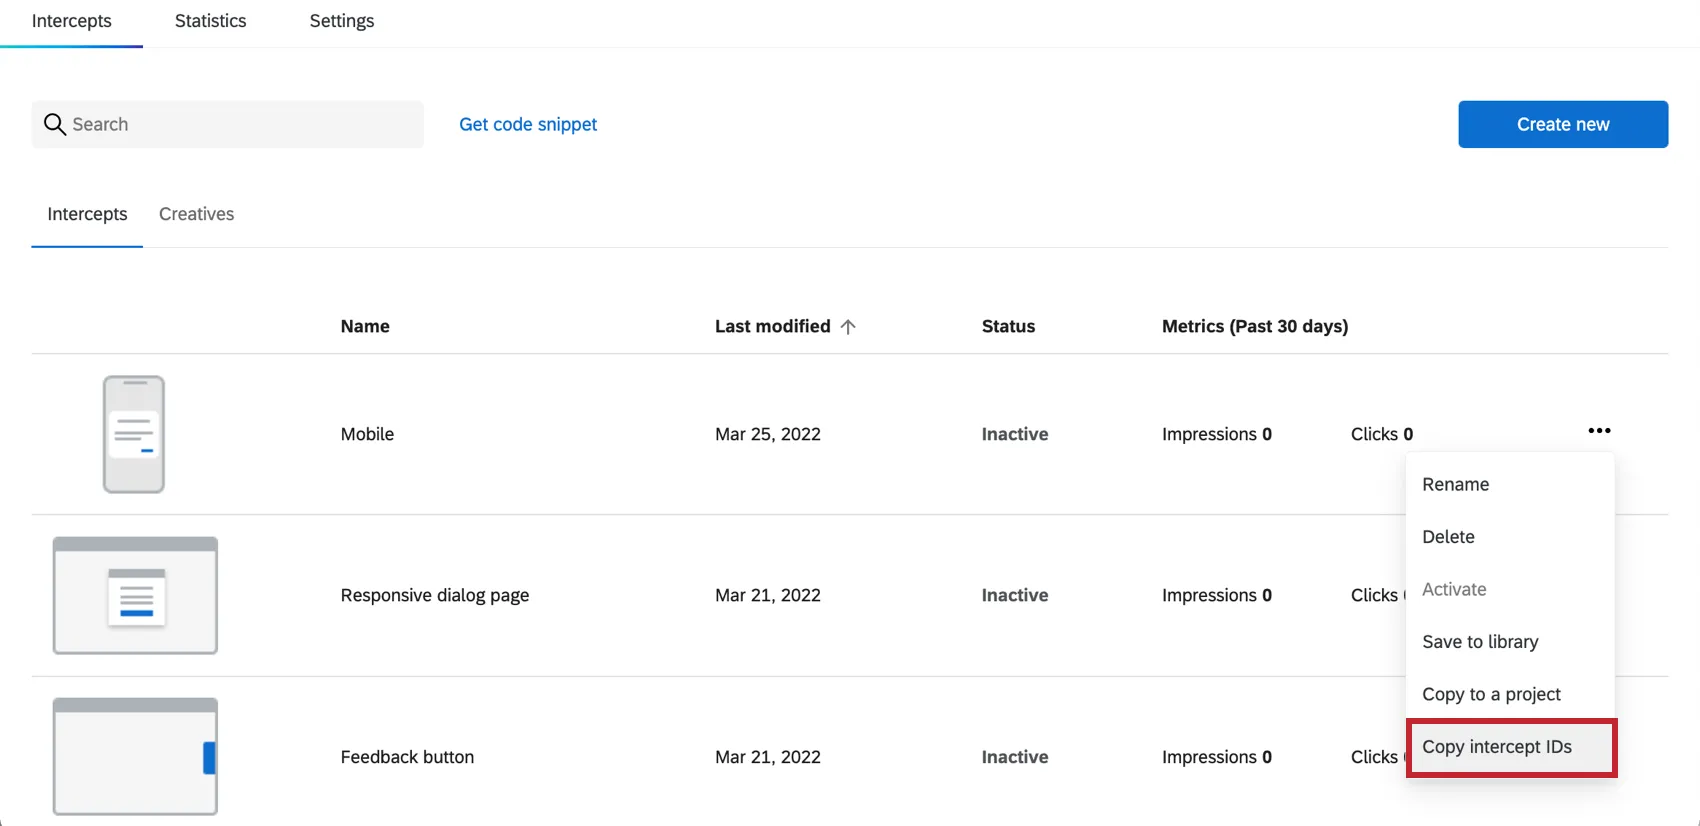
Click Copy Intercept ID’s and send them to your team.
Qtip: Qualtrics Support is unable to implement these IDs for you. It is up to your mobile app development team to place the IDs inside your application.
Mobile App SDK
Attention: Always make sure you are using the latest version of the SDK. Qualtrics support can only assist with SDK versions that are fully supported. To see currently supported versions, view the related documentation: Android, iOS, React.
In order to get your Mobile App Feedback Project up and running, there’s an integration you must implement on your end. The Mobile App SDK (Software Developer’s Kit) can be found at the following pages:
- Getting Started on iOS
- iOS API Reference
- Getting Started on Android
- Android API Reference
- React Native API
- Notifications (Android)
- Notifications (iOS)
Intercept, Project, and Brand IDs are all required to initialize SDK calls. See the above section to learn more about how to access these IDs.
FAQs
When should I use logic on my action sets?
When should I use logic on my action sets?
For example, since creatives are not responsive to screen size, many users like to implement action set logic focused on whether a website viewer is/is not using a mobile device or whether the website is being displayed on a certain screen size. By using logic in this instance, you are able to target a properly formatted and sized creative to the appropriate person.
Action set logic based on location can even be used to make sure that website viewers are seeing a creative that is written in the language that most likely applies to them.
Can I capture information from my website visitors in my intercept's survey? How?
Can I capture information from my website visitors in my intercept's survey? How?
Aside from simply setting a static value that you want carried into the survey, the embedded data menu also comes pre-built with other options that can be carried into the survey. For example, you will be able to automatically capture the ID of both the intercept and creative shown, the URL of the page that displayed the intercept, the person‘s site history, or even how much time was spent on the site. You will even be able to capture information from a cookie that appears on that person‘s web browser or you can write a JavaScript expression that captures a particular variable that you are interested in.
If you are running a survey in Qualtrics, then you can also add the embedded data in the Survey Flow to save this information to the survey response.
That's great! Thank you for your feedback!
Thank you for your feedback!