Creating CX Dashboard Pages
About Pages
Every CX Dashboard is made up of pages. Pages are where your widgets live, and are meant to be customized to meet your organization’s data needs.
Viewing Pages
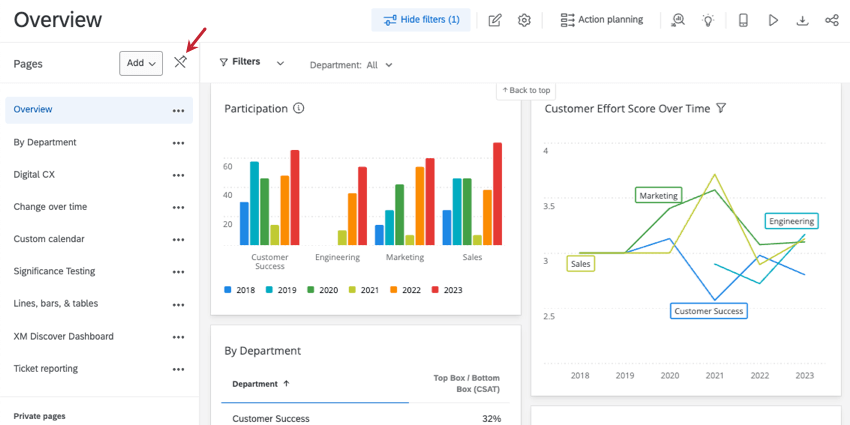
Your dashboard’s pages are shown in the menu to the left on your dashboard. Click a page to open or edit it. If you ever want to close this menu, click the pin icon. You can click this same button to pin it open again.
Creating Pages
To create multiple pages:
- Navigate to your dashboard.
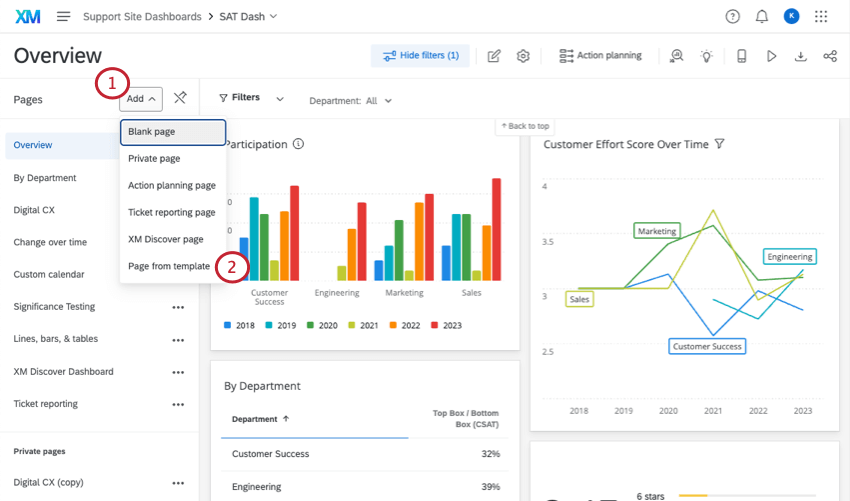
- Click Add.
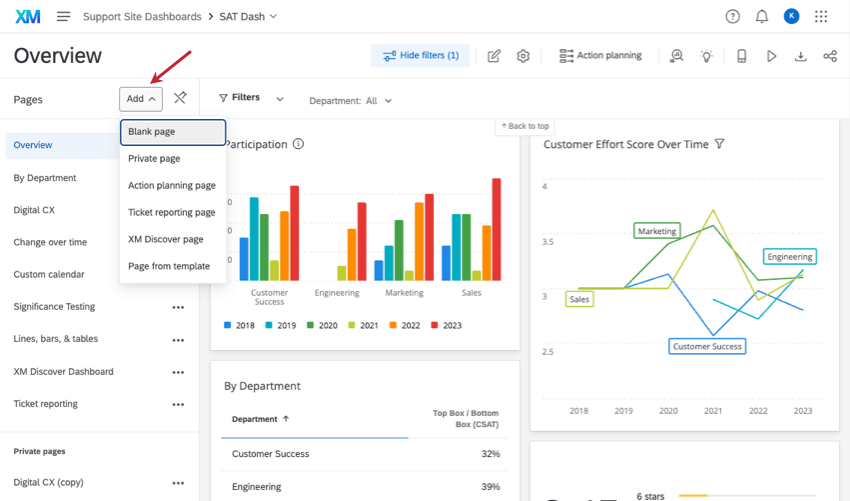
- Choose one of the following:
- Blank page: A regular dashboard page. Report on the data mapped in your dashboard data with all kinds of widgets.
- Private page: A page that can only be viewed by you. Private pages can be invaluable for tracking response rates, viewing metadata, and troubleshooting your data sources. If you’d like, you can make a public copy of a private page.
Qtip: Private pages separated from public ones in the page list. See the Private pages header in the screenshot above.Qtip: You cannot view private pages on the Qualtrics XM App.
- Action planning page: Report on the progress of your action plans. See the Action Planning (CX) page.
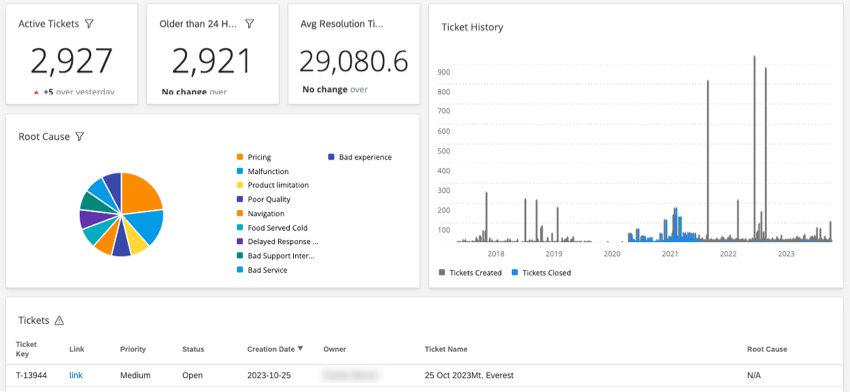
- Ticket reporting page: Report on key ticket data. See the Ticket Reporting (CX) page.
- XM Discover page: Embed XM Discover dashboards in your CX Dashboard. See Studio in Qualtrics Dashboards.
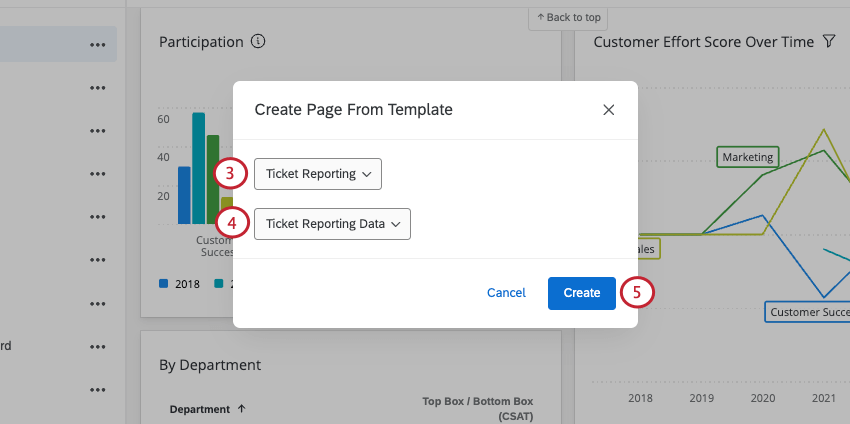
- Page from template: Create a page from a template.
Page Options
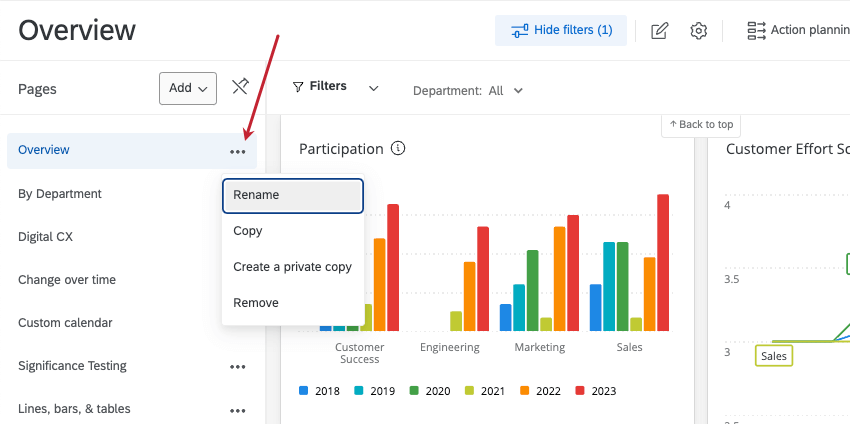
When you click the 3 dots next to any public or private page, you have the following options:
- Rename the current page.
- Copy a page and its visualizations.
Attention: When you select this option on a private page, you create a public copy!
- Create a private copy (i.e., an unshareable version) of a page.
Warning: Only you can view a private page. The only way to make a private page public is to select the regular Copy option. Additionally, you cannot view private pages on the Qualtrics XM App.
- Remove a page.
Warning: If you remove a page, you will not be able to recover it.
Dashboards in the XM App
When viewing a dashboard in the XM App, it’s important to make sure that your dashboard is formatted for mobile. See Enabling Dashboards for Mobile Viewing to preview and set up your mobile dashboard.
Page Templates
You can also get access to ready-made page templates that will report your data in insightful ways. There are a few templates to choose from:
- A template for Ticket Reporting
- A template for the XM Directory Respondent Funnel
- A template for Online Reputation Management
- A template for Distribution Reporting
These features must be enabled and their data must be mapped before you can use their templates.
More Resources on Dashboard Pages
For more information about page features and options, please see the following pages:
- Filtering pages: You and your stakeholders can filter page data for increasingly granular analysis.
- Restricting pages: Pages can be restricted based on individual roles (attributes) and the security-level of your data.
- Sharing pages: Unique pages can be assigned to separate audiences and stakeholders.
- Ticket Reporting (CX): Learn how to use ticket pages to report on tickets.
- Action Planning (CX): Learn how to use action planning pages to report on the progress of your organization’s action plans.
