Frontline Reminder Widget (CX)
About the Frontline Reminder Widget
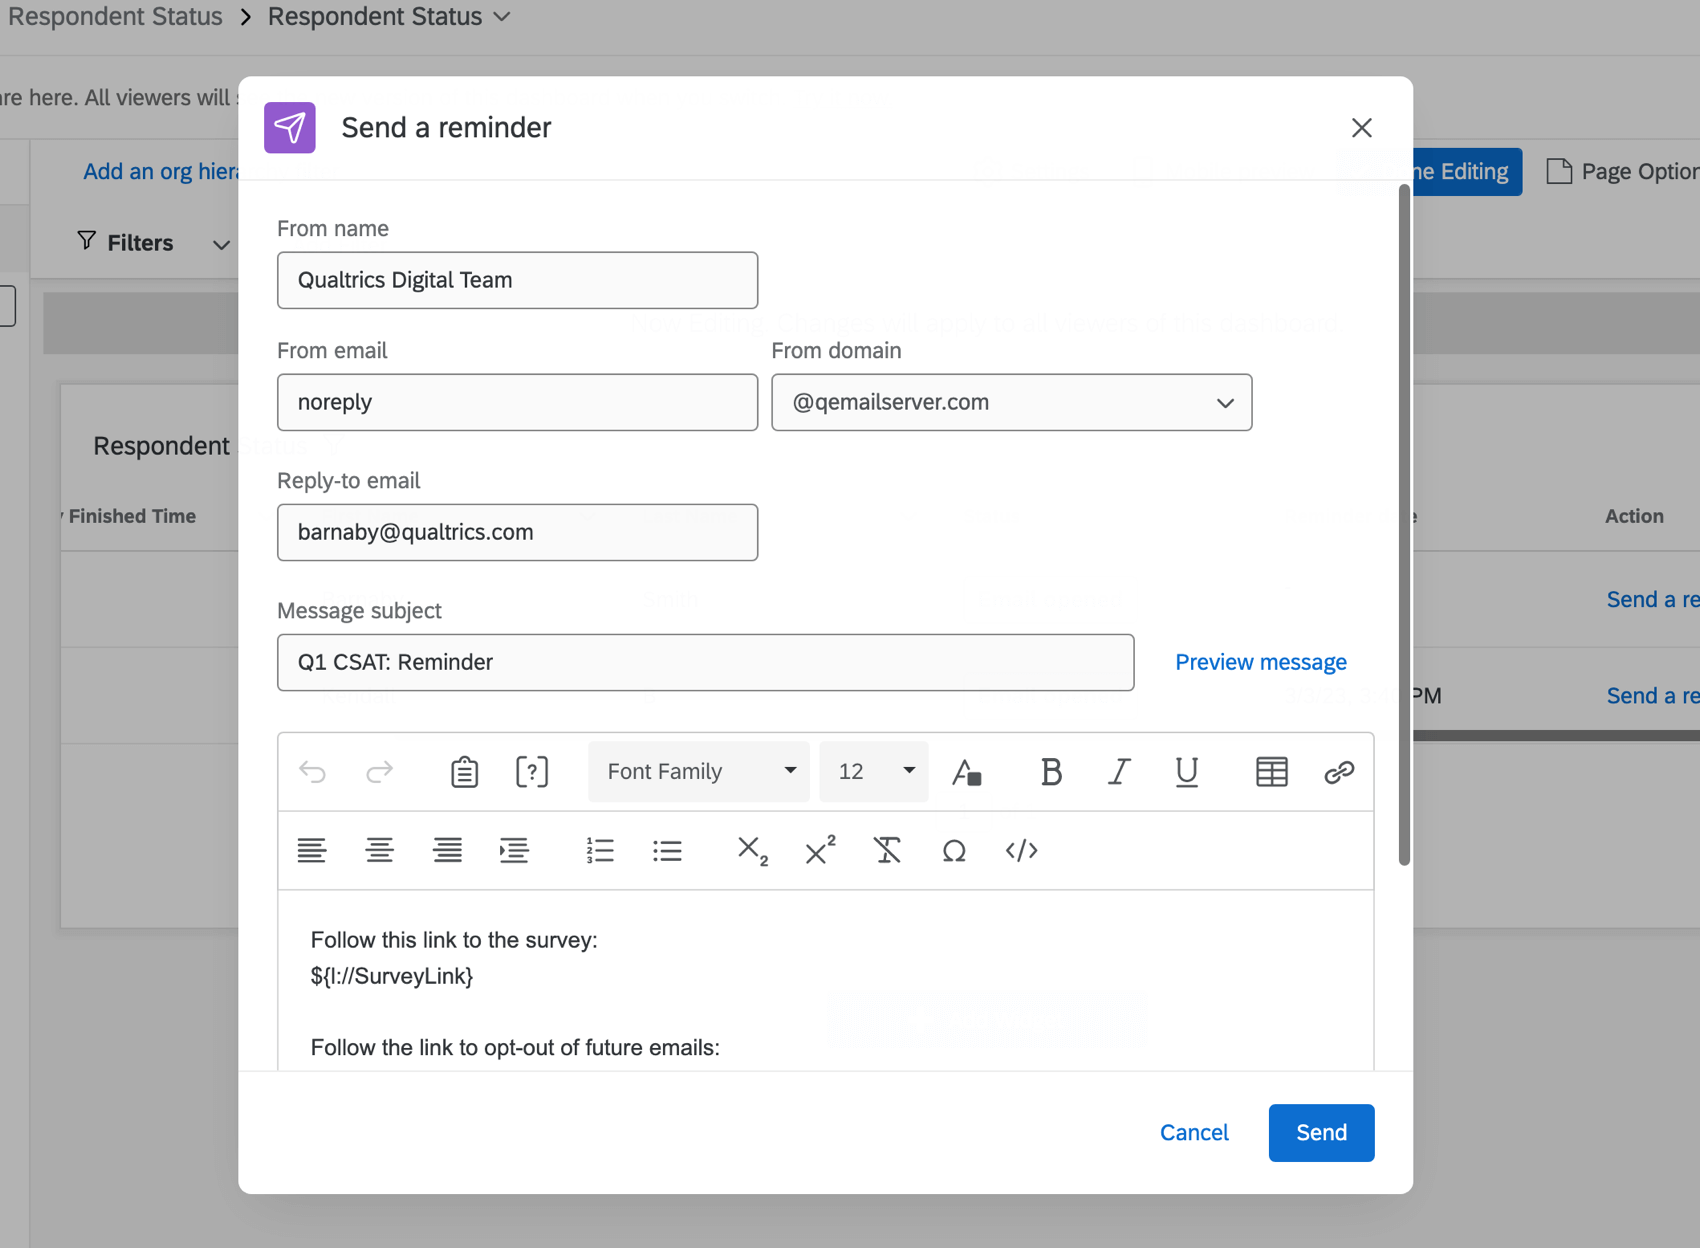
The frontline reminder widget displays distribution data and allows non-admin users to send survey completion reminders directly from a respondent funnel dashboard. Frontline users can now monitor data collection, and improve response rates and response quality.
Setting Up the Frontline Reminder Widget
- Create or open a dashboard with a respondent funnel data source. Ensure all of the following fields are mapped:
- Email Blocked (Numeric Value)
- Email Bounced (Numeric Value)
- Email Failed (Numeric Value)
- Email Opened (Numeric Value)
- Email Sent (Numeric Value)
- Email Skipped (Numeric Value)
- Email Sent Time (Date)
- Survey Finished (Numeric Value)
- Survey Partial Recorded (Numeric Value)
- Survey Response Screened Out (Numeric Value)
- Survey Started (Numeric Value)
- Distribution ID (Text Set)
- Distribution Category (Text Set)
- Directory ID (Text Set)
- Email Address (Text Value)
- Contact ID (Text Value)
- Survey ID (Text Set)
- Response ID (Text Set)
- List ID (Text Set)
- Transaction ID (Text Value)
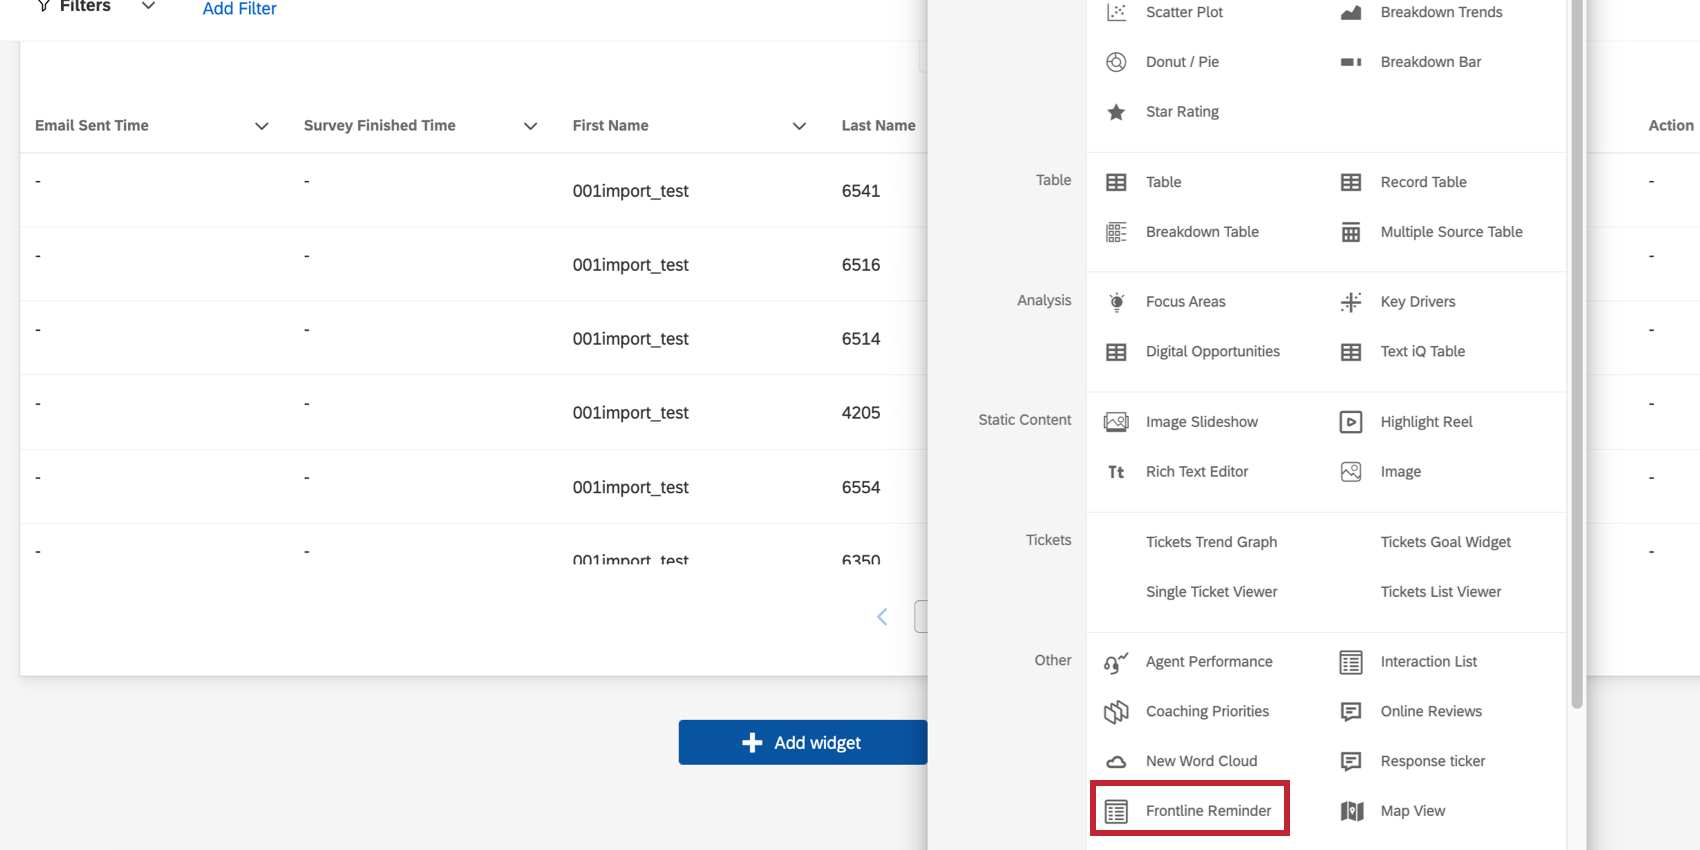
- Add the Frontline Reminder widget to the dashboard.
Configuring the Frontline Reminder Widget
For basic widget customization, like editing widget titles, descriptions, and resizing, visit the Building Widgets support page. Continue reading for customization specific to the frontline reminder widget.
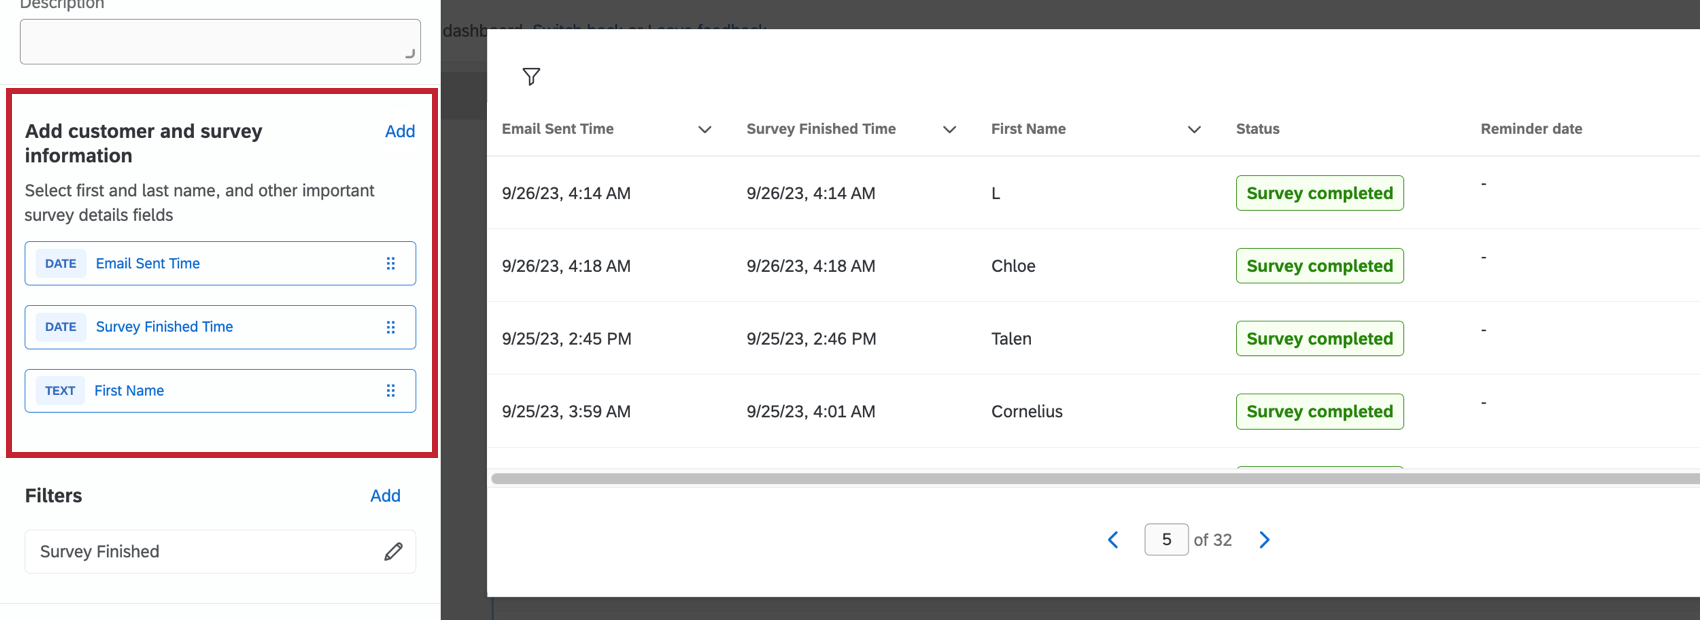
ADD CUSTOMER AND SURVEY INFORMATION
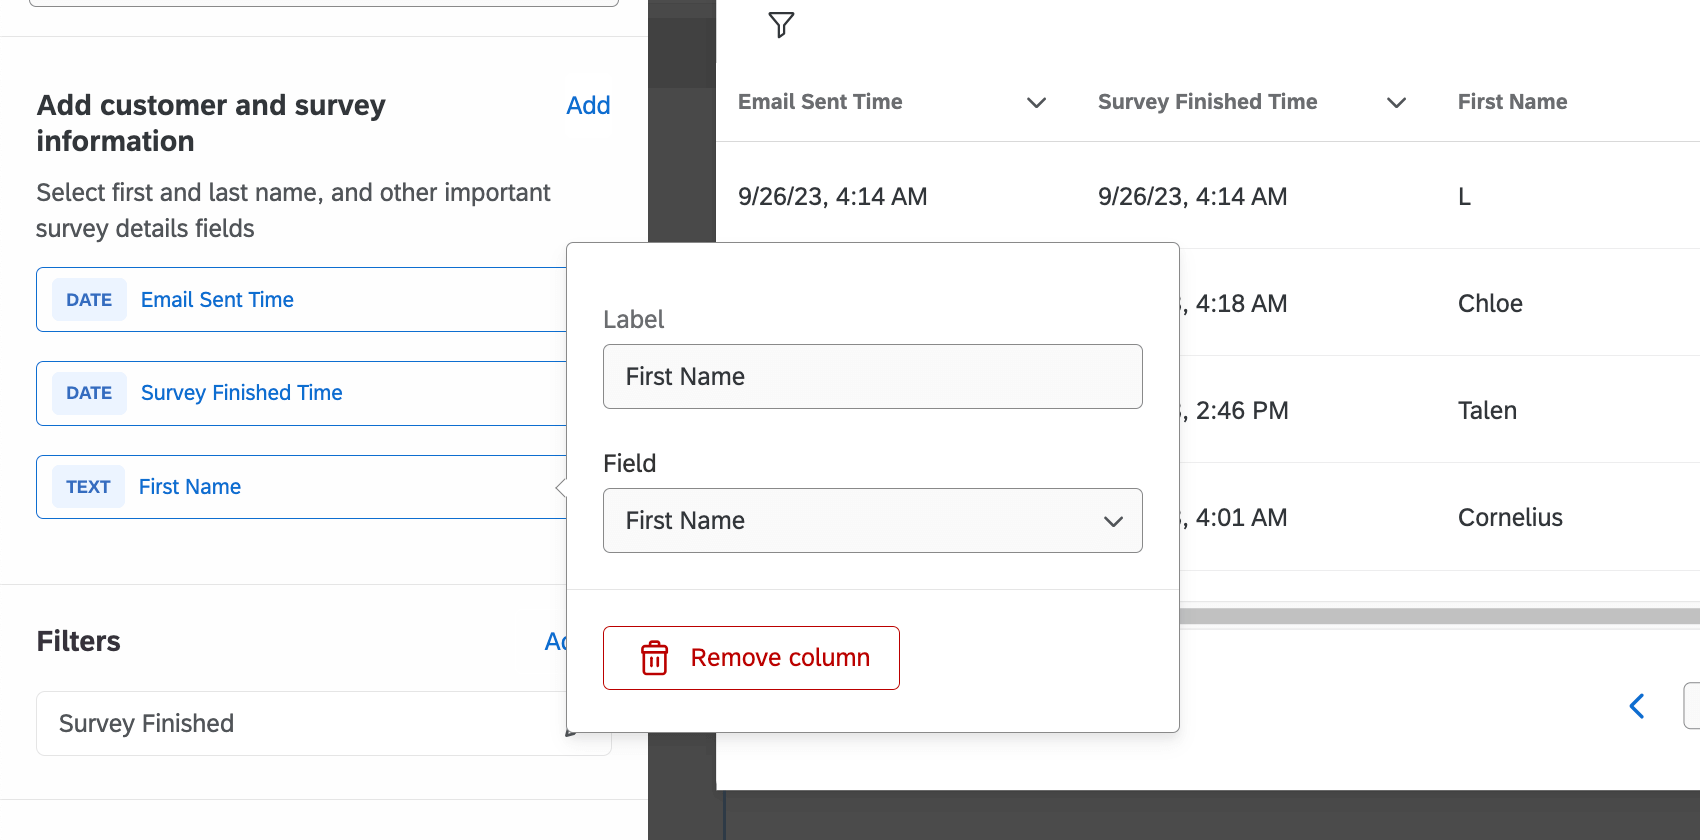
Select which data fields you would like to be visible in the widget. Email sent time, survey finished time, first name, and last name will show by default. Click on a field to edit it. To add another field, click Add.
To remove a column, click the column name. In the pop-up menu, click Remove column.
FILTERS
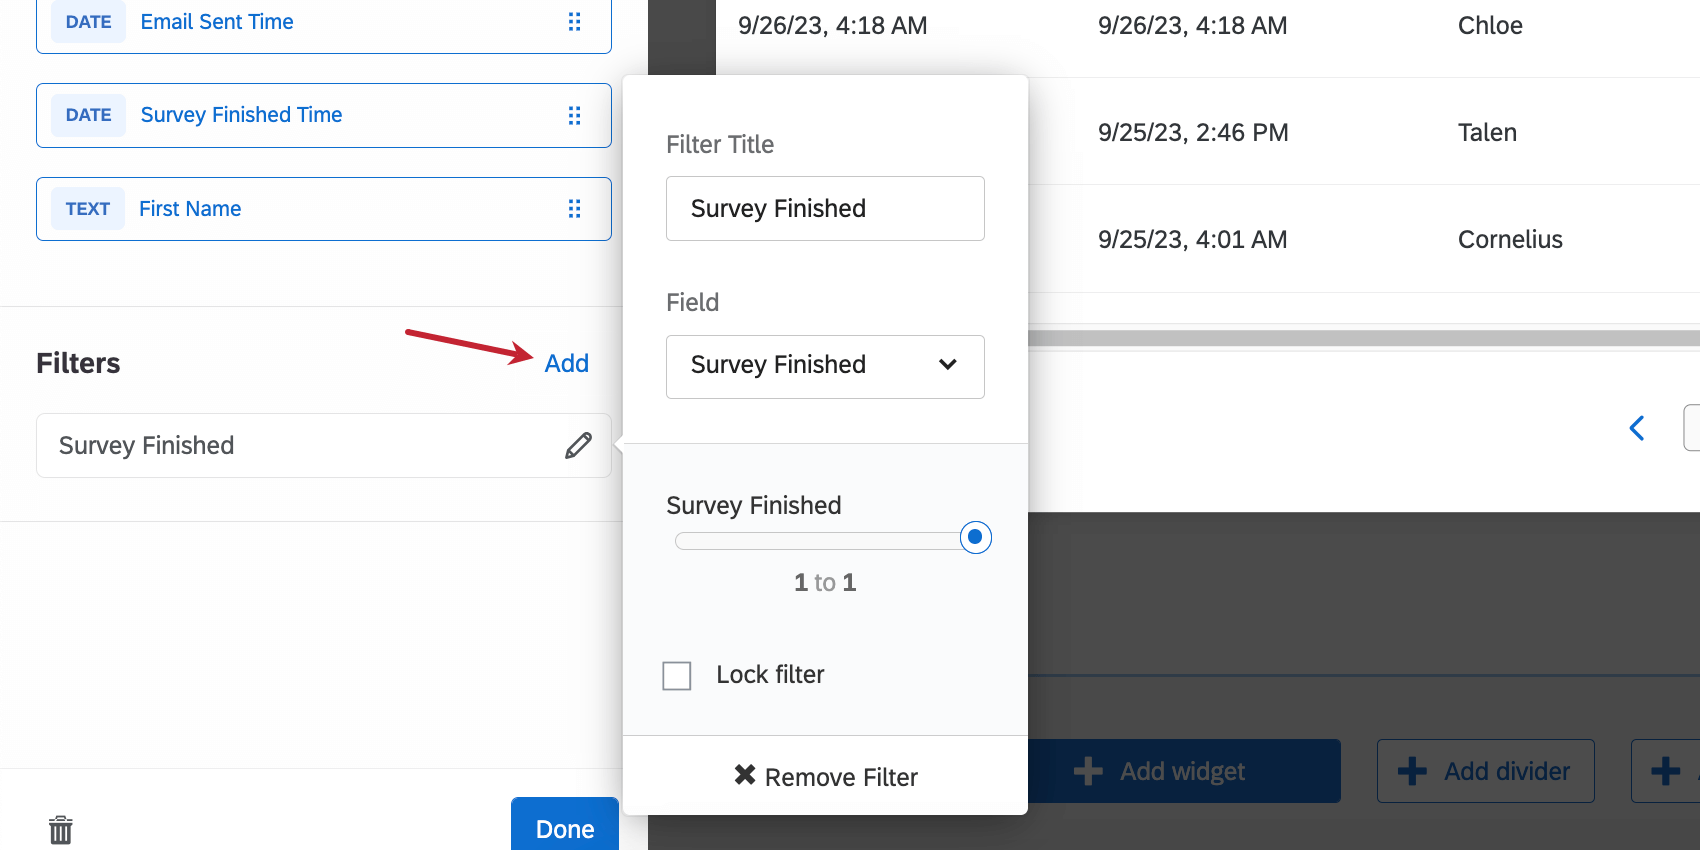
Add filters to your widget for a more granular look at the data in your chart. Click Add and then decide which metrics to include or exclude. To configure the filter, click the filter and edit the properties in the menu.
We highly recommend adding a filter to your frontline reminder widget in order to narrow down the distributions shown to ones eligible for reminders. This will help you make sure you can see the Send reminder button.
Here are some of the most common conditions you can add:
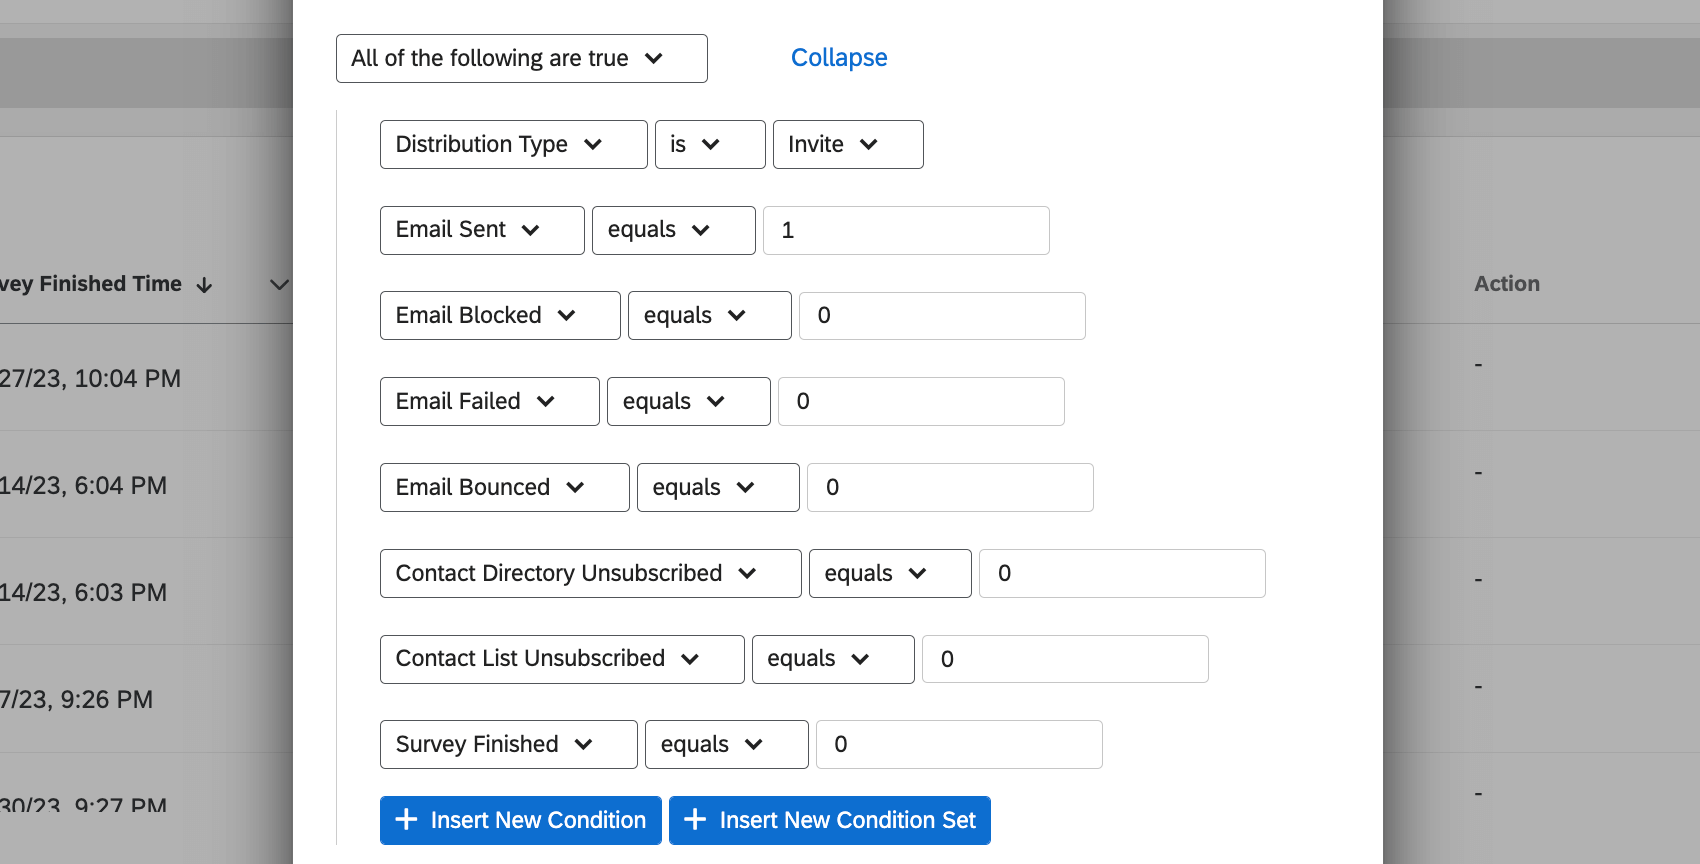
- Distribution Type is Invite, since you can only send reminders on invites, not thank you emails or other reminders.
- Set Email Sent equal to 1.
- Set Email Bounced, Email Blocked, and Email Failed equal to 0, to ensure the email was successfully delivered to the contact.
- Set Contact Directory Unsubscribed and Contact List Unsubscribed to 0. This makes sure your contacts haven’t unsubscribed from the directory or lists, and thus are fine with being contacted.
- Set Survey Finished to 0. This implies the survey hasn’t been completed, which means the respondent is still eligible for reminders.
You can combine all of these conditions into a single advanced filter. This is what the advanced filter would look like:
You can add any additional conditions you want. For example, you can exclude survey screen outs, or add a date filter so you only see recent distributions.
For more general details on building filters and how they work, see Filtering CX Dashboards.
Display Options
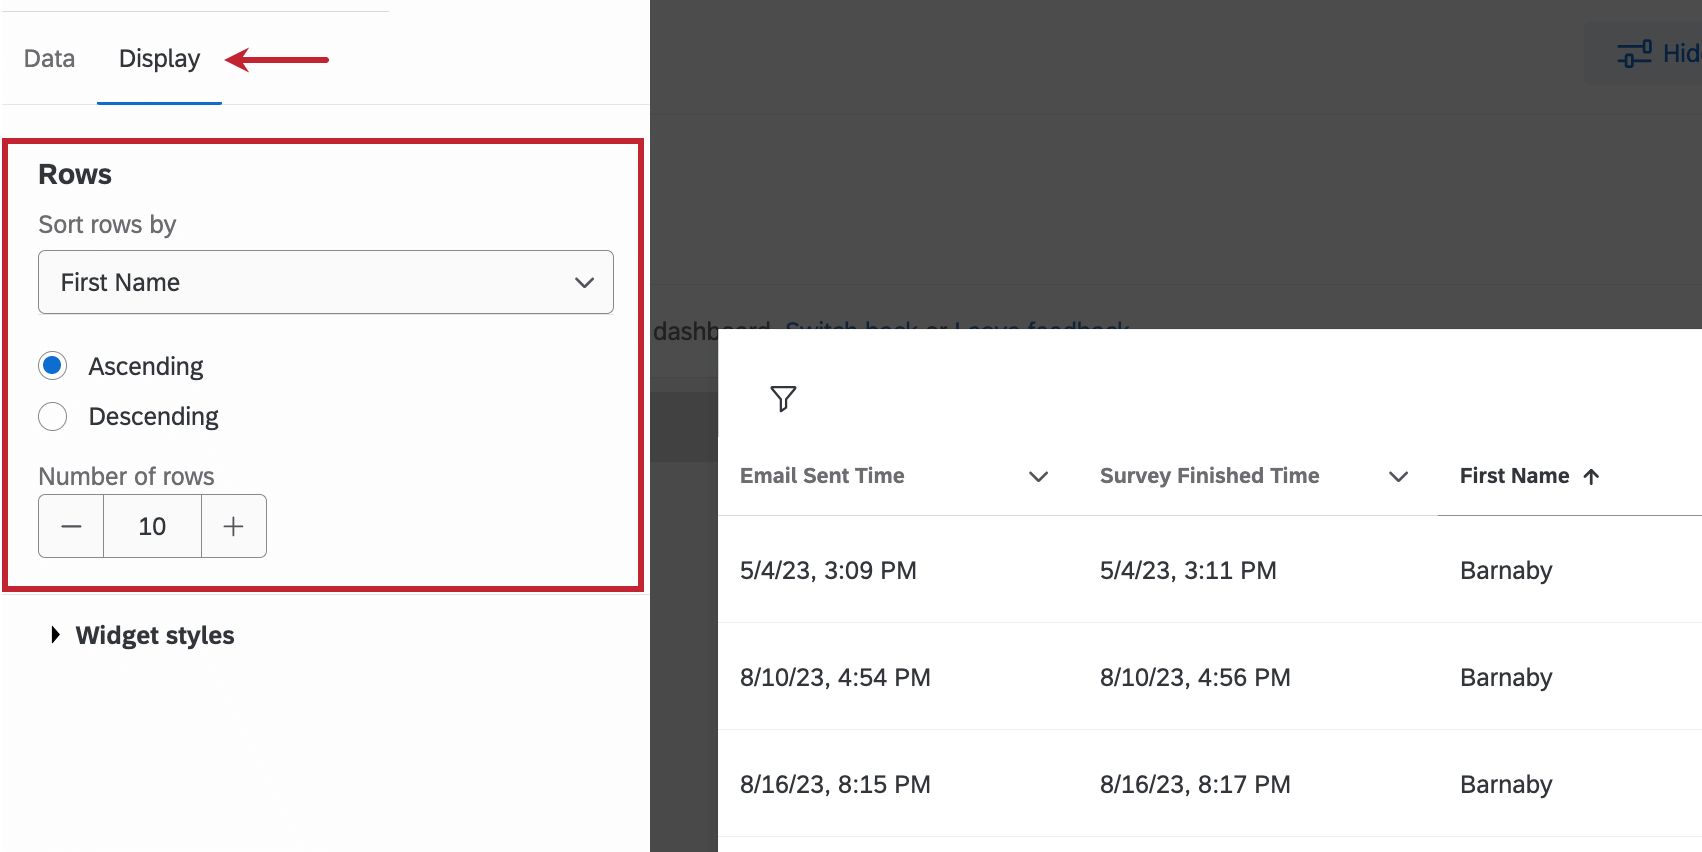
Use the display options to customize the rows in the frontline reminder widget. Indicate which field to sort rows by, as well as the number of rows per page of the widget.
Using Frontline Reminder Widget
The frontline reminder widget is a useful tool for displaying distribution data in your dashboard. This widget can also be used to easily monitor data and reach out to respondents if needed.
- Sorting the table: Click the header on the column to sort the table by that field. The status column cannot be used to sort the table.
- Send reminder: Click Send reminder to send a reminder email to the recipient in the widget. This email will be sent to the email address saved for that contact.
