Adding Dynamic Org Hierarchies to CX Dashboards
About Adding Dynamic Org Hierarchies to CX Dashboards
This page will go over the steps for configuring dynamic org hierarchies so they can be used to filter data in CX Dashboards. Thus dashboard users will only be able to see data according to their level in an employee hierarchy.
Before you can add a dynamic hierarchy to your dashboard, you must meet the following requirements:
- Your brand uses unique identifiers.
- You’ve added users to your dashboard project via the User Admin
- You’ve created an org hierarchy.
- You have a survey that contains the users’ unique identifiers.
Please note that this page describes functionality that is different from dashboarding in Employee Experience projects.
Adding a Dynamic Org Hierarchy to a Dashboard
Once you have made sure that unique identifiers are attached to your dataset, you can add the dynamic hierarchy to the dashboard with the following steps.
- In your dashboard, go to the settings.

- Navigate to Dashboard data.
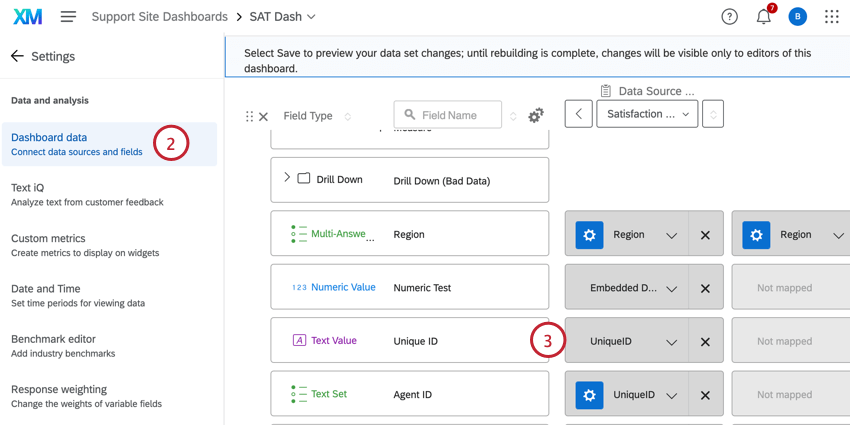
- Make sure the unique identifier is added to your dashboard source as a Text Value.
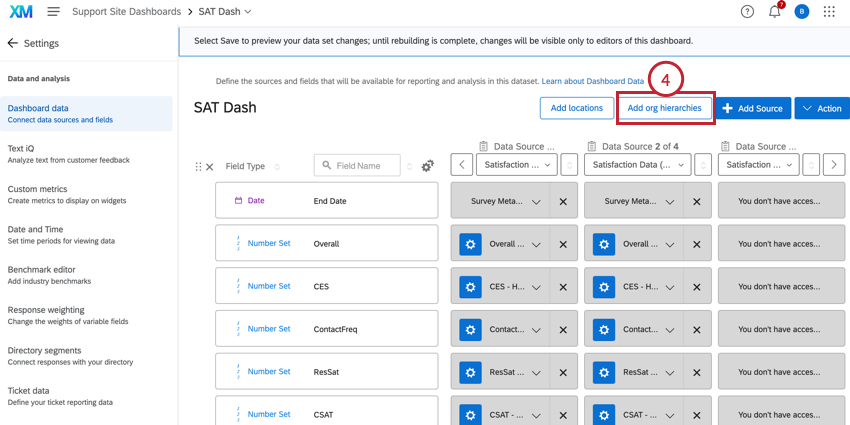
- Click the Add org hierarchies in the top-right corner of the data mapper.
- Select the field where you mapped your unique ID.
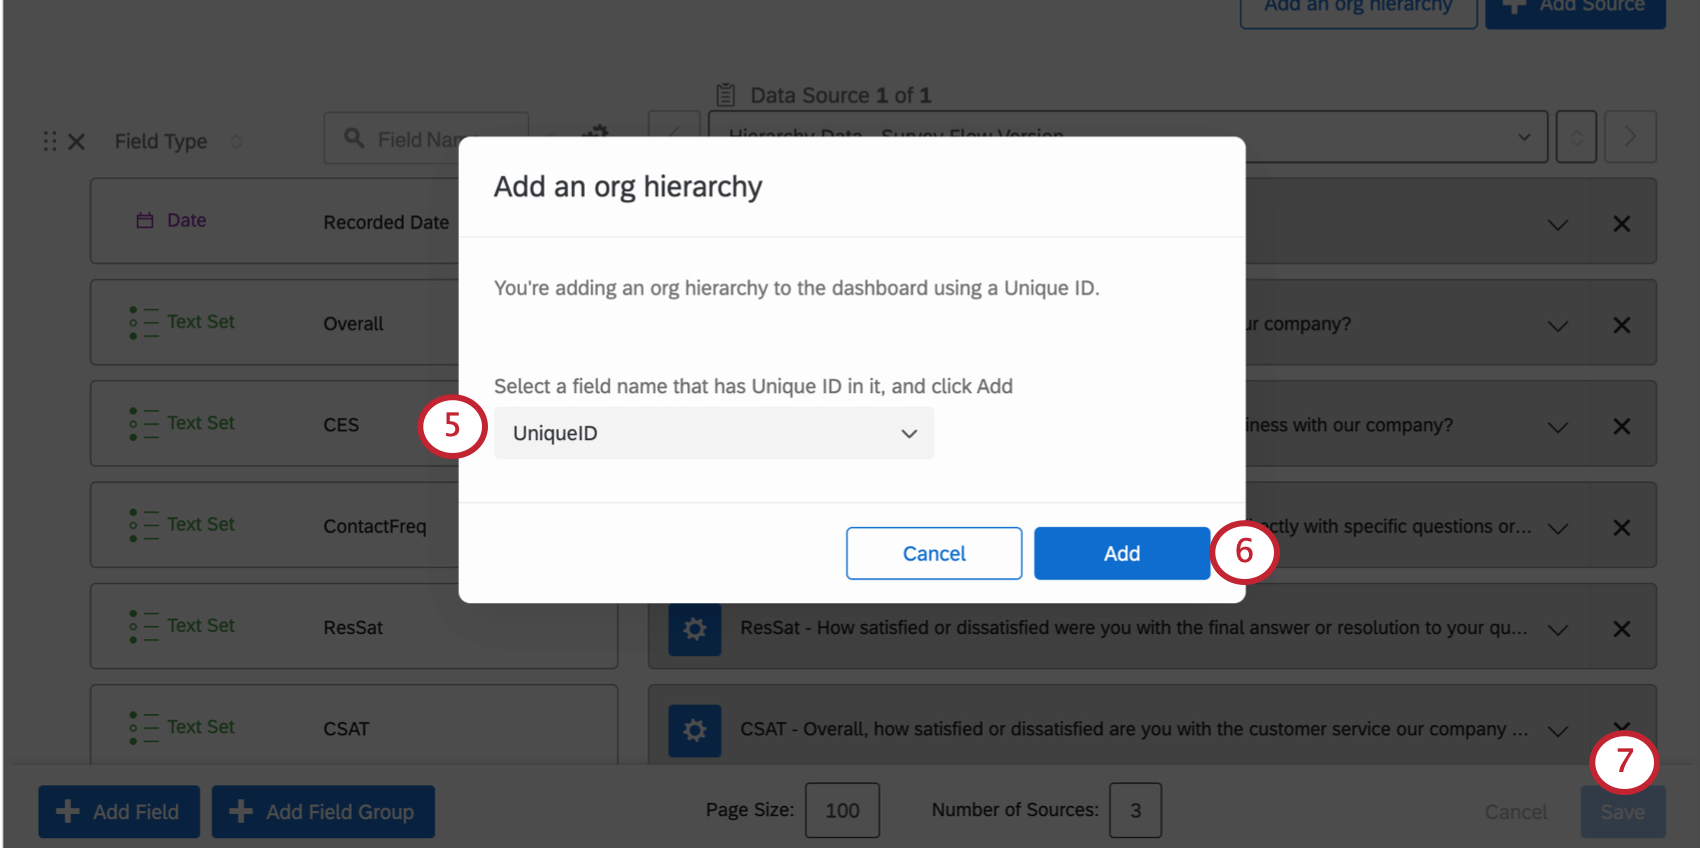
- Click Add.
- When finished, click Save on your dashboard data.
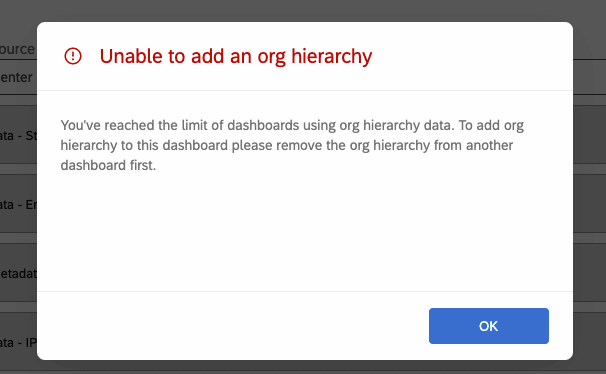
Qtip: You can add hierarchy data to a maximum of 7 different dashboards per all the users in the brand (not per user). If the limit of dashboards has been reached, in order to add an org hierarchy to a new dashboard, you will be asked to remove the org hierarchy from another dashboard first.
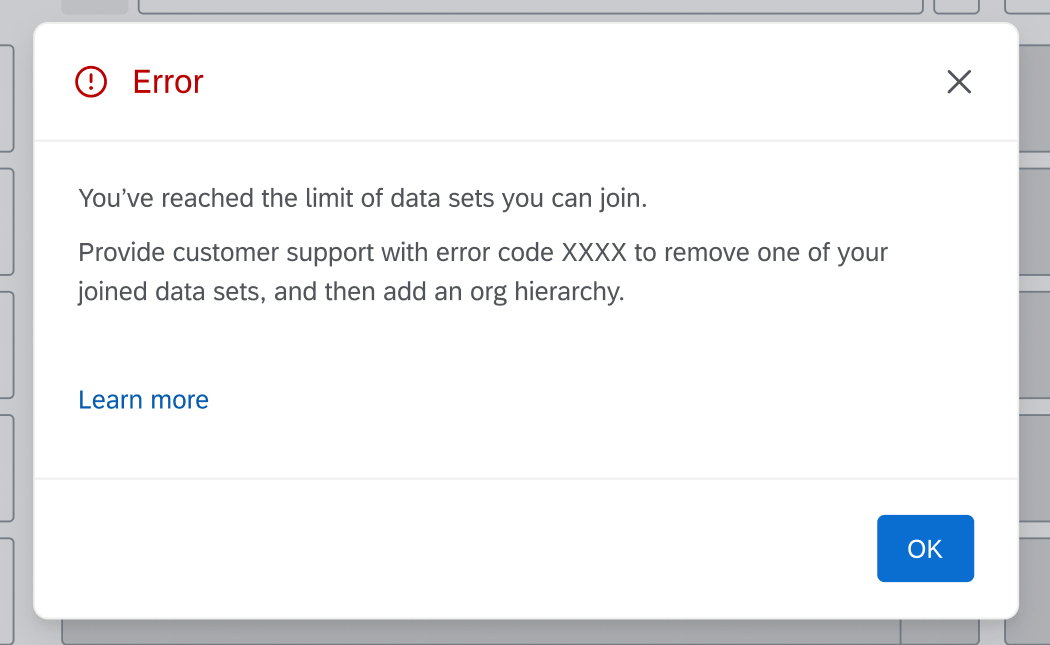
Qtip: If you have any custom “joined datasets,” your dashboard will be limited to 3 such data sources. If your dashboard already has three joined data sources, you will not be able to add the org hierarchy, and you will see the message shown below. If you are unsure whether you have “joined datasets,” reach out to your contact in Engineering Services. If you have not purchased Engineering Services, it is highly unlikely that you have joined datasets.
Adding an Org Hierarchy Filter to a Dashboard
After adding a hierarchy to your dashboard, you can apply the hierarchy as a dashboard filter.
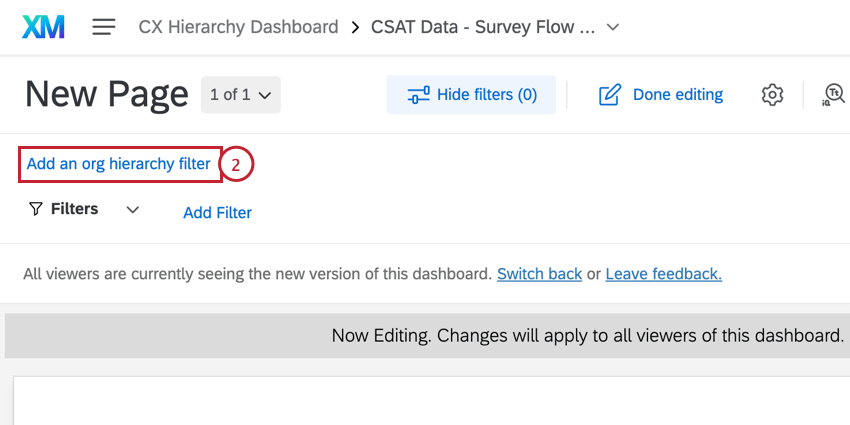
- In your dashboard, click Edit.
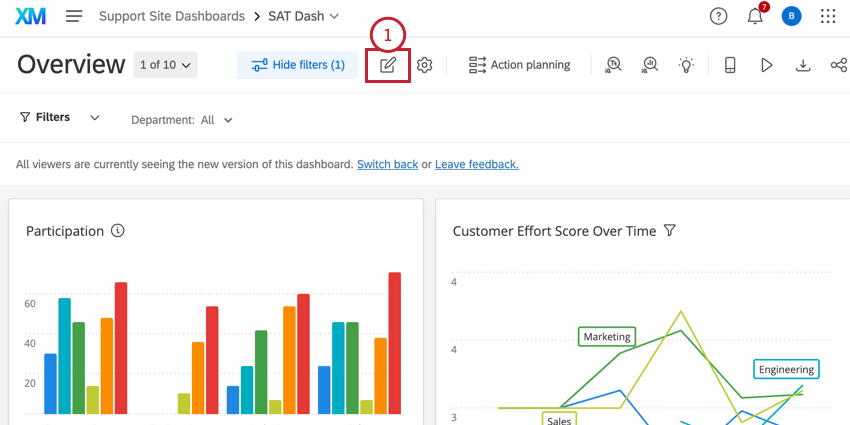
- Click Add an org hierarchy filter.
- Select the desired hierarchy from the menu.
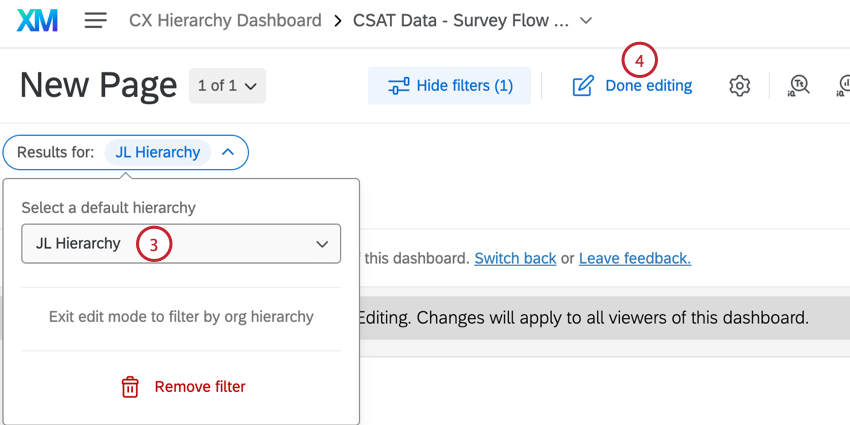
- Click Done editing.
Using an Org Hierarchy Filter
Using an org hierarchy filter in a CX Dashboard works exactly the same as using an org hierarchy filter in an Engagement Dashboard. To learn more, see the following Engagement Dashboard pages:
Removing an Org Hierarchy from a Dashboard
- In your dashboard, go to the settings.

- Navigate to Dashboard data.
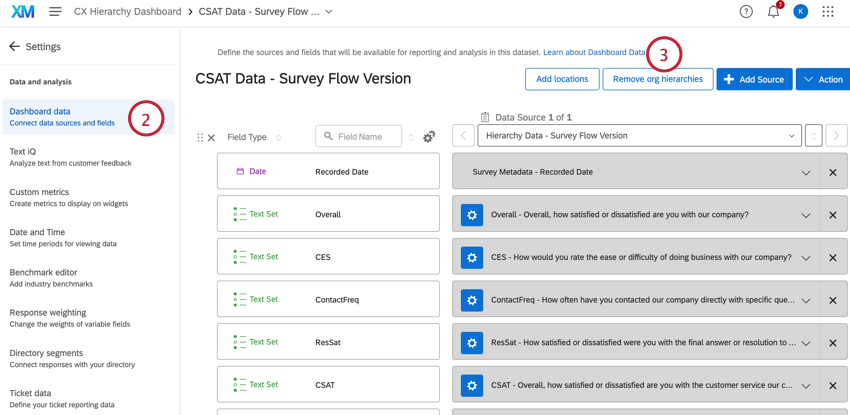
- Click Remove org hierarchies in the top-right corner.
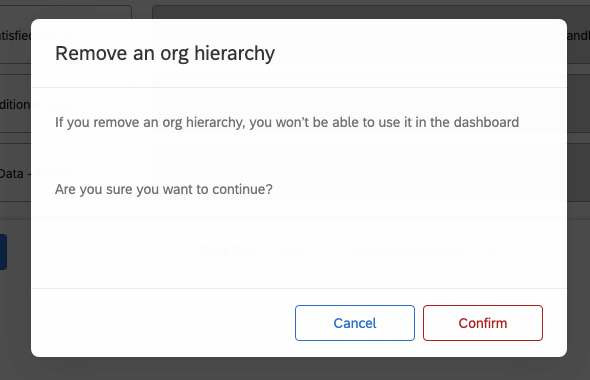
- Read the warning and click Confirm.
- When finished, click Save on your dashboard data.
Using Org Hierarchy Metadata Fields in a Dashboard
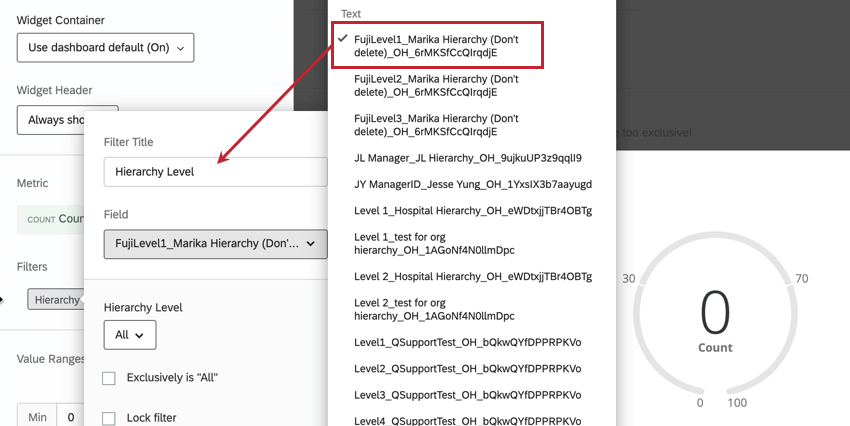
Adding org hierarchies to your dashboard allows you to access the metadata fields used to configure those hierarchies in your dashboard. These fields are available in any widget that is compatible with embedded data fields. Org hierarchy metadata fields follow the syntax: [field name]_[hierarchy name]_[hierarchy ID].
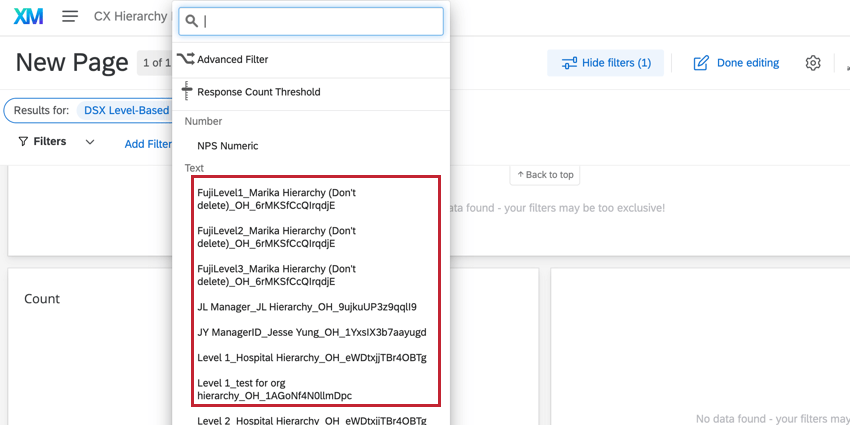
When using hierarchy metadata in widgets or page filters, the Label feature can be used to rename the org hierarchy field to provide more clarity for end users.
REFRESHING ORG HIERARCHY DATA
To access newly added metadata fields, you will need to refresh your org hierarchies. You can only refresh org hierarchies once every 3 hours.
- Navigate to the User Admin tab in your dashboards project.
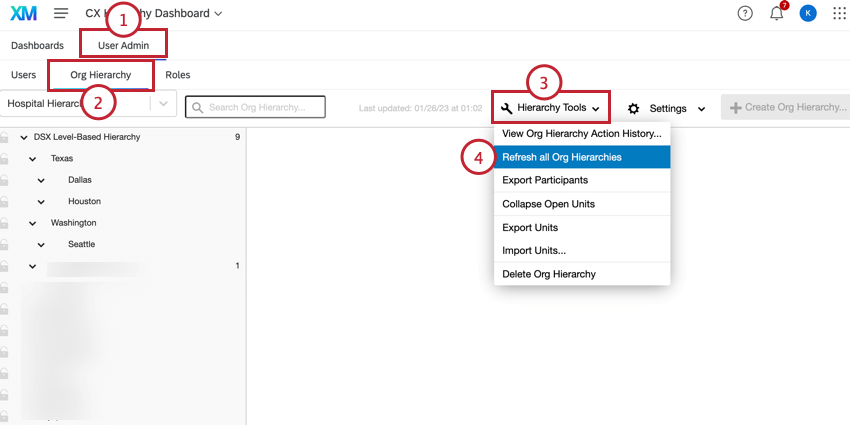
- Navigate to the Org Hierarchy section.
- Click the Hierarchy Tools dropdown.
- Click Refresh all Org Hierarchies.
Qtip: If the Refresh all Org Hierarchies button is grey, the dataset has been refreshed within the last three hours and you will need to wait in order to refresh again.
