Adding, Importing, & Exporting Users (CX)
About Adding, Importing, & Exporting Users (CX)
In the Users section of the User Admin tab, you can either upload users in bulk using a file or by manually typing their information into a form. You can also export a list of your users for use in another dashboard or for use in external records you may keep.
When adding or uploading users, you must include the following fields: email, first name, and last name.
Add Users Manually
You can add users by typing their information into fields, or by pasting it.
- Go to the Users section in the User Admin tab.
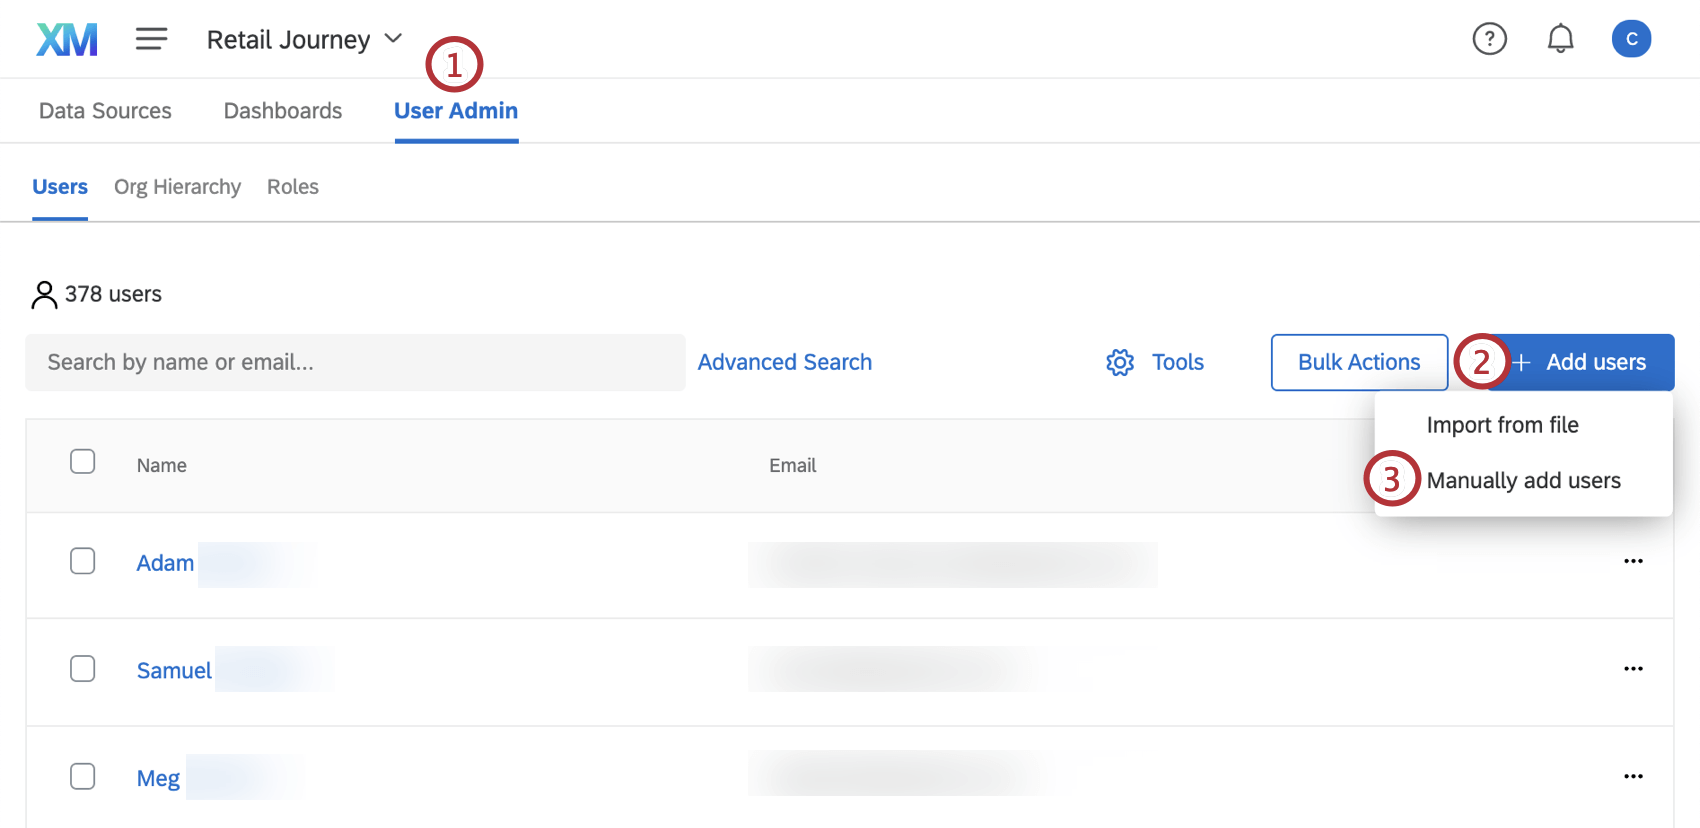
- Click Add Users.
- Select Manually Add Users.
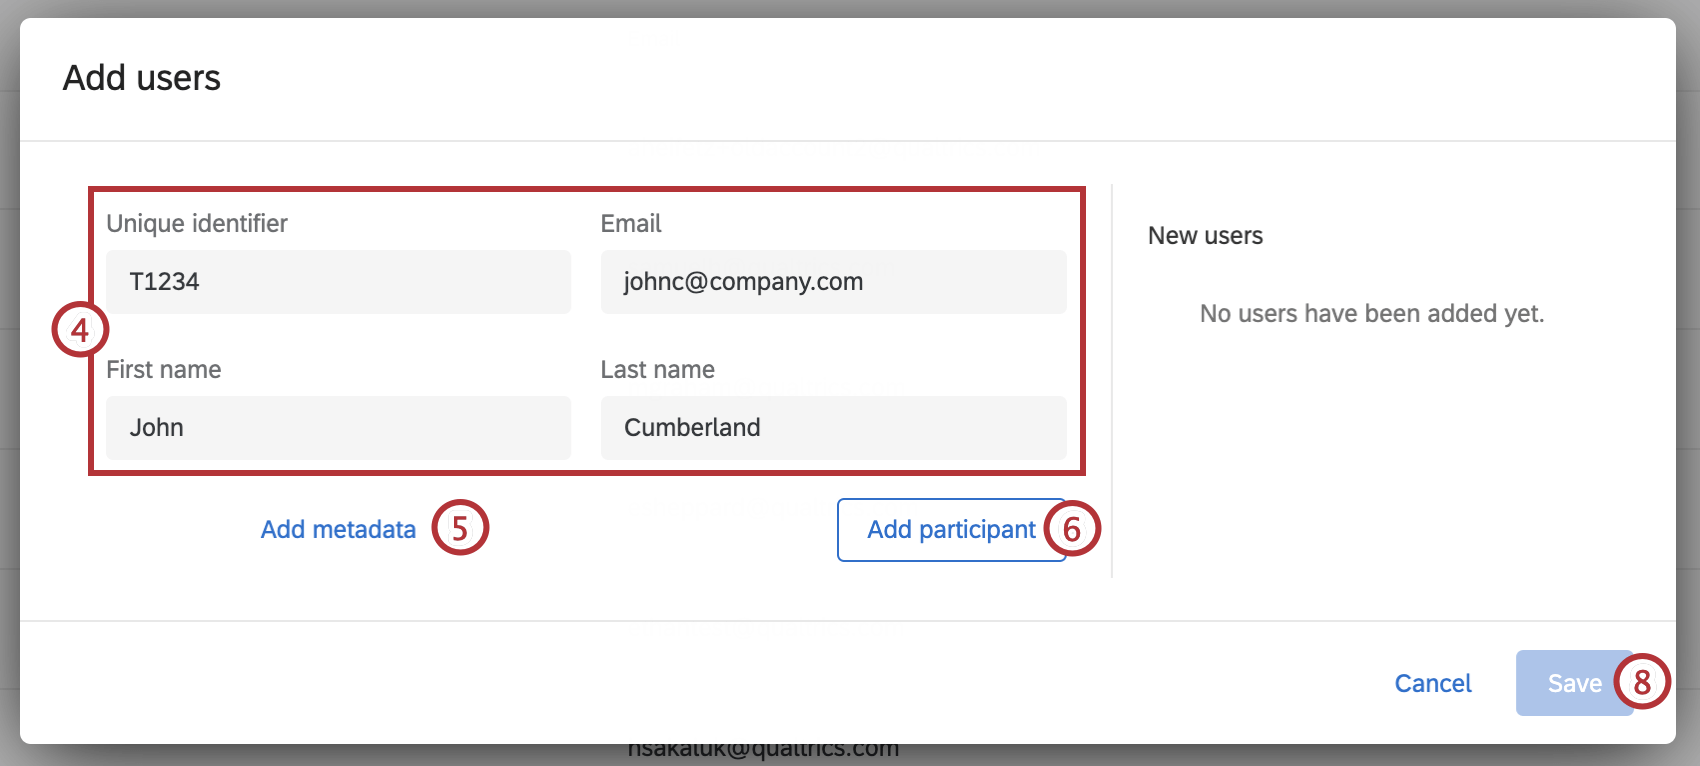
- Fill out the fields. You must at least provide an email, first name, last name, and unique identifier.
 Attention: See Maximum and Supported Characters for guidelines and restrictions around user and metadata fields.Qtip: The email address will become the user’s username to log in to Qualtrics. All uppercase characters will be automatically converted to lowercase.
 - Click Add metadata to add metadata to your user.
Qtip: Metadata serves as any additional information you want to include aside from the basic fields provided. You can name the column whatever you want.
- Click Add participant.
- Add additional participants by repeating steps 4 through 6.
- When you’re done, click Save.
Importing a File
It can be much easier to upload many users at once using a file made in Excel. This also saves you from having to manually add metadata columns or type values one-by-one.
Formatting Your Document for Import
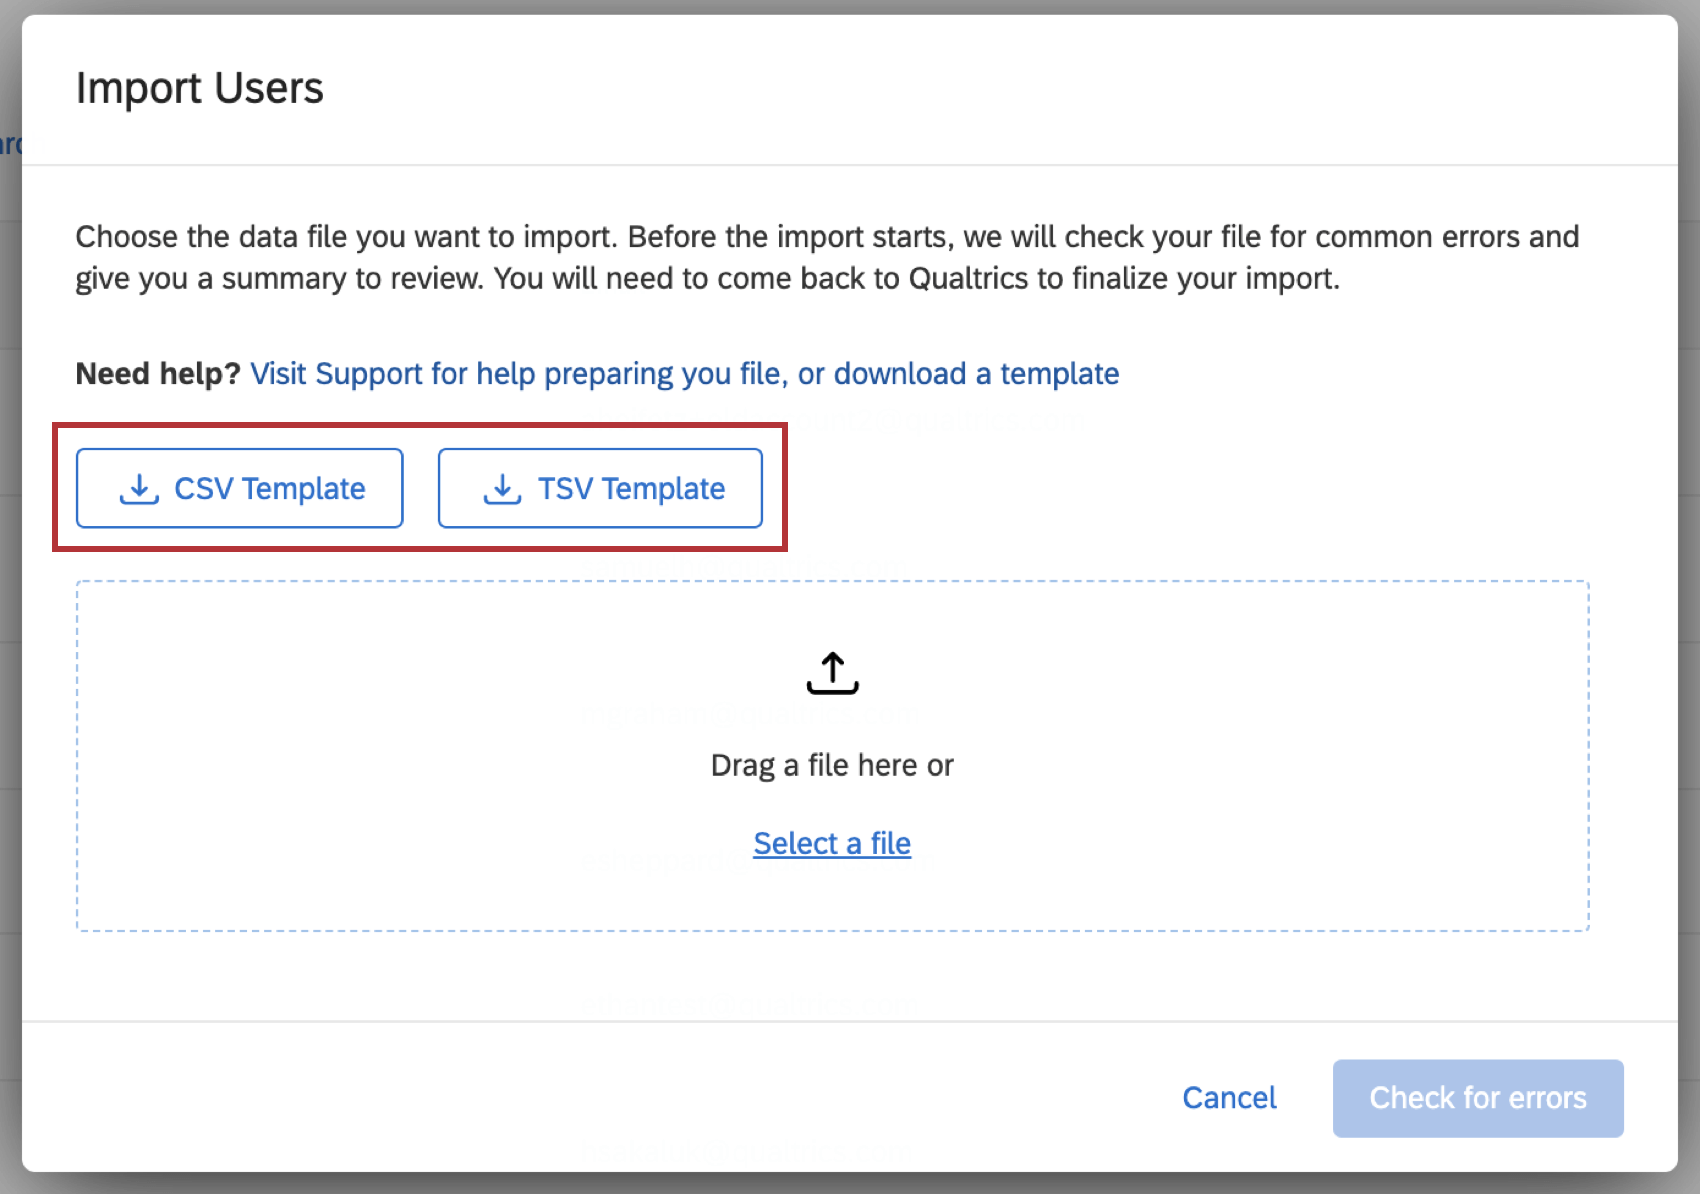
When you are on the upload window, click CSV Template or TSV Template to download an example file for the format you should follow.
Here is a list of requirement this file must meet:
- You must include FirstName, LastName, UniqueIdentifier, and Email for all users.
Qtip: If your organization uses SSO, you must include a Username column! The Username column needs to be filled in with the values from your Active Directory that you are passing us for the username attribute. The #brandID will be appended to the username automatically upon upload of the file.
- The file must be saved as a CSV or TSV.
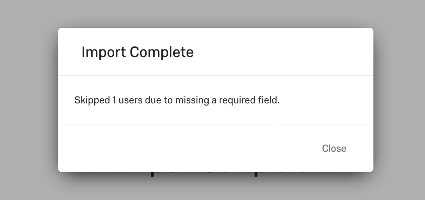
Qtip: See our CSV/TSV Upload Issues page for help troubleshooting upload issues.
- The spelling and capitalization of certain headers (FirstName, Email, LastName) are vital to this information uploading correctly. The only column headers you can change are the Metadata columns, which can have any header name you want, be as many columns as you want, or be deleted entirely.
- If you are including a Language column, make sure Language is capitalized, and the value for each user is in language code format.
Importing the File
When your file is configured for import, you can upload users within the Users tab.
- Click Add Users.

- Select Import from file.
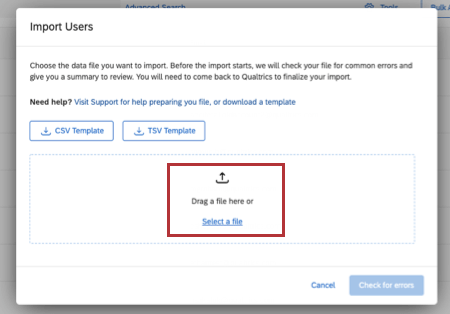
- Where it says Drag a file here, drag your file from a folder and drop it. Or, click Select a file to select your file normally.
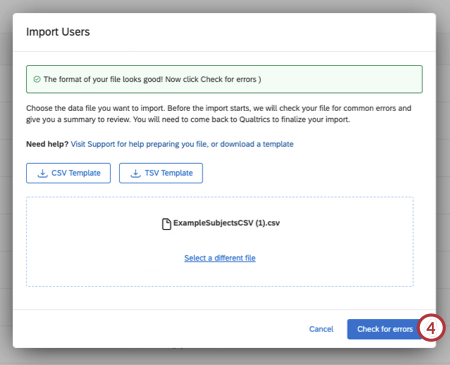
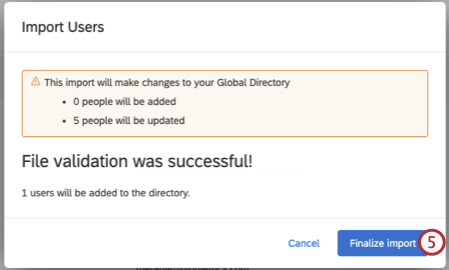
- Click Check for errors. If there are no errors, a pop-up will appear showing how many users will be added and how many existing users will be updated.
- Click Finalize Import to upload the users.
Exporting Users
You can also export a list of your users to a CSV or TSV. This file contains every column of information, including FirstName, LastName, Email, UniqueID, and all metadata.
Exporting Selected Users
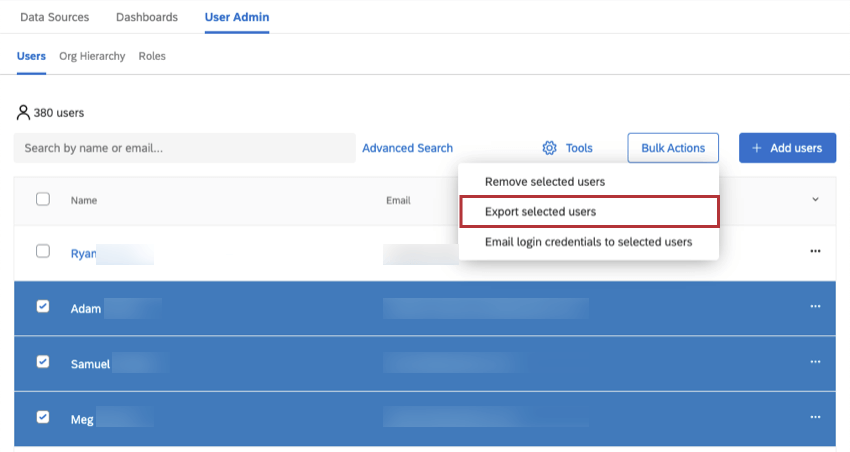
Once you select users using the checkboxes to the left, go to Bulk Actions and select Export selected users.
The only metadata that appears in this export is metadata that at least one of the users has a value for. Blank data is excluded if none of the users selected has a value for that metadata.
Exporting All Users
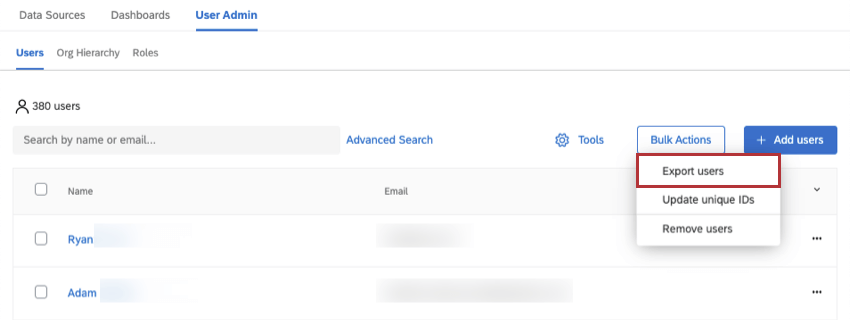
To export all the users in your brand, click Bulk Actions and select Export users.
Removing Users
You can use a file to remove users from the admin in bulk, or you can choose to remove only selected users.
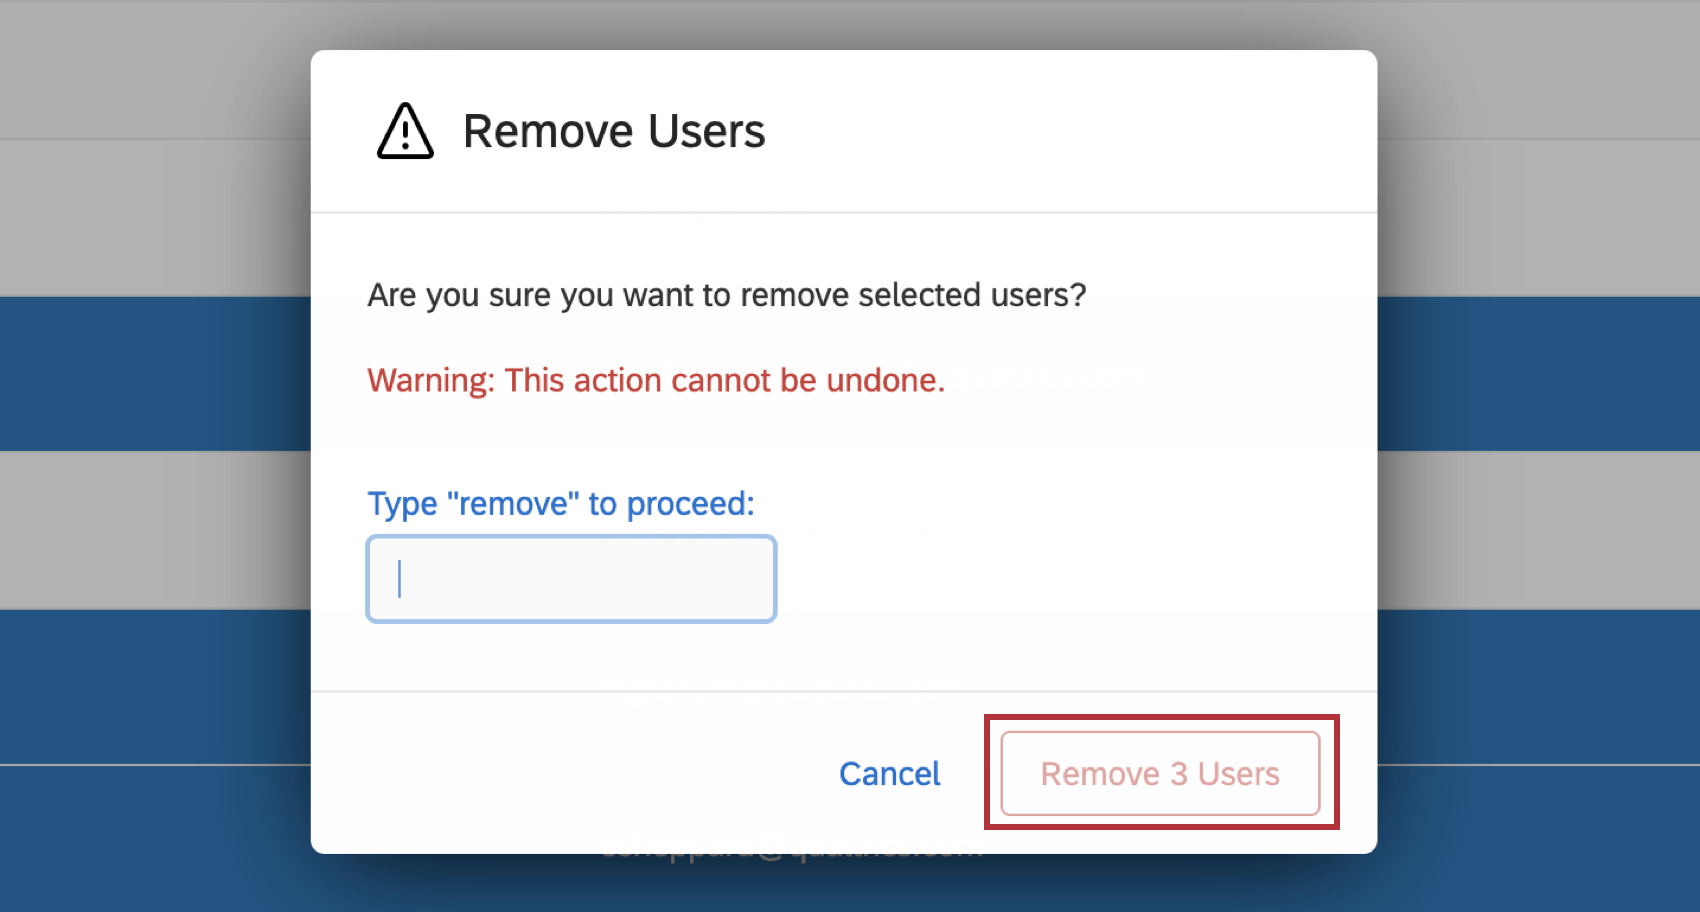
Removing Selected Users
- Select users using the checkboxes to the left.
- Select Bulk Actions and click Remove selected users.
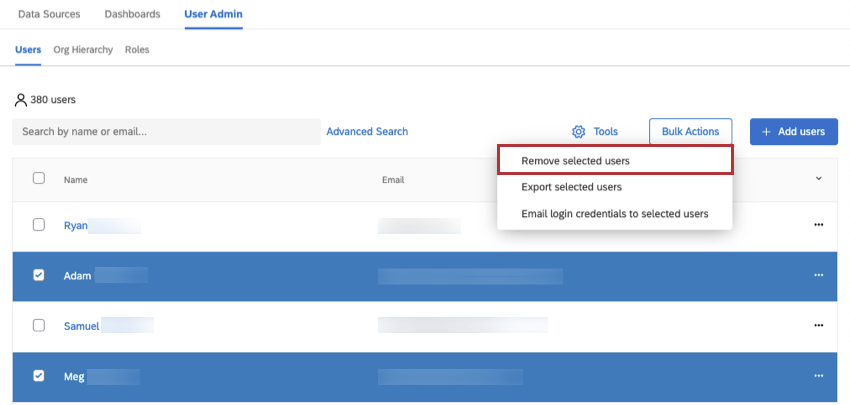
- Type “remove” and select Remove # users.
Removing Users with a File
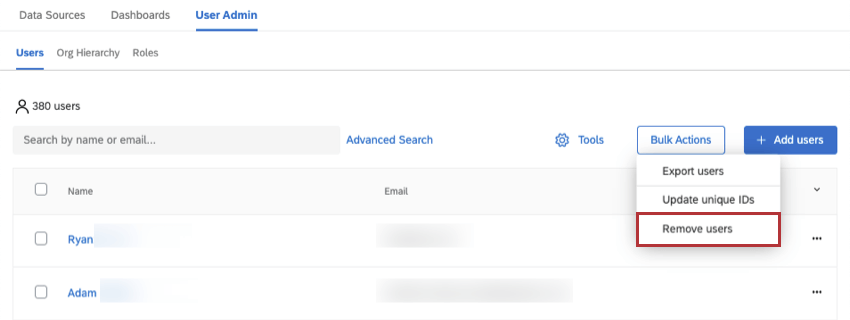
You can use a file to remove users from the admin. This file only needs to contain the users you would like to remove. Users will only be removed from the Users tab within User Admin and will remain in the Qualtrics global directory.
- Select Bulk Actions and click Remove users.
- Click Download to download an example file for the format you should follow.
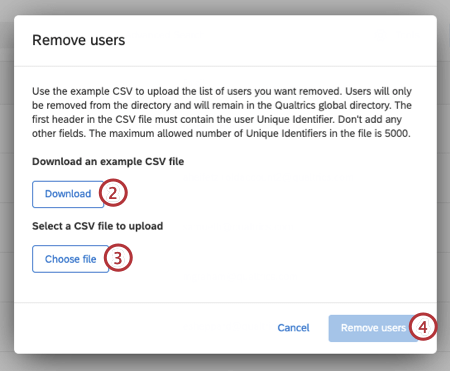 Qtip: The first header in the CSV file must contain the user’s unique identifier. Don’t add any other fields. The maximum number of unique identifiers allowed in the file is 5000.
 - Click Choose file to upload the file of users you want to delete.
- Click Remove Users.
Updating Users
You can also use a file to update your users as a group. See the Updating Multiple Users’ Metadata Values page for further instruction.
Updating Unique IDs
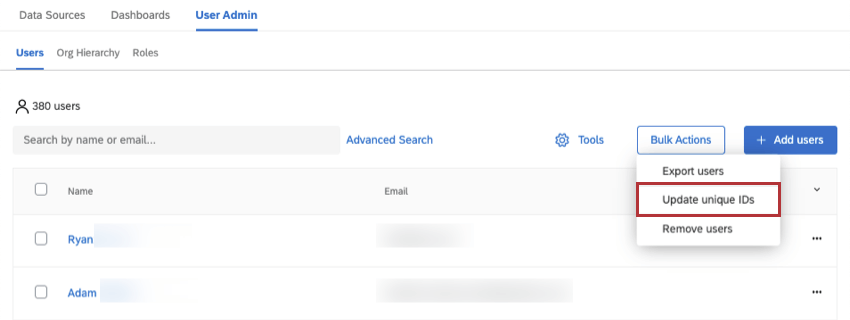
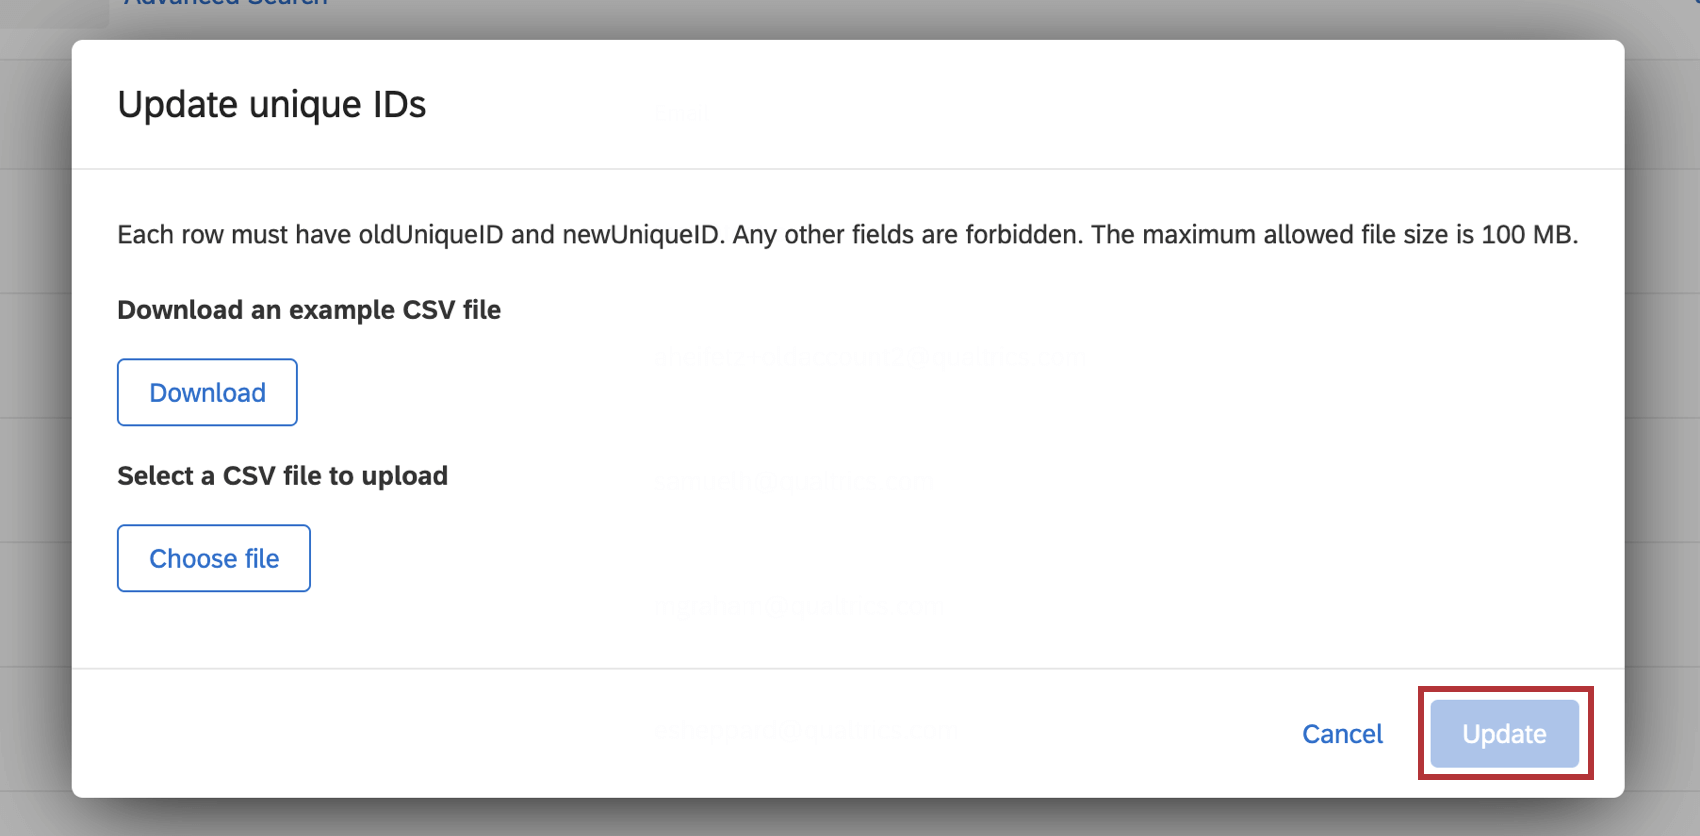
Select Bulk Actions and click Update unique IDs. Upload a CSV file with the users you want to update. Each row must have oldUniqueID and newUniqueID. Any other fields are forbidden.
Once your file is uploaded click Update.
Automatically Uploading Users
You can automatically upload users to your CX directory on a regular schedule using workflows. Here are some resources we recommend checking out:
- Scheduled workflows
- Load Users into CX Directory task
Qtip: This step also allows you to automatically update your hierarchy.
- Automatic role assignment
