Dashboard Role Data Restrictions (CX)
About Dashboard Data Restrictions
When sharing a dashboard, you can choose to limit data by user or role. Any user or role with whom the dashboard is shared will be able to view the dashboard with the restrictions you choose. These restrictions will apply to all widgets and pages.
Restrictions Based on Survey Data
- Share your dashboard to a user or user role with View-only (View) access selected.
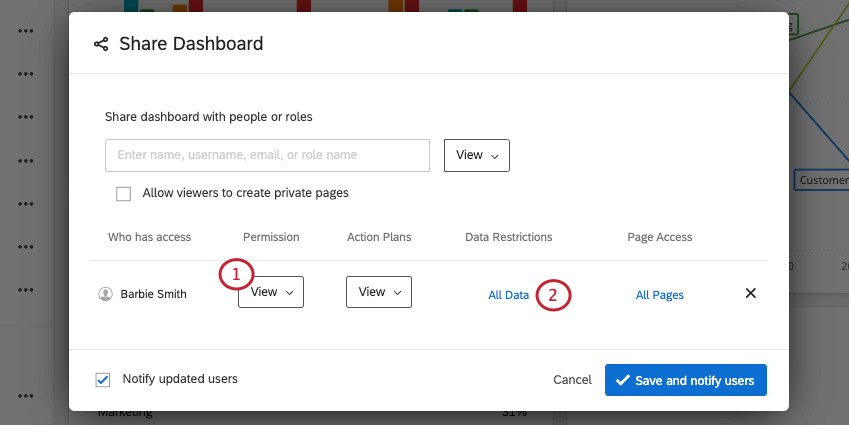 Qtip: You cannot restrict data for all users of a dashboard – data must be restricted on a user or role.
 - Click on the All Data option next to the individual’s name.
Qtip: If a data restriction is already in place, the data restriction itself will display instead of “All Data.”
- Click on Add Restrictions.
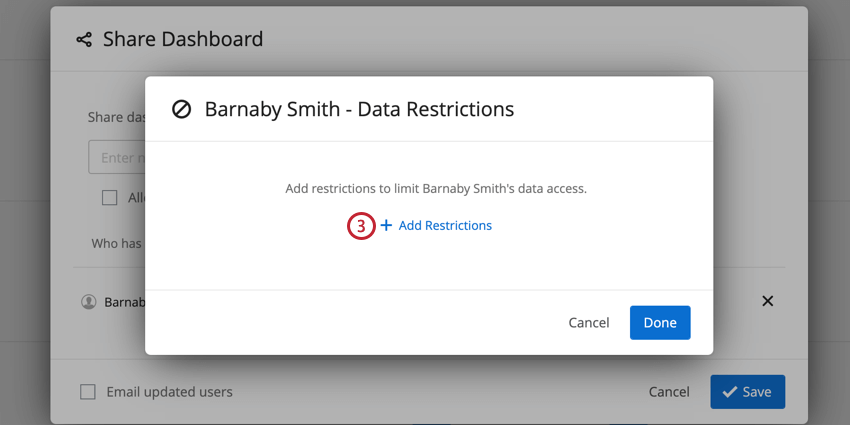
- The user/role will only be able to see the data that satisfies the conditions you will now set. Construct a condition by first setting any Text Set field within your dataset.
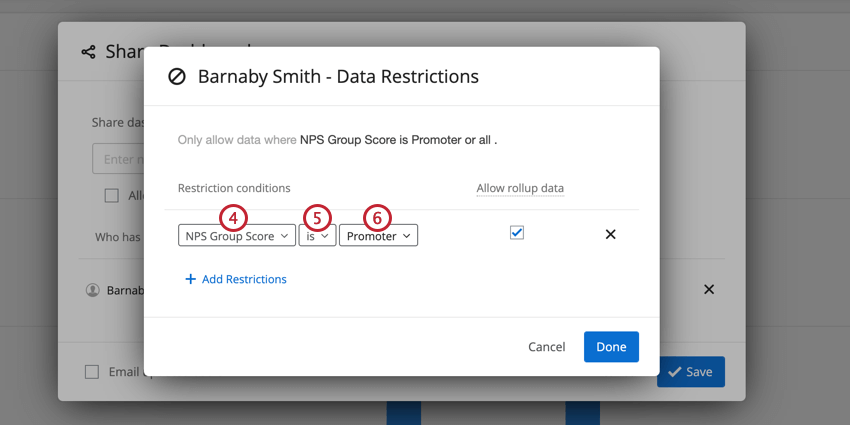
- Click on the Select Type box to select an operator. In this example we will choose “is.”
- Select the values in the dropdown that you want, or do not want, the user to be able to access. Again, this depends on the condition that you set. Note that you can select multiple items.
Qtip: You can only set static restrictions for values that are currently in your dataset.
Restrictions Based on User Attributes
- Share your dashboard to a user with View-only (View) or Export (Export) access.
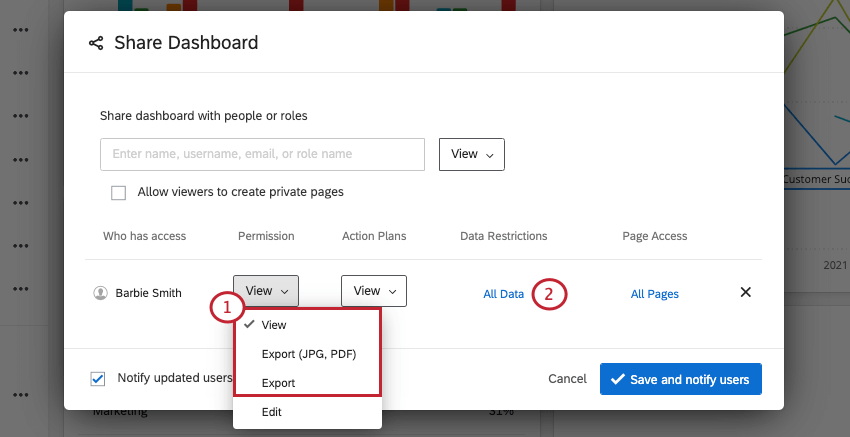
- Click on the All Data option next to the individual’s name.
Qtip: If a data restriction is already in place, the data restriction itself will display instead of “All Data.”
- Click on Add Restrictions in the pop-up window.

- Choose any Text Set or Number Set field within your dataset.
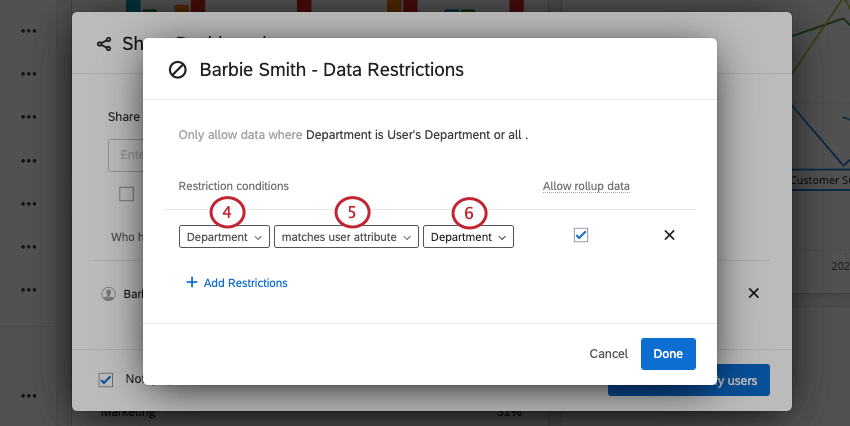
- Select the “matches user attribute” operator.
- Select the values from the dropdown menu that you want to be restricted based on the role’s/user’s attributes.
User attribute data restrictions are commonly used with SSO (Single Sign On) logins to use your already existing hierarchy to limit access to data. For example, an SSO login system could store an attribute called “StoreID” with each user’s store ID. If the store ID is also present in your dashboard data, you could restrict based on the store ID found in the User Attribute. The field and SSO attribute names don’t need to match, but their values do.
This is particularly useful when using both User Roles and User Attributes. By sharing with a User Role and then limiting the data by a User Attribute, each user will only see the data that matches their User Attribute. This allows you to share the dashboard with hundreds of individuals with just a few clicks rather than having to collaborate with every user individually. Your users must have User Attributes set in order for this to work.
Allow Rollup Data
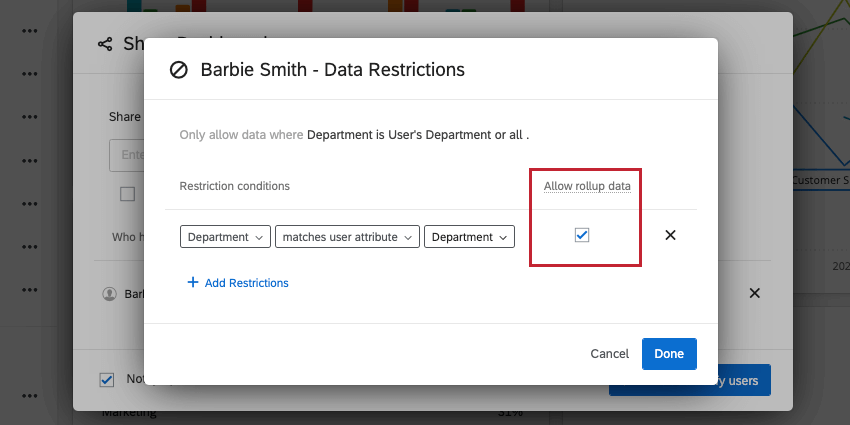
“Allow rollup data” allows users to view all of the aggregate data of that field, but it restricts data filtering to the specified value or values. For example, a filter for “Region is West” with “Allow rollup data” checked would allow a user to see the aggregate data across all regions, but the user would only be able to filter to the “West” region.
Attention: When “Allow rollup data” is checked for a dashboard field, a filter will not automatically appear on the user’s end. If a filter based on the field is applied to the page, the filter will default to the restricted value, but the user will still be able to select “All” to view aggregate data.
If a locked filter based on the data restriction is applied to the page, the filter will default to the restricted value and the user will not have the option to select “All” to view aggregate data.
Restricted User’s View
If you have applied permissions to the user’s role or directly to the user, all data they see will be limited to their data restrictions. They will still see that filters have been applied to a page or widget, but the un-editable filters will show in dark gray. The restriction is applied regardless of whether the restricted field is present as a page-level filter or not.
If you have allowed users to see multiple values within a set, they will be able to toggle between these values within a filter. Similarly, if there are other values that are dependent on the restricted value (e.g. multiple restaurants within one state), all values that fall beneath the restricted value will be available.
Interactions Between Data Restrictions for Users and Roles
An administrator can set data restrictions for dashboard viewers on both an individual level and as part of a role. Throughout this section, we use many examples to show how these restrictions interact. In our examples, we’re giving access to a CX dashboard user analyzing data for a fictional airline.
Multiple Restrictions Applied to the Same Field
It’s possible to assign multiple data restrictions for the same field. Depending on the method used to restrict data, the data restriction will act differently:
- If a field has two or more data restrictions, and the restrictions come from both an individual level and a role, then the restrictions on the individual level will take precedence.
Example: In this example, Barnaby Smith has been given access to a dashboard on both an individual level and as part of a role. On the individual level, he is restricted only to see data for the LAX and ORD airports. On the role level, he is restricted only to see data for the SLC airport. Since Barnaby has restrictions on both levels, the restriction on the individual level will supersede the role level. When Barnaby views the dashboard, he will see data for the LAX and ORD airports.
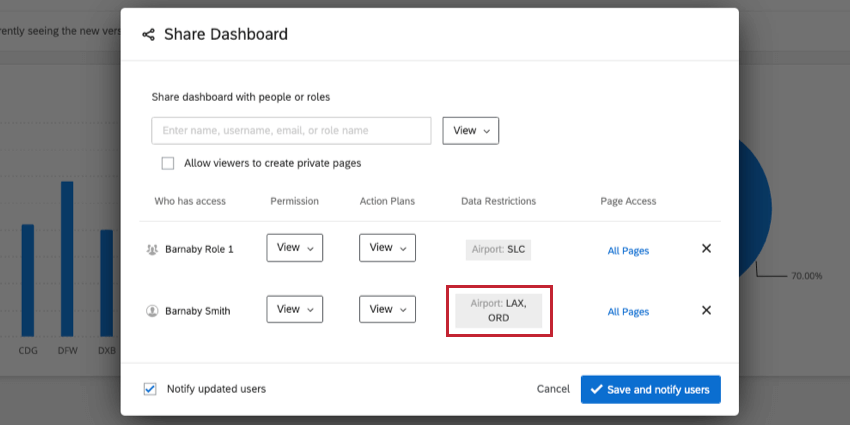
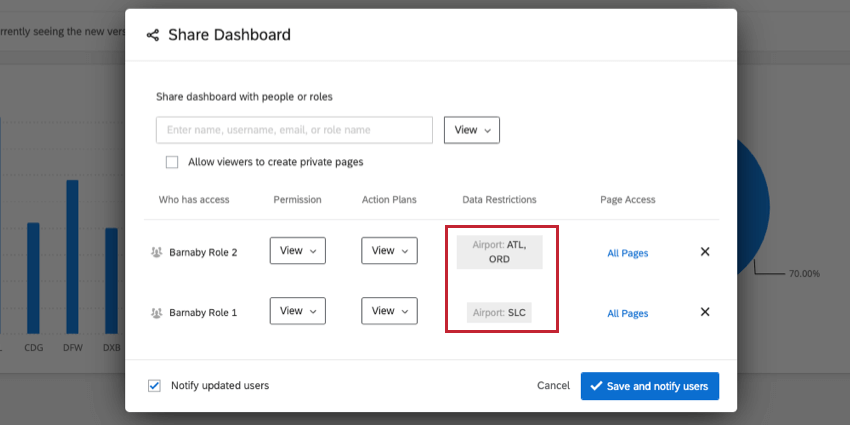
- If a field has two or more data restrictions, and these restrictions come from different roles, then the restrictions are applied with “or” logic. This means the dashboard viewer will be able to see data for which any given restriction is true.
Example: In this example, Barnaby Smith has been given access to a dashboard in two different roles. In one role, he is limited to data for the SLC airport only. In the other role, he has access to the ATL and ORD airports. Since the data restrictions both come from roles, Barnaby will be able to see data for all three airports.
Data Restrictions Applied to Multiple Fields
It’s possible to restrict data access for multiple fields. Depending on the method used to restrict data, the data restriction will act differently:
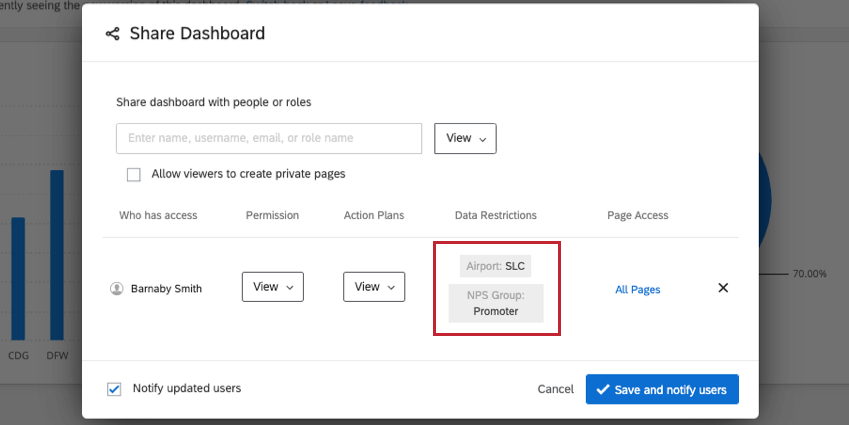
- If data restrictions are applied to multiple fields, and the restrictions come from a mix of a role and an individual level, or are all within the same level (i.e. all on an individual level or all from the same role), then the restrictions are applied with “and” logic. This means the dashboard viewer will only be able to see data for which all restrictions are true.
Example: In this example, Barnaby Smith has been given access to a dashboard on an individual level. His data is restricted so that he can only see responses for the SLC airport and for responses who are NPS Promoters. Since these restrictions are set on the same level, Barnaby will only be able to see data for Promoters at the SLC airport.
- If data restrictions are applied to multiple fields, and the restrictions come from multiple roles, then the restrictions are applied with “or” logic. This means the dashboard viewer will be able to see data for which any given restriction is true.
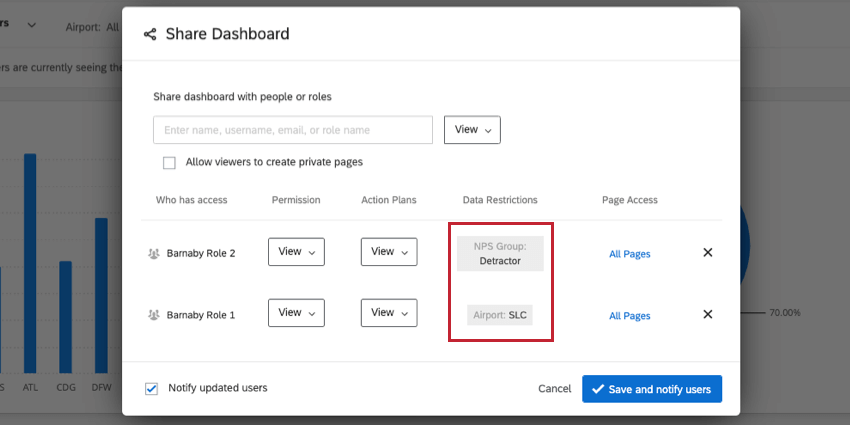
Example: In this example, Barnaby Smith has been given access to a dashboard as a part of two different roles. In one role, he is limited to data for the SLC airport. In a different role, he is limited to data for NPS Detractors only. Since his restrictions come from two separate roles, Barnaby will be able to see data for all responses at the SLC airport as well as all responses that are NPS Detractors.
