Dashboard Notifications
About Dashboard Notifications
If you want your CX program to tell you when it’s time to step in and take action, you can set up notifications to alert you when there’s a significant change in your dashboard metrics. This allows you and your team to keep an eye on performance trends and take action when necessary.
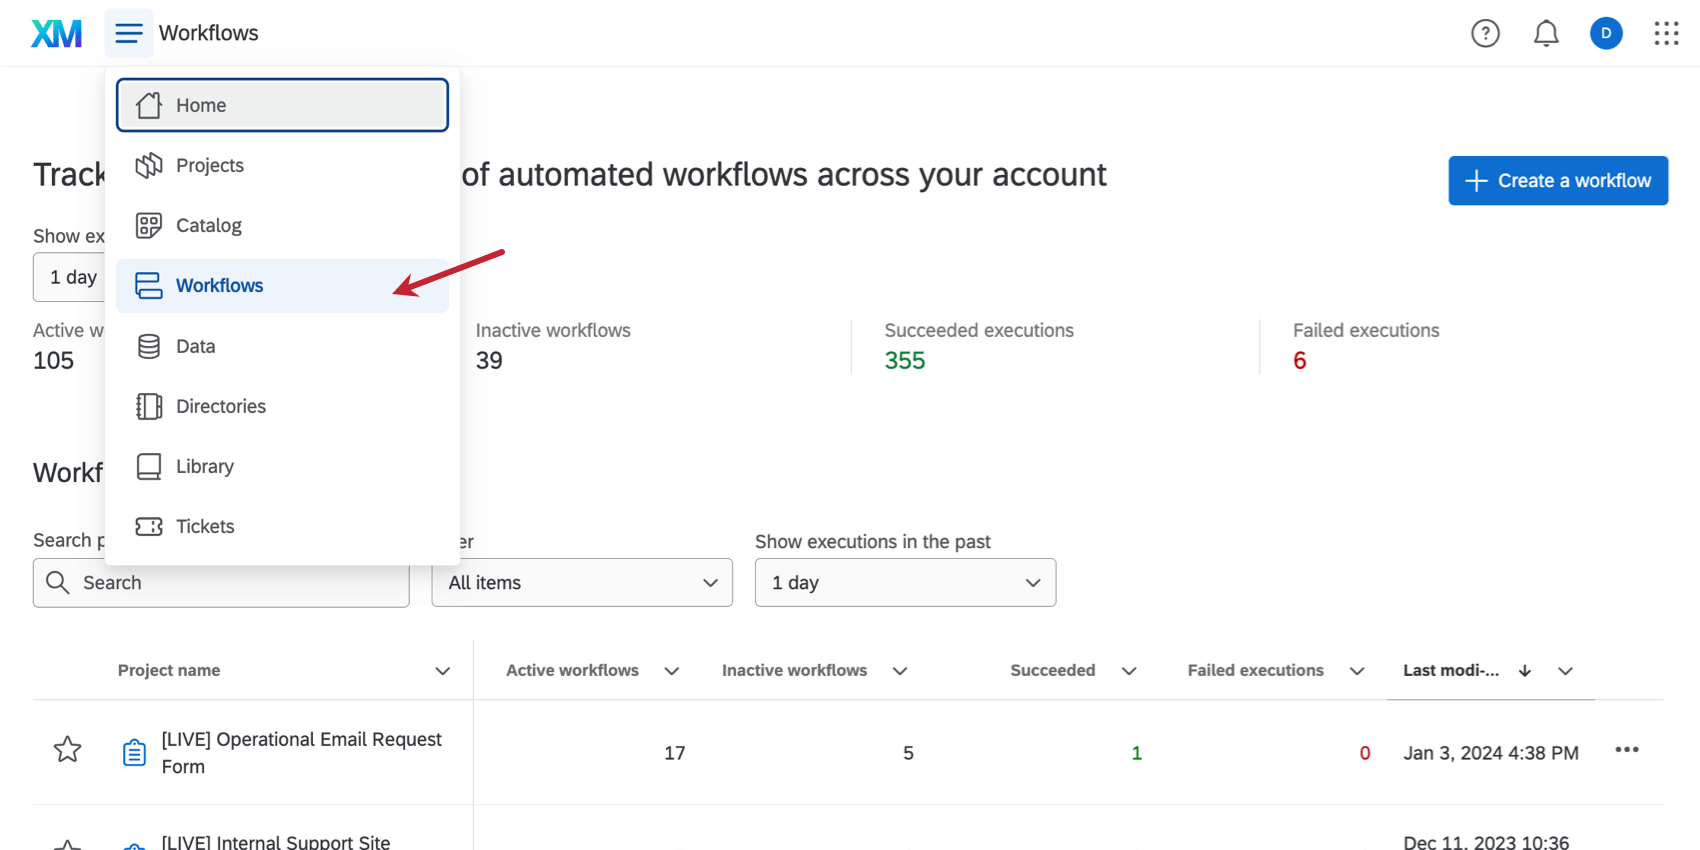
Customize the alerts you send to your stakeholders by heading to the Workflows page.
Deprecation of CX Dashboard Notifications
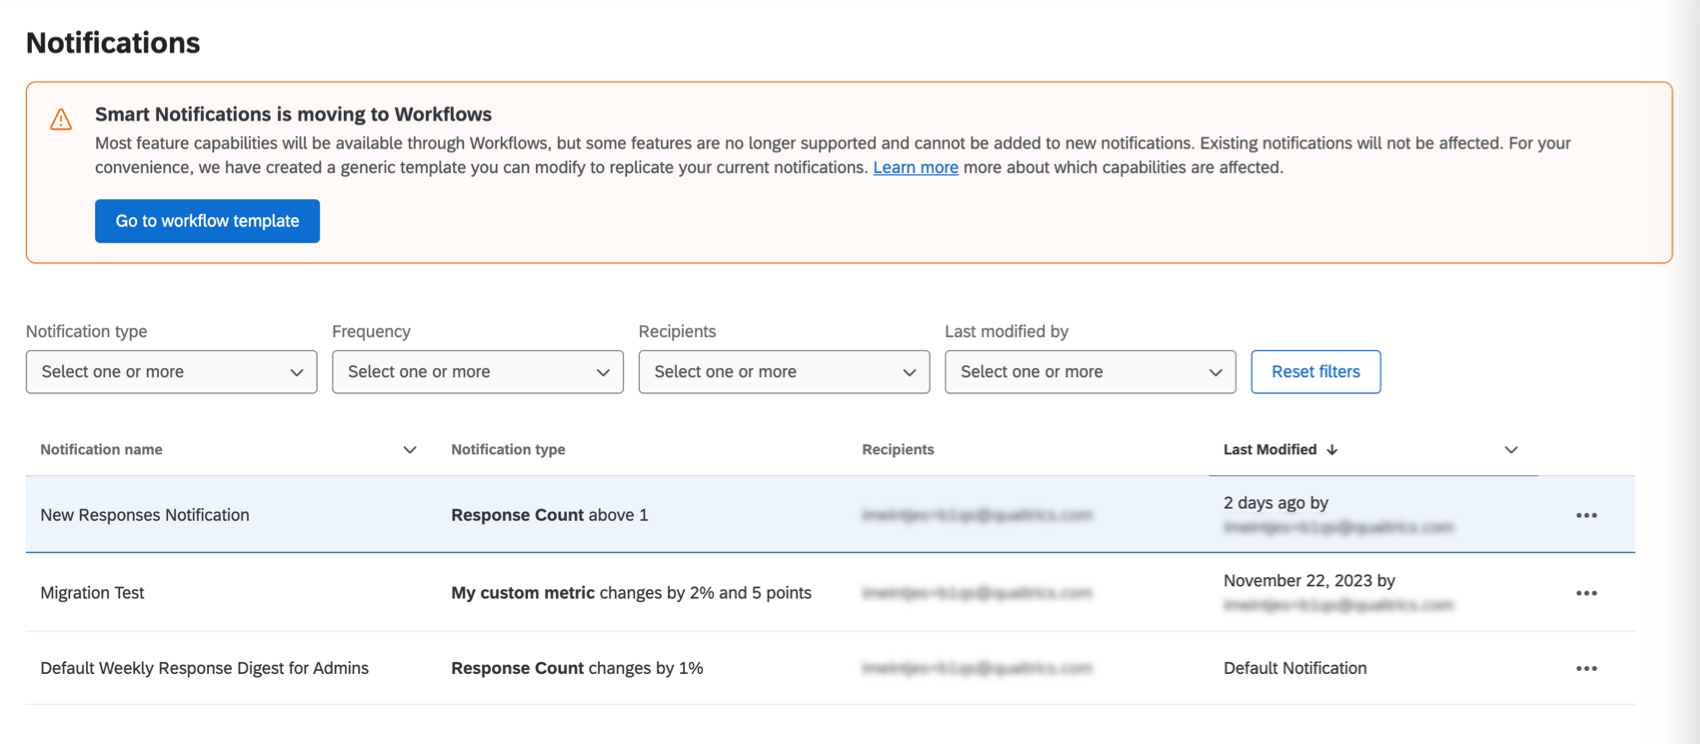
Starting December 31, 2023, you can no longer create or edit notifications in the Notifications section of dashboard settings.
Dashboard notifications that are not using the deprecated features will continue to run and will be automatically migrated to Workflows by January 31, 2024.
Any dashboard notifications that are using deprecated features will stop running and will be deleted from our systems by February 28, 2024.
Here’s a list of deprecated features:
- Roles or user attributes as recipients
- “Breakout By”
- Digest emails for notifications
- Referencing saved dashboard filters
- Trending detection
Some of these features can be replicated in workflows. See more about how to build these in the next sections.
Using the Dashboard Notification Template
To make it easier to create dashboard notifications in workflows, we’ve provided a template you can use.
Go to the Notifications section of dashboard settings. In the banner, click Go to workflow template.
You can also access this template from the Workflows page. See Workflows Templates for steps.
Creating Metric Change Notifications
Once fields are mapped to your dashboard, you can base notifications off of them. Here are the most important components of a dashboard notification that identifies metric changes:
- Calculate metric task: Set up automated workflows based on changes to a dashboard metric over a selected time period. The resulting calculation can be used to trigger other tasks within your workflow, such as communications.
Example: You compare your dashboard’s Satisfaction metric over the last 7 days vs. the previous 14 days. When it’s lower than expected, you trigger a series of communications.Qtip: You can add filters to your metric while setting it up! That way you can make calculations based on a subset of data.
- Conditions: Determine the thresholds that should be met before the next steps happen in your workflow. If you exclude a condition, you can create a general notification showing metrics for the week (e.g., a digest).
- Assorted communication tasks: Notify your team about this metric over an assortment of channels. For example:
Breaking Out Notifications by Groups
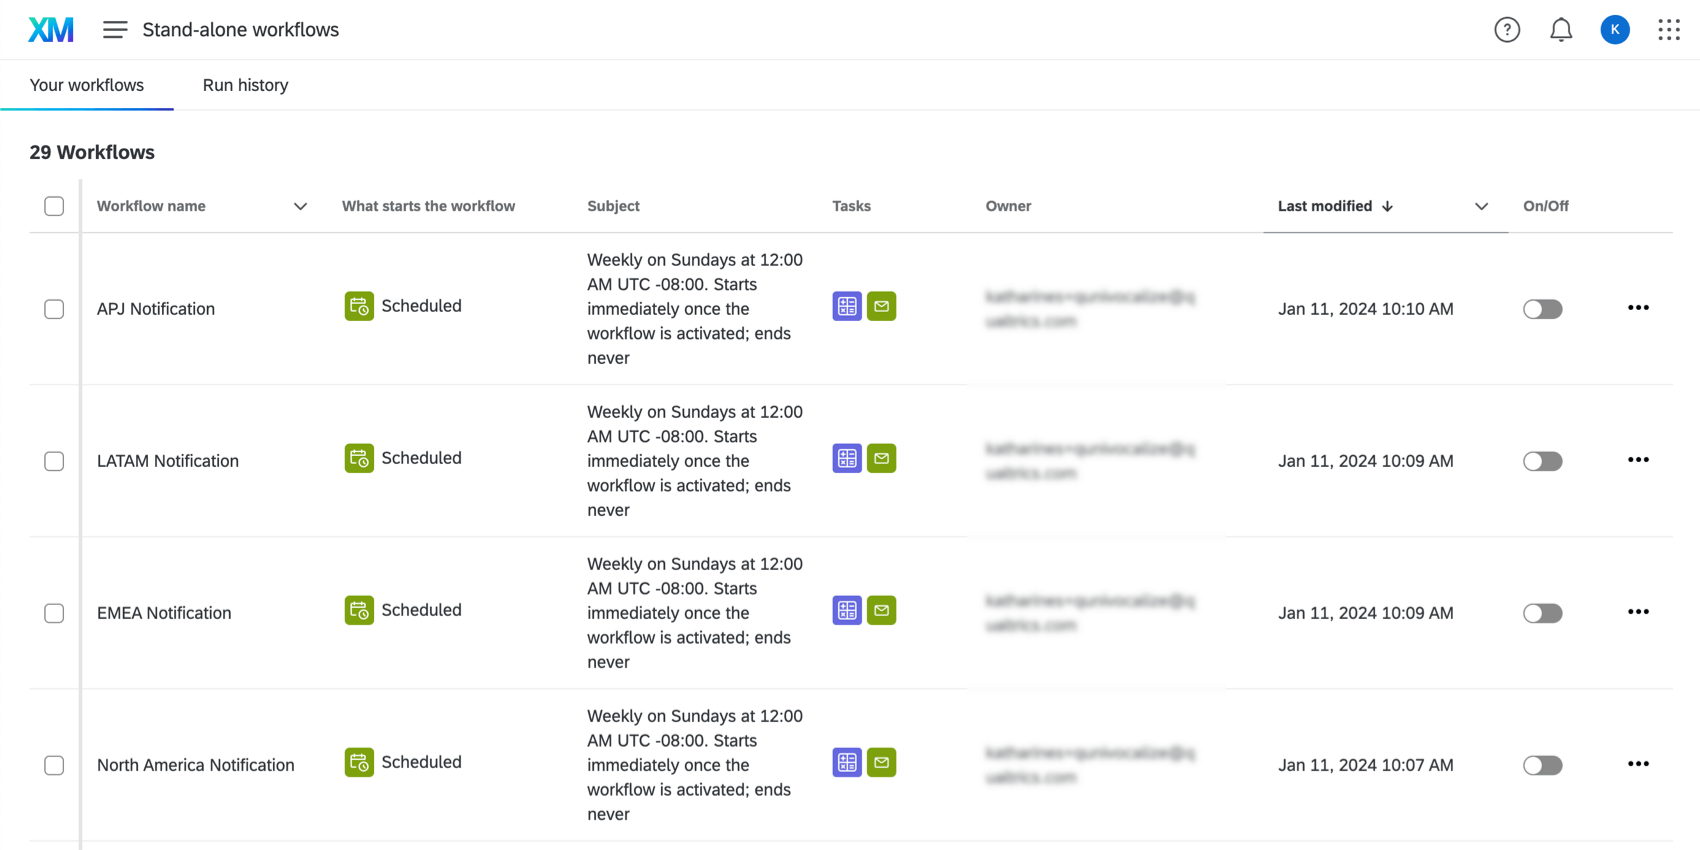
To create new notifications that are broken out by different groups, we recommend creating separate workflows for each group. If you copy workflows, you’ll only have to make a few small edits to each version.
For example, let’s say we want to let managers know about their region-specific satisfaction trends.
- Make sure your dashboard data is mapped and recoded. See details on the Calculate Metrics Task page.
- Create a scheduled workflow with a calculate metric task.
- Filter the calculate metric task.
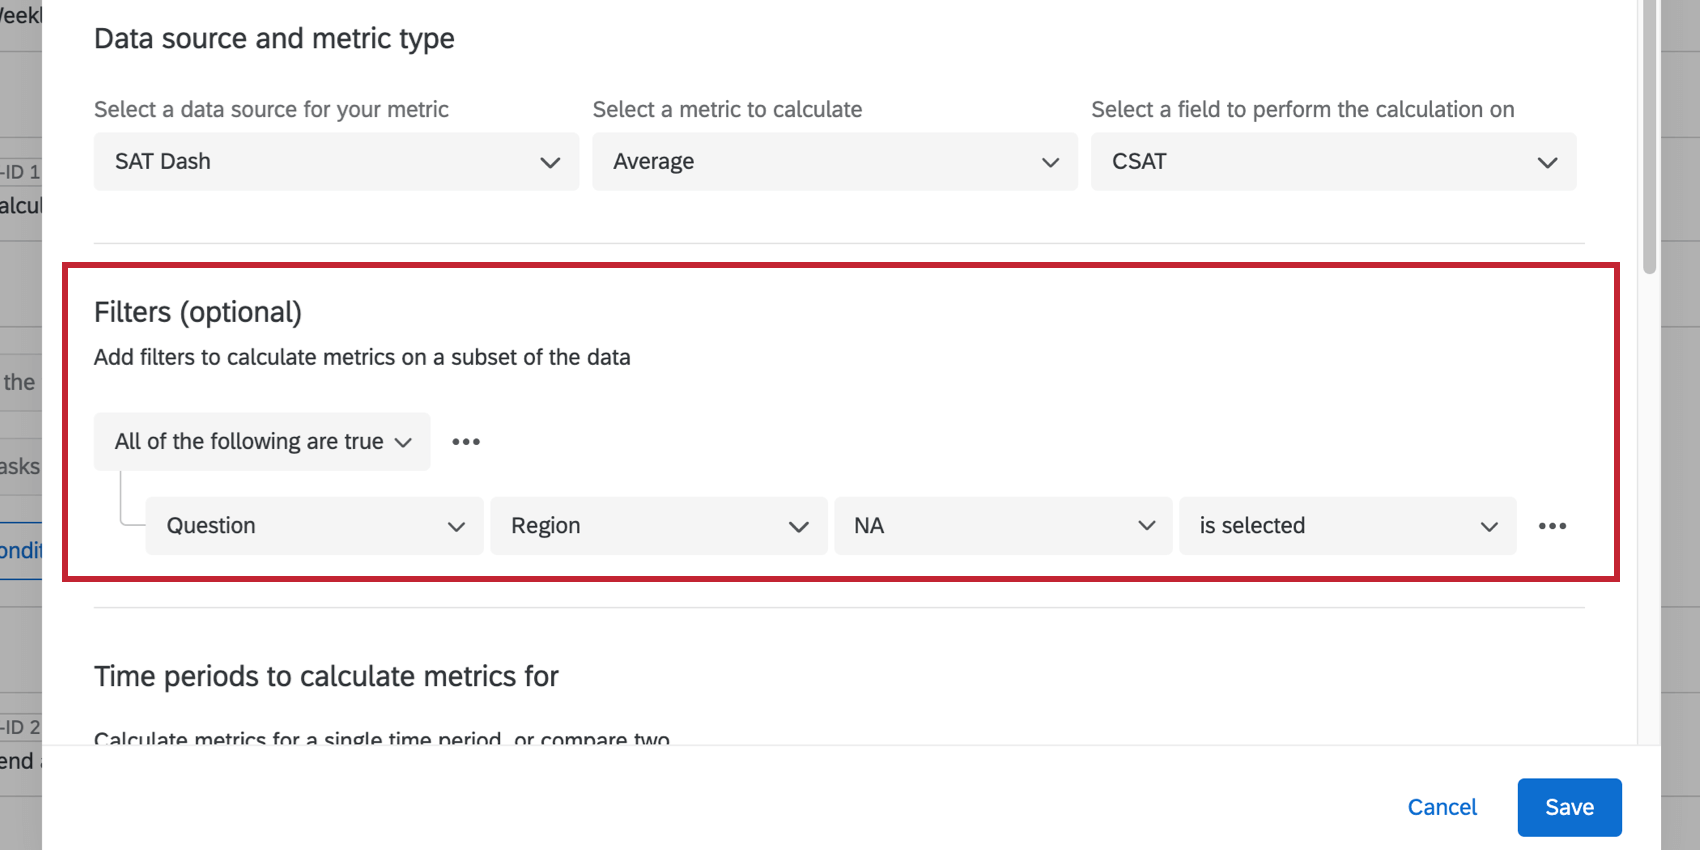 Qtip: For a dashboard dataset, select Question to find all mapped fields.
 - Select your first region, e.g., “North America.”
- Add a communication task, such as an email task. Make the recipient the North American managers.
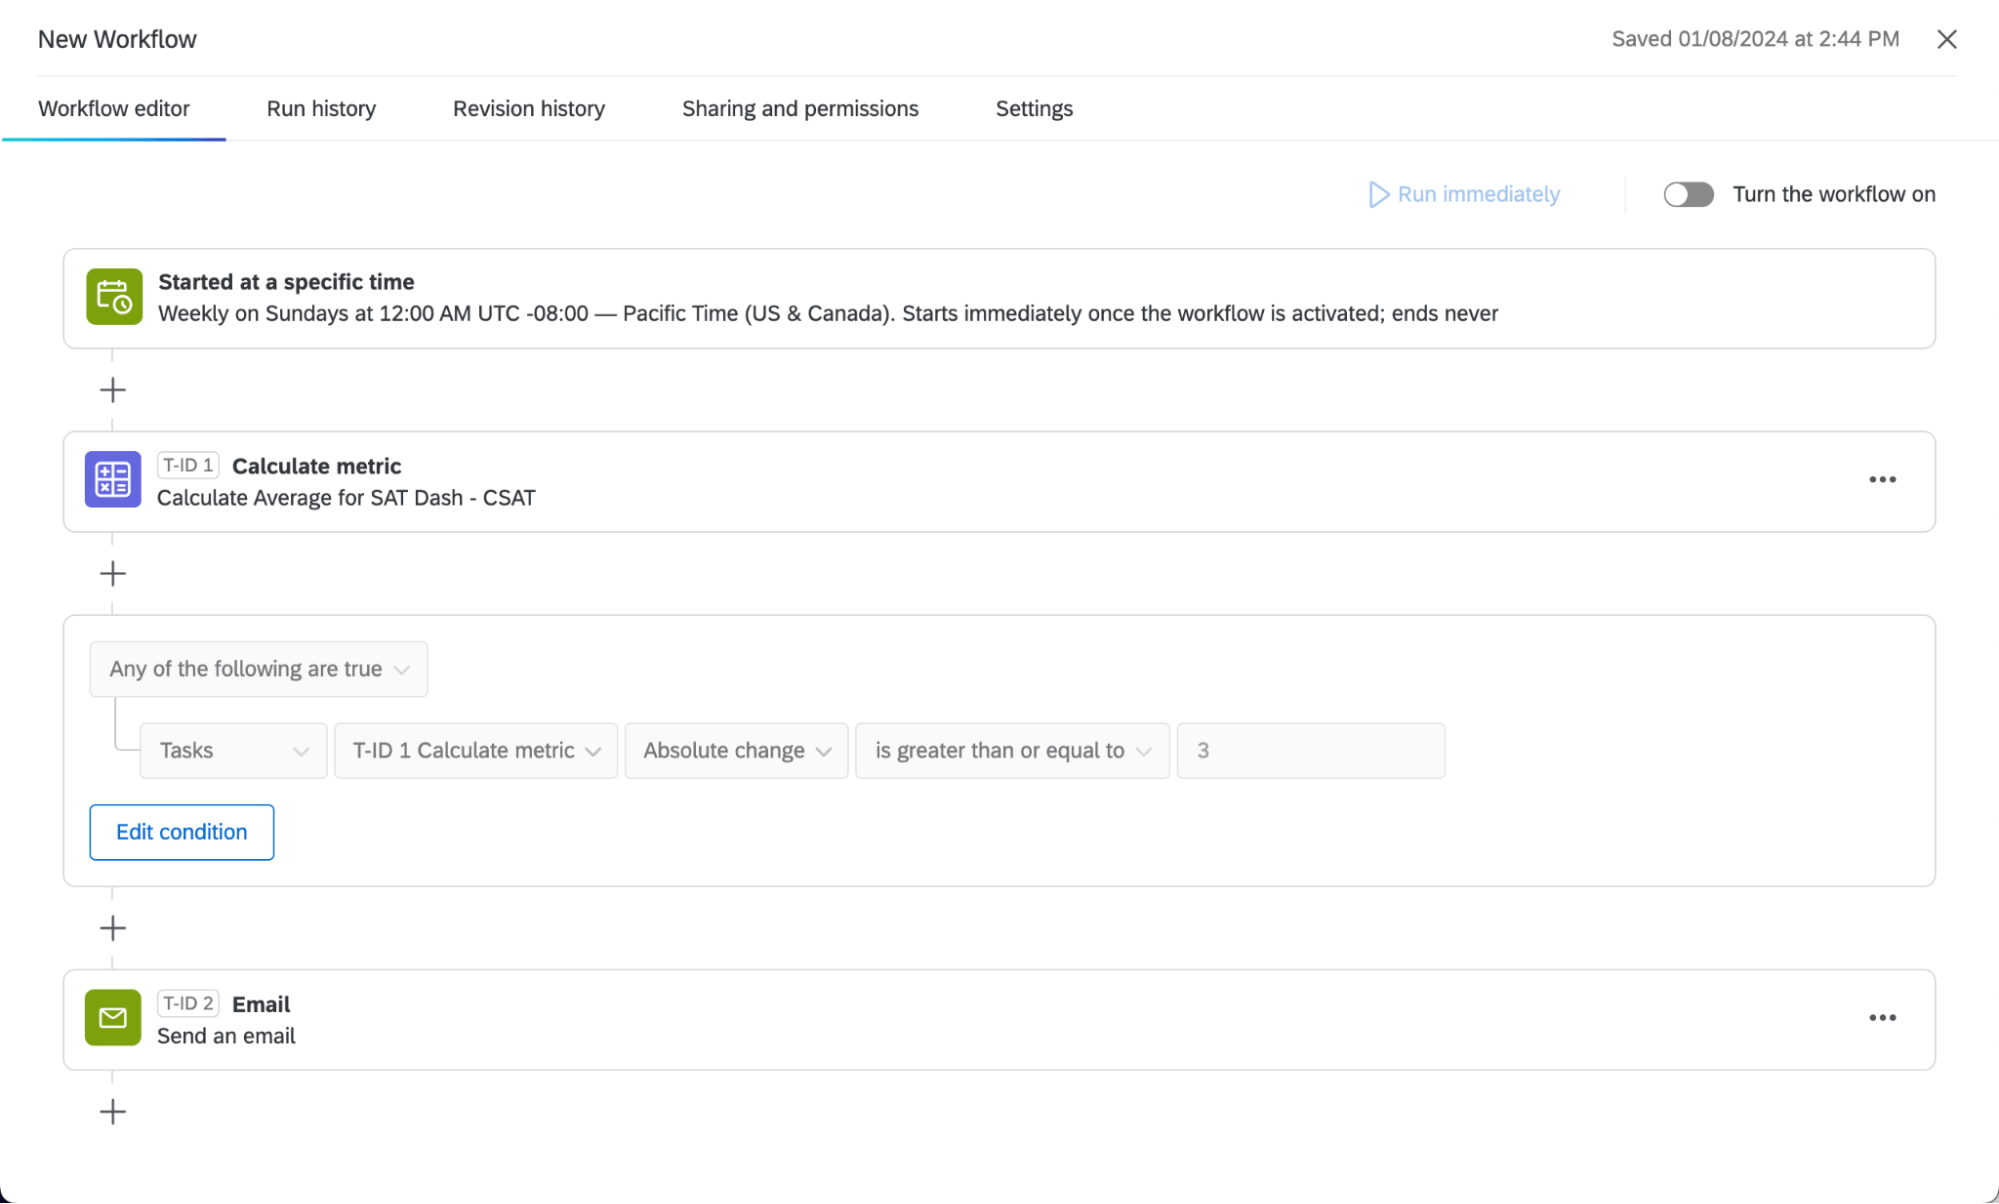
- Once the workflow is complete, copy it.
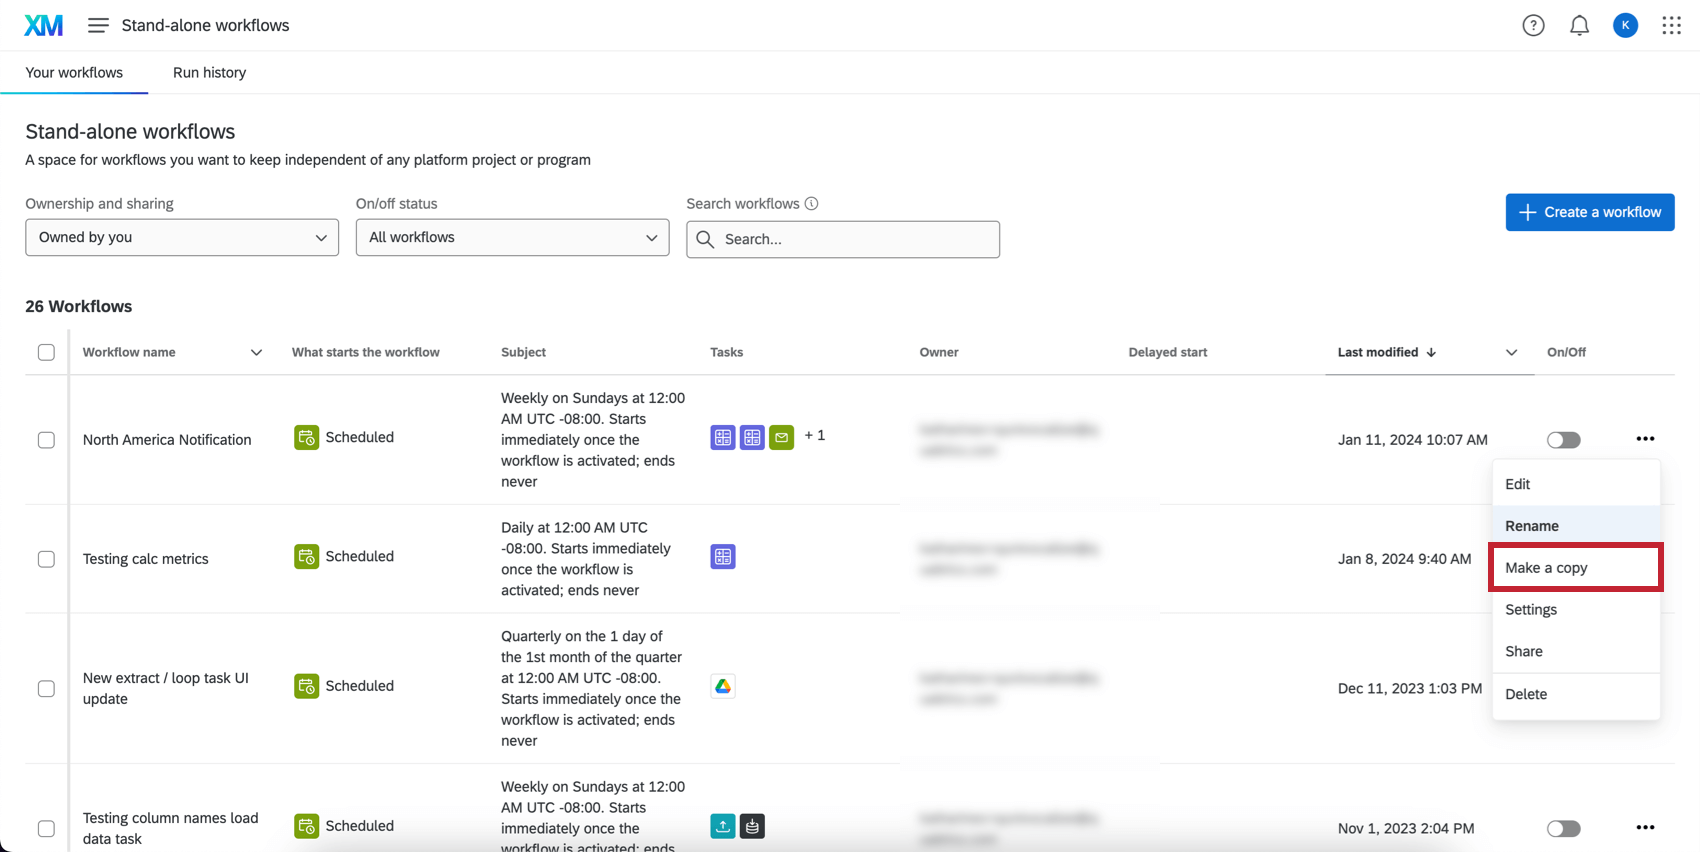
- In the copy, change the calculate metric’s filter to a different region, and change the recipients of the email task. Everything else stays the same.
- Repeat these steps. At the end, you should have a workflow for each region you want to notify.
Text Analytics Notifications
You can automate workflows based on topics, sentiments, and actionability in customer feedback. See TextFlow for more details.
Sorting and Filtering Legacy Dashboard Notifications
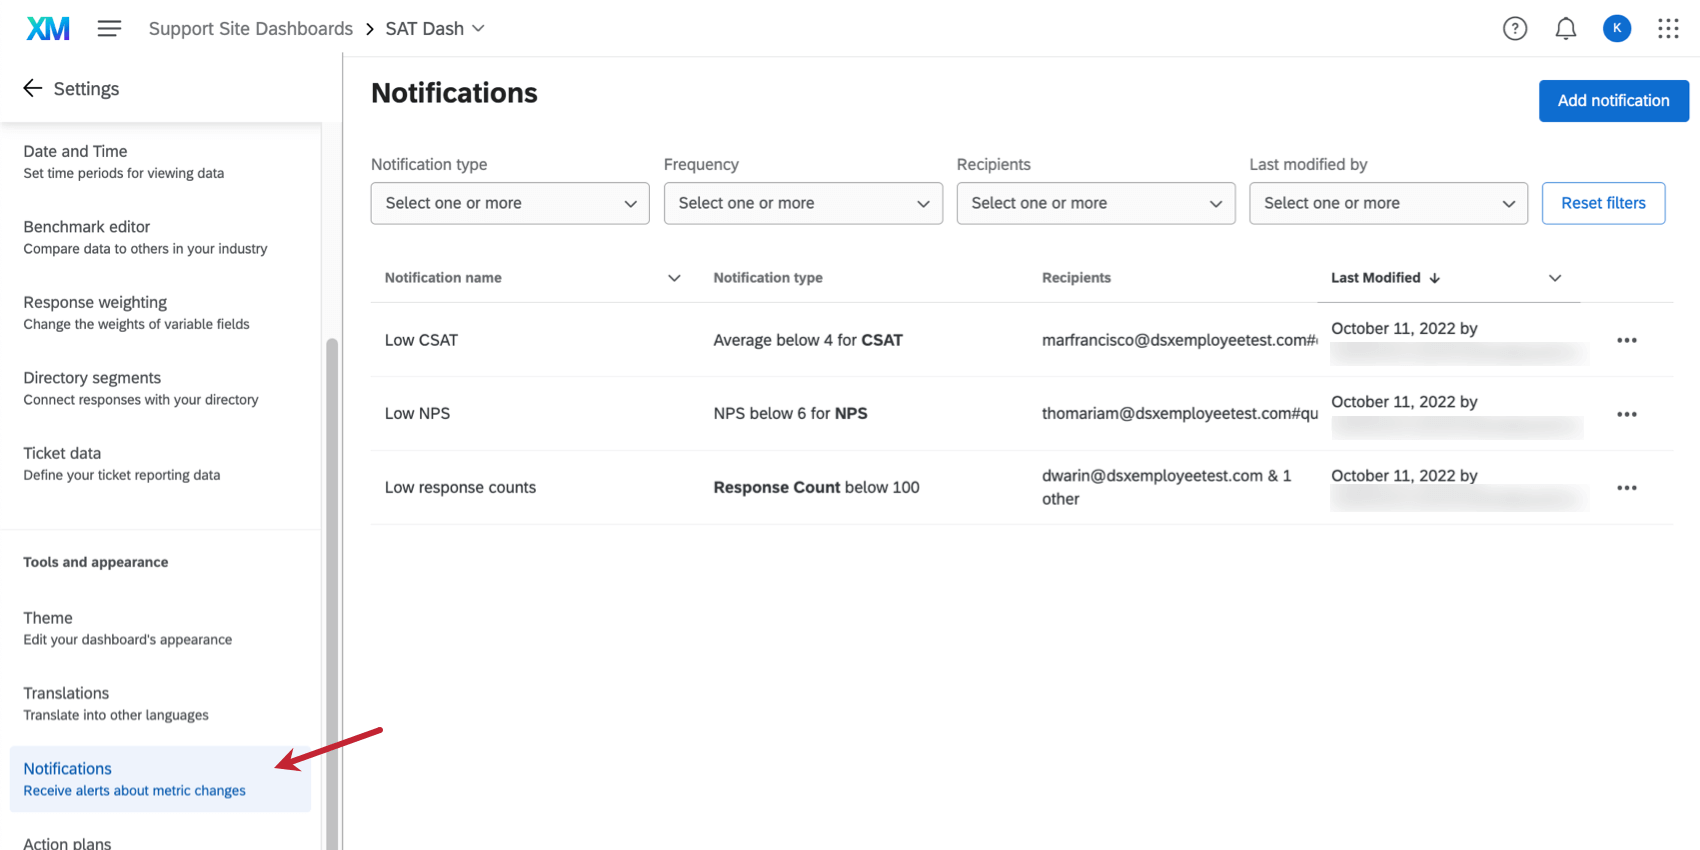
This section describes how you can manage notifications on the Notifications page of dashboard settings.
Sorting
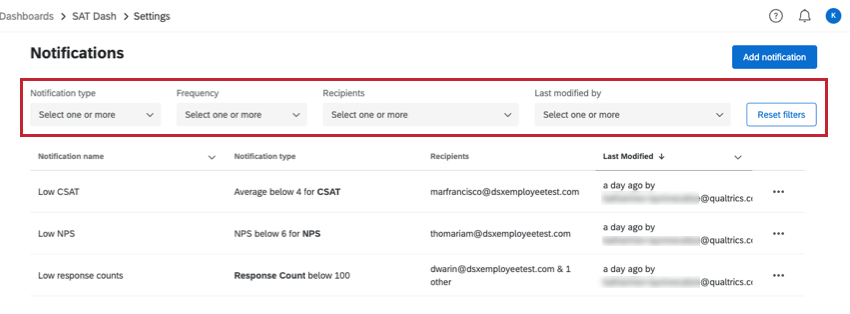
For every notification, you’ll see the following columns of information:
- Notification name: The name of the notification.
- Notification type: A description of the type of data that triggers the notification (e.g., “Average below 4 for CSAT”).
- Recipients: The dashboard users who receive these notifications.
- Last modified: When the notification was last edited and the user who edited it.
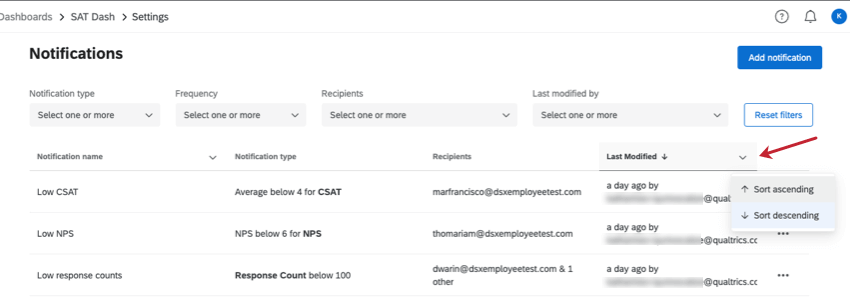
You can sort by the Notification name and Last modified column. Click the header name to change the sort direction, or click the dropdown next to the column name to switch between Sort ascending and Sort descending.
Filtering
You can filter notifications by the following:
- Notification type: Threshold, relative, or trending detection notifications.
- Frequency: Daily, weekly, or monthly.
- Recipients: The users the notifications are sent to. You can type a username or name to search.
- Last modified by: The user who last modified any notifications. You can type a username or name to search.
To remove all the filters you’ve added, click Reset filters.
