-

Qualtrics Platform -

Customer Journey Optimizer -

XM Discover -

Qualtrics Social Connect
Creating Custom Benchmarks (CX)
About Creating Custom Benchmarks (CX)
You can add personalized company benchmarks in your dashboard. Match each goal to the corresponding data, then easily reuse your benchmarks across your dashboard widgets.
Creating Custom Benchmarks Manually
Follow these steps to manually create your own individual benchmarks.
- Go to the Benchmark editor.
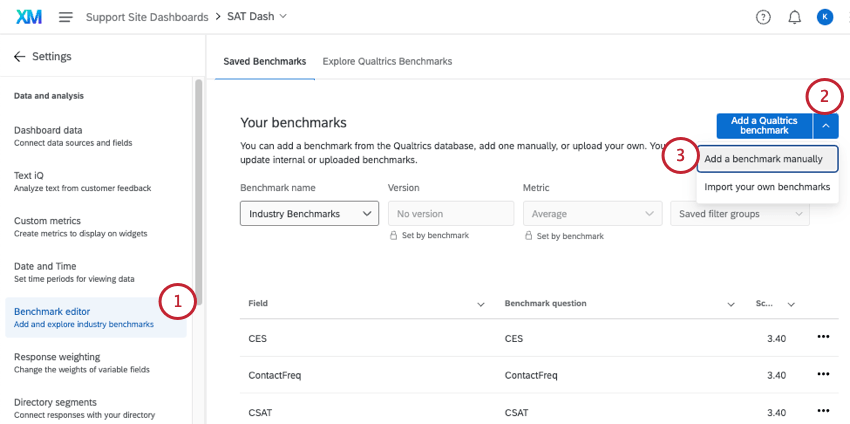
- Click the downward arrow next to Add a Qualtrics benchmark.
- Select Add a benchmark manually.
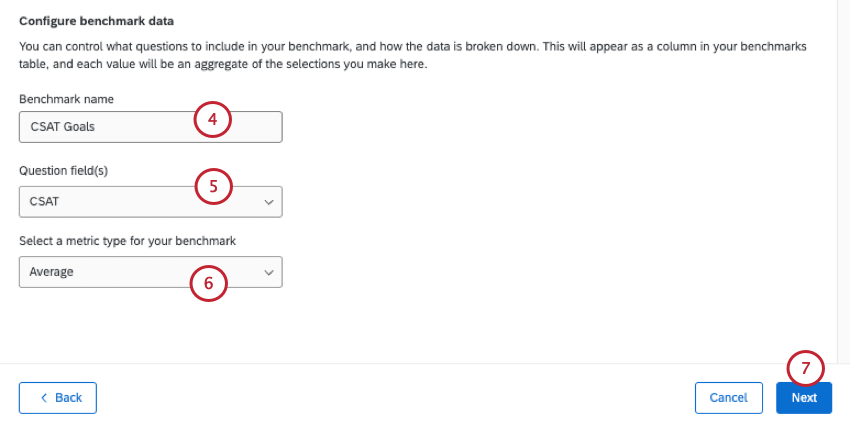
- Enter a name for your benchmark.
 Attention: If you change the name of an existing benchmark, it will change the name for all fields under the benchmark.
 - Select the question field(s) from your dashboard that you want to add benchmarks for.
Qtip: See which field types benchmarks support.Qtip: Click Select all to select all benchmark fields.
- Select the metric type for your benchmark.
- Click Next.
- Enter the values for your benchmarks into the score column.
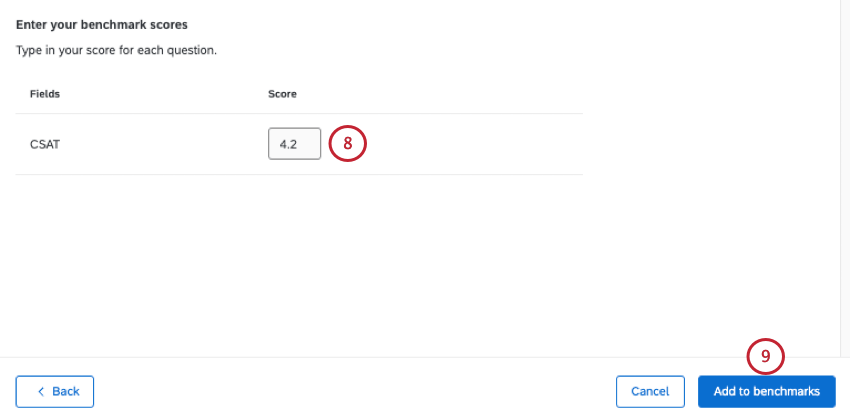
- Click Add to benchmarks.
Uploading Custom Benchmarks in Bulk
If you need to upload benchmarks to your dashboard in bulk, you can upload them from a file. These steps will take you through how to get a template, prepare your file, and upload your benchmarks.
You can use this method to upload new benchmarks or update existing benchmarks.
- Go to the Benchmark editor.

- Click the downward arrow.
- Select Import your own benchmarks.
- Select a benchmark import type:
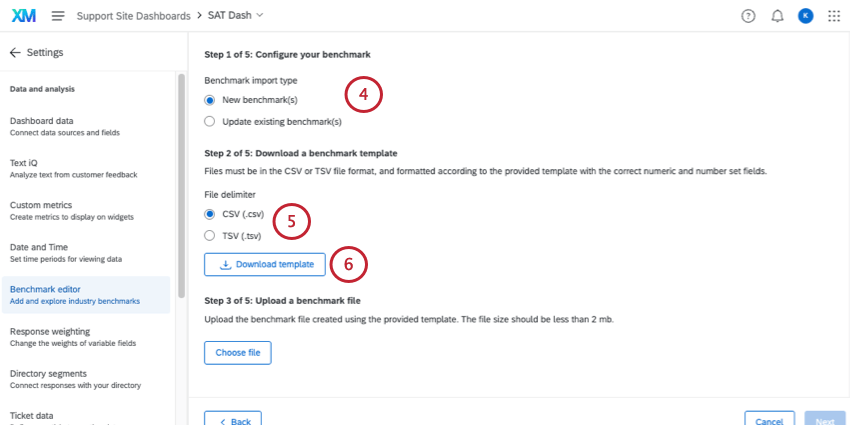
- New benchmark(s): Upload an entirely new benchmark or set of benchmarks. Keep in mind that all of the benchmarks in a set need to be the same metric (e.g., all averages, not a mix of averages and top box).
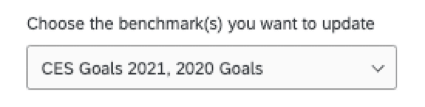
- Update existing benchmark(s): Update existing custom benchmarks. Select the benchmark (or multiple benchmarks) you want to edit.
 Qtip: We highly recommend only updating benchmarks in the same metric format. For example, only updates all averages, not a mix of averages and bottom boxes.
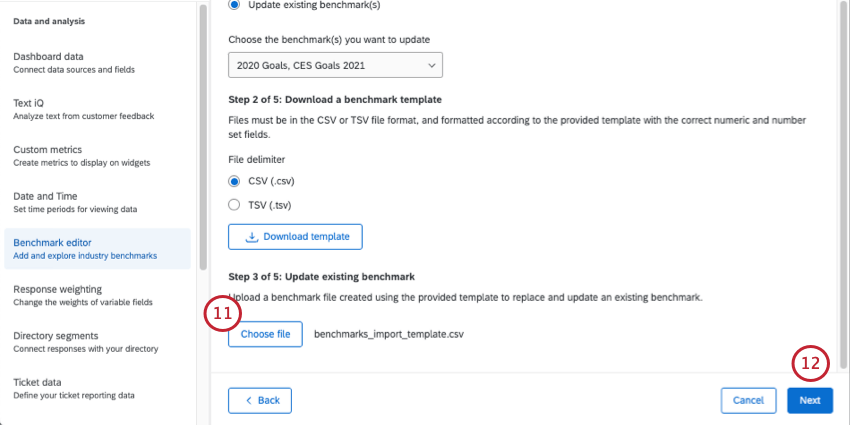
- Select a format for your template file. The available file formats are CSV or TSV.
- Click Download template.
- The first column in this file shows all of the numeric and number set fields mapped to your dashboard.
 Attention: Even if you chose to make updates, this file will not contain your existing benchmarks – only your numeric and number set fields. If you are updating benchmarks, you will have to reenter all values in your file.Qtip: Check out your Dashboard Data page if there are fields that need their names or field types changed, or if you need to add a new field.
 - In the header, add the names of the benchmarks you want to upload. Each column represents one set of benchmarks.
- Each row represents a field and its benchmarks. Under your benchmark names, add the corresponding benchmarks for each dashboard field.
Attention: All fields that are included when exporting the template need to be included in the import file, even if they don’t have a benchmark value. Do not include any blank rows in your import file. Otherwise, you will see the error: “This file is missing field IDs or has invalid field IDs”.
- Save your file in one of the following formats:
- CSV UTF-8 Encoded
- TSV
Qtip: TSV is recommended if your field names contain characters not used in the English alphabet. See TSV / CSV Upload Issues for troubleshooting help.
- Back in the benchmark editor, click Choose file to upload the file you created.
 Qtip: If your file is too large, you won’t be able to upload it. You can upload smaller, separate files if needed.
 - Click Next.
- Select a metric type for your benchmark values.
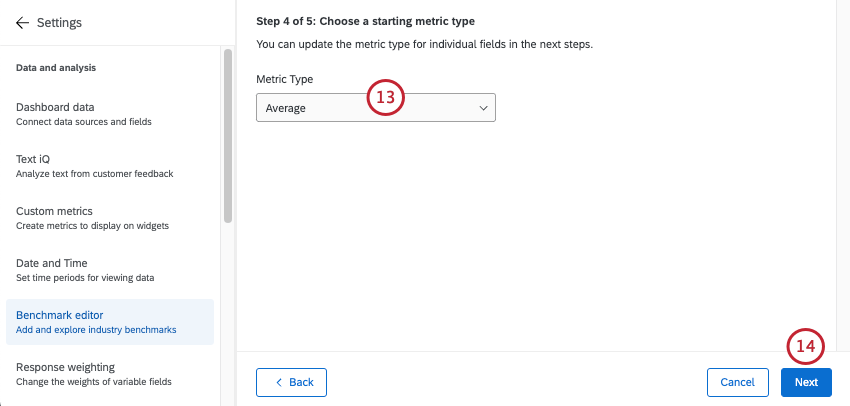
- Average: Each of the benchmarks in this set are represented as an average (or mean) value.
- Top/Bottom Box: Each of the benchmarks in this set are represented as a top or bottom box score. Top box is the percentage of respondents who fit into the highest ends of the scale. Bottom box is the percentage of respondents who fit into the lowest ends of the scale.
- NPS: Each of the benchmarks in this set are represented by a Net Promoter Score®. See more on Calculating Net Promoter Score.
- Click Next.
- Review your fields to confirm the data is mapped correctly.
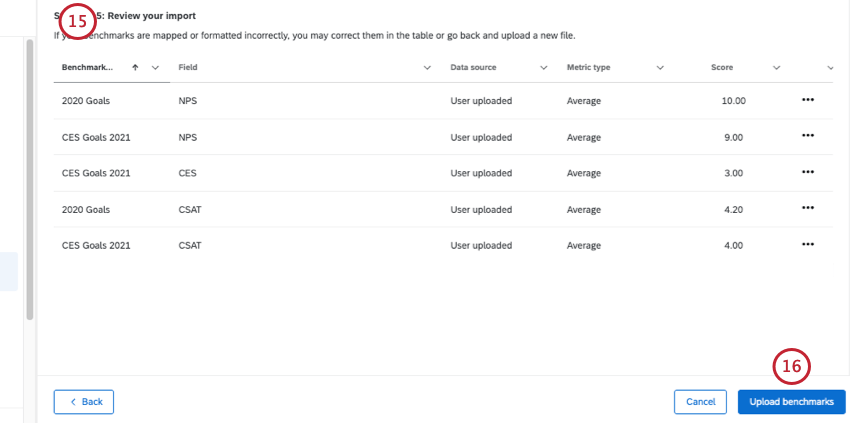 Qtip: If you need to edit a benchmark, click the 3 dots next to each row and select Edit benchmark field row.Qtip: Click Back in the bottom-left to go back and adjust settings or upload a new file.
 - Select Upload benchmarks.
Troubleshooting Benchmark Uploads
You’ll receive an error message if your uploaded file failed to update participants. This section includes the error messages, as well as some troubleshooting tips to help you resolve each error.
- The file is missing field IDs or has invalid field IDs. Upload a revised file to proceed: This message is typically an error in the fieldId column, which you should never edit. To resolve, we recommend downloading a sample template, inserting the benchmark values and ensuring the fieldID column is correct, then re-uploading that file. These errors could be caused by:
- Deleting a fieldID.
- Benchmark values with less than or more than two decimal places. For example, an error message will show for 0.7 or 0.712 instead of 0.70 or 0.71.
- This file has benchmark(s) that already exist(s) in your dashboard. Upload a revised file to proceed. If you wanted to update an existing benchmark, change the benchmark import type: This message indicates that new benchmarks are being uploaded that already exist in their benchmark editor. If you are updating an existing benchmark, make sure you selected this import type. If you want to create a new benchmark, give it a different name. See Creating and Updating Benchmarks in Bulk.
- The benchmark(s) you’re trying to update do not exist. Upload a revised file to proceed: This means that the benchmarks you are trying to update have incorrect headers or formatting. To resolve, download a sample template, insert the benchmark values, and then re-upload this file without changing the name.
In addition, here are some general best practices and file requirements:
- Benchmark files need to be less than 2 MB in size.
- Benchmarks only support up to two decimal places in a single benchmark. For example, you can make 2.54 your benchmark, but you can’t do 2.543.
Editing and Removing Benchmarks
Click the 3 dots next to a benchmark to edit or delete it. There are a few deletion options that differ from each other.
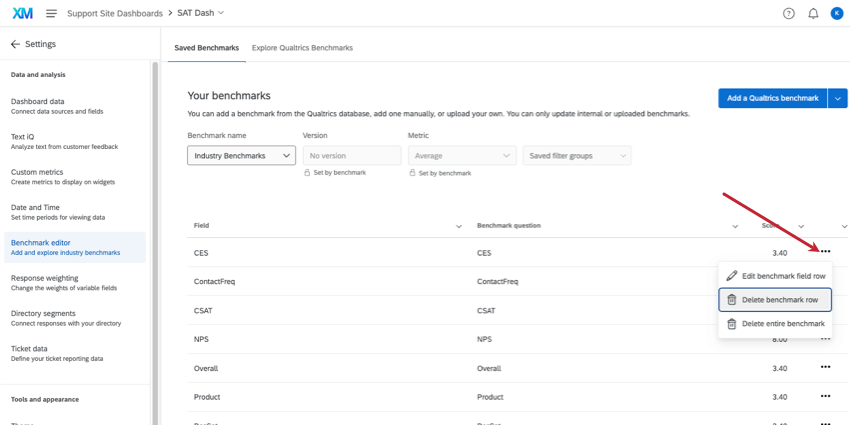
- Edit benchmark field row: Edit this individual benchmark. In this example showing “Industry Benchmarks,” only CES would be edited.
- Delete benchmark row: This option would permanently delete just the 1 row of the benchmark. In this example showing “Industry Benchmarks,” only CES would be deleted.
- Delete entire benchmark: This option deletes not just the individual row, but all rows surrounding it in the same benchmark. In this example showing “Industry Benchmarks,” the entire “Industry Benchmarks” collection would be deleted.
Warning: Deleting a benchmark is permanent. Once a benchmark has been removed, it cannot be recovered. Only delete benchmarks you are absolutely sure you no longer need.