-

Qualtrics Platform -

Customer Journey Optimizer -

XM Discover -

Qualtrics Social Connect
Reusable Choices
About Reusable Choices
Sometimes you’ll need to reuse the same list of choices for many of your questions. Instead of copying and pasting the same choices over and over, you can create reusable choices.
Reusable choices allow you to save a list of choices in your survey that you can reuse in more than 1 question. If you realize later that you forgot to add a choice, you don’t have to edit every question individually. You just edit your reusable choices, and all questions using this feature will change automatically.
Project Type Compatibility
Depending on your license, you may have access to a few different types of project. Reusable choices are only available in a few different types of projects, including:
Reusable choices are not available in any project types not listed above.
Manually Creating Reusable Choices
You can create reusable choices manually or by importing them. Reusable choices apply to 1 survey at a time; editing your reusable choices in one survey won’t change them in a different survey.
- In the Survey tab, click the Tools button.
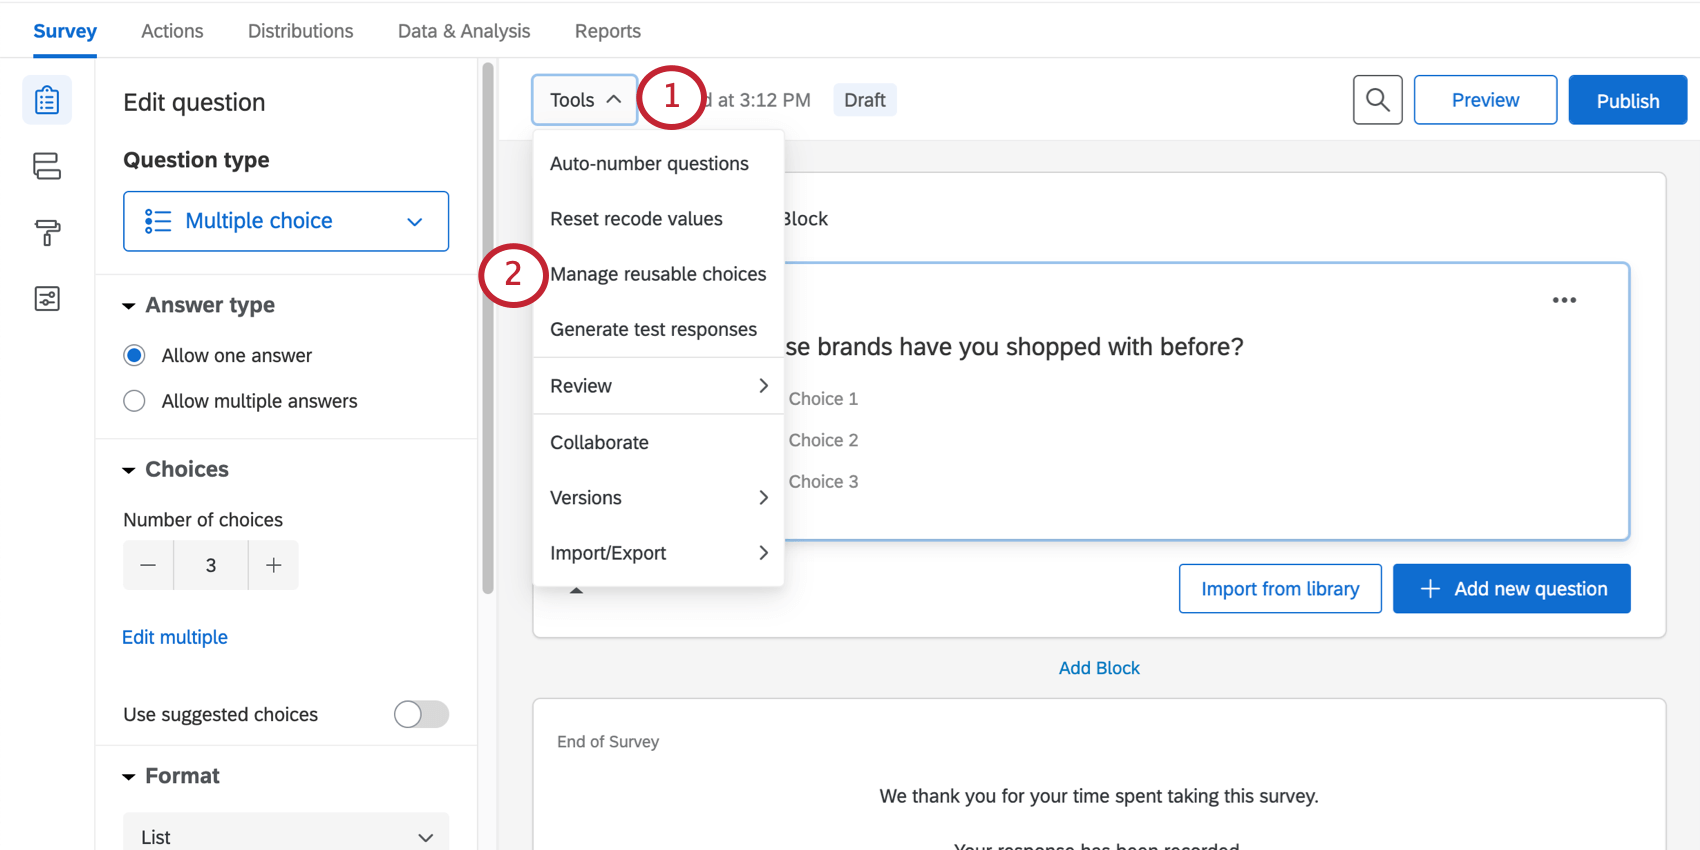
- Select Manage reusable choices.
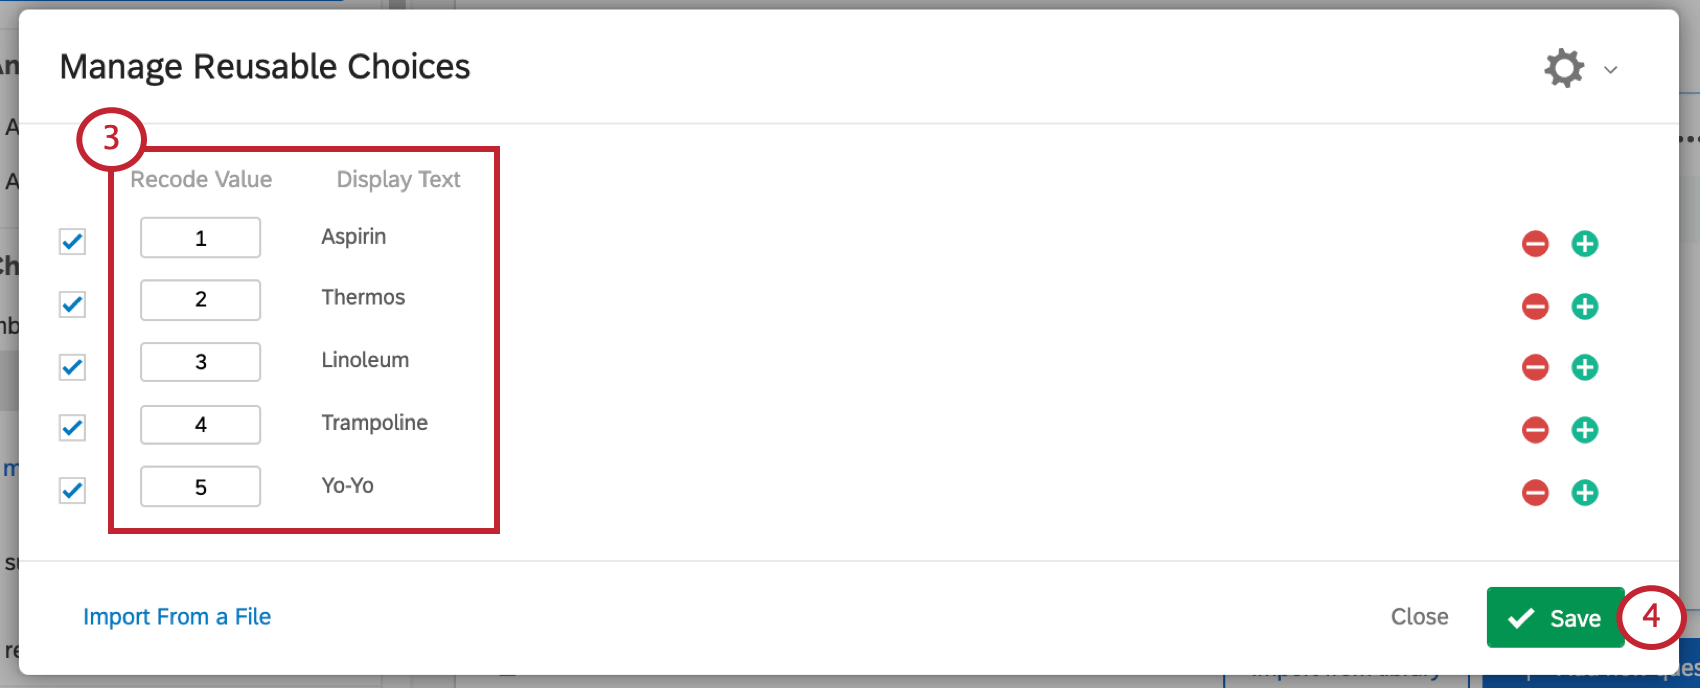
- Click on a choice and retype the name.
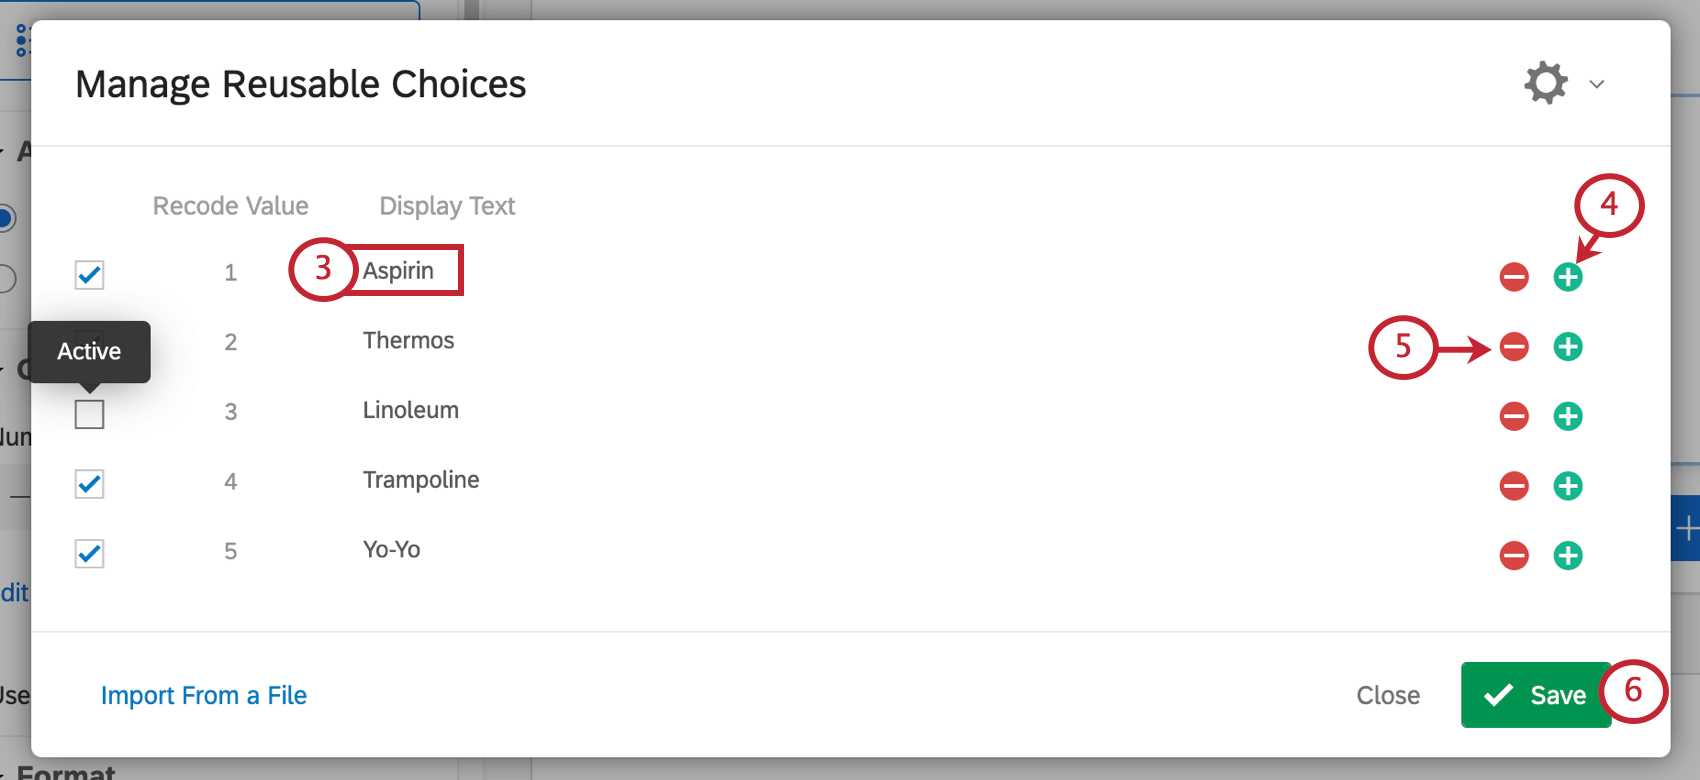
- If you want to add another choice, click the plus sign ( + ) or press Enter on your keyboard after changing the name of another choice.
- To remove a choice, click on the choice and backspace until it’s gone, or click the minus sign ( – ).
- When you’re finished, click Save.
Importing Reusable Choices
If you want to add the same list of choices to several surveys, or you have many choices with special formatting to add at once, you can save time by importing your choices.
- In the Survey tab, click the Tools button.
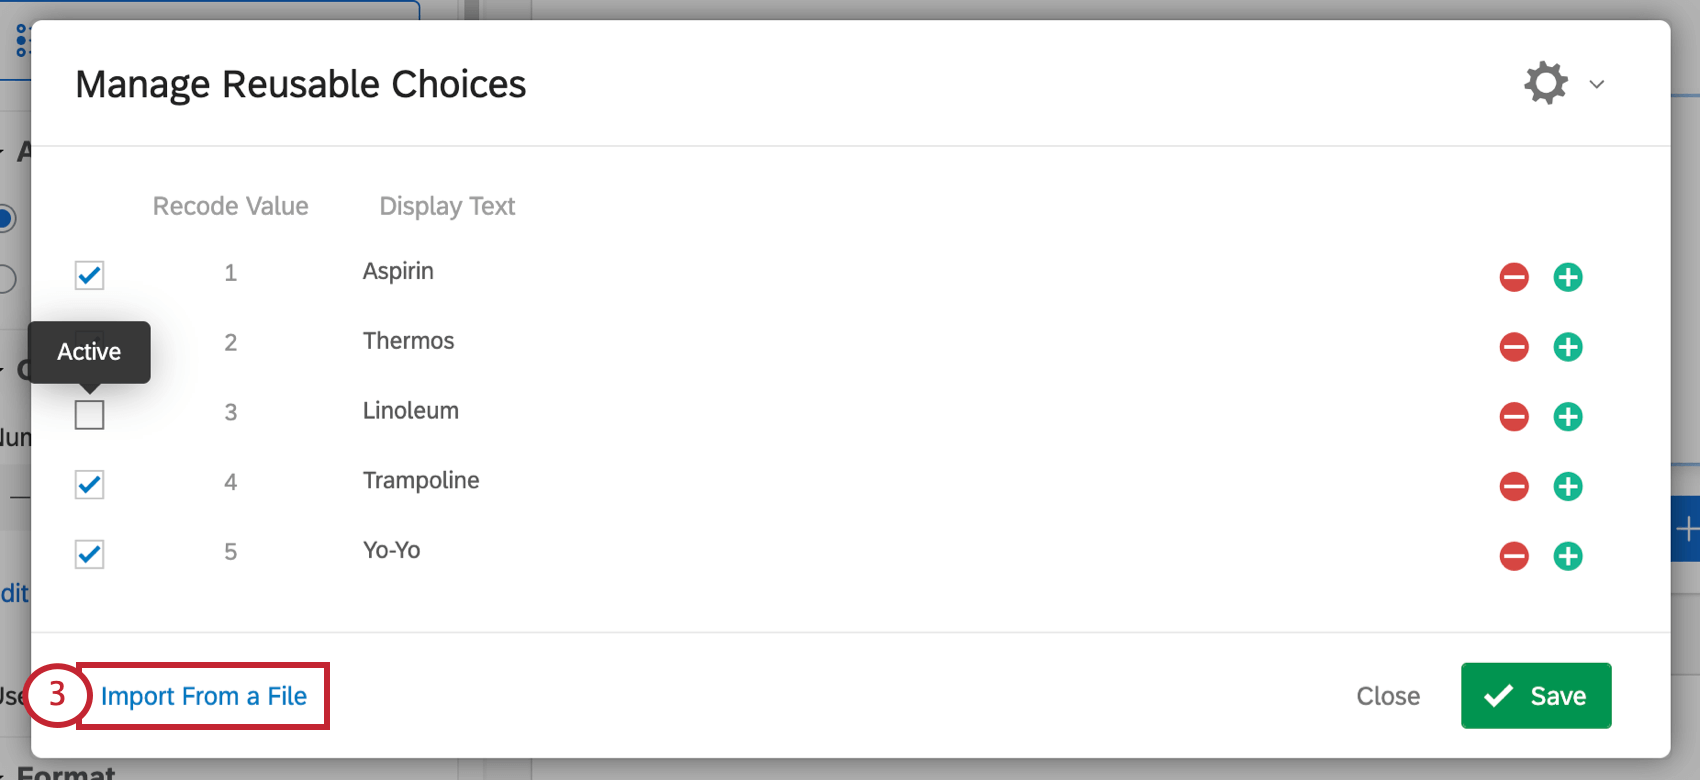
- Select Manage Reusable Choices.
- Click Import From a File.
- You can download either a CSV template or a TSV template.
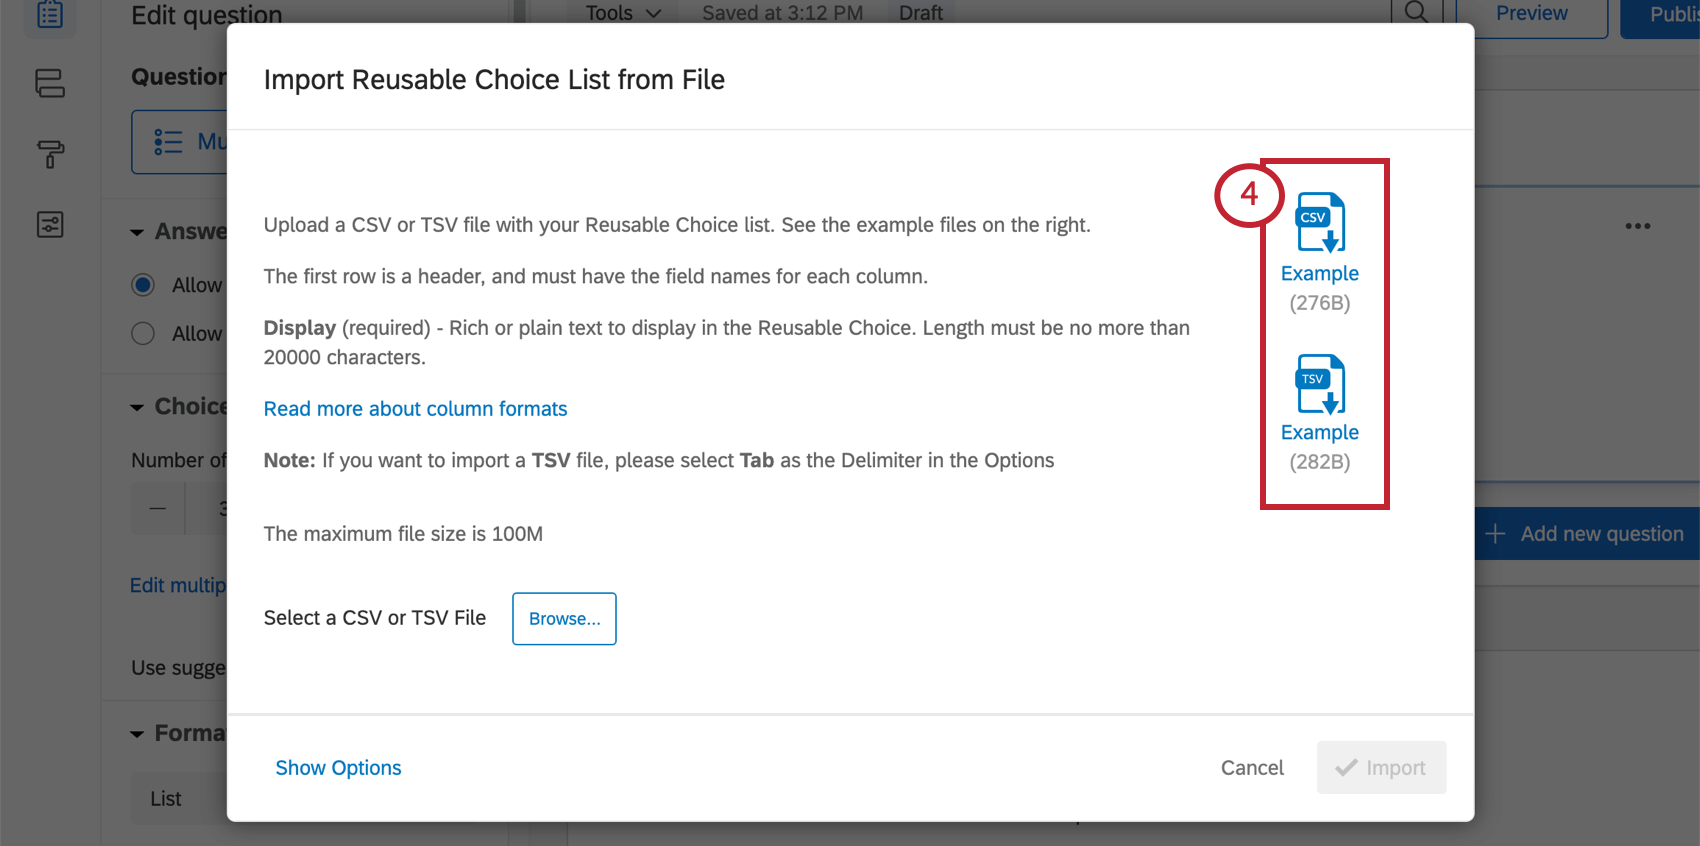
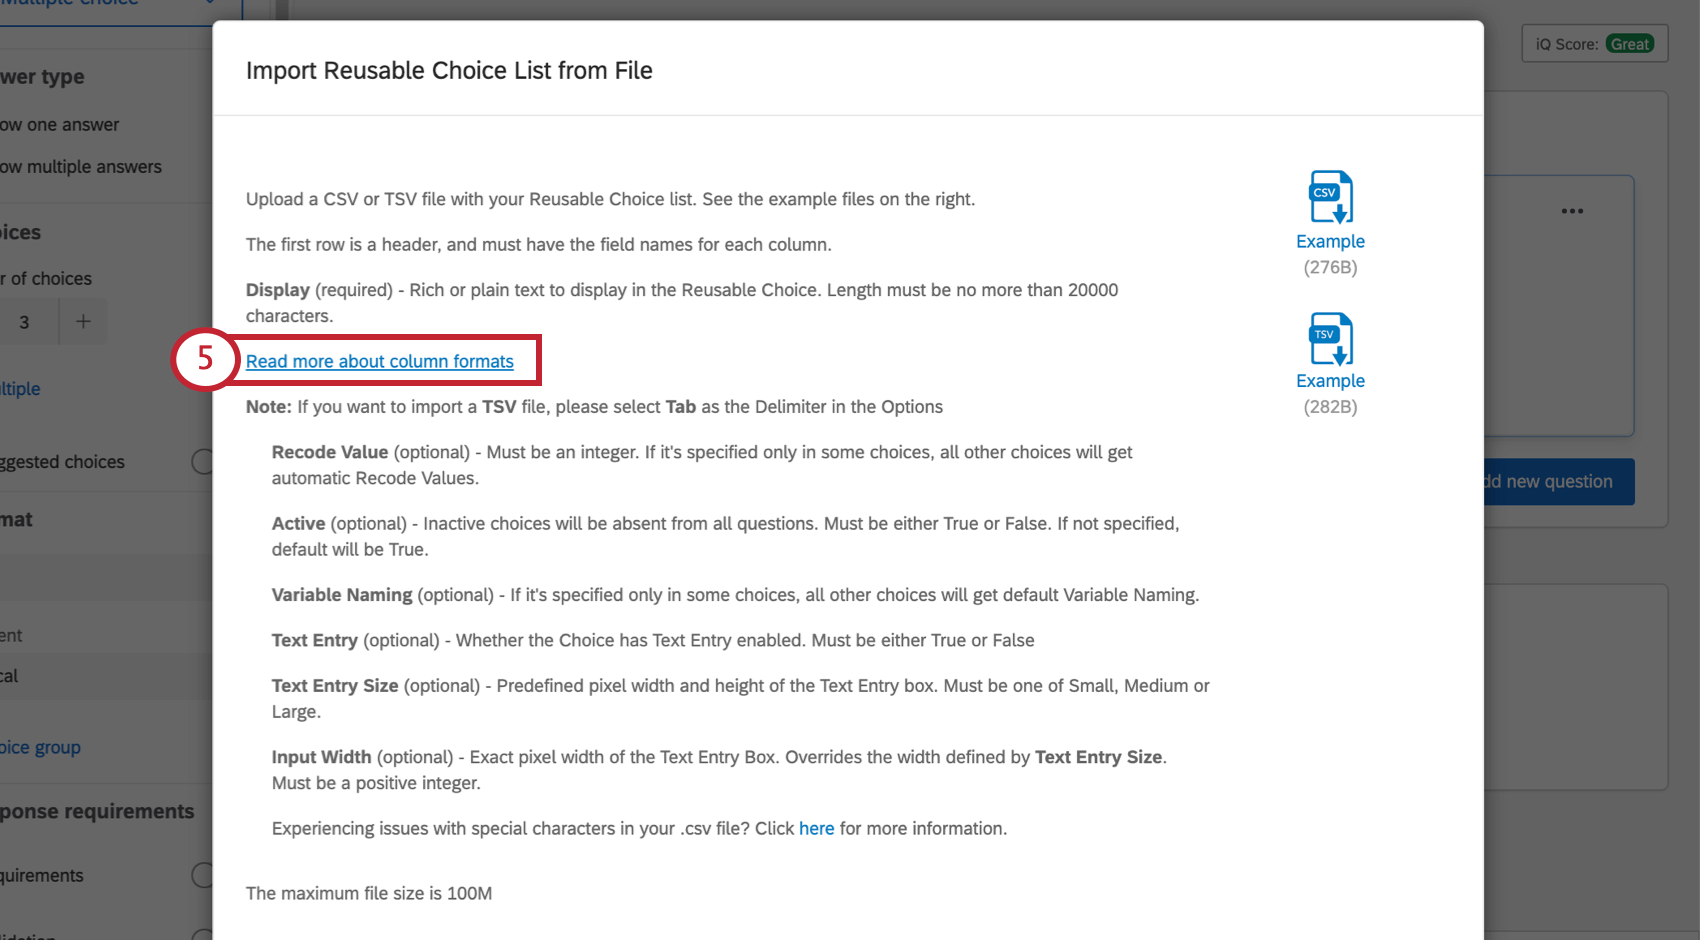
- If you have additional questions on how to format your file, click Read more about column formats.
- Once your file is ready, click Browse, then select the edited example file.
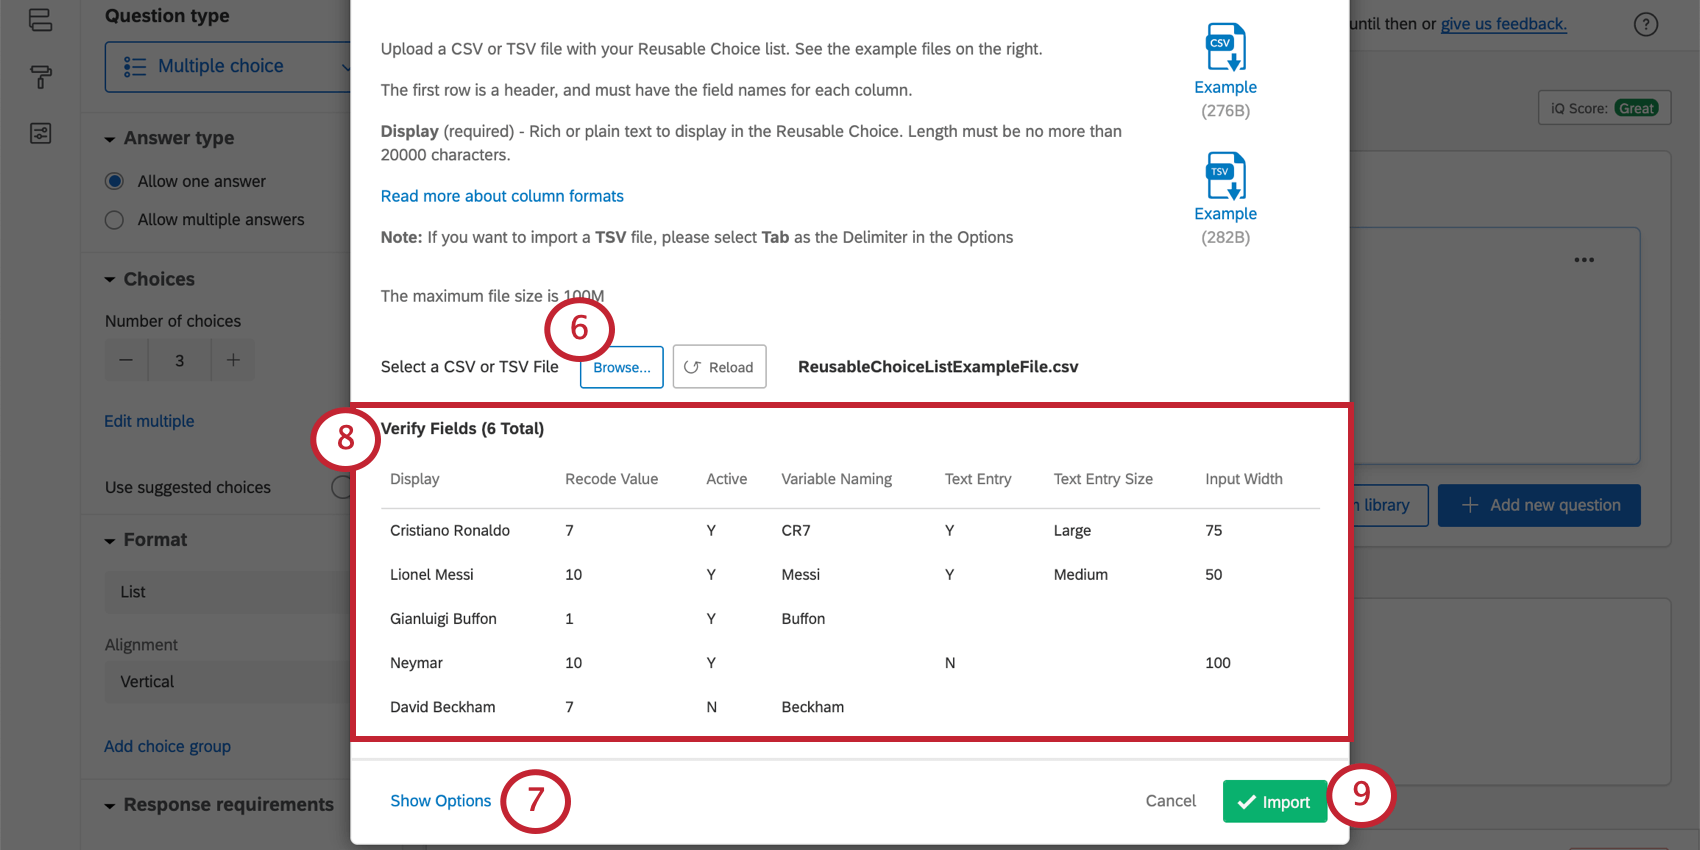
- Click Show Options to adjust the delimiter or enclosure. Change the delimiter to Tab for TSV files.
- Look at the Verify Fields section to confirm that the file is being read correctly.
Qtip: If you’re having trouble uploading your file, check out the CSV/TSV Upload Issues support page.
- Once ready, click Import.
Import File Columns
- Display: This is the only required column. Name the choice. You can include basic HTML to add rich text, such as bolding, italics, or font colors. The maximum length of a choice name is 20,000.
- Recode Value: Set a recode value for the choice. This must be an integer (a number with no decimals or fractions). Choices left blank will be automatically assigned recode values.
- Active: If a choice is marked False, it’ll be considered inactive and excluded from all questions. Choices left blank or given a value of True will be considered active.
- Variable Naming: Set a name for the choice. If you leave the choice blank, the choice gets their default variable name, matching exact choice text.
- Text Entry: Whether the choice has text entry enabled. Set this column to True to add text entry, and False to exclude text entry. You can also exclude text entry by leaving the column blank.
- Text Entry Size: Determines the size of the text entry box. Can be set to small, medium, or larger.
- Input Width: Overrides text entry size. Use this field to set specific pixel width instead. Must be an integer (a number with no decimals or fractions).
Formatting Reusable Choices
Click on a choice, then click the dropdown arrow to view additional formatting options.

- Allow Text Entry: Add a text entry box next to the answer choice. For example, if “Other” is a choice, you may want respondents to specify what “Other” is.
- Text Entry Size: For answer choices that have Allow Text Entry enabled, change the size of the text entry box.
Qtip: This setting is disabled if you are using the simple layout.
- Insert Piped Text: Pull text from another survey question, or from a variety of other resources, into your answer choice.
- Move Up: Move the choice up by 1.
- Move Down: Move the choice down by 1.
Hiding Choices
Sometimes, you may decide that you don’t want to include a choice from your list, but you don’t want to delete it. To hide a choice, deselect the check box to the left of the choice.
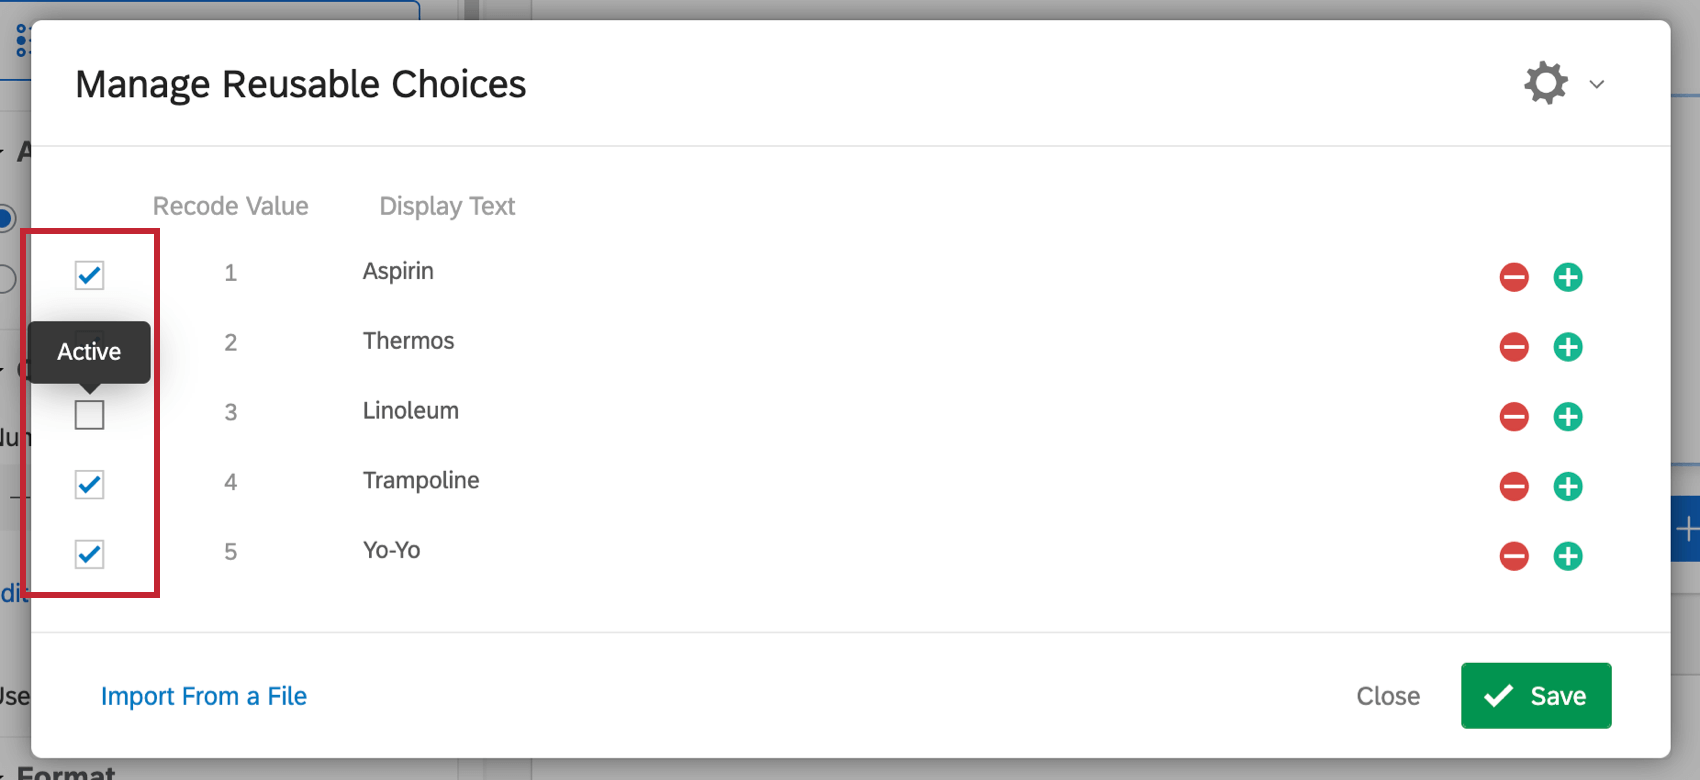
You can show this choice again any time by selecting the choice.
Recode Values and Variable Naming
Recode values are the numeric values behind each answer choice. Variable naming is the label the data exports when you select choice text format.
- In the Manage Reusable Choices window, click the settings icon.

- Select the field you wish to edit.
- Change the values by typing in the fields.
- Click Save.
Adding Reusable Choices to a Question
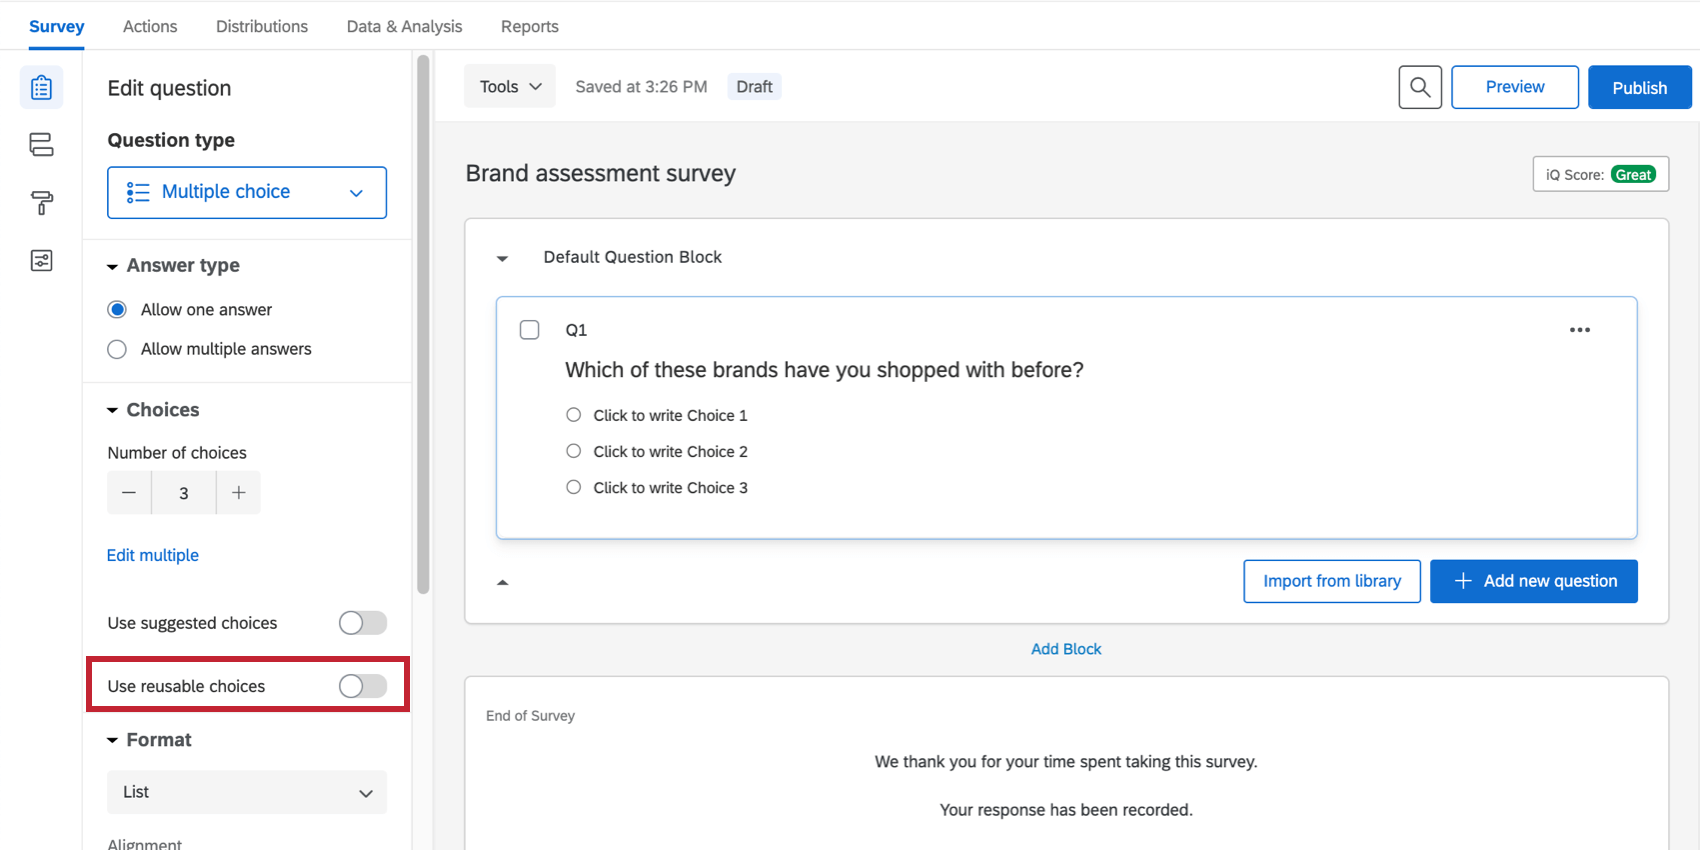
- In the Survey tab, select the question you wish to edit.
- Select Use Reusable Choices.
On the right under Choices, it will say 0. If you want to add additional choices just to this question, in addition to the reusable choices, click the number and type out how many extra choices you want.
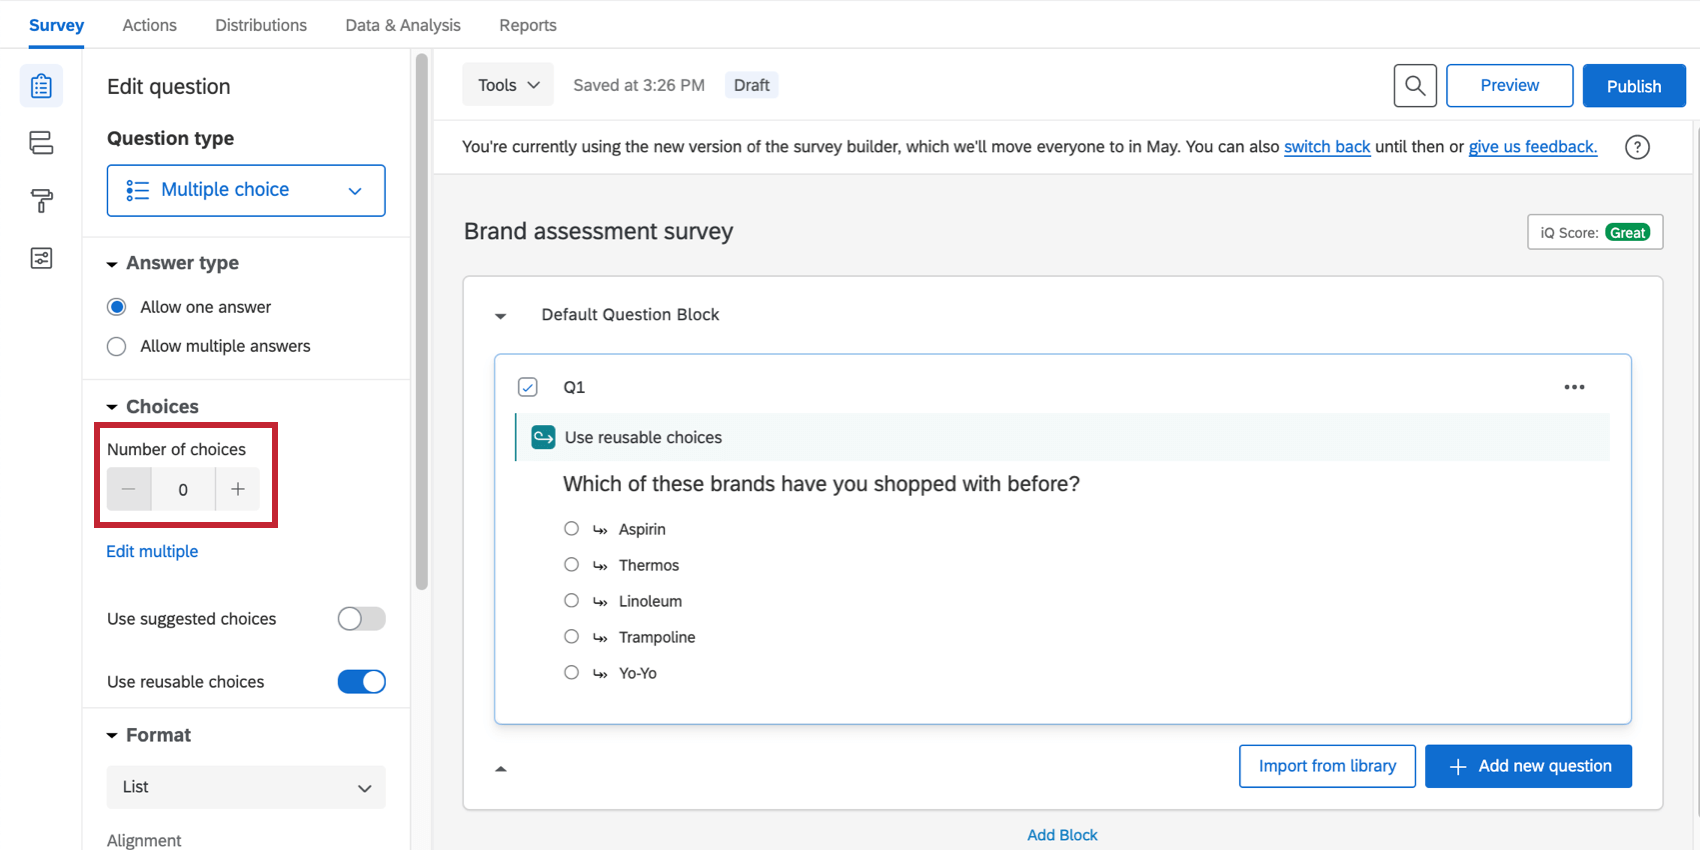
Reusable choices are marked by arrows.
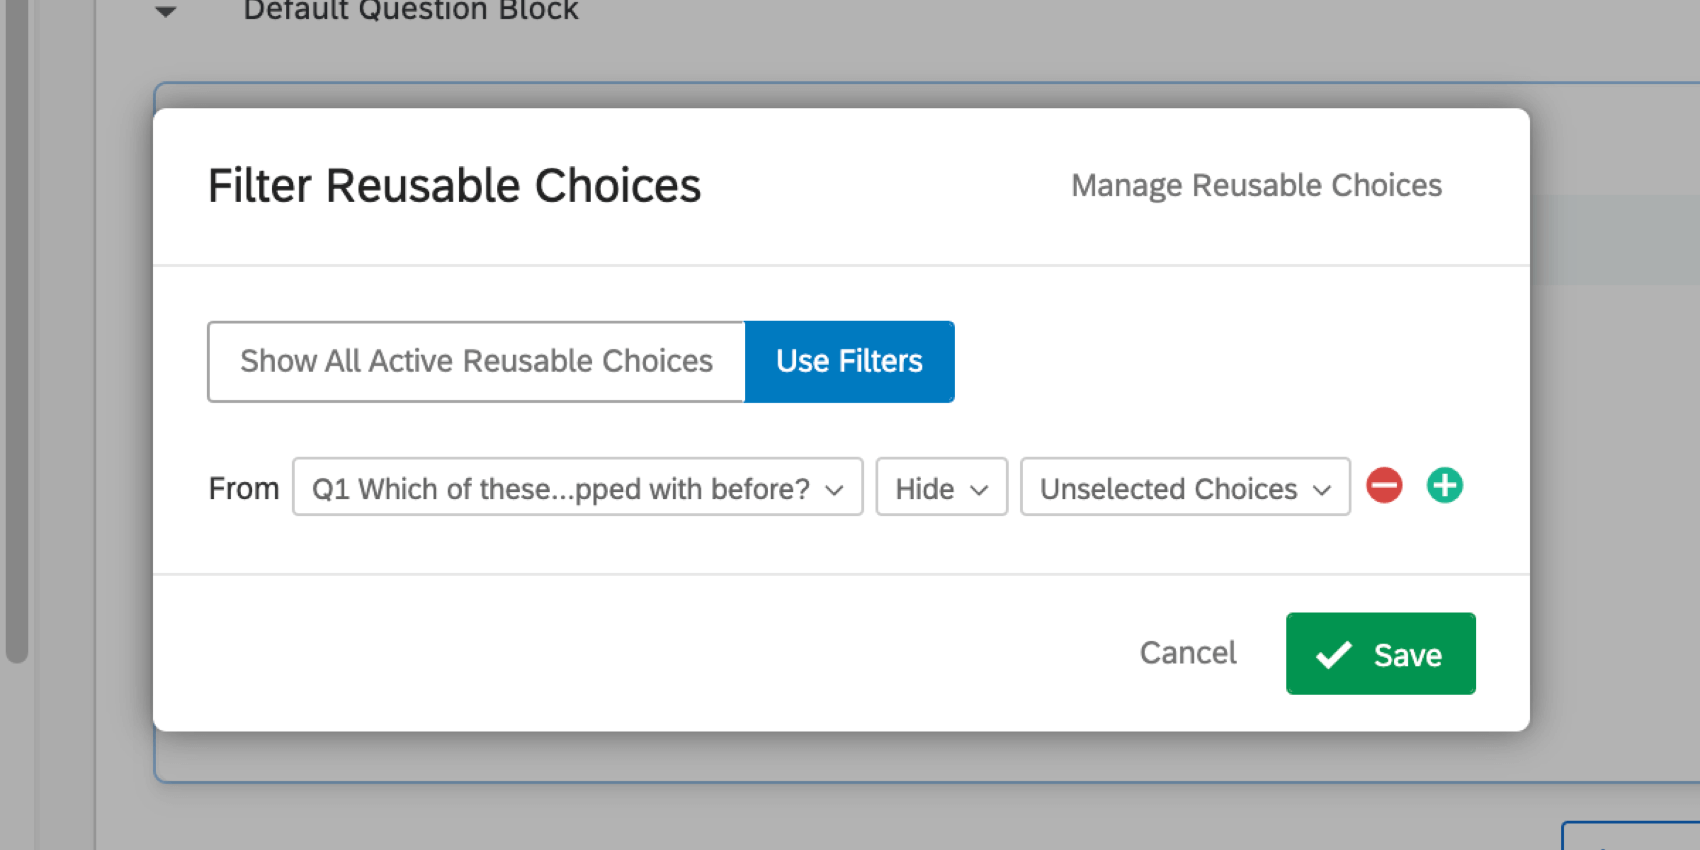
Filtering Reusable Choices
Sometimes, you only want to include reusable choices based on special conditions. For example, maybe you want to hide a brand from the list being assessed if the respondent said they were unfamiliar with that brand in the first question.
- Click the dropdown arrow next to the reusable choices
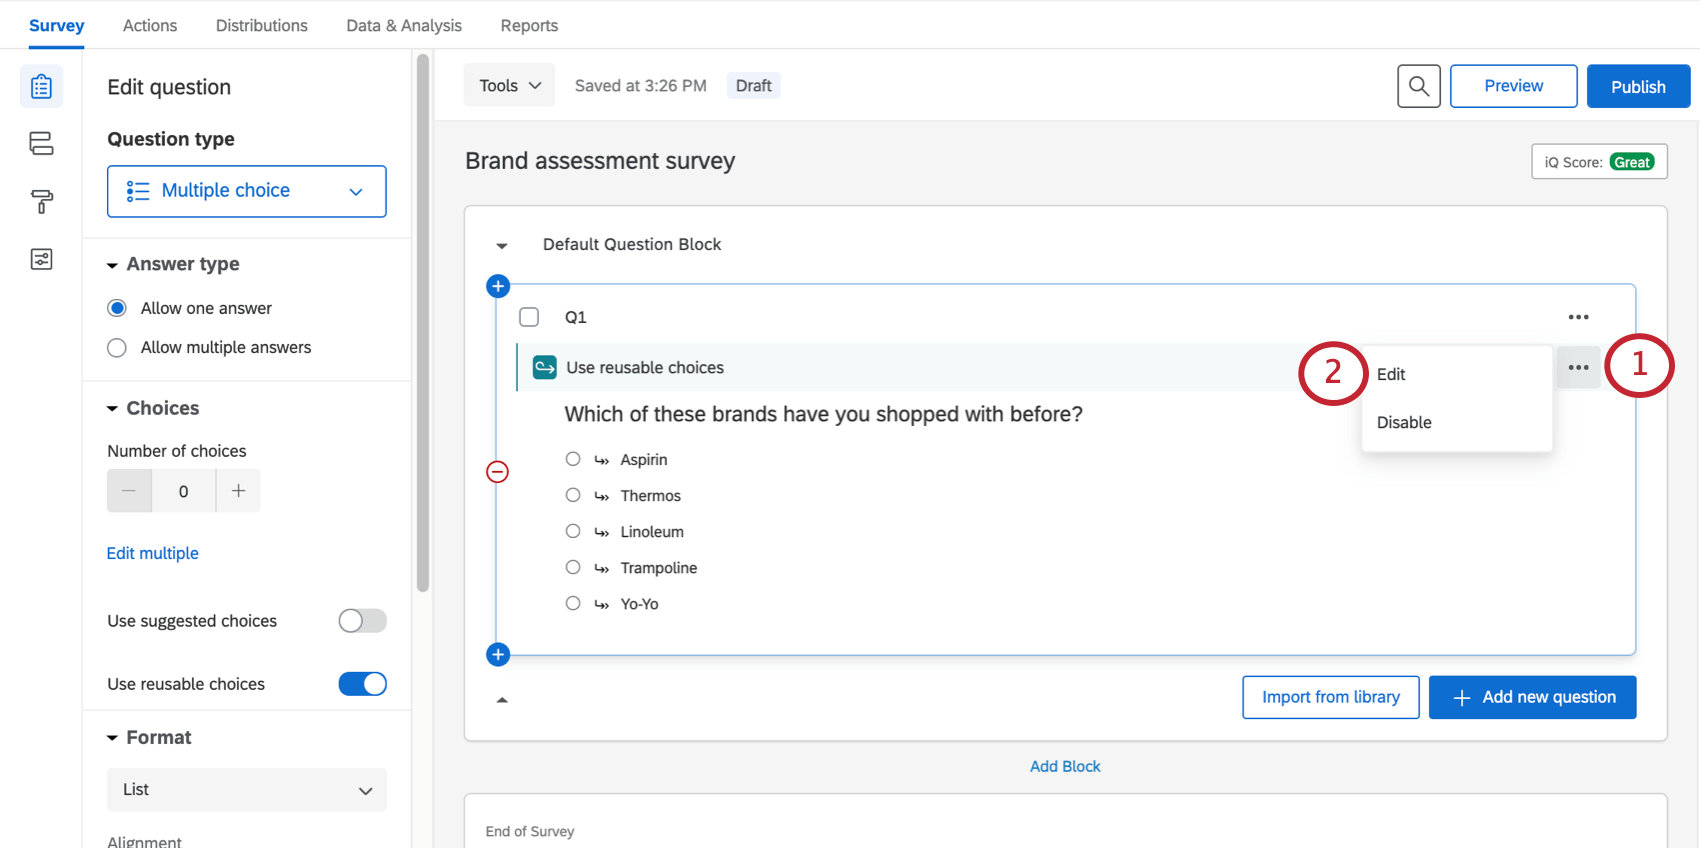
- Click Edit.
- Select Use Filters.
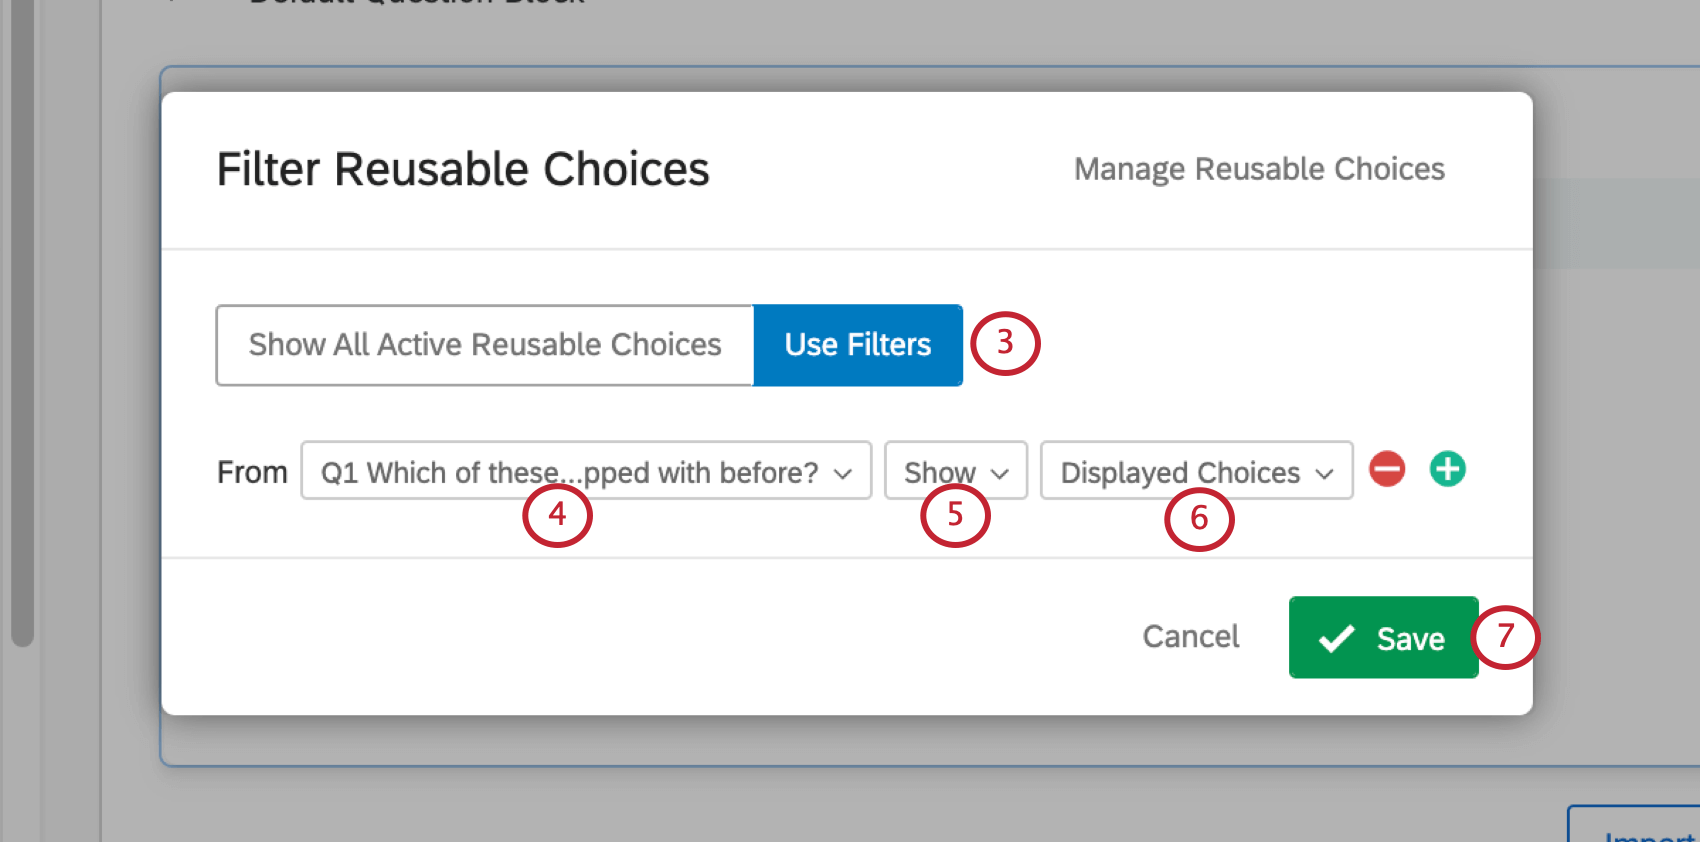
- Select a question to based the filter on.
- Choose to Show or Hide based on this question.
- Select what choices from the selected question to show or hide.
- Click Save.
Question Type Compatibility
Any question with discrete choices is compatible with reusable choices. This includes: