Contact List Triggers
About Contact List Triggers
Whether you are looking to create an email list for future survey distributions or need to update your contacts, contact list triggers can help you do it all automatically. Contact list triggers allow you to construct your own contact list using survey results without having to manually add each contact separately. This kind of trigger can also be used to update an existing contact list with new information, saving you time and unnecessary steps to make sure your contact list is up to date.
Creating a Contact List Trigger
- In the Survey tab, include a question in your survey that asks for the respondent’s name, email address, and any other information you would like included in the contact list.
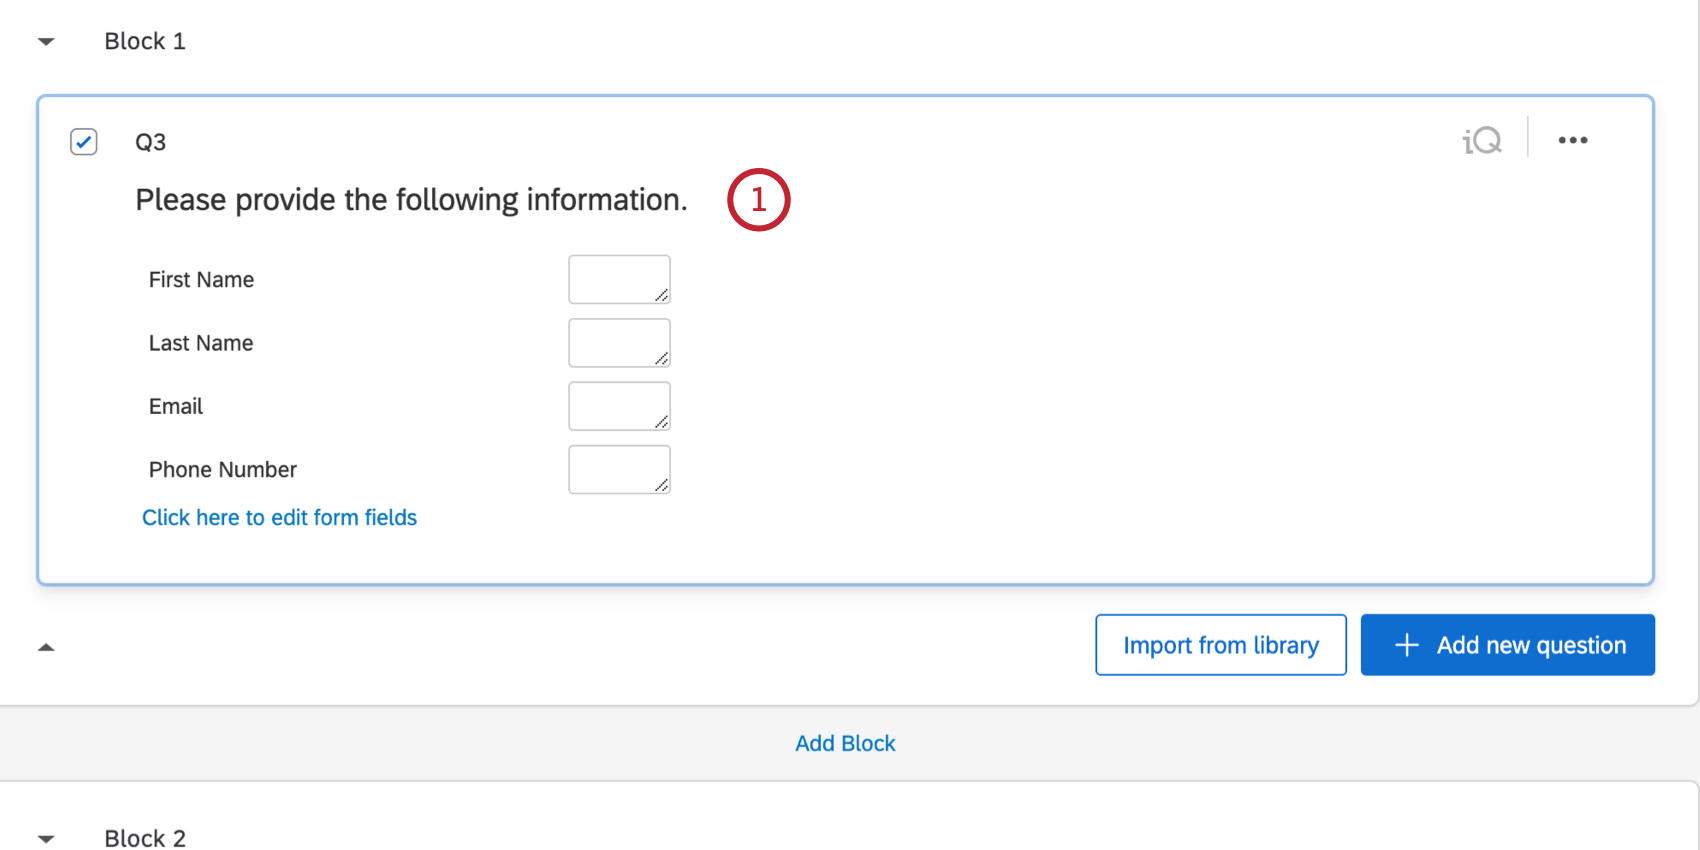 Qtip: This question is a form field question!
 - Navigate to the Survey options.
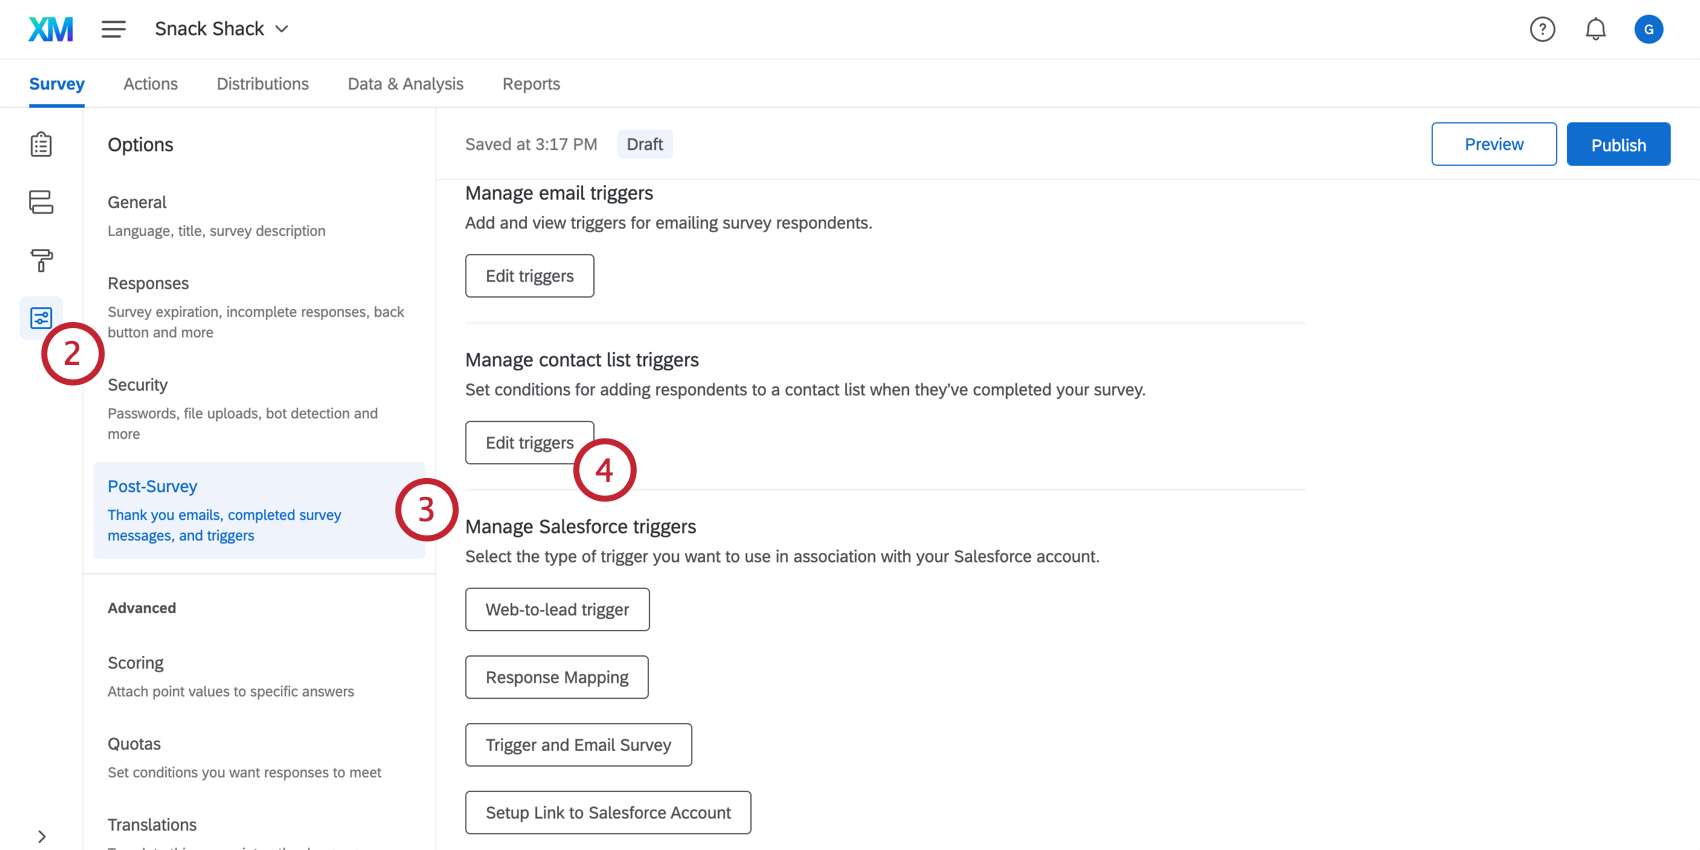
- Select Post-Survey.
- Under Manage contact list triggers, click Edit triggers.
- Click Add a Condition to set the trigger to add respondents to the contact list when the survey is completed AND a specified condition is met (otherwise, the trigger will add contacts any time a respondent completes the survey).
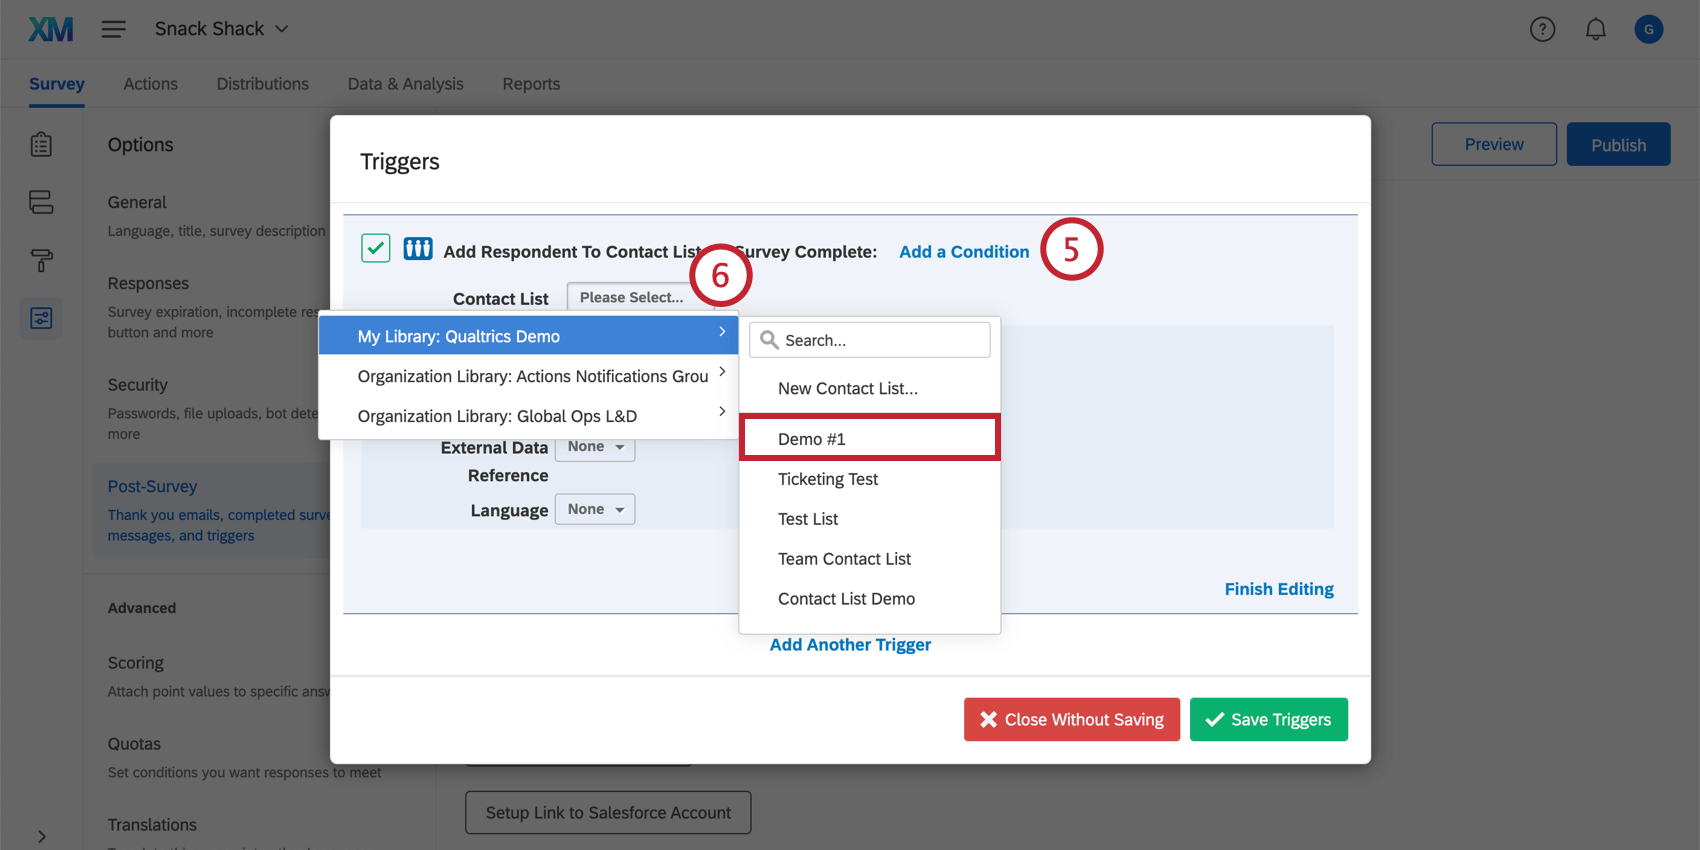
- Click Please Select next to Contact List, choose My Library or any other library that contains your desired contact list, and select which contact list to use (you can also choose to click on New Contact List to create a new list).
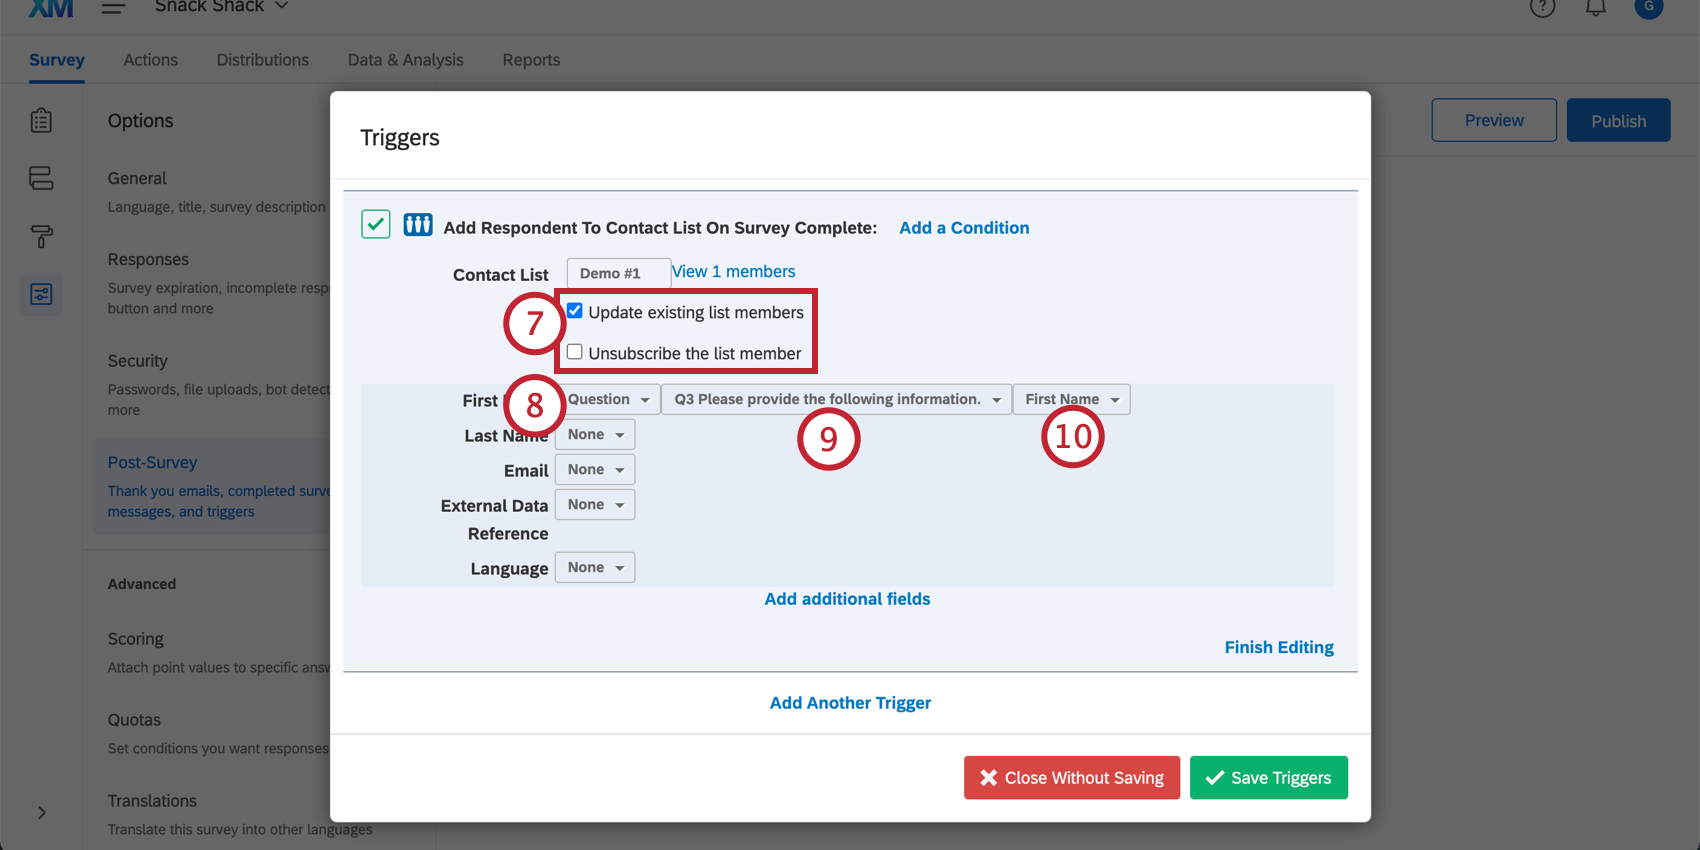
- If desired, enable or disable Update existing list members or Unsubscribe the list member (when enabled, any previous contact from the contact list selected in the trigger will have their contact information updated or will be unsubscribed from the list, respectively).
Qtip: Update existing contact list members will only update if the individual link or multiple completes link were used in a survey invitation, or if an authenticator is used.
If you have XM Directory Lite or XM Directory with deduplication disabled, the emailed/authenticated contact list must be the same one in the trigger. Otherwise, a new contact will be created in the contact list instead. If you do have deduplication enabled in XM Directory, the contact list does not need to be the same.
However, if you have XM Directory and the contact exists in multiple lists, then the contact will be updated in every list in which it appears, regardless of deduplication settings.
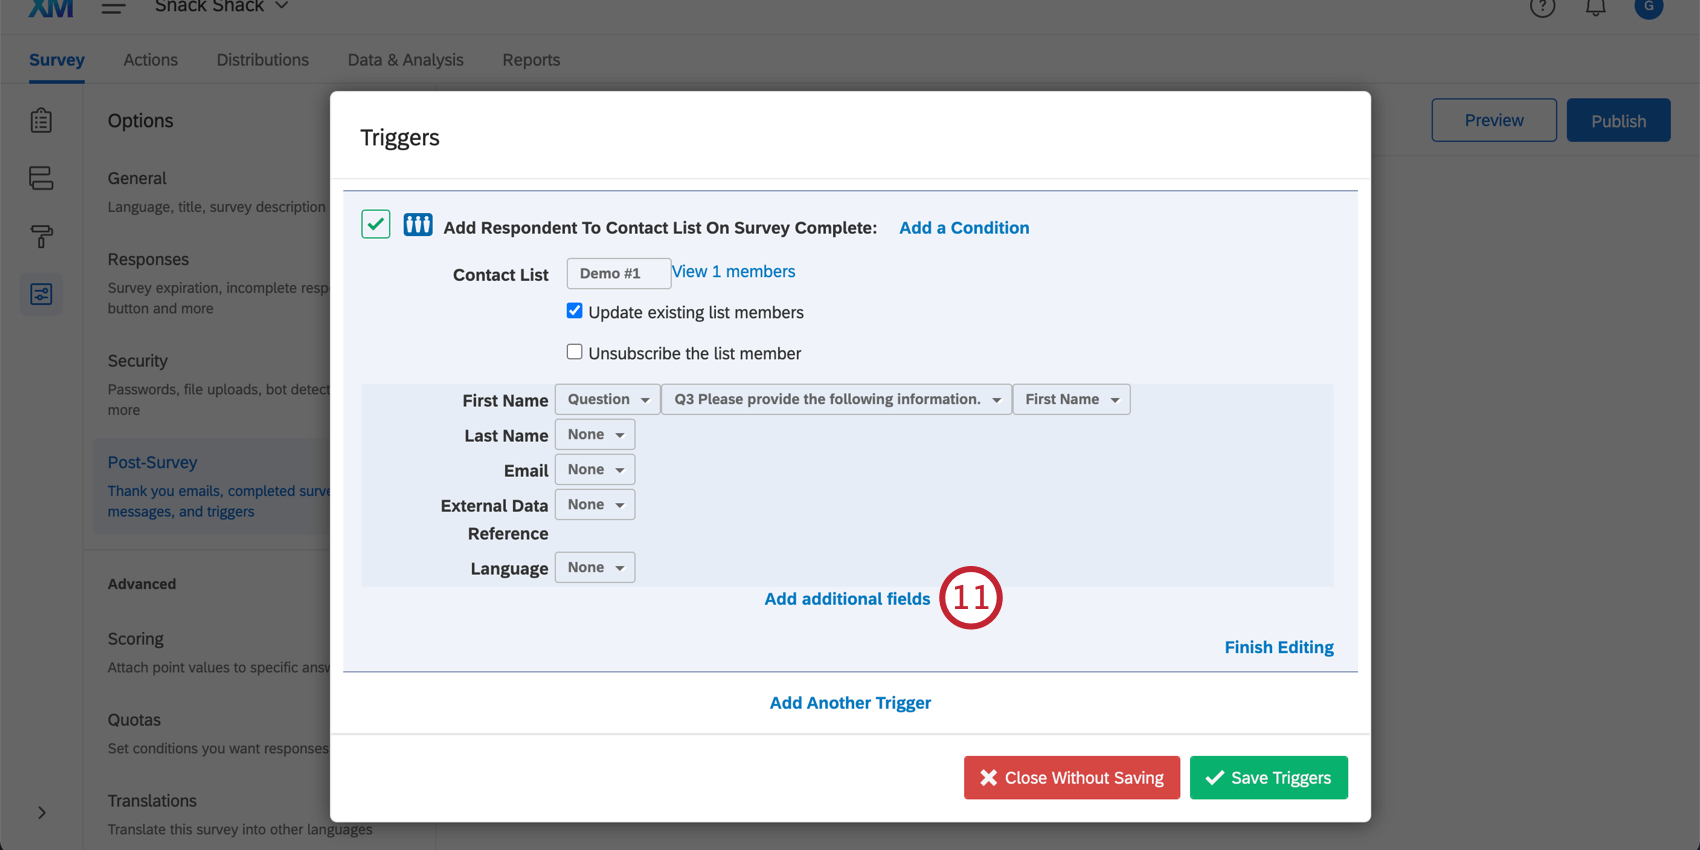
- Click None next to the Contact List fields (such as First Name, Last Name, and Email) to select which item from the survey should be used as the value for that field. The values can be set from survey questions, Embedded Data, or previously recorded recipient information.
Qtip: A new contact will only be added if the Email field is left blank or is in the form of a valid email address. If the email is in an invalid format, the contact won’t be added.
- In the next field, specify the Question, Embedded Data, or Recipient Info.
- In the final field, you may need to specify a particular choice in the question. Here, because we’re selecting First Name, we select the First Name section of the Text Entry form question.
- If needed, click Add additional fields and specify the Embedded Data field you would like created and the question that will populate the value of the field.
- Name your embedded data as it should be saved in the contact list.
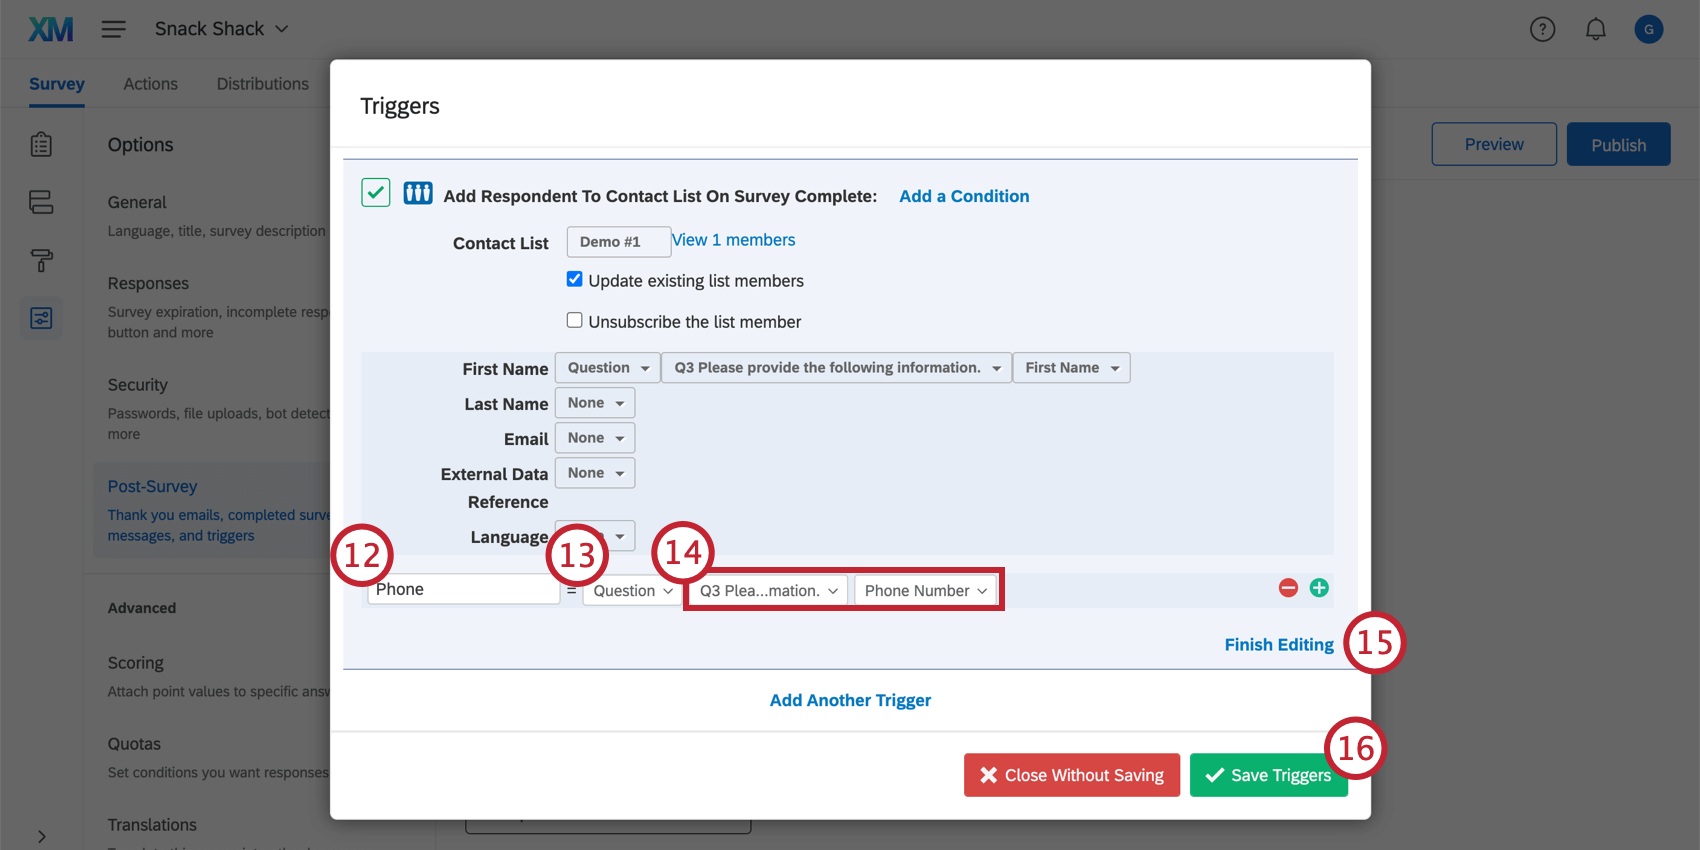
- Specify whether this information is coming from the survey’s Questions, Embedded Data, or Recipient Info.
- Specify which question or item.
- Click Finish Editing to create more triggers.
- To finish, click Save Triggers.
Qtip: Remove a contact list trigger by clicking Finish Editing and then Delete.
You can add as many contact list triggers as you want, changing the conditions, contact list, recipient information as needed.
