Responses Section of Survey Options
About the Responses Section of Survey Options
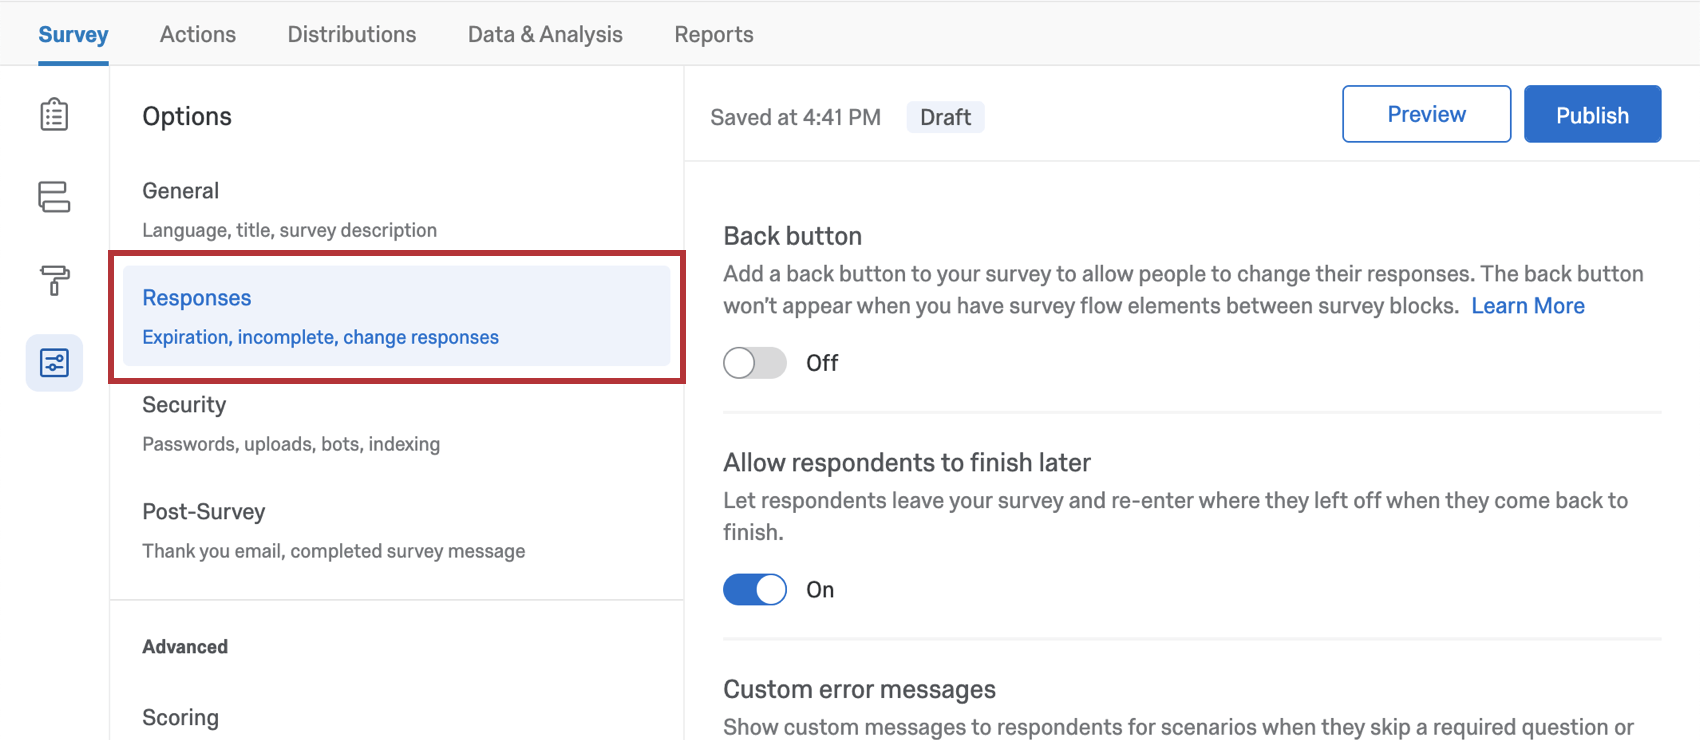
These survey options affect how responses are recorded and how respondents experience the survey-taking process. Here, you’ll find settings related to how respondents can change their answers during a survey session, survey error messages, what to do with incomplete responses, and more.
Back Button
With a back button, respondents can return to pages they have already visited in your survey and update their responses.
Allow Respondents to Finish Later
This setting allows respondents to leave the survey and resume their progress later, so long as they return on the same browser where they started the survey.
This feature is turned on by default and works by placing a cookie on the respondent’s browser that keeps track of the survey progress. If you are distributing your survey using individual links, progress is tracked automatically, so this survey option isn’t needed.
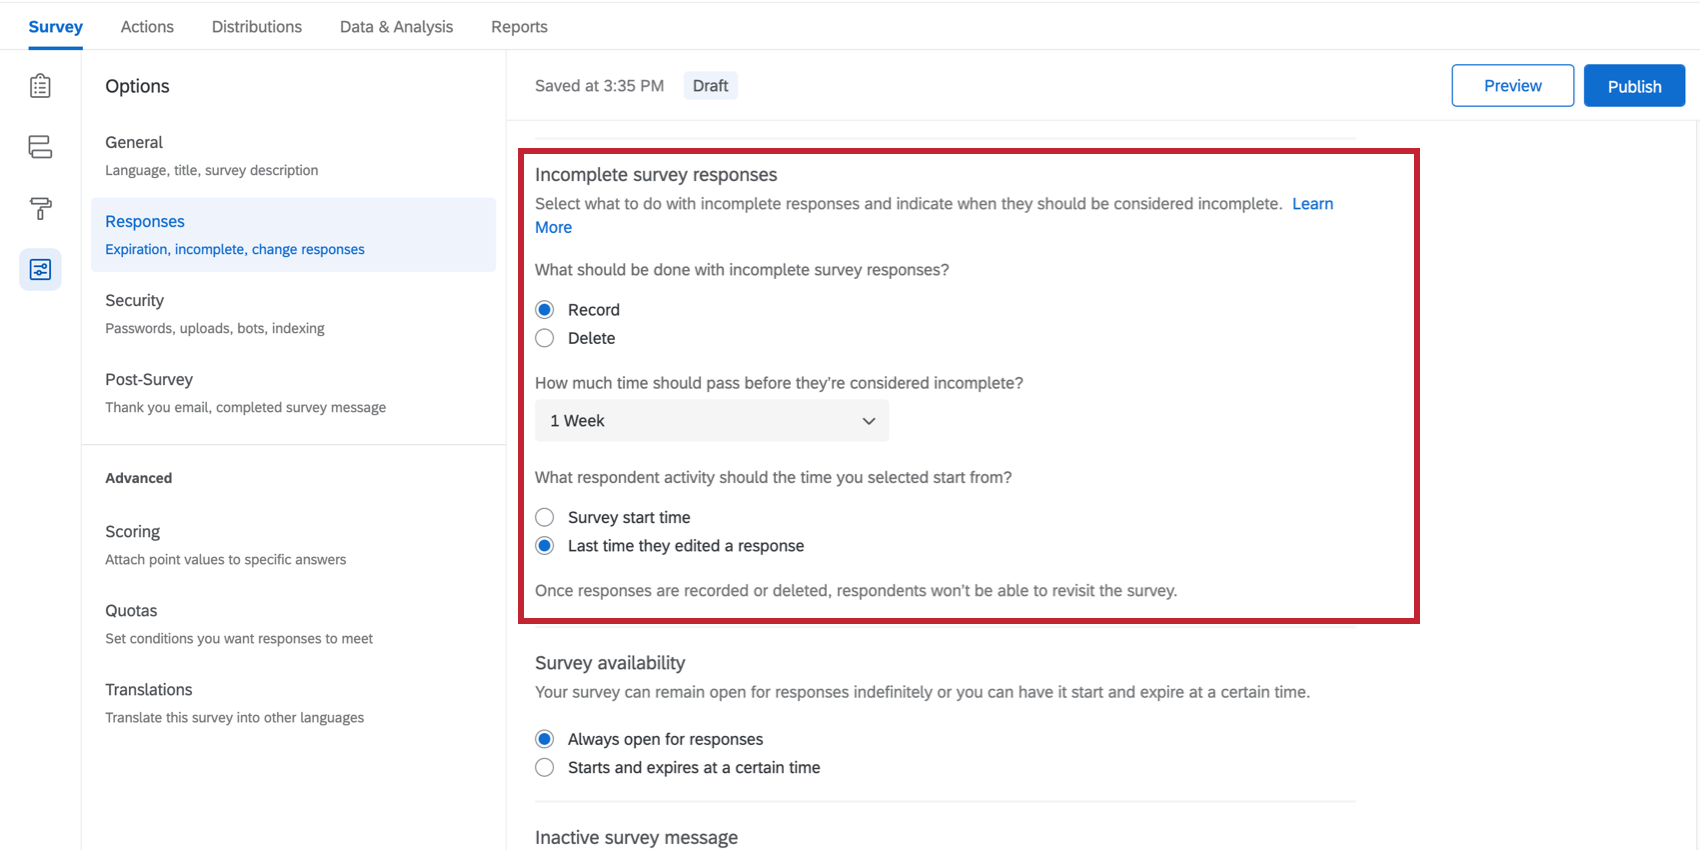
By default, respondents have 1 week to return to the survey and finish their response. After a week, their response will be recorded as-is. This time period can be changed using the Incomplete Survey Responses setting in survey options.
Custom Error Messages
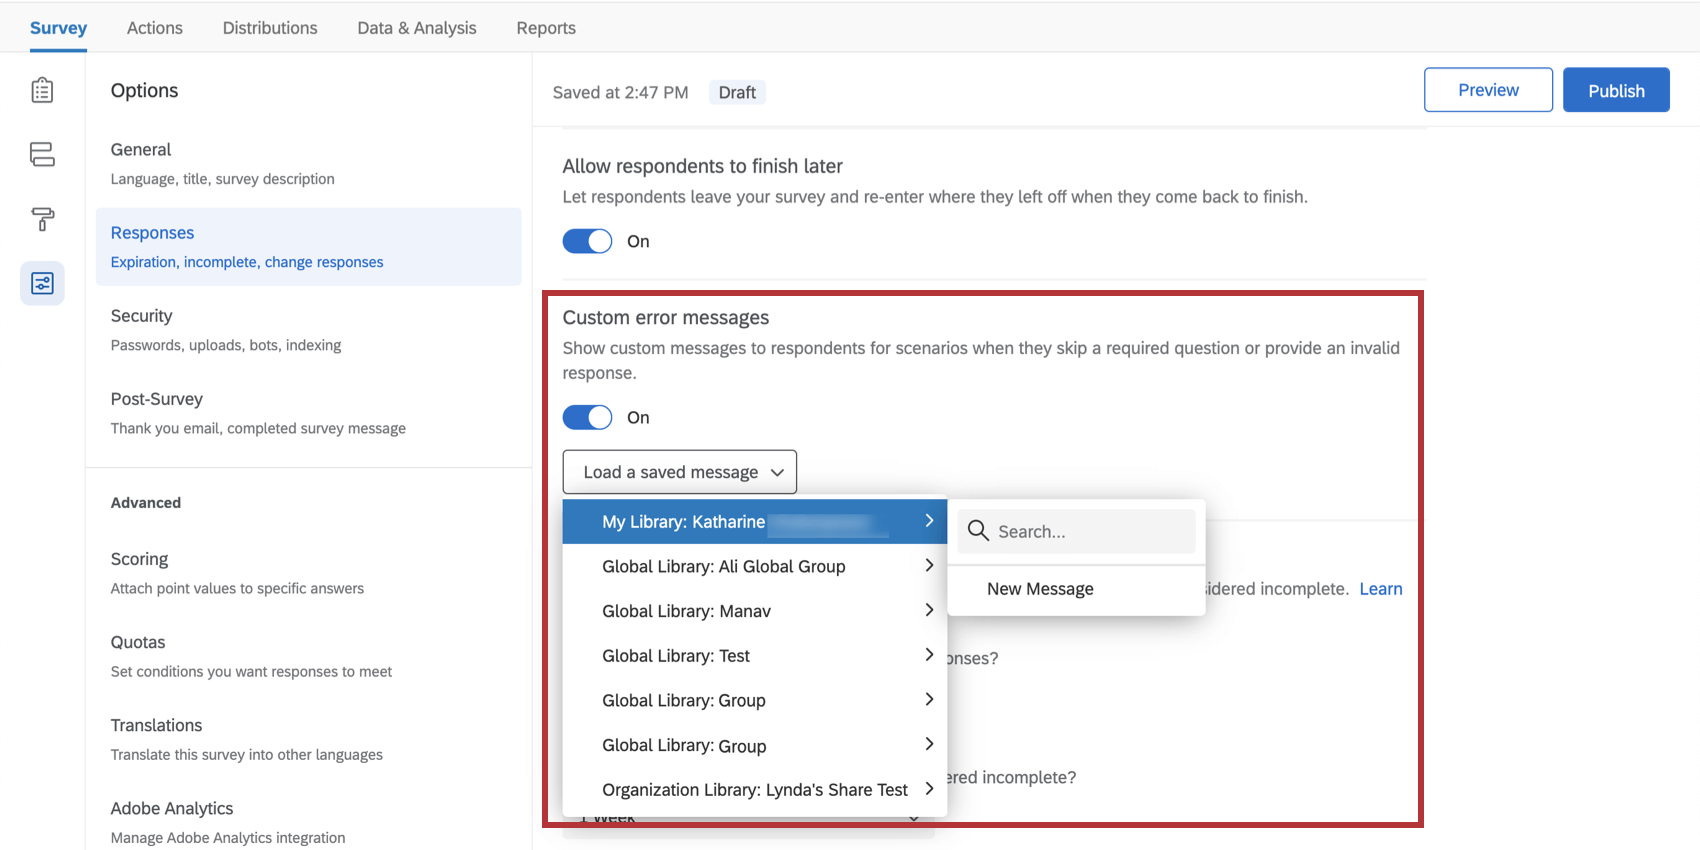
When building your survey, you have the option of forcing respondents to answer certain questions. If a respondent doesn’t answer the question, they’re shown the error message, “Please answer this question.” In survey options, you can also customize a new standard error message to display in this situation.
Creating a new Validation message
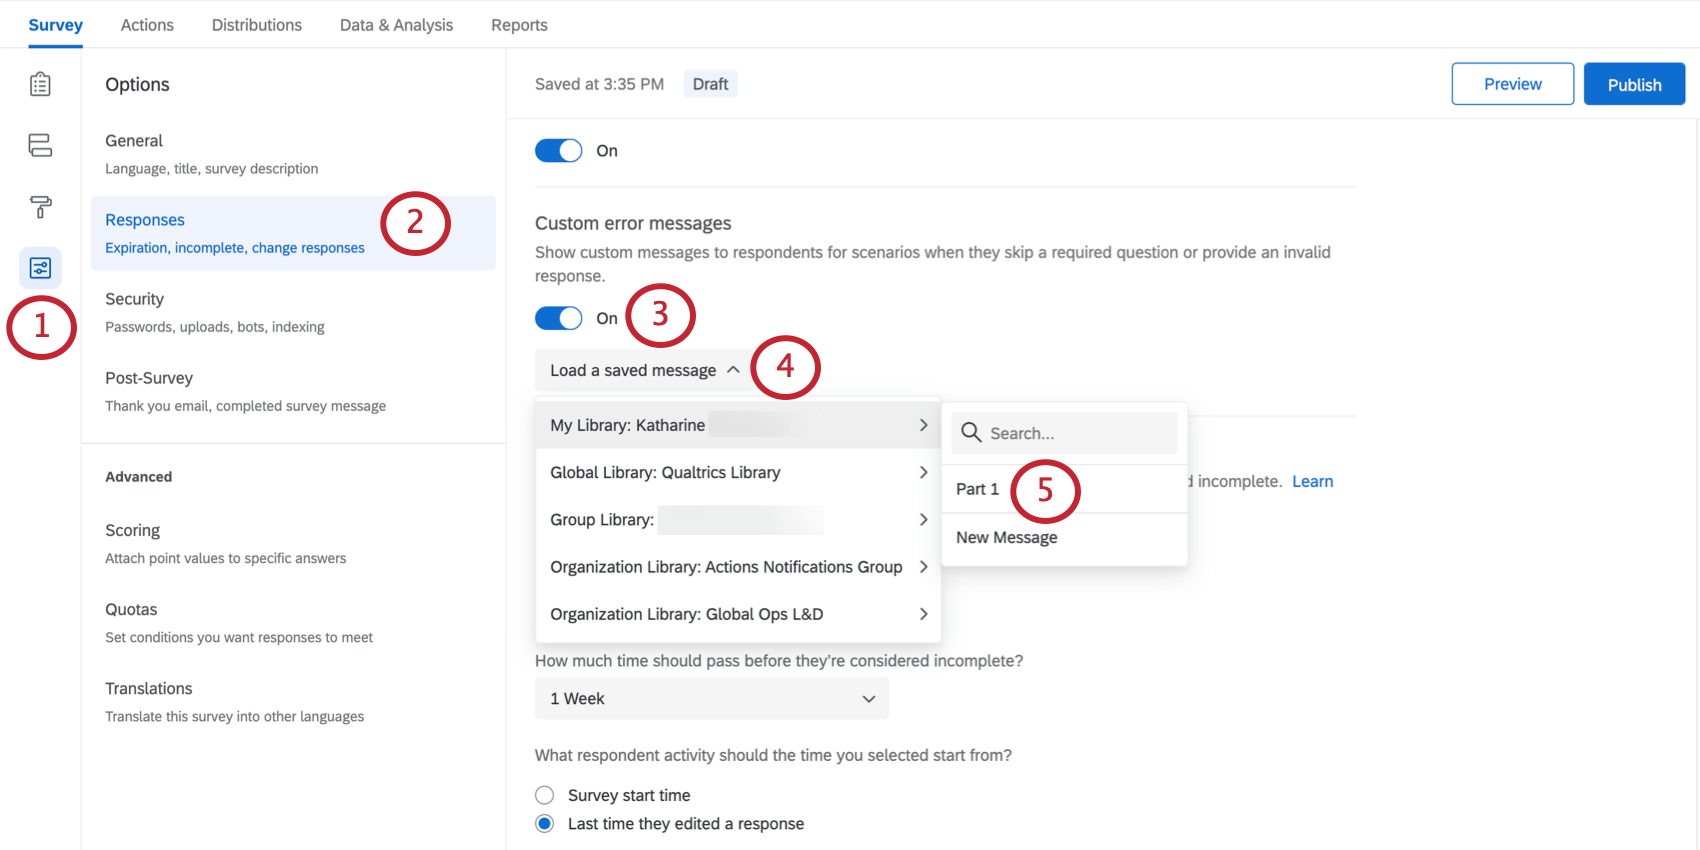
- Open Survey Options in the Survey tab.
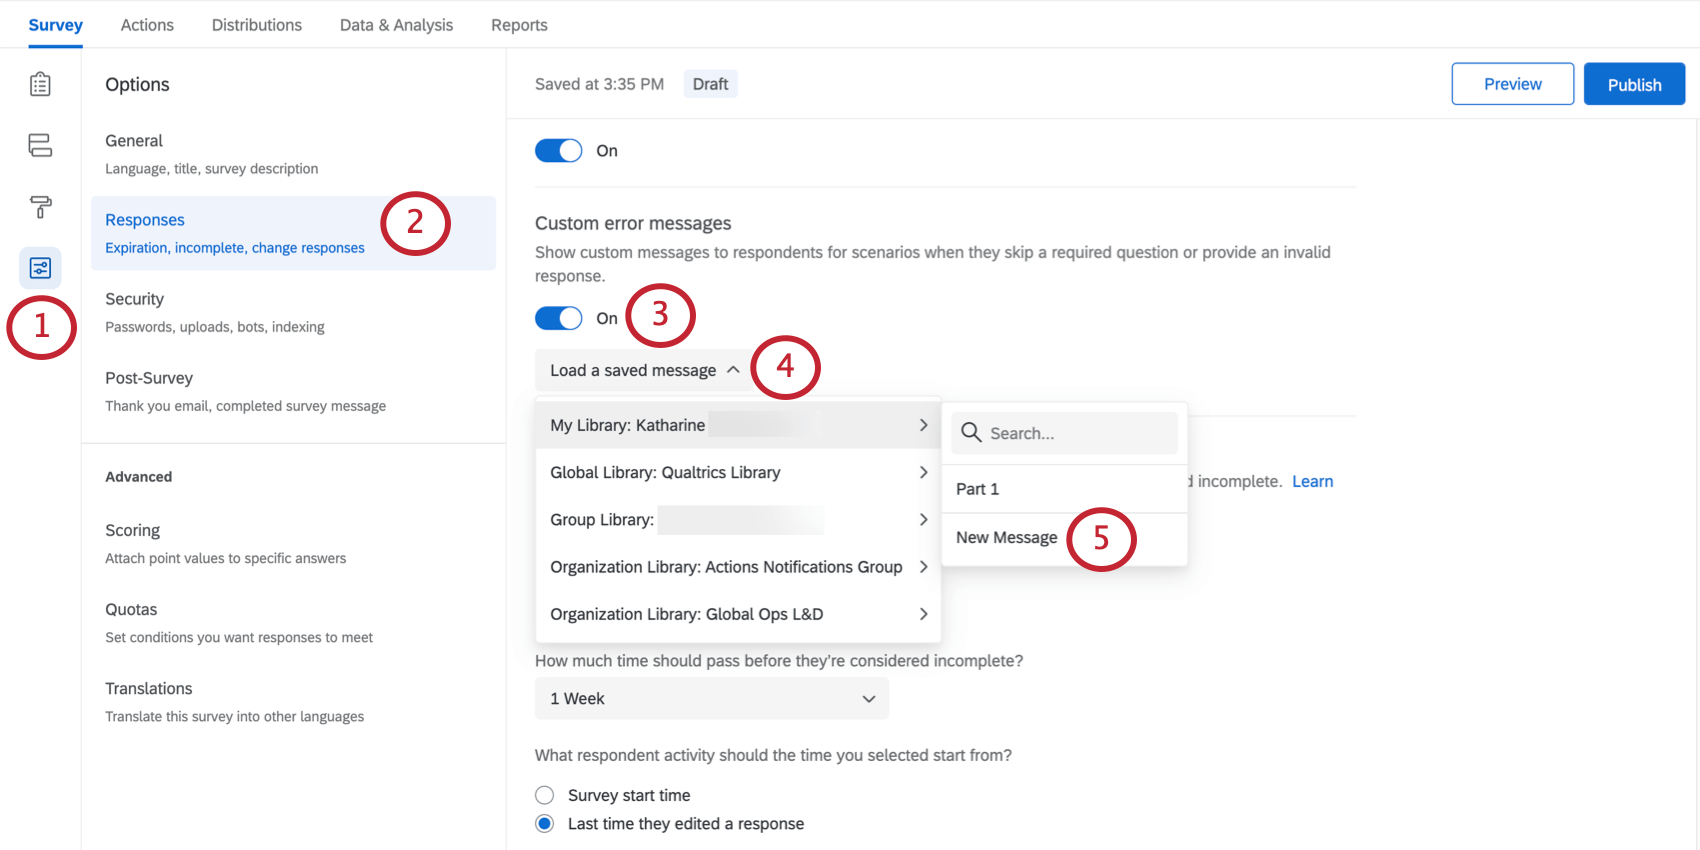
- Go to the Responses section.
- Turn Custom error messages on.
- Click Load a saved message.
- Hover over the library you’d like to save the messages in and click New Message.
- Enter a description that’ll help you find these messages later.
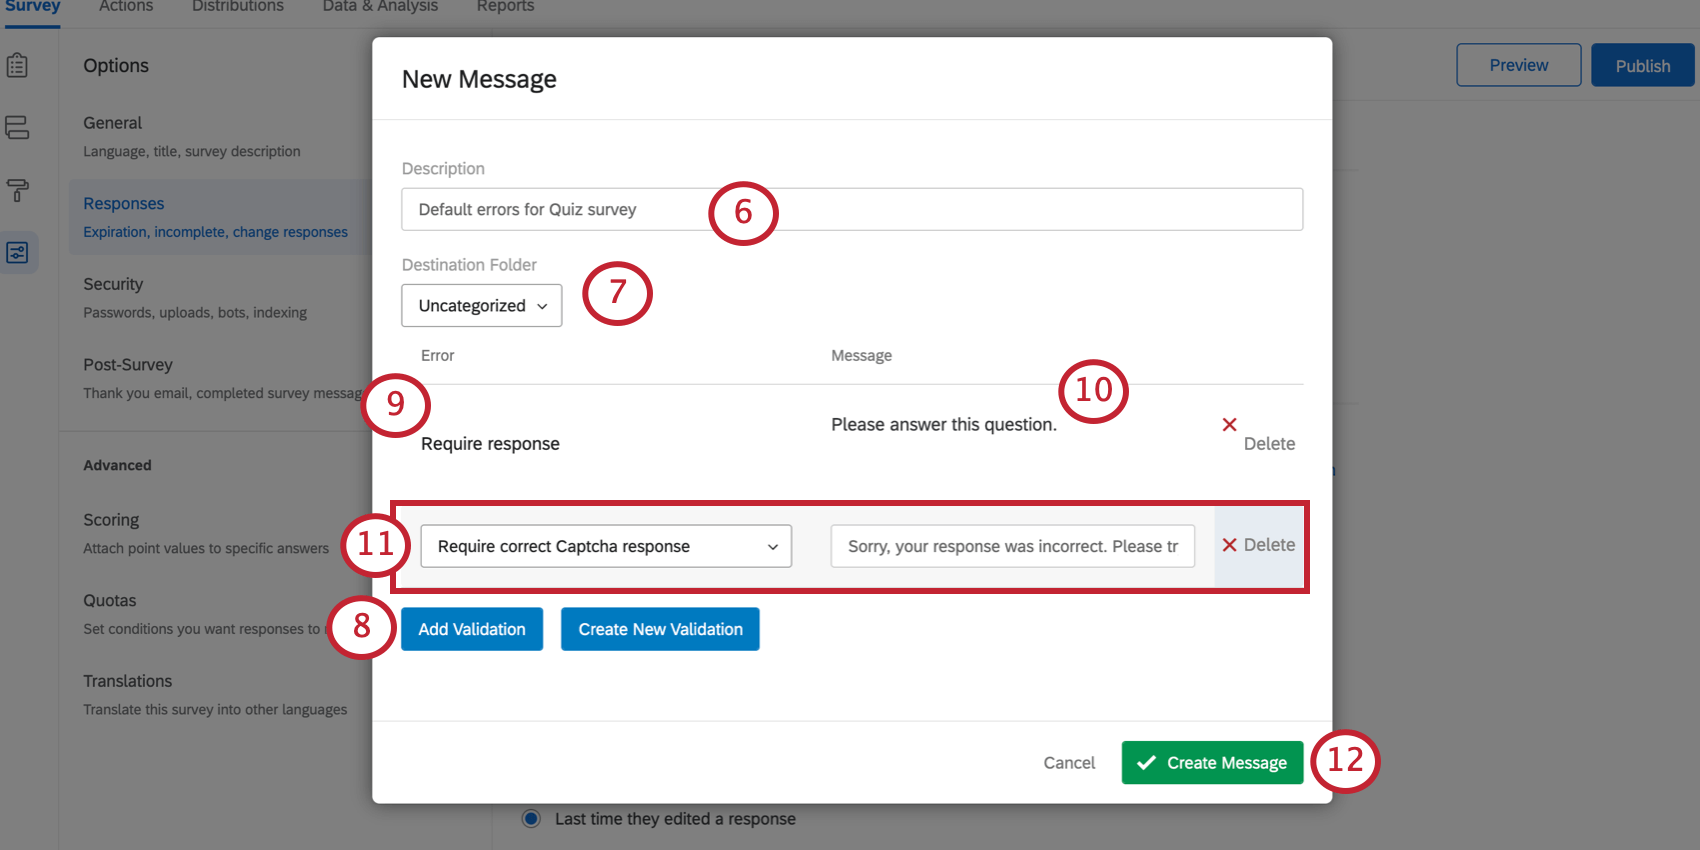
- If desired, choose the Destination Folder.
- Click the Add Validation button.
- Under Error, select which system error category you’d like to customize. Require Response is how you change your default Force Response messages.
Qtip: To add a system error category to the defaults list, select Create New Validation. This would be appropriate if you want to create a new error type to be used in custom validation.
- Under Message, type the text you’d like to display to the respondent.
- Repeat steps 8 and 9 for as many messages as you’d like. In the pictured example, the default captcha error message is also being changed.
- Click Create Message.
Qtip: Custom error messages can also be created and edited in the message library.
Selecting an existing Custom Validation message
- Open Survey options in the Survey tab.
- Go to the Responses section.
- Turn Custom error messages on.
- Click Load a saved message.
- Select the library and the message collection within that library that you would like to use.
Incomplete Survey Responses
Sometimes, respondents will get partway through a survey before they quit. The Incomplete survey responses settings allow you to determine whether to record or delete incomplete responses, and after how long. See the Incomplete Survey Responses support page for more details.
Automatic Survey Closure
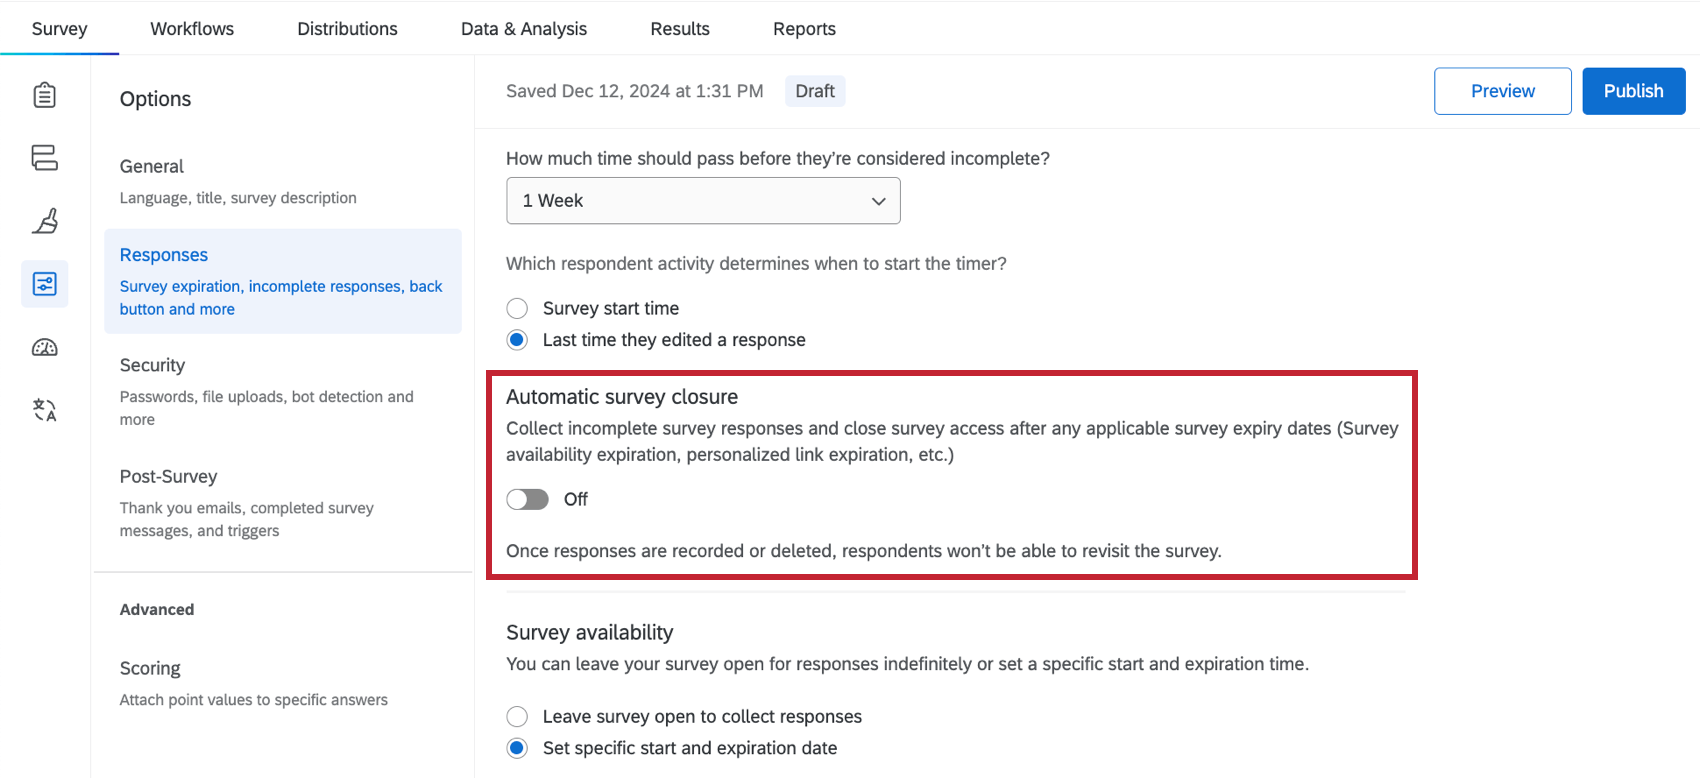
The Automatic survey closure setting allows you to automatically close access to the survey after any survey expiration dates are reached. Once responses are recorded or deleted, respondents won’t be able to revisit the survey. In-progress survey sessions will be closed based on the first occurring expiration setting, which can include:
Survey Availability
With the survey availability setting, you can make your survey available as long as its status is active, or set an expiration date when the survey will be closed to new respondents.
Respondents trying to access your survey before or after the specified range will see a simple message explaining that the survey is currently unavailable. The expiration date specifically affects participants’ ability to start the survey. Participants in the middle of a response will be allowed to continue taking their survey and can finish after the expiration date.
- Determine your survey availability.
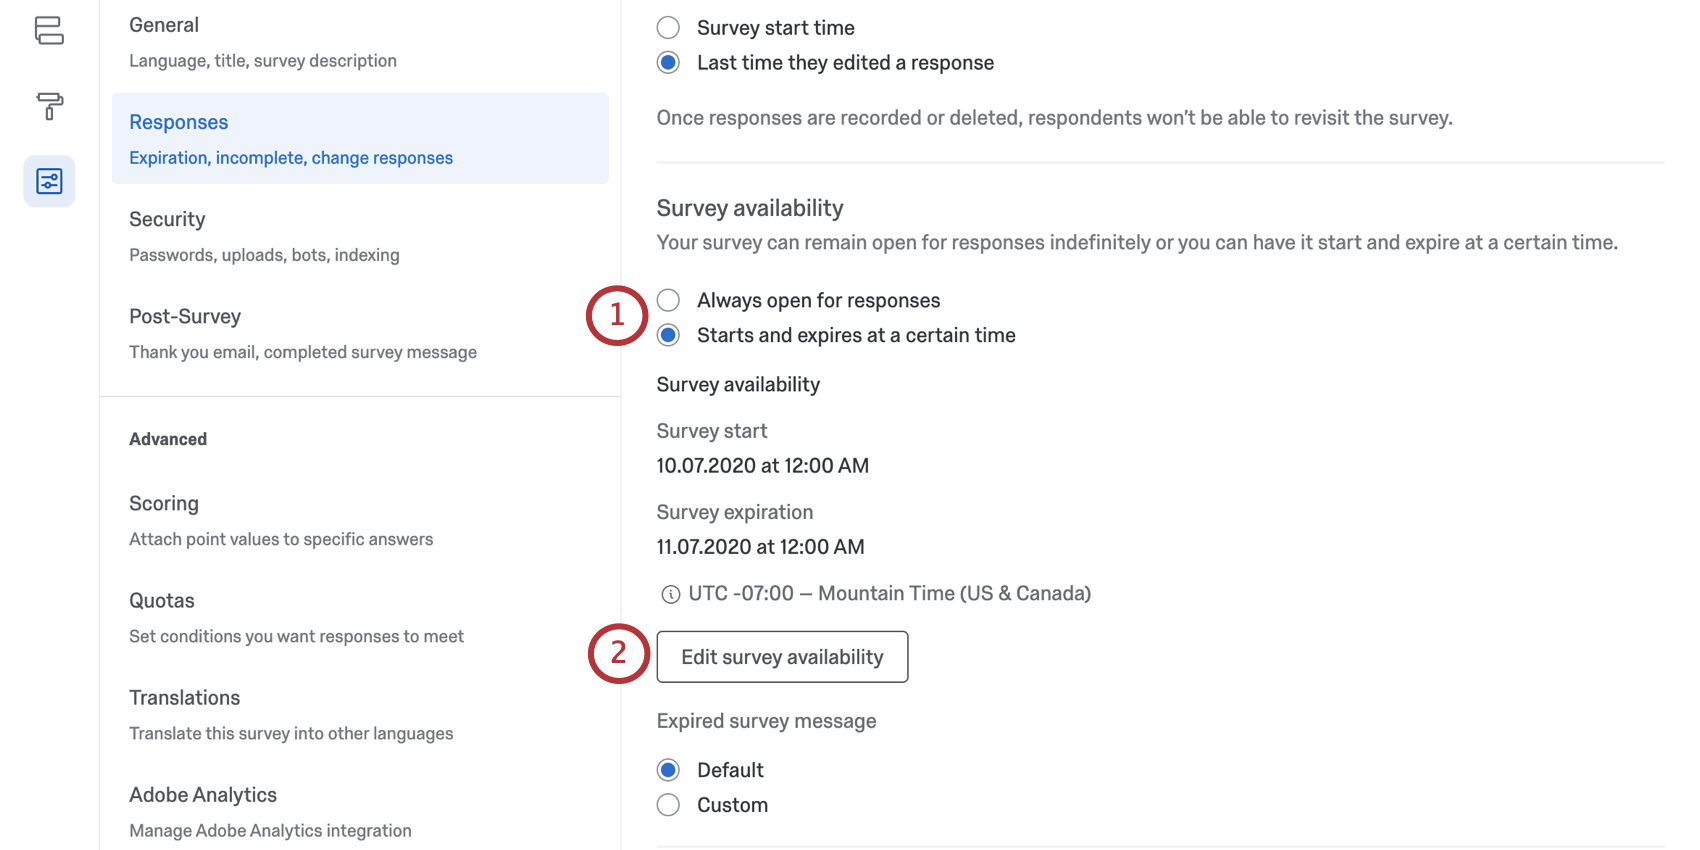
- Always open for responses: This is selected by default. The survey will be able to collect responses so long as the status is active.
- Starts and expires at a certain time: Set a specific start and end date for your survey.
- If you chose to set an expiration, review the date and time set. To make changes, click Edit survey availability.
- Set the start date, start time, end date, and end time of your survey’s availability.
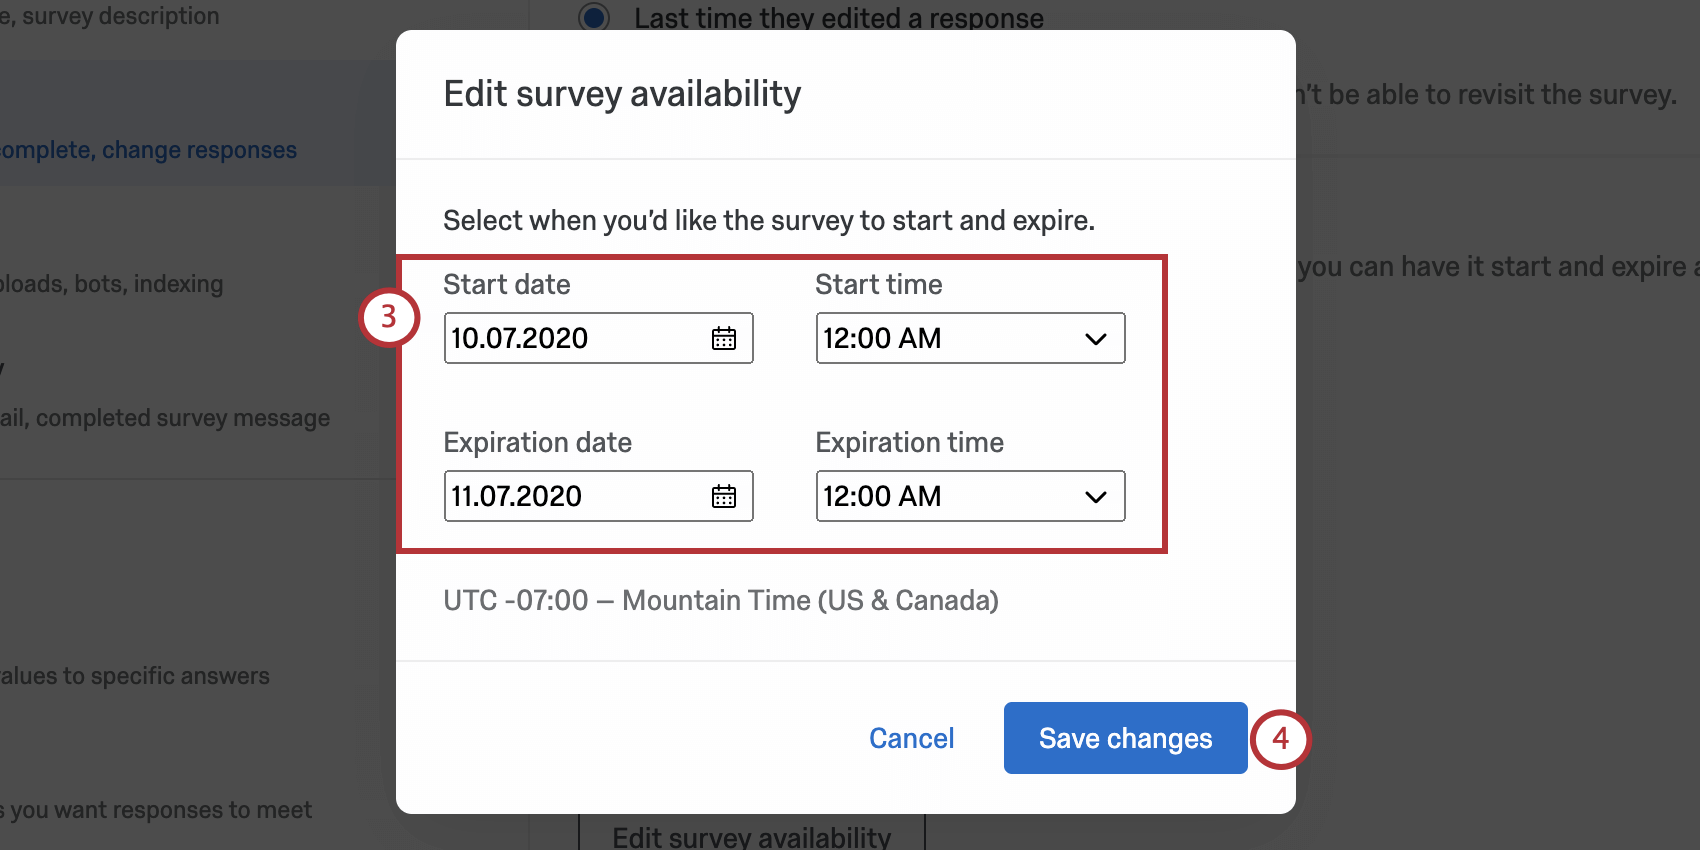
- When you’re finished, click Save changes.
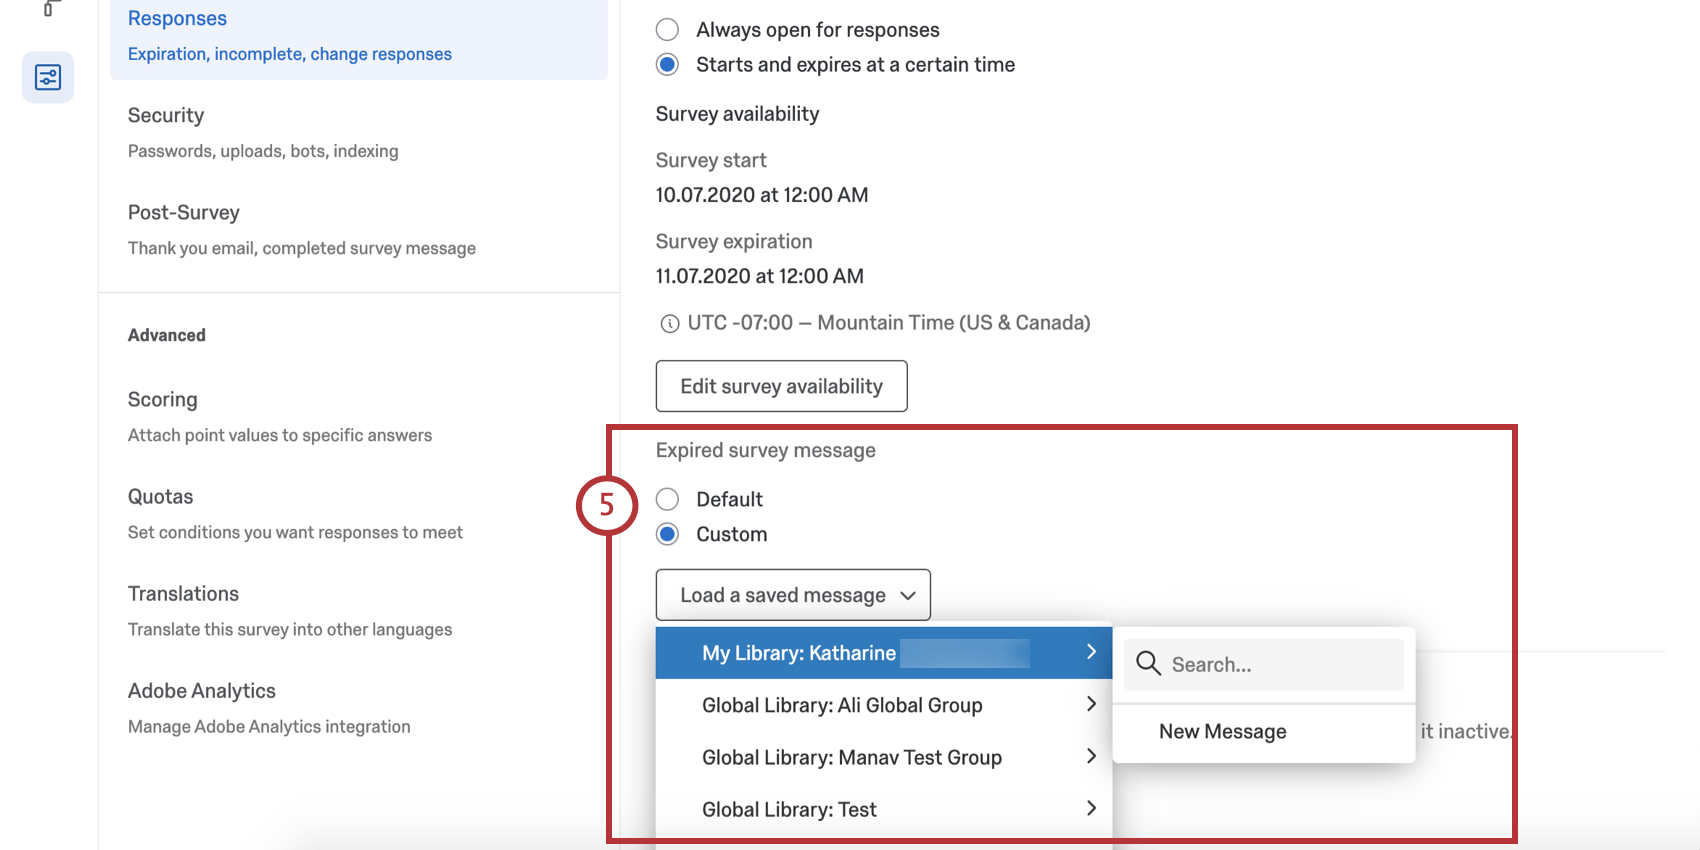
- Under “Expired survey message,” determine whether you want to use the Default expiration message or a Custom message. Custom survey expiration messages can be created in your Qualtrics library.
Inactive Survey Message
When someone attempts to take a survey that has been deactivated (e.g., when your survey is no longer collecting responses), the following default message is displayed: “Sorry, this survey is not currently active.” You can change this message to a custom message by doing the following:
- Select Custom.
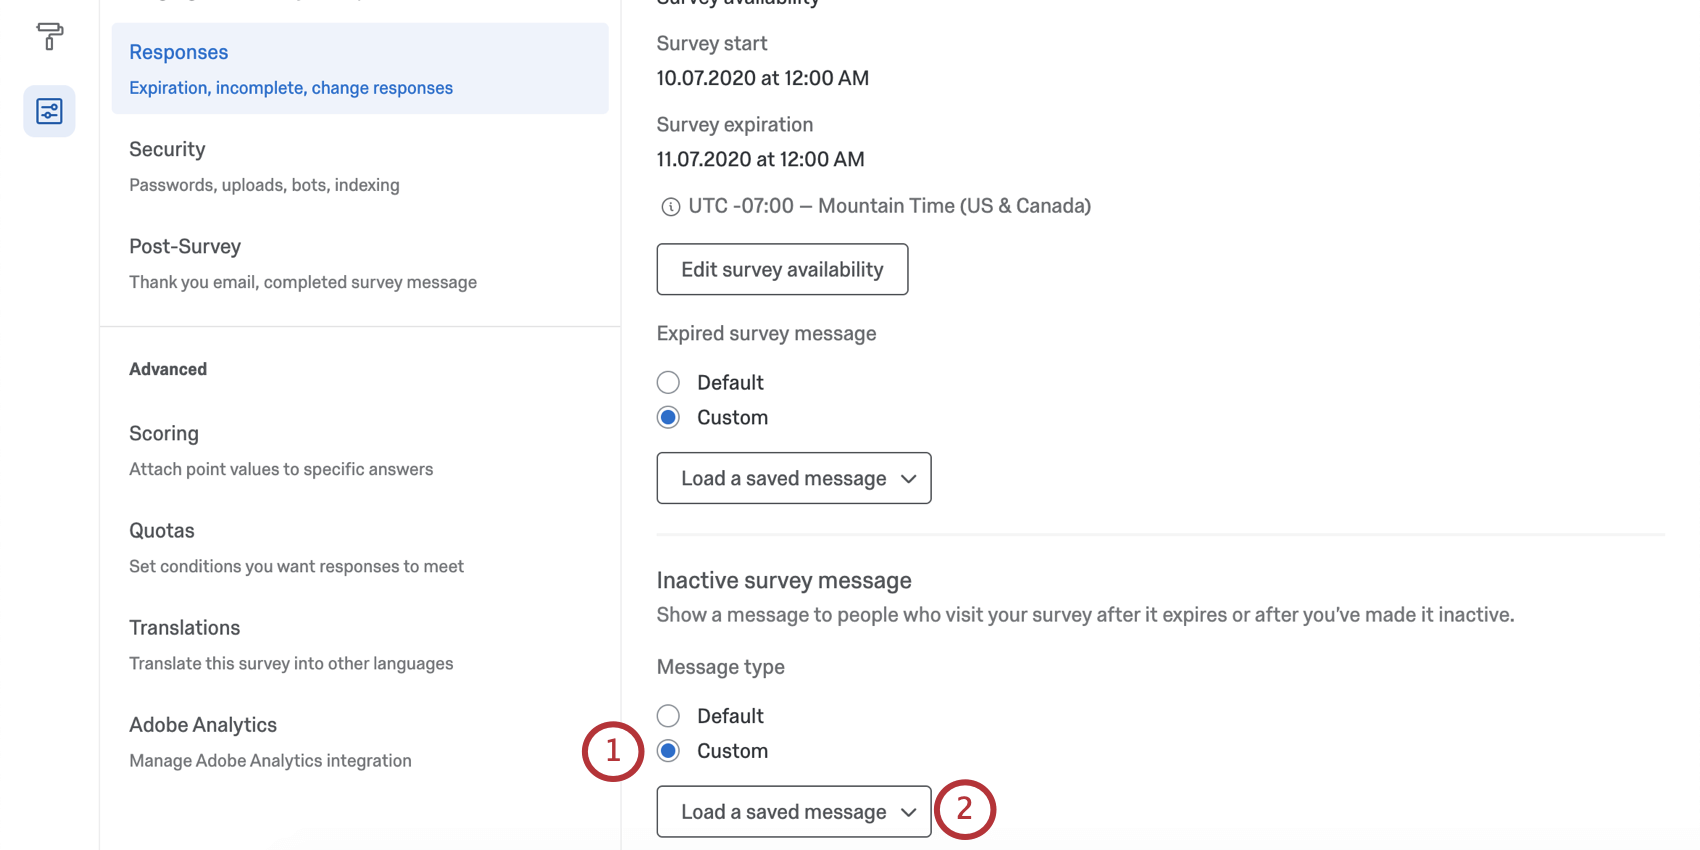
- Click Load a saved message.
- Select the library to save the messages in.
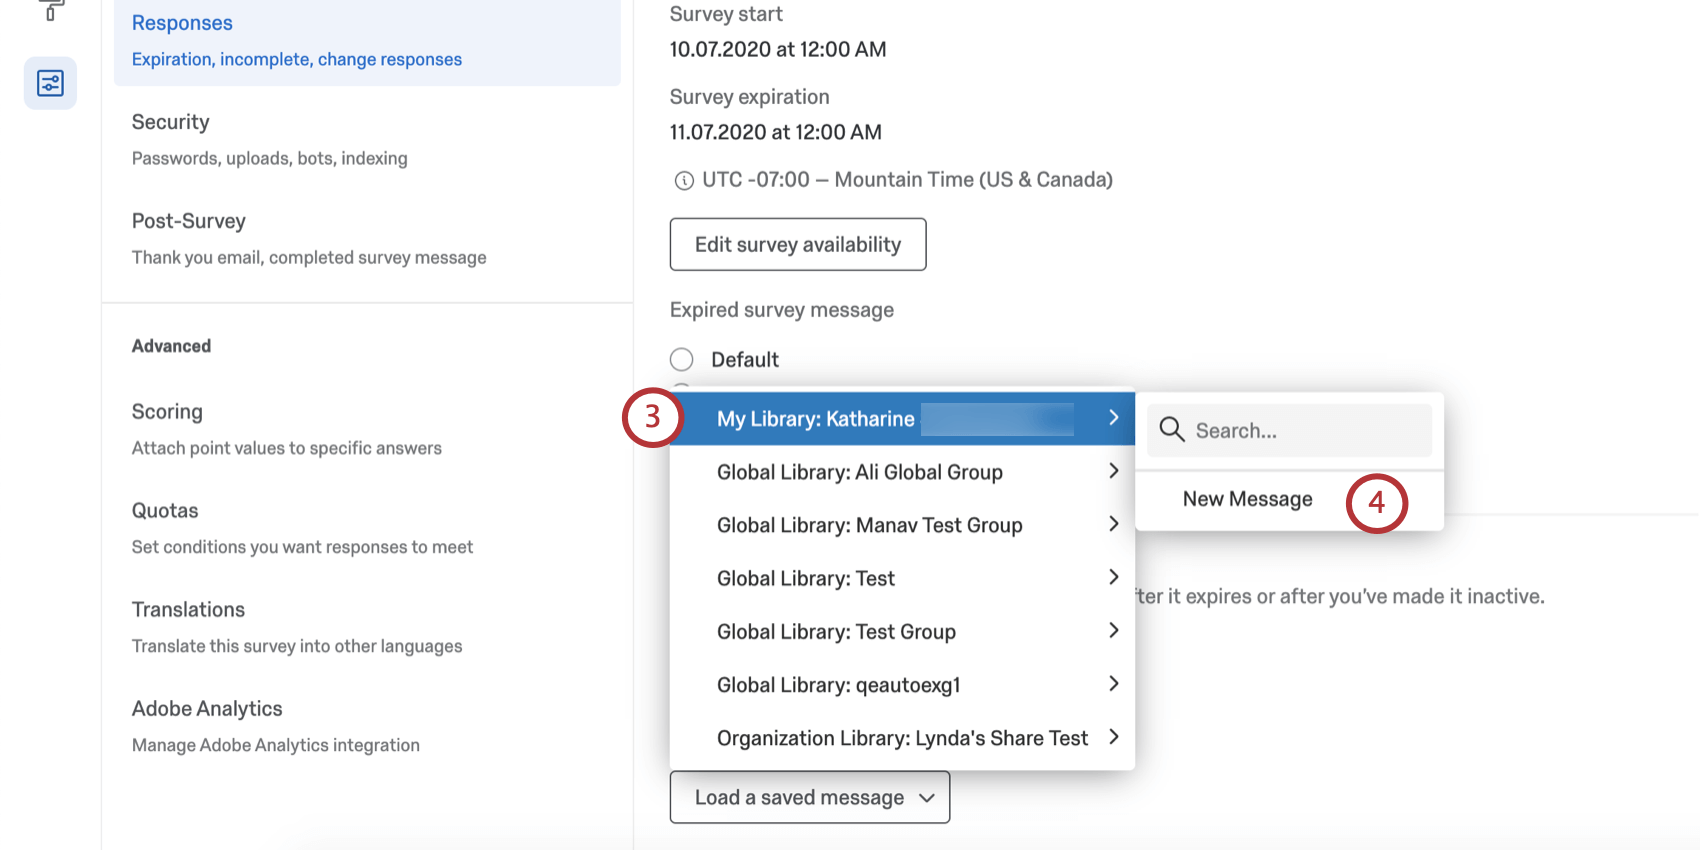
- Click New Message.
Qtip: Alternatively, select an existing message for use.
- Enter a Description for your message.
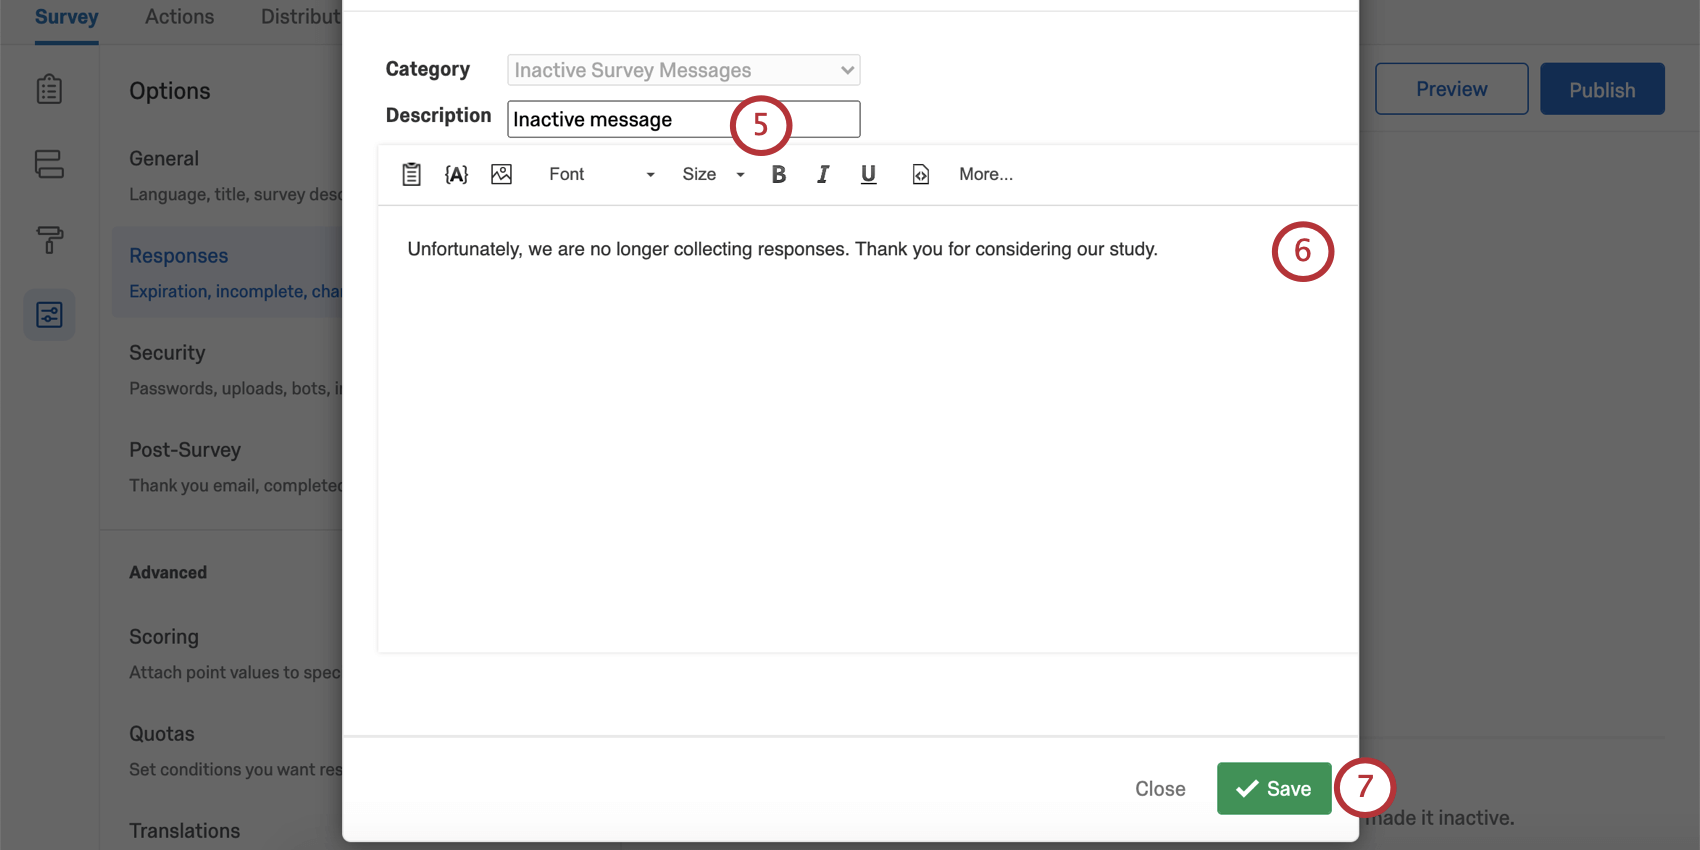
- Type your message as you would like it to appear to your respondents.
- Click Save.
Survey Options in Different Project Types
Survey options are available in many different types of projects. The options described on this page are available in:
There are a few other projects that have access to survey options, but with unique functionality to keep in mind.
- For Engagement, Lifecycle, or Ad Hoc Employee Research projects, please see Survey Options (EX).
- For Pulse, see the section on survey options in Features Available in Pulse Surveys.
- For 360 projects, see Survey Options (360).
- For Conjoint and MaxDiff, see Survey Options.
