User Types
About User Types
Setting user permissions one account at a time can be tedious. As a brand administrator, you can quickly update and maintain permissions for many users at once by using user types. User types are sets of permissions that can be assigned to user accounts. Whenever you want to make a widespread permission change, just edit the user type and all associated user accounts will update automatically.
Creating a New User Type
- Navigate to the Admin page.
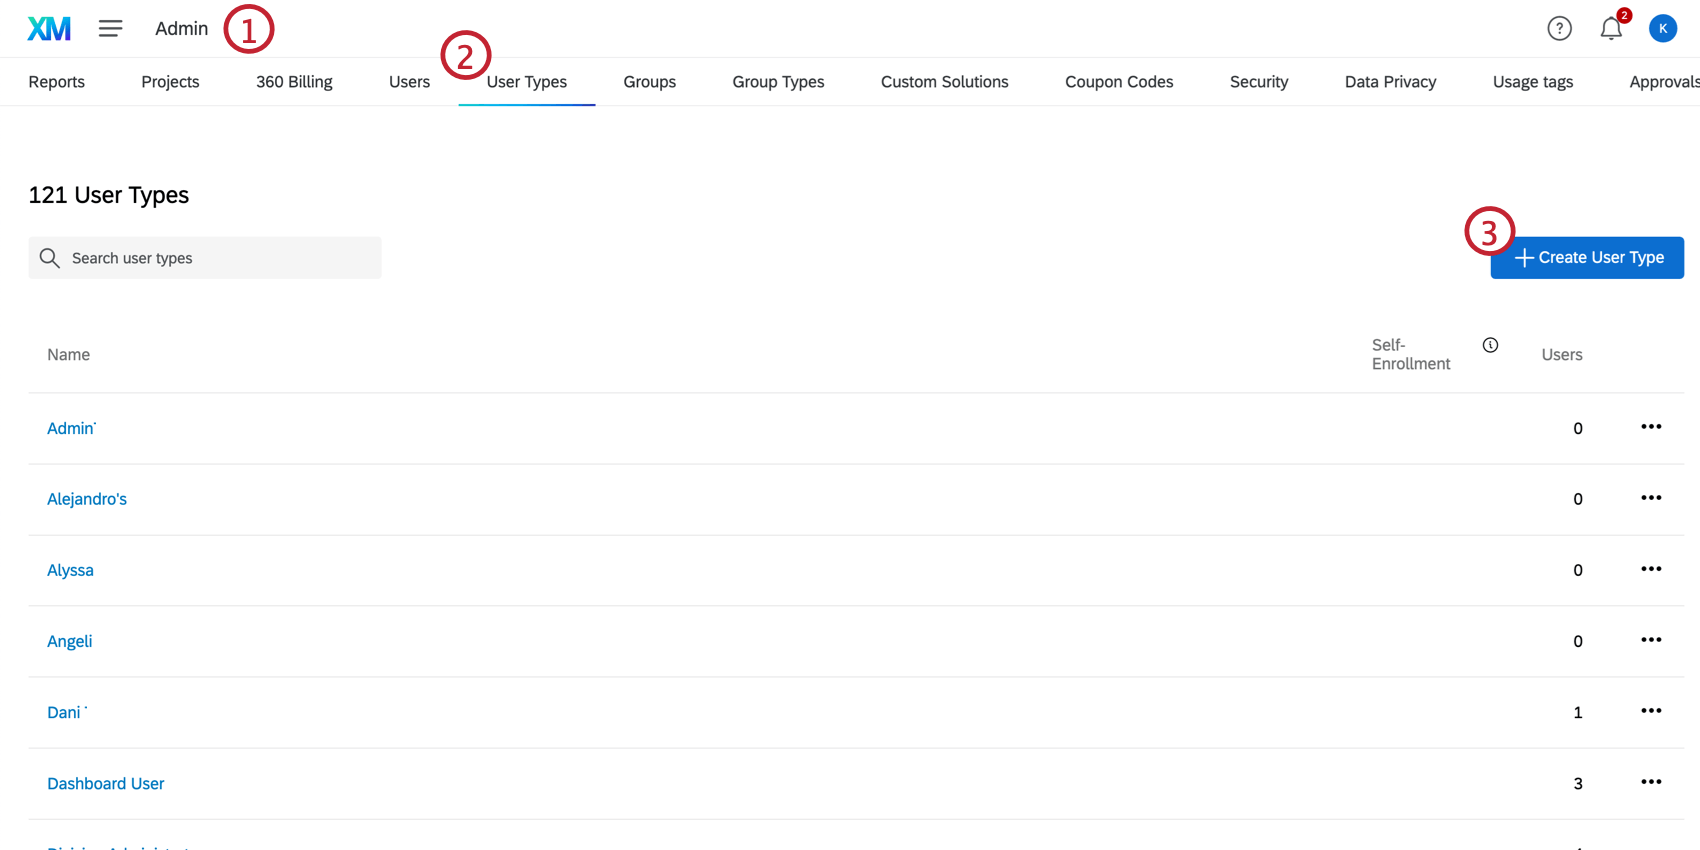
- Select User Types.
- Click Create User Type.
- Name your user type.
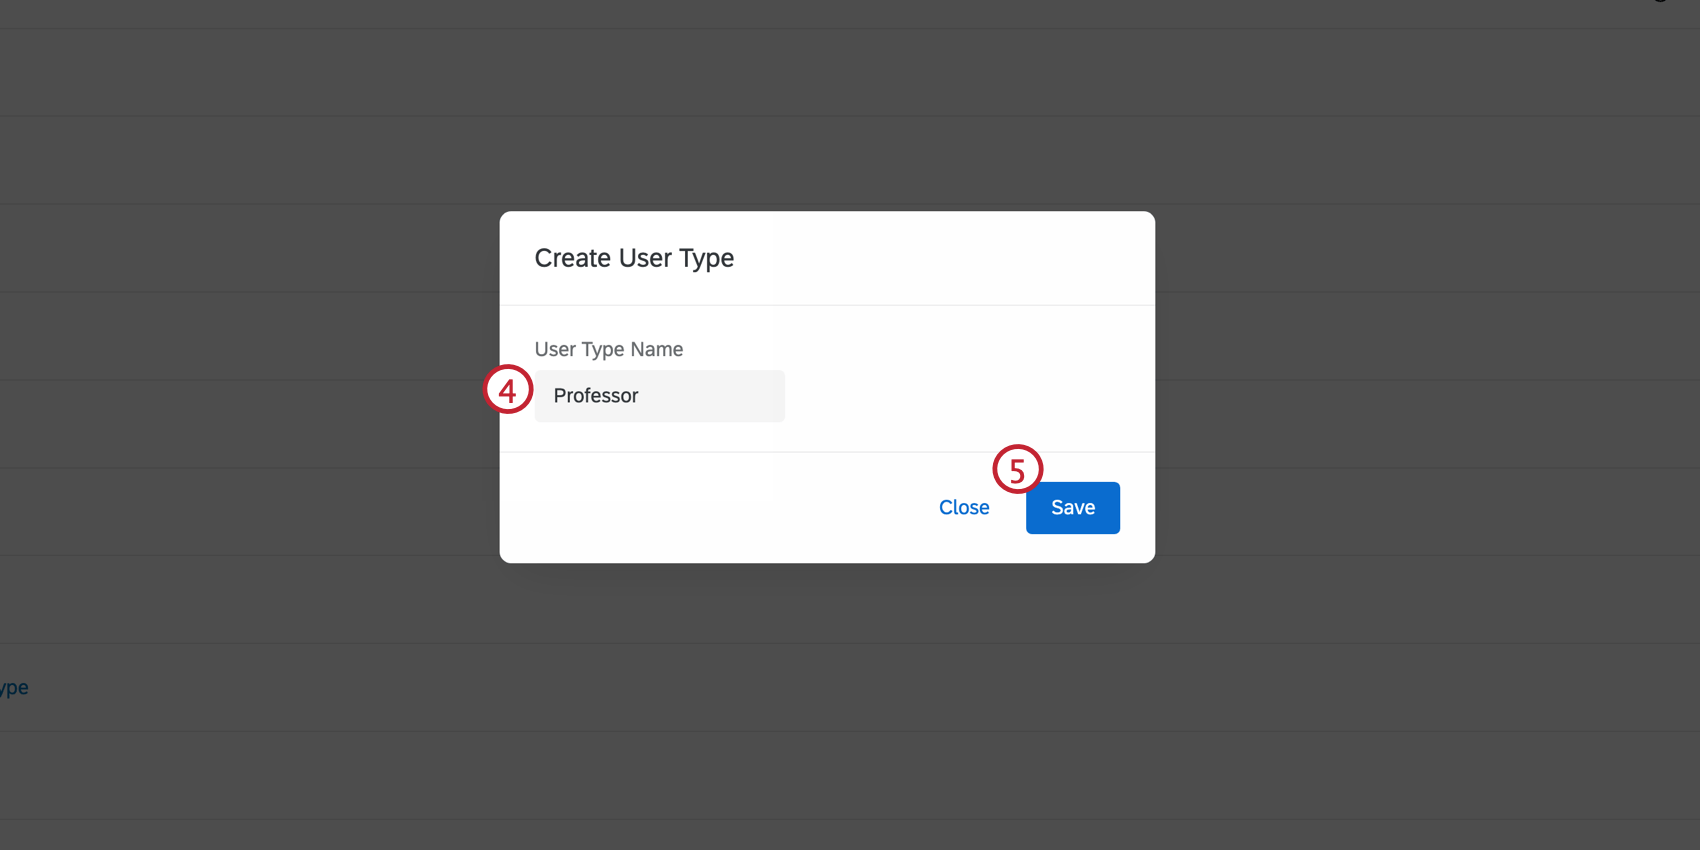
- Click Save. The user type is now created.
- Enable/disable permissions by selecting the switch on the right-hand side. For a detailed list of permissions, visit our User Permissions page.
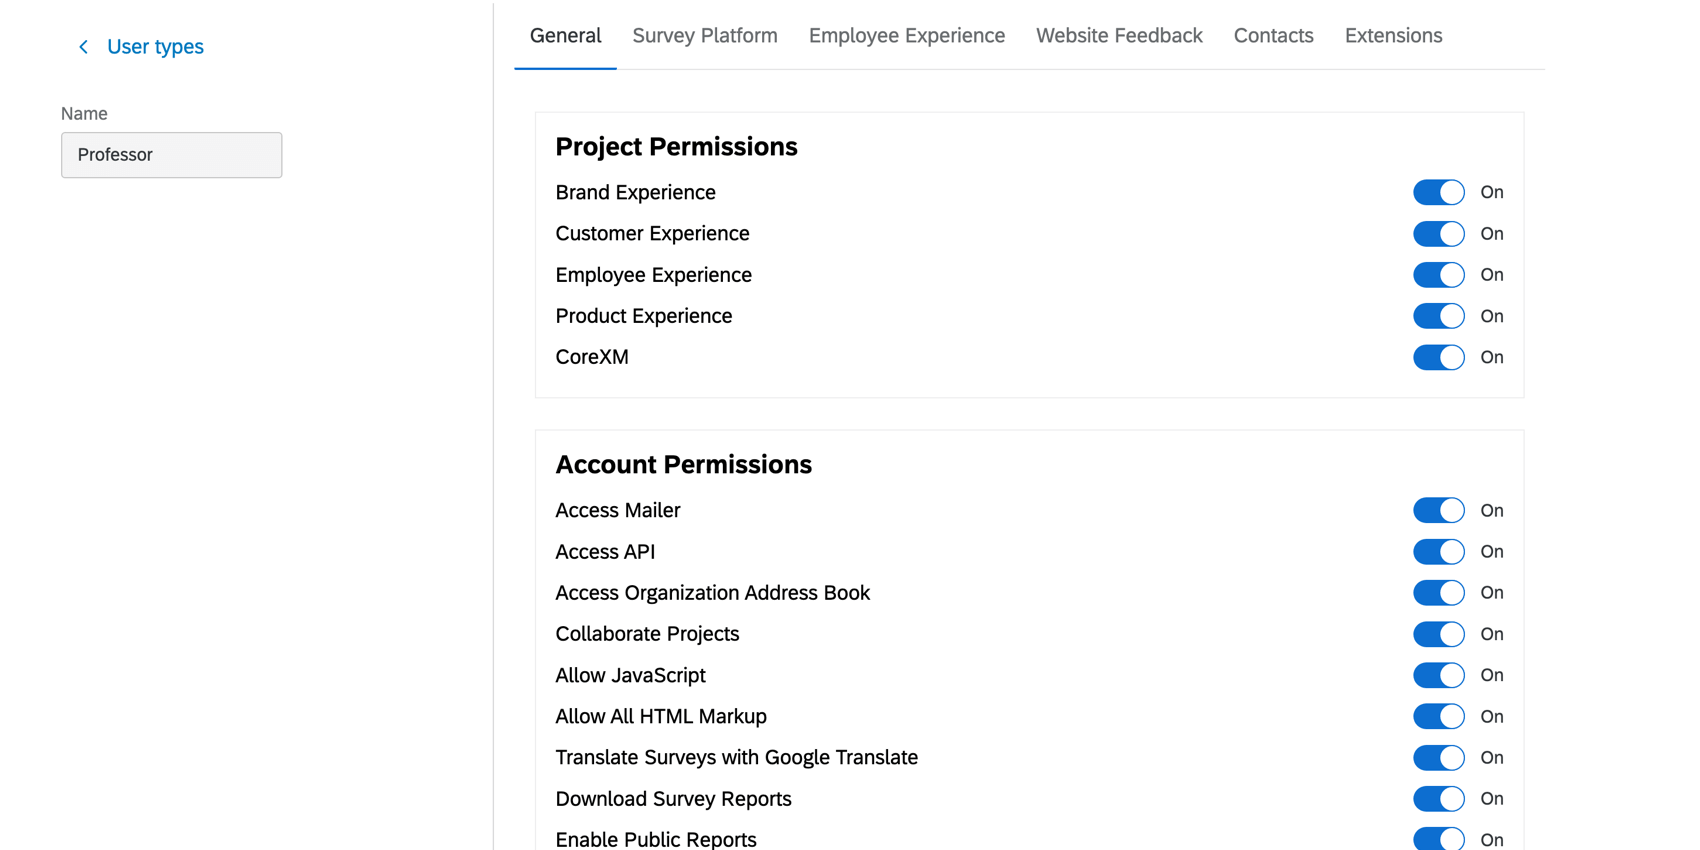
- If any edits were made to the permissions, scroll to the bottom and click Apply to save the new permissions. If not, click User types in the upper-left corner to navigate back to the user types page.
Deleting a User Type
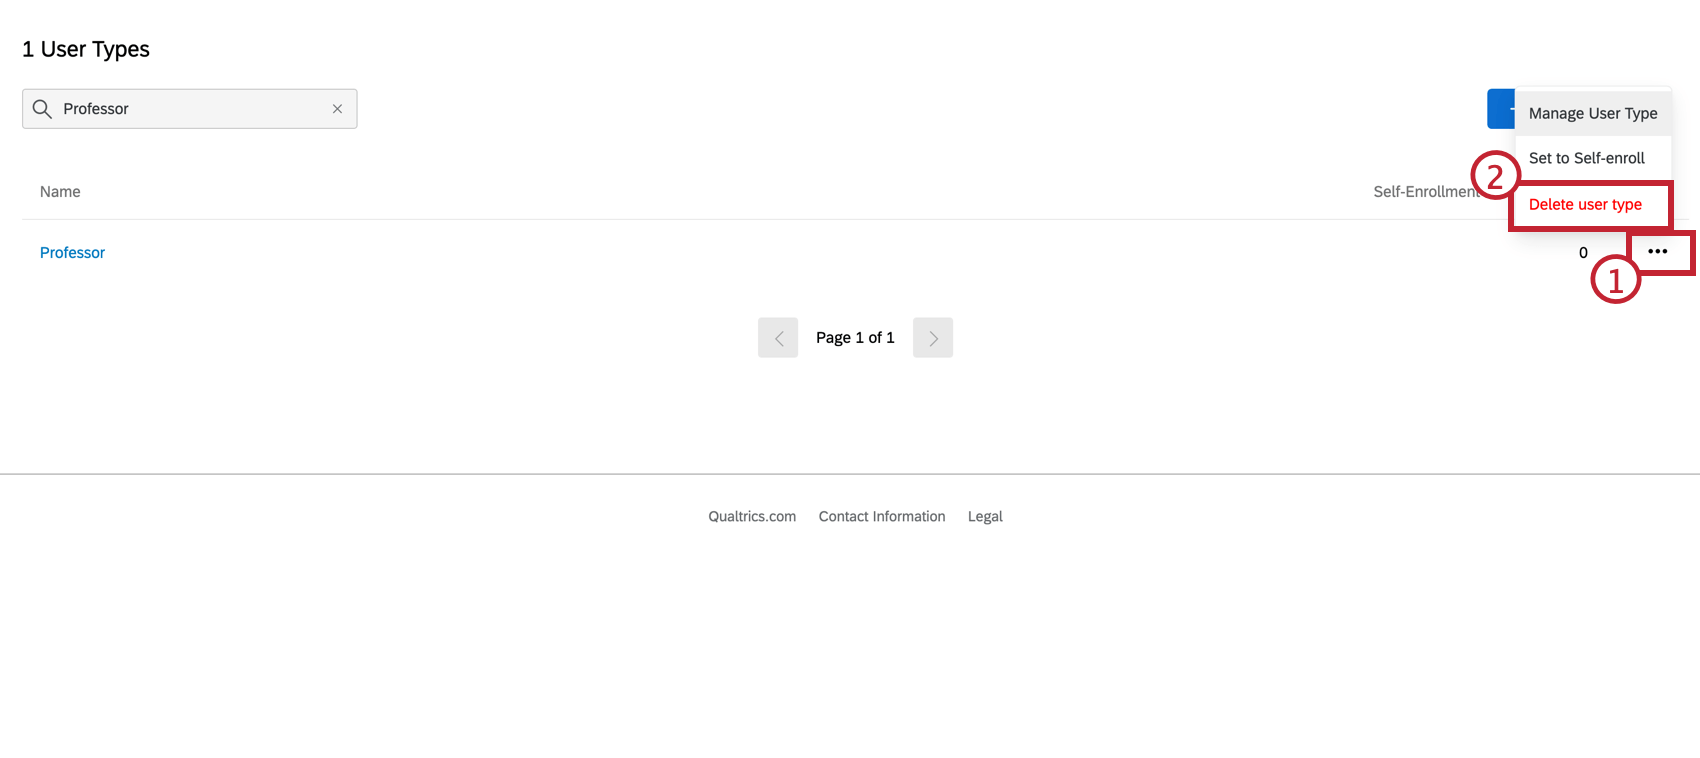
To delete a user type, click the 3 dots on the right side of the user type and click Delete user type.
Setting a Default User Type
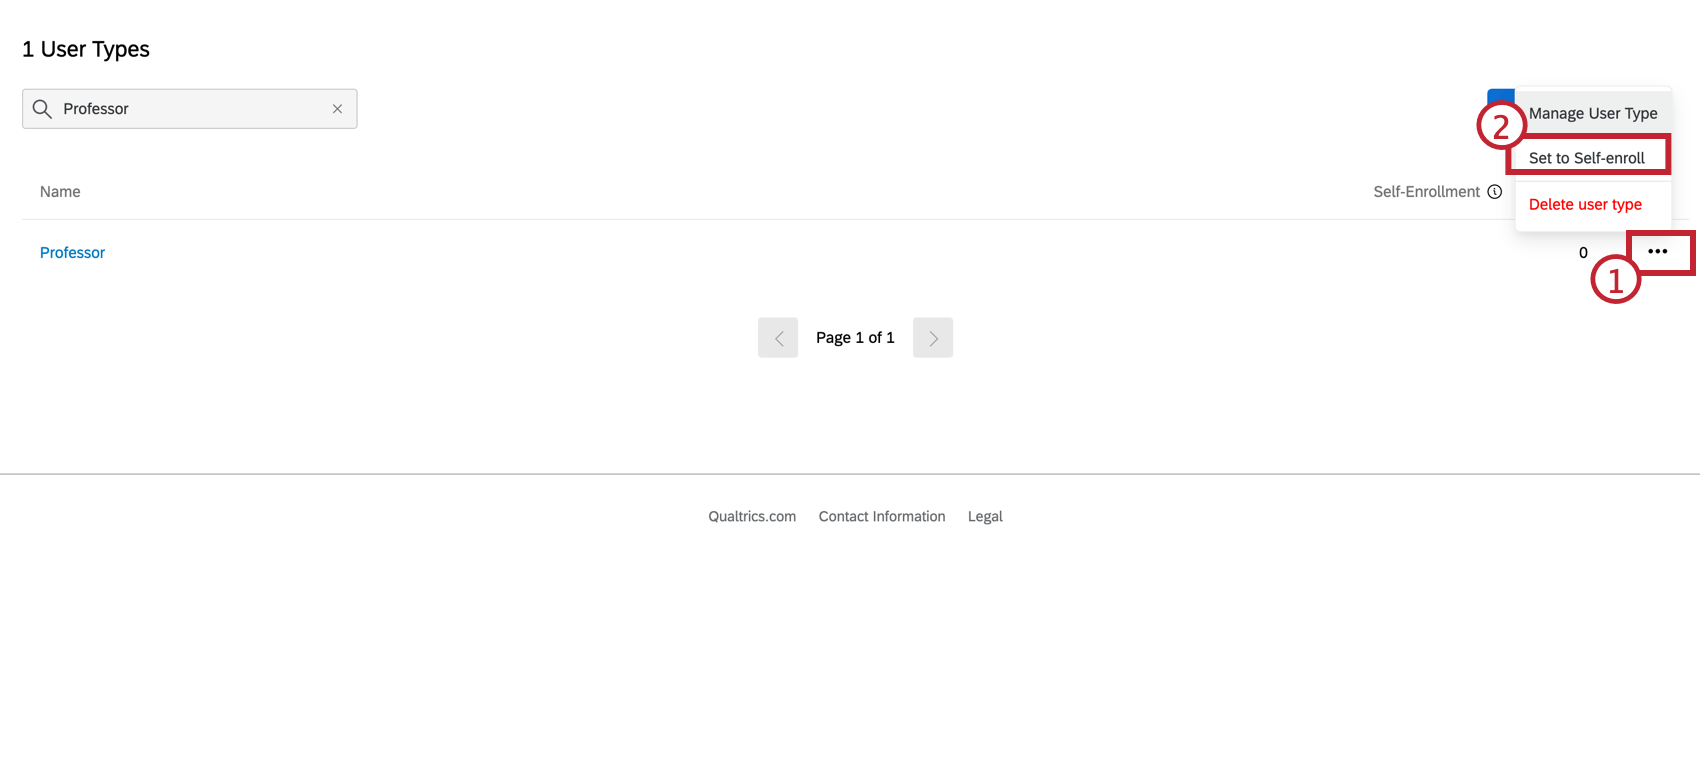
If your users are creating accounts via the self-enrollment feature, they will automatically be assigned a default user type. You can specify which user type will act as the default by clicking the 3 dots on the right side of the user type then clicking Set to Self-Enroll.
The user type that has a checkmark under the Self-Enrollment banner is the user type that will be assigned to self-enrolled users.
![]()
Assigning a User Type
- Navigate to the Admin page.
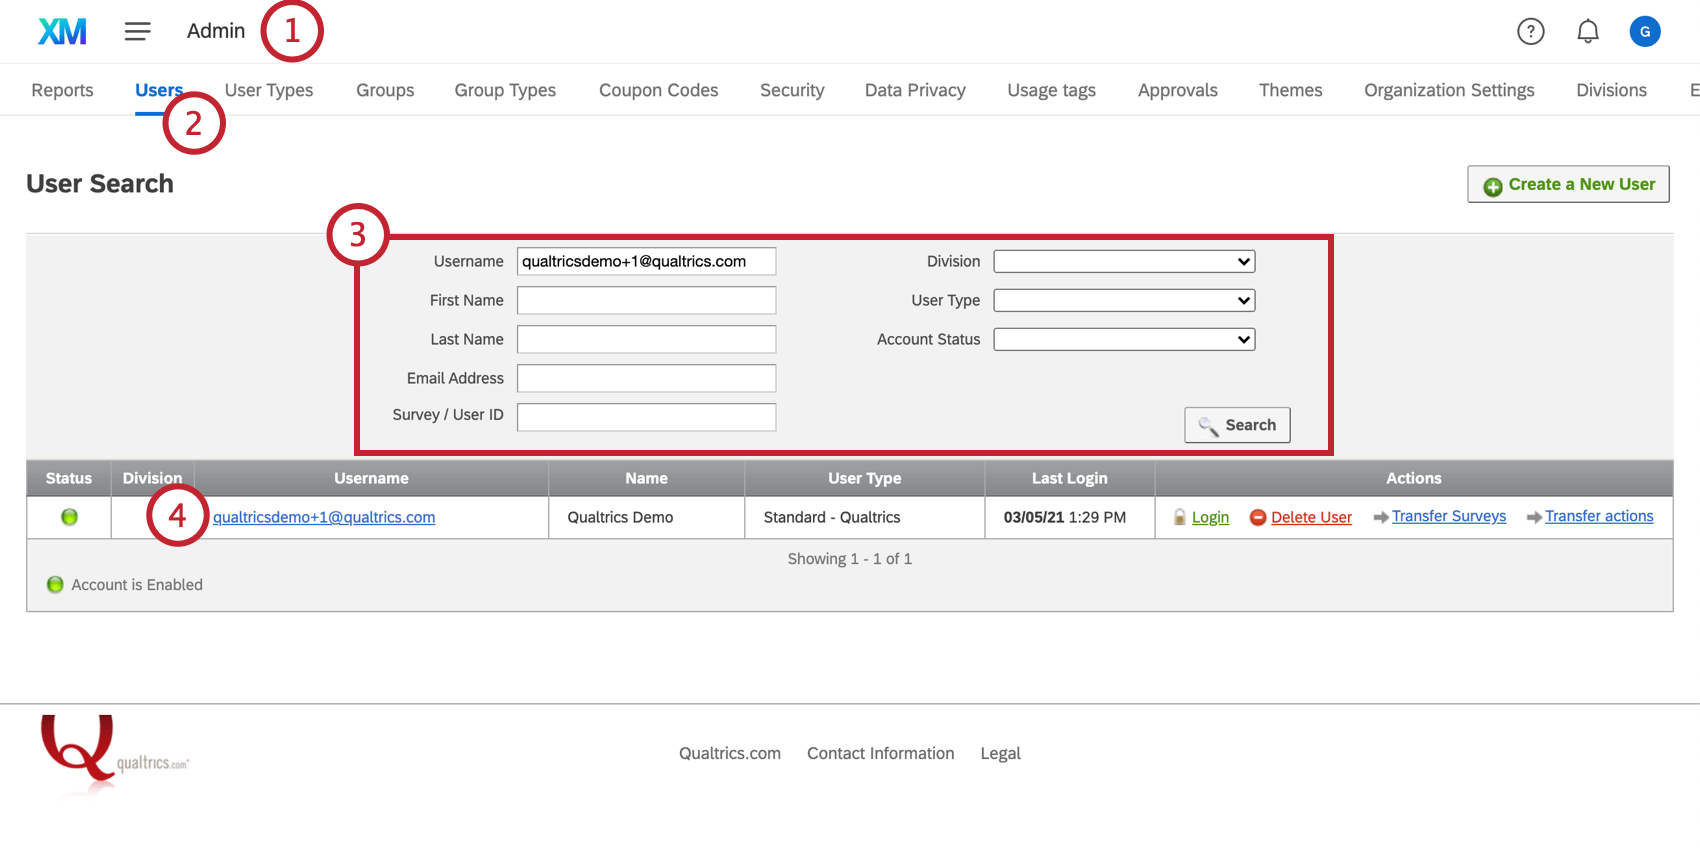
- Select Users.
- Search for the existing user by using any of the search criteria and filters (Username, First Name, Last Name, etc., as well as Division, User Type, and Account Status). You can use multiple criteria at once.
- Click the username of the desired account.
- Click the User Type dropdown list and select the user type you’d like to apply.
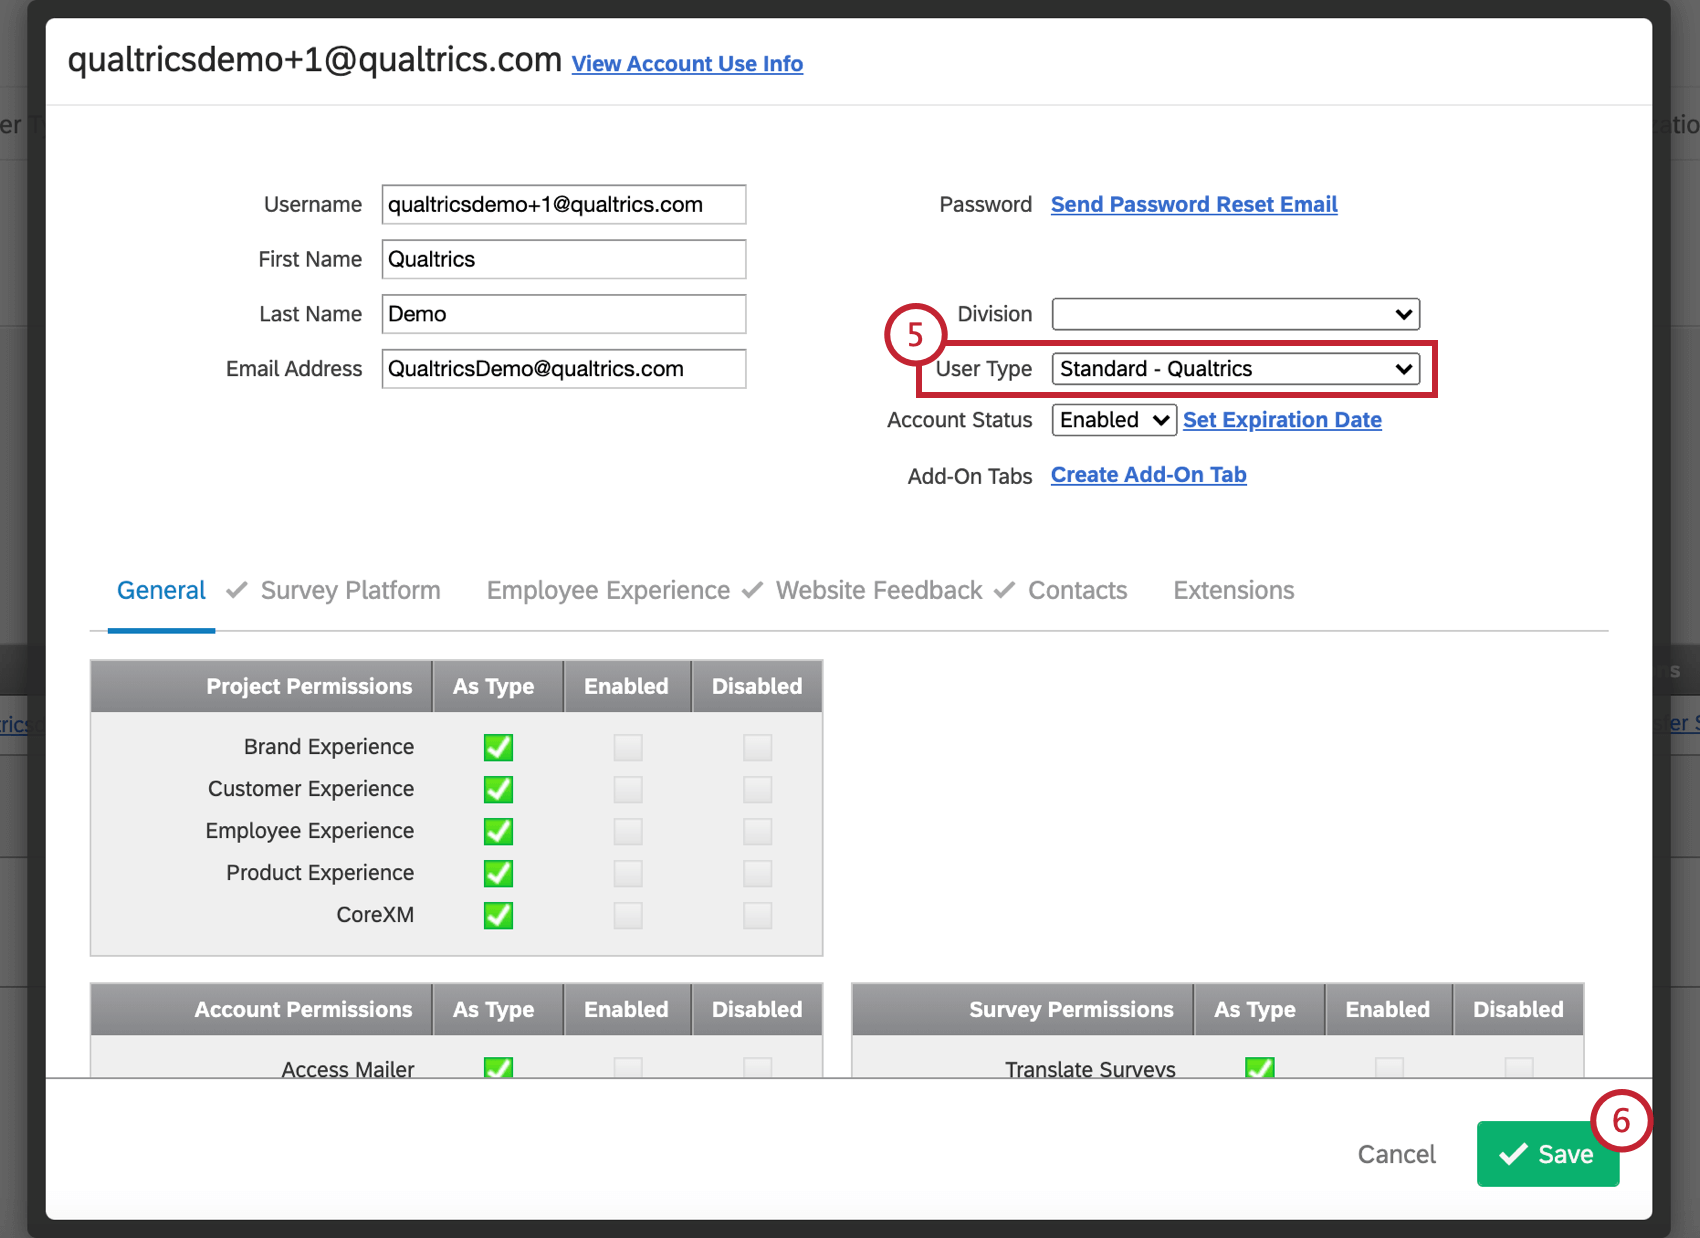 Qtip: You can add additional Brand Admins by changing the user type of any existing user to Brand Administrator.Qtip: If you would like to create a user type that isn’t a default Qualtrics user type, navigate to the Creating a New User Type section.
 - Click Save.
Existing User Types
If you don’t feel like building every user type from scratch, Qualtrics has provided 2 primary ready-made user types:
- Brand Administrator: The brand administrator is a special user type with the ability to edit administrative settings for the whole brand. Most users with access to the Admin page are Brand Administrators, with the exception of division administrators (which are a division setting, not a user type).
- Standard Account / Qualtrics – Standard: This user type generally has access to all the features in the brand except administrative ones.
Specialty User Types
The following pre-made user types are used only for the corresponding premium software.
- CX Administrator: These users have the Manage CX Users permission enabled, meaning they can administrate ticket settings usually reserved for brand administrators, roles, and CX dashboard users without being a Brand Administrator. These users also have access to use the CX Program project type, meaning, if they have applicable permissions, they will be able to create surveys, view restricted data associated with surveys, view survey results, view response IDs associated with surveys, create and manage DX projects, create ORM projects and manage location data, and create and manage tickets.
Qtip: These users do not have access to the Admin page, but do have access to the User Admin tab of a dashboard project.
- CX Program Admin: This user type is designed to give standard Qualtrics user types access to the widgets on the CX Program Overview page. These users will be able to use the CX Program project type, meaning, if they have applicable permissions, they will be able to create surveys, view restricted data associated with surveys, view survey results, view response IDs associated with surveys, create and manage DX projects, create ORM projects and manage location data, and create and manage tickets.
Qtip: CX Program Admin users do not have access to the Admin page.
- Employee Insights Admin: Users assigned to this type can work on Employee Experience projects, can be participants/dashboard users, and have access to global employee directories (as represented by the Access Directories permission). A user will be considered an EI Administrator if they have any of the following Employee Experience permissions enabled: 360, Employee Engagement, Employee Pulse, Employee Lifecycle, or Ad Hoc Employee Research. These users do not have access to the Admin page. See Administration (EX) for more information.
Qtip: By default, Employee Insights Admins have more limited permissions than EX Administrators do. Employee Insights Admins have limited use of the library and don’t have access to certain question types (even in survey projects). Most importantly, Employee Insights Admins do not have access to Pulse programs. You can always enable these permissions to individual Employee Insights Admins, but if your users need access to these features, we recommend using the EX Administrator user type instead.
- EX Administrator: Users assigned to this type can work on Employee Experience projects, can be participants/dashboard users, and have access to global employee directories (as represented by the Access Directories permission). A user will be considered an EX Administrator if they have any of the following Employee Experience permissions enabled: 360, Employee Engagement, Employee Pulse, Employee Lifecycle, or Ad Hoc Employee Research. These users only have access to Projects section of the Admin page. See Administration (EX) for more information.
Qtip: Employee Insights Admins and EX Administrators can import Brand Administrators as project participants. However, they cannot edit any Brand Admin user data, which can only be changed by other Brand Admins. This is to prevent user account admin information from being modified by lower level user admins. If you’d like to change this behavior, reach out to Qualtrics Technical Support and ask to have the Limit EX Admin Update Person permission disabled for the organization.
- Participant: Users assigned to this type take 360 or EE surveys and view dashboards. These users are created automatically when you add users in the Participants section of your Employee Experience project. See Administration (EX) for more information.
Qtip: If you use CX Dashboards, then users will be assigned the participant user type when you add people in the Users tab of a dashboard and do not specify a user type. Note that the these users are not given the dashboard viewing permission; to assign a user type that can view CX dashboards, use Vocalize User.Qtip: By default, new Participants have the View XM Platform permission disabled.
- Vocalize User: Users assigned to this type are dashboard viewers who can use CX Dashboards, but not build Survey Platform Projects.
Qtip: If your brand has access to CX Dashboards, the Standard Account user type has access to CX Dashboards.
Best Practices
Some examples of practical user types are:
- You want to control who creates, views, builds, imports, exports, shares, prints, handles tickets, and every combination in between
- The sensitivity of your data requires varied levels of viewing permissions across your users
When building user types, keep in mind these important considerations:
- Manually changing a permission that differs from an individual’s user type should not be done frequently
- Check the Qualtrics pre-built user types before building one from scratch
- Having many user types makes upkeep difficult, most brands within Qualtrics maintain 2 to 4
