Moderated User Testing Overview
About Moderated User Testing
Moderated User Testing allows you to conduct user experience research through remote live moderated sessions with respondents. In a Moderated User Testing project, moderators set up interview details and add their availability, then distribute the study to participants. Participants can select their preferred interview times and provide contact details.
Both moderators and participants will then receive a Zoom link for the scheduled interview, during which participants can share their screen and provide live feedback on whatever you are testing. Interviews are recorded and stored within the Audio & Video library, where they can be analyzed.
Moderated User Testing projects contain the following tabs:
- Interview Setup: Edit general interview settings, add moderator availability, and add additional moderators. For more information about this tab and the options within it, see Interview Setup Tab (Moderated User Testing).
Qtip: Make sure to set availability in the Interview Setup tab of your project, otherwise respondents won’t be able to schedule interviews.
- Survey: Edit the survey that will be distributed to respondents. By default the survey will include an Interview Selector question that allows respondents to schedule an interview with moderators. For more information on configuring this question type, see Interview Selector Question. You can also add additional questions and survey customization. For more information on editing surveys, see the Survey Tab Basic Overview support page.
- Workflows: Configure project-specific workflows. For example, you can set up a workflow to send respondents a thank-you email once they’ve scheduled an interview. For more information on creating workflows, see Workflows Basic Overview.
- Distributions: Send your survey to respondents in a variety of ways. After distributions are sent, respondents will be able to use the survey to schedule interviews. For more information on the available distribution methods, see Distributions Basic Overview.
- Bookings: View and manage scheduled interviews. Use the tabs at the top to navigate between different interview statuses, or filter interviews by specific moderators or different interview setups.
- Data & Analysis: View responses for your survey, including recordings of each interview. For general information on Data & Analysis, see the Data & Analysis Basic Overview page. For information on viewing video recordings, see the Audio & Video Editor support page.
- Results: View a quick and simple visualization of your survey results. For more information, see Results Dashboards Basic Overview.
- Reports: Create informative reports to share with your stakeholders. For more information, see Advanced-Reports Basic Overview.
Permissions
To create Moderated User Testing projects, you will need the following permissions, which can be enabled by a Brand Administrator:
- Moderated User Testing
- Access Data & Analysis – Audio & Video
- Moderated User Testing (Solution)
- MUT Scheduler Question
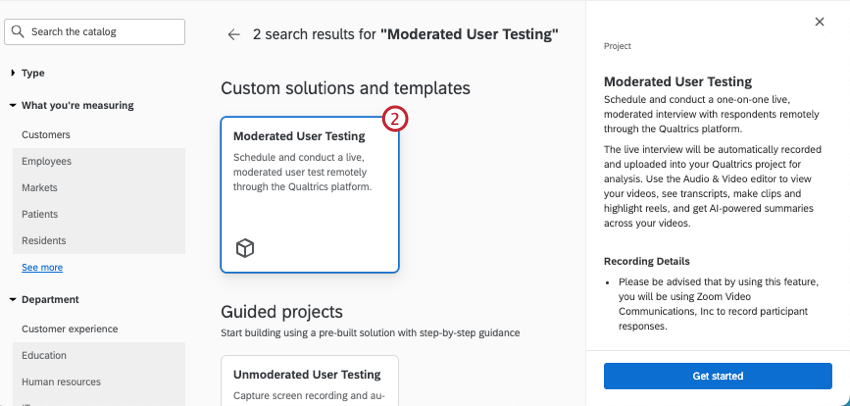
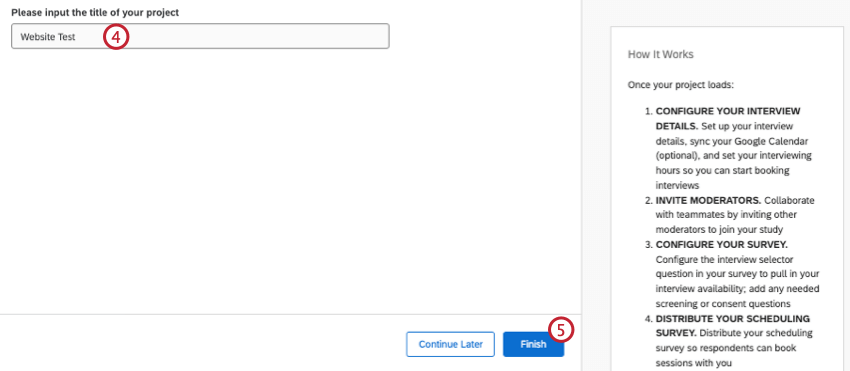
Creating a New Project
Project Guidance
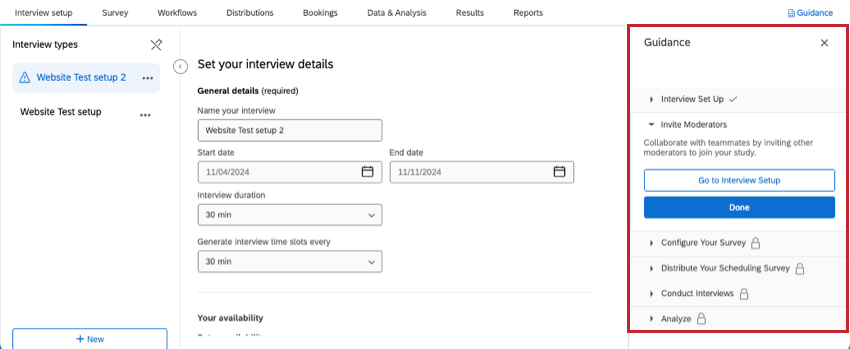
While editing your project, guidance will appear on the right-hand side of the screen. This guidance will walk you through the steps needed to set up your project and conduct your research.
Once you’ve finished a step, click Done to mark it as completed. Click the Go to button to be taken to the relevant part of our project to complete the step.
To hide guidance, click the X in the top-right corner.
Bookings Tab
In the Bookings tab you can view and manage scheduled interviews. Use the tabs at the top to navigate between different interview statuses. You can also use the dropdowns to filter interviews by specific moderators or different interview setups.
Use the icons in the top right to switch between a list view and calendar view.
You can also click the 3 dots next to an interview to view additional options:
- See interview details: View additional details about the interview. You can also copy the link to the Zoom meeting, reschedule, or cancel the interview.
- Meeting links: Copy the host link, guest link or live stream link. Clicking the host link will let you join the Zoom meeting as the host, while the guest link will let you join the Zoom meeting as a guest.
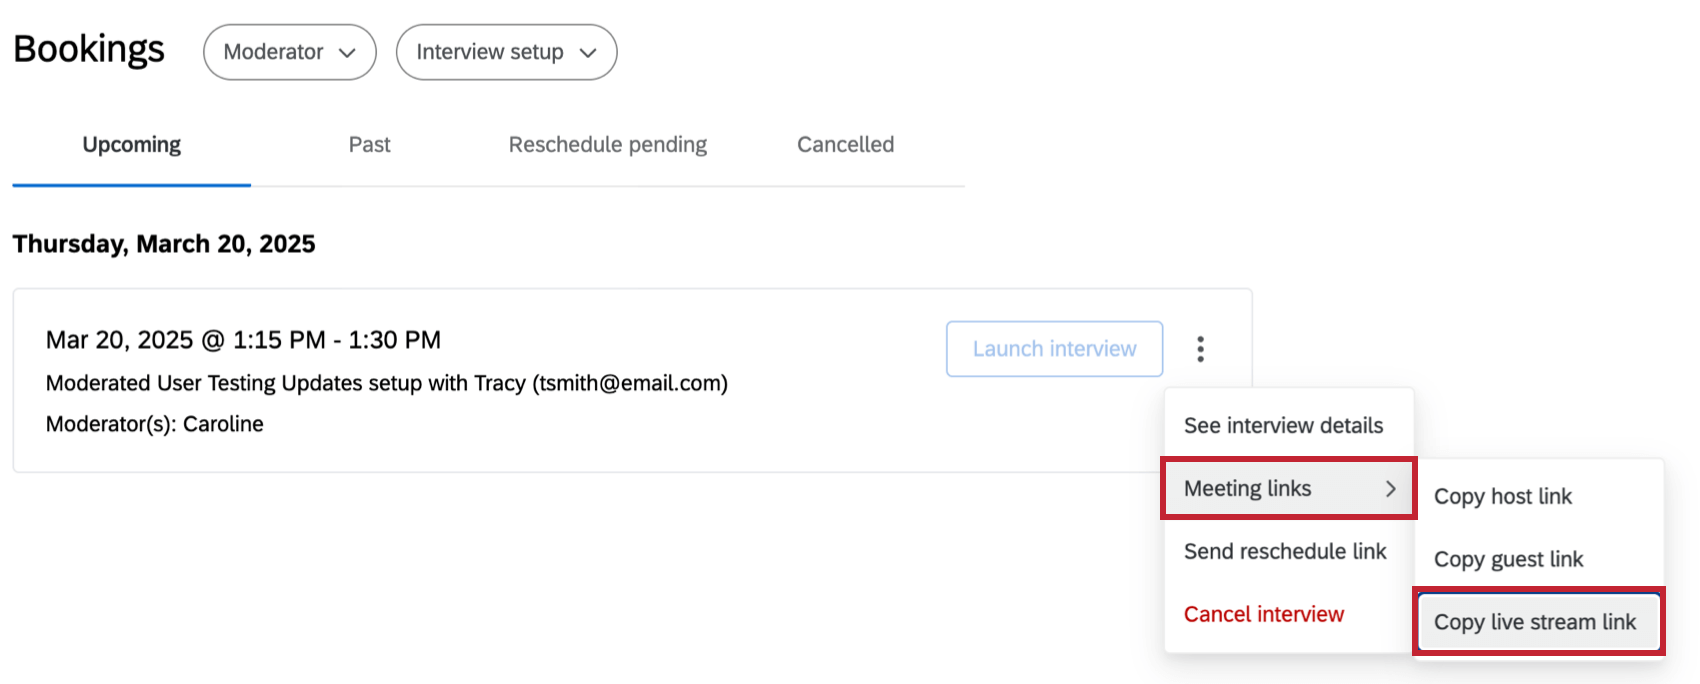
Qtip: Once a live stream link is generated, the option to Copy live stream link will appear. For more information on the live stream link, see Interview Live Streams.
- Send reschedule link: Send a link to the participant to choose a new day and time for the interview, using the time slots according to the moderator(s) availability.
- Cancel interview: Cancel the interview. This will send a notification to the participant letting them know the interview has been canceled.
Scheduling Tab
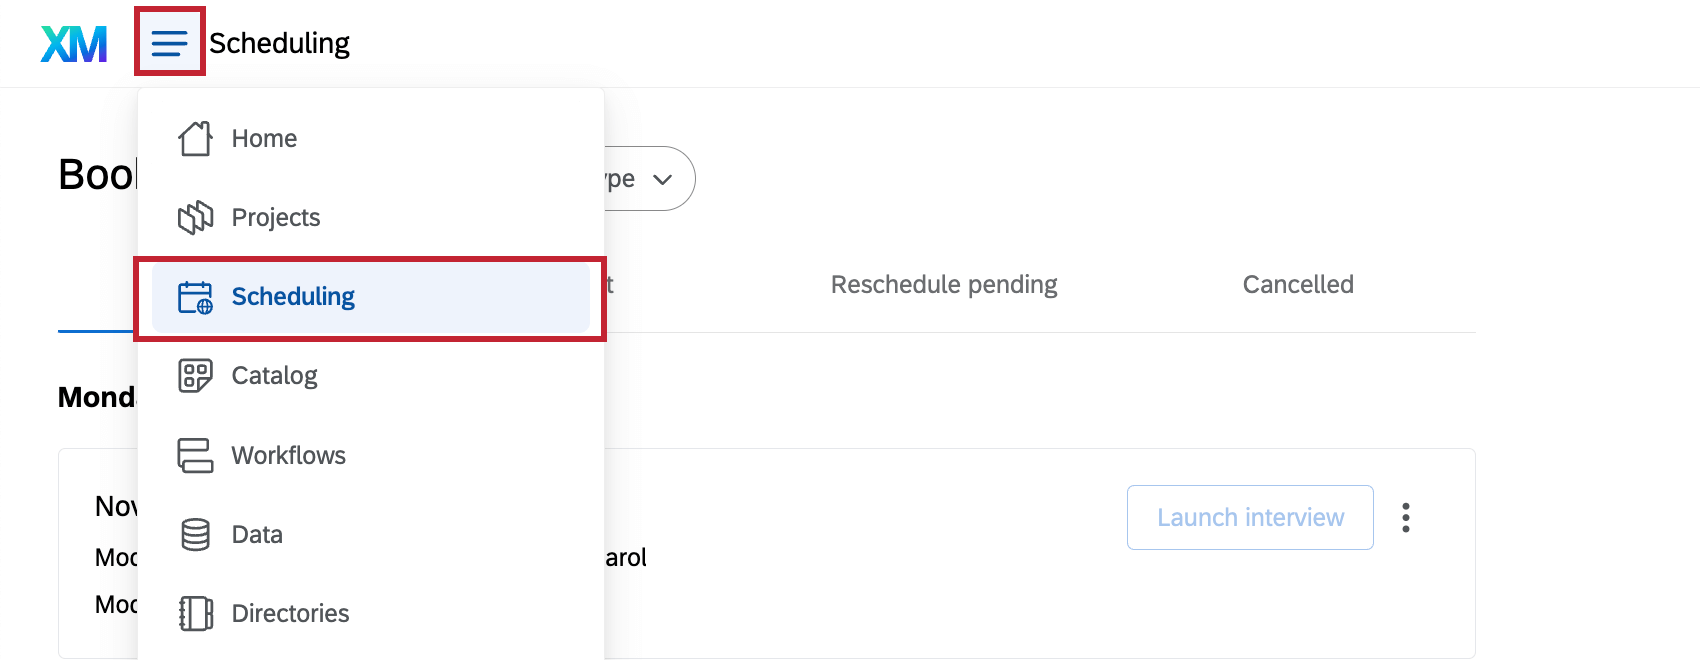
In addition to viewing all the bookings within your project, you can access the global Scheduling tab to view bookings across all Moderated User Testing projects you have access to. To view this page, click the global navigation menu and select Scheduling.
Project Collaboration
Click the 3 dots next to your project within the Projects or Home page and select Collaborate to share it with other users.
You can then select their level of access:
- Admin access: User has full access to the project. They can create new interview setups, add moderators, and modify any bookings.
- Edit access: User has full access to editing the survey, but can’t edit the interview setup or cancel other moderators’ bookings.
- Read-only access: User can view the survey but can’t make any changes.
Interview Live Streams
You can generate a live stream link in the Bookings tab for each scheduled interview in your project. This link can be shared with viewers of the interview. These viewers are neither hosts nor guests, but can watch as the interview happens.
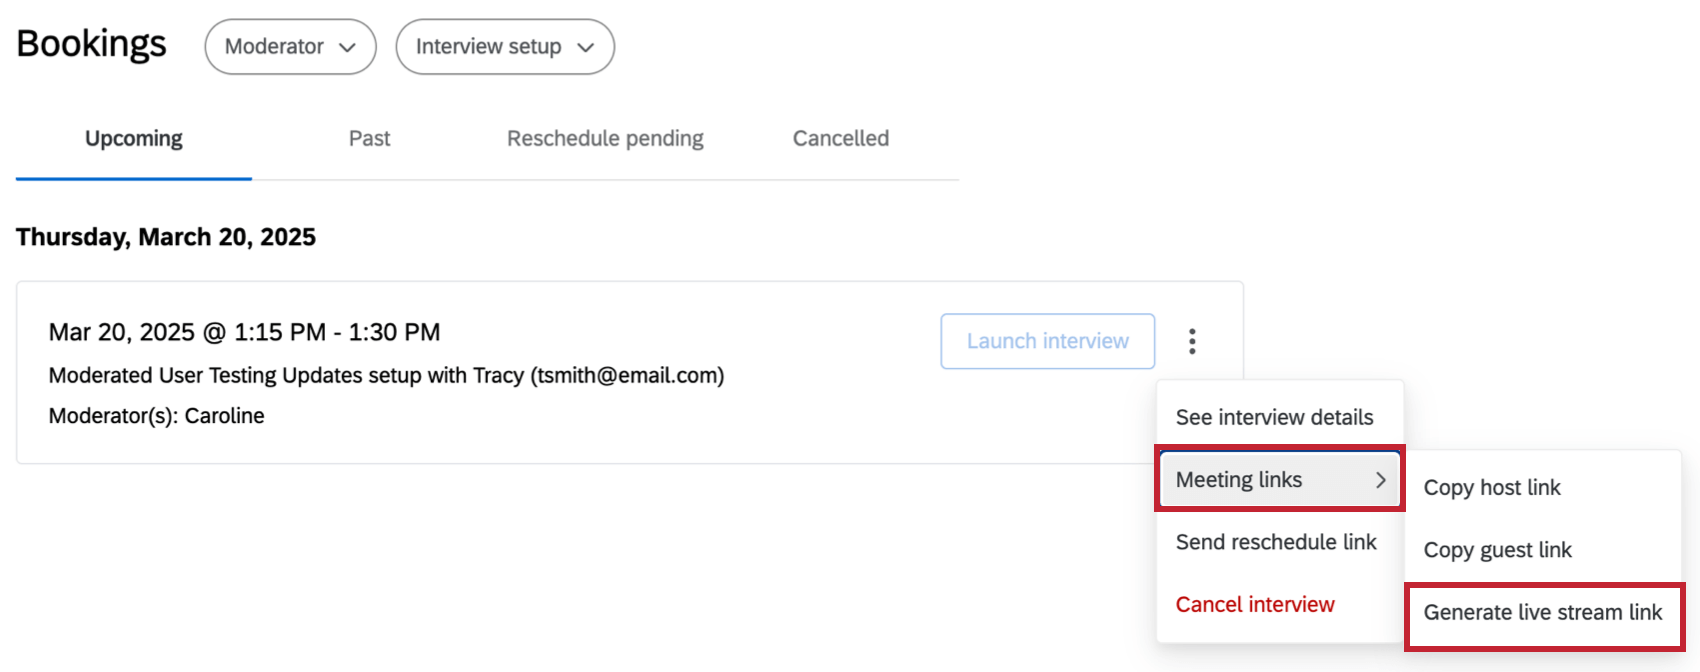
To generate a live stream link, click the 3 dots next to an interview and select Meeting links, then Generate live stream link.
To view the live stream link, click the 3 dots again and select Meeting links, then Copy live stream link.
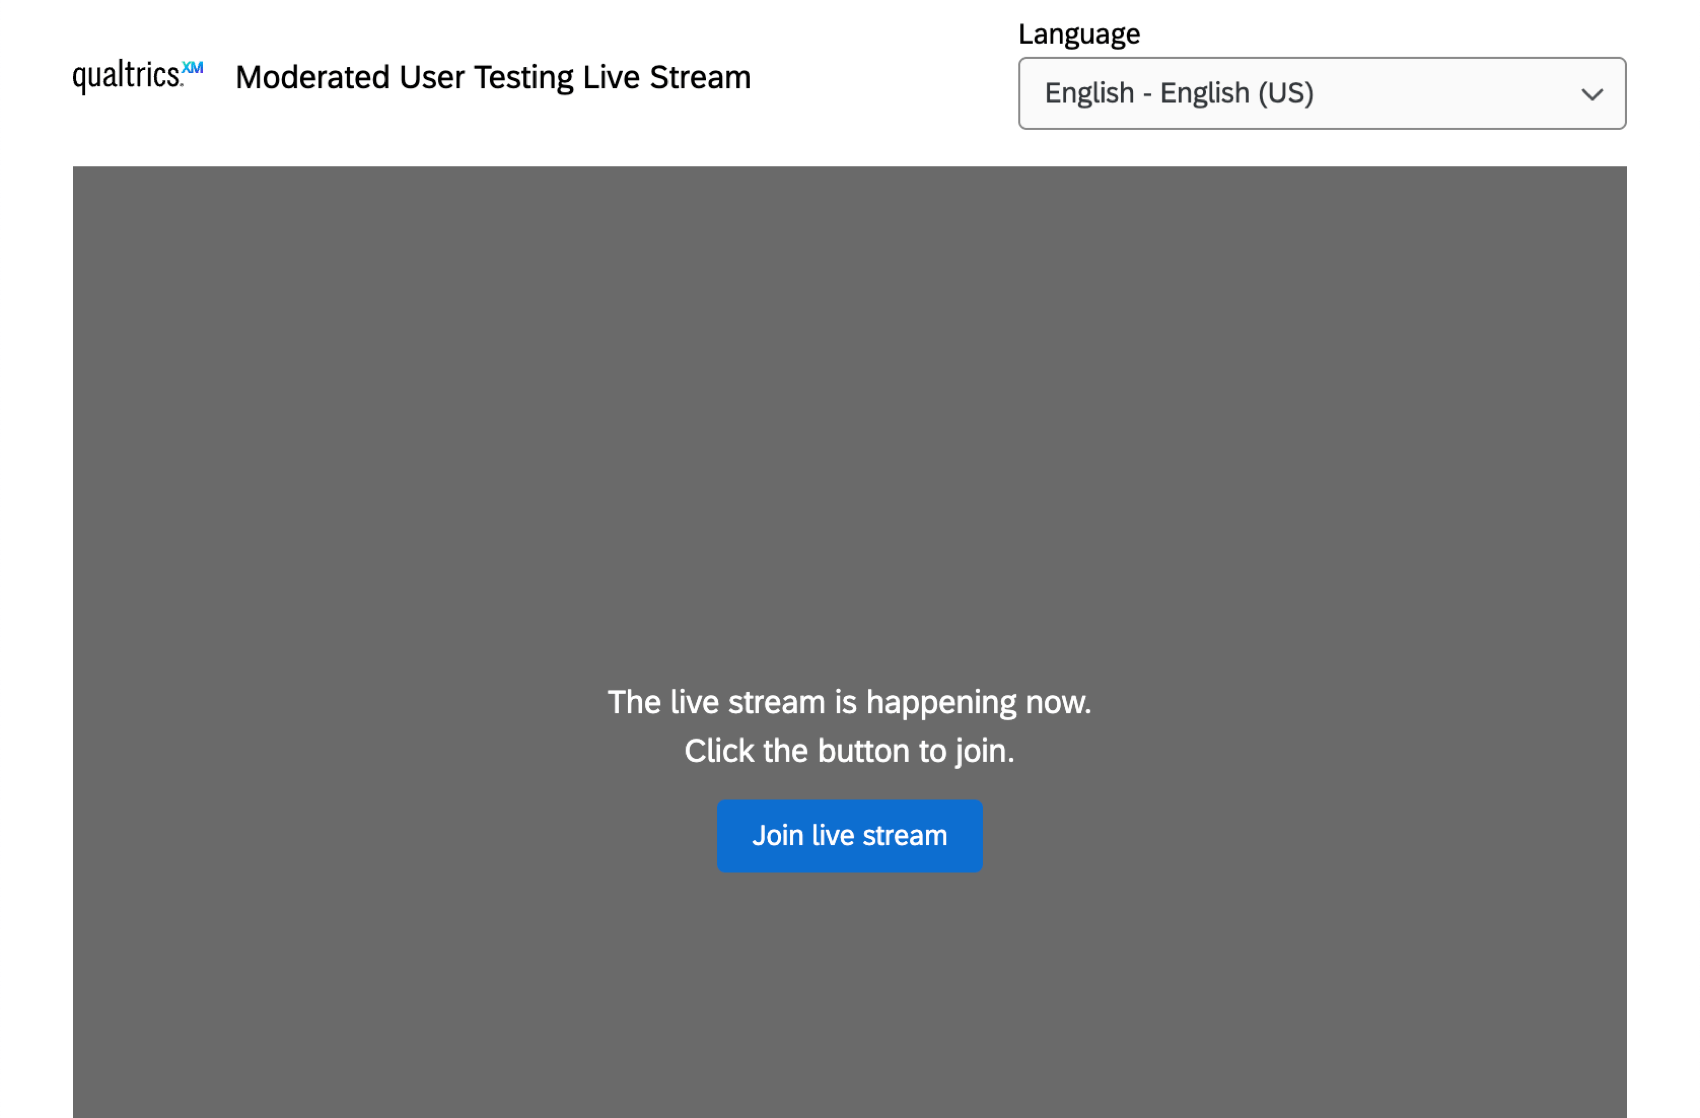
This link can then be shared with viewers so they can watch the interview. After visiting the link, clicking Join live stream will take them to the live stream of the interview.
