Formula Fields
About Formula Fields
Formulas are a type of custom field that allow you to calculate math operations with survey data. Once created, formulas will apply to existing data and be calculated for incoming data. This makes formulas a great alternative to embedded data. Once created, formulas can be used in data analysis and reporting the same way you’d use other numeric survey data.
This support page covers how to create a new formula. For information on making changes to an existing formula, see Editing Custom Fields.
Creating a Formula
- Go to the Data & Analysis tab.

- Select Field Editor.
- Select Create Field.
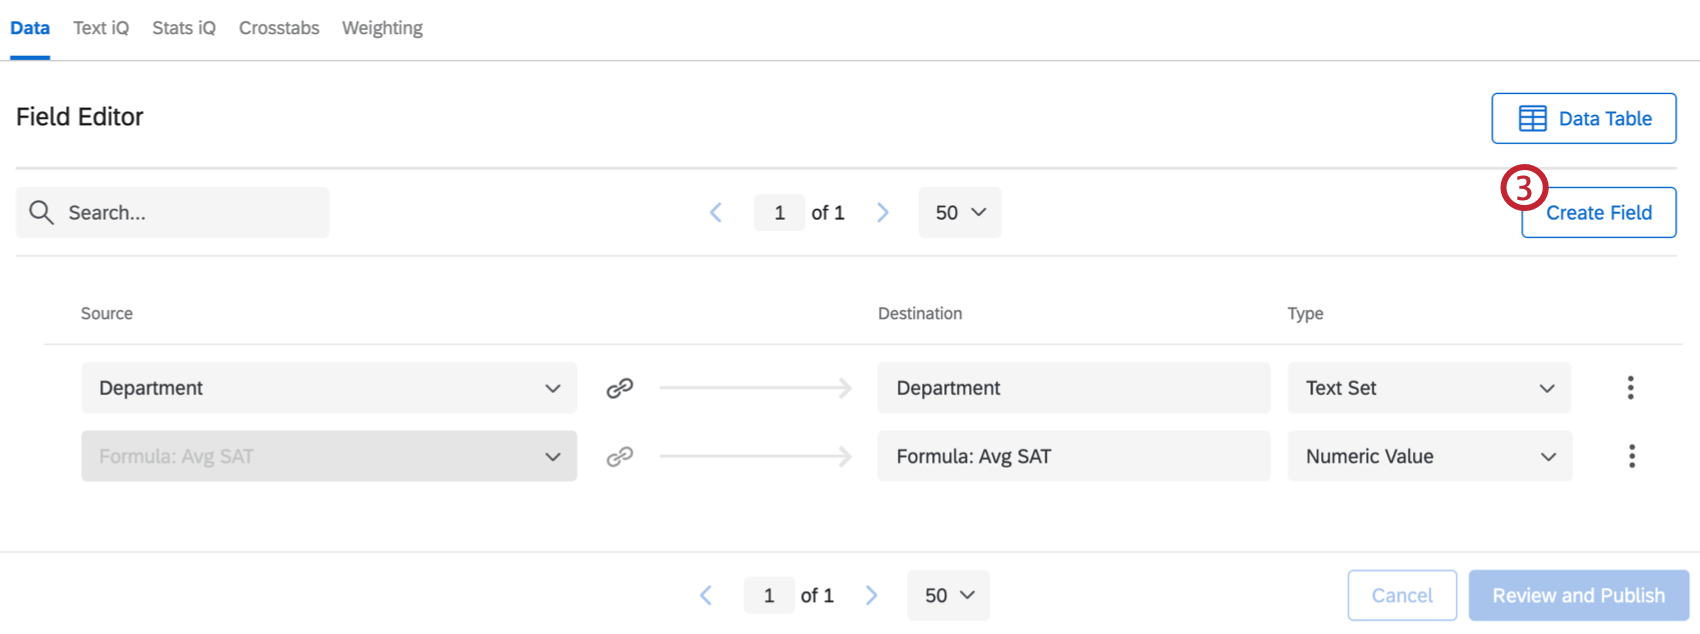
- Select Formula at the top.
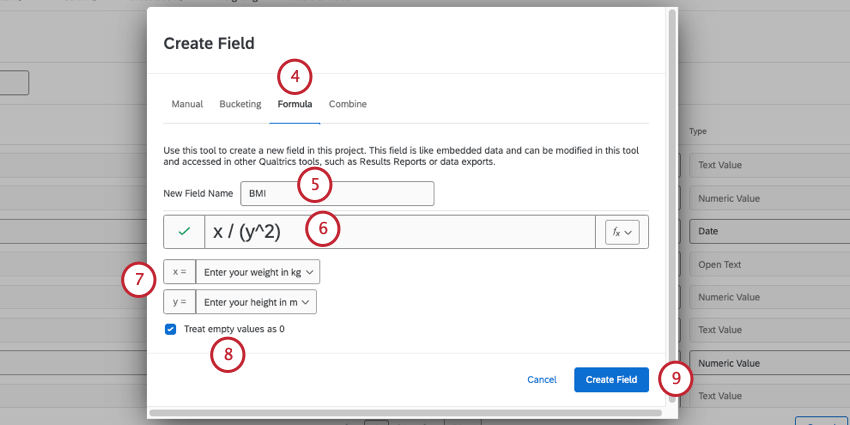
- Name your formula.
- Type your equation in the box. The green checkmark to the left of the box will become a red warning sign if your equation doesn’t make sense.
Qtip: Every formula starts with x and y, but you can add new variables by typing new letters into the box, and remove variables by deleting the corresponding letter from the formula box.
- Set x and y equal to a question, survey metadata, or embedded data.
- Decide whether you want to ignore missing values, or Treat empty values as 0.
- When finished, click Create Field.
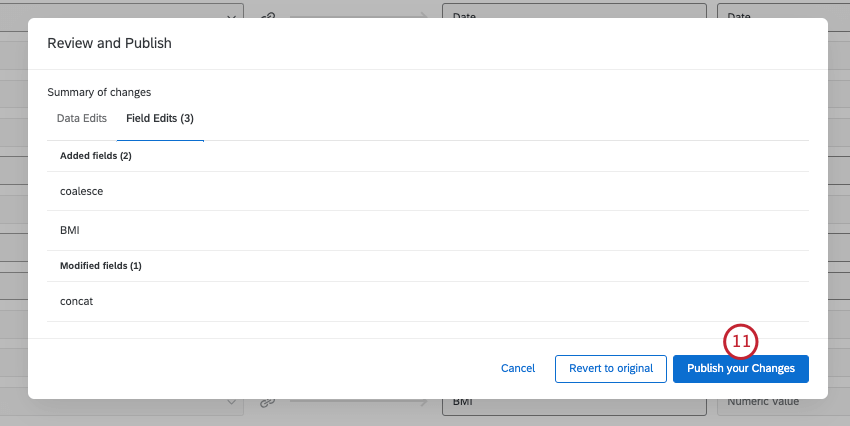
- Click Review and Publish to save your changes.
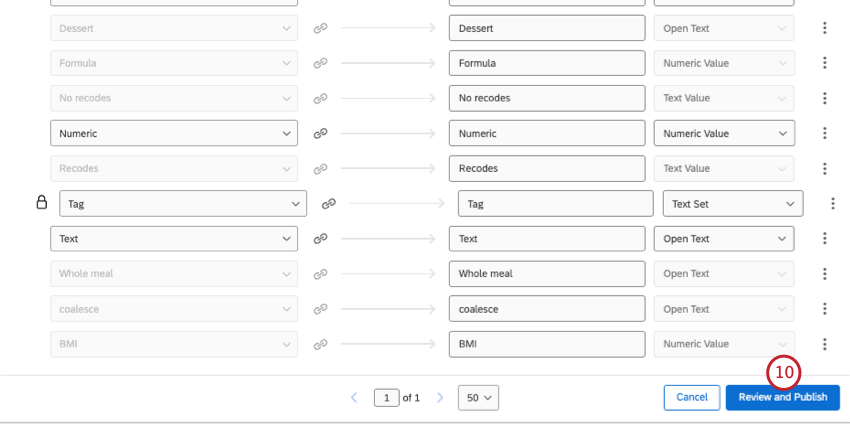
- Click Publish your Changes.
Using the Correct Syntax
A formula has to make sense before it can be added to your data. A warning icon will appear if the formula doesn’t make sense, and you won’t be able to save your changes until it’s corrected. Here are a few recommendations:
- Always remember to close parentheses. ( x + y ) will work, but x + y ) won’t.
- Numbers, single-letter variables, and the symbols listed in the table below are compatible with formulas. However, combined letters, like xy, are not. Instead, use x * y.
- Spacing has no impact on the effectiveness of a formula. x/(y^2) and x / ( y ^ 2 ) will work the same way.
Available Operations
| Math Operation | Symbol | Example |
| Addition | + | x + y |
| Subtraction | – | x – y |
| Multiplication | * | x * y |
| Division | / | x / y |
| Powers (x^2) | ^ | x ^ y |
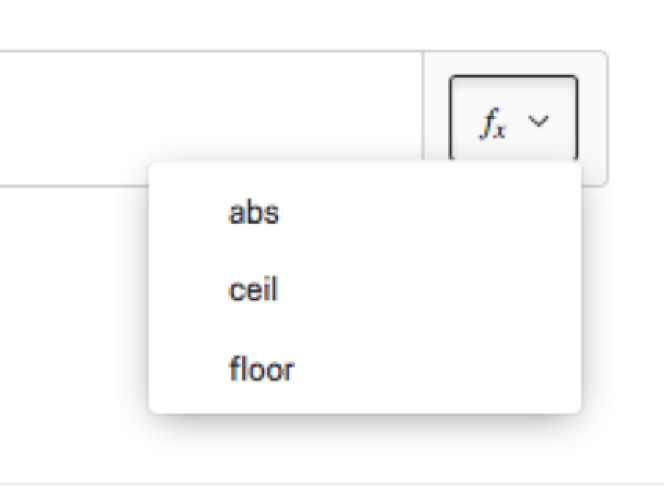
| Absolute Values | abs( ) | abs(x) |
| Ceiling | ceil( ) | ceil(x) |
| Floor | floor( ) | floor(x) |
Fields You Can Use in Formulas
Not all survey information can be used in a formula. Compatible items must finite in nature, or be set to accept numeric values. This includes:
- Questions with multiple choices. Make sure to recode values as intended.
- Questions set to numeric-only answers, such as sliders and constant sum questions.
- Text entry questions set to numeric validation.
- Embedded data set as number or number set types.
- Numeric survey metadata, such as response type, progress, duration (in seconds), and finished status.
- Numeric manual fields.
Projects Where Formulas Can Be Created
Depending on your license, you may have access to several different types of projects that have a Data & Analysis tab. The options described on this page are available in:
- Survey projects
- XM Solutions
- Imported data projects
- 360 projects
Qtip: See Creating New Fields (360) for more details.
- Conjoint / MaxDiff
Qtip: While you can build formulas from Conjoint and MaxDiff-specific fields, the data may not make sense and cannot be recoded. We recommend only building formulas from survey fields.
- CX Dashboards
While the functionality is technically available, we do not recommend using these custom fields with other types of Employee Experience projects. See Creating New Fields (EX) for more details.

