
Survey Tips & Tricks
What's on this page
About Survey Tips & Tricks
This page covers some of the most common tips and tricks that can improve your survey. Each one is easy to implement and can enormously help your study, depending on the format you’re trying to achieve.
Qtip: When making any of the changes suggested on this page, don’t forget to publish your survey!
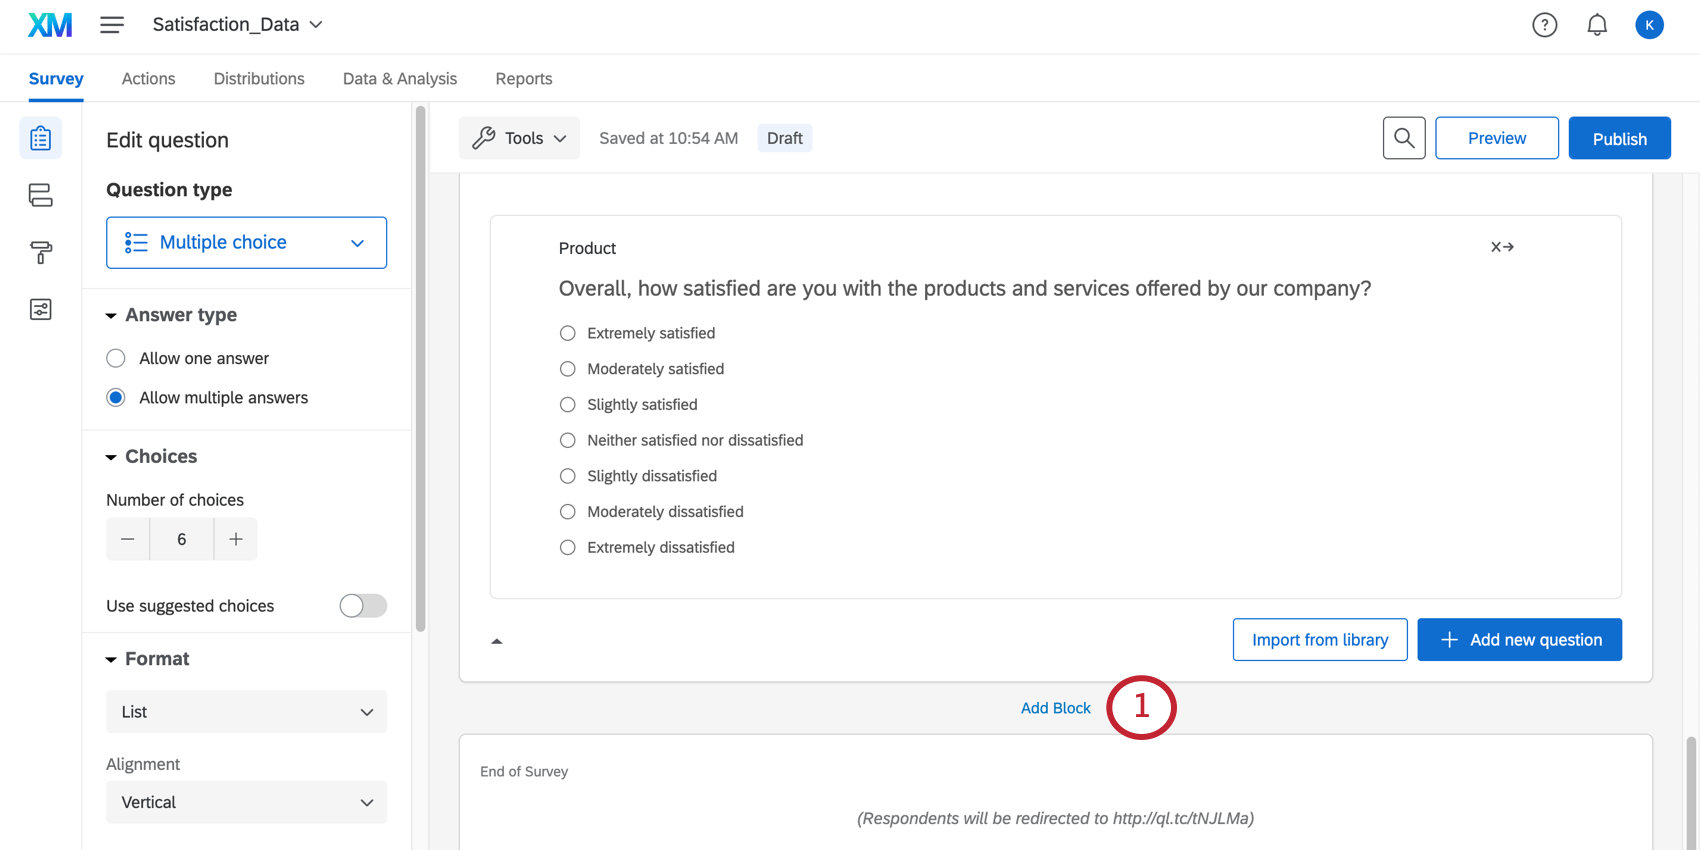
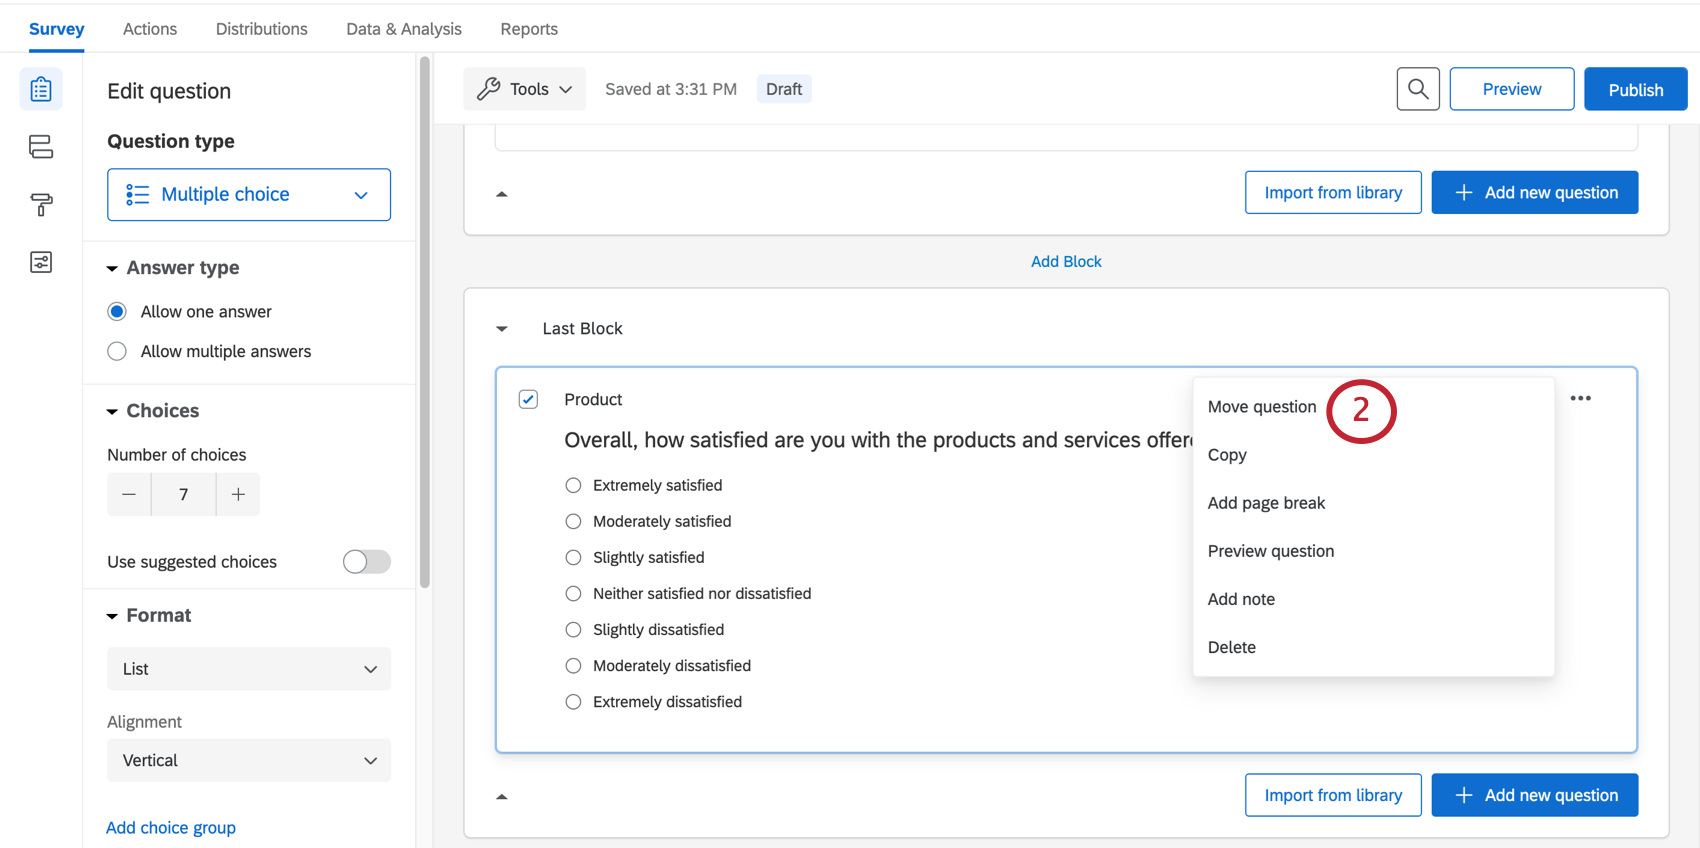
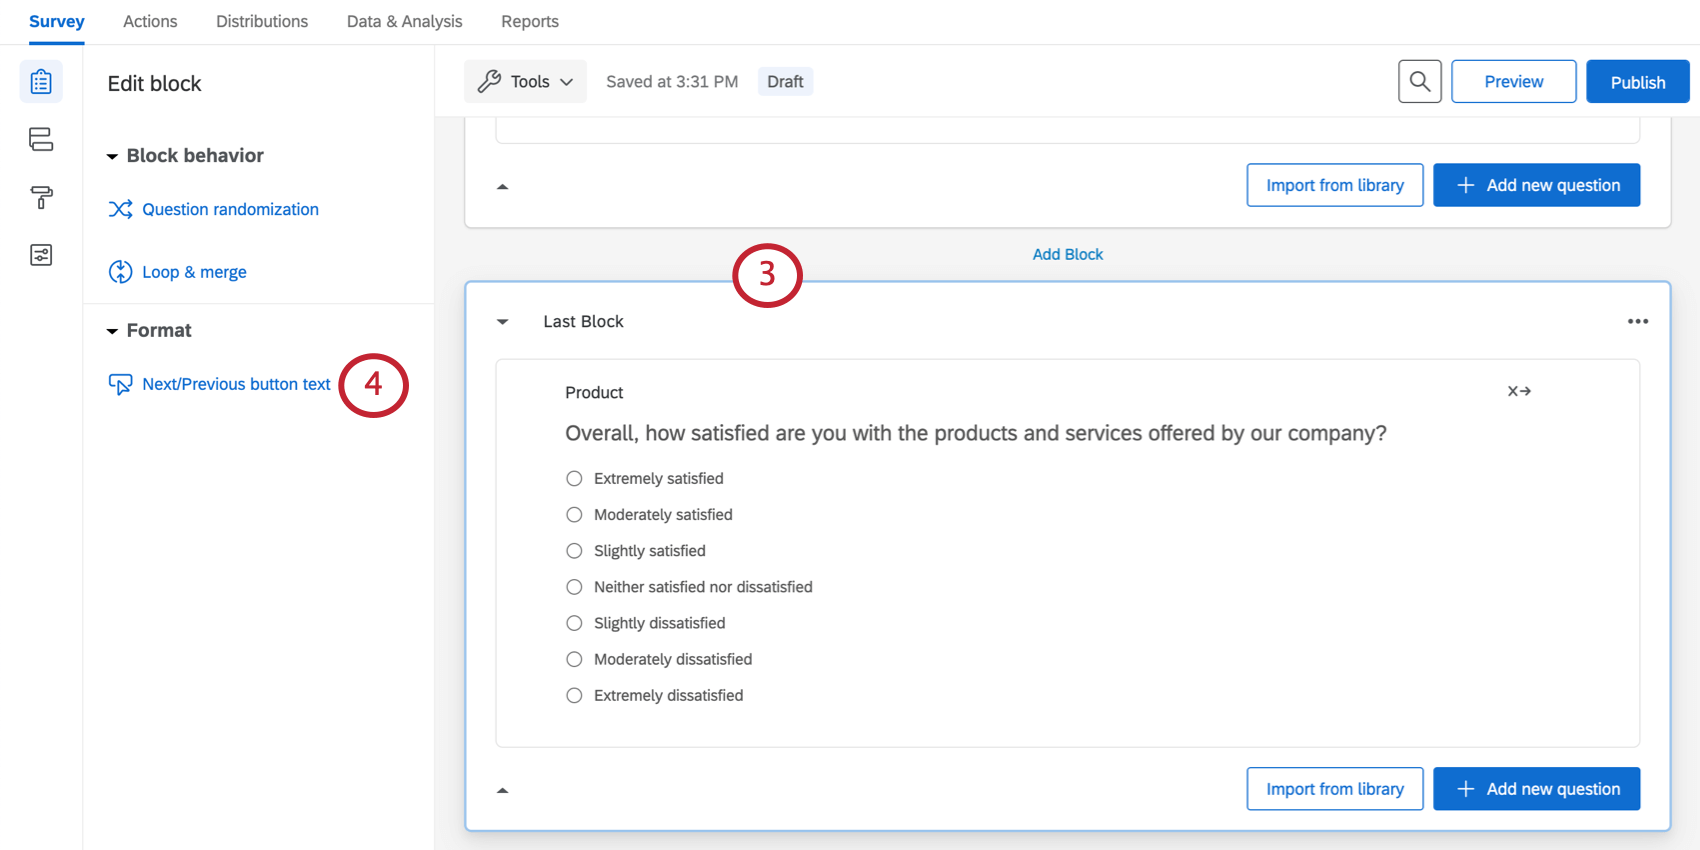
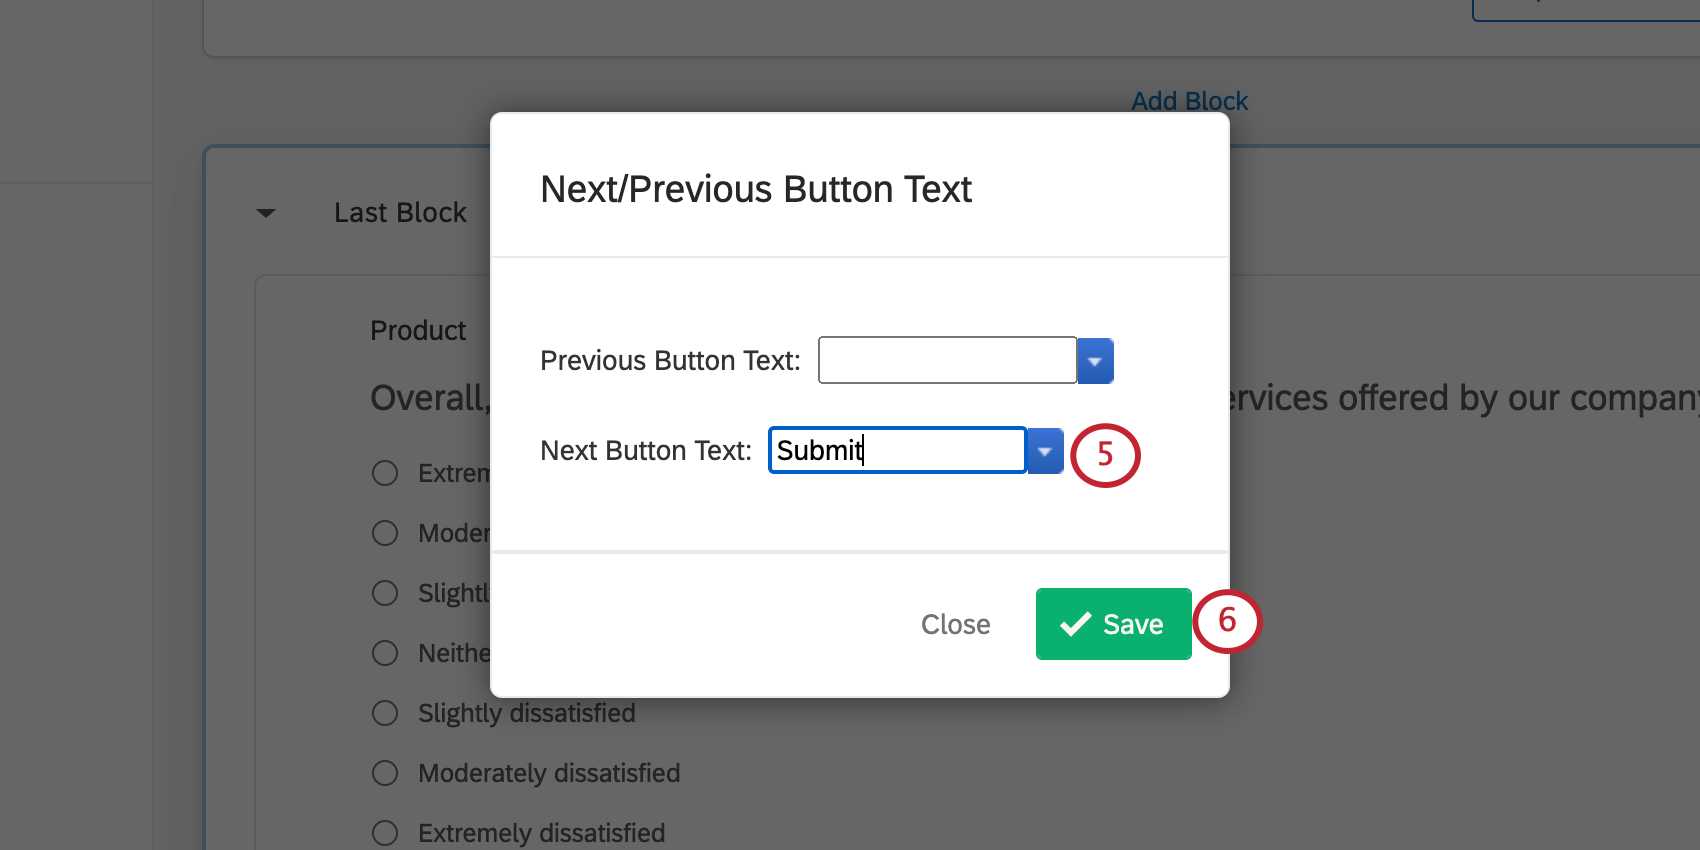
Making a Submit Button
Adding a submit button to your survey can make it clear to respondents that they are on the final page of a survey. This lets respondents in surveys with back buttons know this is their last chance to make edits. It can also reassure respondents who are fatigued and considering quitting that they have only a few more questions to go.
This setup ensures the submit button is only on the last page of your survey, not every page of your survey.
Qtip: If you have customized your survey flow, be sure your blocks still appear in the order desired under the appropriate branches, authenticators, and so on. If your survey has loop & merge enabled, be careful to add a submit button only to a static page that won’t repeat.
Making an Inline Email Question Submit Immediately
You can embed a survey question in your invite. Once the respondent clicks an answer in the email, they are redirected to the survey, where they can manually proceed through the other questions. In cases where your survey is only one question, however, you probably just want this question to submit and the answer to be collected. This section teaches you how to do this with the lowest possible delay.
Qtip: This use case requires you have access to the timing question. If you’ve found you don’t have access to this question, contact your Brand Administrator to see if you can have this enabled, or if your organization needs to purchase this feature.

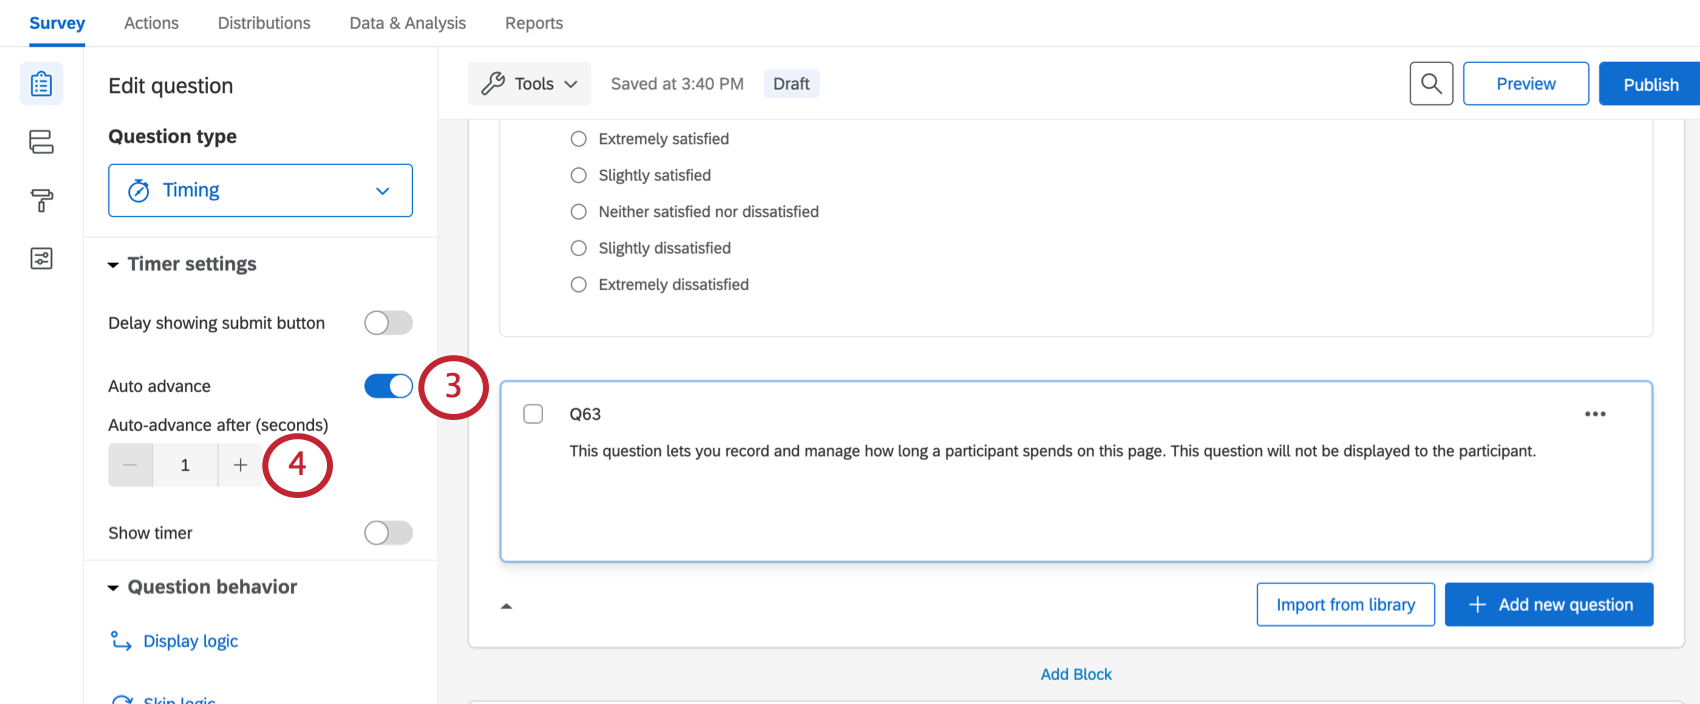
Qtip: These values cannot have decimals. We have chosen 1 because it is the shortest period of time you can enter, but you are welcome to make changes to this timing where desired.
Qtip: Make sure your look and feel settings do not have questions per page set to a specific number. There should be no page breaks between the only question in the survey and the timing question. See Page Breaks for more information on identifying page breaks.
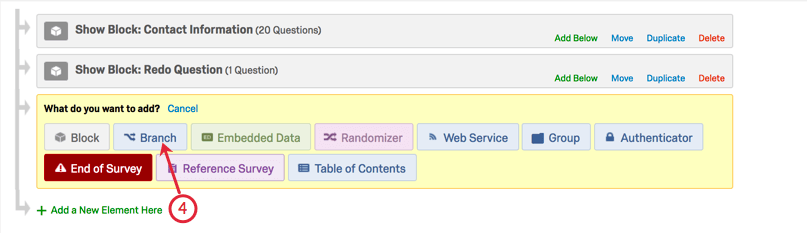
Allowing Respondents to Redo Survey Sections
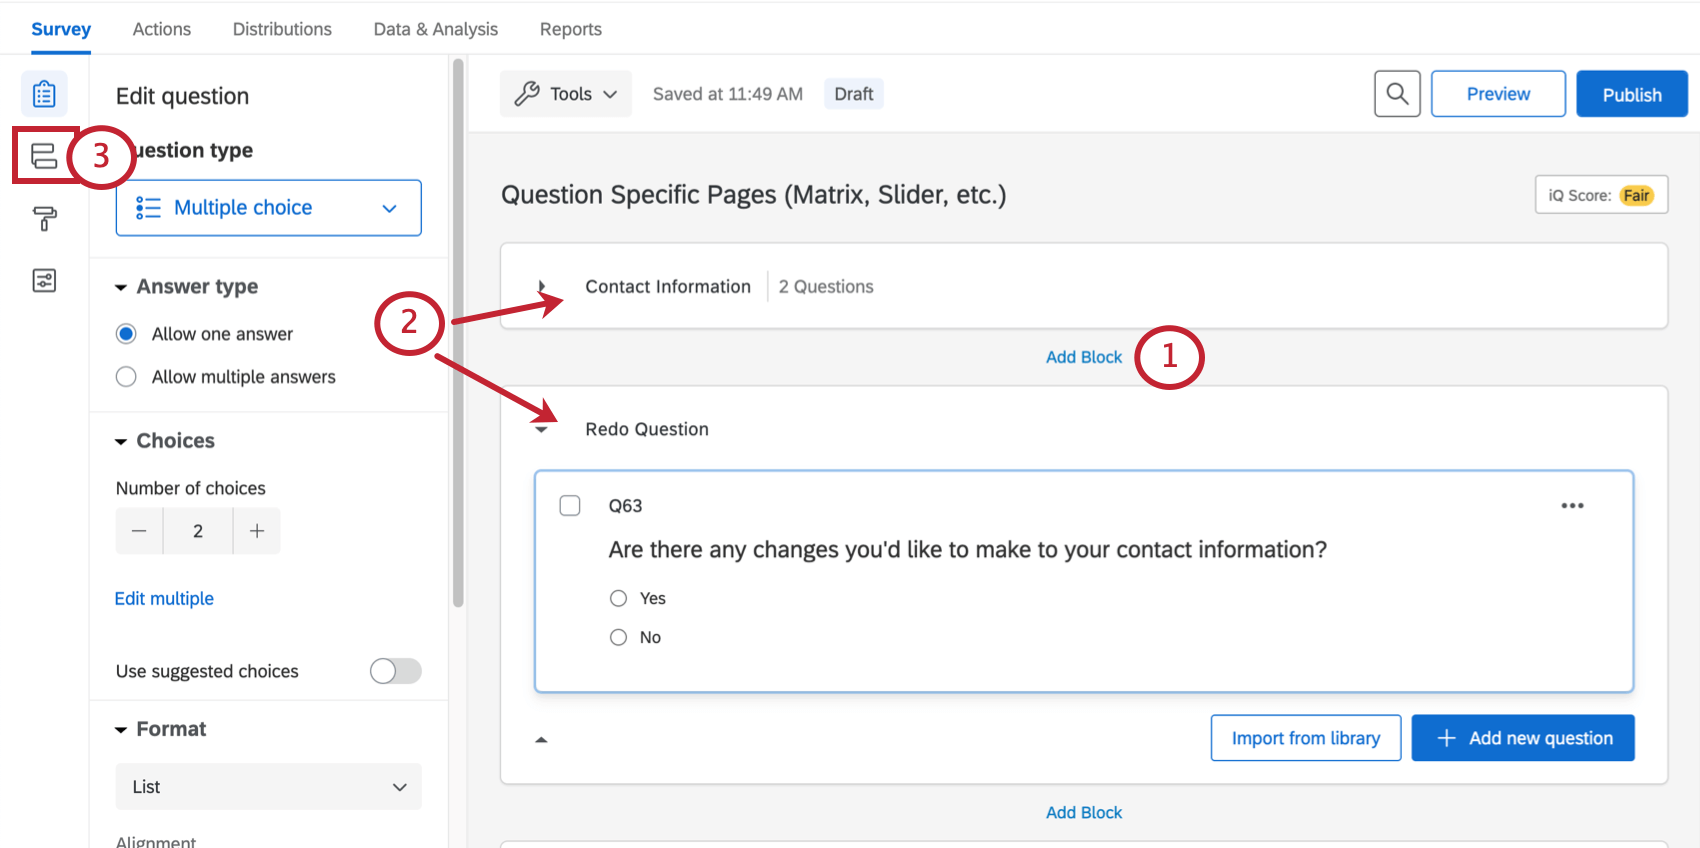
Back buttons and the table of contents can be an excellent way to let users go back and edit their answers. But sometimes, it’d be nice if we could simply ask, “Do you want to redo this section?” and, based on their answer, send them back. This may be for clarity, or because there are some sections we want respondents to redo, while other we do not want them to.
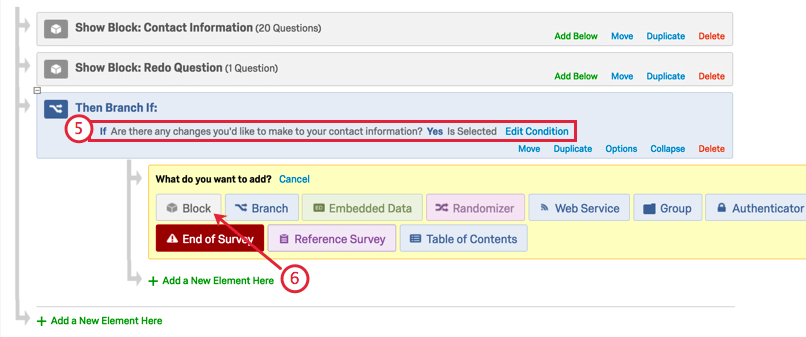
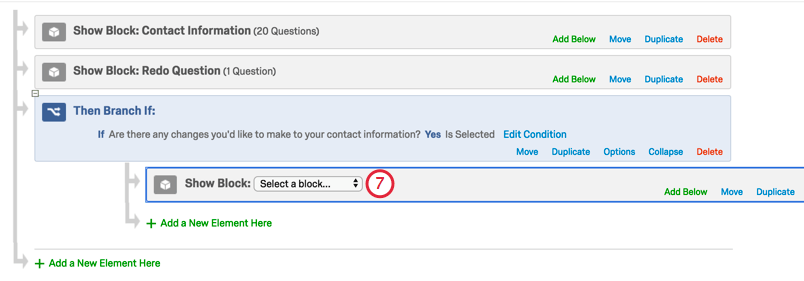
In this section, you’ll learn how to send a respondent back into a section after they consent to redo it. When respondents re-enter the block to make their edits, they will see their previous answers and have the chance to make changes.
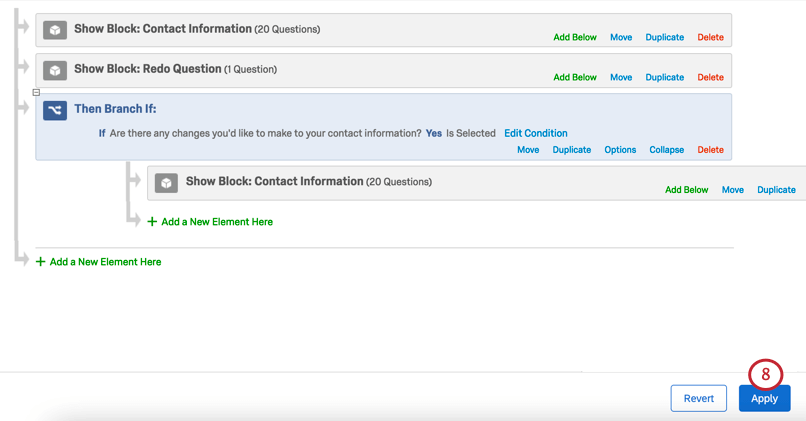
Qtip: Do you want respondents to be able to go back to the same section multiple times? You can keep adding elements under your branch to reflect this. Be careful not to include the redo question in the last loop.
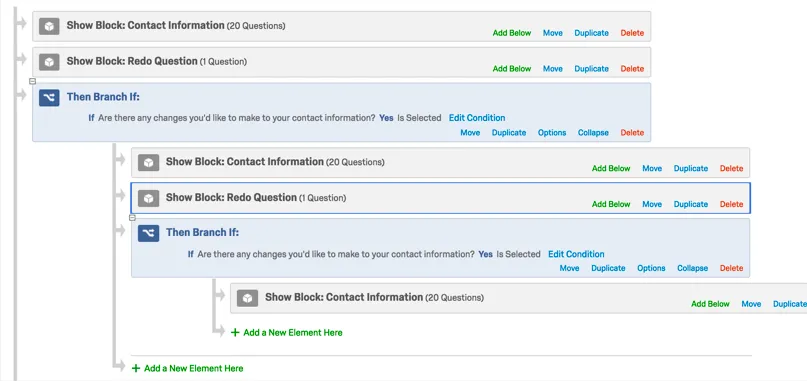
However, there is no way to give the respondent an infinite number of times to go back; at that point, you should use a back button or table of contents with clear instructions, instead.
Customized Response Reports
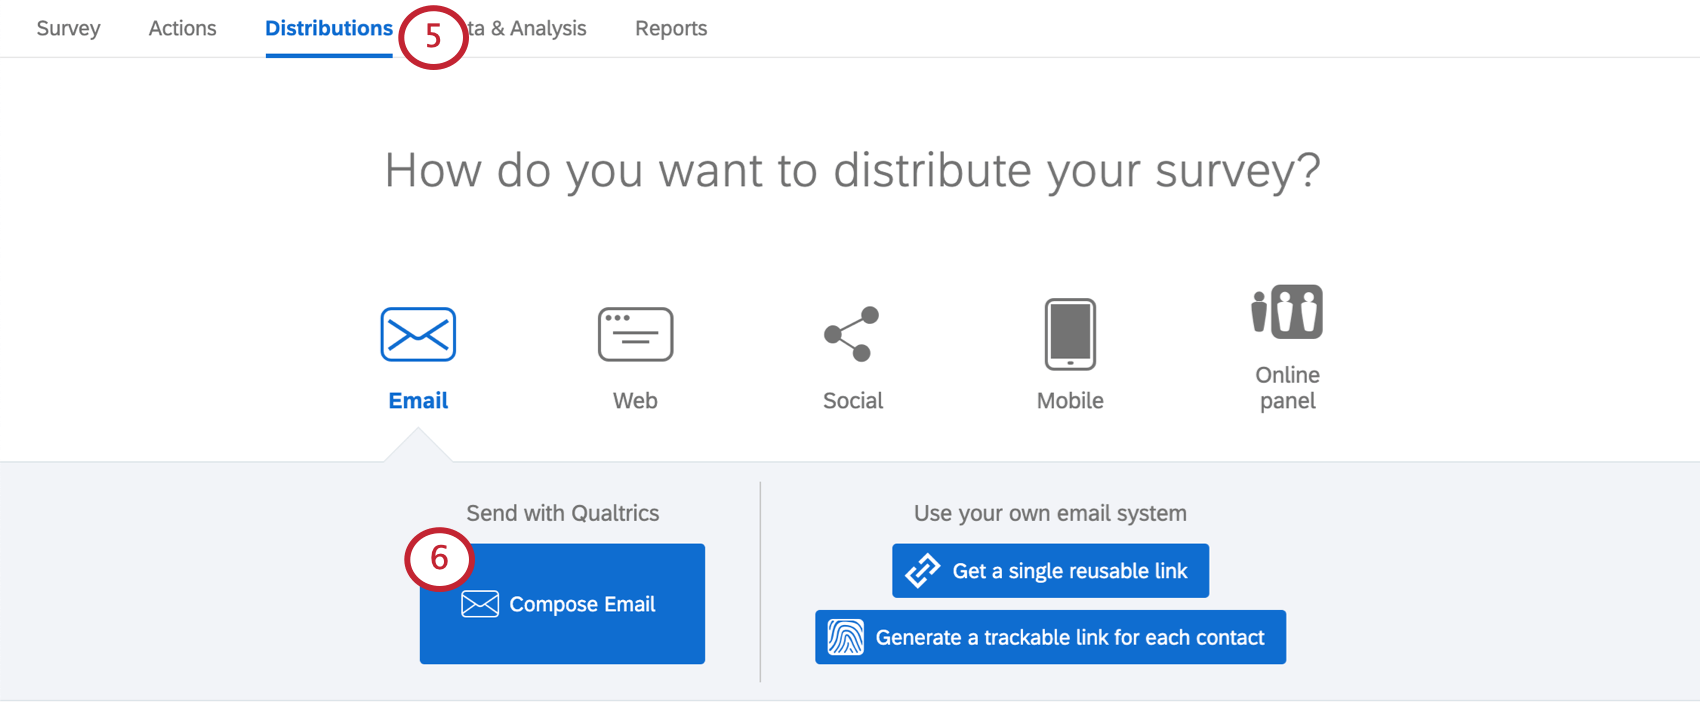
When creating an email task or email trigger, you can choose to include a response report, which has all the answers your respondents provided in the survey. However, there are times where you may want to exclude certain questions, exclude embedded data or scoring information, or include new math operations to the report.
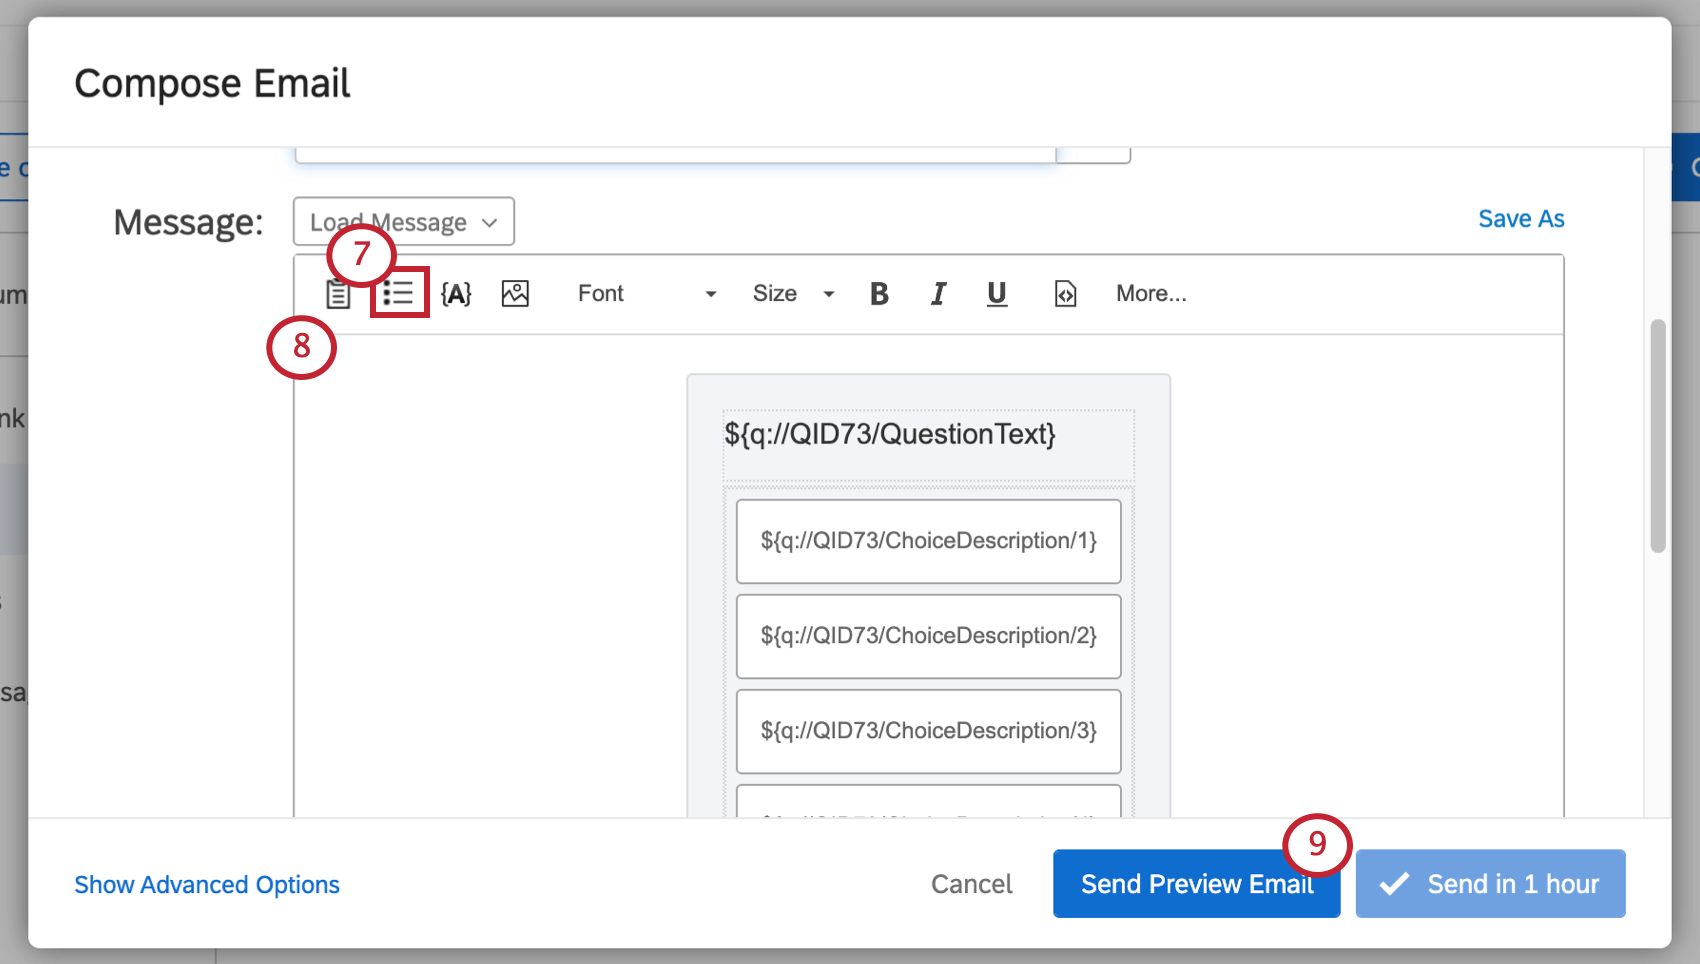
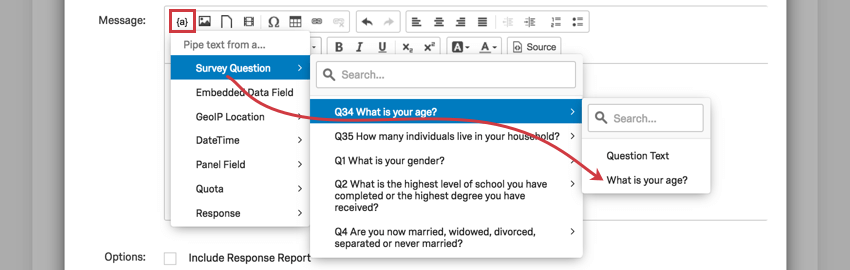
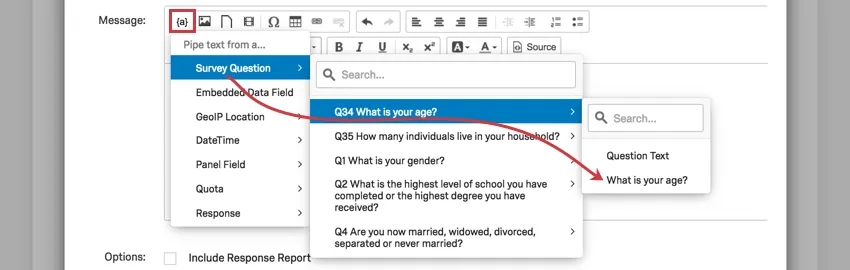
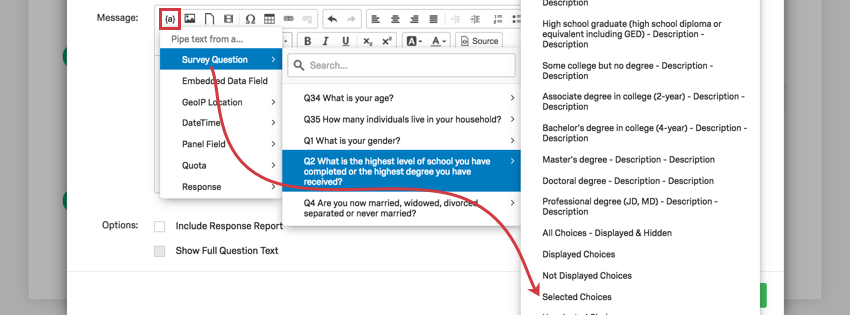
While you cannot customize your response report, you can edit the body of your email task or trigger to only contain the information you want. Using piped text, you can determine what answers you want to include in the email.
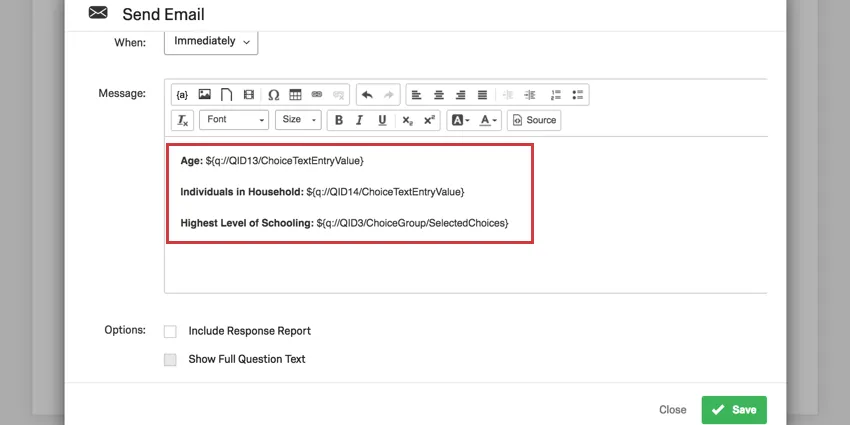
In the example above, the Age field is followed by the piped text for the question where the respondent provides their age. This will display the exact text the respondent typed in this question, e.g., 23.
In this same example, the Highest Level of Schooling is followed by the piped text for the Selected Choices for the question where the respondent is asked to indicate their education. This will display the exact text of the answer the respondent selected, e.g., Master’s degree.

Qtip: Note that in this example, Include Response Report is not selected.
Allowing Respondents to Deselect Answers in a Multiple Choice Question
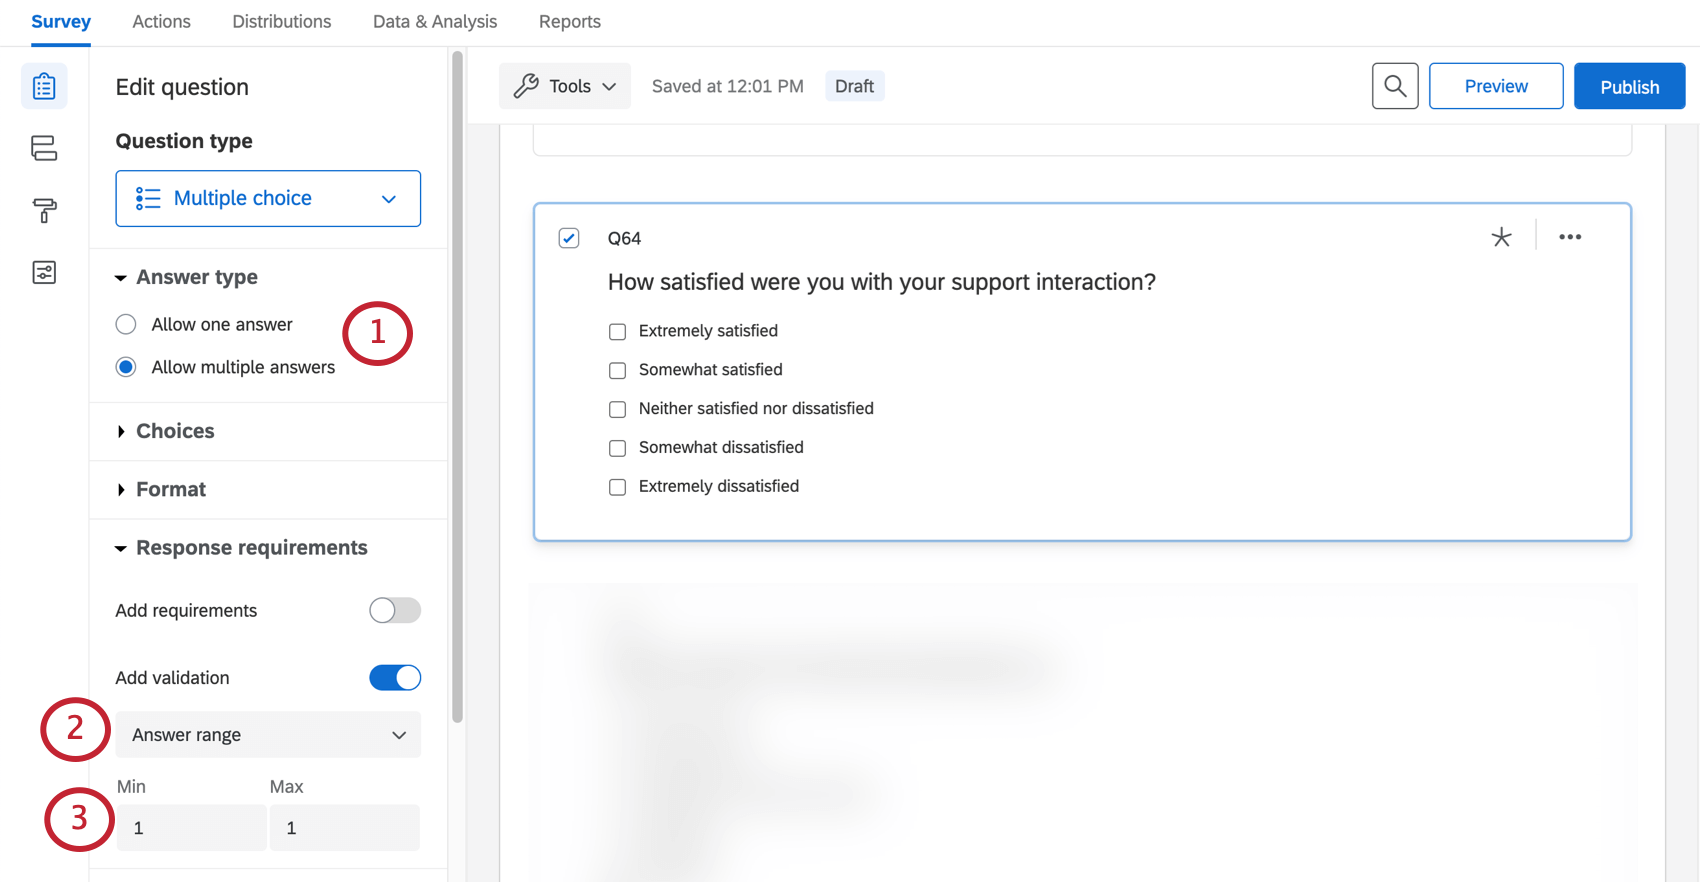
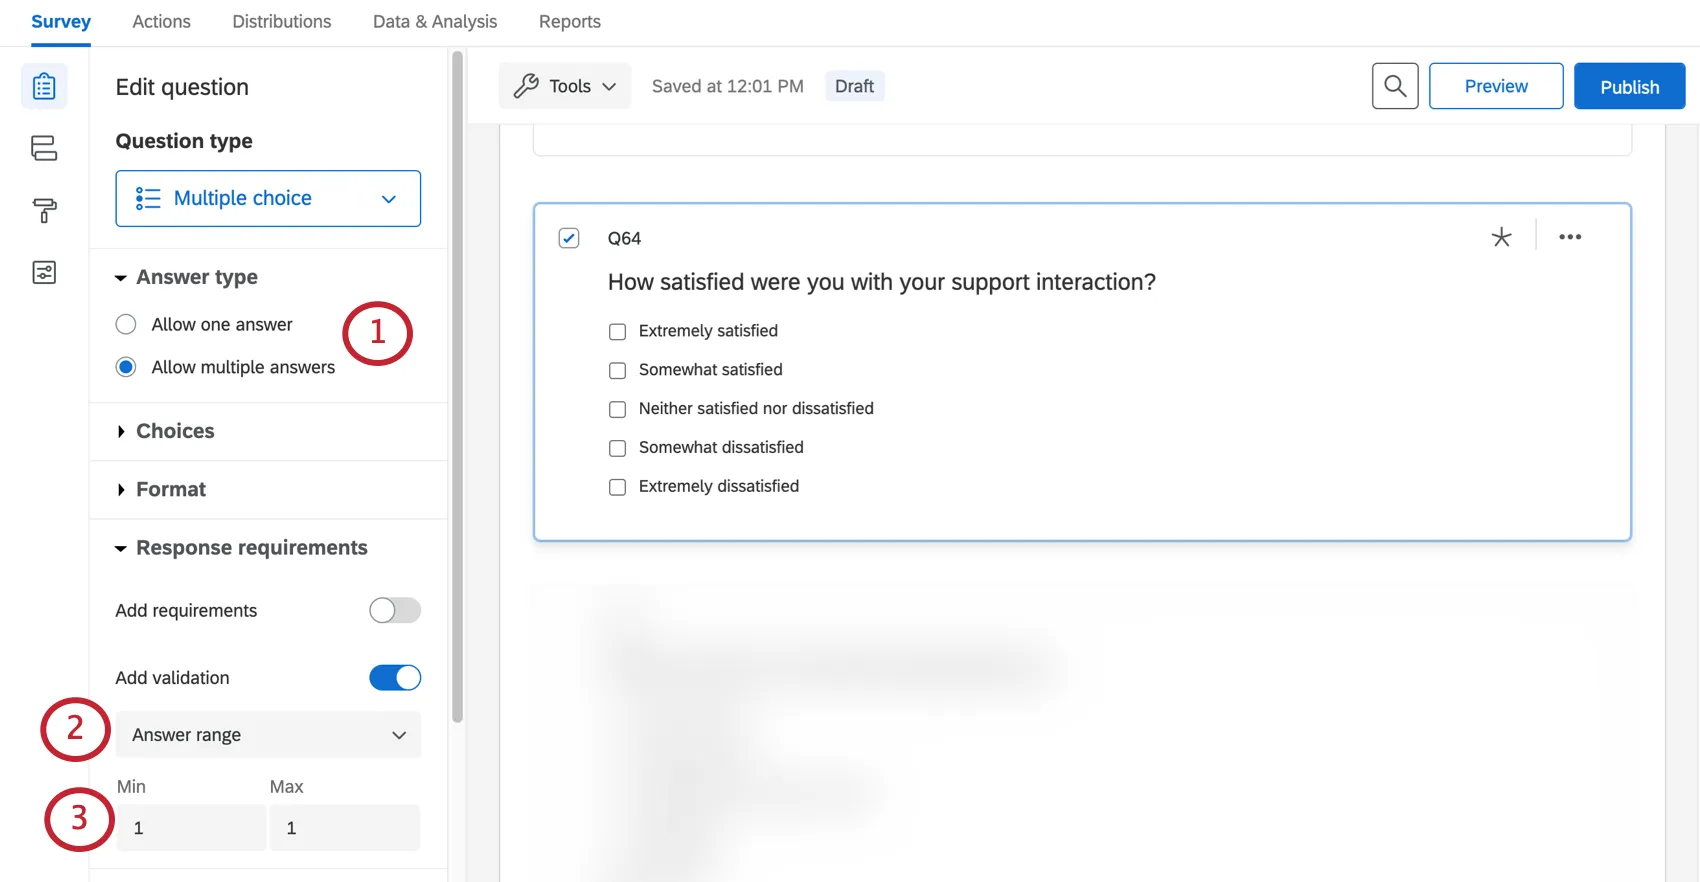
By default, Qualtrics only allows respondents to change their answer for a single answer multiple choice question, not deselect it altogether. Sometimes, you may want respondents to be able to deselect their answer for a multiple choice question. This can be useful in situations in which the question is optional. The section below guides you how to enable deselectable answer choices on your multiple choice question.
That's great! Thank you for your feedback!
Thank you for your feedback!