COVID-19 Customer Confidence Pulse
About the COVID-19 Customer Confidence Pulse
Whether you are a B2B or B2C company, it’s more important than ever to keep an on-going pulse on customer expectations, confirm COVID-19 response measures are communicated effectively to customers, and capture key insights to take action on improving your company’s handling of the situation. The COVID-19 Customer Confidence Pulse XM Solution is a premade survey and report that can help you do just that.
Methodology
Developed by Qualtrics CustomerXM scientists, the COVID-19 Customer Confidence Pulse is an automated XM Solution offering two proven methods for organizations to check in with their customers:
- COVID-19 Quick Check-in: Two minute simple customer confidence barometer. Understand how well your company’s communication of response measures is meeting customer expectations, and gauge customer satisfaction with actions your company has taken so far to address the coronavirus (COVID-19) situation.
- COVID-19 Customer Confidence Assessment: Five-to-seven minute survey to better understand customer expectations, identify gaps, and take targeted action on the following key areas pertaining to your COVID-19 response:
- Communication – What are customer expectations with regard to the frequency and channels for communicating your company’s COVID-19 response, and how well are you meeting those expectations today?
- Action – How satisfied are customers with the actions you have taken, considering both the relevance and timeliness of those actions?
- Confidence – How confident are your customers in the ongoing ability of your company/brand to meet the evolving needs of customers in these trying times?
- In-person/On-location interaction (if applicable) – How are behaviors changing for in-person or on-location customers (e.g. restaurant patrons), and how do they want to interact with the company going forward?
- Customer Needs – What would customers like your company to do better or different in your handling of the evolving COVID-19 situation?
Creating a COVID-19 Customer Confidence Pulse
- Select Catalog from the global menu.
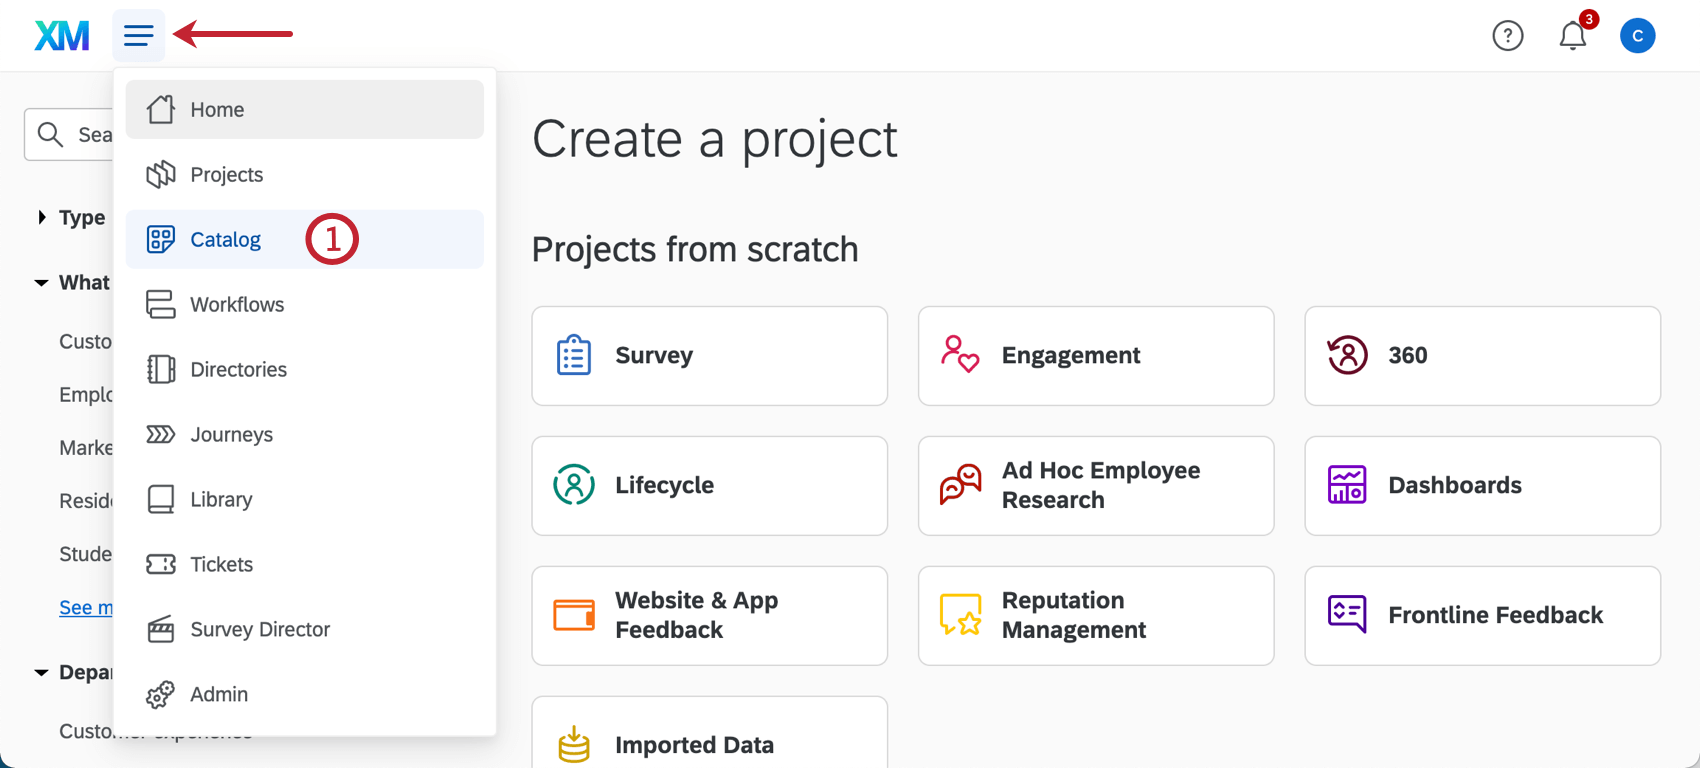 Qtip: A project can also be created from the Projects or Homepage.
 - Under COVID-19 projects, select COVID-19 Customer Confidence Pulse.
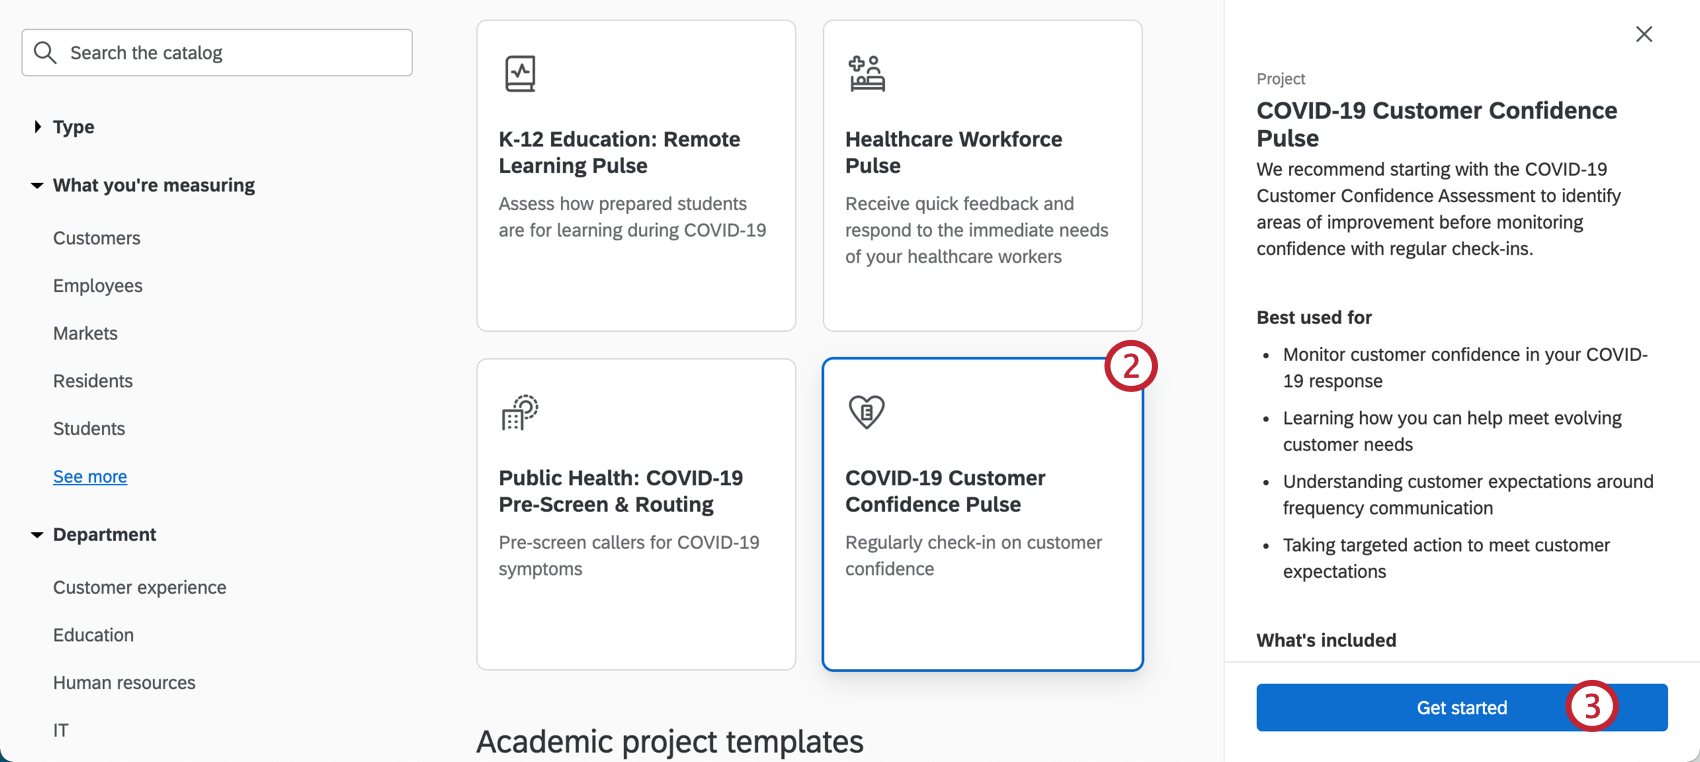 Qtip: You can also use the search in the catalog to find this project.
 - Click Get started.
- Name your project.
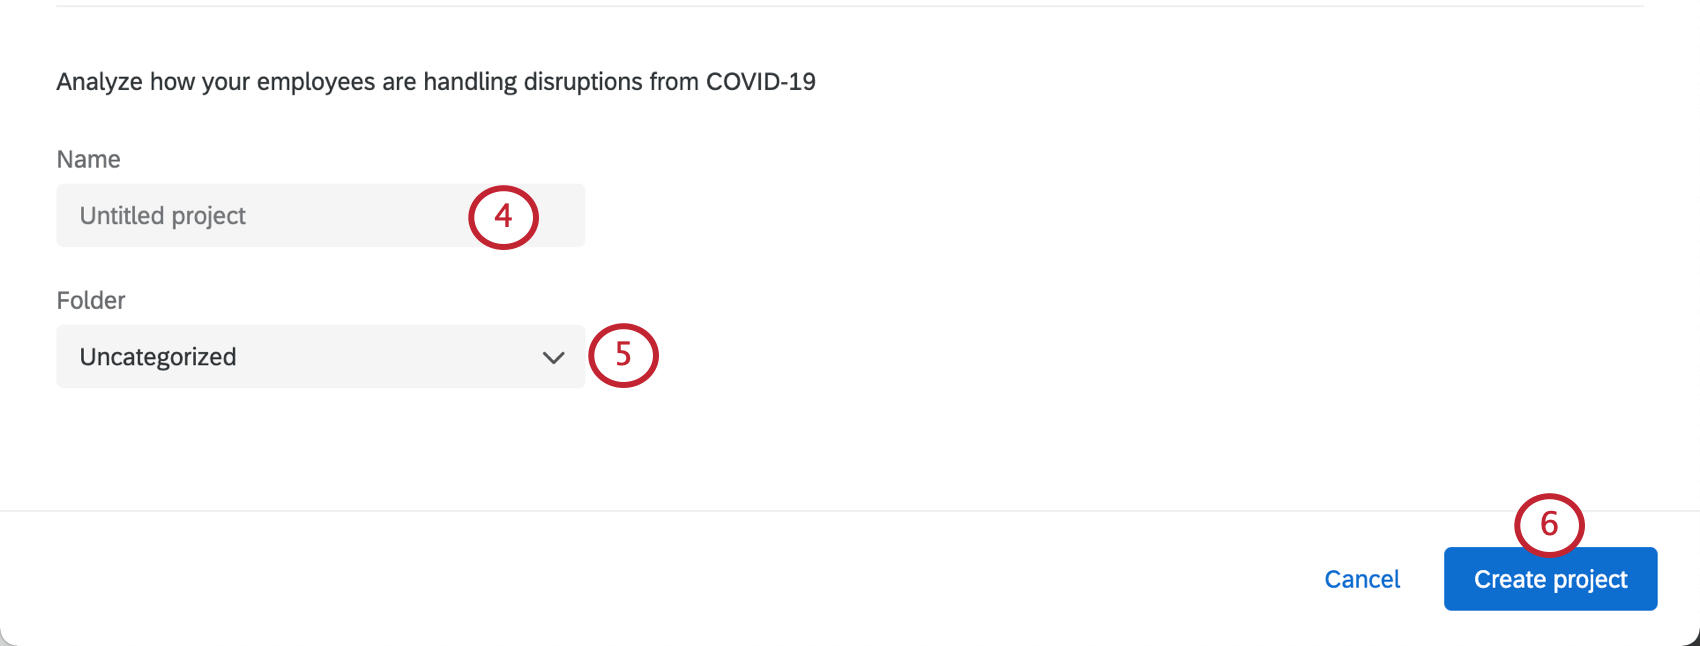
- If desired, put it in a folder.
- Click Create project.
- Provide your organization’s name.
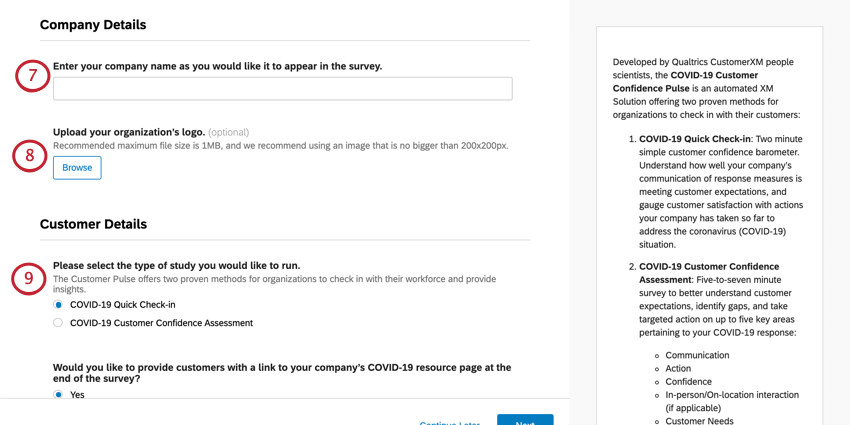
- If desired, upload a copy of your organization’s logo. Max file size is 1MB.
- Decide whether you’d like to create a COVID-19 Quick Check-In or the full COVID-19 Customer Confidence Assessment. See link for an overview of each.
Qtip: If you choose one option and then later decide you’d prefer to work with the other, please create another, separate COVID-19 Customer Confidence Pulse.
- Determine whether you’d like to provide customers with a link to your company’s COVID-19 resource page at the end of the survey, and enter the URL if eligible.
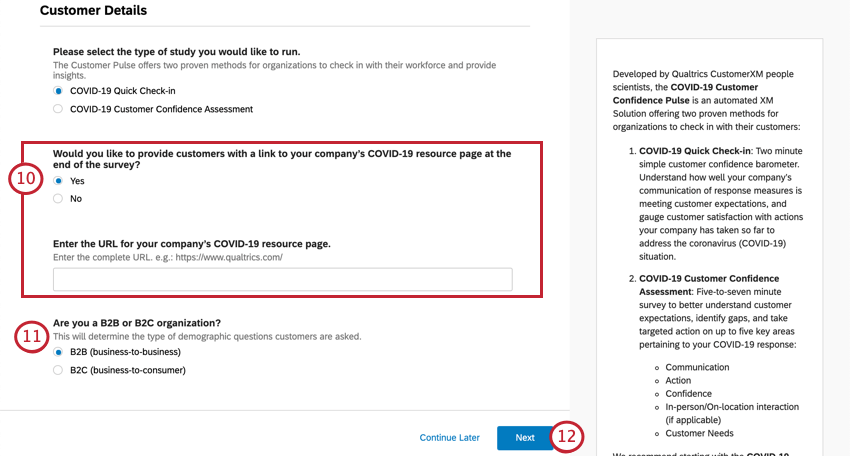
- Select your company’s type. Your answer determines the type of customer information you can configure in the next steps.
- B2B (business-to-business): Your company creates solutions, services, or products intended to help businesses run more smoothly.
- B2C (business-to-consumer): Your company creates solutions, services, or products for the everyday consumer.
- Click Next.
- If you chose B2B, you will enter the following information:
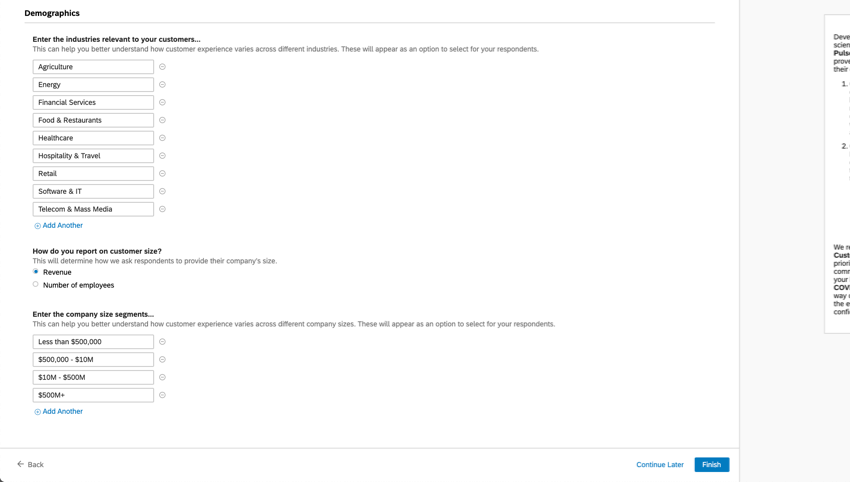
- Enter the industries relevant to your customers. This can help you better understand how customer experience varies across different industries. These will appear as options your respondents can select.
- Specify whether you report on company size by revenue or number of employees. How you answer then determines the pre-populated company size segments we recommend; you can edit these as needed in the fields provided.
- If you chose B2C, you will answer the following questions:
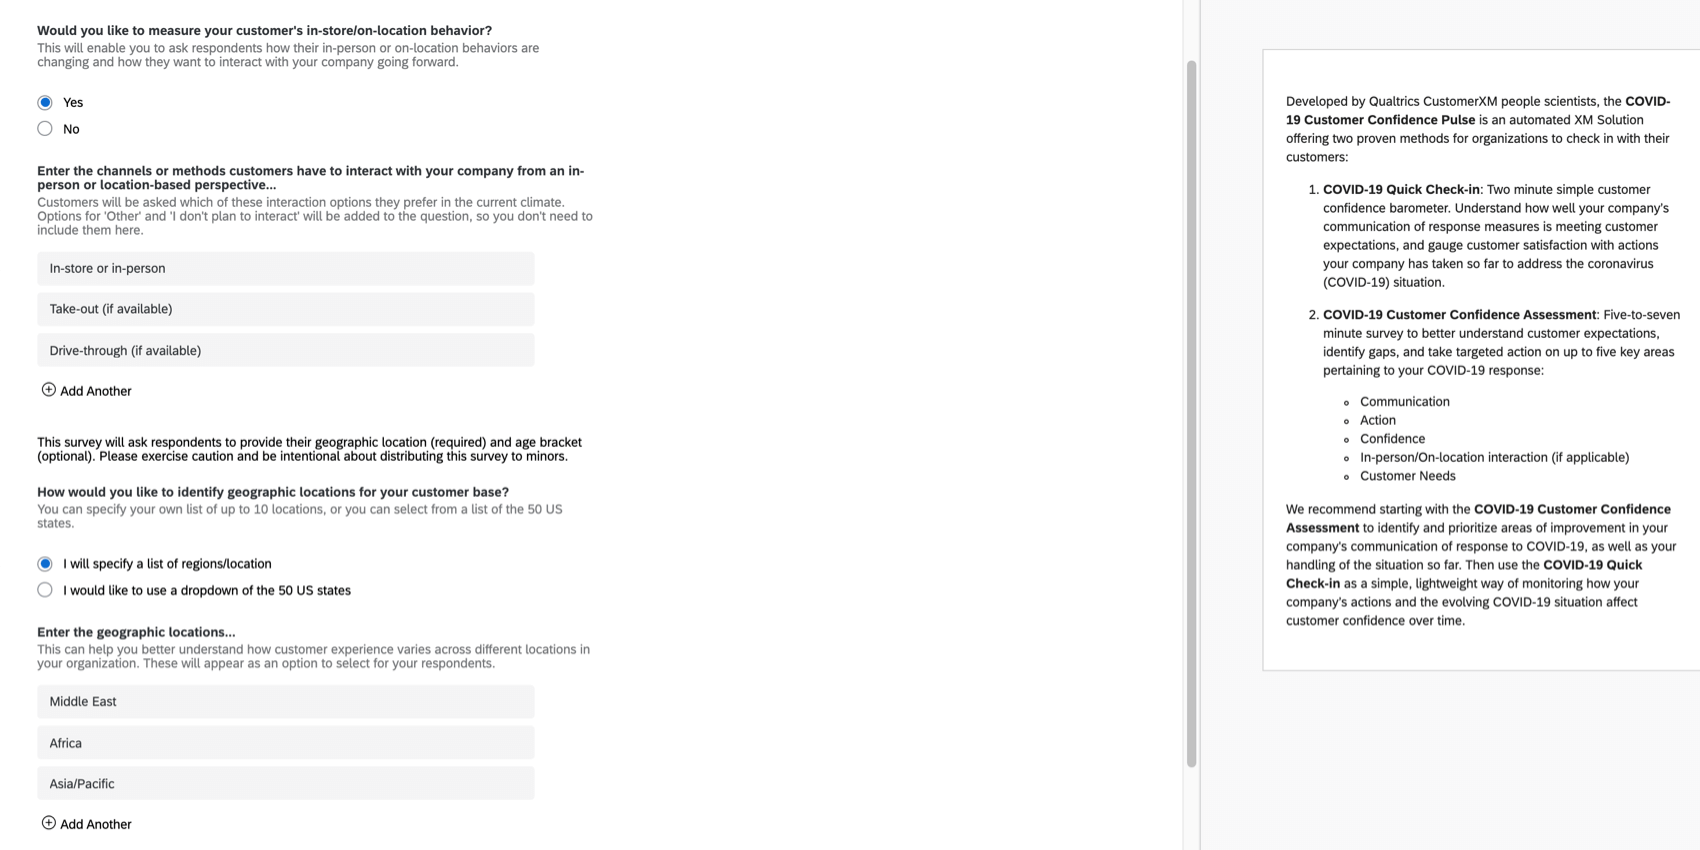
- Specify whether you would like to measure your customer’s in-store (location-based) behavior.
- Enter the channels or methods customers have to interact with your company from an in-person or location-based perspective.
- Specify whether you like to provide a list of geographic locations to measure. If you do not provide a custom list of locations then respondents will be asked to provide their location from a list of the 50 US states.
- Click Next.
- Specify whether you would like to ask customers about the potential actions your company could take to address the evolving COVID-19 situation. If so, enter the actions your company is considering to address the situation.
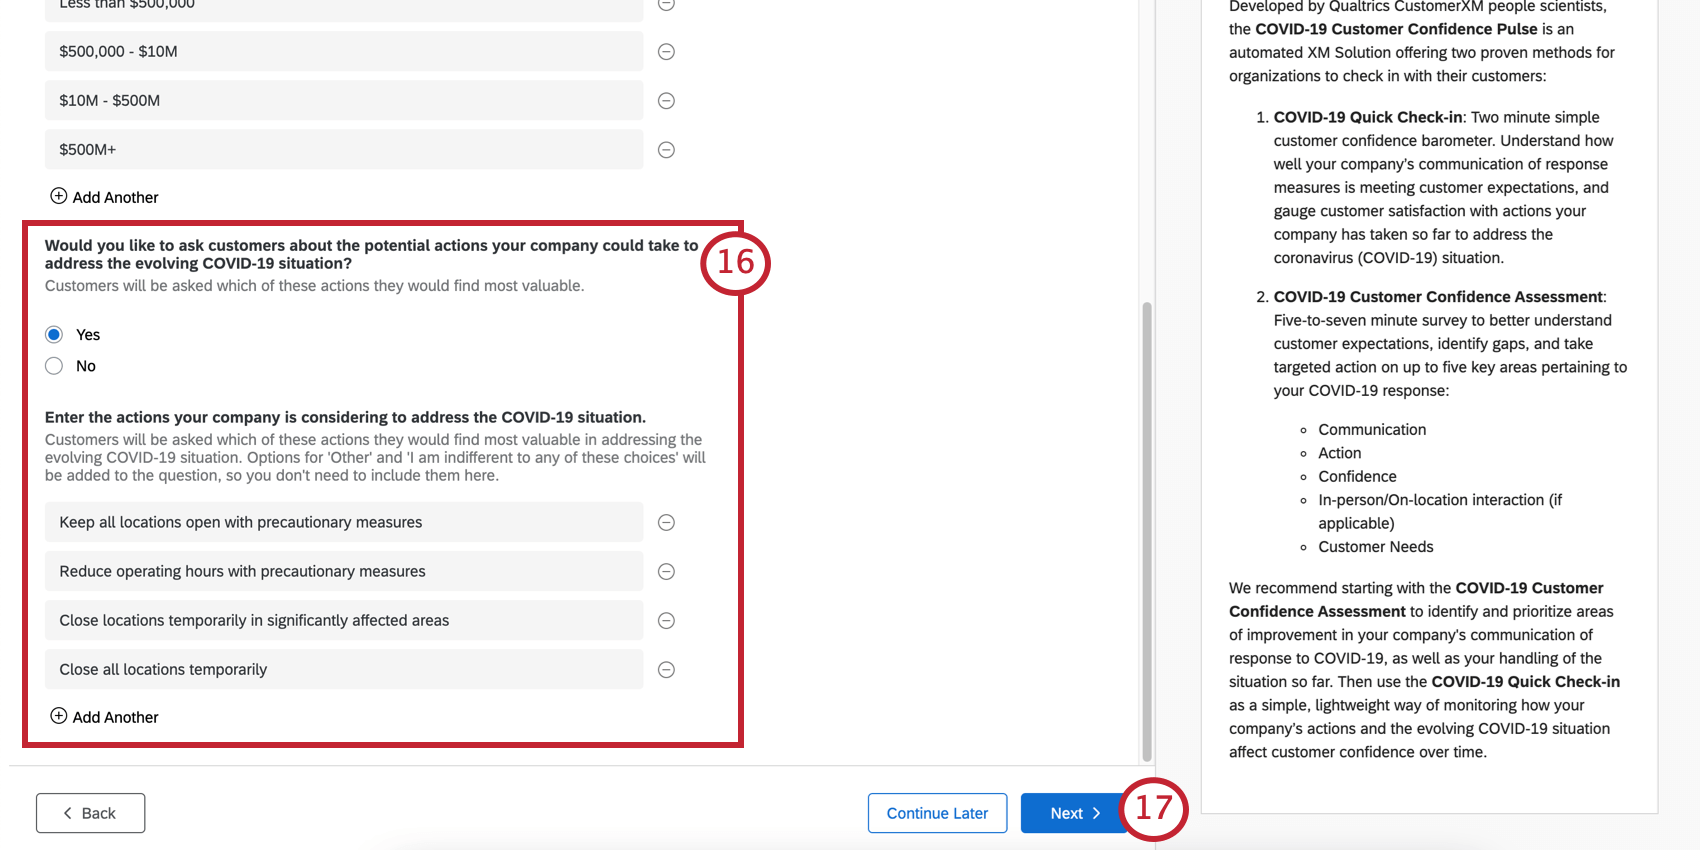
- Click Next.
- Determine whether you’d like to be notified when responses come in. If you say yes, you’ll be asked to specify the threshold of responses you’d like to reach before being notified.
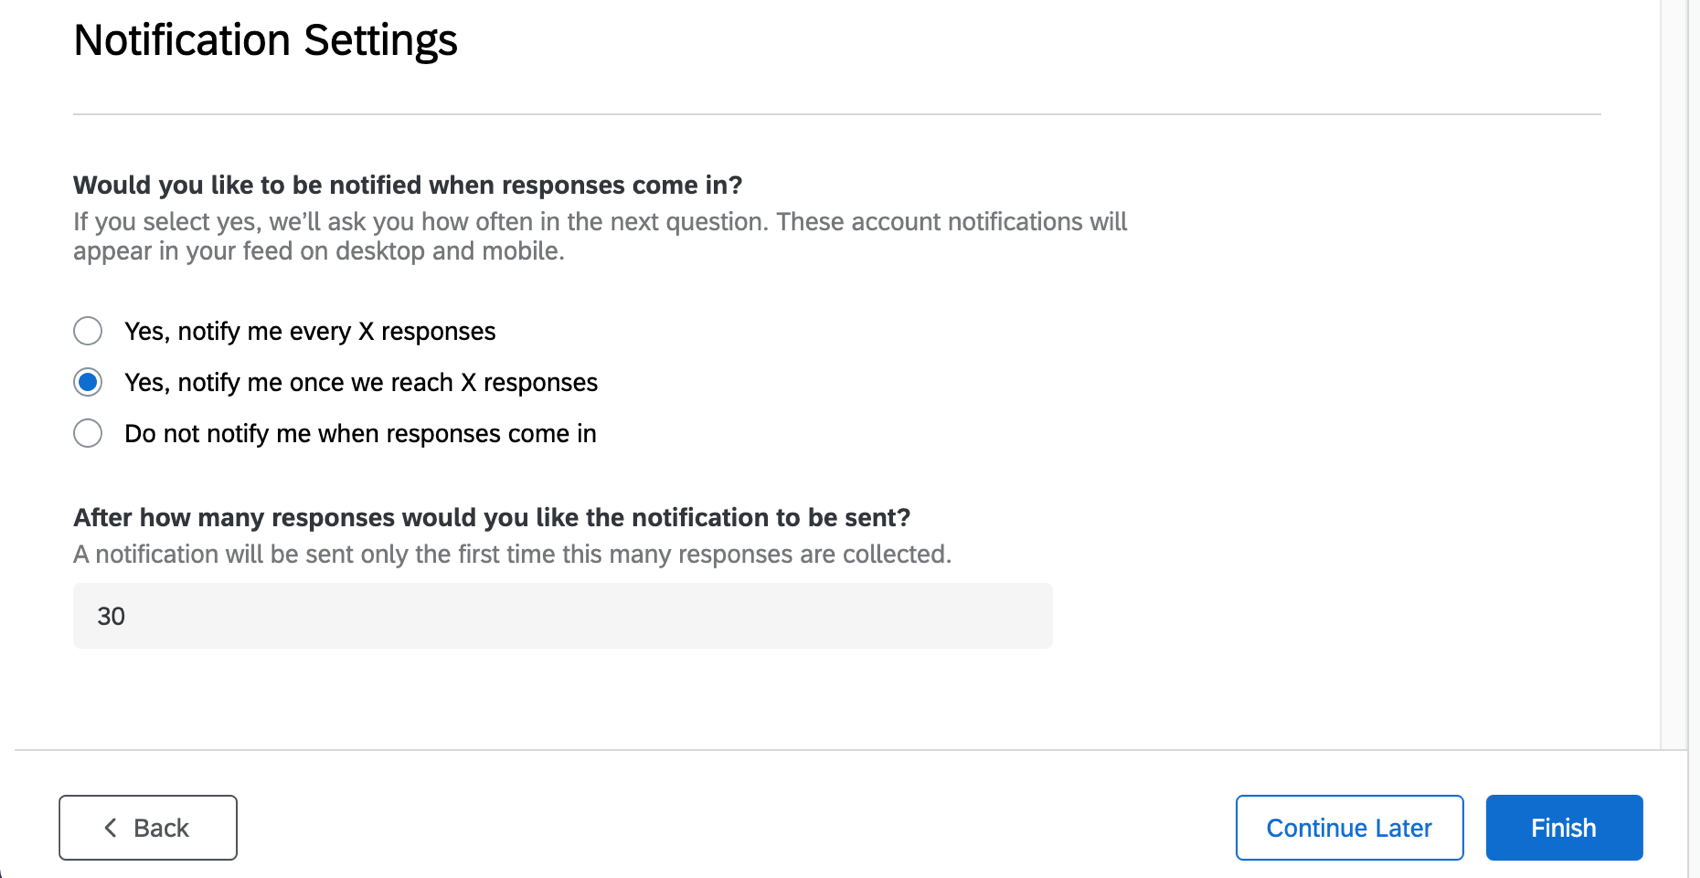
- When you’ve filled out these fields, click Finish to generate your survey.
- Click Preview Survey to test your survey.
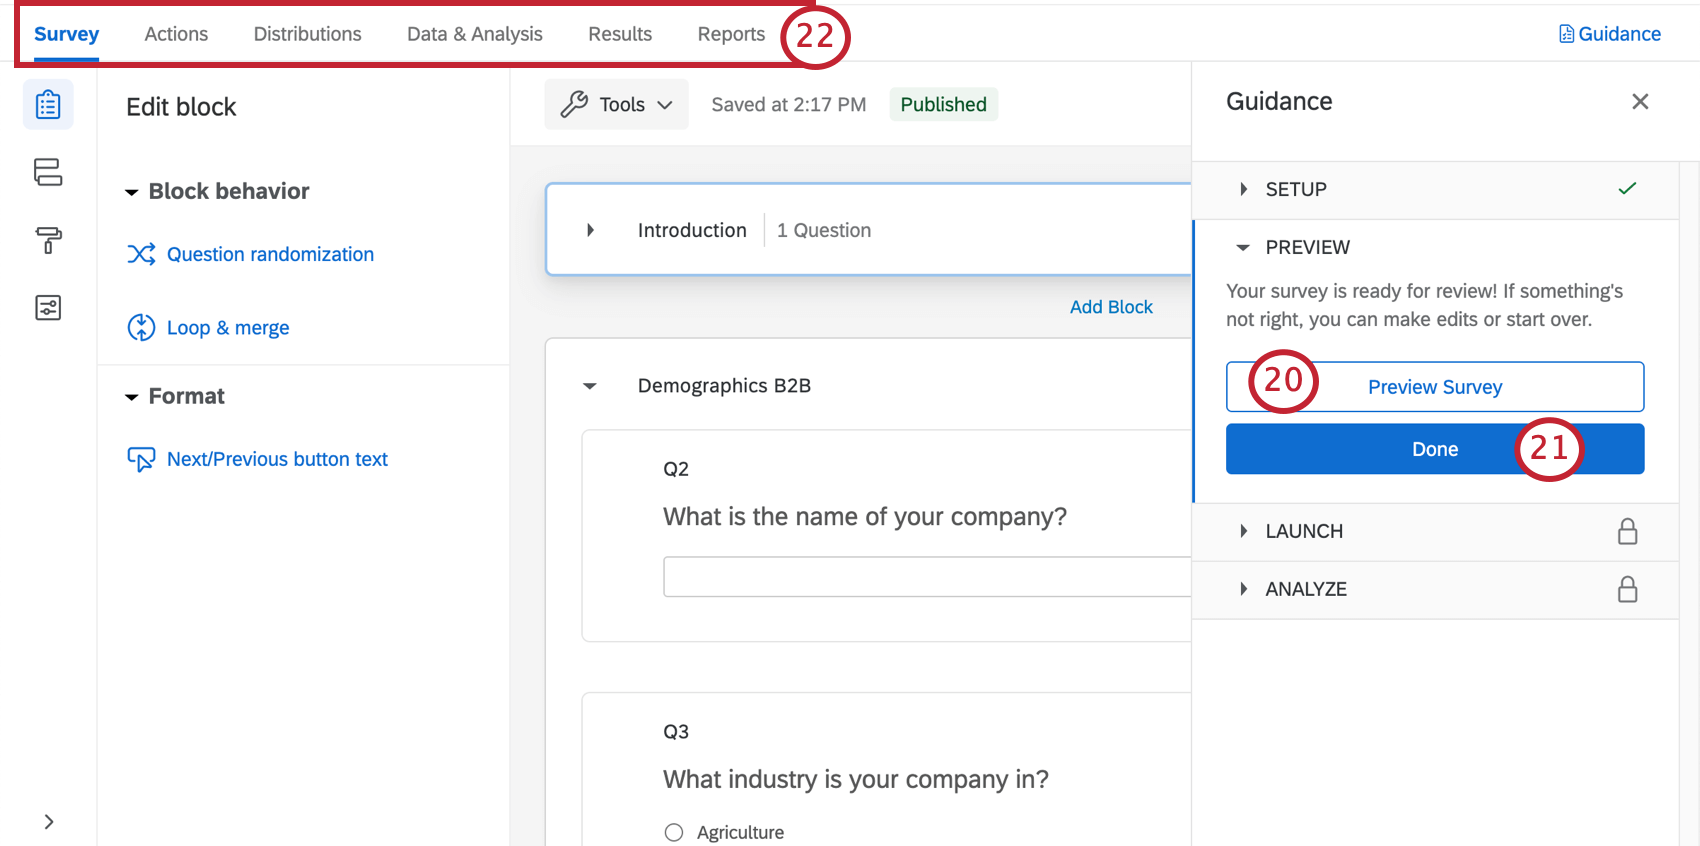 Qtip: Did your survey Preview not appear? Make sure your browser doesn’t block pop-ups on Qualtrics.
 - Click Done to resume the guided setup.
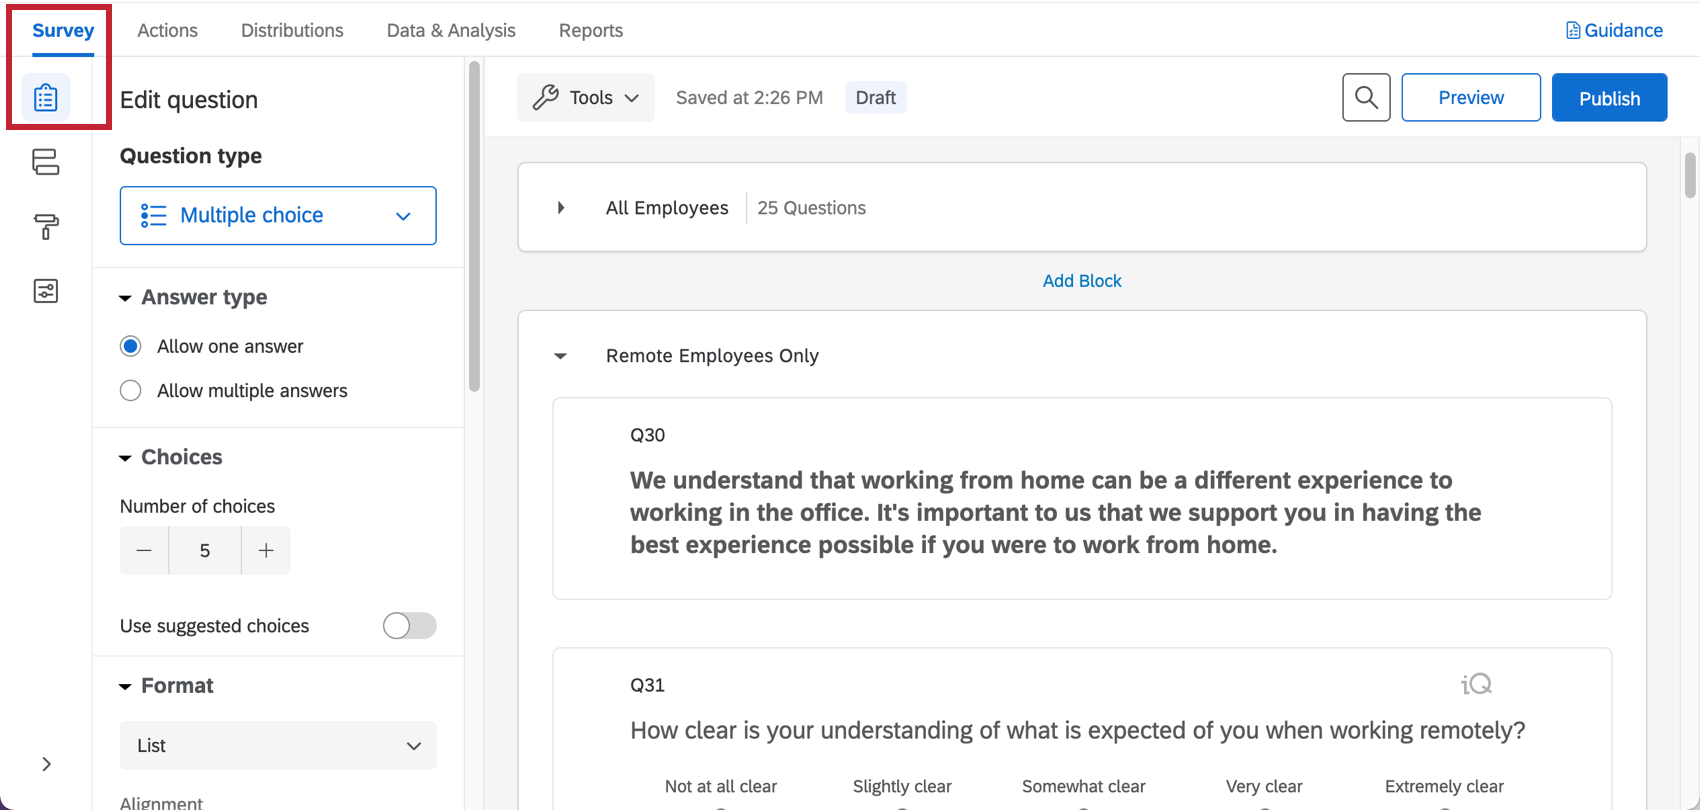
- Use the tabs along the top if you’d like to edit components not included in the blue button steps. For example, you can go to the Survey tab to edit the survey theme and add demographic questions, whereas you can go to the Distributions tab to download a distribution history for emails you’ve sent.
Customer Confidence Pulse Survey Customization
If you want to see the questions in your survey or edit them, click the Survey tab. Once inside the survey builder, you can add new questions, tweak the wording on existing ones, edit the survey theme, and much more.
If there’s particular functionality you’d like to add, try searching the Support Site, or use the Support Site’s menu to the left to pick a page. In this section, we’ll cover some of the fundamentals of survey editing.
Adding and Editing Questions
You can add as many additional questions as you want. However, keep in mind that the shorter the survey, the more likely customers are to fill it out.
For guides to adding and editing questions, see:
Deleting and Restoring Questions
If you have sent a question to the trash, it is possible to restore it. To roll back many changes at once, see also how to revert a survey back to a previous version.
Saving and Publishing
All edits you make are saved automatically; however, they won’t necessarily be pushed to the live version of the survey. When you are finished with all of your edits and are ready to generate a link and share the survey with your customers, remember to click Publish in the upper-right.
For more on how this works, see Survey Publishing & Versions.
Translating the Customer Confidence Pulse
The COVID-19 Customer Confidence Pulse XM Solution is available to be created in accounts set to one of the following platform languages: English (US), English (UK), Brazilian Portuguese, French EU, German, Italian, Japanese, Spanish EU, Spanish (LATAM), Chinese (Simplified), Chinese (Traditional), Dutch, Finnish, Korean, Portuguese (EU).
Additionally, you can add translations to the project so that respondents can choose from a language dropdown when taking the survey. You may choose to translate this XM solution through one of the following methods:
- Importing a translated language file provided by Qualtrics
- Adding translations manually
- Using automatic translation
Method 1: Importing a translated language file
Since the COVID-19 Customer Confidence Pulse XM Solution has been translated into the core languages, you can use Qualtrics-provided translation files to import additional translations to your project. The file contains translations for Brazilian Portuguese, French EU, German, Italian, Japanese, Spanish EU, Spanish (LATAM), Chinese (Simplified), Chinese (Traditional), Dutch, Finnish, Korean and Portuguese (EU). To import your languages correctly, follow the below steps:
- Download the language file based on the type of survey method you selected.
- Export the translation file for your project from the Translate Survey option in your Survey Tools. See this support page for a step-by-step guide on exporting your translation file.
- Copy the desired translations from the file you downloaded in step 1 and paste them into the file exported in step 2. Make sure you paste the translations into their correct columns by matching the language codes.
Qtip: You only need to copy the languages that you will use.
- If needed, make any necessary edits to your translation file.
Qtip: All of the translations contain {{Company Name}} in place of your inputed company name in the translated text. Make sure to replace these with the correct translations.
- Import your translation file through the Translate Survey option in your Survey Tools. Visit this support page for a step-by-step guide on importing your translation file.
If you’d like to import a translation for a language that is not in the file provided by Qualtrics, see this support page for creating custom translations.
Method 2: Adding translations manually
If you’d like, you can translate each question and answer choice of your survey manually. This method generally takes longer than using the import method above. More information about translating your project manually can be found on this support page.
Method 3: Using Automatic Translation
To speed up your manual survey translation process, you can use the built-in automatic translation feature. The automatic translation feature uses Google Translate to translate your survey. Since this is an automatic translation, it may not be perfectly accurate. Therefore, we do not recommend using this as the final translation you share with respondents. Rather, this feature can save time when working with a professional translator, as they will only need to clean up automatic translation rather than starting from scratch. For more information on using this feature, please refer to the support page on automatic translations.
Distributing the Customer Confidence Pulse
When you are ready to distribute the COVID-19 Customer Confidence Pulse, it’s super quick and easy to do so:
- Make sure you have published any survey edits.
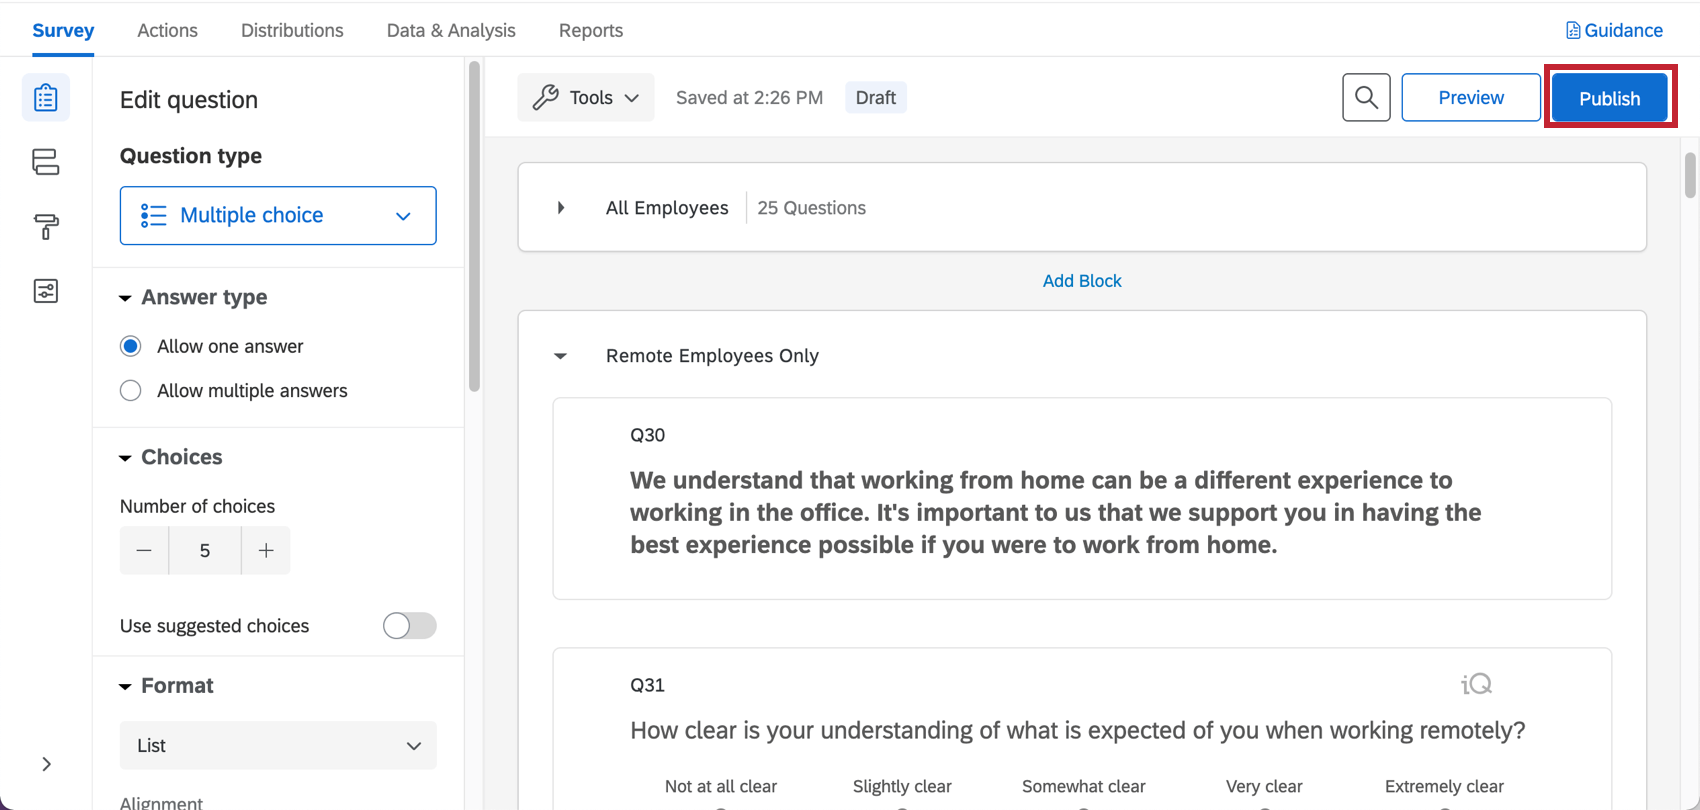
- If your changes are published or you don’t have changes to publish, head to the Distributions tab.
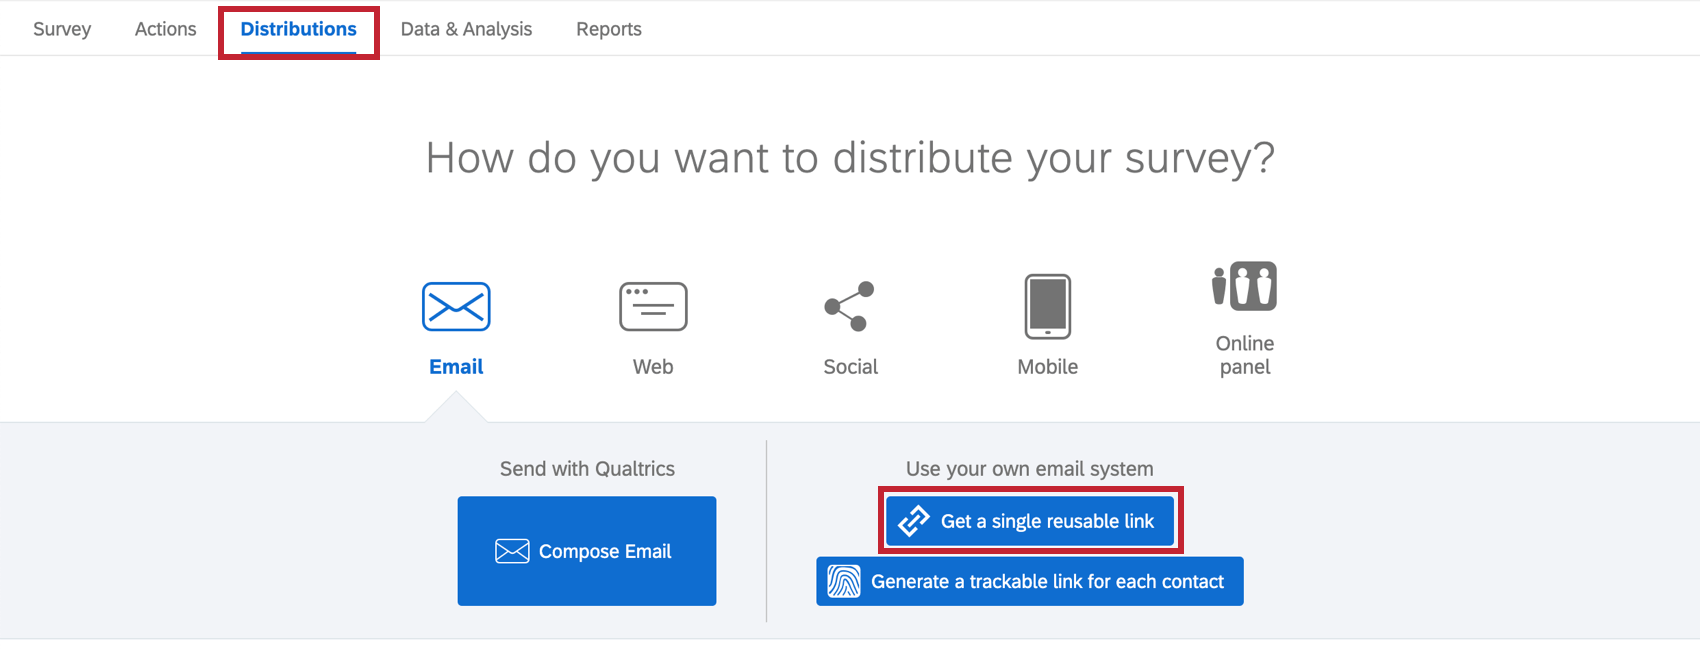
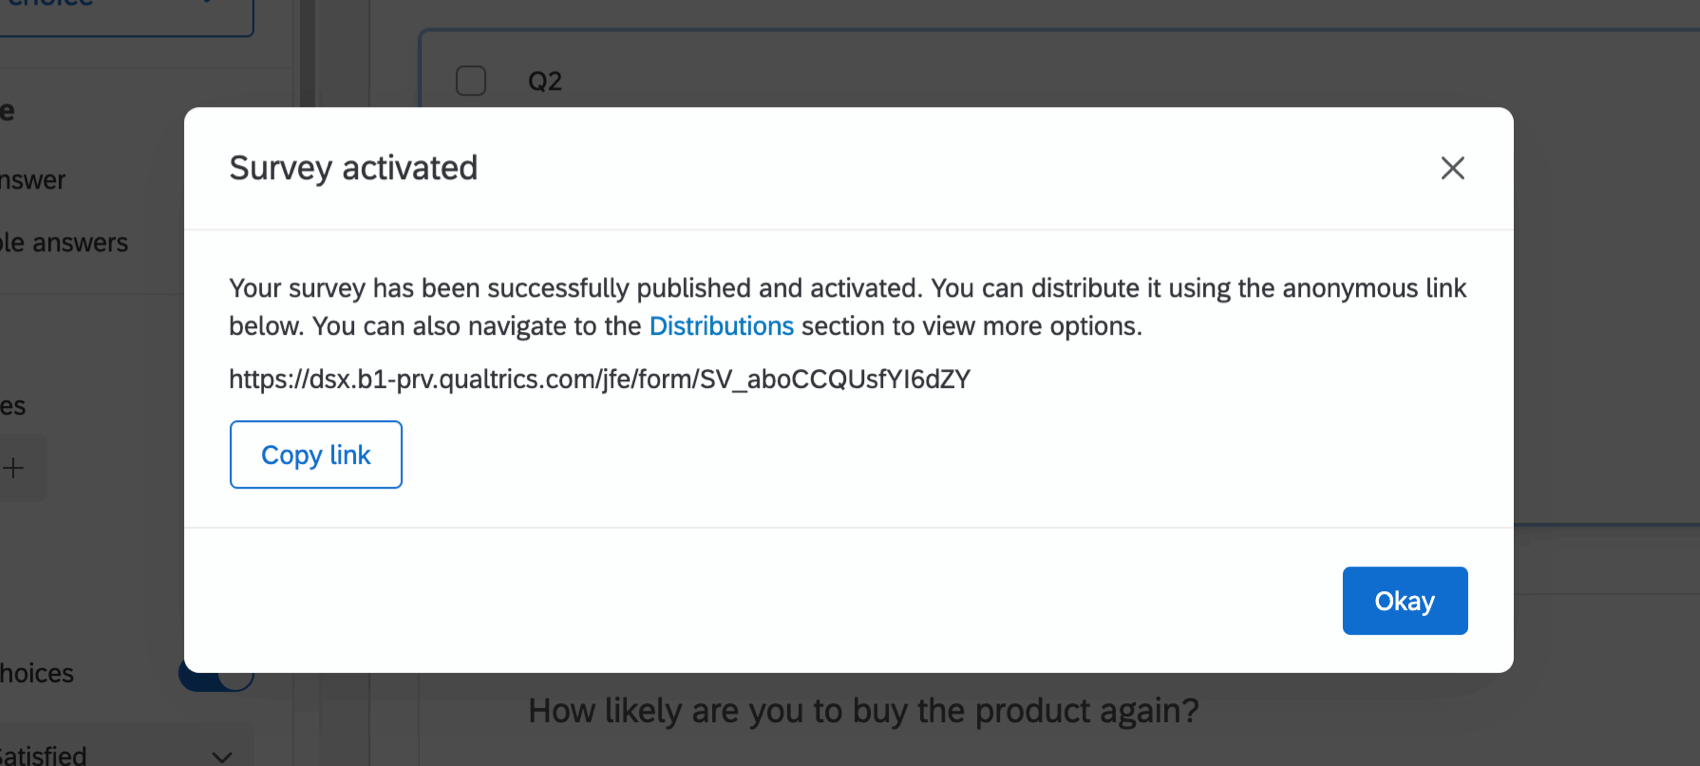
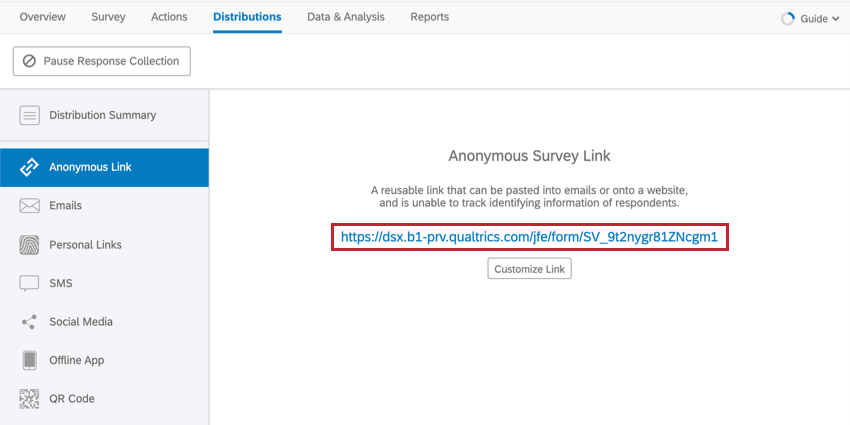
- Choose Get a single reusable link.
- You will see the anonymous link. This link does not collect any identifying information other than what you explicitly ask for in the survey. You can copy this link and distribute it through your company’s email.
Other Methods of Distribution
We recommend using the anonymous link method described above, because it’s the quickest and easiest distribution method.
If you are interested in other methods of distribution, such as emailing from Qualtrics, see the Distributions Basic Overview for a list of options. Please note that depending on your license, not all options may be available, and some may be restricted.
Reports
Premade Reports
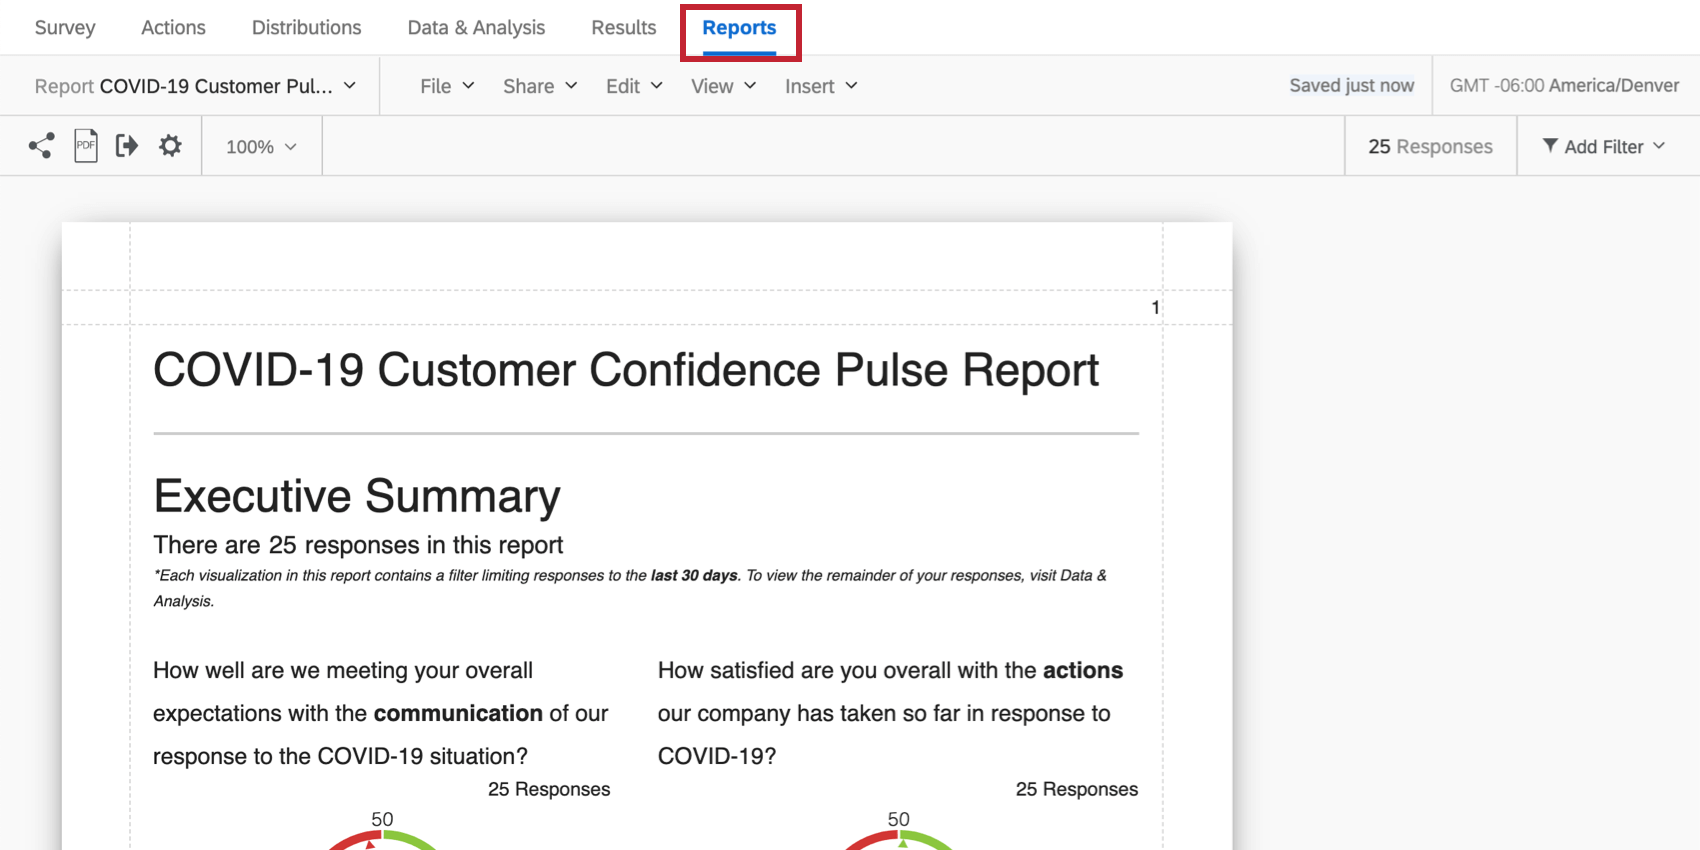
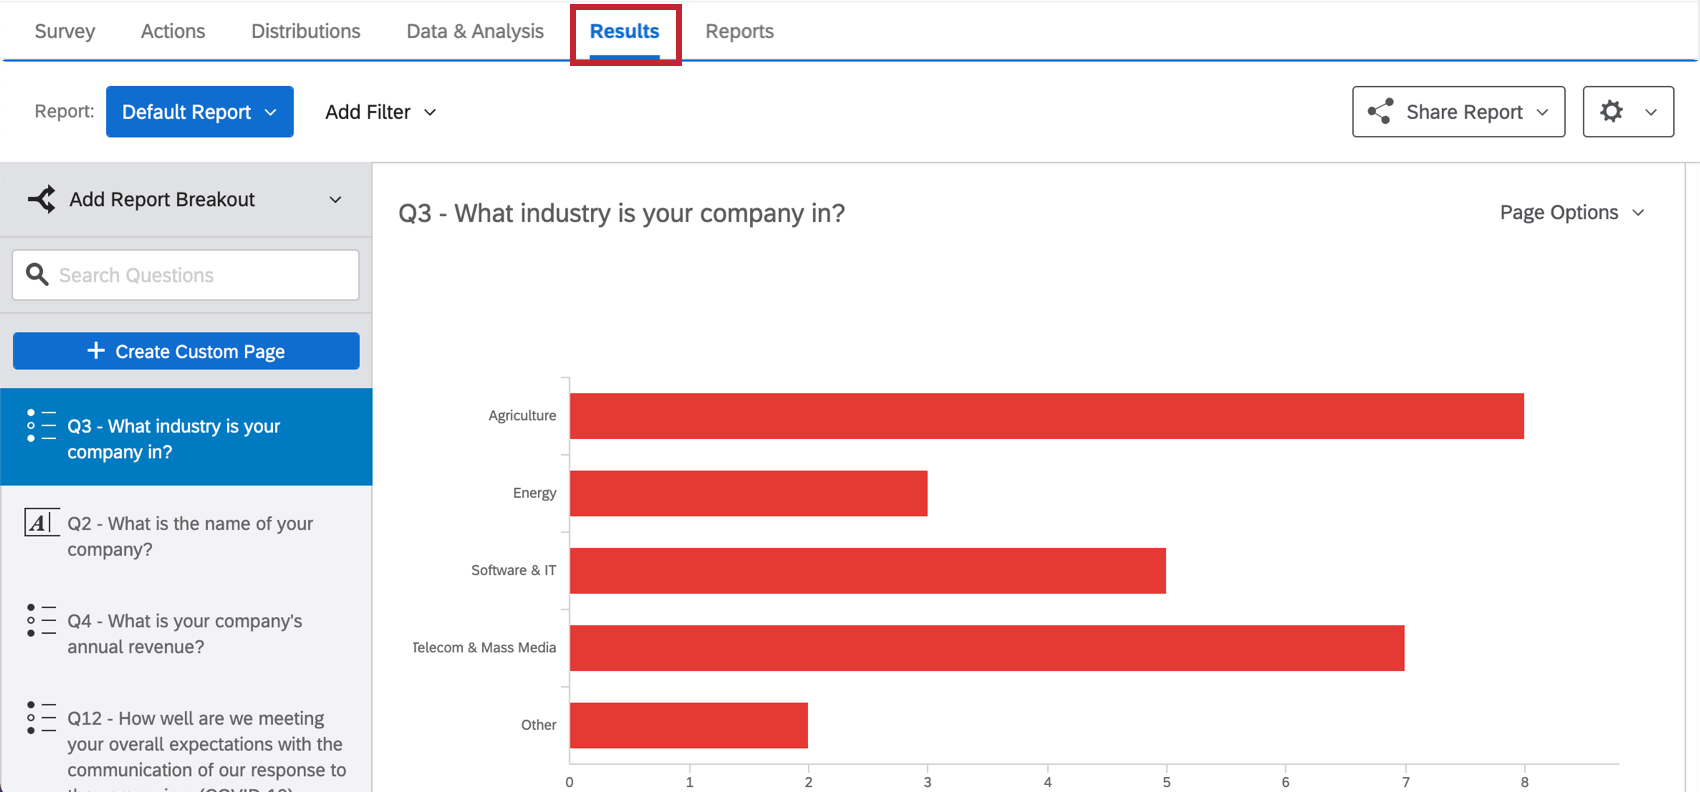
Our XM Scientists have developed a special report for this XM Solution. This report gives an overview of the results, and is ready to share as soon as you have collected data. Just go to the Reports tab to view it.
- Sharing the Report: You can share a PDF copy of this report with your colleagues, or even create a link where anyone can view the report! See Sharing Your Advanced-Report.
- Making New Reports: You can click File and then New to create a new report from scratch if needed. Use the report name dropdown to navigate between reports.
- Customizing Reports: See Advanced-Reports Basic Overview to get started customizing your reports.
Other Ways to View Data
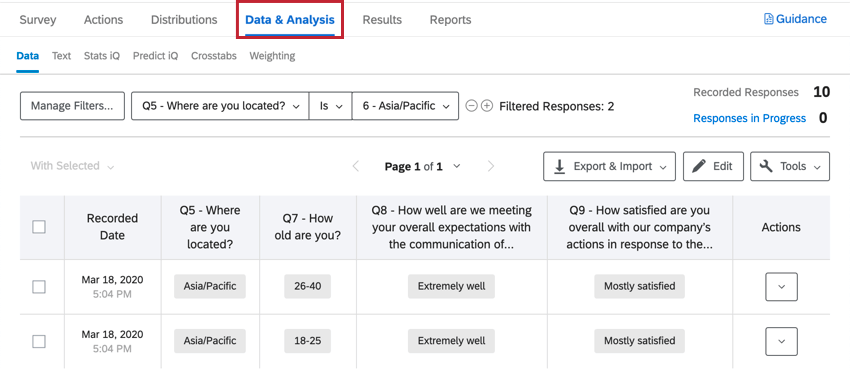
Data & Analysis allows you to edit data, export a spreadsheet of all responses, filter your responses, and much more.
Results-Reports give a quick overview of your data, and do not require you to work from scratch. They have different charts and graphs than Advanced-Reports, and are generally there to help you get quick assessments of data.
Closing the Loop
Once you start collecting responses in your survey, you may realize that you want to follow up with clients to see how you can better serve their needs. There is a way to automate this process inside Qualtrics, using a feature called an Email Task, located inside the Workflows tab. This feature allows you to either send an email to your team or straight to your customers whenever you get a survey response.
- Go to the Workflows tab.
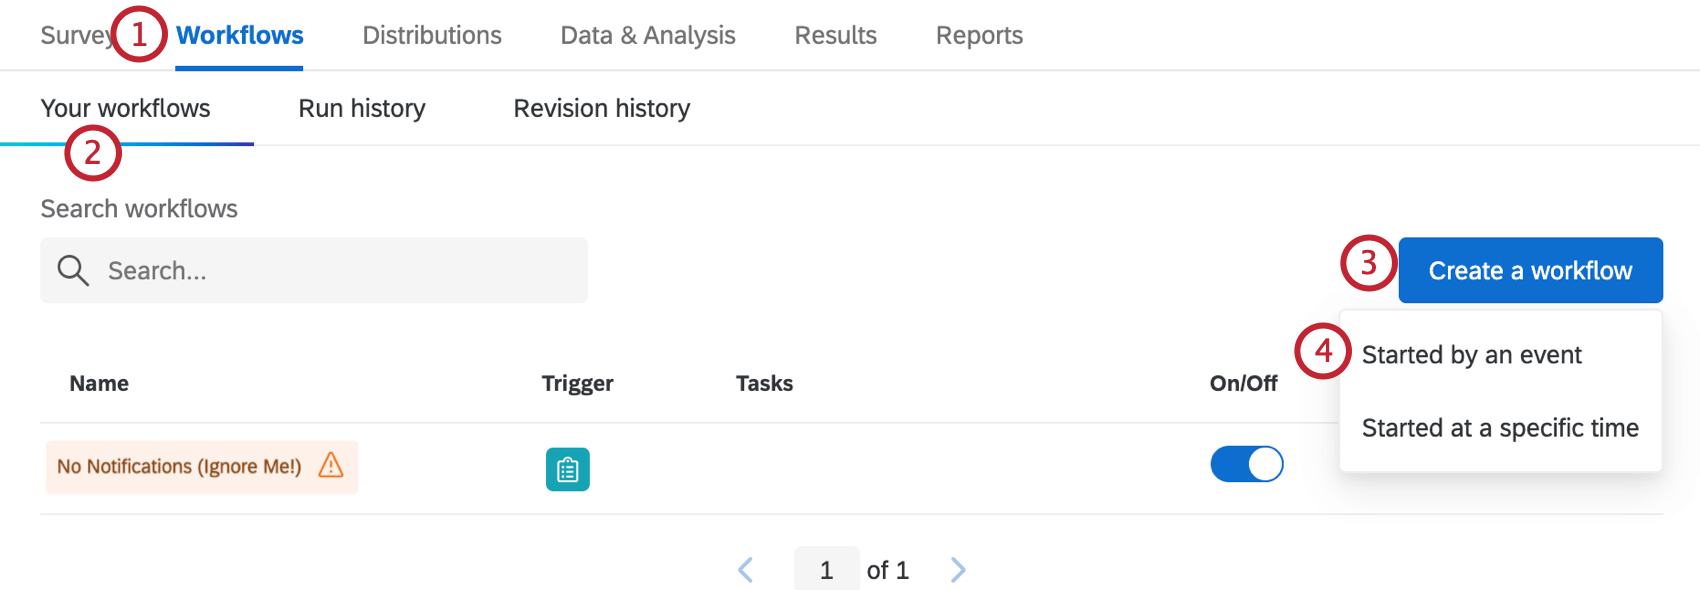
- Stay in the Your workflows section.
- Click Create a workflow.
- Click Started by an event.
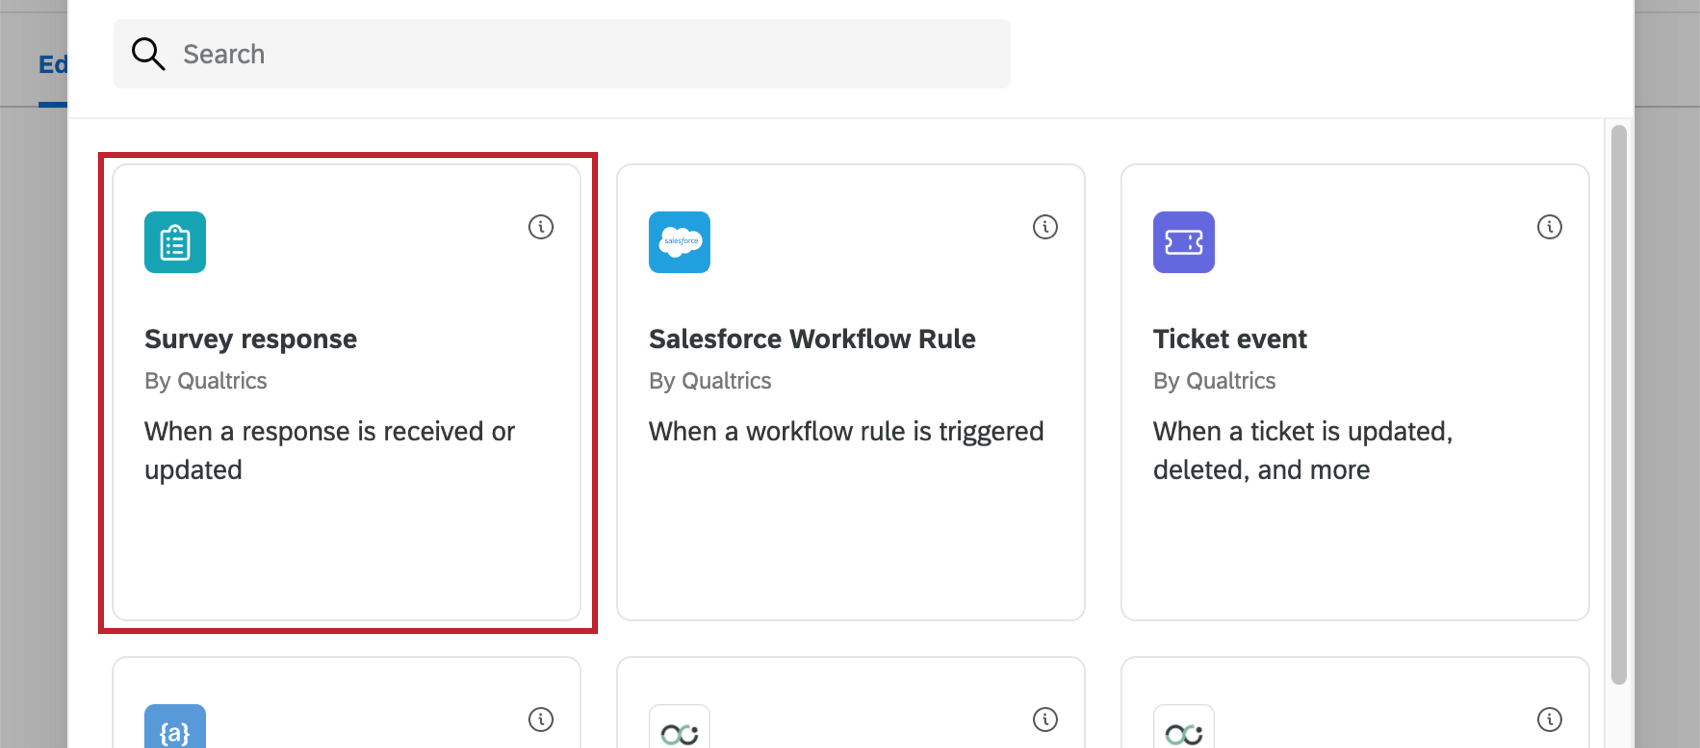
- Select Survey Response.
- Determine whether you want an email to go out when a survey response is created or updated. Most likely, you will choose Newly created responses.
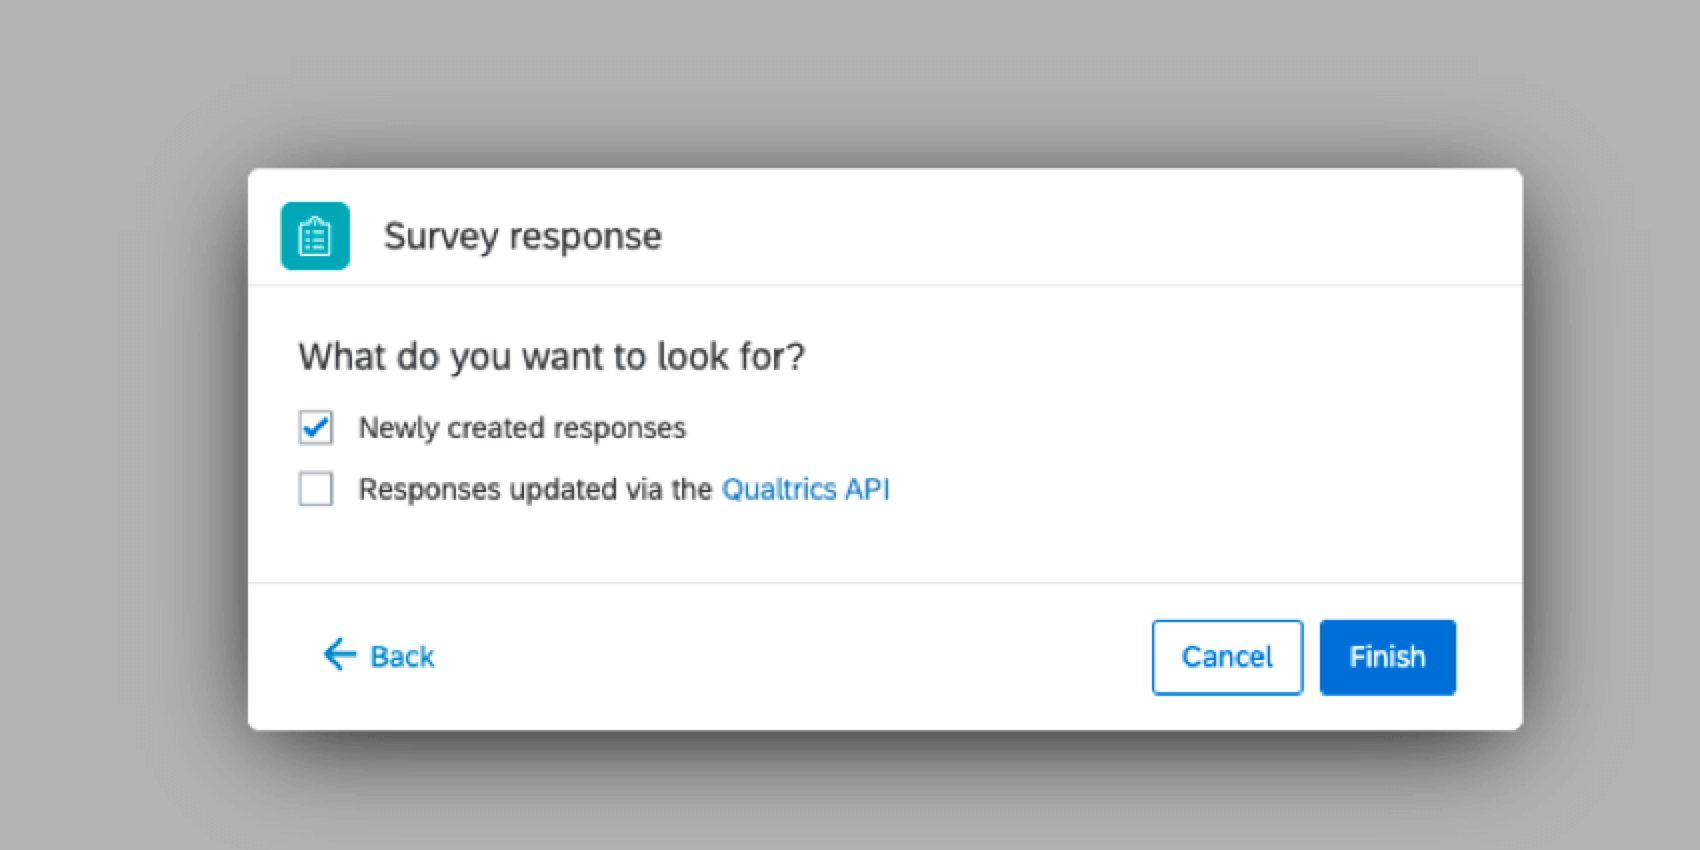 Qtip: Learn more about the differences on the Survey Response Event support page.
 - If you want to specify further when the email should go out, add a condition. For example, do you only want to target customers who don’t leave the email address field empty? Do you want to focus only on concerns from a certain retail location? You can add conditions based on any data you’ve collected in the survey.

Qtip: For more on building conditions, see:
- Add a task.
- Select Email.
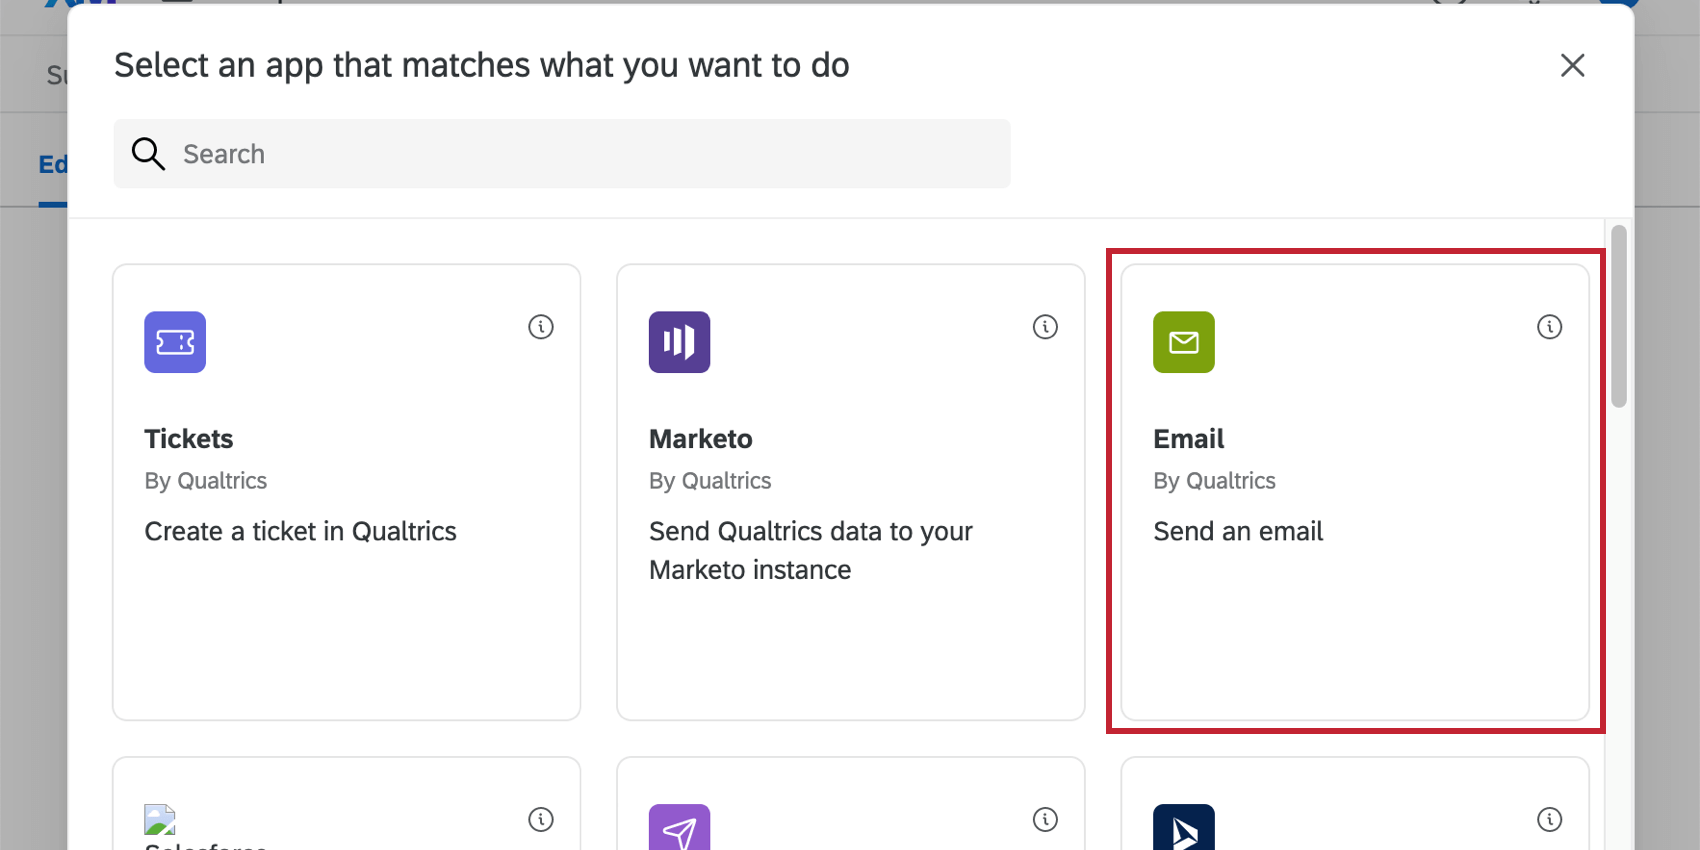
- Determine who should receive this email. You can list up to 10 comma-separated emails. If you collected the customer’s email, you can use the {a} button to select the field where this email address is saved.
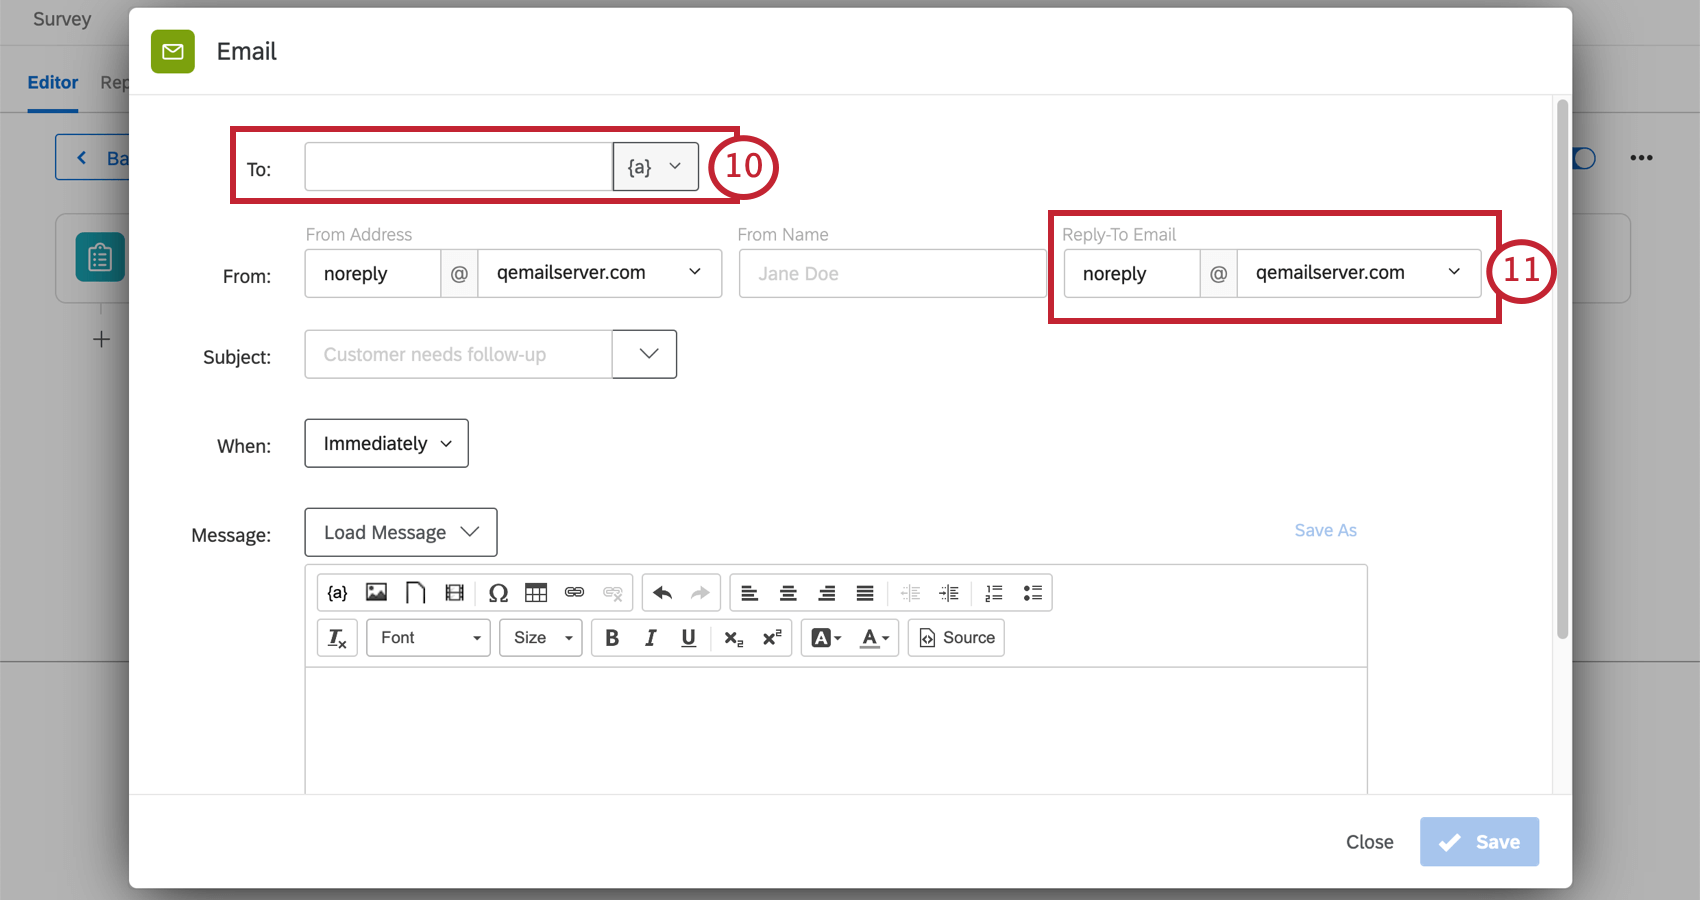 Qtip: Do not select “Panel Field” and “Recipient Email” unless you distributed your survey through Qualtrics email.
 - The reply-to email is where you determine who gets responses to this email. If you’re sending this email to customers, make sure your reply-to is a functioning email address.
- For additional details on the From Address, customizing the message, and more, please see the Email Task support page.
Response Notifications
Depending on how you set up your guided project, there may be notifications built in. These can be found in the Workflows tab, and may require additional setup to complete.
Qtip: Once you’ve configured the notifications feed task as desired, make sure it is enabled.
As needed, you can either review or edit:
- Who receives the notification
- The conditions under which the condition are sent
- The message included in the notification
Depending on the frequency you chose, these conditions are set up with one of the following:
- Embedded data set in the survey flow.
- Quotas.
Do not edit the conditions on these workflows, the corresponding embedded data in the survey flow, or the quotas involved.
If you don’t want to receive this notification after all, you may delete the workflow or disable the workflow (if it is not already disabled). Please note that once you delete a workflow, it cannot be retrieved.
Viewing Reports
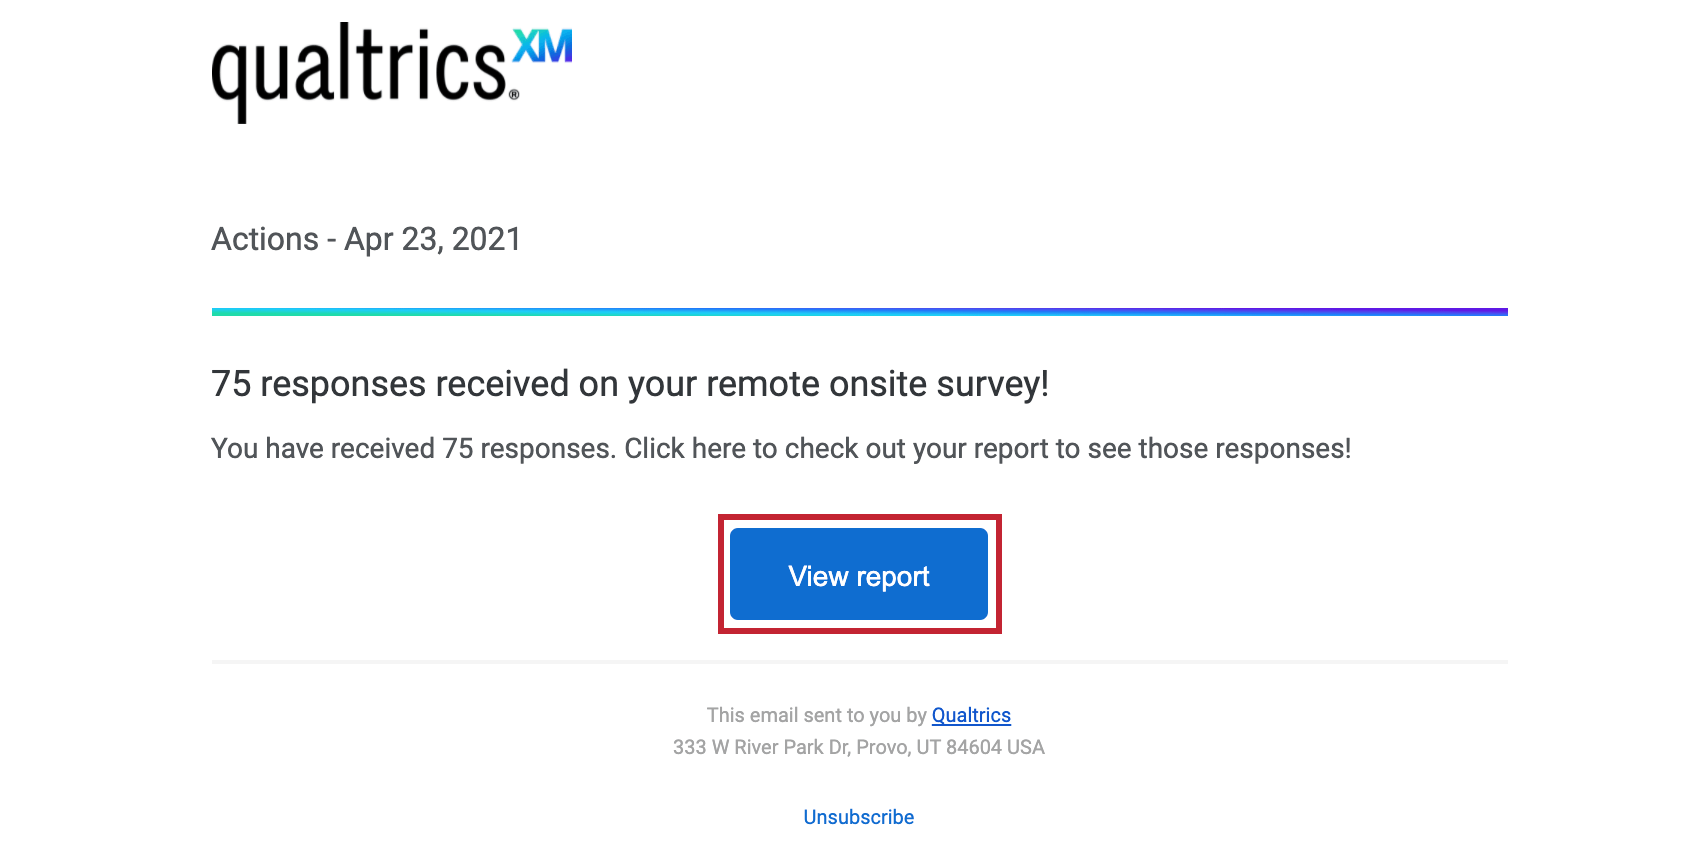
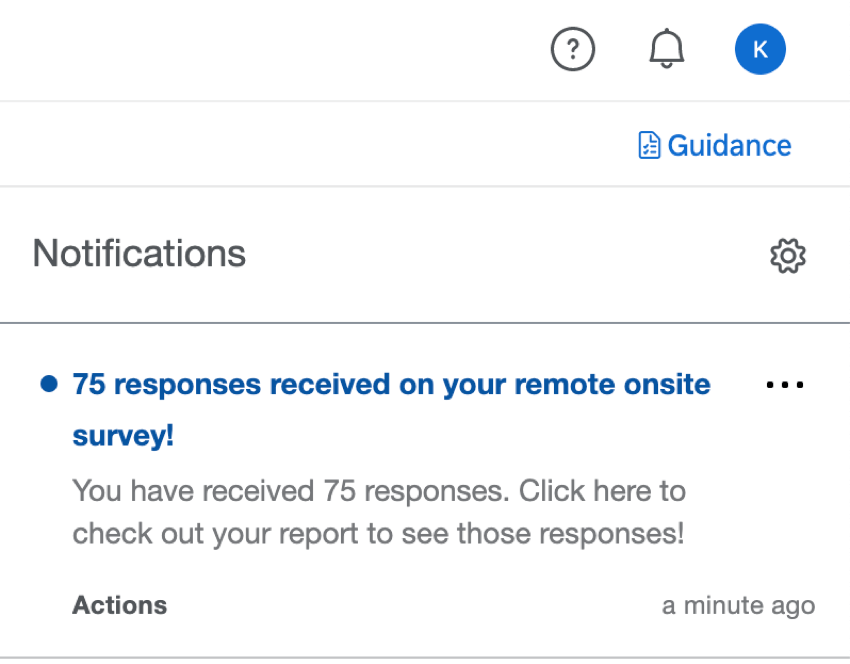
View report: Clicking View report in the email or clicking the in-product notification will take you to the Reports section of the Reports tab of your project, where you should see the pre-built report.
Unsubscribing from Notifications
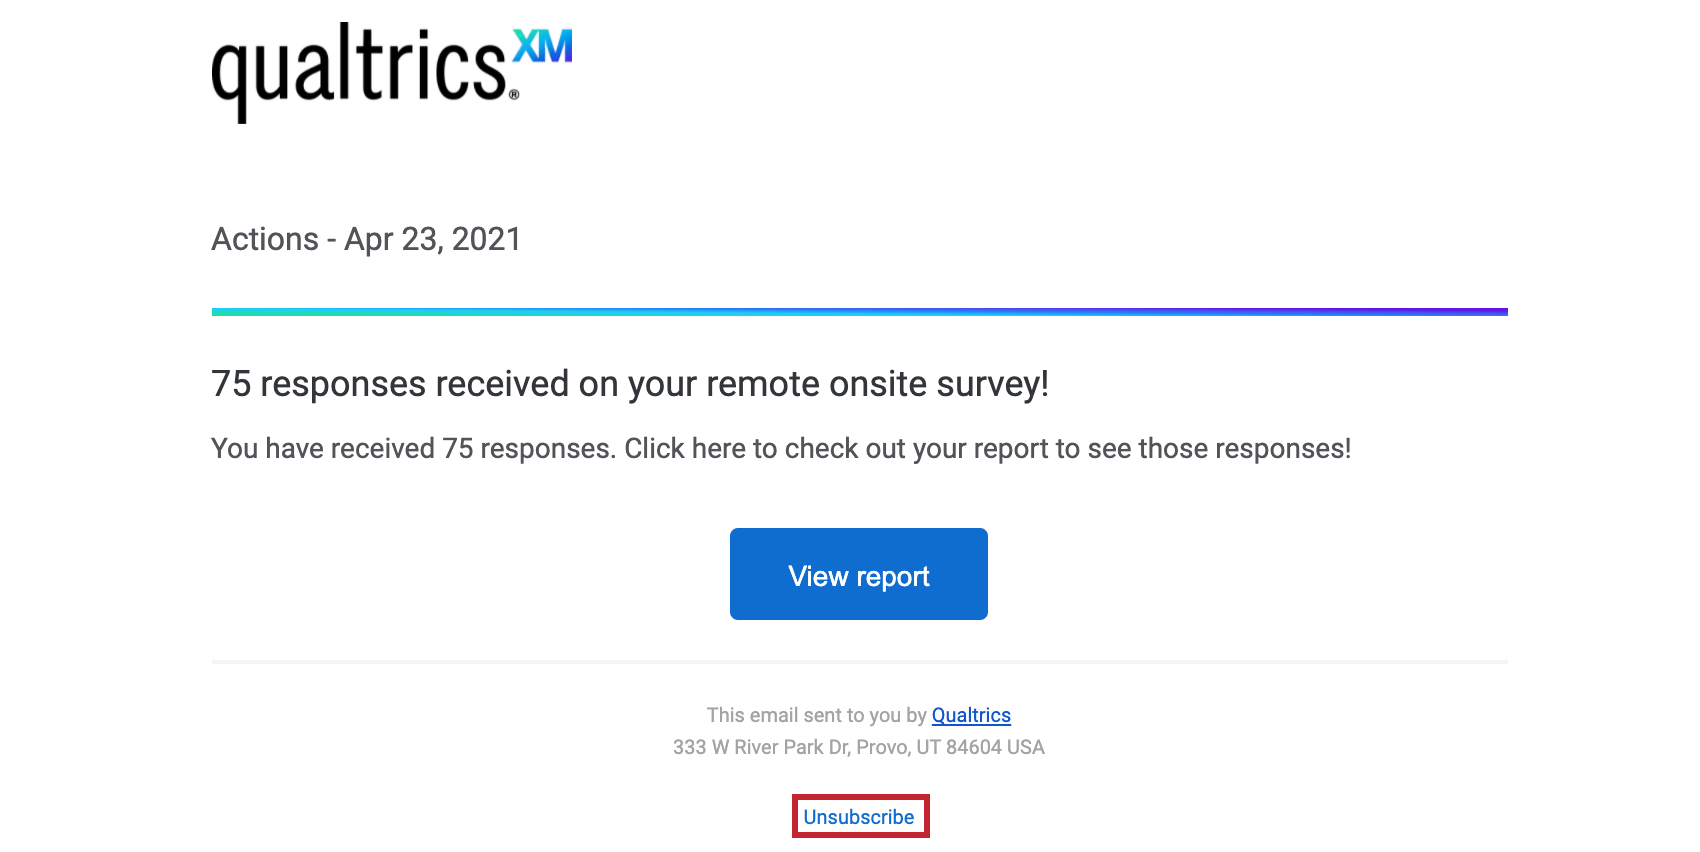
If you no longer wish to receive notifications, you can click unsubscribe at the bottom of the email.
Subscribing to Updates
Most users will be subscribed to these automatically. However, if you unsubscribed and find you want to start receiving them again, you can do the following:
- Go to your Qualtrics account.
- In the upper-right corner, click the notifications icon.
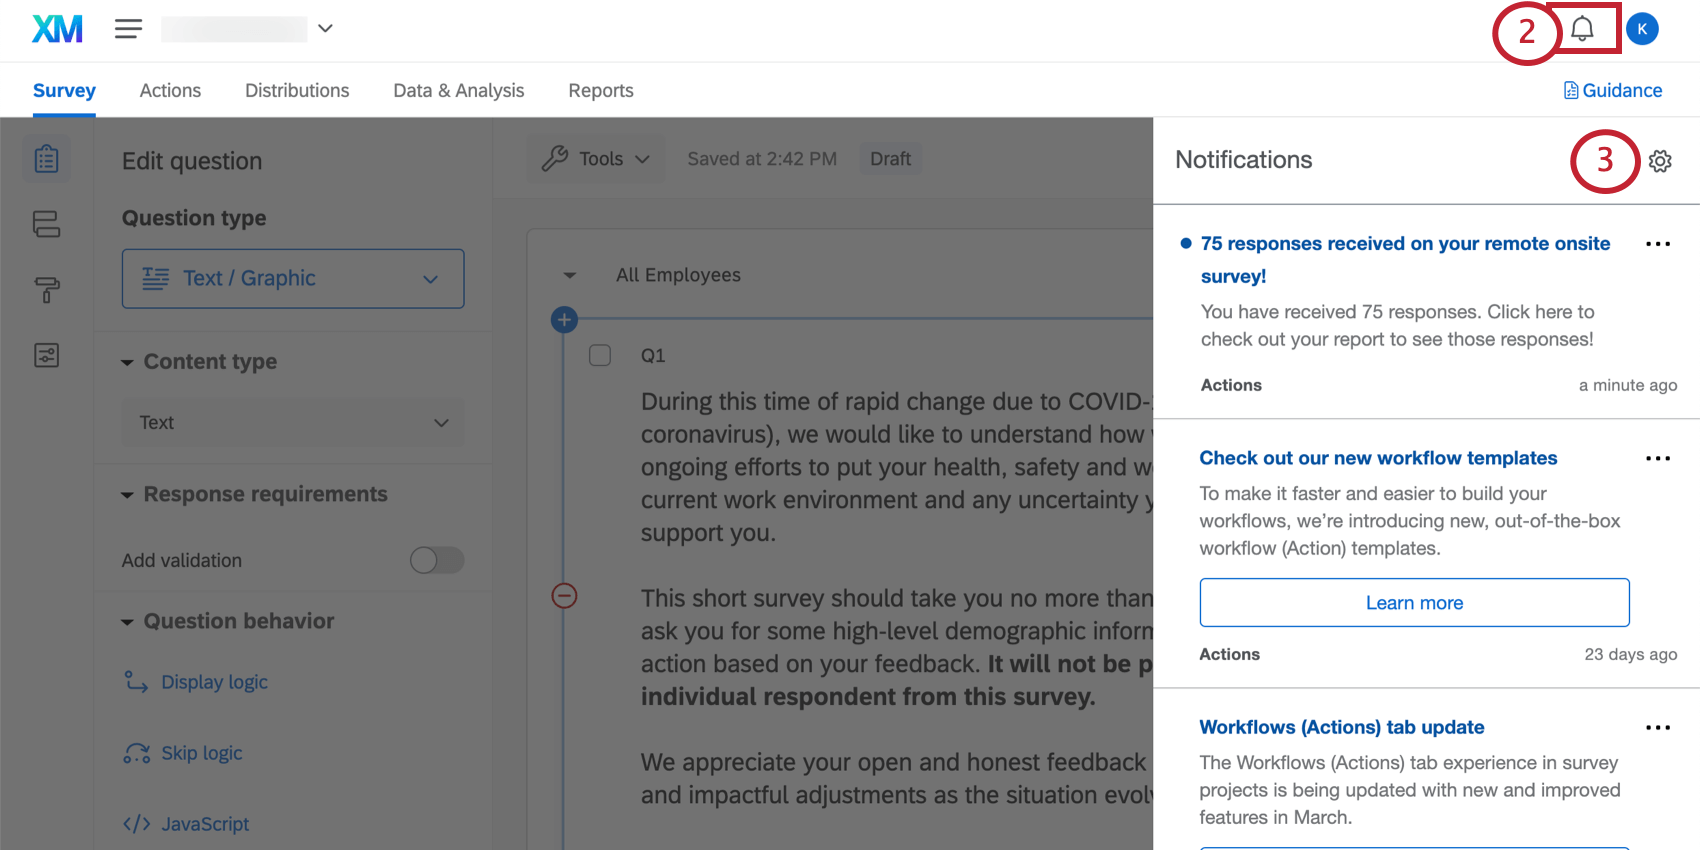
- Click the settings gear.
- Select Workflows to subscribe to notifications set up using the Workflows tab.
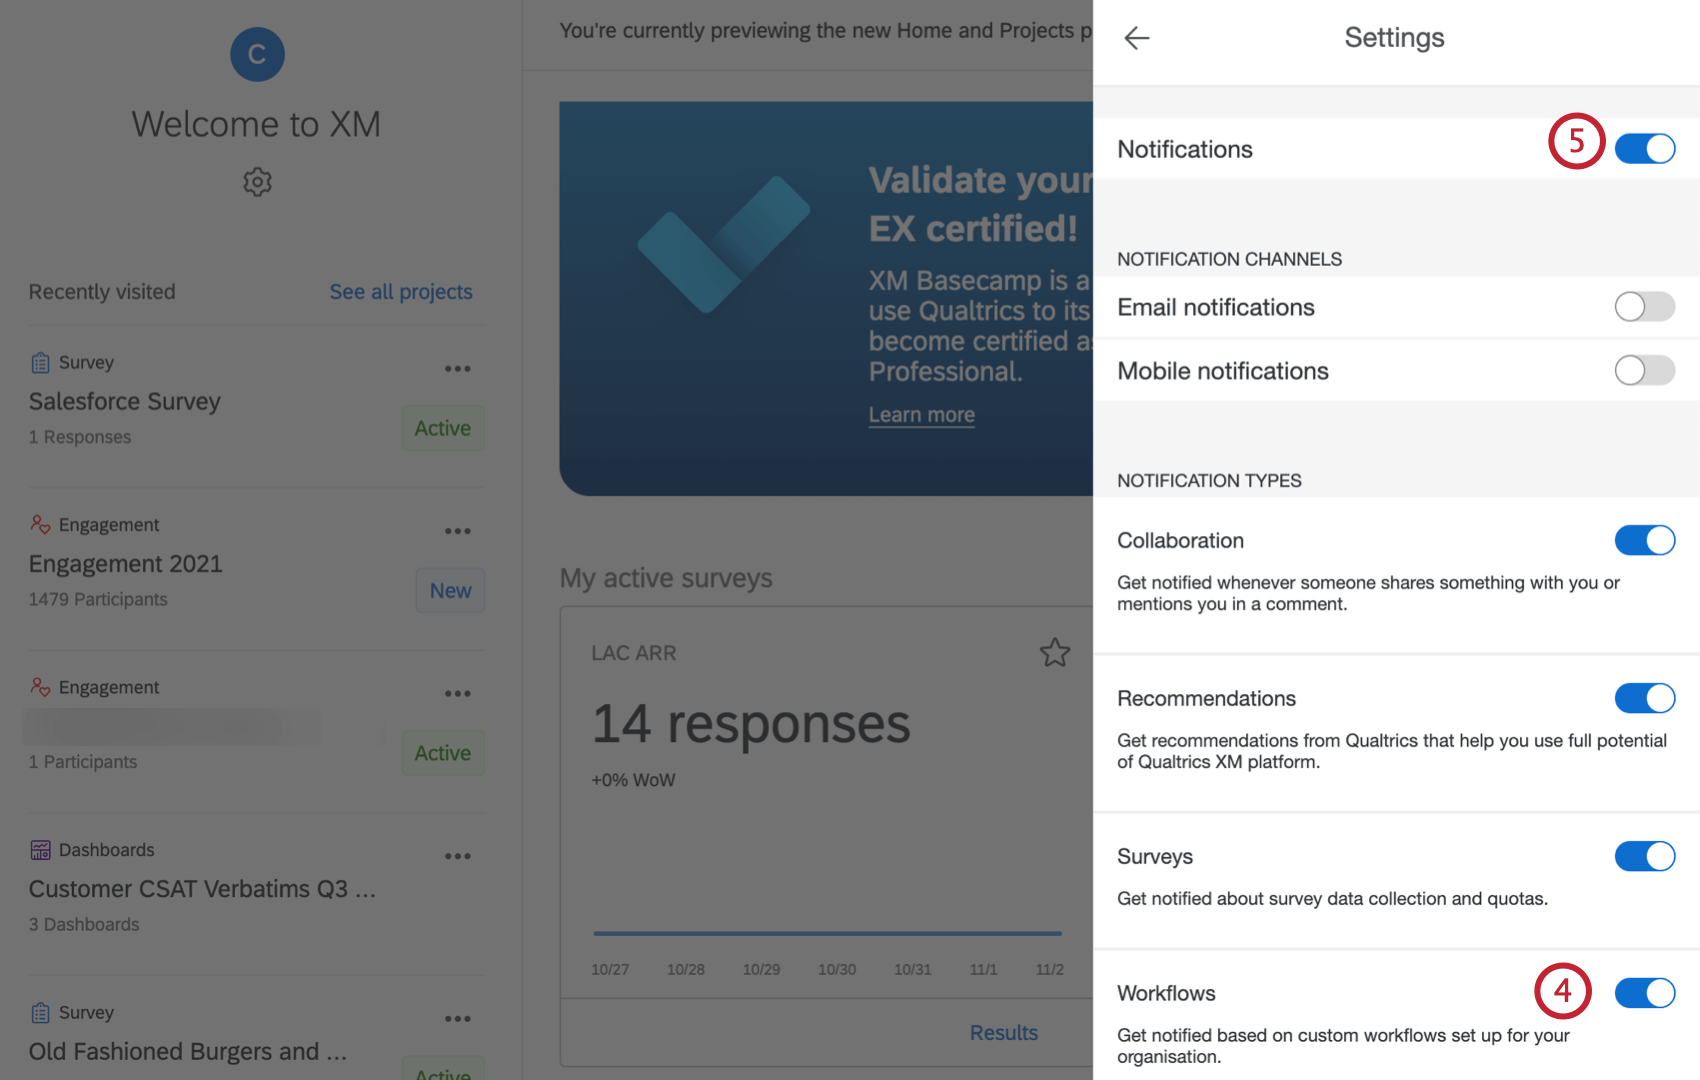
- You may need to select Notifications first if you at some time or another unsubscribed from all account notifications.
Terms of Use: COVID-19 Solutions
Expiry Dates
The following terms only apply to customers who sign up from the “Here to Help” or “Return to Work” landing pages or via Qualtrics Surveys. Prior to expiration on 30th November 2021, these customers will need to export their data or upgrade to a paid product.
Access to the following solutions is subject to expire on 30th November 2021. Users will be notified in advance of access being terminated. This is applicable to the Return to Work Pulse, Remote + Onsite Work Pulse, Public Health: COVID-19 Pre-Screen & Routing, High Education: Remote Learning Pulse, K-12 Education: Remote Learning Pulse, Remote Educator Pulse, Dynamic Call Center Script, Customer Confidence Pulse (1.0), Brand Trust Pulse, Supply Continuity Pulse, and Healthcare Workforce Pulse solutions.
Response and Email Limits
- New customers who are based in India and sign up from the “Here to Help” or “Return to Work” landing pages with a work email will get their own provisioned brand up to 500k responses total. This is applicable to the Return to Work Pulse, Remote + Onsite Work Pulse, Public Health: COVID-19 Pre-Screen & Routing, High Education: Remote Learning Pulse, K-12 Education: Remote Learning Pulse, Remote Educator Pulse, Dynamic Call Center Script, Customer Confidence Pulse (1.0), Brand Trust Pulse, Supply Continuity Pulse, and Healthcare Workforce Pulse solutions.
- Customers who sign up for access to the COVID-19 solutions as described above will be limited to 1K emails per week per user.
New customers who sign up from the “Here to Help” or “Return to Work” page with a personal email will be provisioned a free account with up to 500 responses for each Return to Work Pulse or Remote + Onsite Work Pulse survey. This is also the case for new customers who sign up via Qualtrics Surveys. The full COVID-19 solutions will only be available to new customers who sign up with a work email on the “Here to Help” or “Return to Work” pages as indicated above.
Other Free COVID-19 XM Solutions
The following COVID-19 XM Solutions are free to customers with existing licenses and to customers based in India. Click the name of the Solution for more guided support:
- Remote + On-site Work Pulse
- Public Health: COVID-19 Pre-Screen & Routing
- COVID-19 Customer Confidence Pulse
- Higher Education: Remote Learning Pulse
- K-12 Education: Remote Learning Pulse
- COVID-19 Dynamic Call Center Script
- Healthcare Workforce Pulse
- Remote Educator Pulse
- Supply Continuity Pulse
- COVID-19 Brand Trust Pulse
- Return to Work Pulse
