-

Qualtrics Platform -

Customer Journey Optimizer -

XM Discover -

Qualtrics Social Connect
Workflow Settings
About Workflow Settings
The Settings tab of a workflow lets you set up notifications for when the workflow fails and delay the start of the workflow for holidays and other downtime.
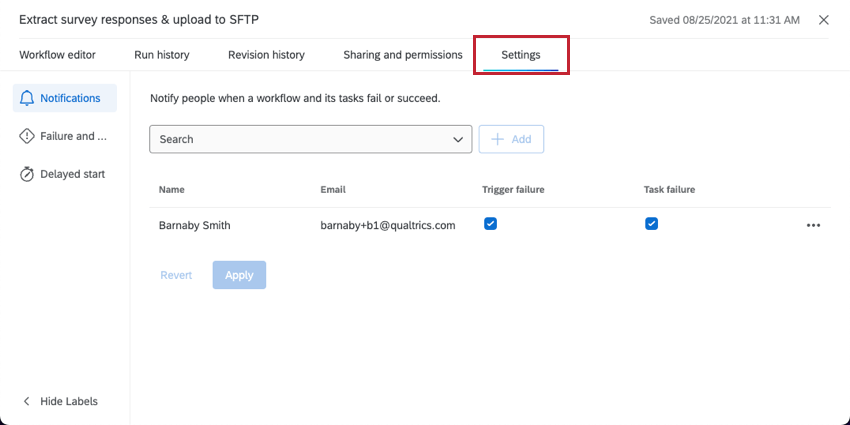
Notifications
You can set up notifications for when a workflow fails. For scheduled workflows, you can also set up a notification for when the workflow succeeds.
For more details and step-by-step instructions, see Workflow Notifications.
Workflow and Task Failures
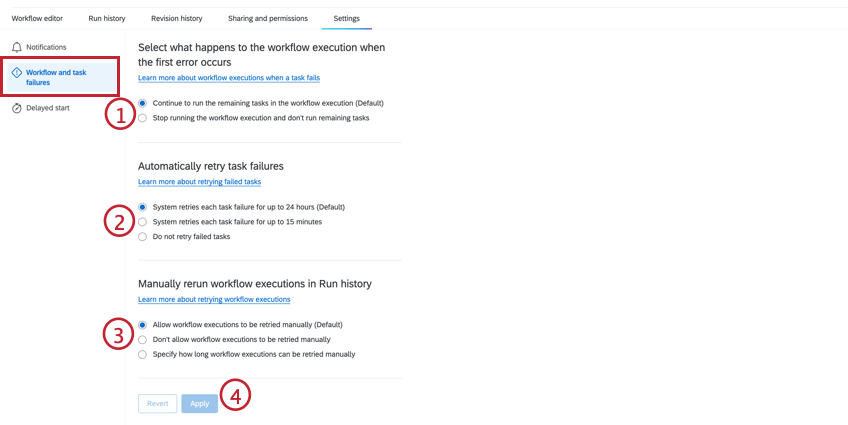
The Workflow and task failures section of workflow settings allows you to control what happens to your workflow if one of its tasks fails.
To change your task failure settings:
- Choose what you want to happen when a task fails:
- Continue to run the remaining tasks in the workflow execution: When a task in your workflow fails, the workflow will continue to process any remaining tasks. This option is selected by default.
- Stop running the workflow execution and don’t run remaining tasks: When a task in your workflow fails, any tasks that rely on the task that failed will not run. This includes any tasks that use piped text from the task that failed, or if the task is part of an ETL workflow (for example, if the extract task fails, the load task will not run).
- Choose how you want the system to retry failed tasks:
- System retries each task failure for up to 24 hours: When a task in your workflow fails, the task will automatically be retried for up to 24 hours. This option is selected by default.
- System retries each task failure for up to 15 minutes: When a task in your workflow fails, the task will automatically be retried for up to 15 minutes.
- Do not retry failed tasks: When a task in your workflow fails, it will not be retried.
Qtip: You can see more information about why a task failed by viewing the task’s JSON output. Only 429 and 5xx errors will be retried. - Choose if you want to allow users to retry workflow executions from the Run History:
- Allow workflow executions to be retried manually (Default): Users can rerun workflows by selecting them from the run history. For more information, see Rerunning Workflows.
- Don’t allow workflow executions to be retried manually: You cannot retry failed workflows.
- Specify how long workflow executions can be retried manually: You can retry failed workflows if that workflow failed during the specified time frame.
- Click Apply.
Qtip: Click the Revert button to cancel your changes and return to the default setting.
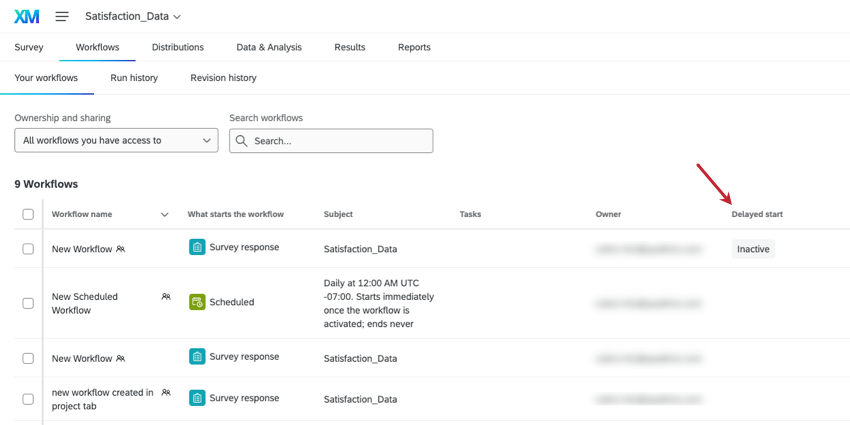
Delayed Start Workflows
Delaying the execution of workflows can be useful when determining how your workflows get actioned. In the delayed start section of workflow settings you can either schedule specific dates where a workflow will be paused, or delay workflows for a specified amount of time every time they’re triggered.
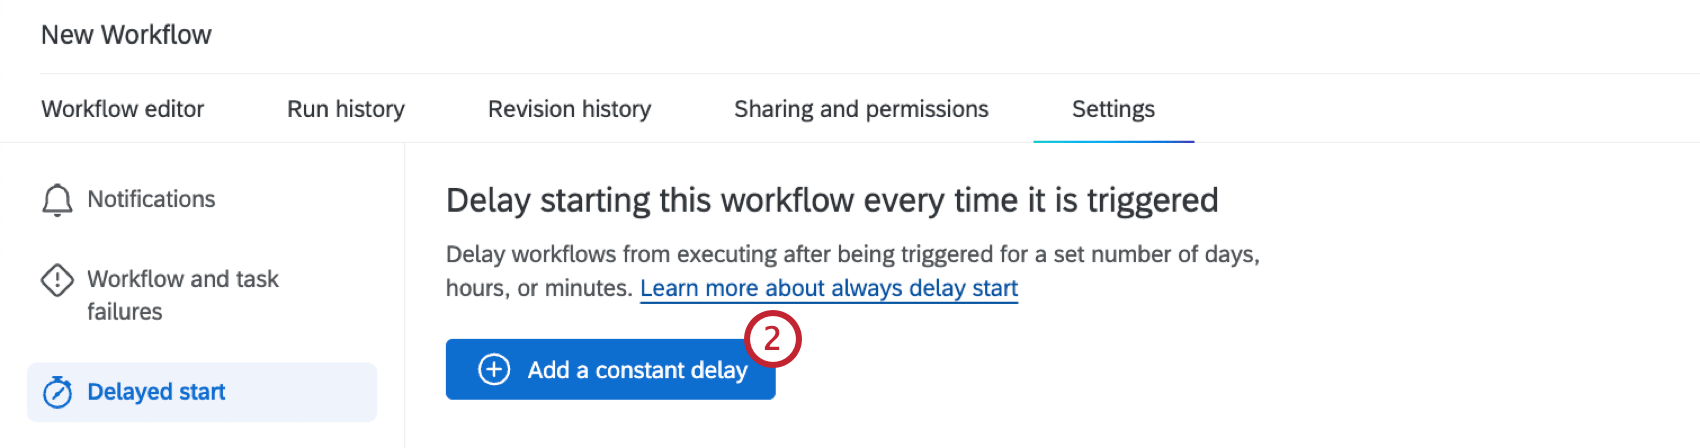
Constant Delays
Constant delays allow you to delay workflows every time they are triggered to add a buffer between when they are triggered and when they are executed.
- Navigate to the Delayed start tab.
- Click Add a constant delay.
- Select the duration of time to delay the workflow.
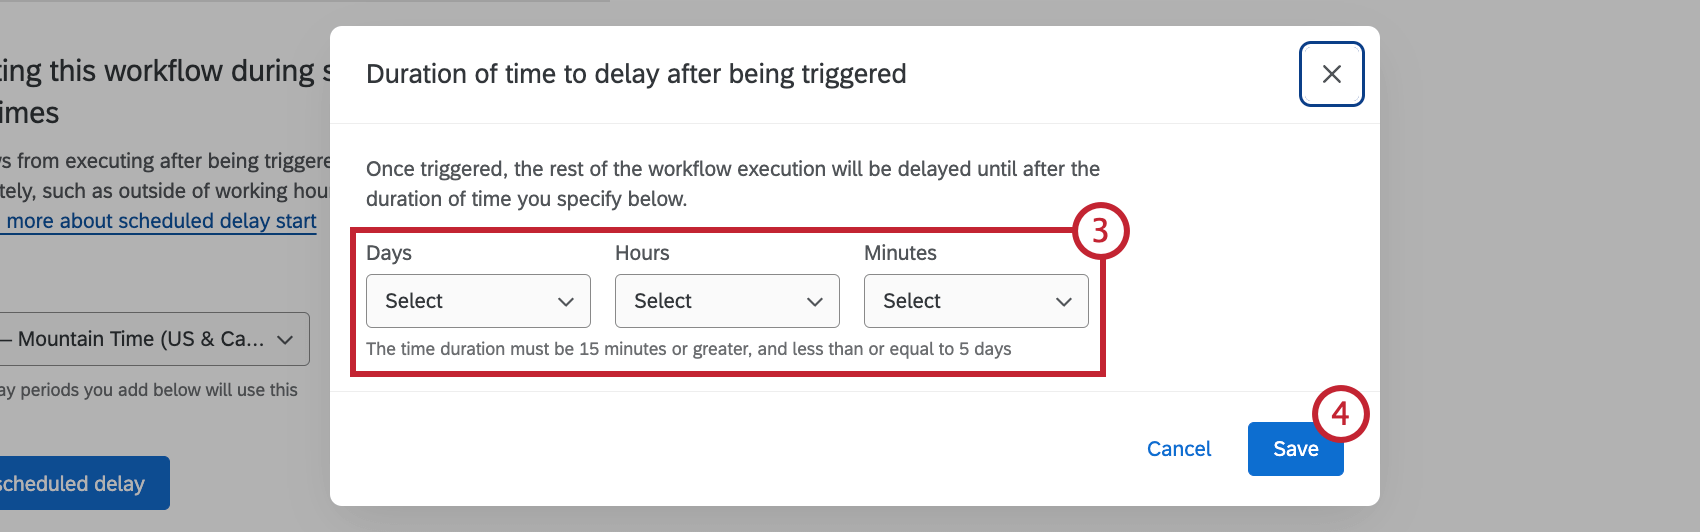 Qtip: Delays must be at least 15 minutes and at most 5 days.
 - When you’re finished, click Save.
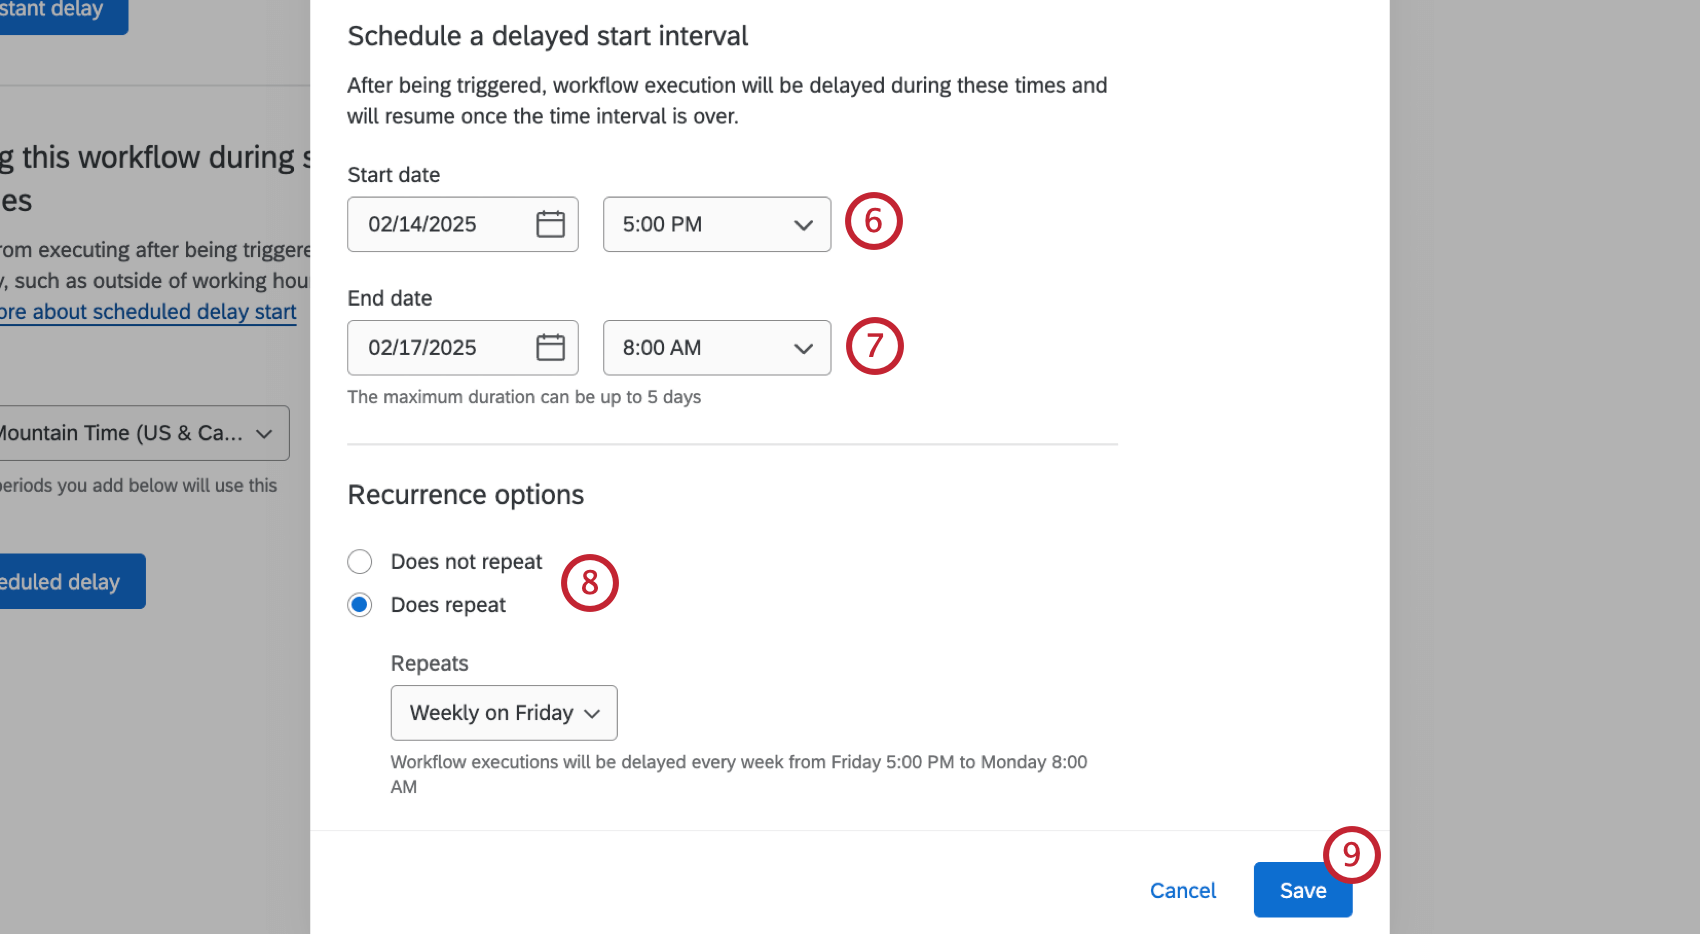
Scheduled Delays
You can define a time period(s) where a workflow will be paused immediately after being triggered and executed only after that time period has ended. This is useful if you want to pause workflows over holidays or outside of working hours and resume them once back in office.
- Navigate to the Delayed start tab.
- Select a time zone. All scheduled delay periods you add will use this timezone.
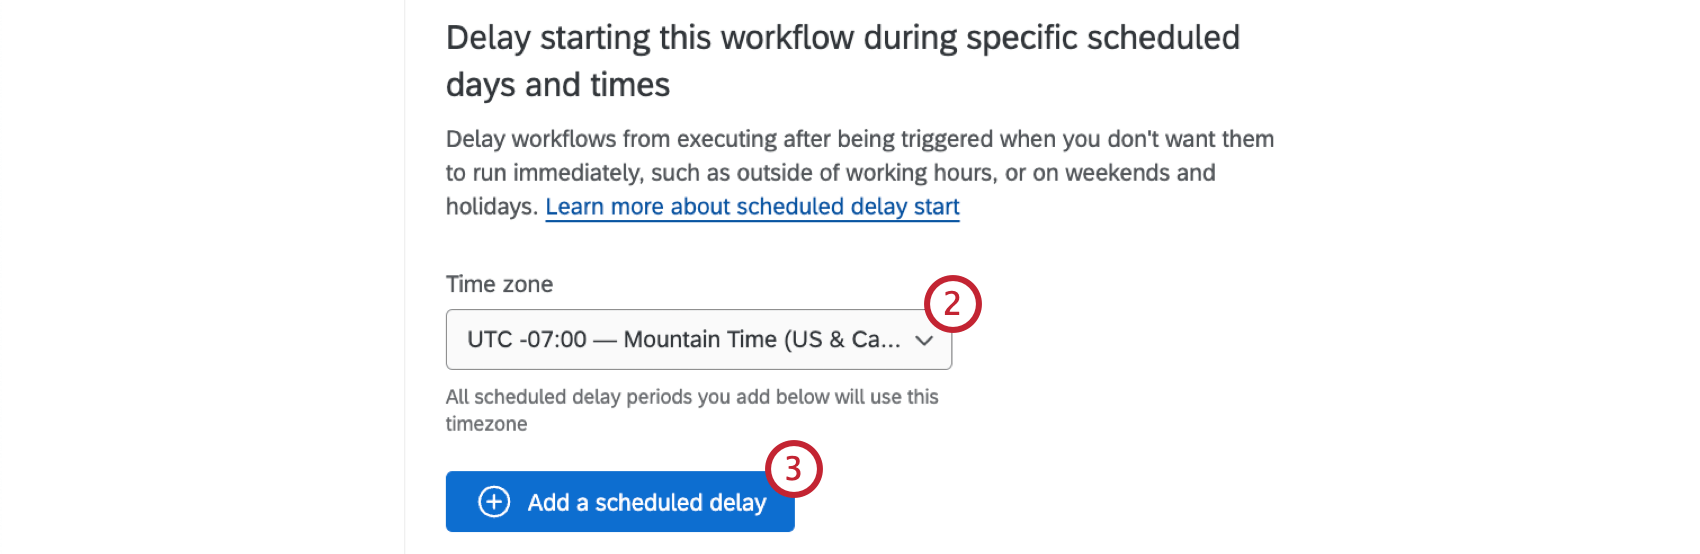
- Click Add a scheduled delay.
- Name the delay.
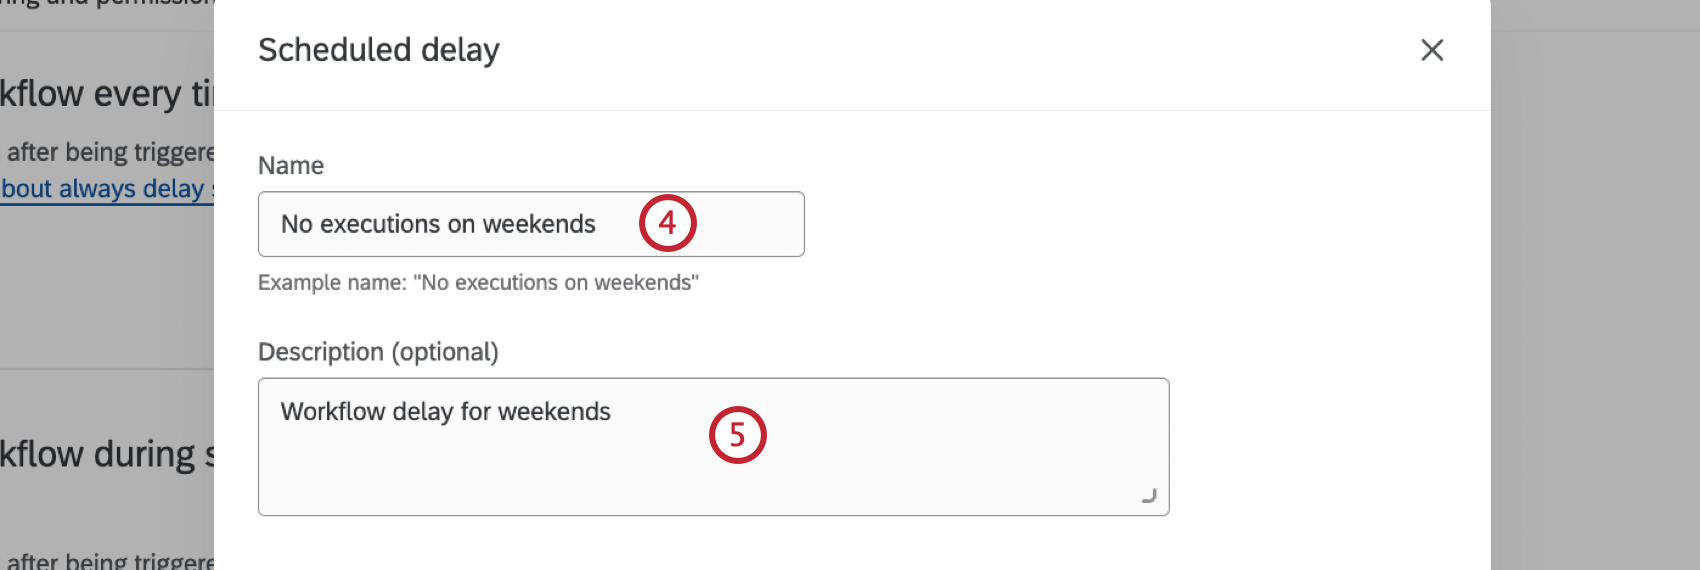
- Under Description, give a reason for the delayed start (optional).
- Give the Start date of the time period the workflow should not be run. This is the first day the workflow will be paused.
 Qtip: Workflows will not start during the time period you choose and will resume once this time period ends.
 - Give the End date of the time period. THis is the day the workflow will resume, and when any workflow triggered during the time period will execute all at once.
Qtip: The maximum duration of a delay date / time period is 5 days.Attention: To ensure your workflow runs successfully, a randomized buffer period of between 1 minute and 1 hour is added to your end time. This means delayed start workflows may not run at your exact end time. For example, if you select 12:00AM as your end date, the workflow will run sometime between 12:01 AM and 1:00 AM.
- Under Recurrence options, choose whether or not the workflow delay repeats. Repeats can be weekly, monthly, or yearly.
- When you’re finished, click Save.
- Repeat these steps to create additional scheduled delays.
Editing and Removing Delayed Start Settings
Click the 3 horizontal dots next to a workflow delay and select Edit to make changes, or Delete to delete it. How much you can edit depends on whether the delayed start is active or inactive.
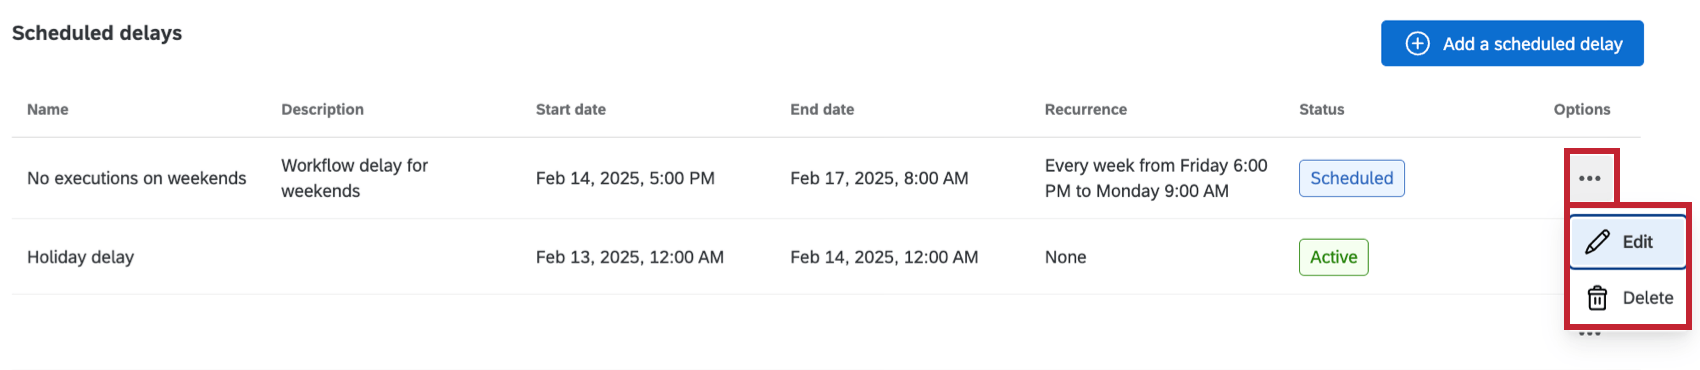
When a delayed start time period is inactive, you can change all parts of the configuration, including removing or reverting changes.
When a delayed start time period is active, you can do the following:
- Edit the end date / time. Workflows that were initiated and put in the delayed queue before you edit the end date / time will resume at the original end date / time you set. Only new instances initiated after the end date / time was edited will honor the new end date / time.
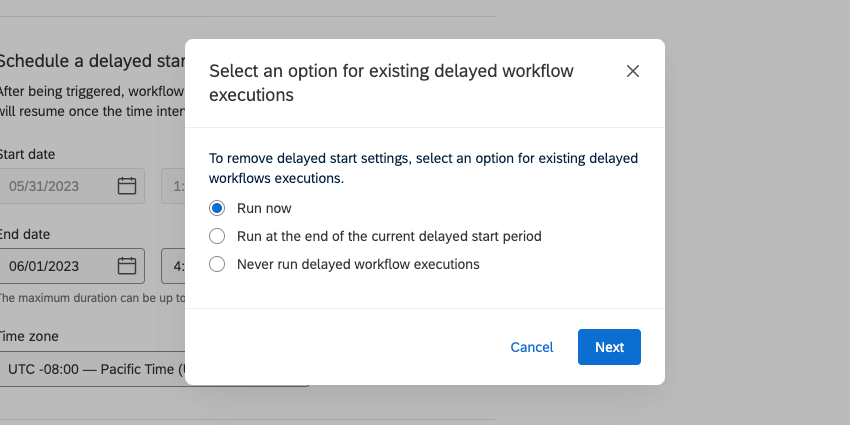
- Remove the delayed start interval. You’ll have to then choose what happens to workflows that were initiated (but then held back) during the delayed time interval:
- Run them now.
- Run them at the end of the delayed start period.
- Never run delayed workflow executions.