Send Survey via Email Task
About Sending a Survey via Email
The Send a survey via email task allows you to distribute a survey by email whenever a workflow is triggered. You can use this task to automate survey distribution to the contacts saved in your XM Directory. You can even automate reminders, reaching out to incomplete respondents over email or SMS. Multiple tasks can be included in a workflow, allowing you to configure multiple emails to send when the workflow is triggered.
You can email the survey to:
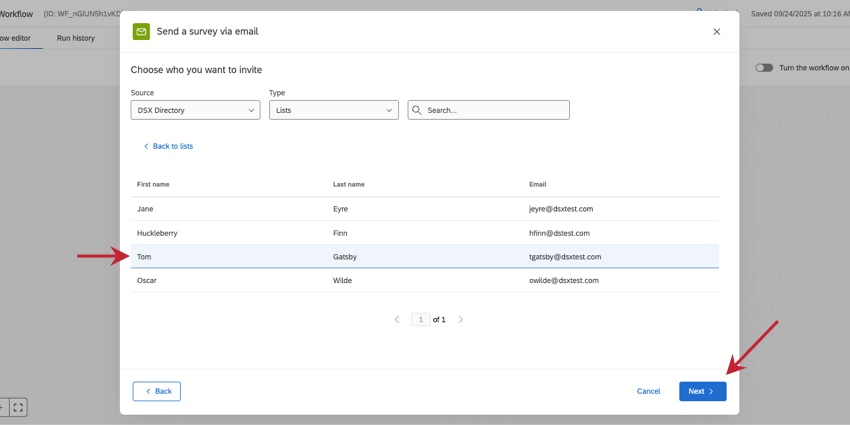
- A full mailing list, or an individual from a list
- A sample
- A segment
- A transaction group
- Or, components from supported workflow events and tasks
Supported Workflow Components
There are various workflow events and tasks you can combine with the “send a survey via email” task to create an automated survey distribution workflow. For example, you can have one workflow task that creates new contacts and then the following task sends a survey to the new contacts.
The below workflow components can be combined with the “send a survey via email” task:
- Experience ID segments event: This event triggers a workflow when a segment is changed. You can then distribute a survey to the segment that triggered the workflow.
- Add contacts and transactions to XMD task: This task lets you create or update contacts, transactions, and mailing lists in XM Directory. First, you build a full ETL workflow, with this task as the “loader.” Then, you can add a Send a survey via email task at the end of the workflow. You’ll be able to choose either the mailing list or transaction group as your recipient.

- Update XM Directory contacts task: This task allows you to create or update contacts in XM Directory. You can use contact, mailing lists, and transactions made from this task as your survey’s recipients.
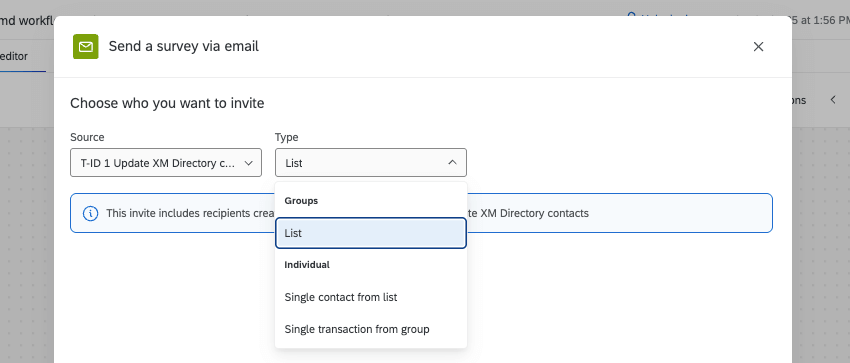
Example: First, create a workflow with this task. Then, add a Send a survey via email task at the end of the workflow. When you choose a recipient, change the Source to the Update contacts task, then choose the list, single contact, or transaction group.
- Create experience ID sample task: This task allows you to create a new sample in XM Directory. You can then distribute a survey to the sample.
Setting up a Send a Survey via Email Task
- Follow the linked instructions to create a new workflow. When building the workflow, you can set it to trigger based on a specific event, or to trigger periodically on a schedule. You can also decide if your workflow should have any preceding supported events or tasks.
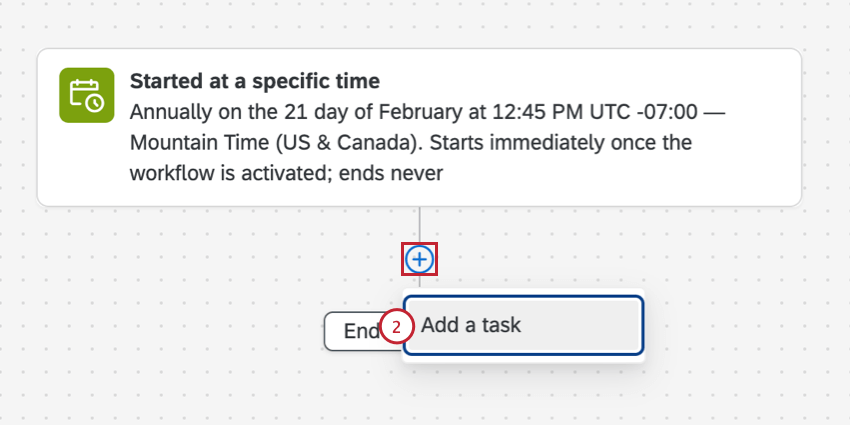
- Click the plus sign ( + ) and choose Add a task.
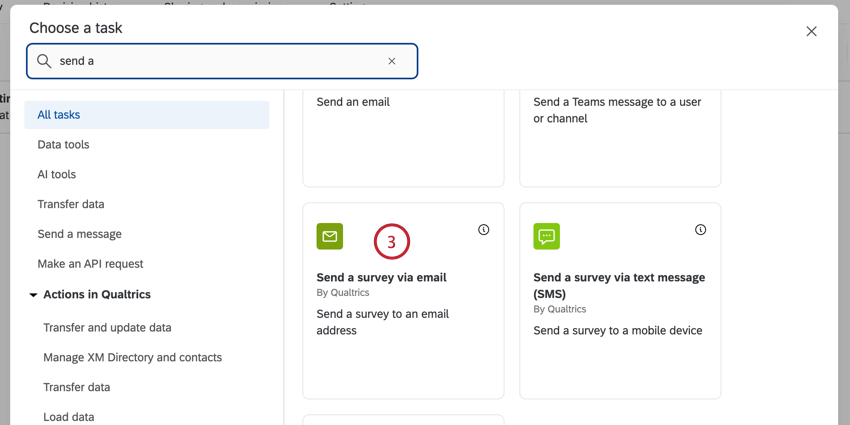
- Select the Send a survey via email task.
- Select the project you’d like to distribute. Only survey projects will appear here.
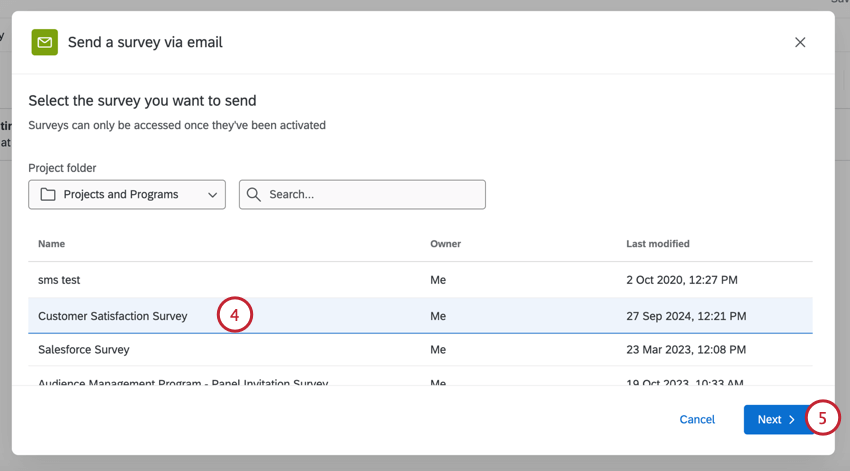
- Click Next.
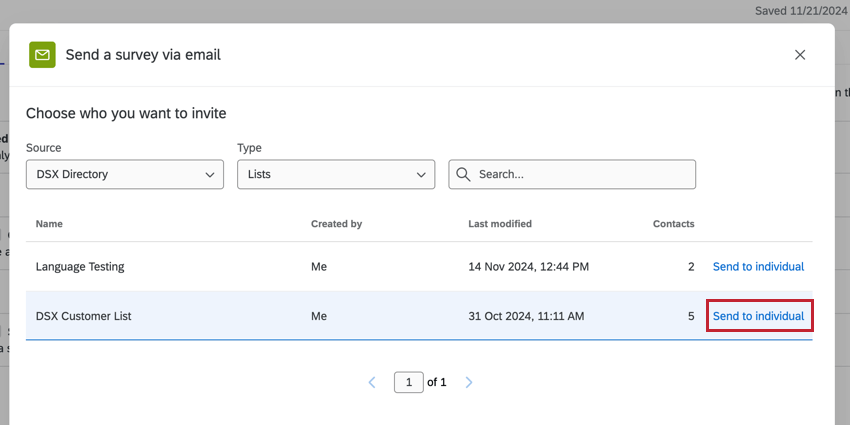
- Choose the Source that contains the contacts you’d like to survey:
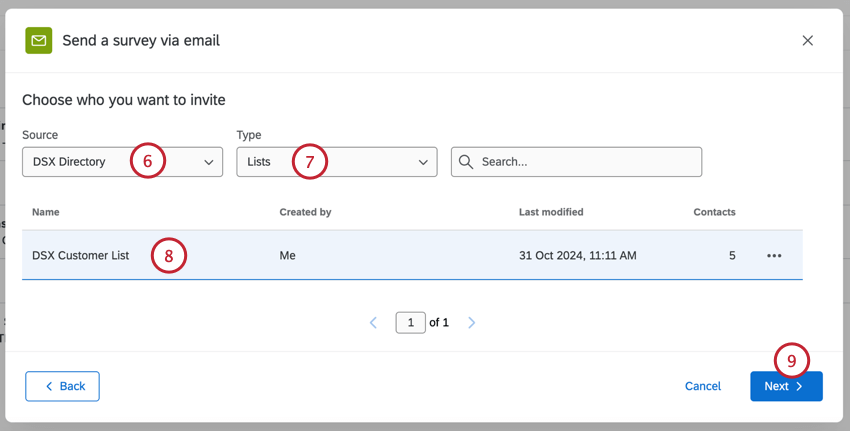
- Directory: Choose from one of the directories you have access to.
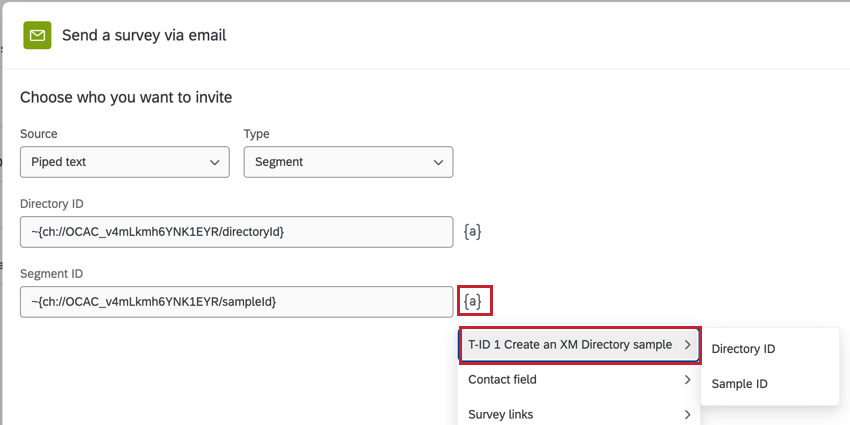
- Piped Text: Use piped text to enter the directory ID and other relevant IDs (mailing list ID, sample ID, etc.). Choose this option if you want to distribute to contacts from other components in your workflow.
Qtip: When using piped text to send to a single contact from list, be sure to use the correct ContactID based on your event. For example, if your contact is from a survey event using a personal link, you should input the RecipientID.
- Available Tasks: Send the invite to recipient lists or groups that were created by a previous task, such as the Add Contacts and Transactions to XMD task.
- Use the Type dropdown to choose which contacts you’d like to survey:
- Lists
- Samples
- Segments
- Transaction Groups
- Choose the mailing list / sample / segment / transaction group that you’d like to send the survey to.
- Click Next.
- Enter the From name for the email, which can be anything you would like.
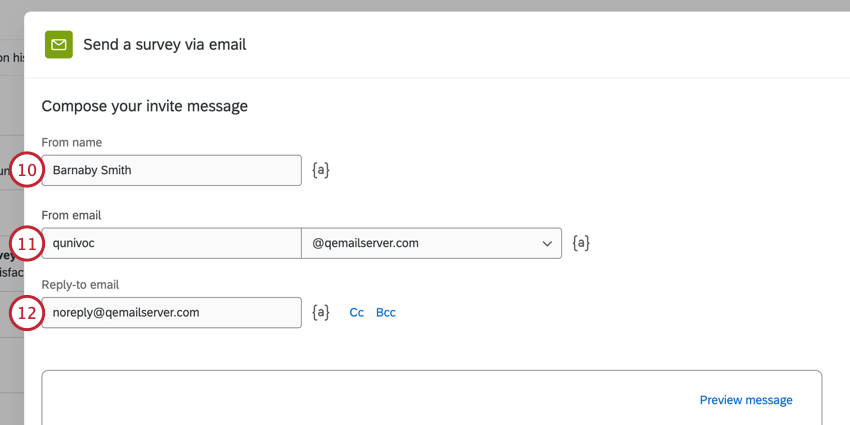
- You can change the From email to another standard Qualtrics email address. Depending on your license, you may also be able to use a custom from address. For more information on changing these, visit our Using a Custom From Address support page.
- Choose a Reply-to email to receive replies to the email invitation.
Qtip: Generally, the reply-to email can only be the email connected to your Qualtrics account. However, brands often have a series of custom FROM domains. These custom domains allow you to use any email address with a valid domain as your reply-to. For example, if you’re a student at Qualtrics University, you may be able to use any email address ending in @qualtricsuniversity.edu. If you’re having trouble setting your reply-to email, reach out to your Brand Administrator to check if it uses a valid domain.Qtip: Click CC or BCC next to the reply-to field to add additional emails to the message. Click the piped text icon ( {a} ) to use piped text to pull in email addresses from the survey data.
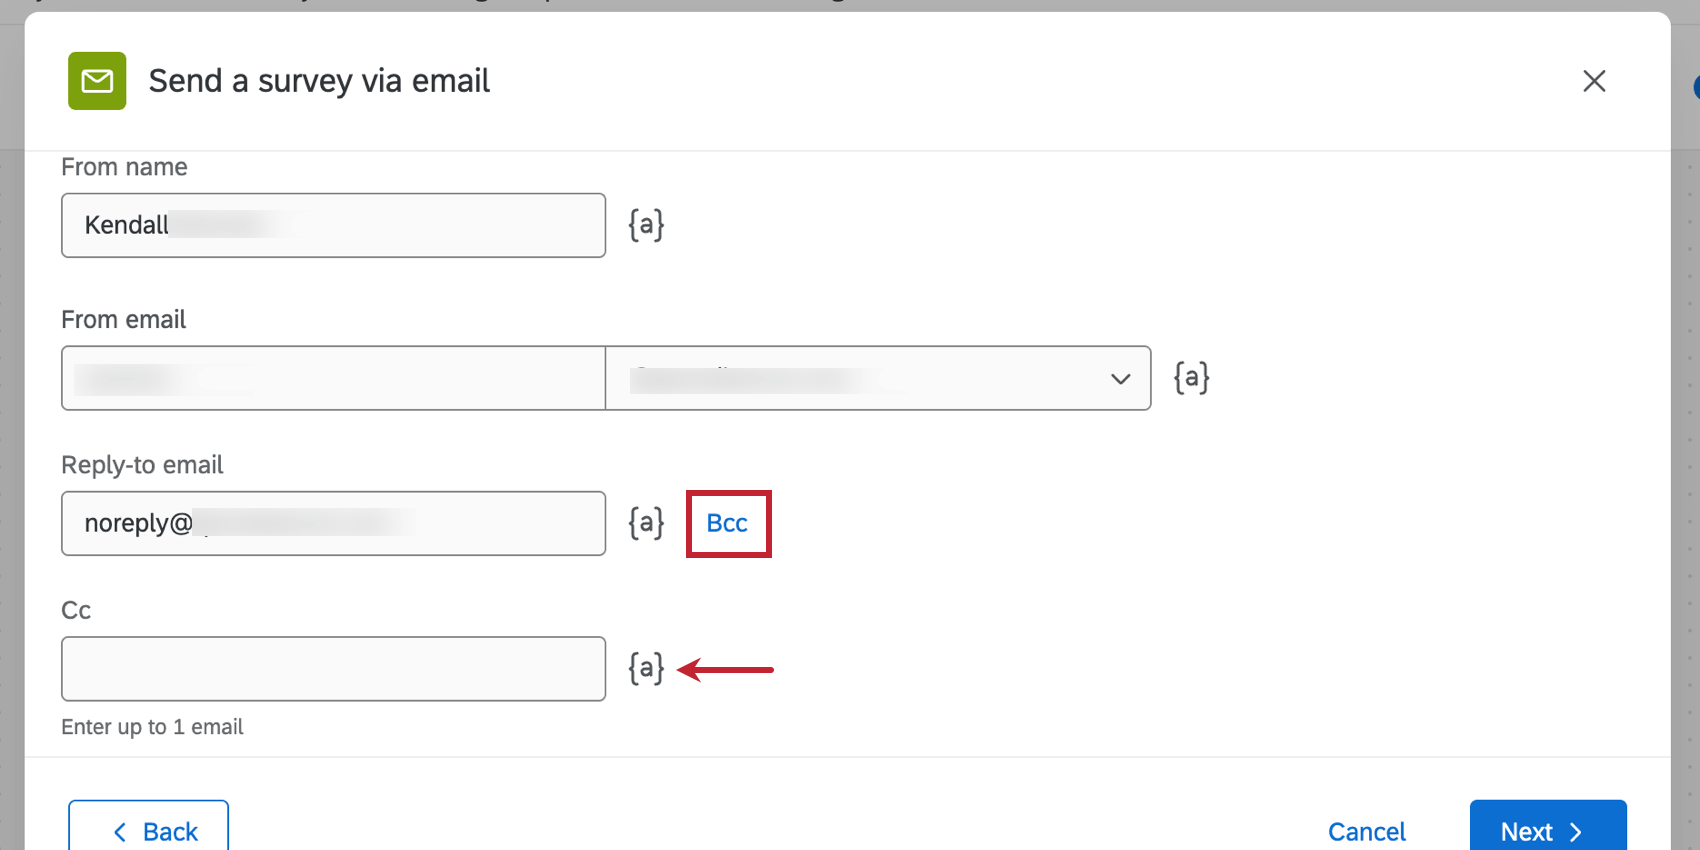
- Enter a subject line for the invitation email.
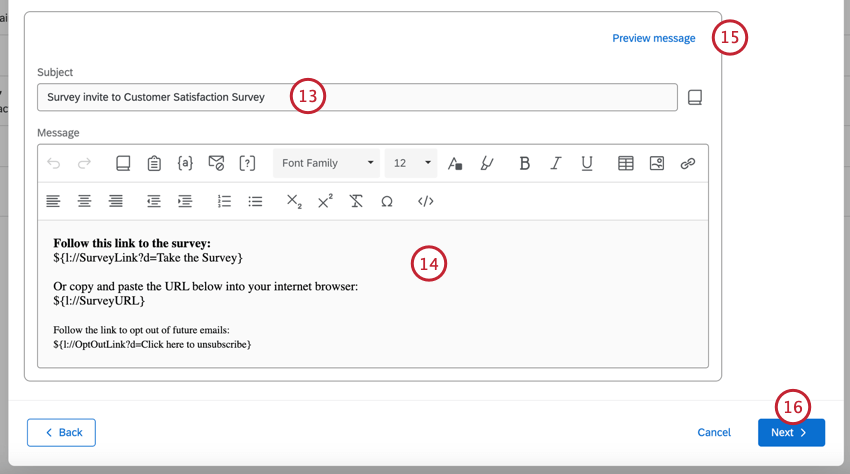 Qtip: You can load a saved subject line from your library by clicking the library icon next to the subject line field. This is especially useful if you need to translate your email into multiple languages.
 - Type an email invitation message into the rich content editor, or click the library icon to insert a previously saved email invitation from your library (this is especially useful if you need to translate your email into multiple languages).
Qtip: For simple distributions, leave the default survey link content in the message editor and add your own message above. For a more custom message, see Customizing Your Email With Piped Text and Inline Email Questions. To ensure your emails will have the best deliverability possible, read the Avoid Being Marked as Spam page before sending your email.
- To test the email, click Preview message and then enter the email address to receive the test email. The survey link in this test email will contain a link to preview the survey. See Previewing Messages for more information about this feature.
- Click Next.
- By default, each recipient of the email will receive their own unique survey link. You can change the survey link type by clicking Change link type.
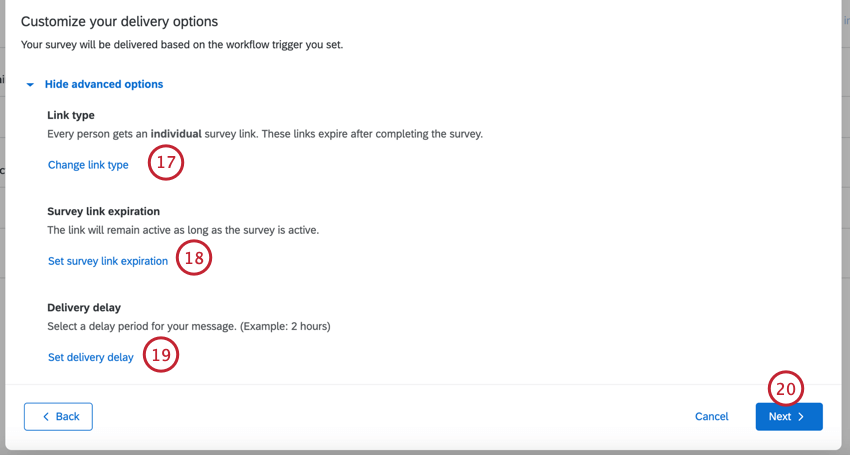 Qtip: The available link types include individual, multiple completes, and anonymous. See Survey Link Types for an explanation of each.
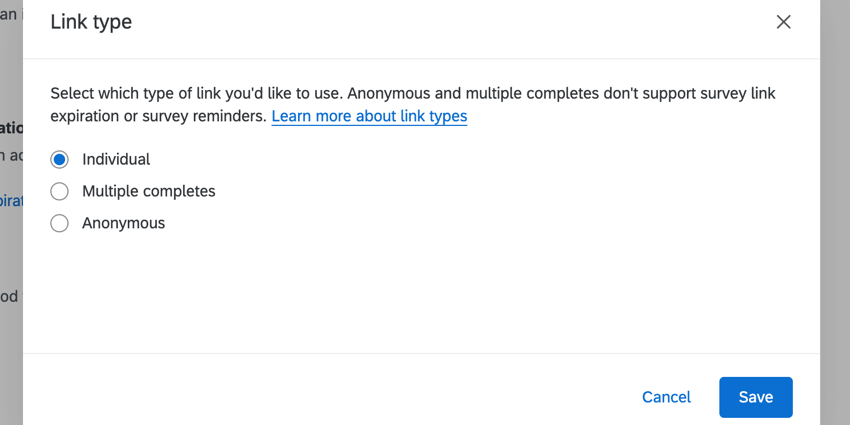
- By default, the survey link will remain active as long as the survey is active. Click Set survey link expiration if you’d like to set a custom date instead. You can then choose for the links to expire after a certain number after they’re distributed.
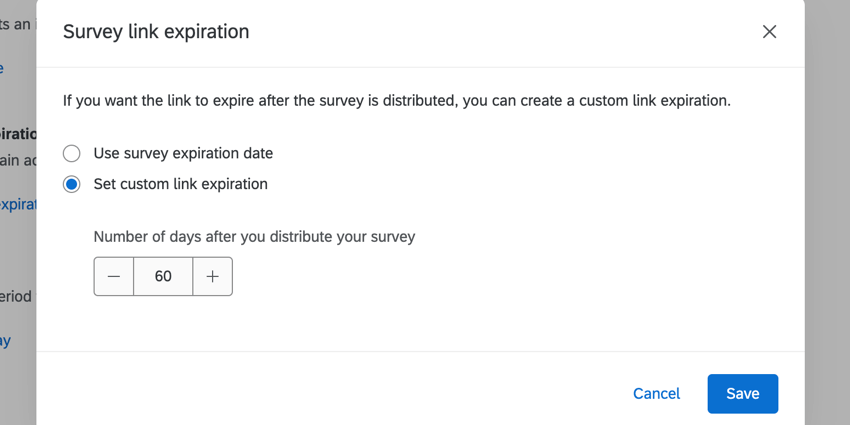
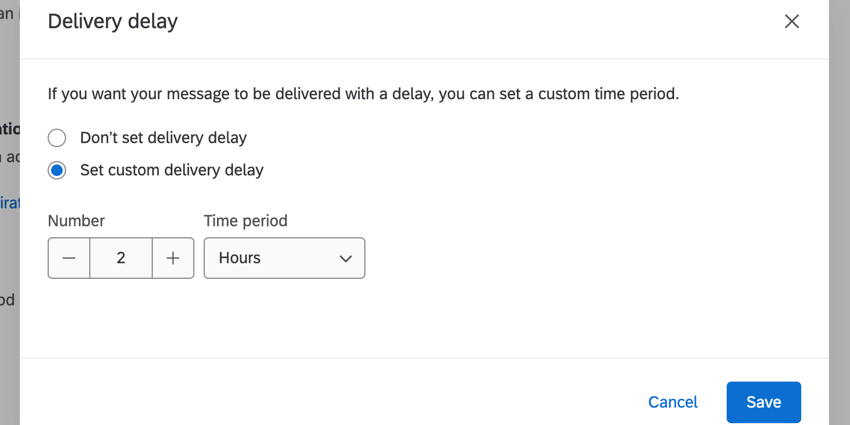
- By default, the invitations are sent immediately once the workflow is triggered. You can set a delay by clicking Set custom delivery delay. Then, choose how long you want the delay to be.
- Click Next.
- Review the details of your distribution and click Edit if you need to change any part of it.
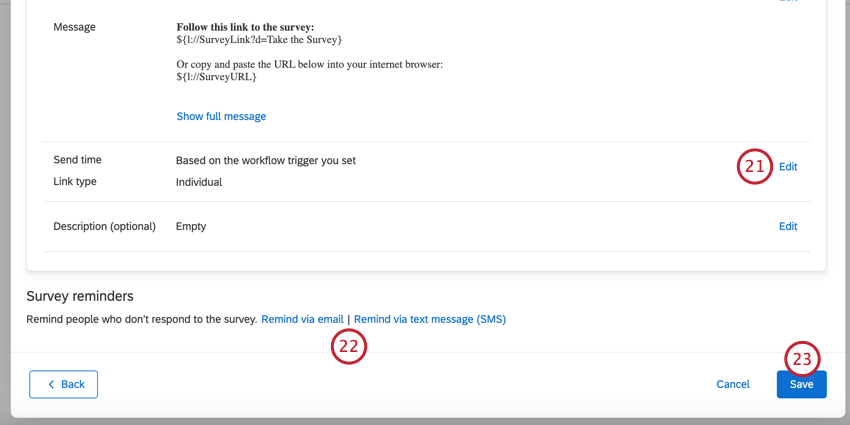
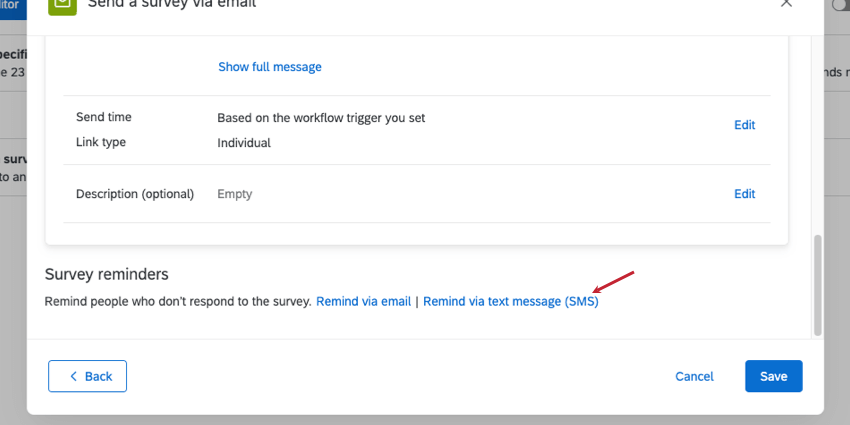
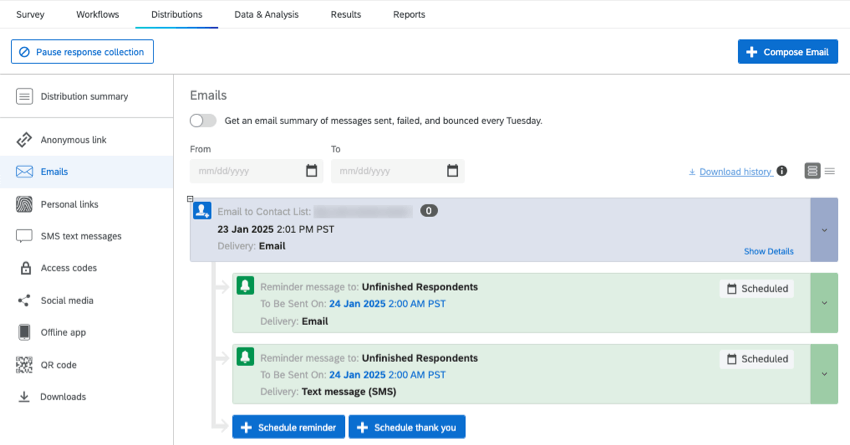
- You can add reminders to this workflow. These reminders will only be sent to people who haven’t responded to the survey invitation. See the linked sections for more information:
- Click Save.
Adding Email Reminders
Follow these steps to set up an email reminder when sending a survey invite via workflows.
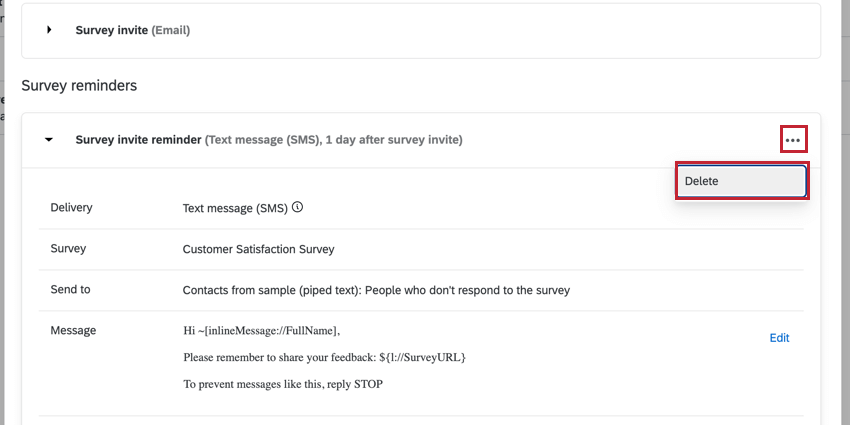
- After setting up your invite, click Remind via email.
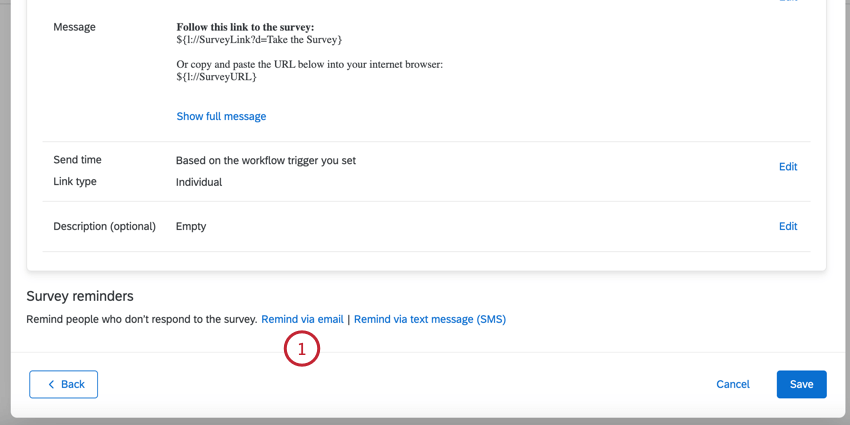
- Set your email’s sender fields:
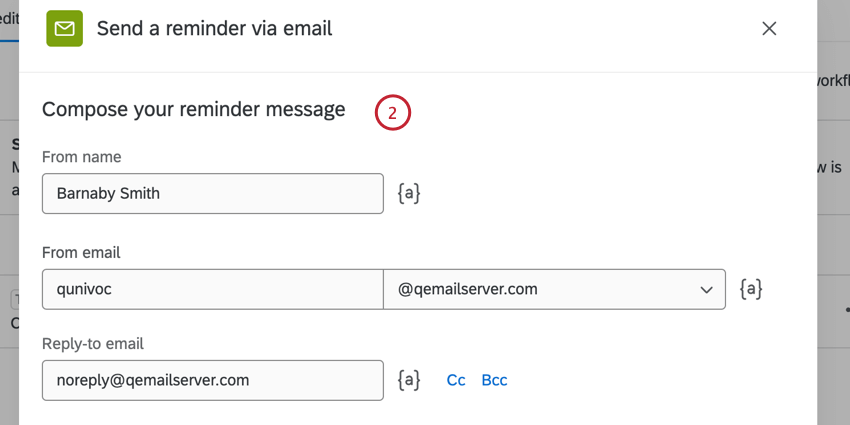
- From name: Can be anything you’d like.
- From email: Can be changed to another standard Qualtrics email address. Depending on your license, you may also be able to use a custom from address. For more information on changing these, visit our Using a Custom From Address support page.
- Reply-to email: Choose an address to receive replies to.
Qtip: Generally, the reply-to email can only be the email connected to your Qualtrics account. However, brands often have a series of custom FROM domains. These custom domains allow you to use any email address with a valid domain as your reply-to. For example, if you’re a student at Qualtrics University, you may be able to use any email address ending in @qualtricsuniversity.edu. If you’re having trouble setting your reply-to email, reach out to your Brand Administrator to check if it uses a valid domain.Qtip: You can also add a CC or BCC by clicking those buttons next to the reply-to field.
- Build the Subject and Message for your reminder. You can load a saved subject line or message from your library by clicking the library icon and then choosing the saved message. This is especially useful if you need to translate your reminder into multiple languages. Click Preview message to test the reminder. See Previewing Messages for more information.
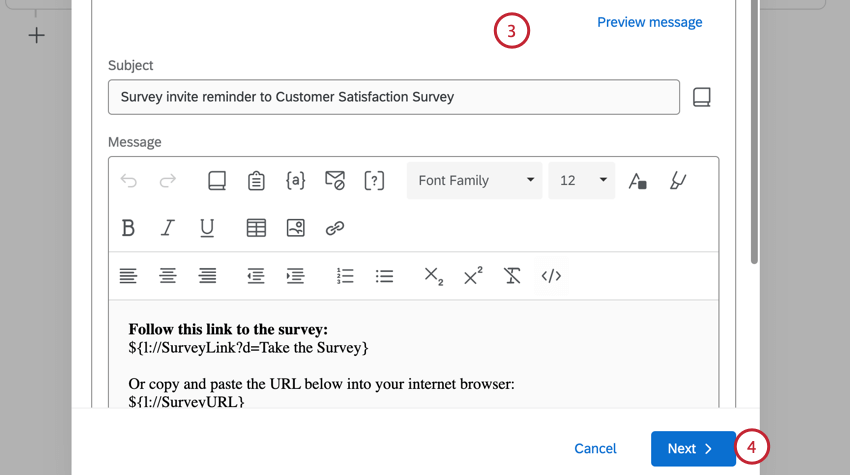
- Click Next.
- Choose when the reminder will be sent. You can send the reminder after a certain number of days or weeks. You can also choose the specific time and time zone for when it’ll send.
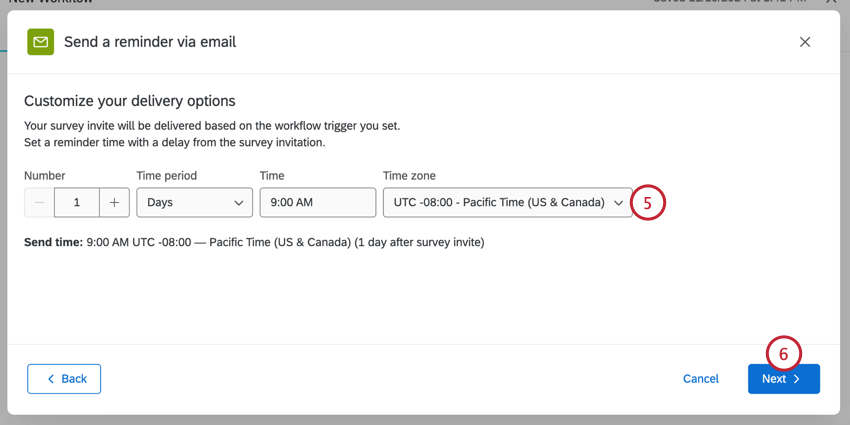
- Click Next.
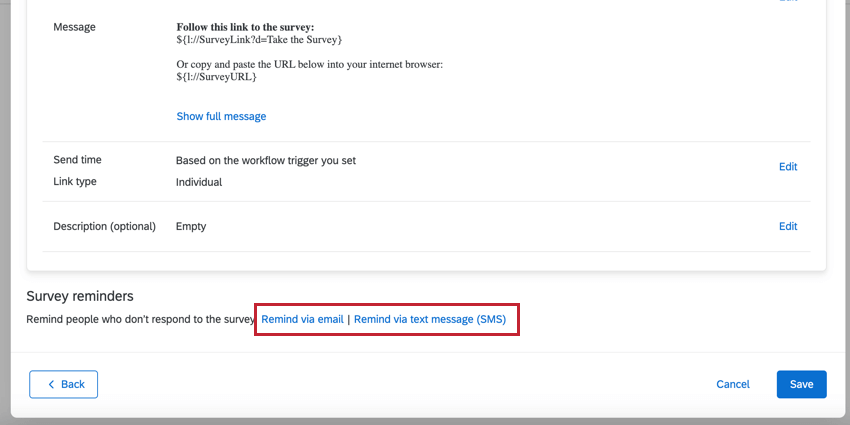
- You can add more reminders by clicking Remind via email or Remind via text message (SMS) and repeating these steps.
Adding SMS Reminders (Text Message)
You can add SMS (text message) reminders to email invites you send in workflows.
Attention: If you’re adding SMS reminders to an email distribution:
- Make sure contacts have phone numbers listed in the correct format.
- Make sure your SMS reminder message meets opt-in compliance guidelines. (See also Legal Requirements.)
- Keep an eye on your SMS credit consumption.
- After setting up your invite, click Remind via text message (SMS).
- Follow the steps on this page.
Previewing Messages
You can preview your message before sending it. When previewing a message, you can send a test message in different translations or use piped text to make the message as close as possible to the real distribution.
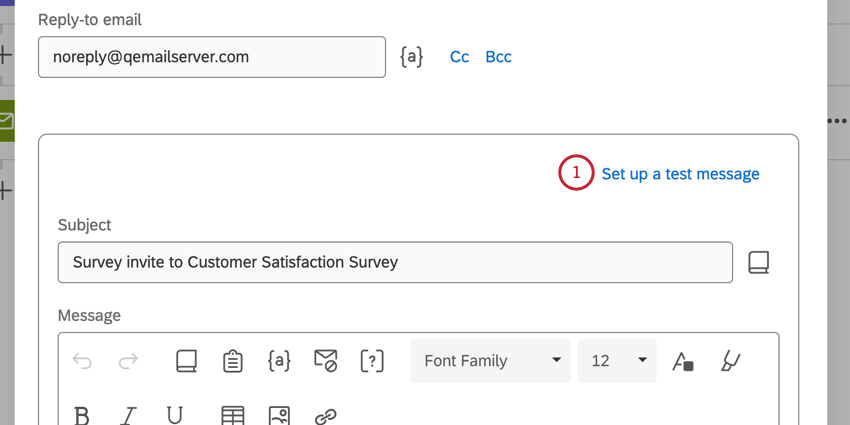
- After customizing your message, click Set up a test message.
- Enter the email address to receive the test message.
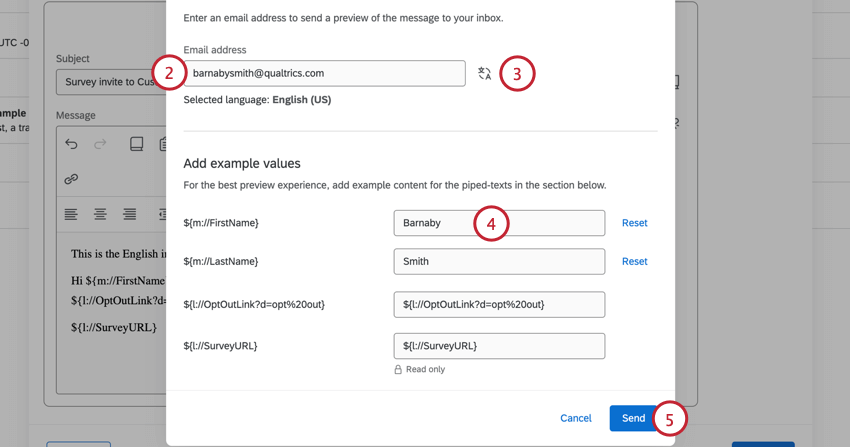
- If your email subject or body has been translated, you can choose which translation to send by clicking the translation icon. The selected language will appear below the email field.
- All of the piped text you have used in your message will appear under Add example values. If you’d like piped text to appear as specific values, enter them here.
Example: Since you’re not sending to a real contact, fields from a contact list will appear as empty in the test email. You can enter example values for these fields so they appear correctly in the email.Qtip: The survey link will be a preview link. You cannot edit this field.Qtip: You can revert back to the default values by clicking Reset.
- When finished, click Send.
Managing Workflow Distributions
You can always manage workflows right from the workflows page. However, one of the great things about workflow survey invites is that they appear in the same places as other survey distributions, giving you a chance to track and troubleshoot all of your distributions in one place. Send Survey via Email Task invites, Send Survey via Text Message Task invites, and all of their reminders qualify.
Distributions can appear in both XM Directory and in the specific survey you’re distributing. To learn more about viewing, managing, and troubleshooting distributions in these locations, see the following support pages:
XM Directory: Outbox
Survey Distributions tab:

