Jira Event
About Jira Events
Jira events allow you to begin a workflow in Qualtrics based on changes to Jira issues. For example, you could build a Jira event that distributes a survey whenever a Jira issue has closed.
Qtip: The Jira integration only works with cloud-based implementations of Jira, and will not work with on-premises deployments.
Qtip: If you have questions about Jira-specific fields and functionalities, please visit the Atlassian community.
Connecting Jira Credentials to Qualtrics
Before you let users on the brand use the Jira event, you can specify a Jira account that can be used brand-wide. See Connecting Jira Credentials to Qualtrics for more information.
Setting Up a Jira Event
Attention: Setting up a Jira event will require working with your Jira administrator to configure a webhook that links Qualtrics with Jira. Any changes made to the event will require the Jira administrator to update the webhook with the same changes.
- Navigate to the Workflows tab of a survey or the global Workflows page.
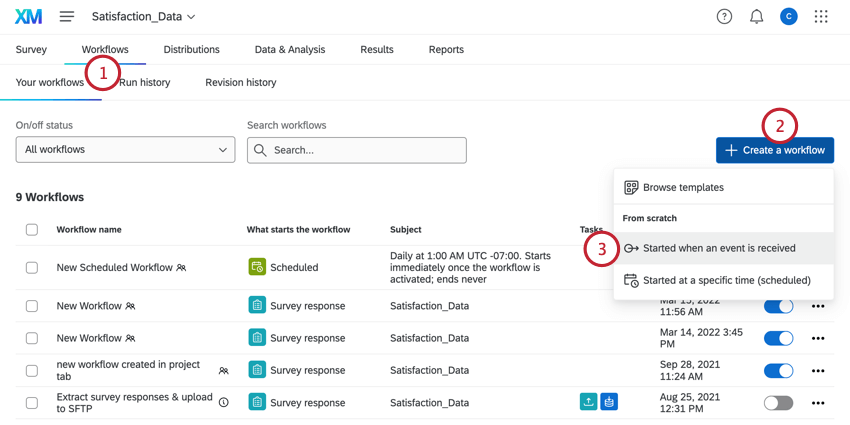
- Click the arrow next to Create a workflow.
- Click Started when an event is received.
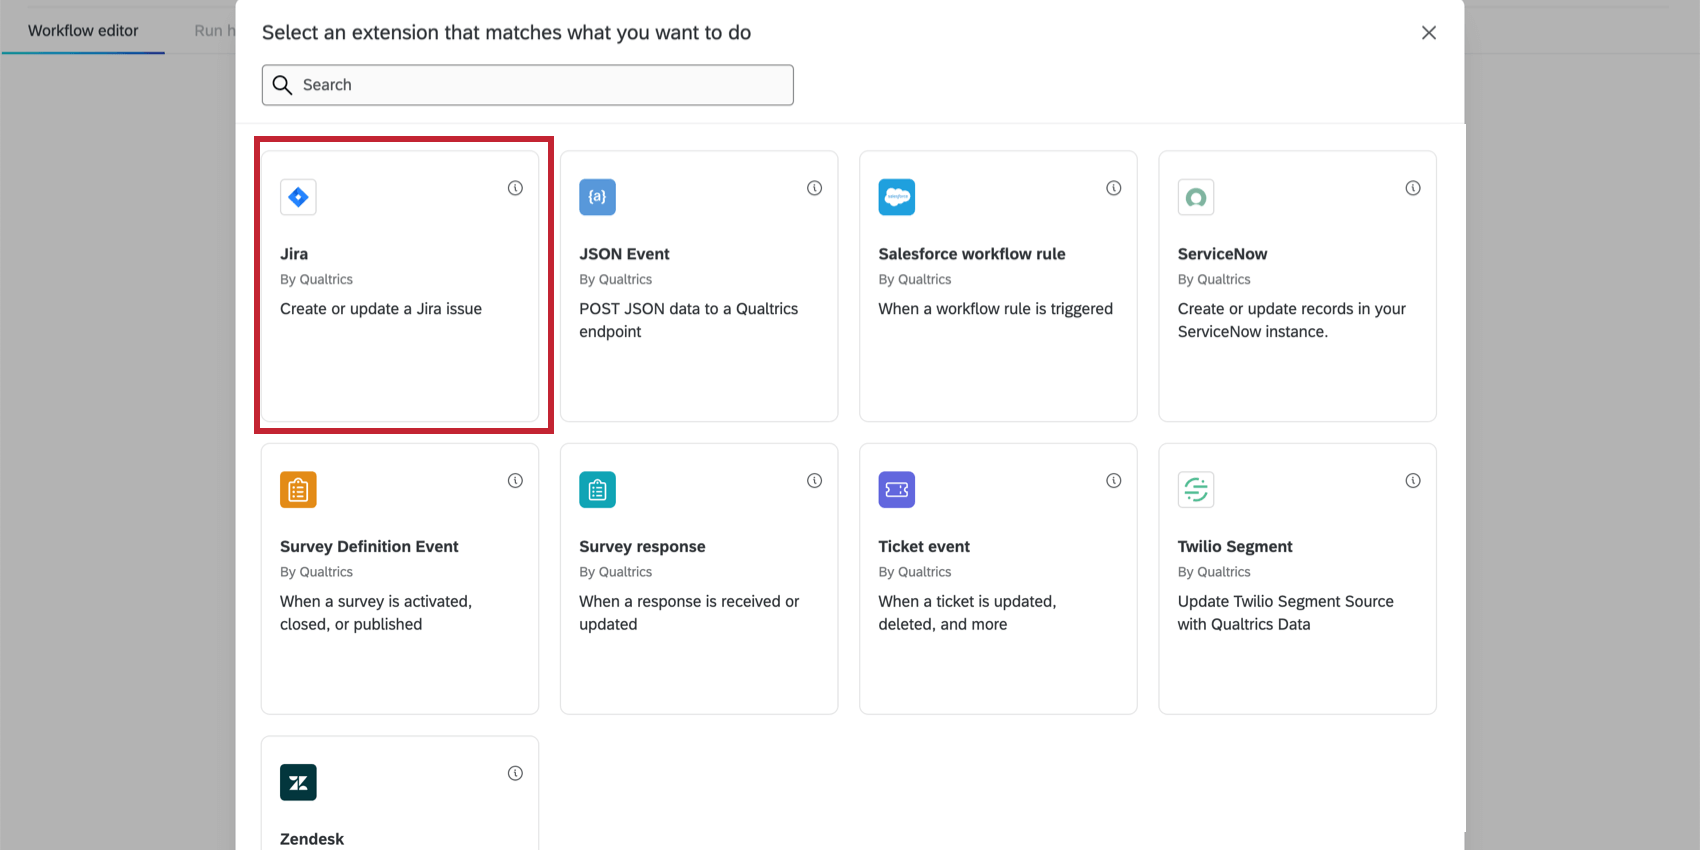
- Select the Jira event.
- Select the account you’d like to connect to.
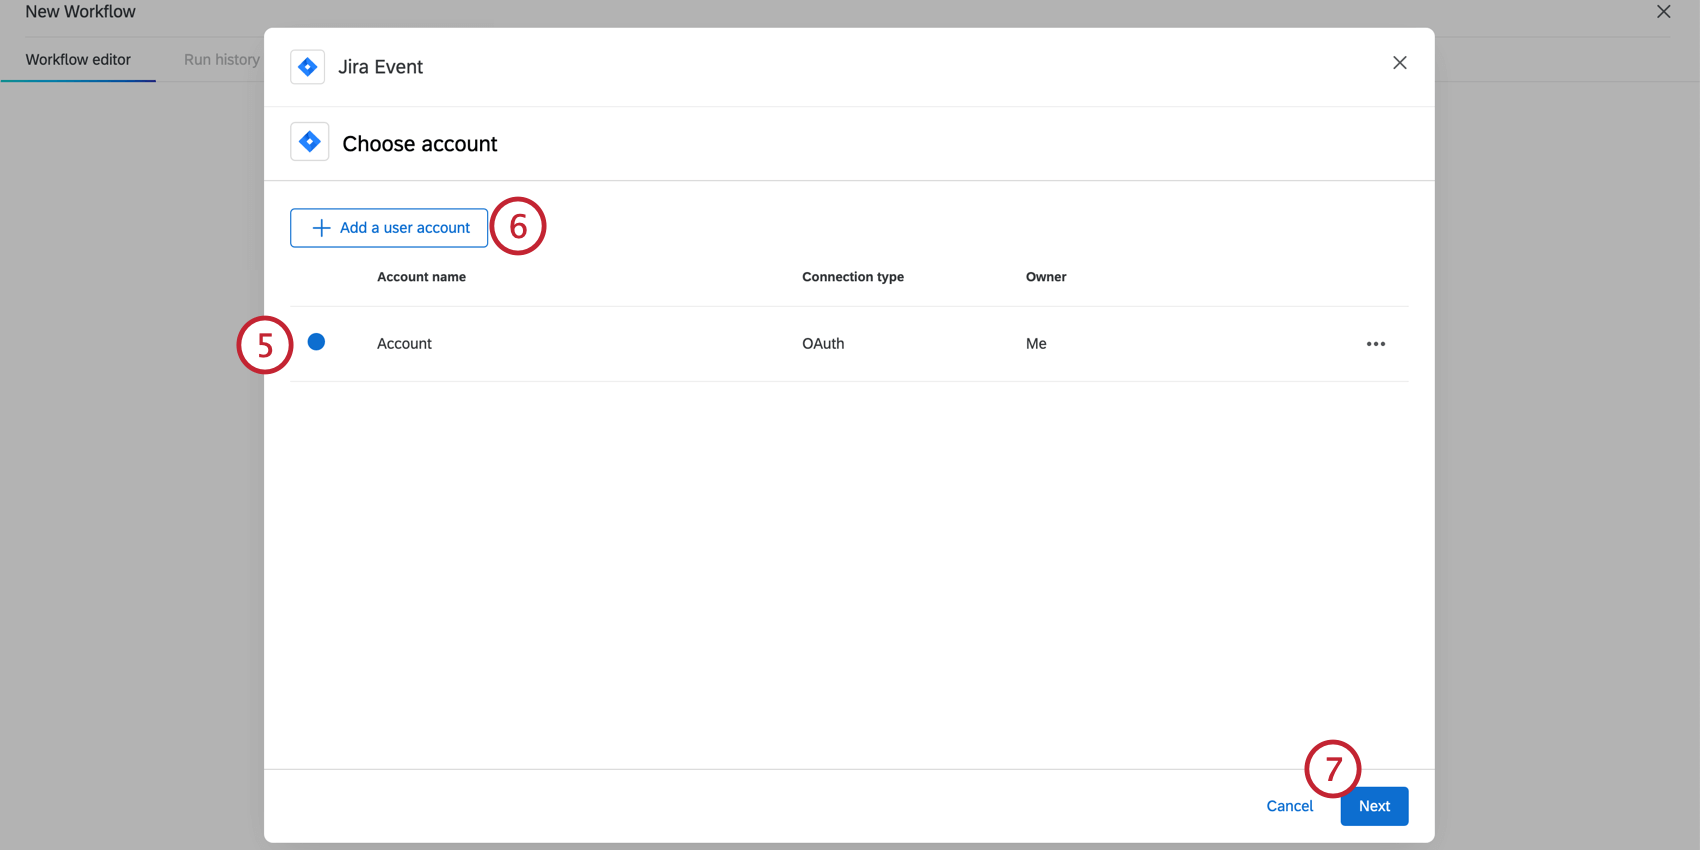
- Click Add a user account if you have a Jira account you’d like to link that isn’t on the list. Note that any accounts you add here will only be accessible to you; in contrast, apps added by brand admins to the Extensions page can be used by the whole brand.
- Click Next.
- Select the instance you would like to build a workflow from.
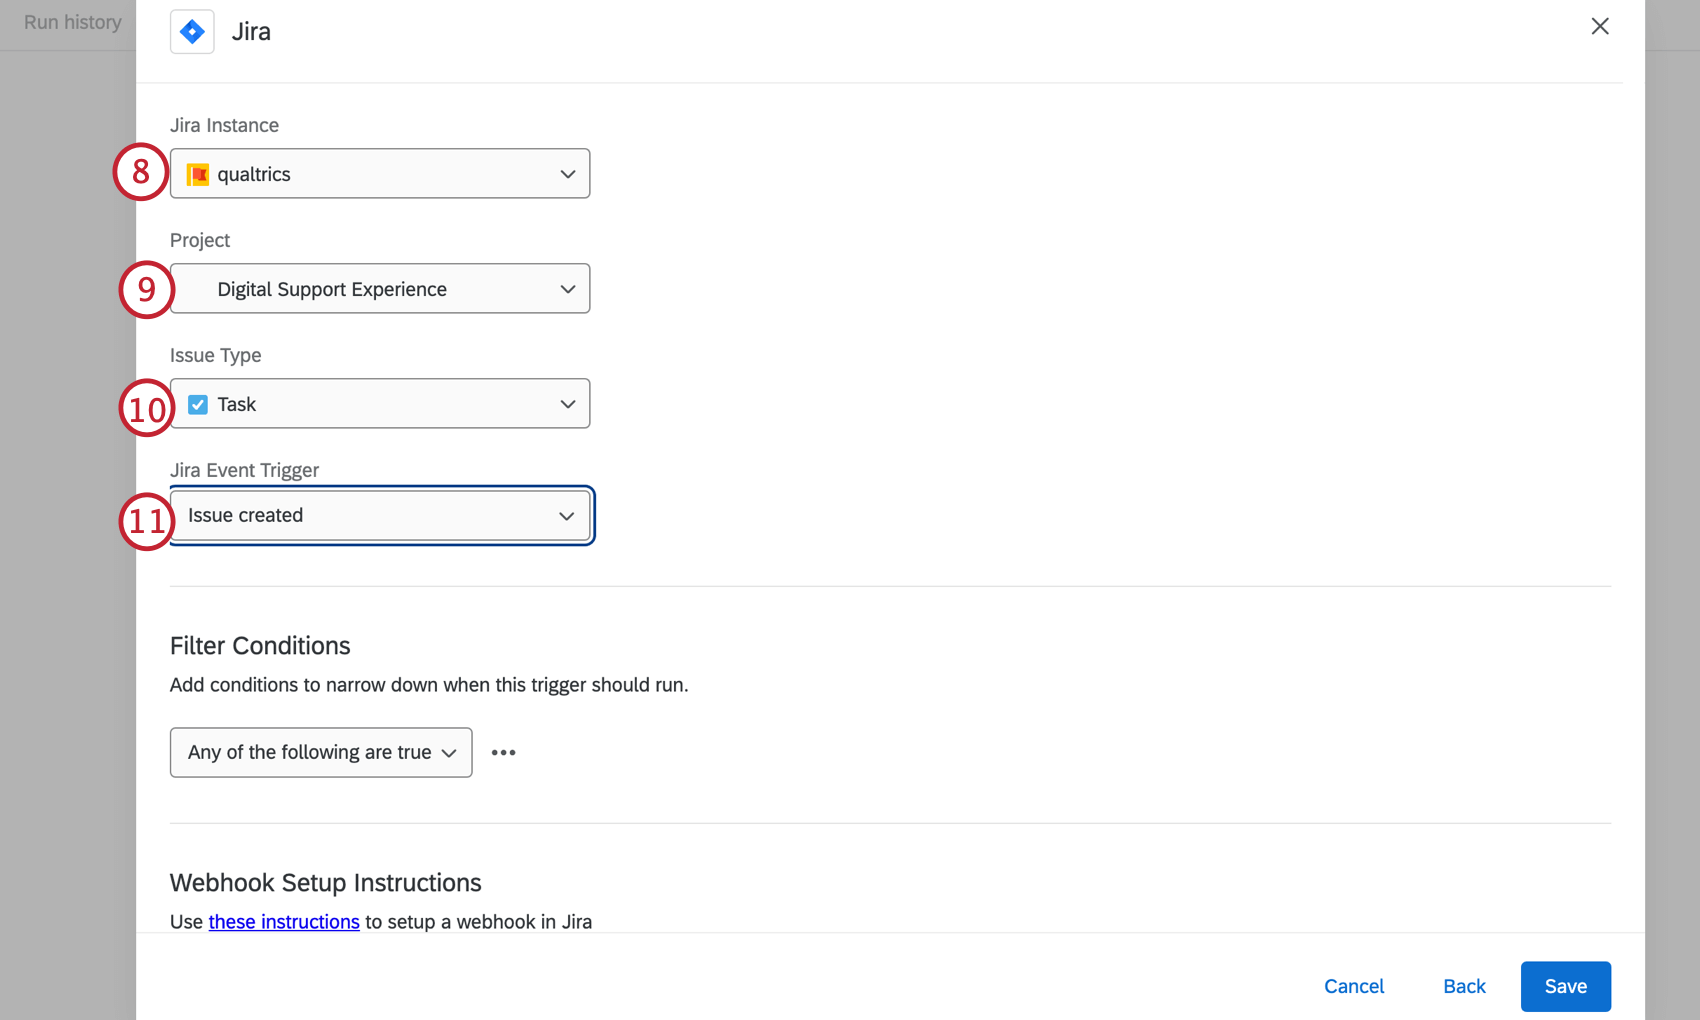
- Select the relevant project within that instance.
- Select the type of issue that should be tracked for changes.
- Select the event you are interested in tracking.
- Add optional filters by clicking the 3 dots under Filter Conditions to narrow down what changes should trigger the workflow.
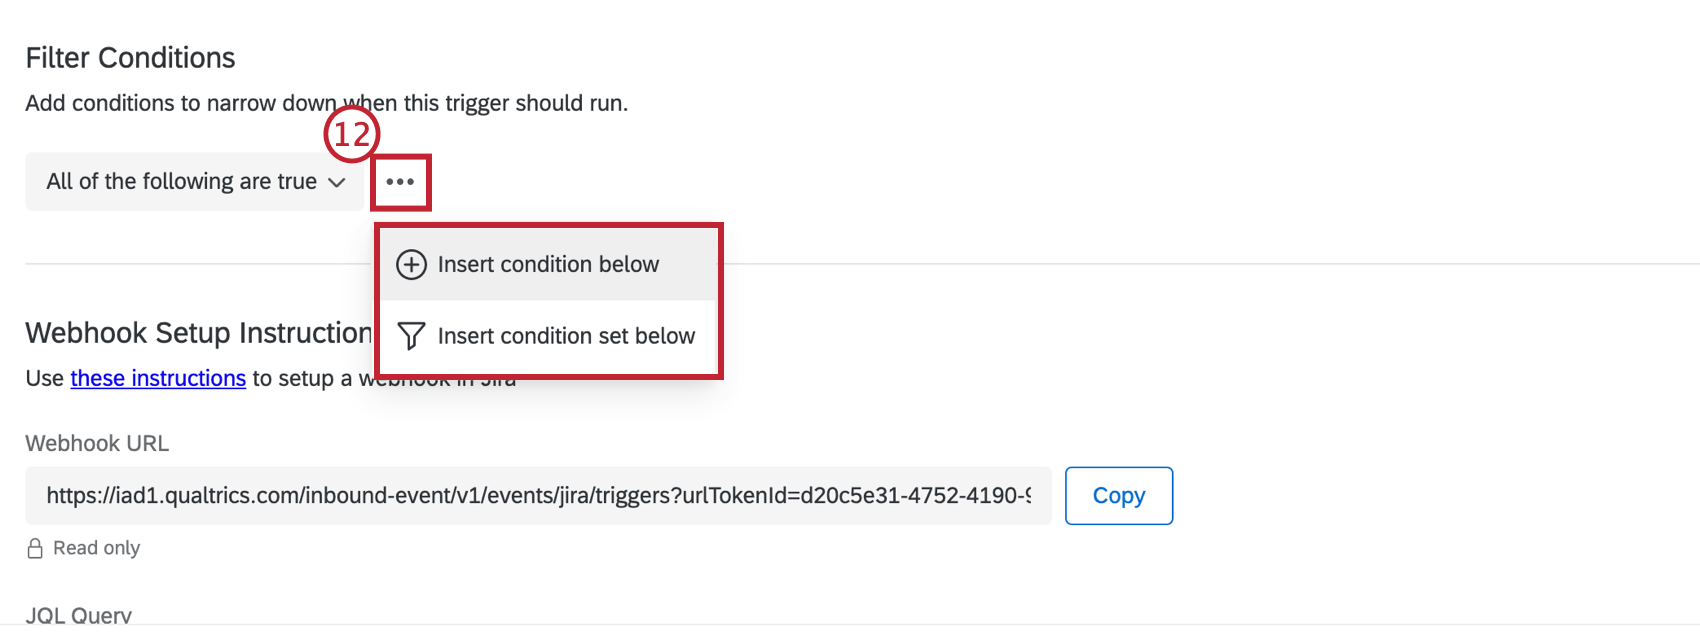 Qtip: We recommend using filters to narrow event parameters and avoid triggering unnecessary workflows.Qtip: These conditions are evaluated before the event triggers. For general information on formatting condition logic, see Creating Conditions. Note that you can still add conditions later in your workflow to determine when your task fires.
 - Copy the Webhook URL and JQL Query and send them to your Jira administrator.
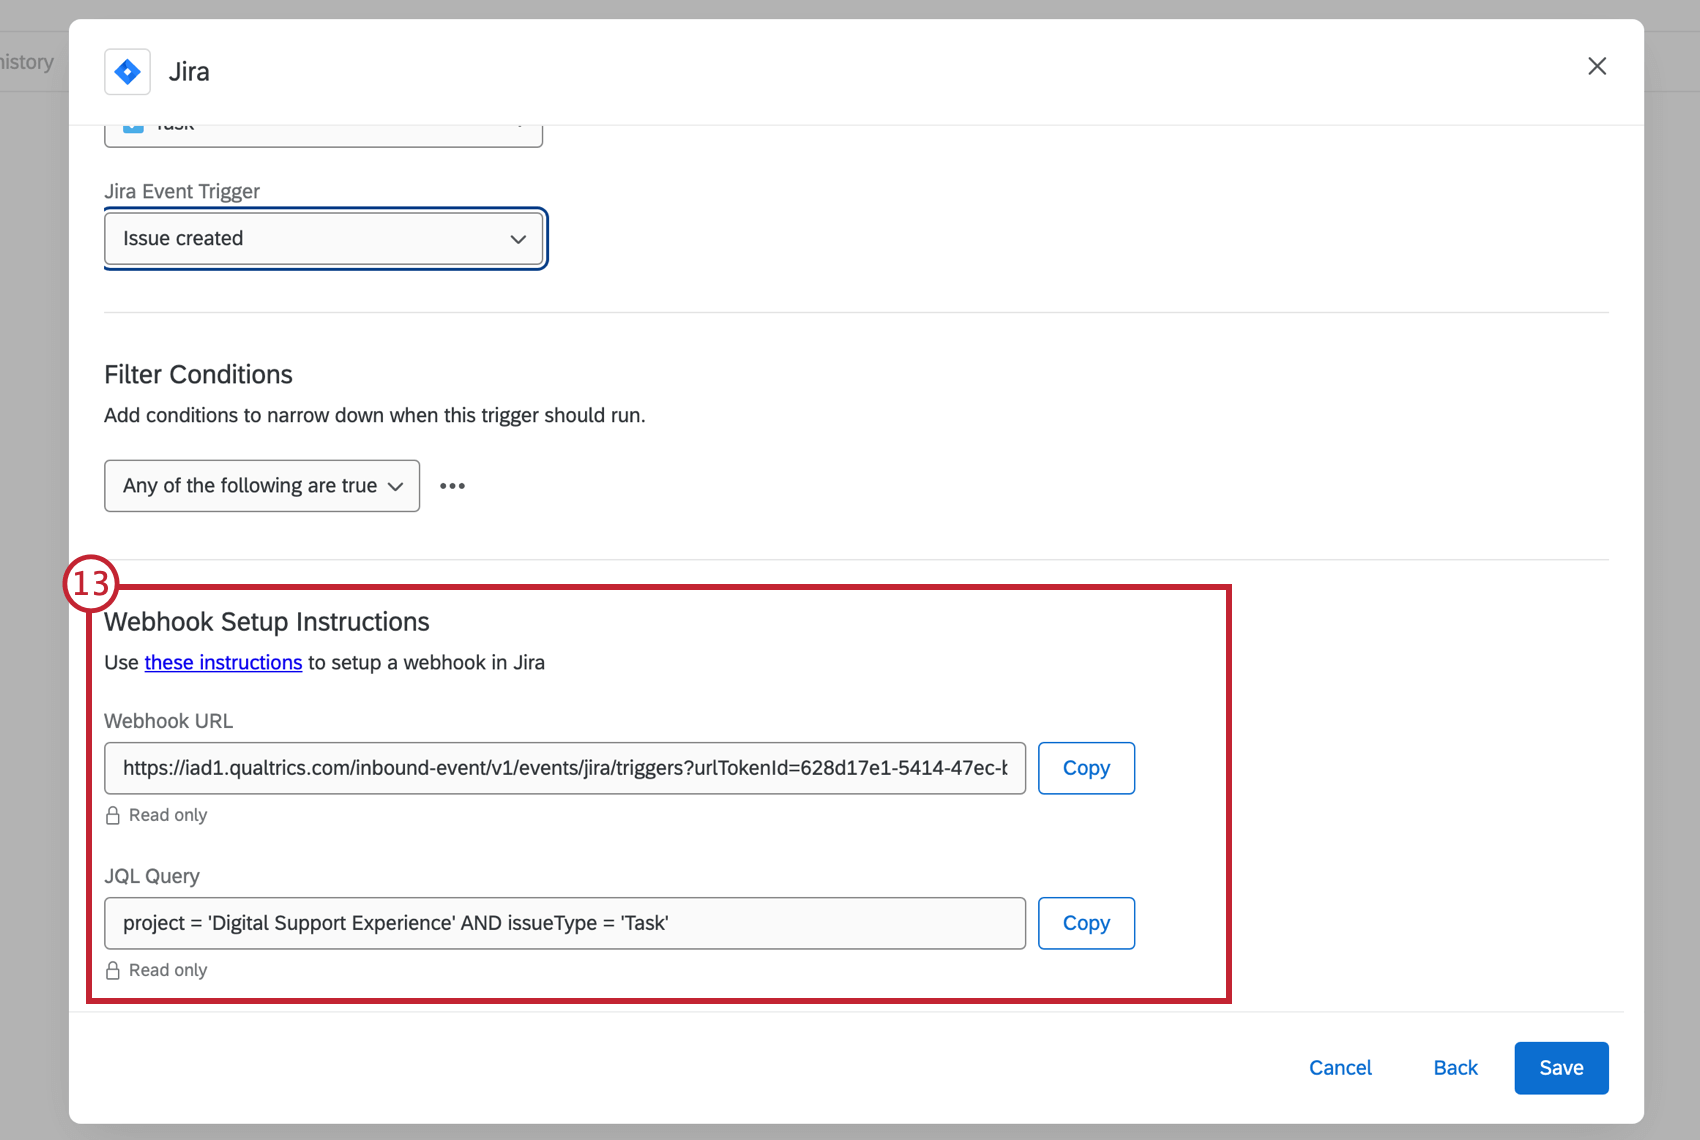
JIRA ADMINISTRATOR CONFIGURATION STEPS
Your Jira administrator must complete the following steps in order for the event to trigger. In the meantime, you can Save and exit your workflow as no further action in Qualtrics is required.
- Navigate to https://<ATLASSIAN_INSTANCE>.atlassian.net/plugins/servlet/webhooks
Qtip: Replace <ATLASSIAN_INSTANCE> with your atlassian instance name.
- Click Create a WebHook.
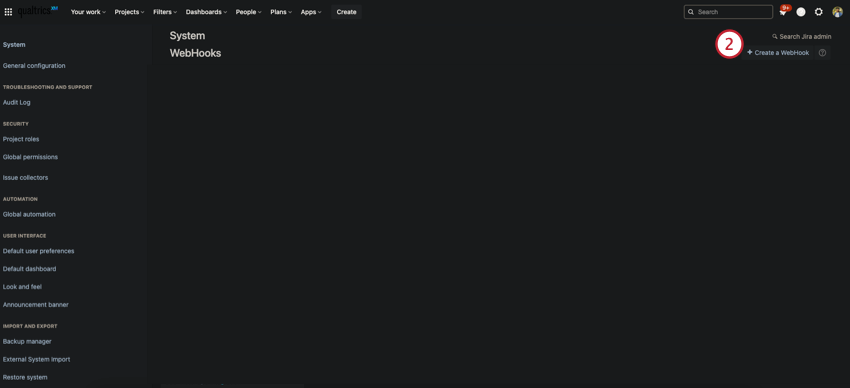 Qtip: What you see in the screenshots may differ from your Jira account since dark mode is enabled.
 - Name the webhook and make sure the status is Enabled.
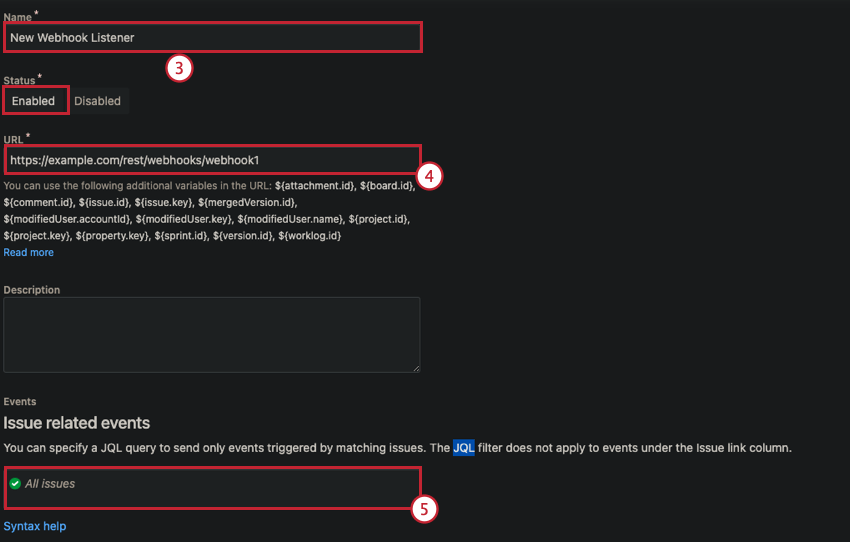
- Paste the Webhook URL copied from the steps above into the URL section.
- Paste the JQL Query from the steps above into the text box in the issue related events section.
- Use the checkboxes in the issue related events section to select the type of event that will trigger the workflow in Qualtrics.
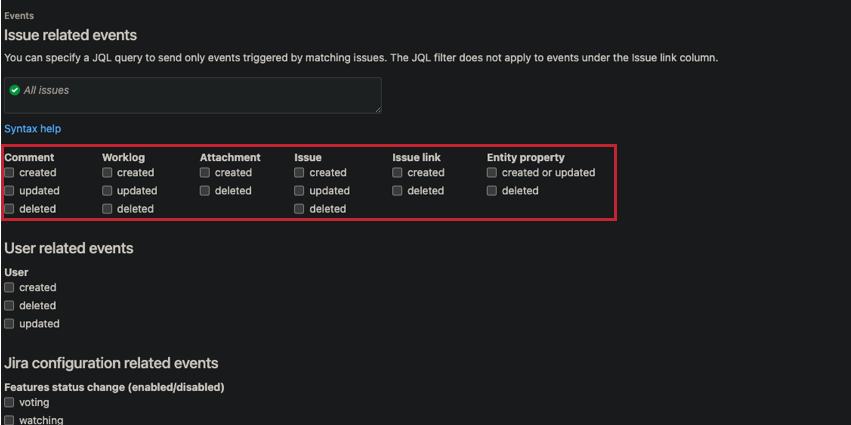 Qtip: Only check the item that was selected in the Jira Event trigger dropdown menu in the Qualtrics Jira Event. Any events outside of these may not map the correct fields.
 - Click Create.

- Save the JIRA event in Qualtrics.