Load B2B Account Data into XM Directory Task
About the Load B2B Account Data into XM Directory Task
The Load B2B account data into XM Directory task allows you to map data imported into Qualtrics to your XM Directory. For example, you can use an Extract data from SFTP files task to import data into Qualtrics and then map that data to your directory.
Setting Up a Load B2B Account Data into XM Directory Task
- Click the navigation menu in the top-left corner.
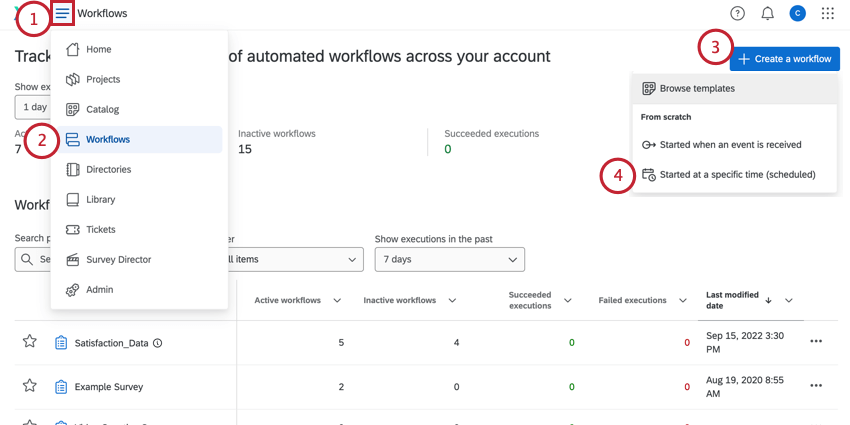
- Choose Workflows.
- Click Create a workflow.
- Determine whether the workflow should be Scheduled or Event-Based. For a comparison of these options, see scheduled Workflows vs. event-based Workflows.
Qtip: Usually, you’ll use a scheduled workflow so that your data is regularly up to date.
- Give your workflow a name.
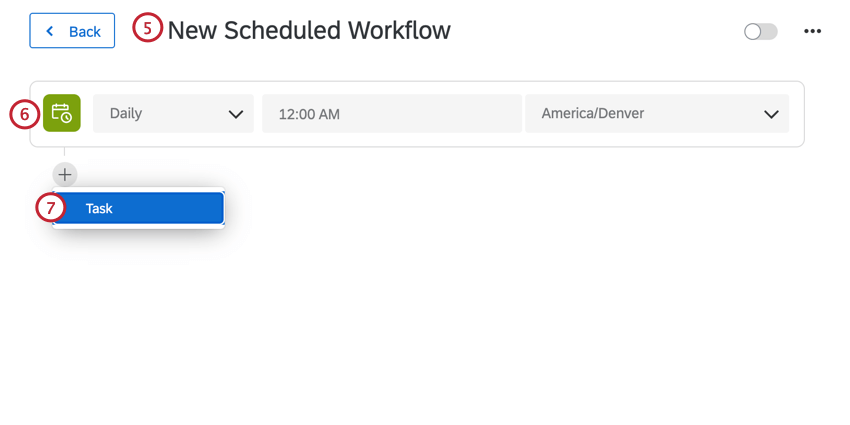
- Determine when the workflow should run (if a scheduled workflow) or the event that triggers the workflow (if an event-based workflow).
- Click the plus sign ( + ) and then Task to set up the data extracting task that imports data into Qualtrics. You must first set up a data extracting task before you can use the Load B2B Account Data into XM Directory task. See using Workflows tasks to build ETL workflows for more information.
- Click the plus sign ( + ) and then Task.

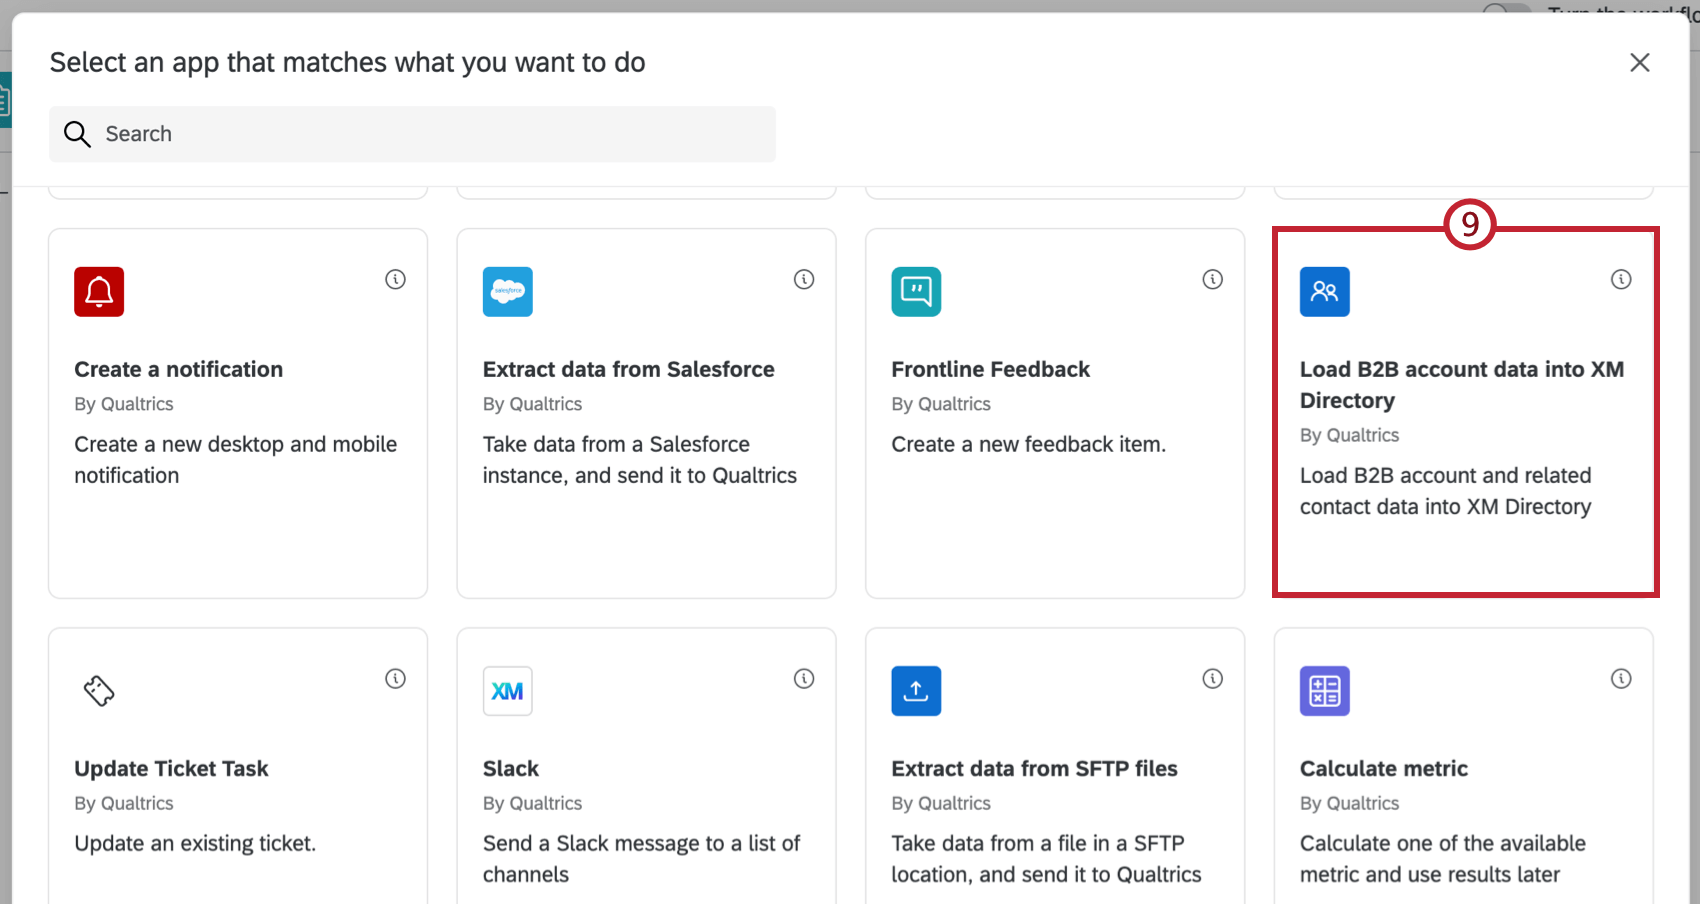
- Choose the Load B2B account data into XM Directory task.
- Choose the directory to map data to.
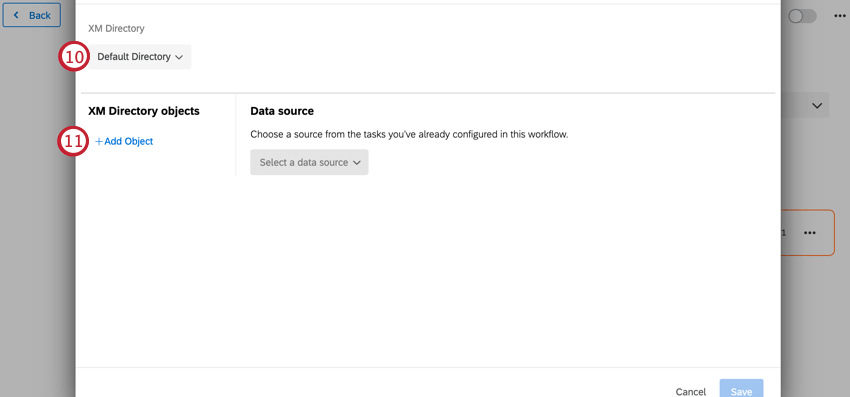 Qtip: Most licenses only have a default directory, but some may have multiple.
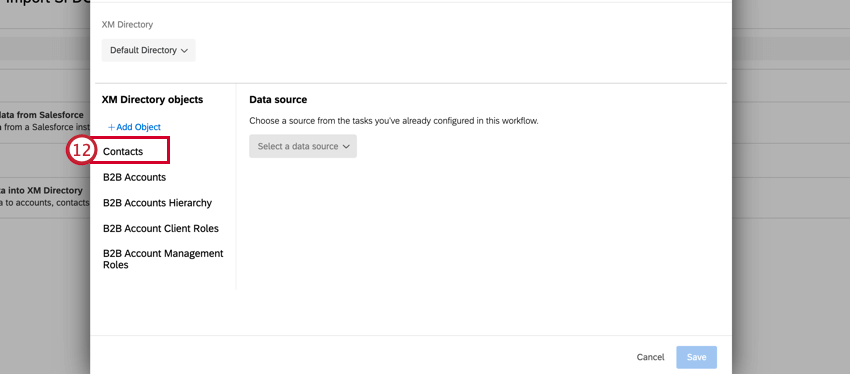
 - Click Add Object.
- Choose an XM Directory object to map data to. You’ll only map data for the Contacts object.
- If mapping Contacts, choose if you would like a new mailing list to be created each time this workflow runs. If you leave this option unchecked, then your newly imported contacts will be added to the general global directory and not in a mailing list.
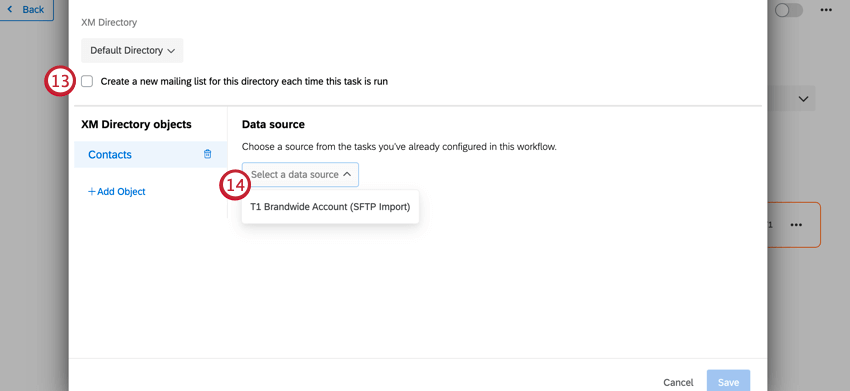
- Use the dropdown menu to choose your Data Source. This should be the data extracting task you set up earlier.
- Use the dropdown menus to map fields from your data extracting task to your XM Directory. Fields with an asterisk are required.
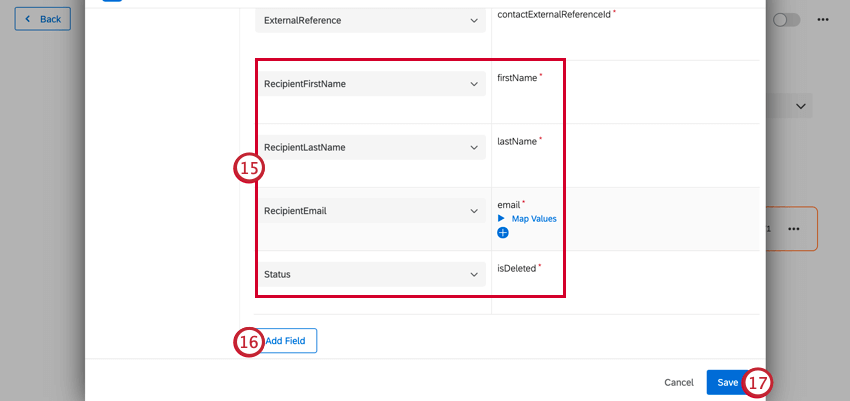 Qtip: You can also map individual field values. See Mapping Field Values for more information.
 - To add custom fields to your mapping, click Add Field.
- When finished mapping fields, click Save.
Mapping Field Values
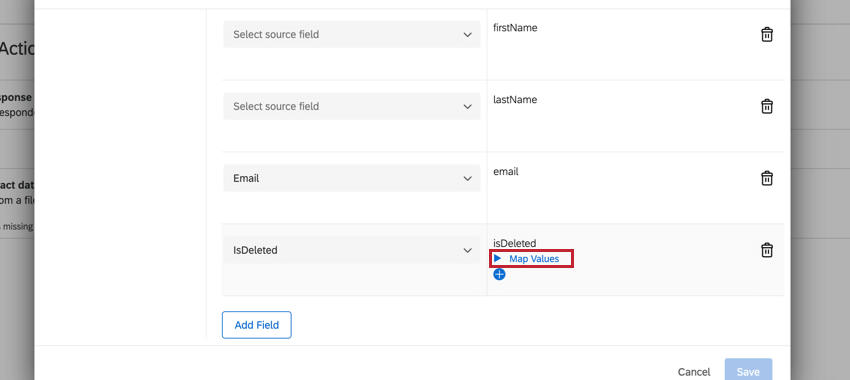
You can map individual field values to save into Qualtrics. You have the option of mapping fields manually, or uploading a file containing your mappings. Additionally, you can determine what happens to unmapped fields.
To start mapping field values, click Map Values under the desired field.
Mapping Values with a File Upload
You have the option of uploading a CSV or TSV file containing your mapping. This is recommended if you have many values to map. If you have already mapped some values, uploading a file will not replace those mappings. Your newly added mappings will be added beneath the already mapped values.
- Click Map Values.
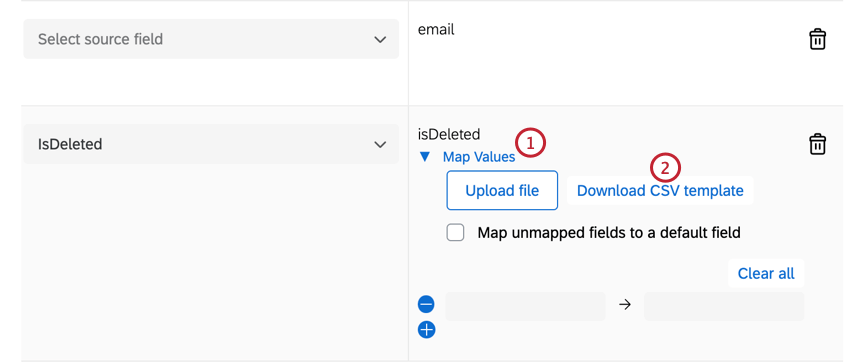
- Click Download CSV Template. We recommend downloading the template since it contains the correct formatting.
- Open this file in a spreadsheet editor on your computer, like Microsoft Excel or Google Sheets.
- The first 2 cells will contain the headers “from” and “to.” These represent your source and destination values, respectively.
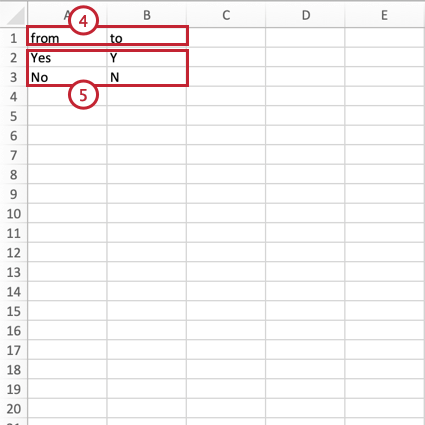
- Add your field values. Your source values go in the “from” column and the destination values go in the “to” column. Make sure your file meets the following requirements:
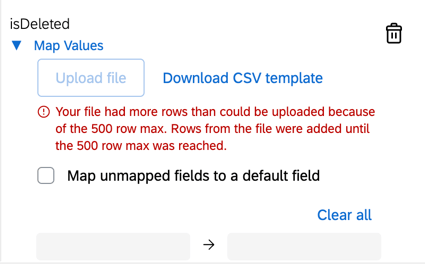
- You may have up to 500 mapping pairs. If your file contains more than 500 mappings, then you will receive an error message and only the first 500 rows will be uploaded.
- Make sure your file contains the “from” and “to” headers. If these headers are not detected, then Qualtrics will assume the first column is “from” and the second column is “to.”
- You may have up to 500 mapping pairs. If your file contains more than 500 mappings, then you will receive an error message and only the first 500 rows will be uploaded.
- Save your file as a CSV or TSV with UTF-8 encoding.
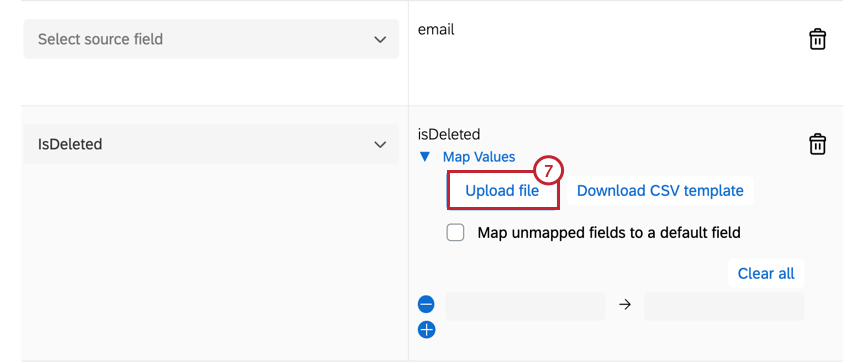
- In the Load B2B account data into XM Directory task, click Upload file and then choose the file from your computer. Your uploaded mapping will then populate in the task.
Manually Mapping Values
You can manually map field values. This is recommended only if you have a few values to map.
- Click Map Values.
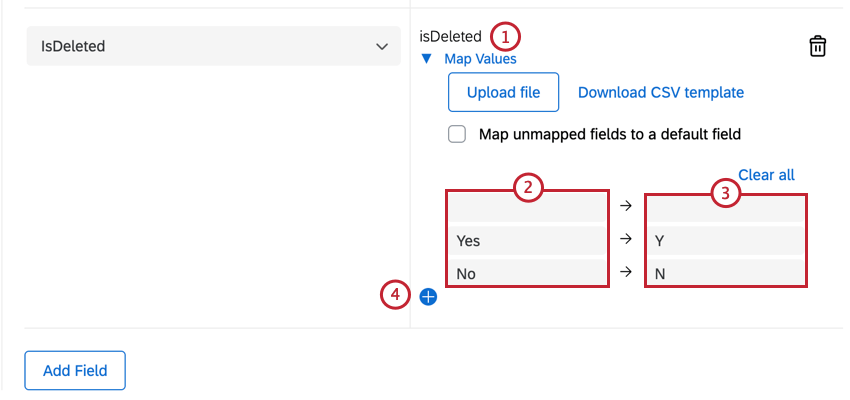
- Enter the source value in the first column
- Enter the destination value in the second column
- Click the blue plus sign ( + ) to add another mapping pair.
Handling Unmapped Fields
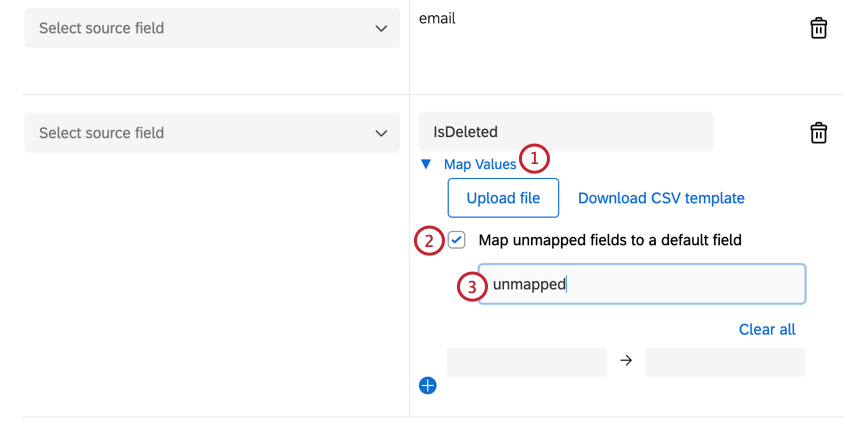
By default, if a field value is not mapped, then the field will be imported into Qualtrics using its source value. However, you can choose to map all unmapped values to a default field value.
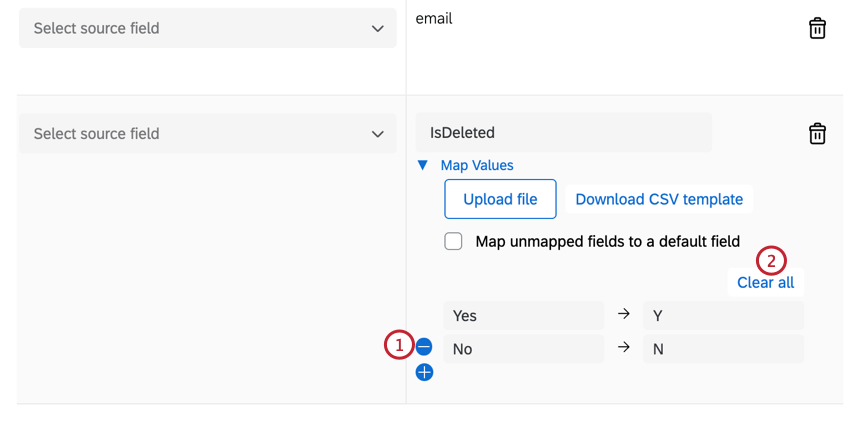
Deleting Mappings
Troubleshooting Tips
- When investigating what went wrong with a workflow task, check out Workflows reporting for any errors and correct them before retrying your task.
- Contact deduplication allows you to retry your task without creating duplicate contacts. Make sure to set up contact deduplication rules when testing and retrying this task.
