-

Qualtrics Platform -

Customer Journey Optimizer -

XM Discover -

Qualtrics Social Connect
Add Contacts and Transactions to XMD Task
About the Add Contacts and Transactions to XMD Task
The Add Contacts and Transactions to XMD task allows you to map data imported into Qualtrics to your XM Directory. For example, you can use an Extract data from SFTP files task to import data into Qualtrics and then map that data to your directory.
This task is similar to the Load B2B account data into XM Directory task, but it allows you to map both contact data and transactional data to XM Directory.
Setting Up an Add Contacts and Transactions to XMD Task
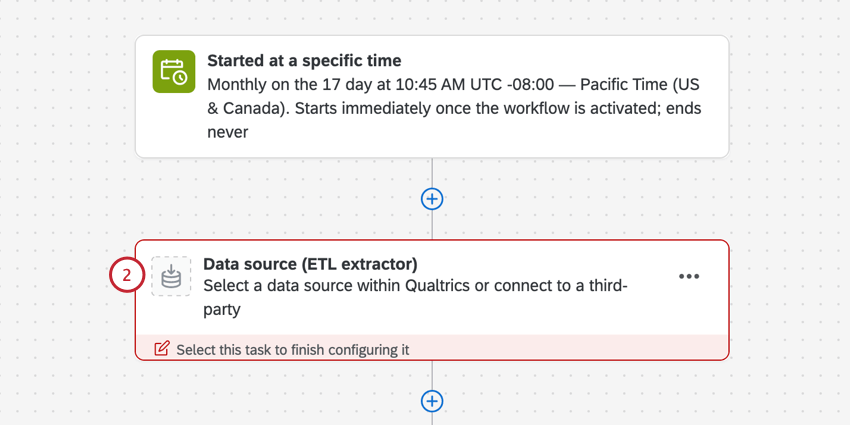
- Create an ETL workflow.
- Select Data source (ETL extractor). In this step, you’ll extract data that you can load to another destination. See using Building ETL Workflows for more information.
 Qtip: Files must be less than 1 GB and 750,000 rows to be compatible with the add contacts and transactions to XMD task.
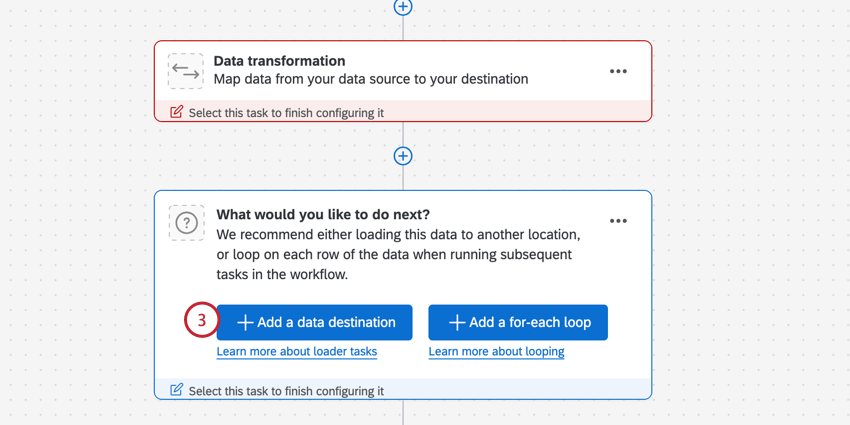
 - Click Add a data destination.
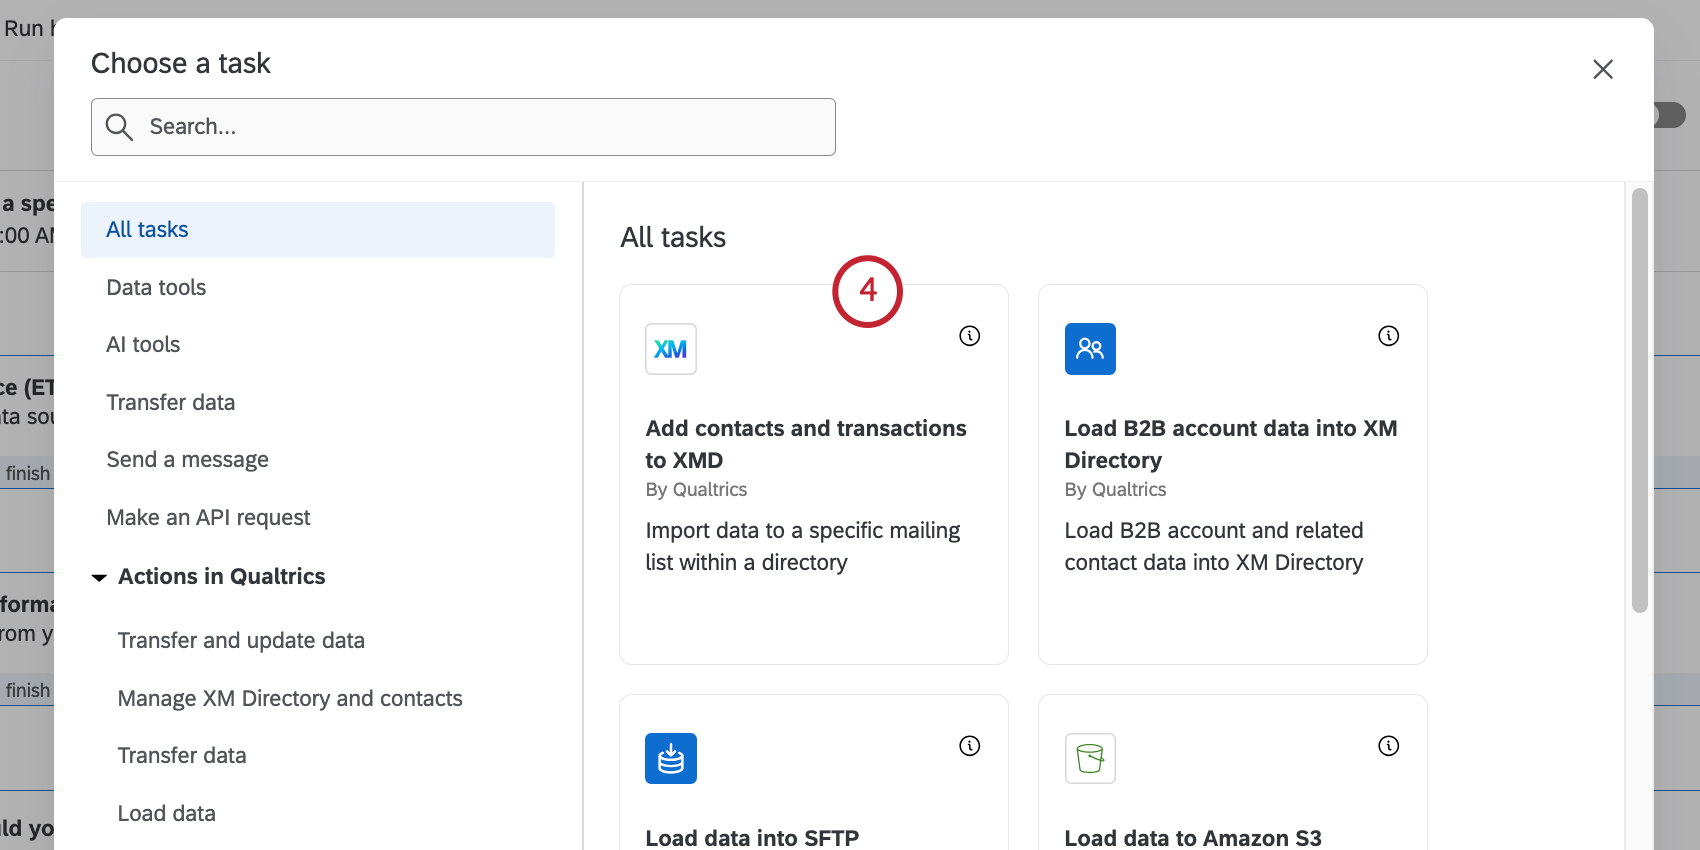
- Choose the Add contacts and transactions to XMD task.
- Choose the directory to map data to.
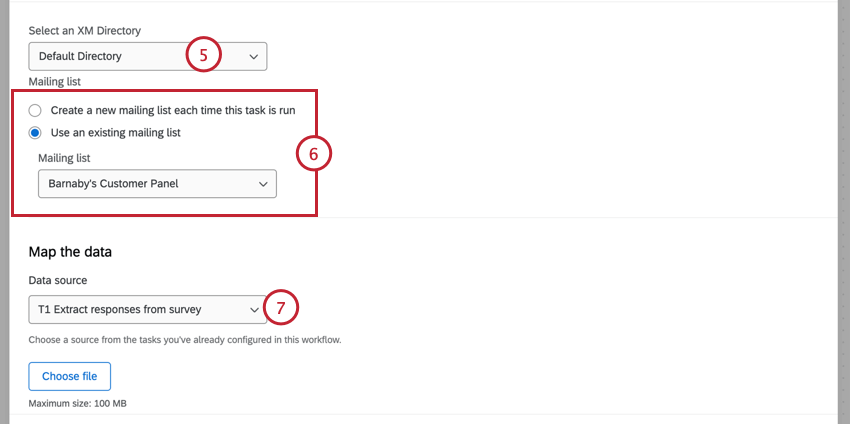 Qtip: Most licenses only have a default directory, but some may have multiple directories.
 - Select a mailing list to map data to. You can also choose to create a new mailing list for this directory each time this workflow runs.
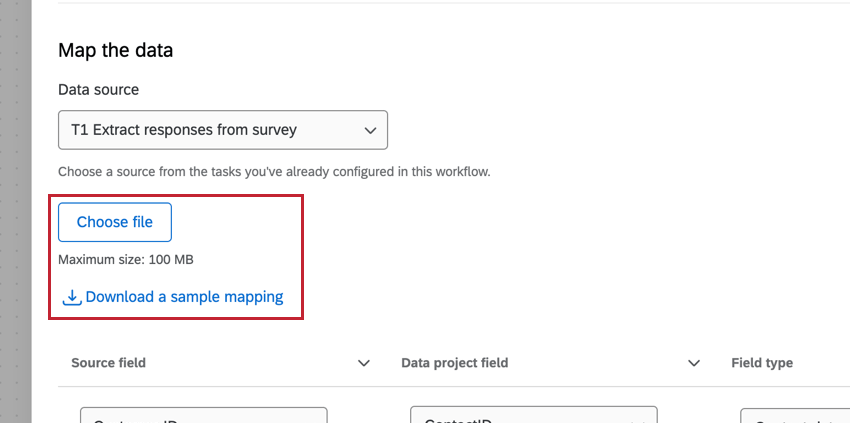
- Select a data source. This should be the data extractor task you set up earlier.
- Use the menus to map fields from your data extracting task to your XM Directory. Fields will be automatically mapped to contact data and existing embedded data and transaction data in the selected directory. Review the mappings and make changes as needed:
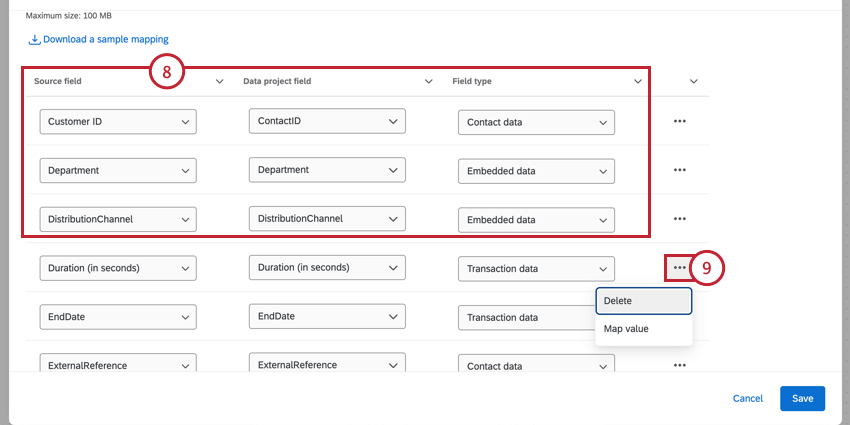
- Source field: The field from your extractor task.
Qtip: Source fields can only be mapped to one destination field within the task.
- Data project field: The destination field in XM Directory.
Qtip: The following XM Directory contact fields are added by default:
- ContactID
- FirstName
- LastName
- Language
- Phone
- Unsubscribed
- ExternalReference (also known as ExternalDataReference)
- Field type: The field type the imported data should be saved as:
- Contact data: Standard contact fields.
- Embedded data: Custom embedded data fields for extra contact data.
- Transaction data: Data imported as a transaction field.
Qtip: The “Transaction Date” field is useful for setting a custom date when the transaction occurred. Dates are assumed to be in UTC unless the time zone is explicitly included in the date value. More information on these formats can be found on the Date Format Syntax support page. Here is a list of compatible time formats:
- ISO-8601 (2006-01-02T15:04:05+07:00)
- ANSIC (Mon Jan _2 15:04:05 2006)
- UnixDate (Mon Jan _2 15:04:05 MST 2006)
- RFC822 (02 Jan 06 15:04 MST)
- RFC850 (Monday, 02-Jan-06 15:04:05 MST)
- RFC1123 (Mon, 02 Jan 2006 15:04:05 MST)
If transaction fields are imported but no transaction date is set, then the current date will be used as the transaction date.
- Source field: The field from your extractor task.
- When mapping fields, there are additional options available:
- Delete: Remove the mapping.
- Map Value: Map individual field values (for example, Y to Yes and N to No). See Mapping Field Values for more information.
- To add custom fields to your mapping, click Add Field and then use the menus to map the field.
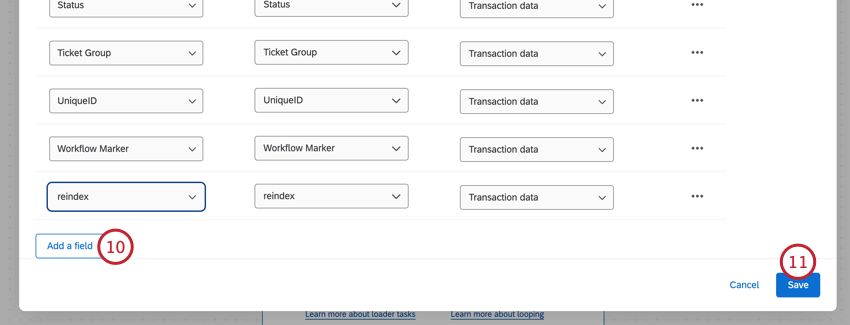
- When finished mapping fields, click Save.
Qtip: This task obeys your directory’s contact deduplication rules.
Troubleshooting Tips
- When investigating what went wrong with a workflow task, check out Workflows reporting for any errors and correct them before retrying your task.
- Contact deduplication allows you to retry your task without creating duplicate contacts. Make sure to set up contact deduplication rules when testing and retrying this task.
- When mapping field values, keep the following in mind:
- You may have up to 500 mapping pairs. If your file contains more than 500 mappings, then you will receive an error message and only the first 500 rows will be uploaded.
- Make sure your file contains the “from” and “to” headers. If these headers are not detected, then Qualtrics will assume the first column is “from” and the second column is “to.