-

Qualtrics Platform -

Customer Journey Optimizer -

XM Discover -

Qualtrics Social Connect
Following Up On Tickets
About Following Up On Tickets
After ticketing is all set up and new tickets are being created, it’s time to follow up with your respondents! This page goes over the many ways you manage your tickets in the follow-up stage, including contacting the respondent from the ticket, changing the status of the ticket, and more.
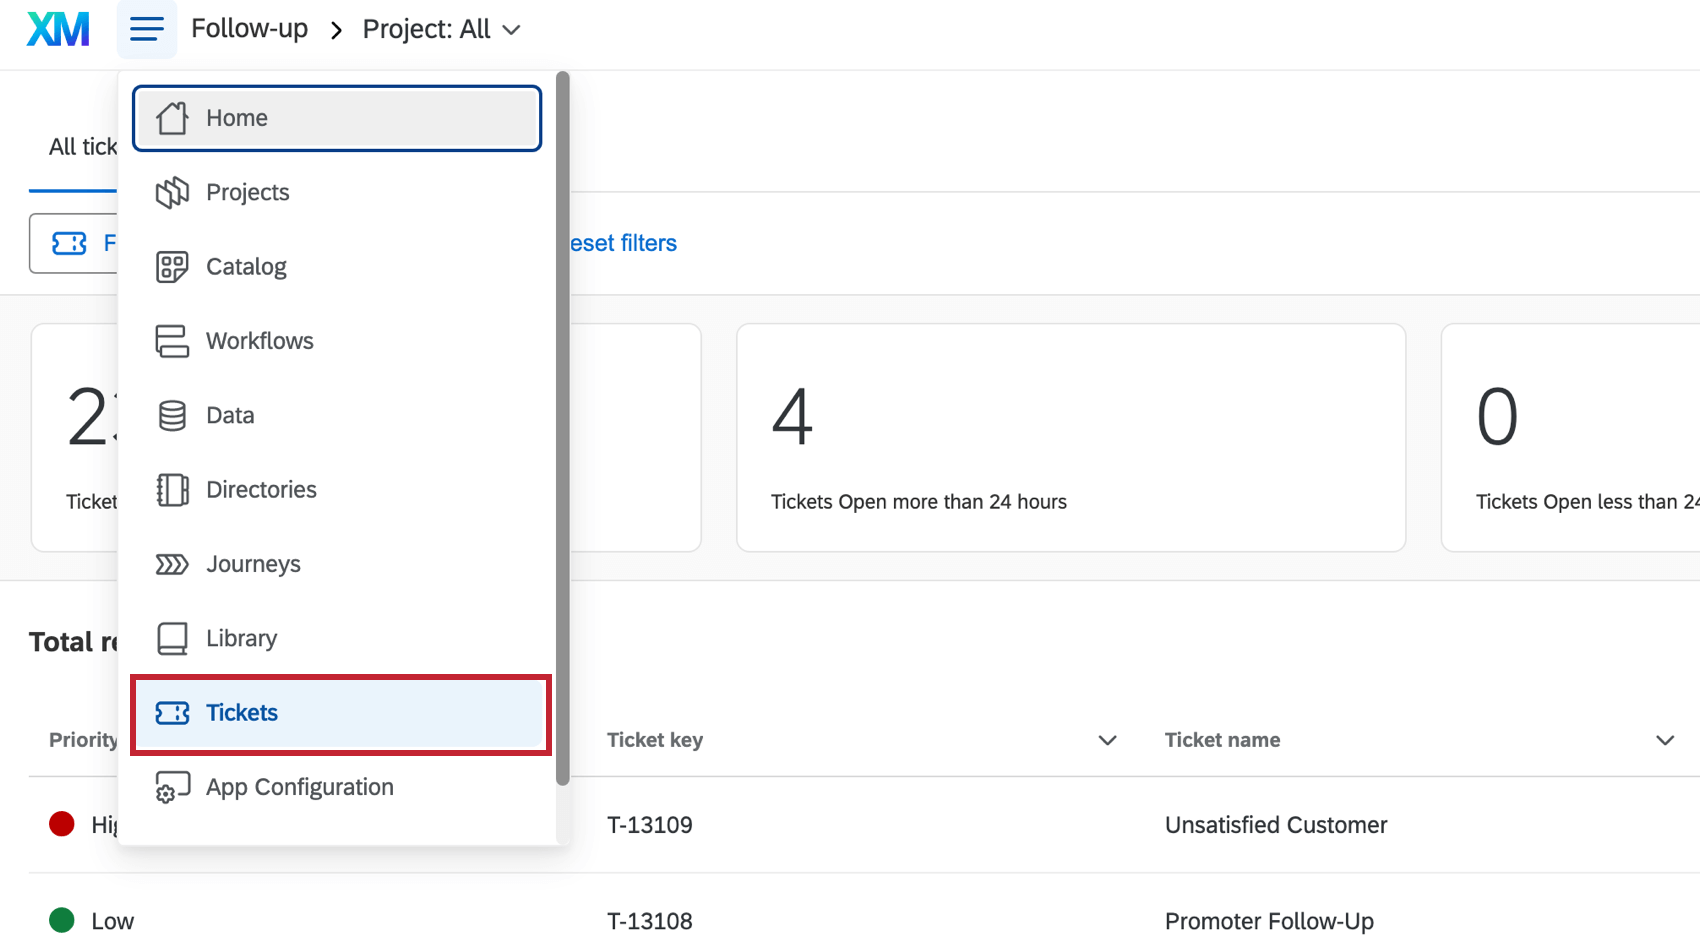
To get started, you can select Tickets from the navigation menu shown on every page of the site.
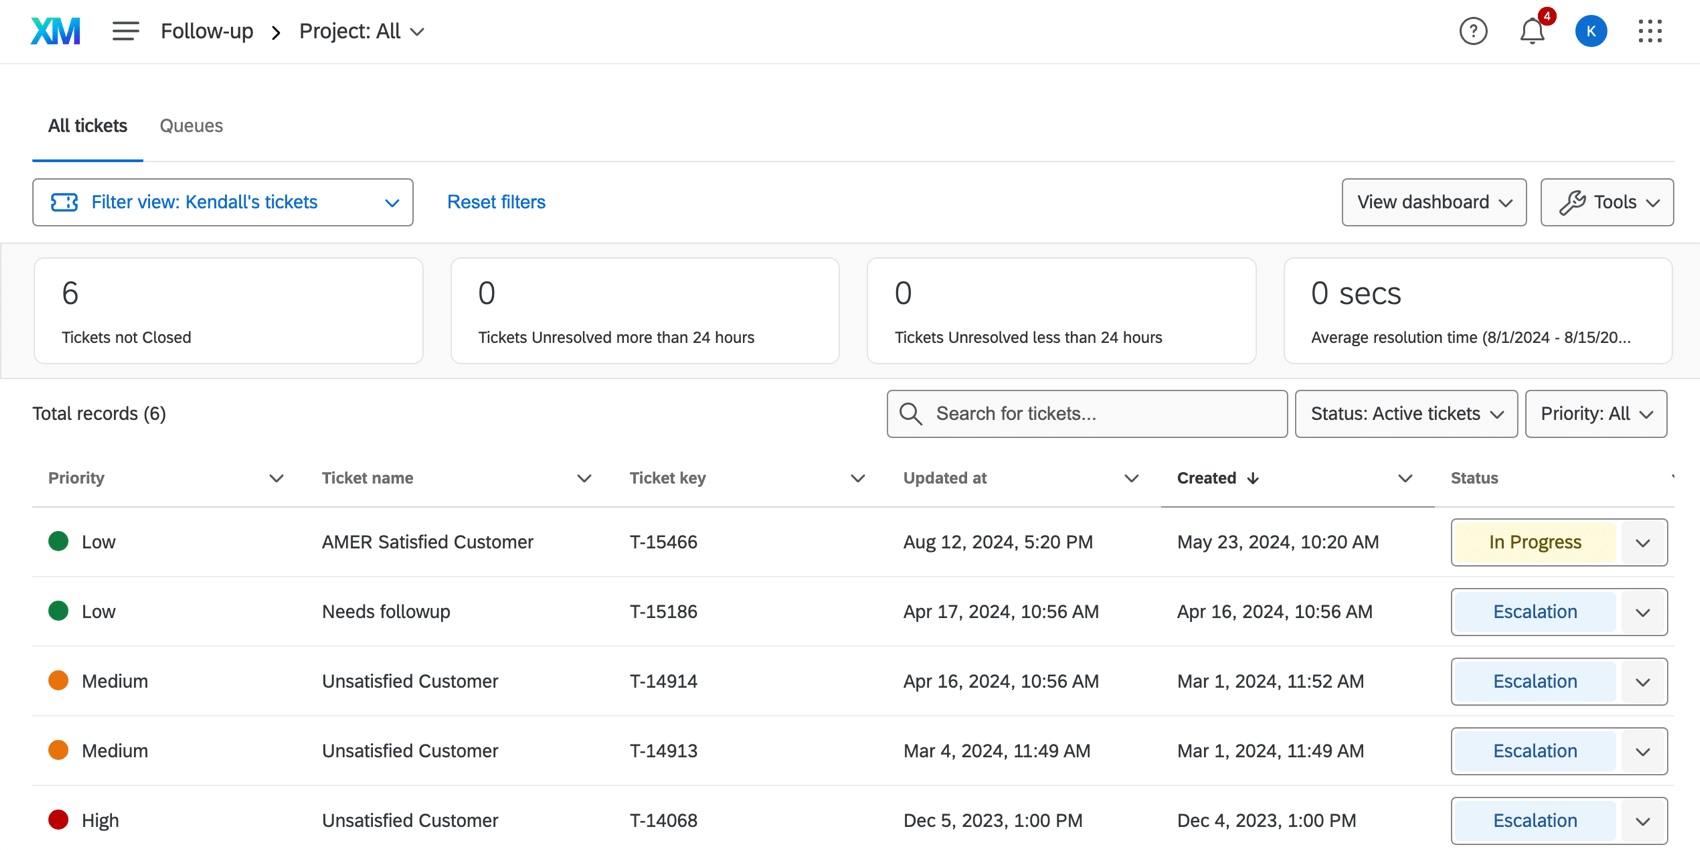
Ticket Follow-Up Page
The follow-up page provides a table of your tickets including ticket details, metrics, and the ability to search and filter. For more information on navigating the follow-up page, see Ticket Follow-Up Page.
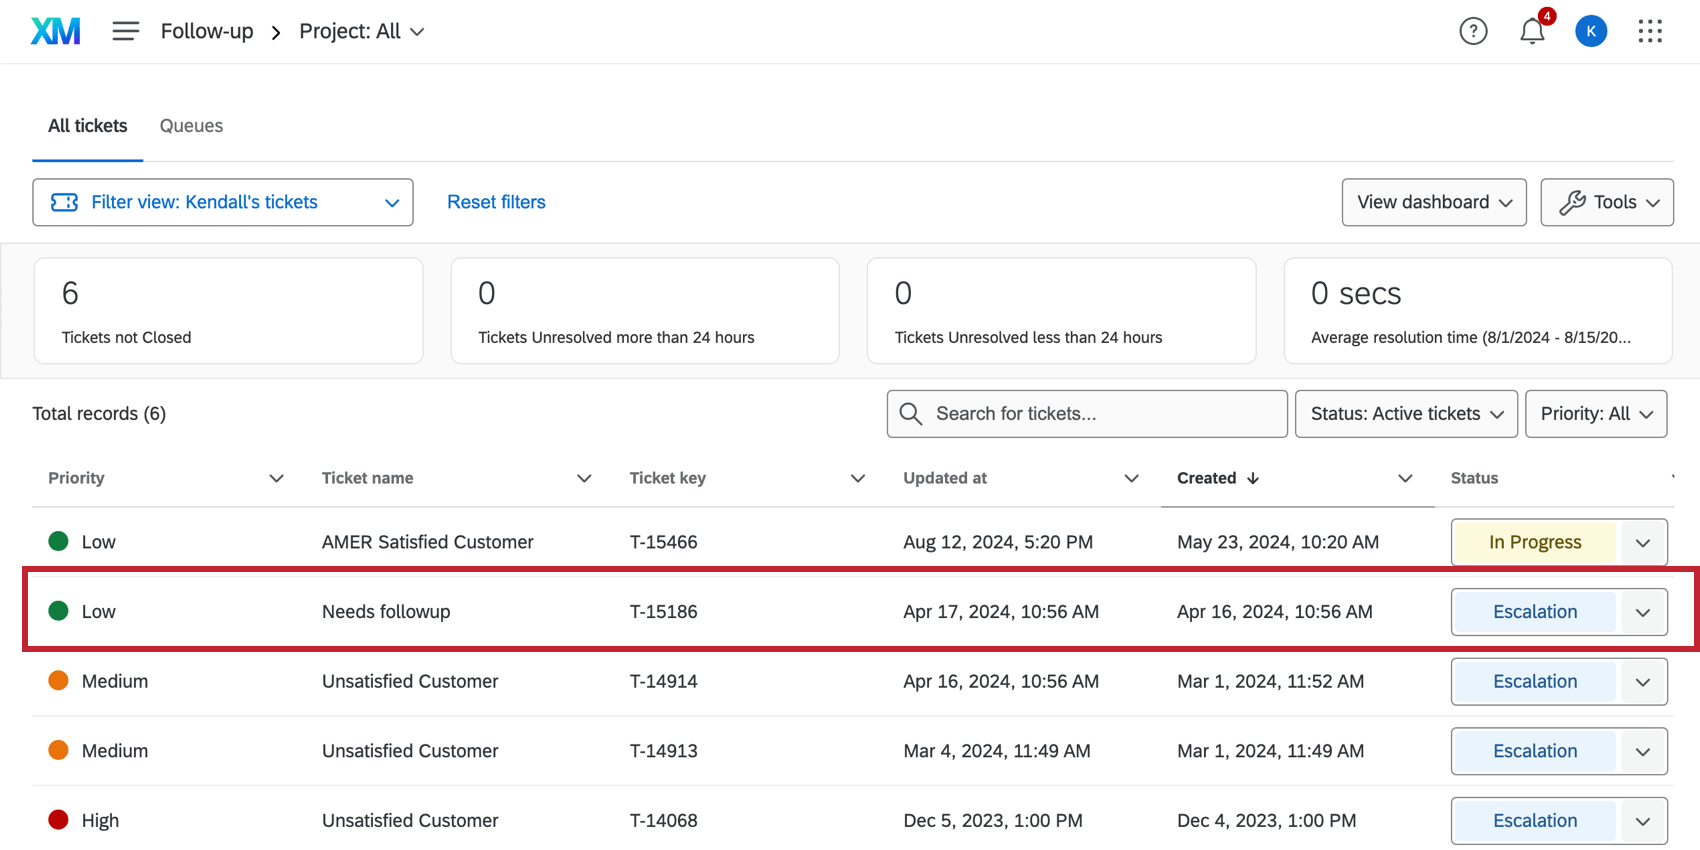
Expanding and Collapsing Tickets
Tickets assigned to you and any team you belong to will be listed in the follow-up page. Click on a ticket to see the ticket details, assign the ticket, change the status, and more.
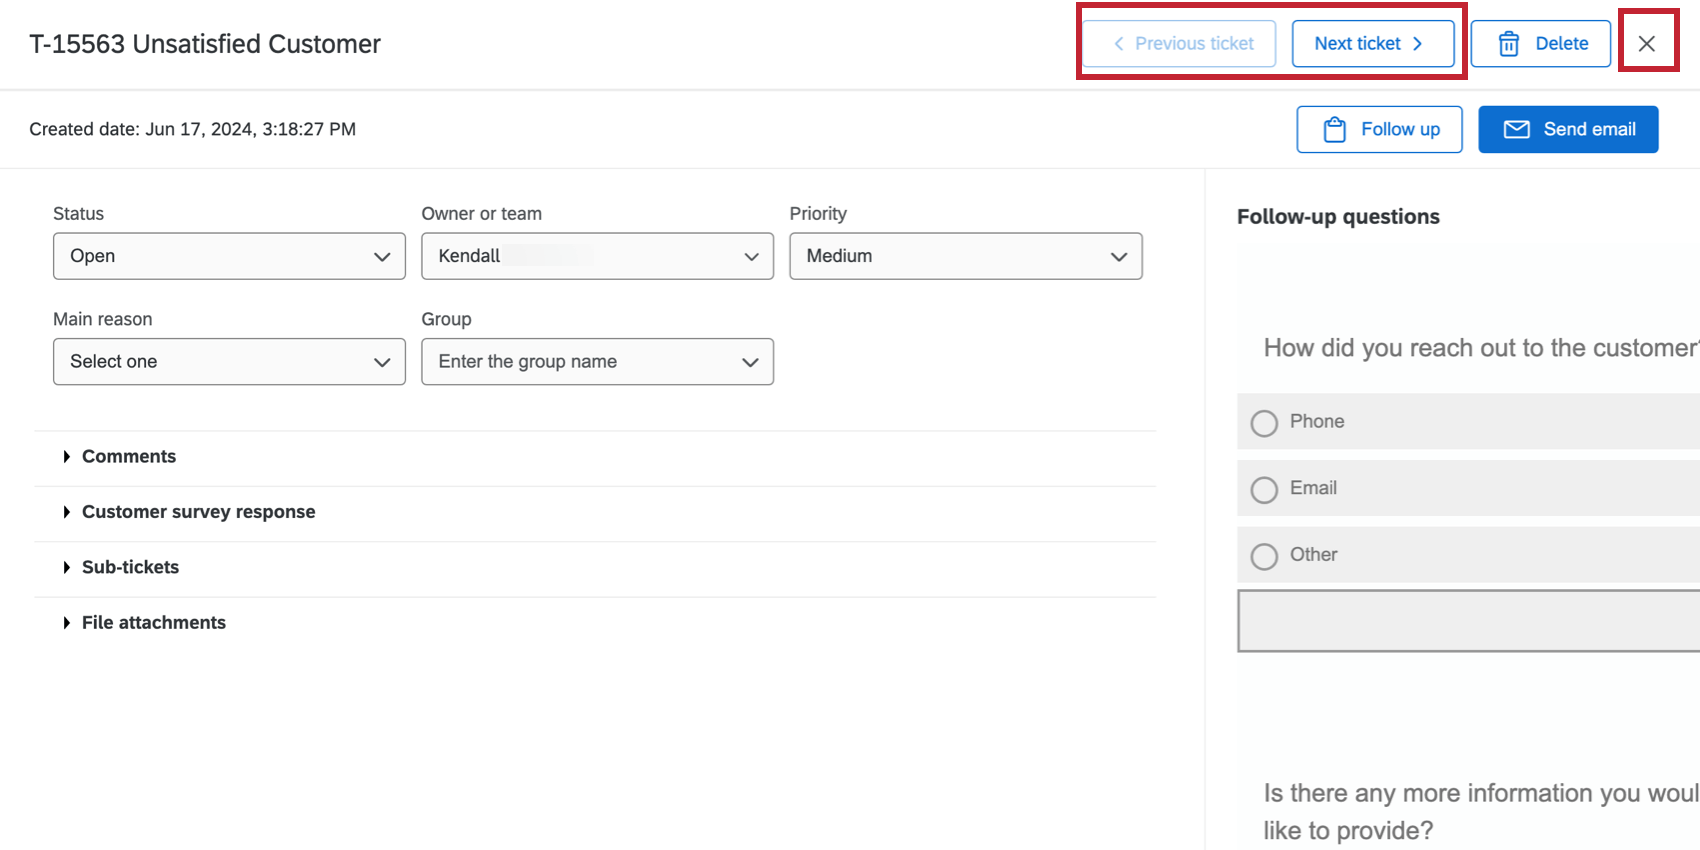
While the ticket is open, use the options in the upper-right corner to move to your next or previous tickets. Click the X to collapse the ticket and return to the follow-up page.
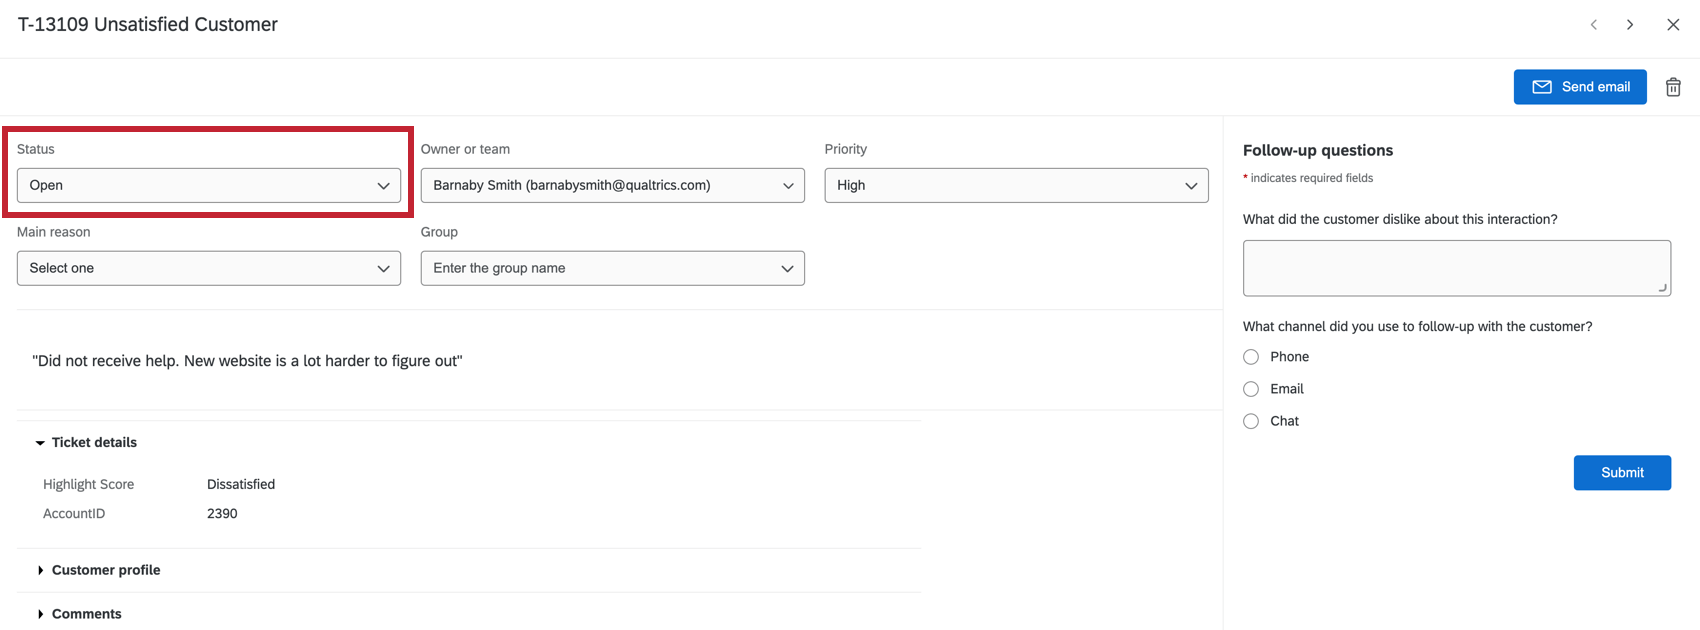
Changing the Ticket Status
Use the status drop-down to change the status of the ticket. Closed indicates that a ticket is no longer active.
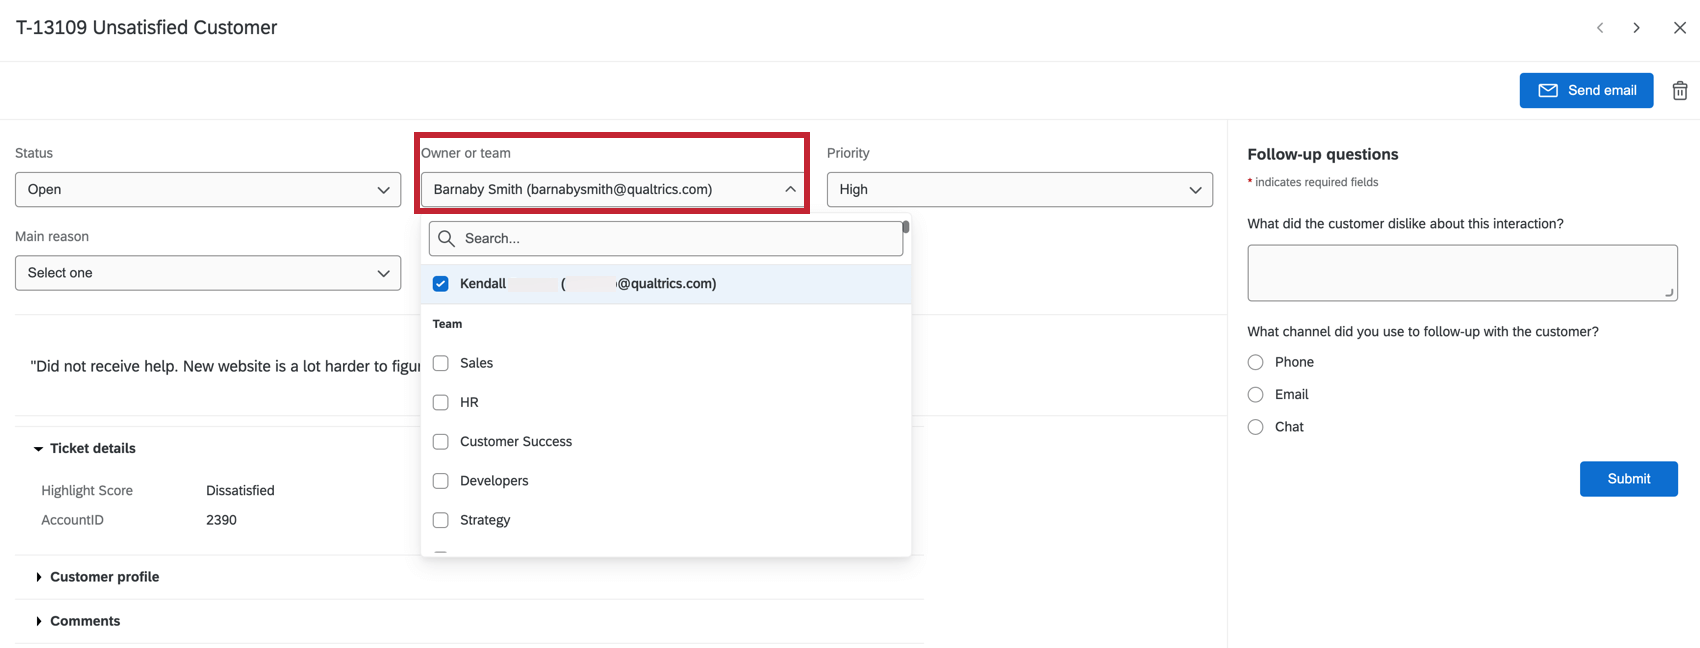
Assigning Tickets to Users, Teams, or Groups
When a ticket is assigned to someone, they see that ticket in their account’s follow-up page. This person or team will also receive an email letting them know the ticket’s been assigned to them. This is a good way to let your teammates know they are responsible for a task.
You can change who the ticket is assigned to by clicking on Assign To, typing the full name of a user or team, and pressing Enter on your keyboard. You can choose anyone in your organization’s Qualtrics license. The Ticket group is a separate dropdown field next to this.
Assigning Priority
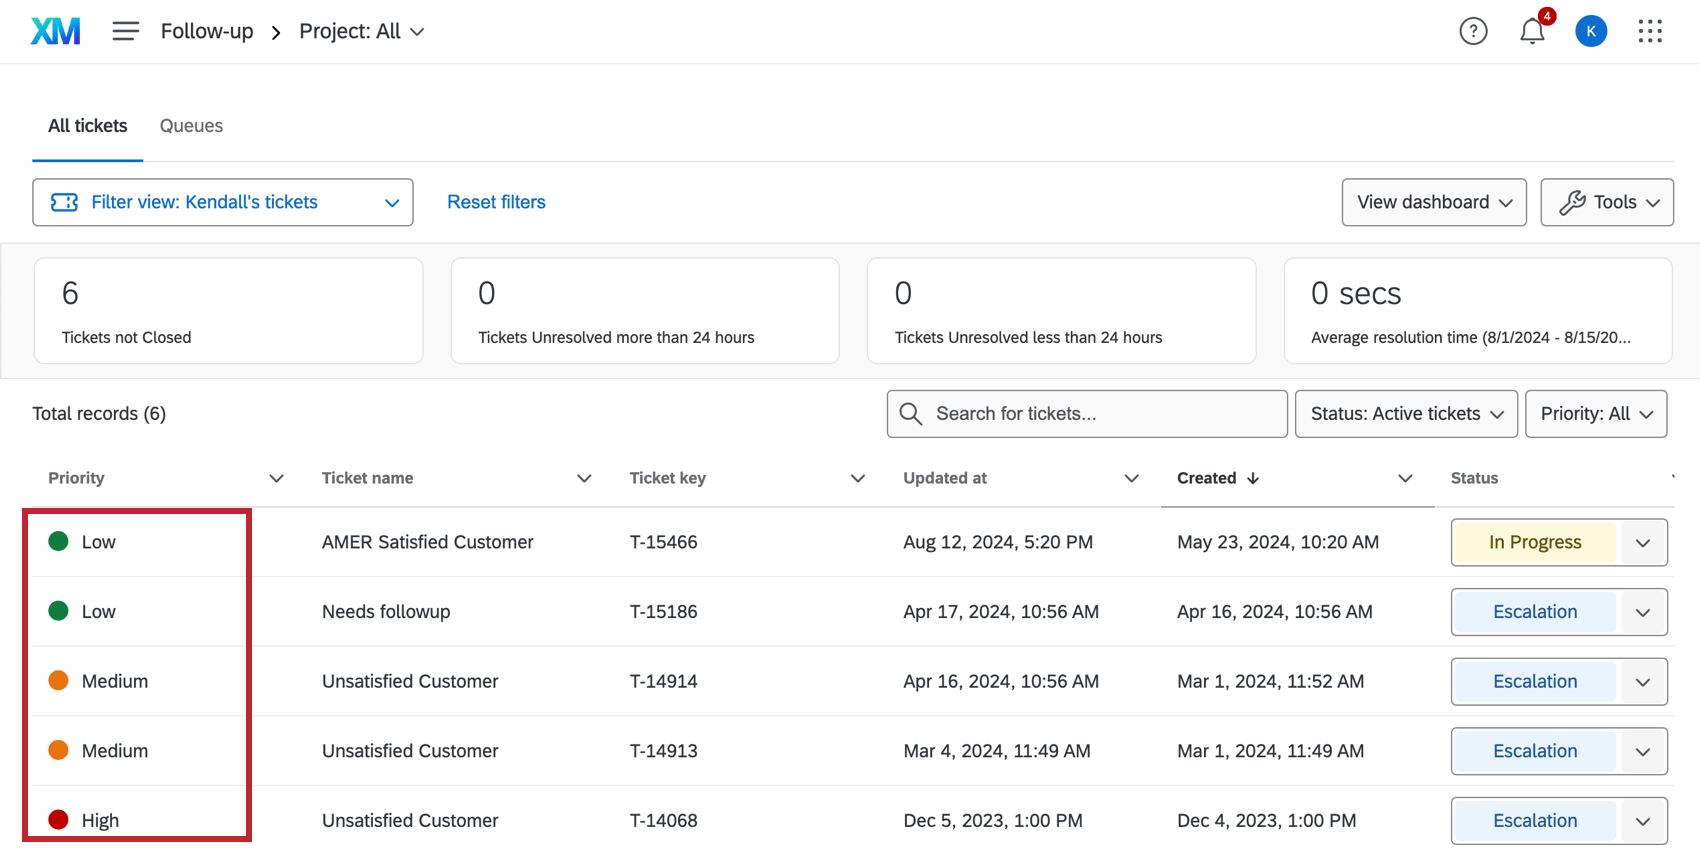
The priority of a ticket is how urgently you want you or your team to address the task described in the ticket. Change the priority by clicking Priority and selecting a new one.
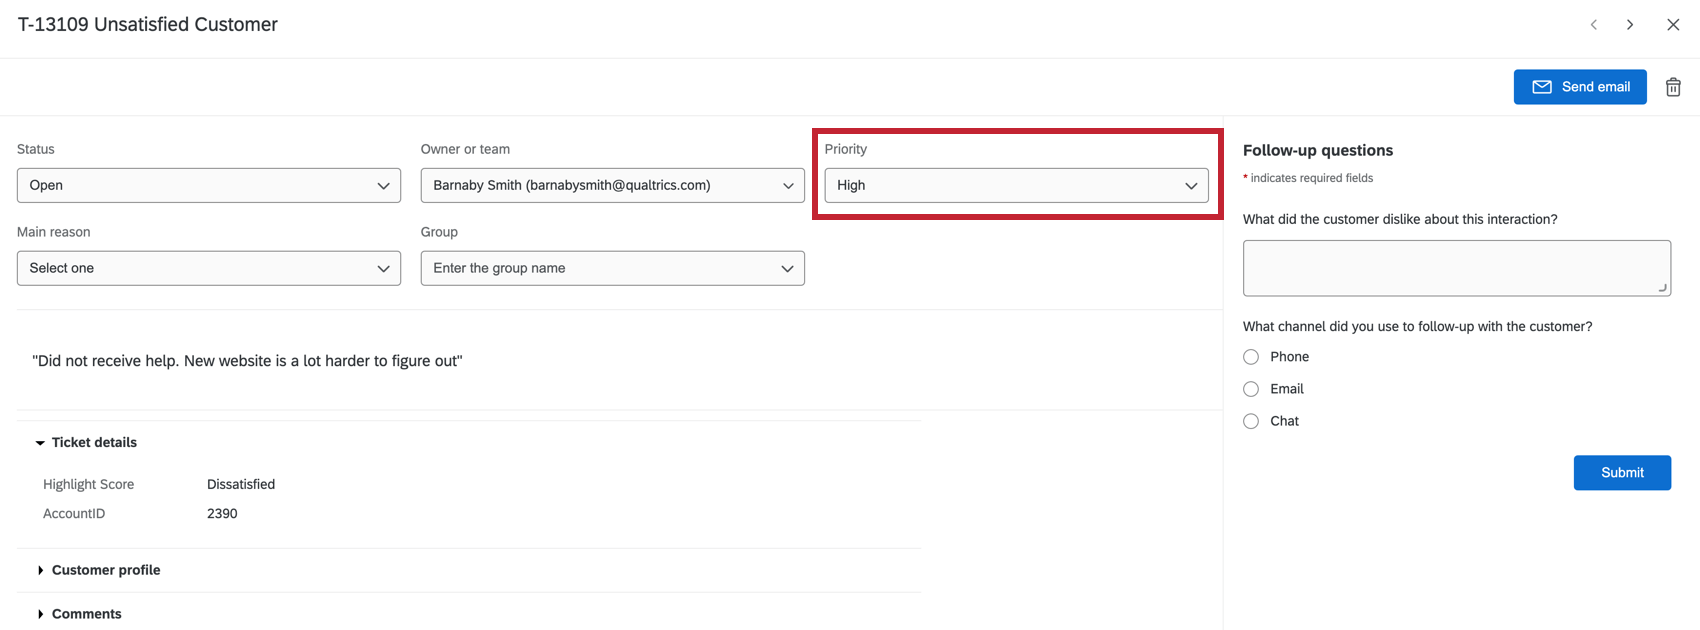
Priority for each ticket wil be shown in the table on the follow-up page.
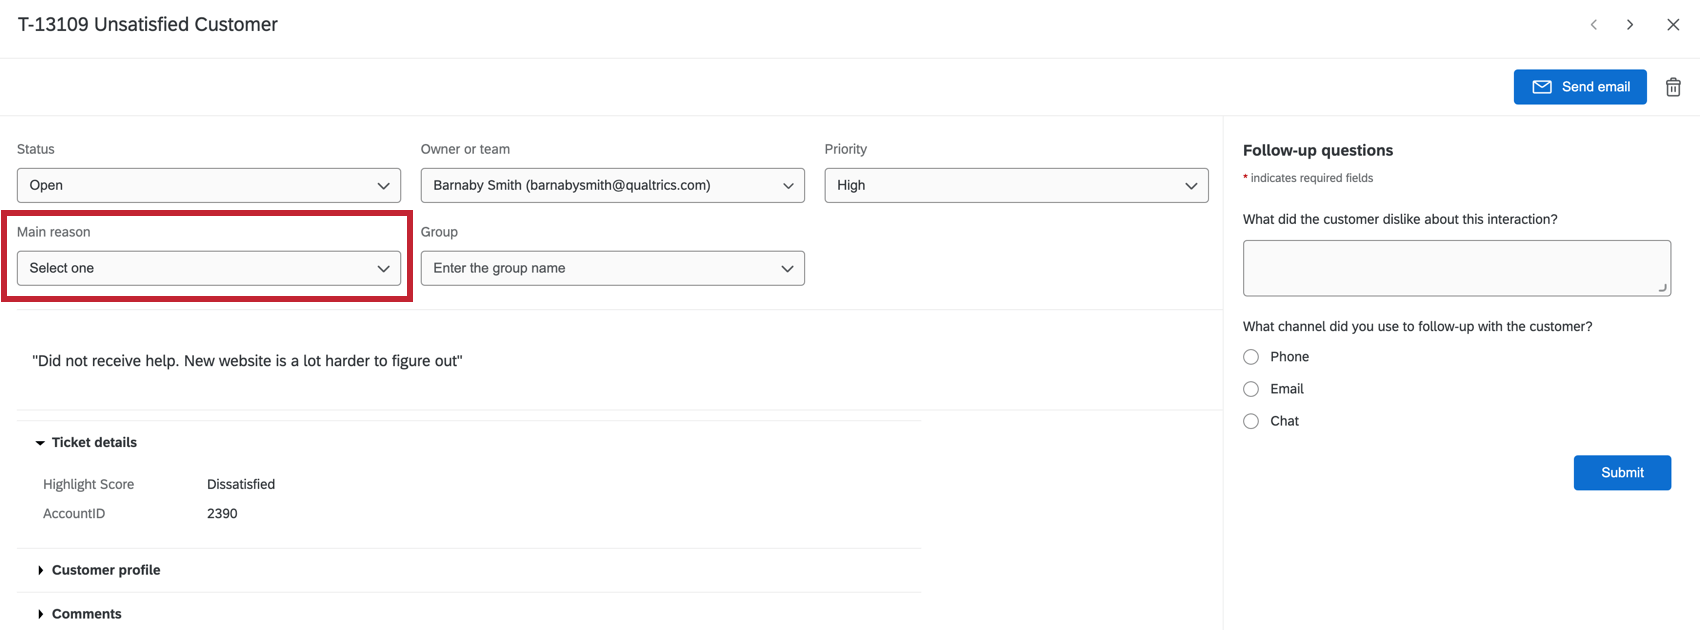
Root Cause
The Main reason drop-down contains the root cause field, which can be used to trace the source of a ticket’s issue. Root cause is configured when the ticket task is created, so this field is not included in every ticket.
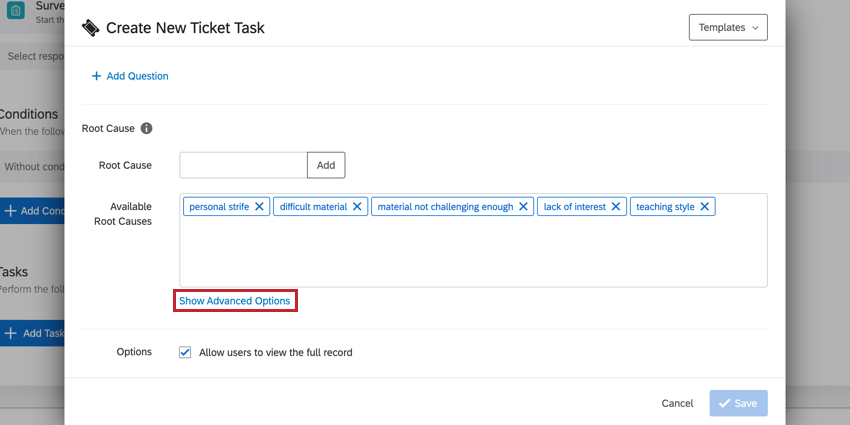
Advanced Options
The advanced options for root causes let you determine if certain ticket statuses require or prohibit a root cause. To access these options, click Show Advanced Options below the root causes box. Note, these options will not appear until you’ve created at least one root cause.
You may then choose the following:
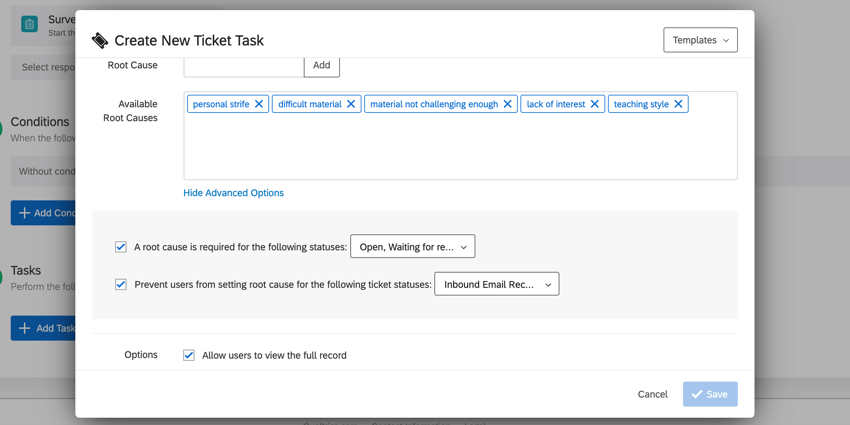
- A root cause is required for the following statuses: This option makes it so that the ticket assignee must pick a root cause when the ticket has a certain status. You can use the dropdown menu next to the option to choose the relevant status(es).
- Prevent users from setting root causes for the following ticket statuses: This option makes it so that the ticket assignee cannot pick a root cause when the ticket has a certain status. You can use the dropdown menu next to the option to choose the relevant status(es).
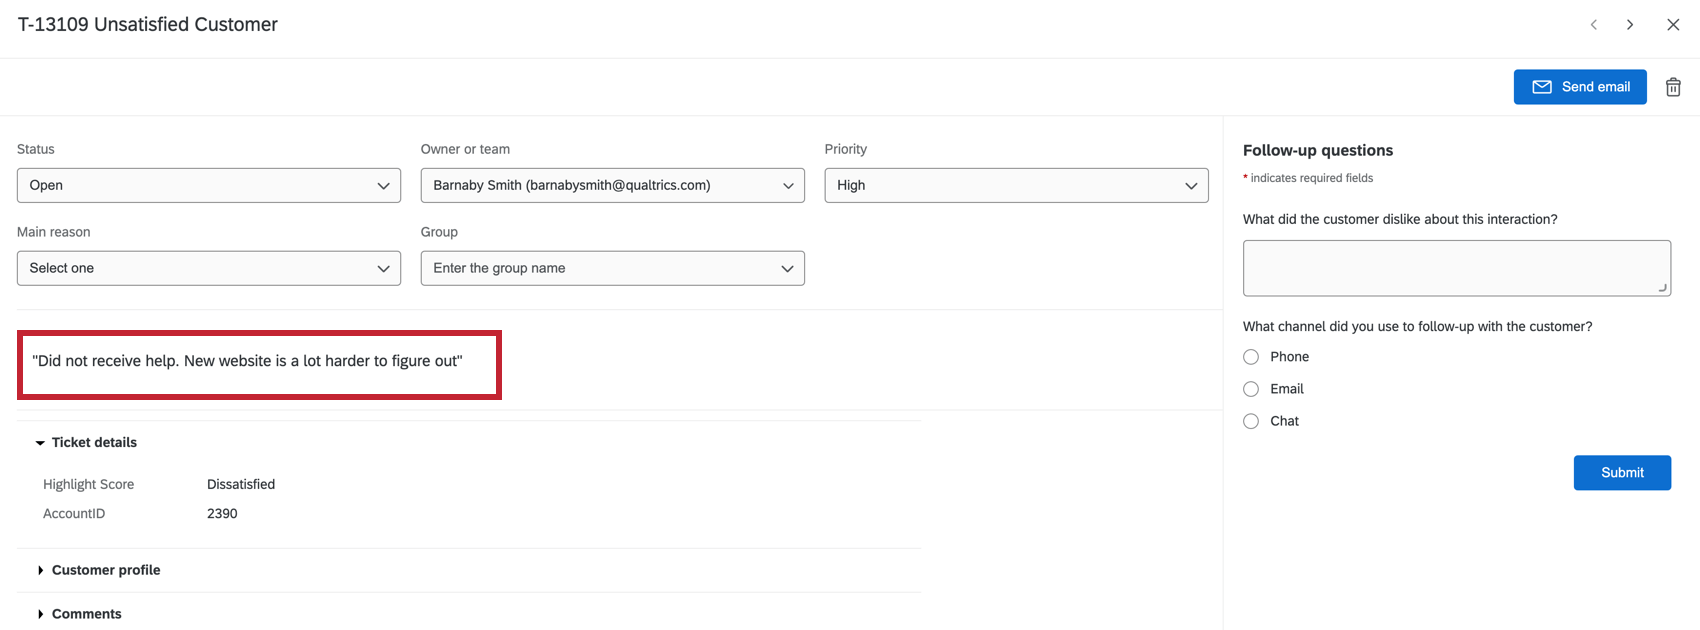
Ticket Summaries
The user who set up the ticket task may choose to add important content to the summary of the ticket. Ticket summaries can help you understand why the ticket has been made and how you’re expected to follow up with it. If you do not see this section, it means no summaries were set up.
Adding Ticket Summaries
When creating a ticket task, the ticket summary can be found after you enter priority and ticket owner.
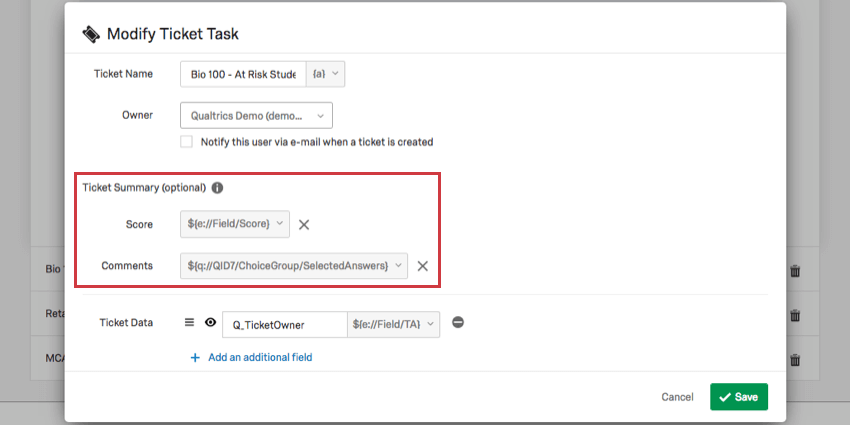
You are given the option to define a Score or Comments based on responses the respondent gave in the survey. These fields can be pulled from questions, embedded data, geoIP location, date / time, panel field (contact information), quotas, response ID, or “Response Link.”
The best fields to load here will contain information that will help your ticket-takers understand why this ticket was created and why it’s important to action it. For example, open-ended feedback would work well as the ticket comments, whereas the CSAT rating the respondent gave your product could be the ticket score.
Qtip: To base the ticket score on actual scoring you added to the survey, you will need to set an embedded data field equal to the score.

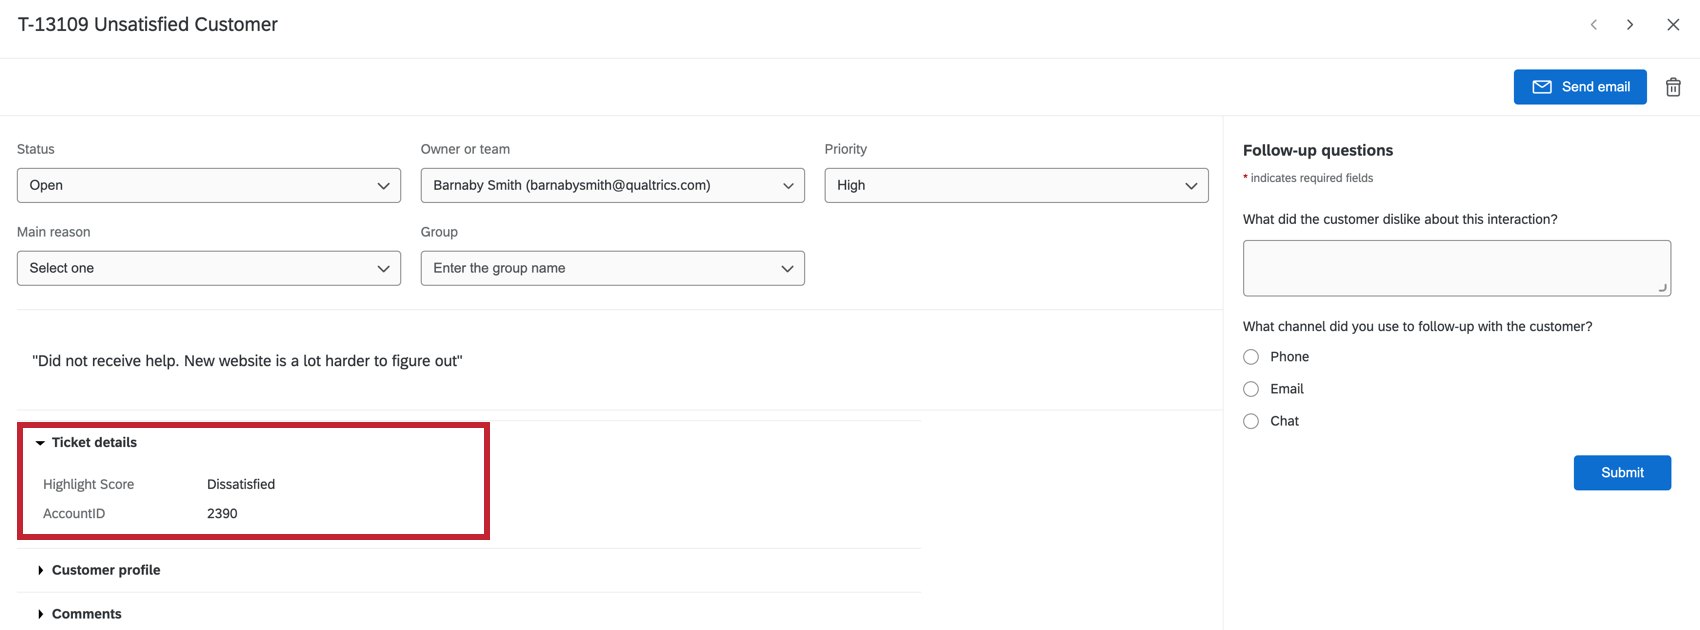
Ticket Data
The user who set up the ticket task may choose to add the score and ticket data fields to your ticket, which will show in the Ticket details section. If you do not see this section, it means no ticket details were included.
Customer Profile
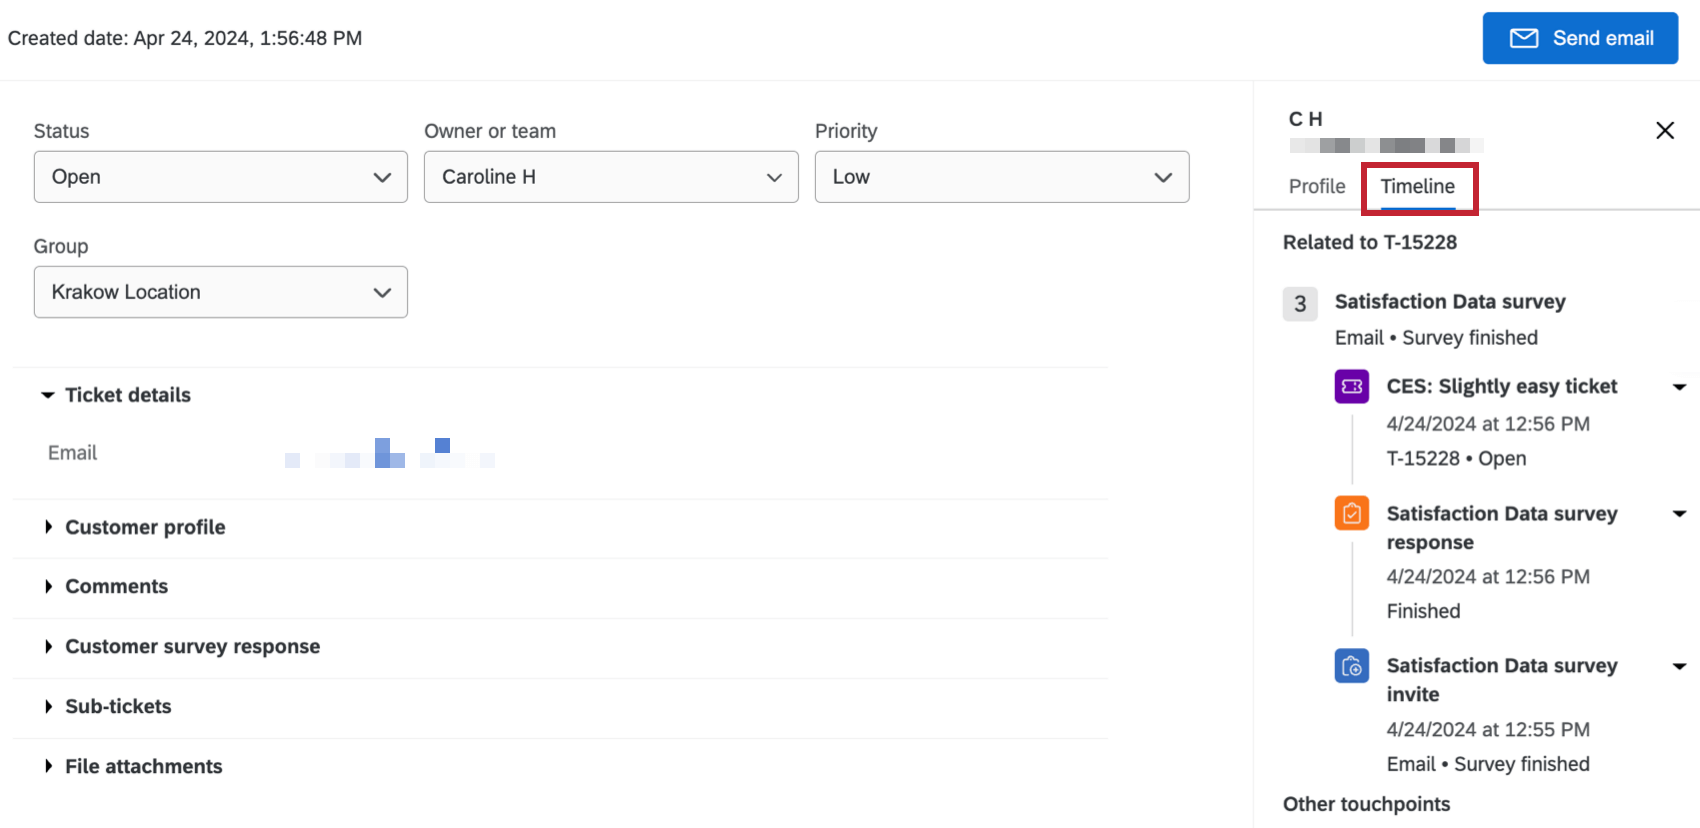
If you have access to the XM Directory and a ticket is generated for a specific contact from your directory, you can view that contact’s information within the ticket itself.
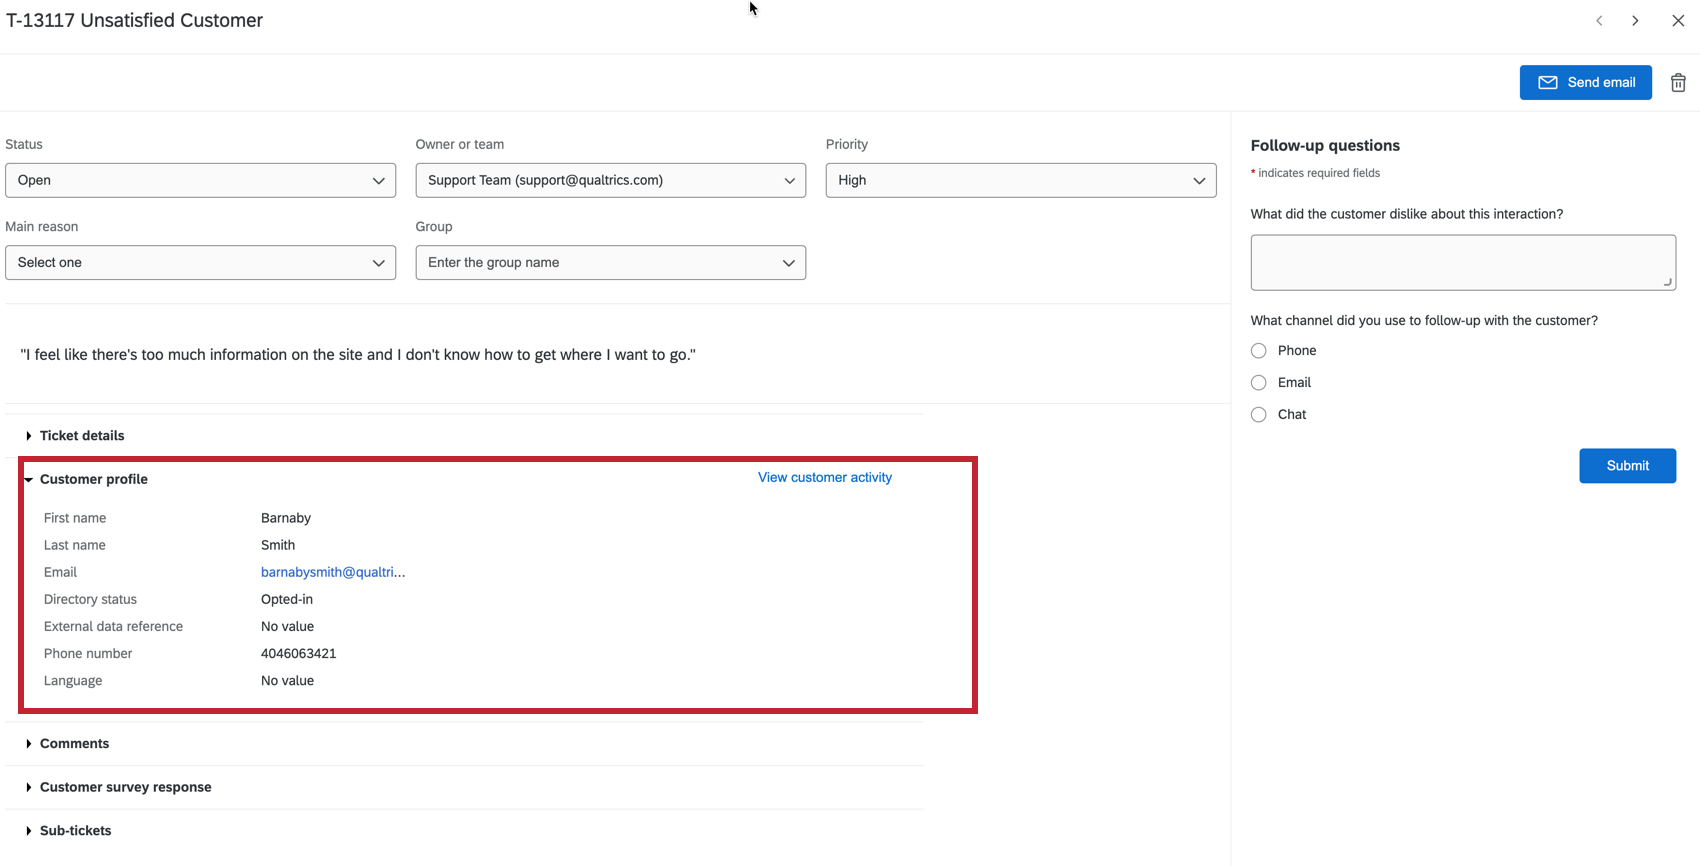
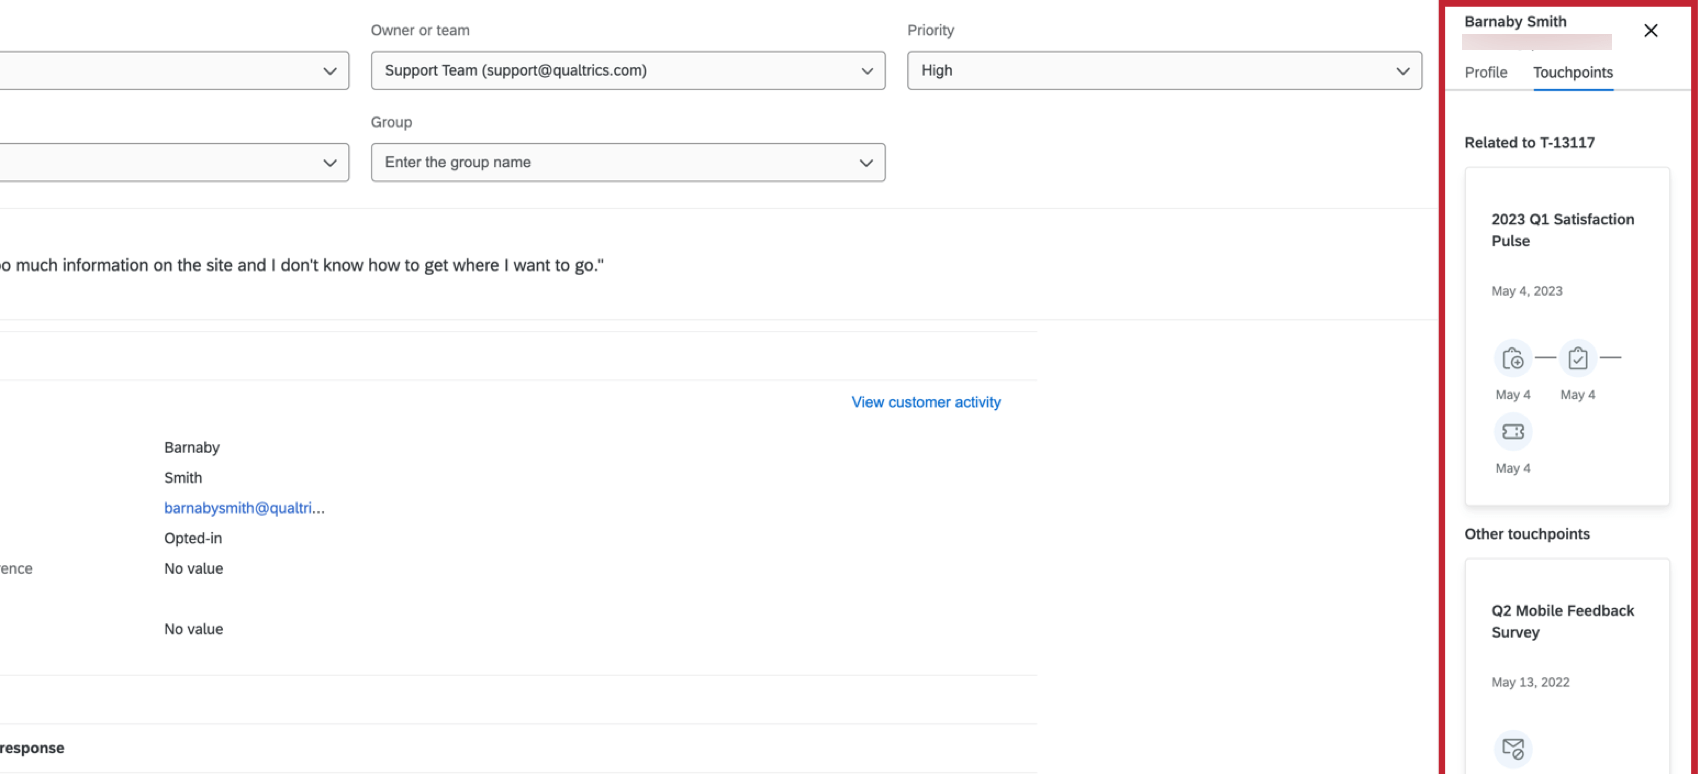
To view all XM Directory profile data including attributes and touchpoints for the contact, click View customer activity. The touchpoint timeline relevant to the selected ticket will be listed first, and any other touchpoint timelines for the contact will appear underneath. You can click on any touchpoint to see more details about that specific interaction.
Viewing the Survey Response
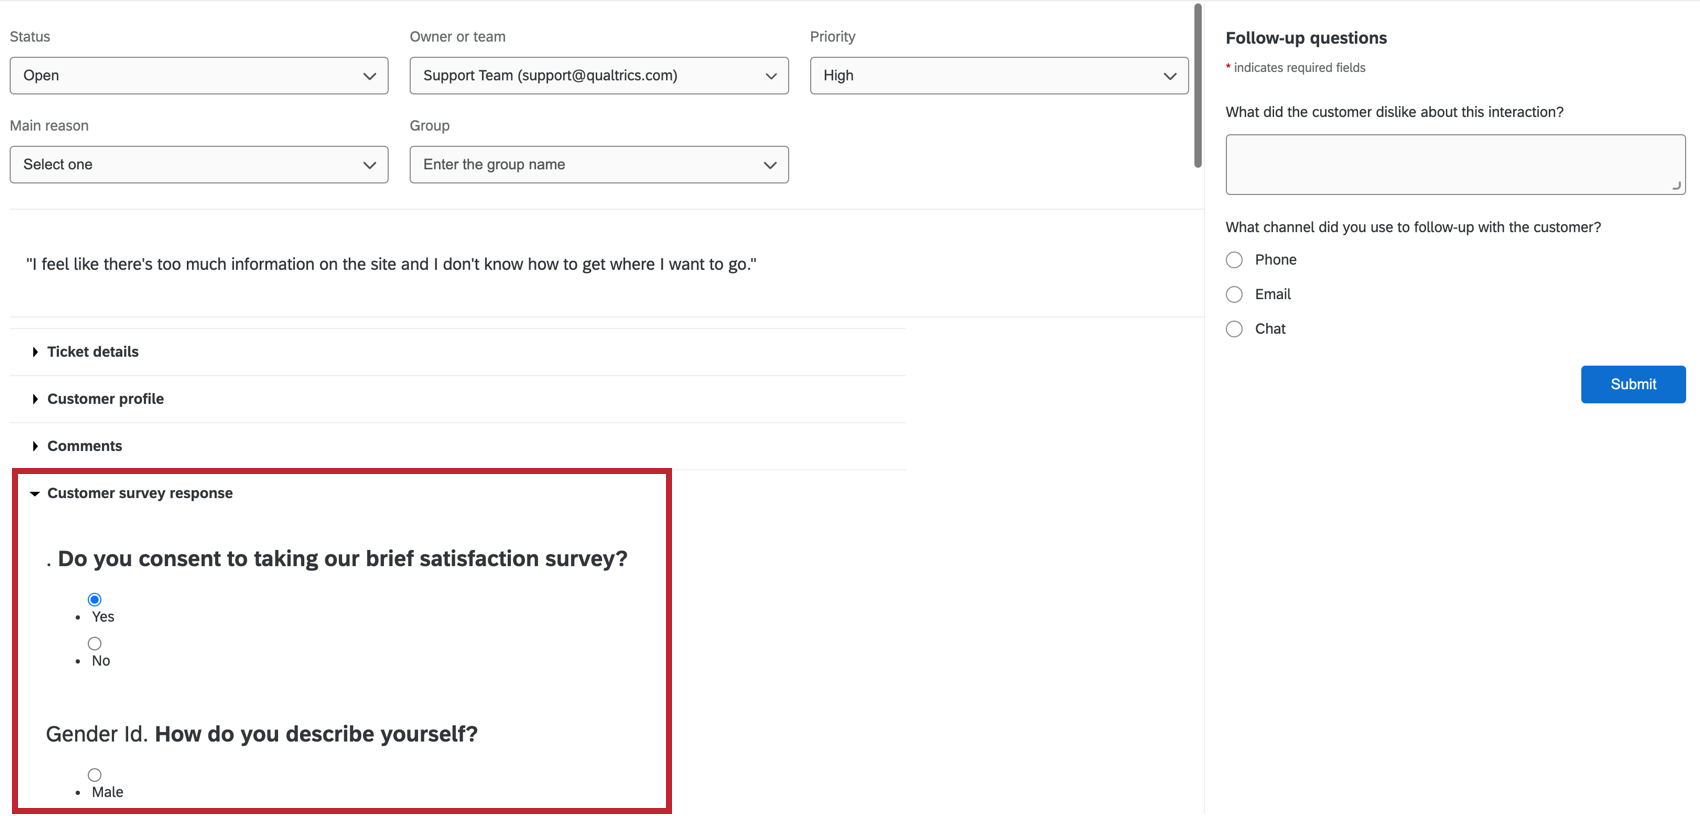
The user who set up the ticket task may choose to allow users to view the survey response within the ticket. To view the survey response, click the Customer survey response dropdown.
Comments
Comments can be added and viewed in the comments section to provide additional clarification and information on the ticket. To edit or delete comments, click the three dots on the right.
Viewing Customer Activity
If you have access to the XM Directory and a ticket is generated for a specific contact from your directory, you can view that contact’s information within the ticket itself.
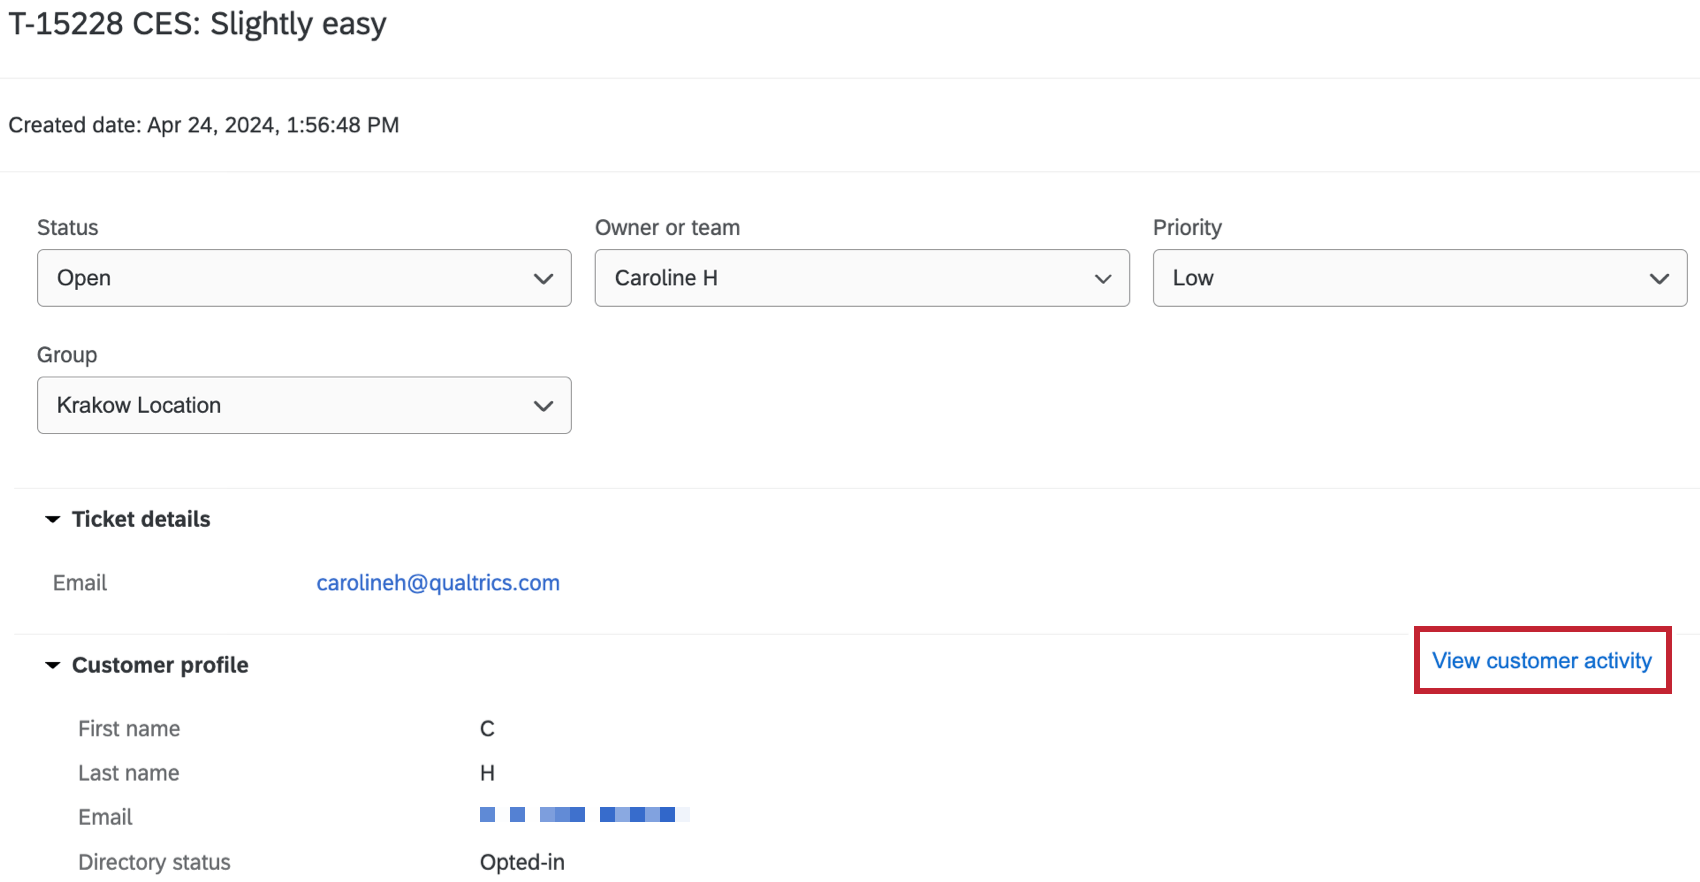
To view a contact’s information, click View Customer Activity on the ticket.
A window will appear that has the contact’s information. In the Profile section, you can see any of the contact’s attributes. This includes their first name, last name, email address, opt-in status, reference ID, phone number, language, and any additional embedded data.
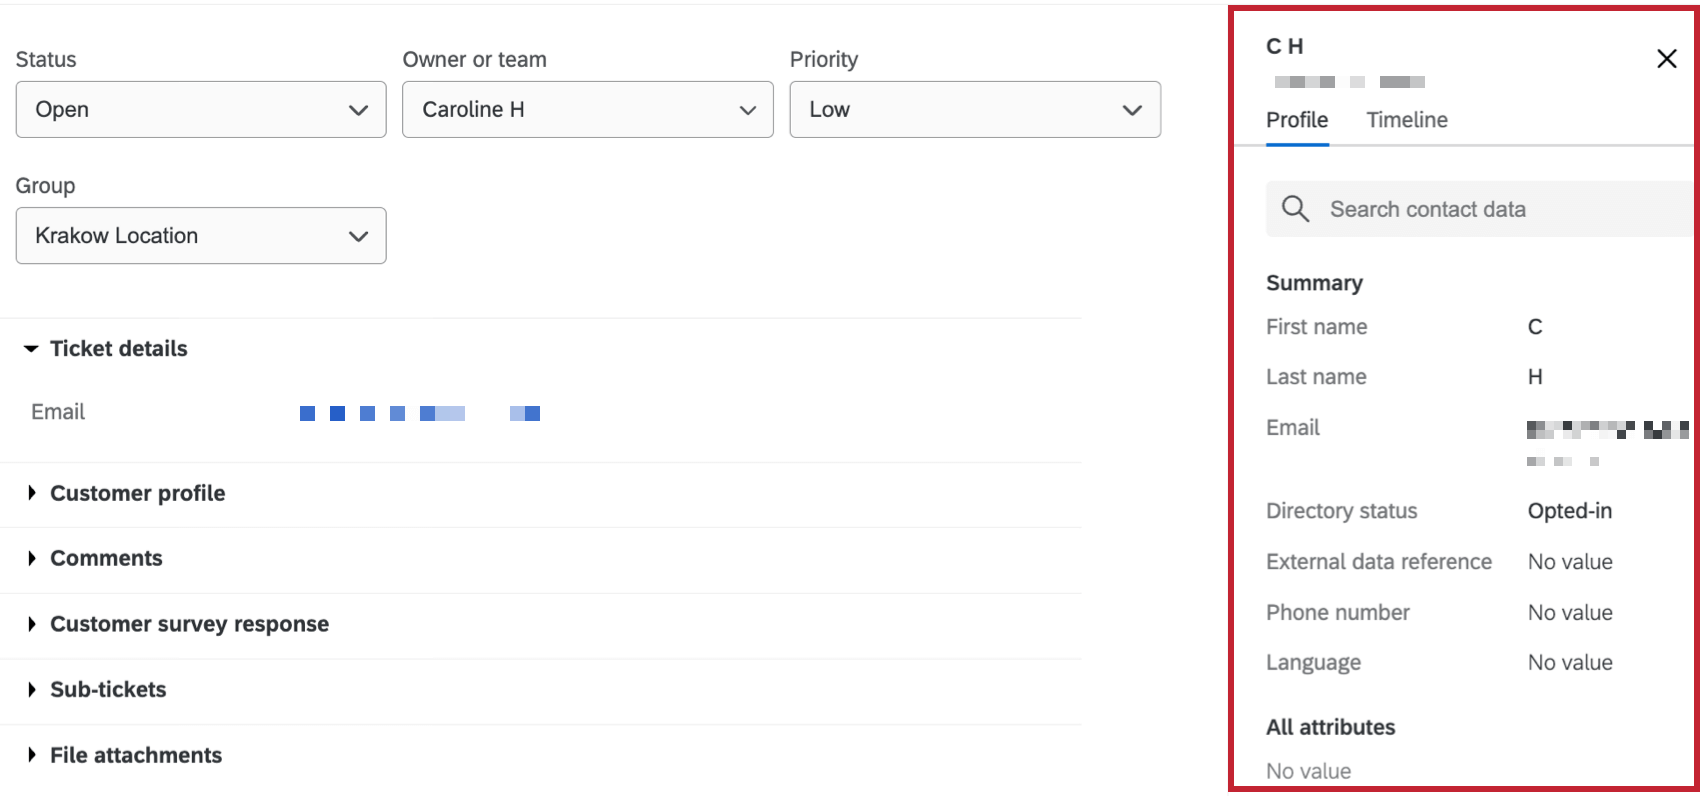
The Timeline section contains all of the points of interaction for your contact. The touchpoint relevant to the selected ticket will be listed first, and any other touchpoints for the contact will appear underneath. You can click on any event to see more details about that specific interaction.
Follow Up Emails
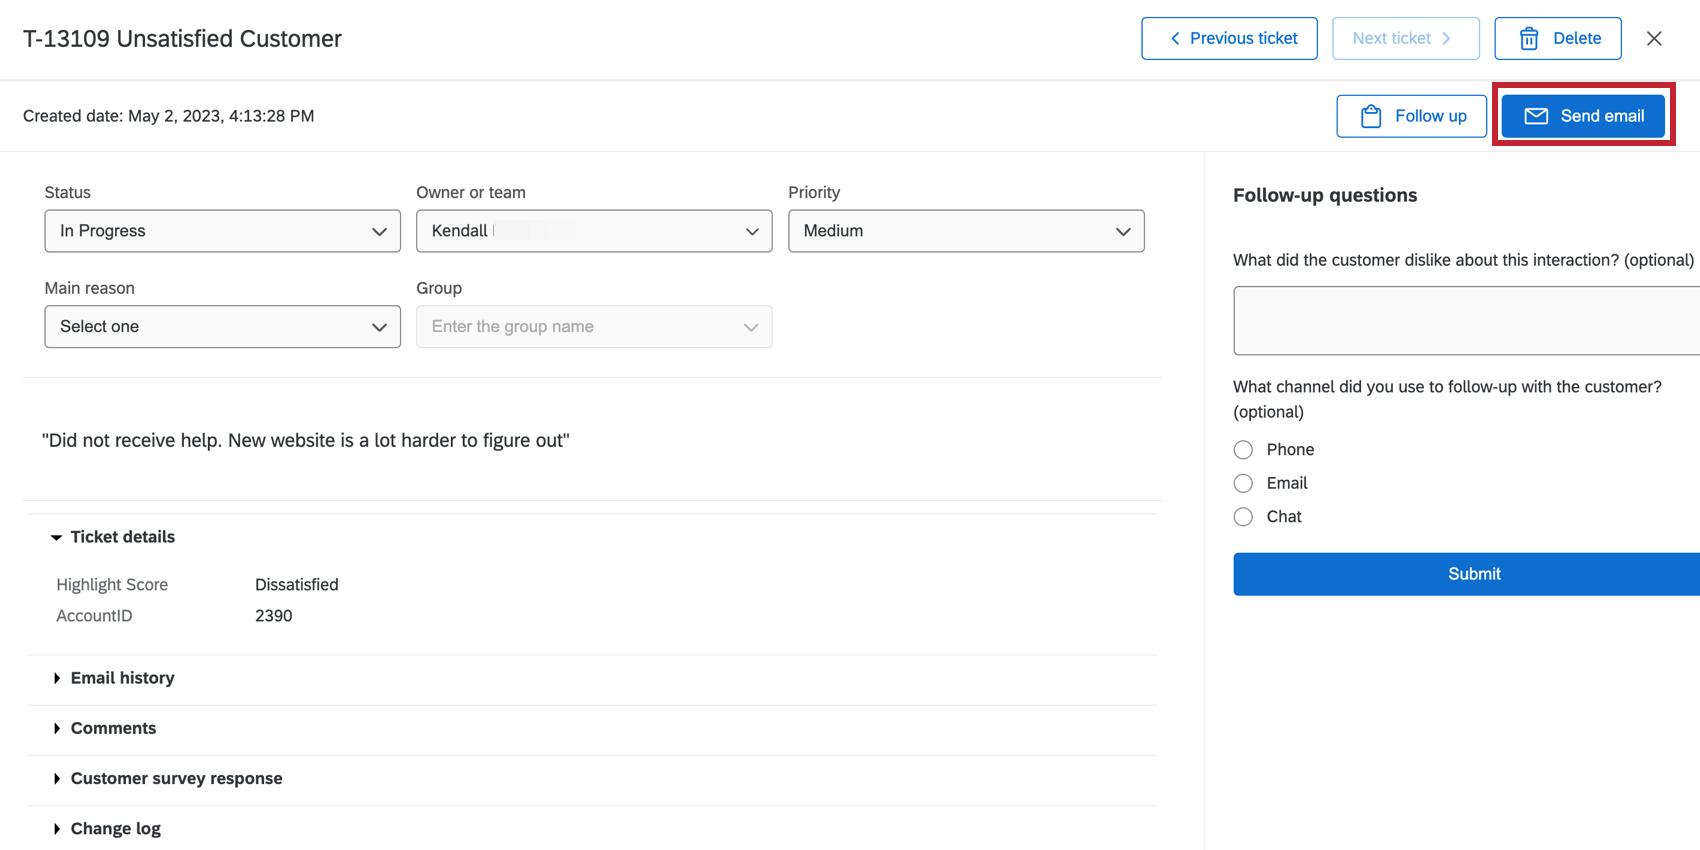
When you’re finished with a ticket, you may want to follow up with teammates who assisted you on the ticket, or the person you helped by resolving the ticket. Compose an email by clicking Send Email.
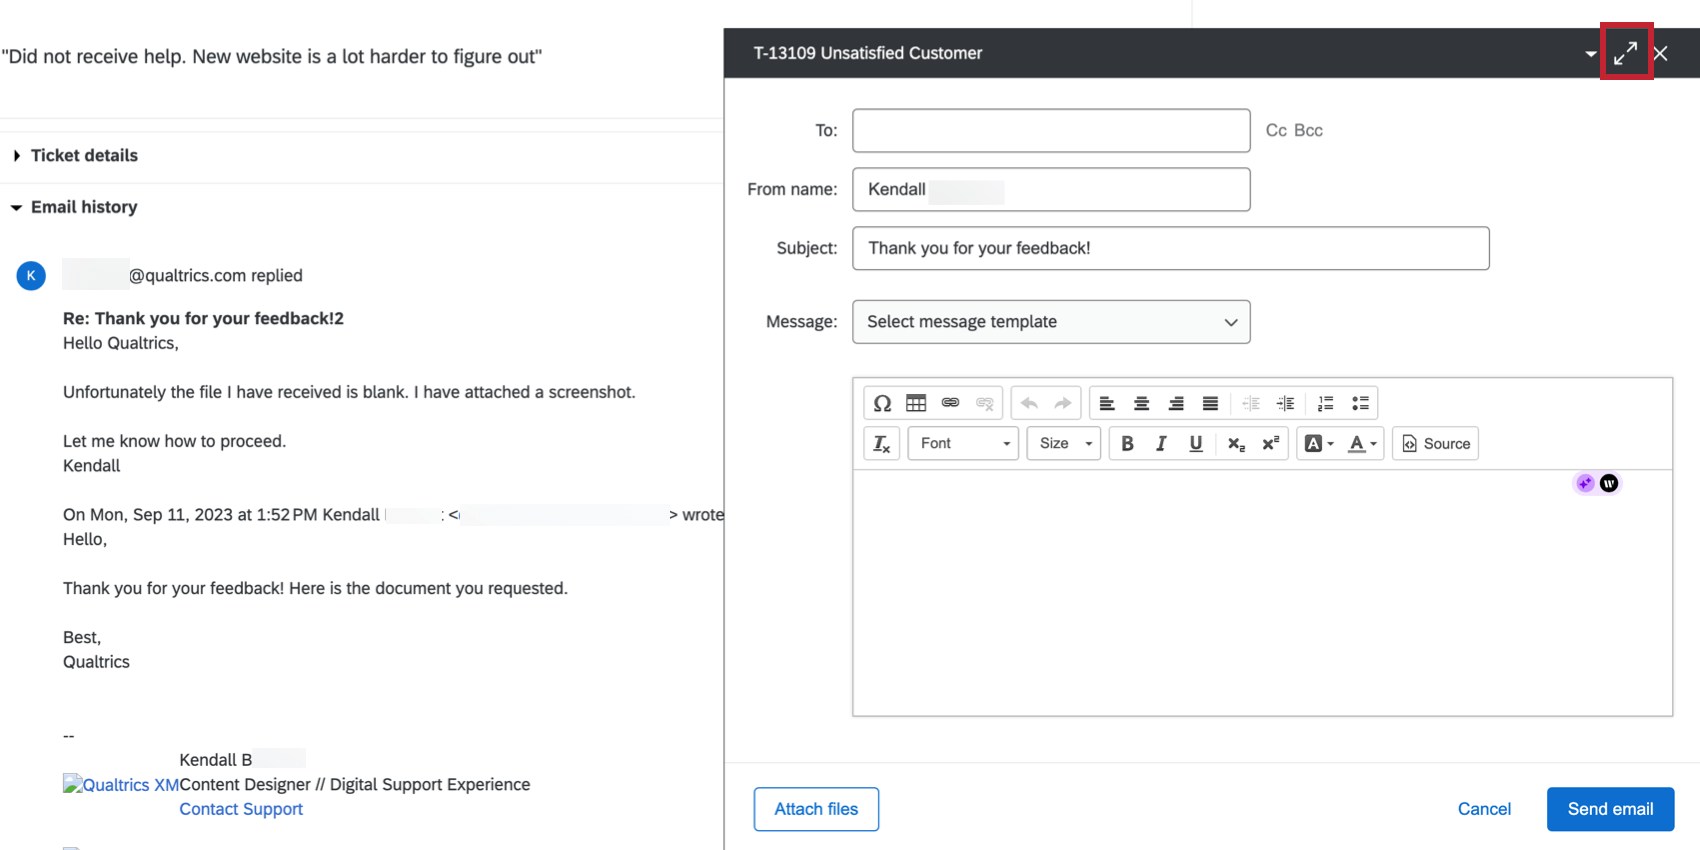
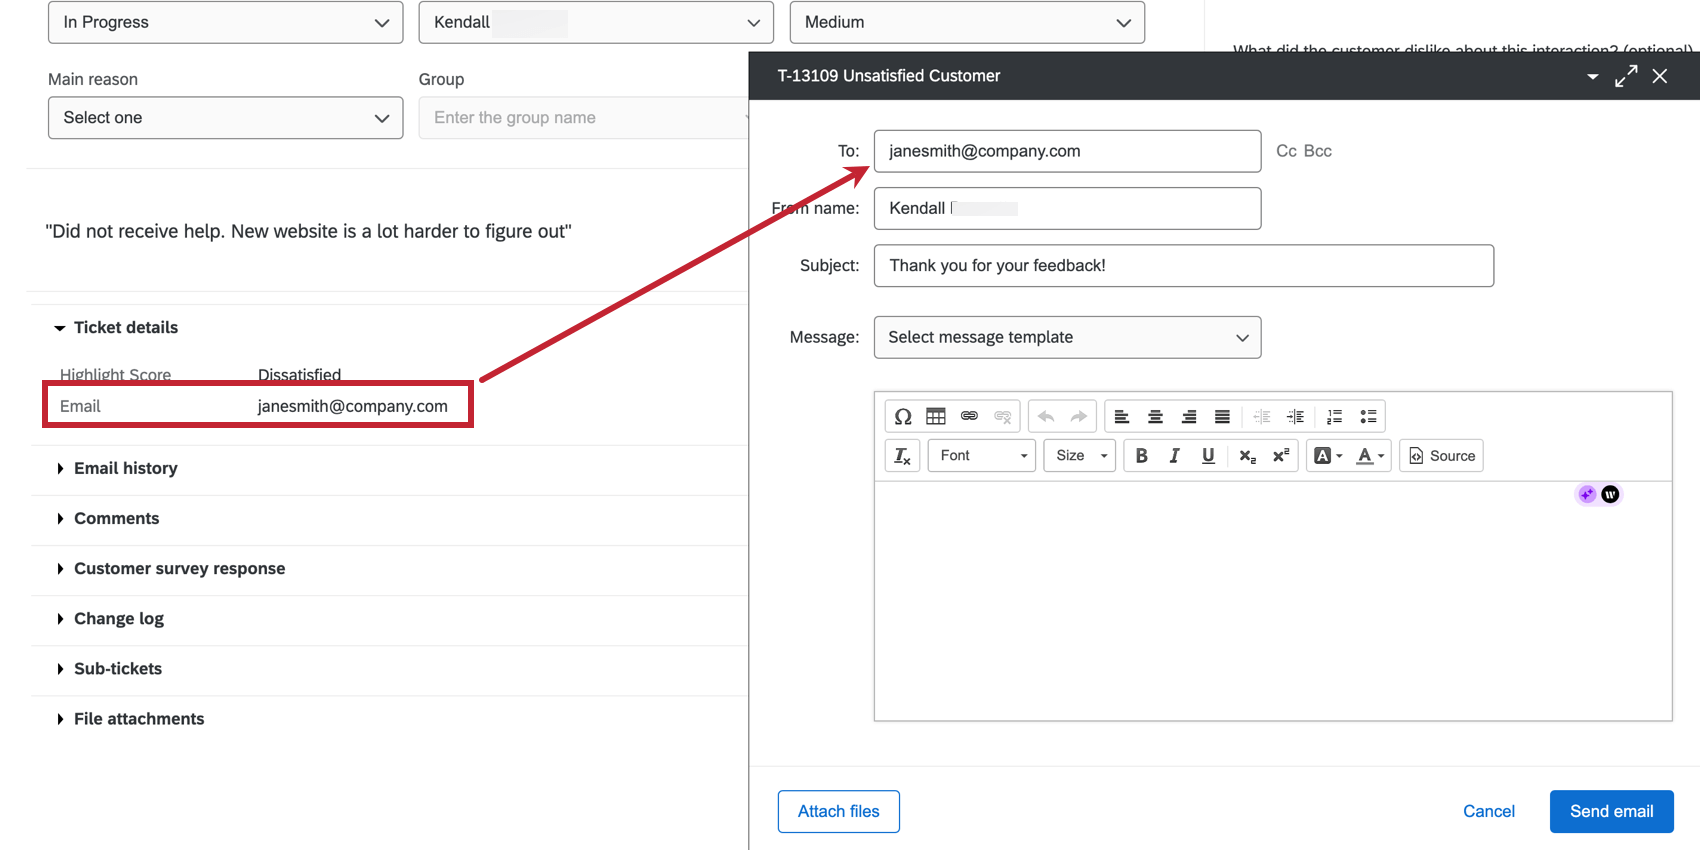
Any emails sent through a ticket will appear in the Email history section of the ticket.
When composing your follow-up email, you can minimize or maximize the Send Email window to check information on a ticket, or to pause writing your email while you perform another action with your tickets.
2-Way Email in Ticketing
Any replies to emails sent via tickets are listed in the Email history section.
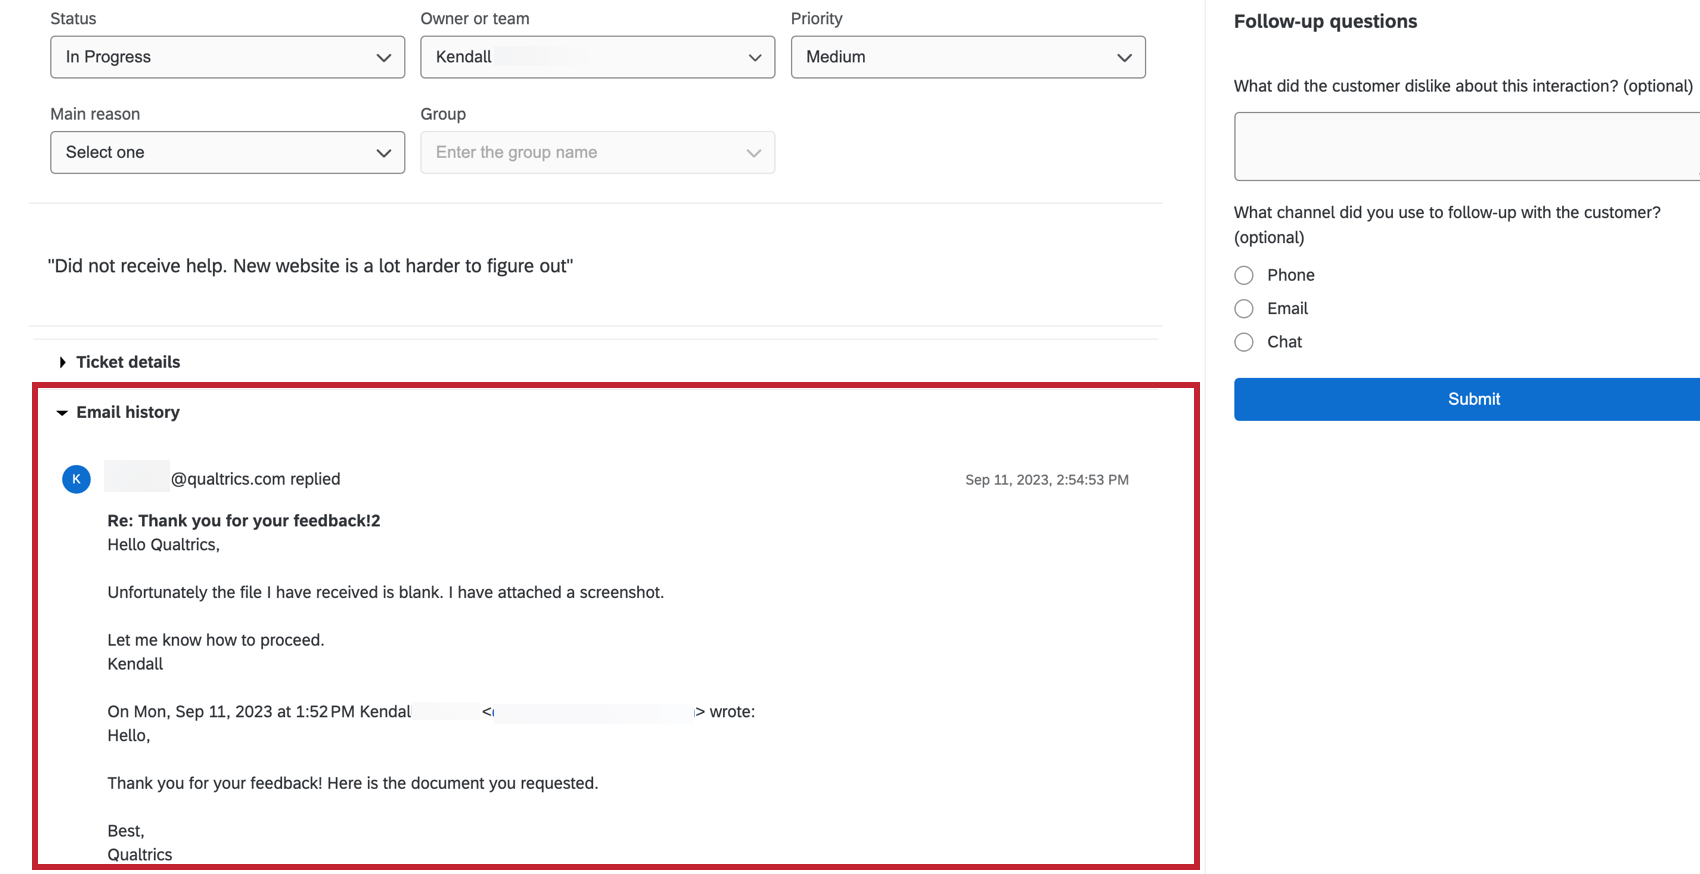
Whenever someone replies to a ticket email, the ticket owner will receive an email notification. However, they will not be sent the message directly. It is best to continue emailed communication through the ticket to preserve the ticket owner’s anonymity and to keep responses archived together in the same place.
- Click here to view an example of emails sent via 2-way ticketing.
-
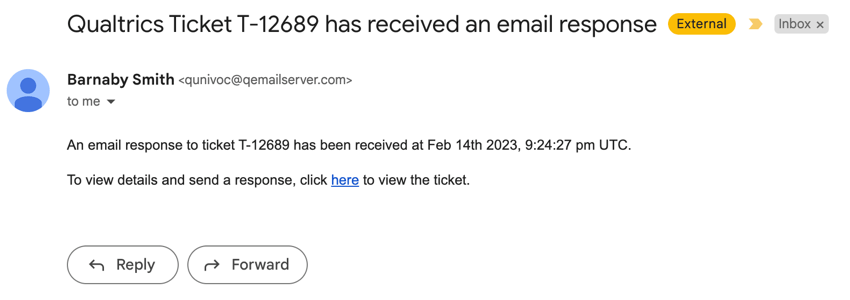
- This first email is sent via the ticket. It is received by the recipient in their usual email inbox.

- After the recipient responds, the ticket owner receives an email that there was a new email response on the ticket. This email contains a link to view the ticket in Qualtrics.
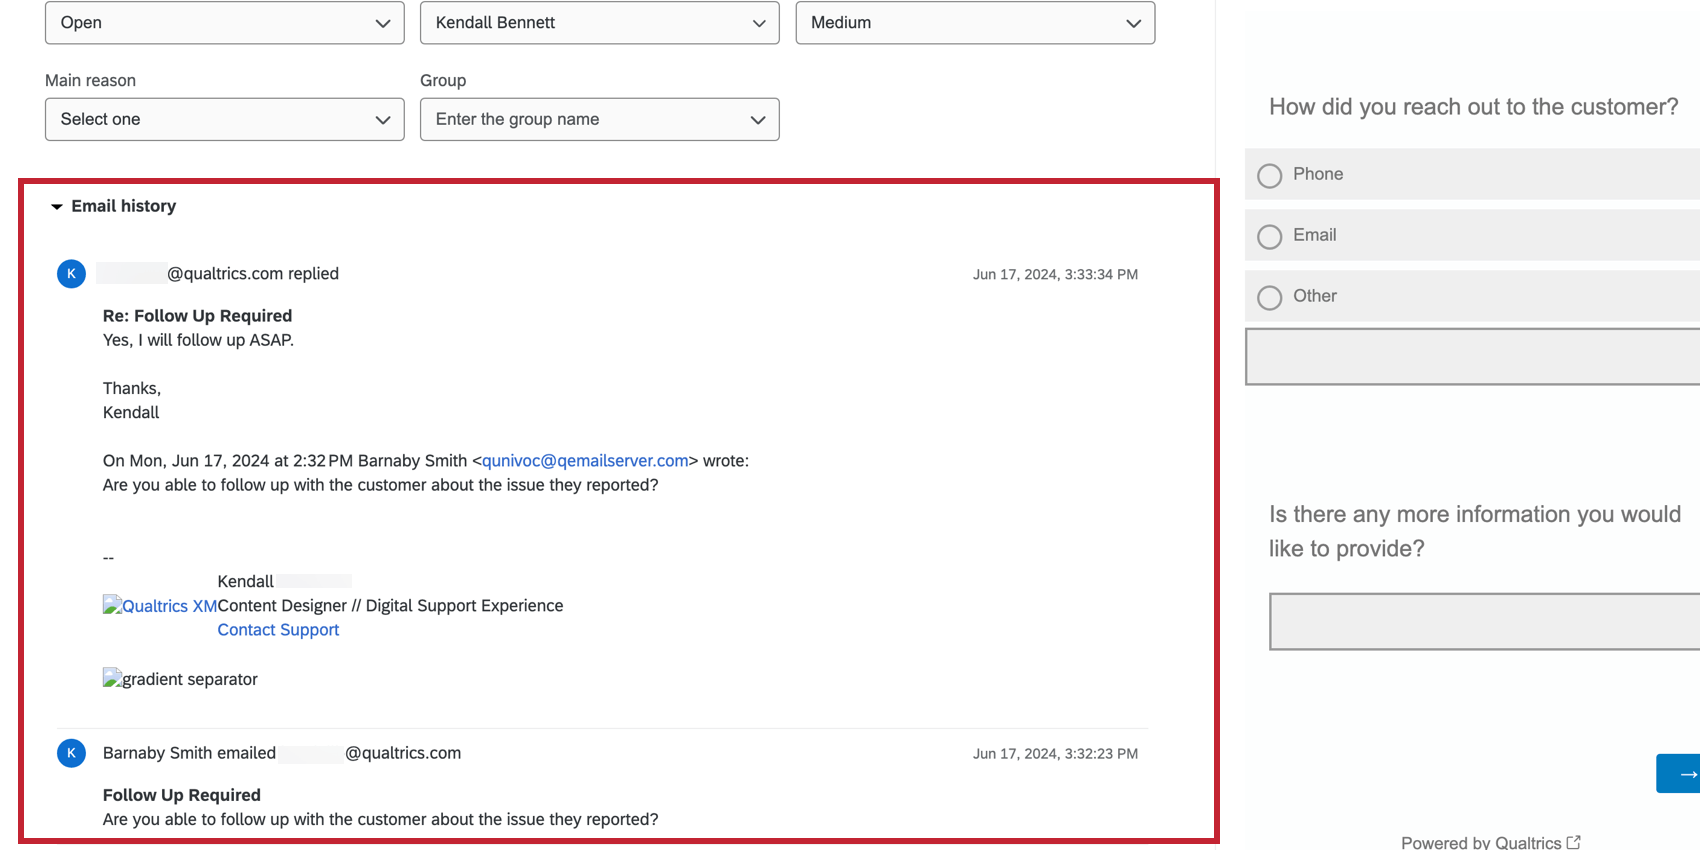
- All email communications are visible in the Email history section of the ticket in Qualtrics.
- This first email is sent via the ticket. It is received by the recipient in their usual email inbox.
Your Brand Administrator can choose whether tickets reopen when you receive an email by adjusting inbound email status settings. This will make it easier for you to follow up with your respondents.
If your organization does not have 2-way emails in ticketing enabled, you will still be able to send emails from tickets, but you will not see replies to that email in the ticket. Also, you will not have access to inbound status settings related to 2-way emails. (You will be able to edit the reply-to email, from name, and from email fields.)
Creating Reusable Ticket Emails
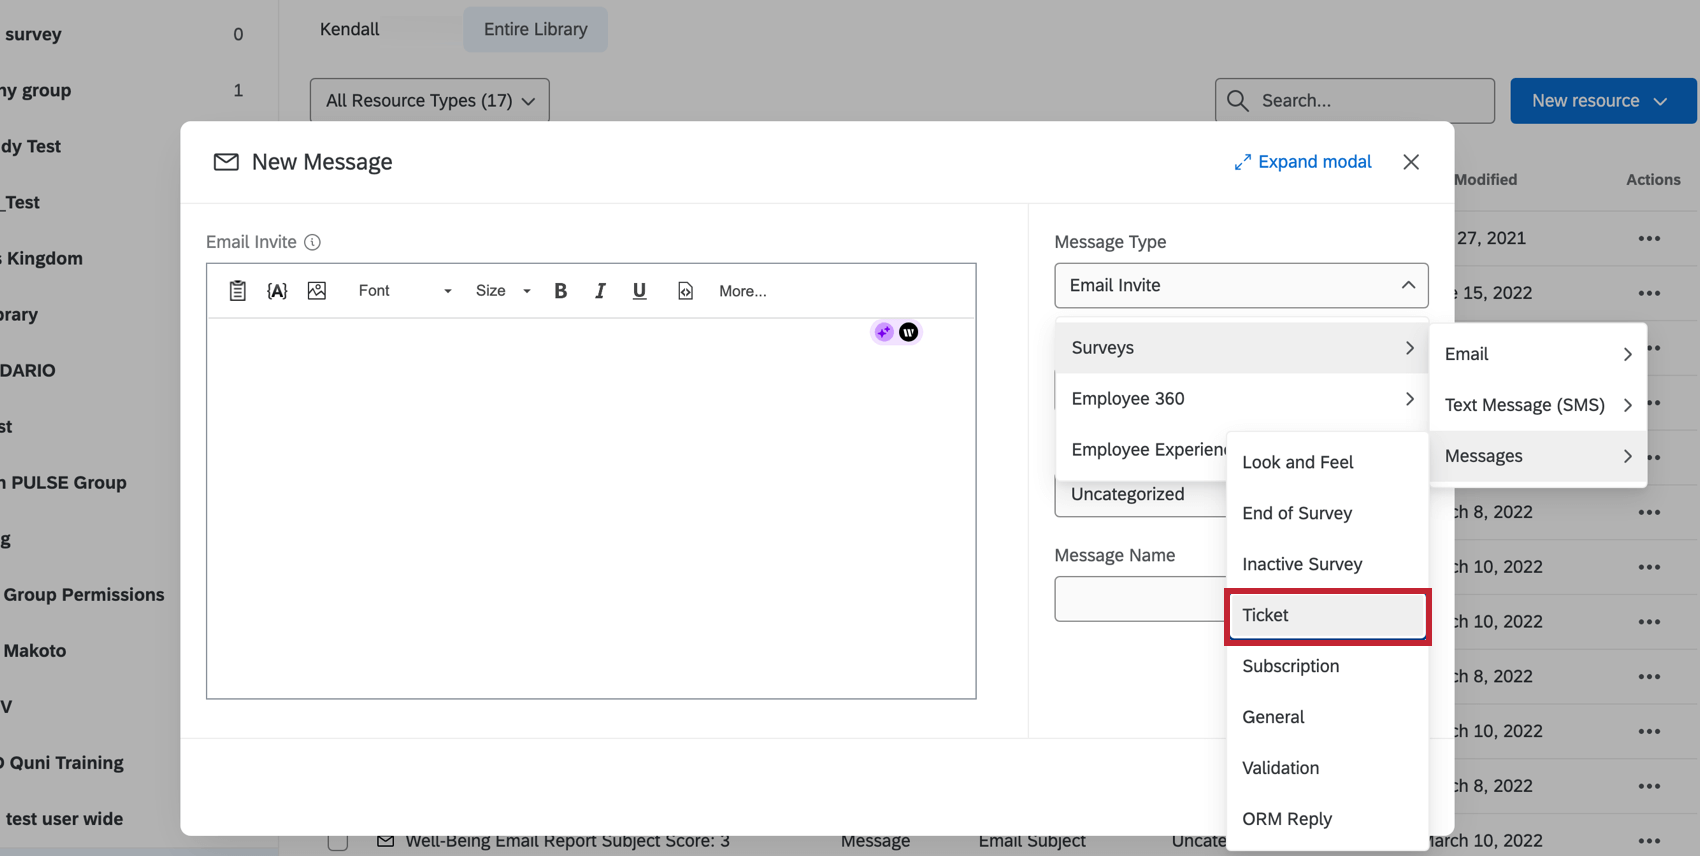
To create a ticket email that you can use over and over again, follow the directions for Creating a Message in a Library. Change the message type to Ticket Messages.
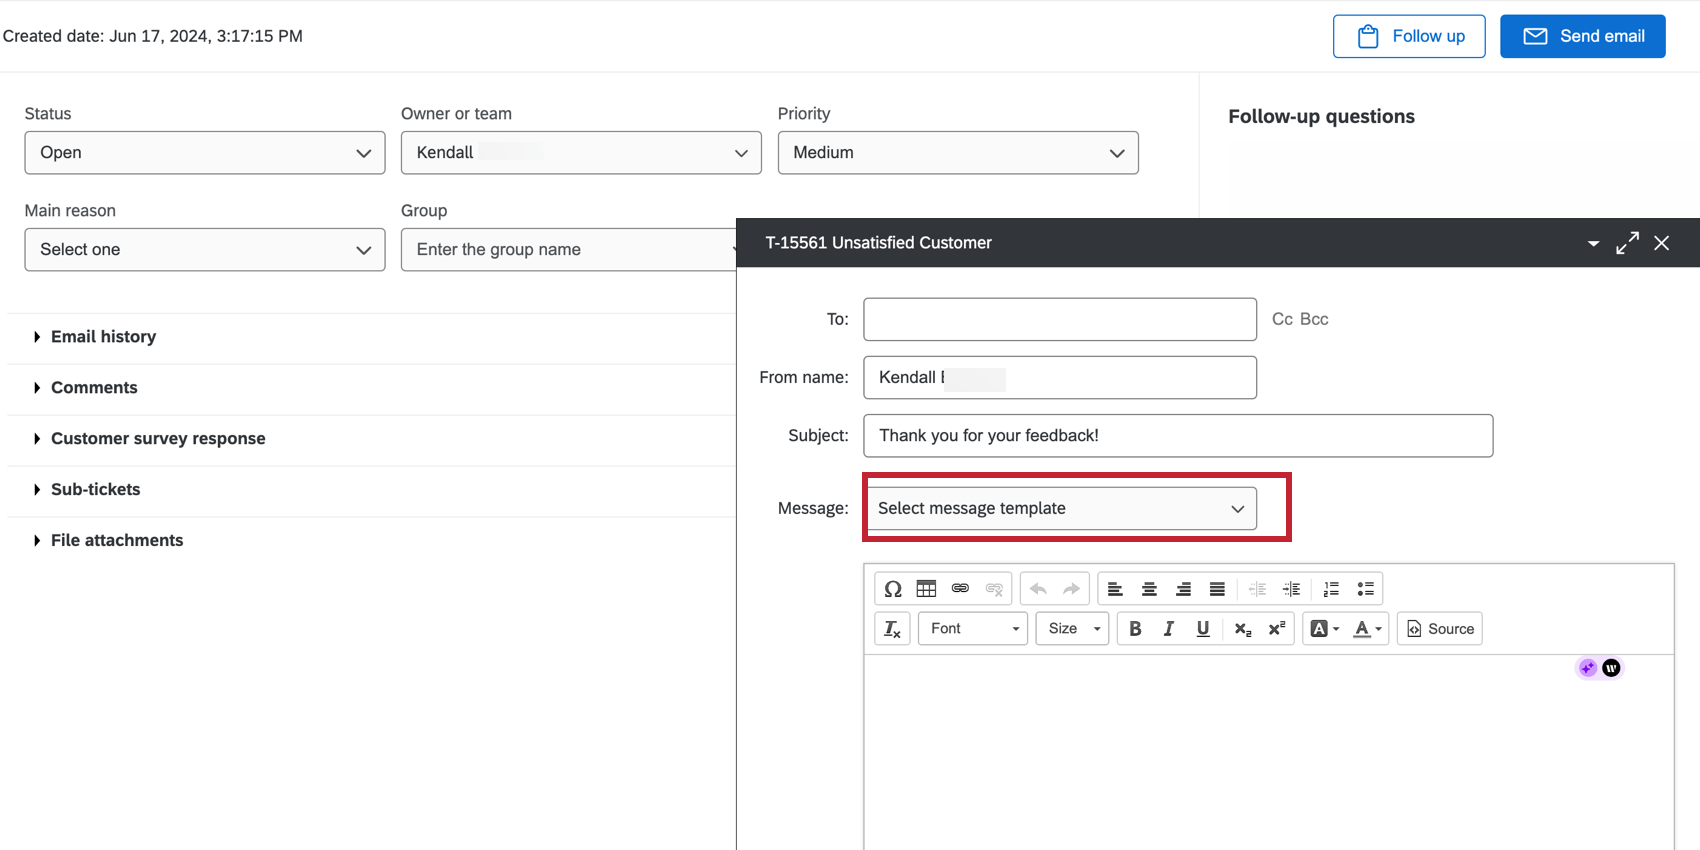
To load a message saved in your library in a ticket email, navigate to the ticket and click Send Email. Then select a message from the Select message template dropdown.
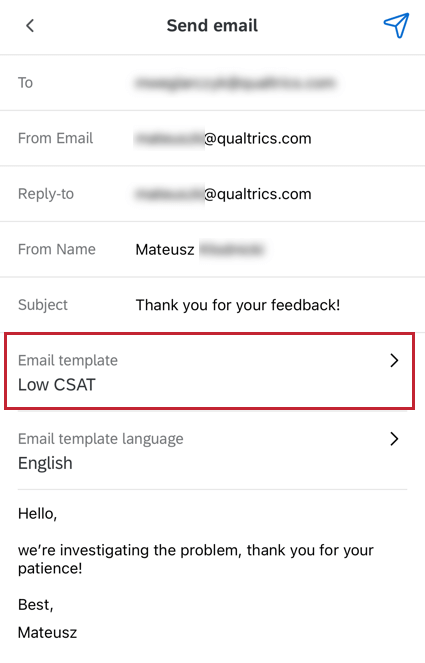
Qtip: The ability to use library messages in ticket emails is also available in the XM mobile app. This option can be found under Email template when you go to send an email.
Deleting Tickets
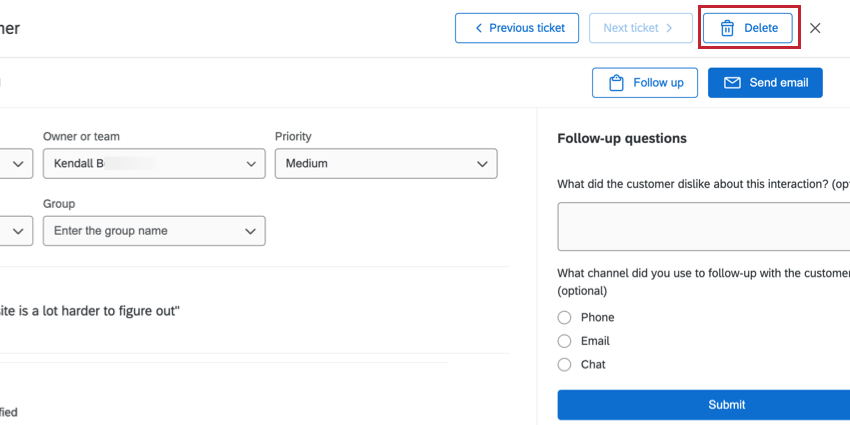
If you are a Brand Administrator, you will be able to delete tickets by clicking Delete in the upper-right corner of the open ticket.
Sub-Tickets
Sub-tickets are tickets that link back to another, “parent” ticket. This is a great feature to use if you’ve discovered that one of your ticket issues actually involves several different tasks, which might require different teams or colleagues to resolve.
Creating a Sub-Ticket
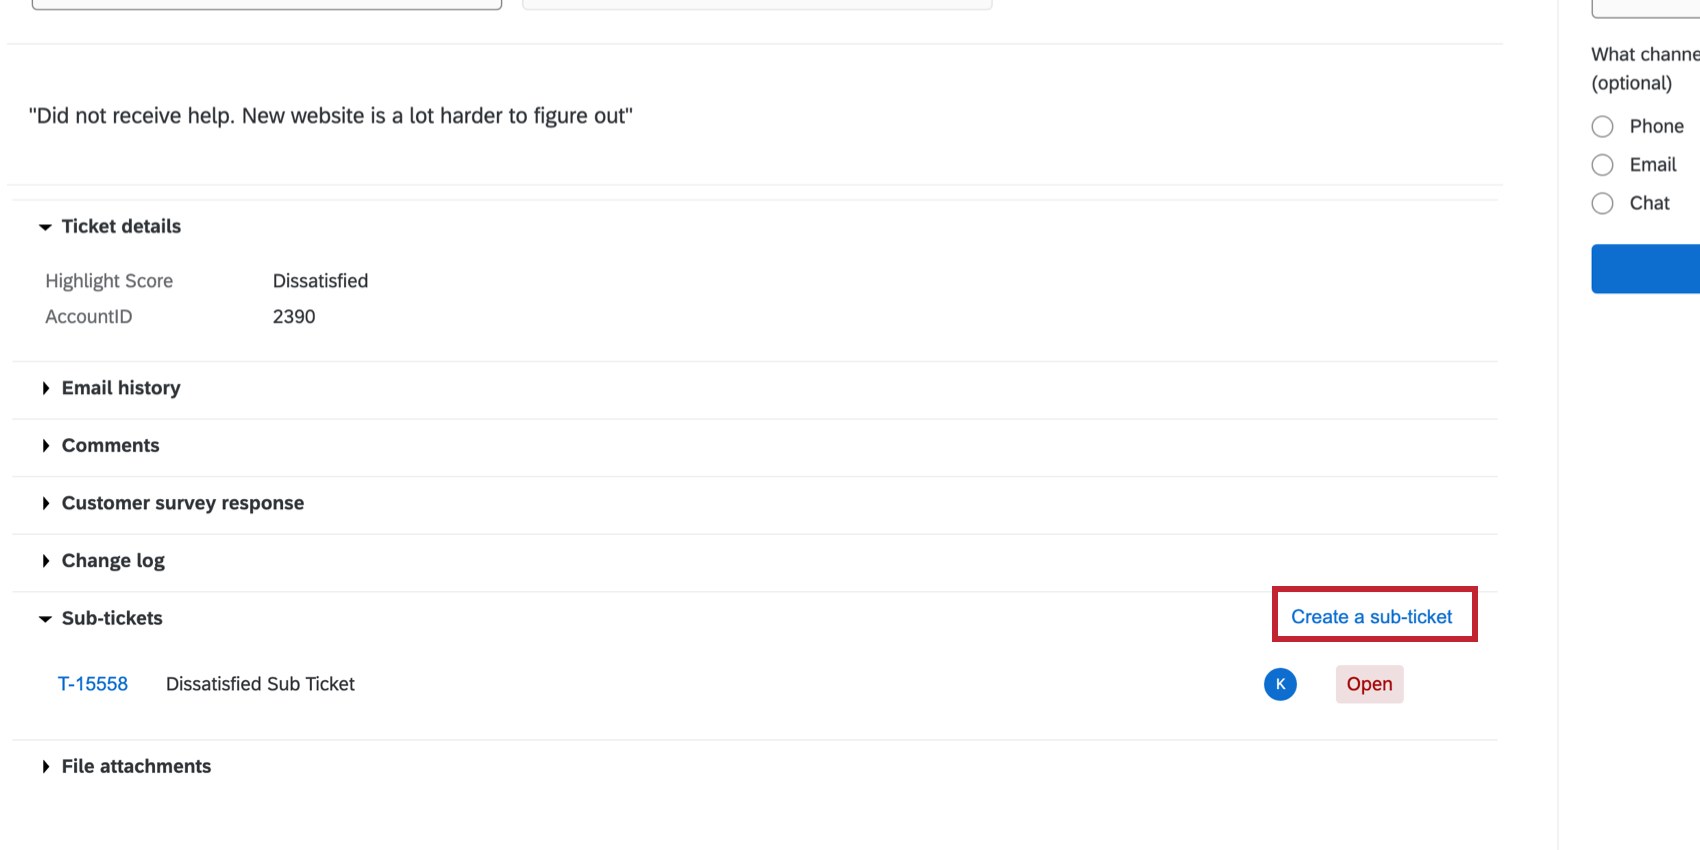
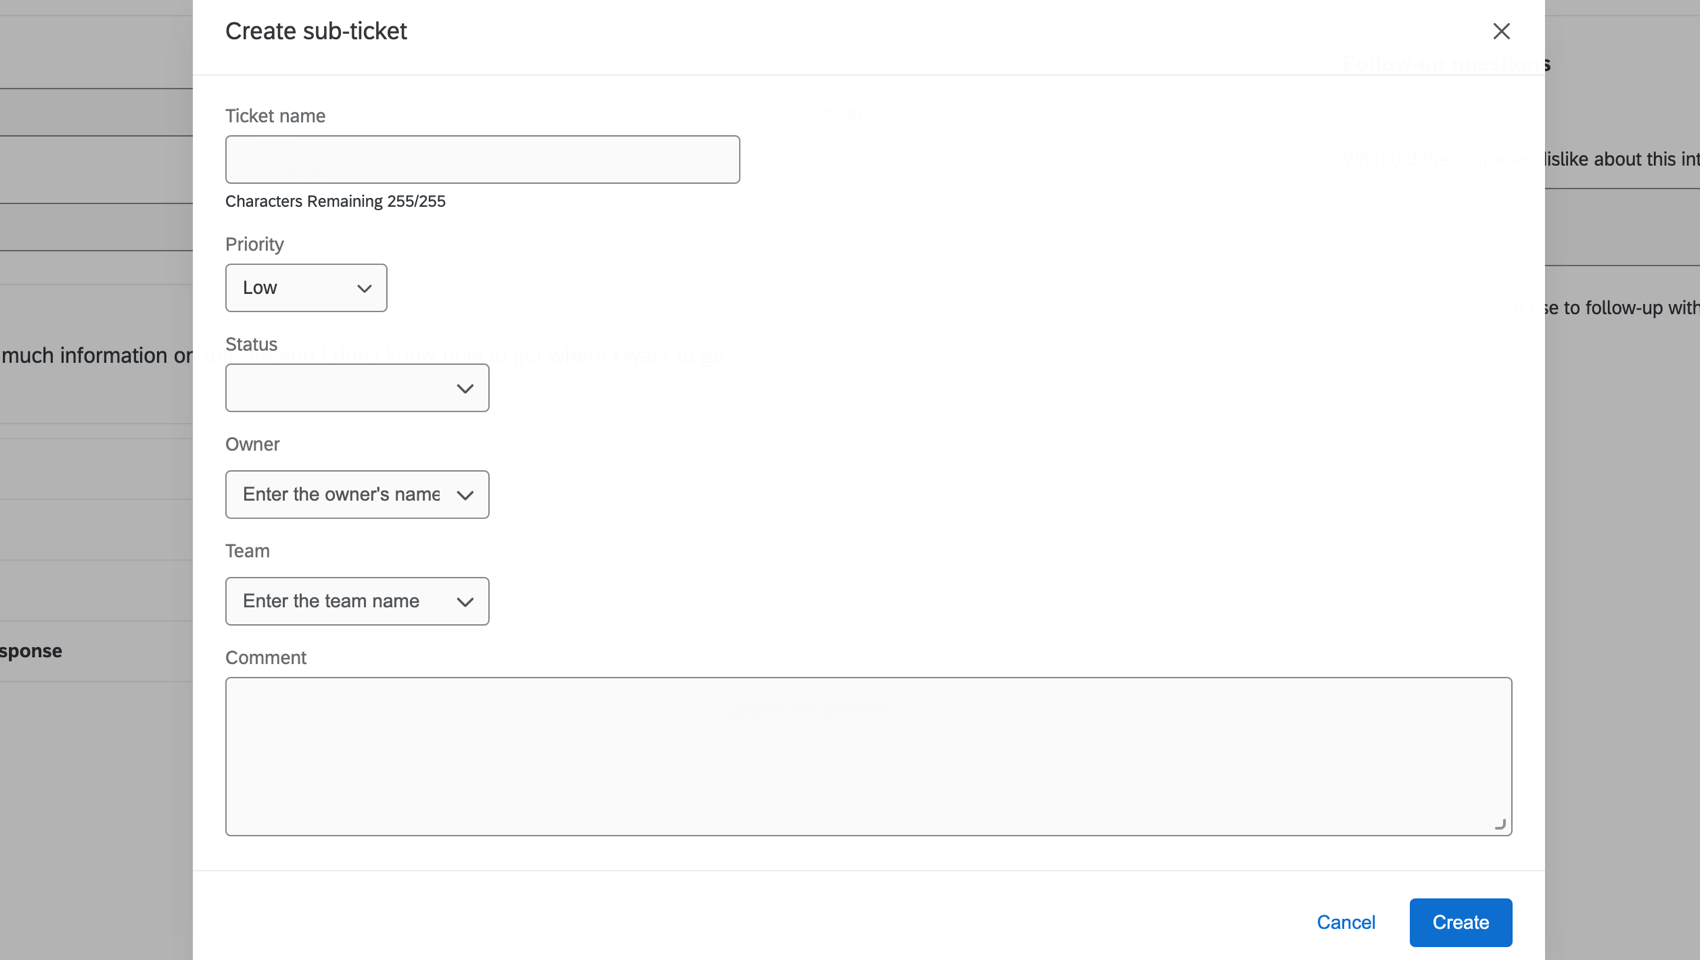
You can create a sub-ticket by clicking the Sub-tickets dropdown and clicking Create a sub-ticket.
From this window, you can designate a name for the ticket, set the priority, indicate the status, assign an owner, assign a team, and provide additional comments.
Managing Sub-Tickets
If you own the parent ticket, you will be able to see all the sub-tickets created for the parent.
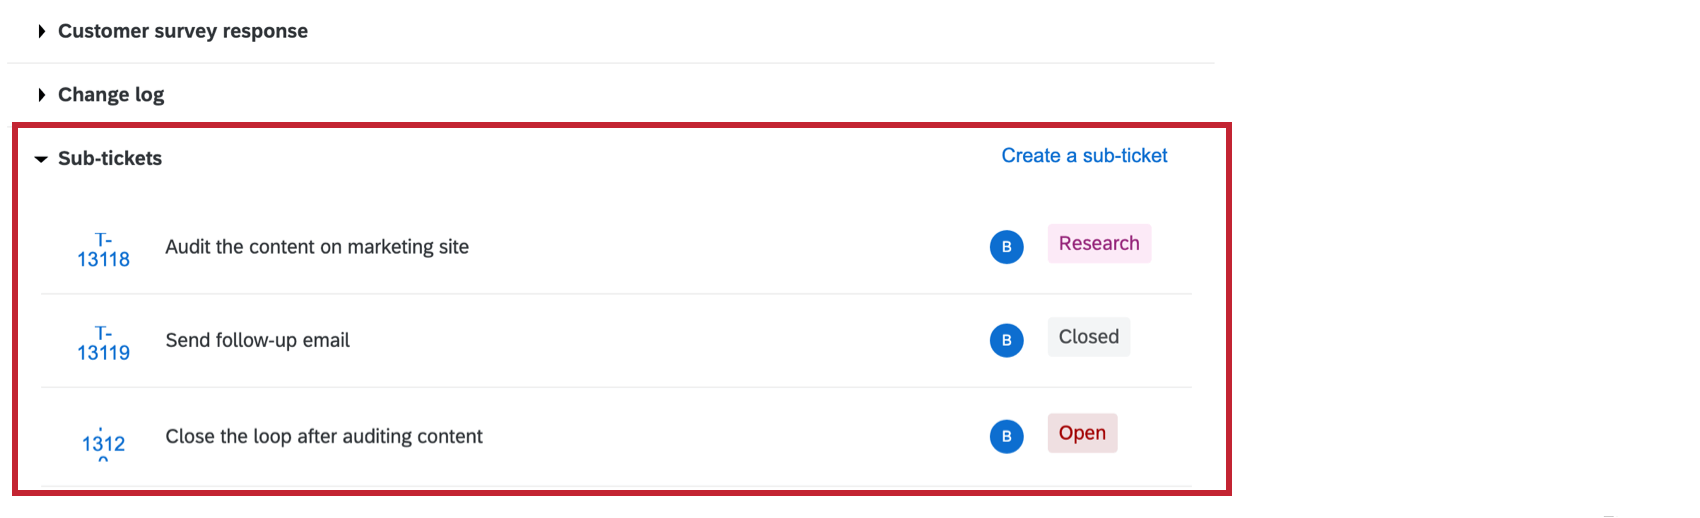
Click the ID link to the left of the sub-ticket to open it up. From this window, you can add comments, change the priority, change the assignment, and send follow-up emails. Brand Administrators can also delete the ticket by clicking the trashcan icon to the right of the ticket name.
Ownership
The owner of a sub-ticket can view the parent ticket when clicking on the parent ticket link within the sub-ticket. They cannot edit this ticket, but they can leave comments on it.
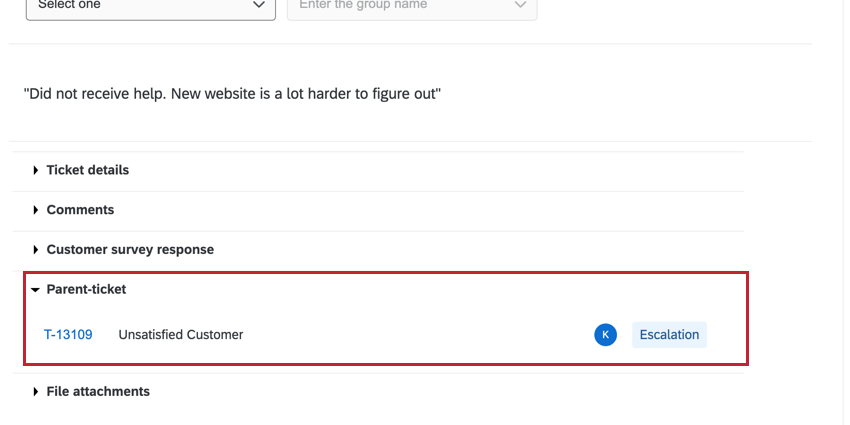
Sub-ticket owners cannot view other sub-tickets of the parent ticket, unless they are also the owner of those sub-tickets. This allows you to maintain privacy between different teams working on different tasks.
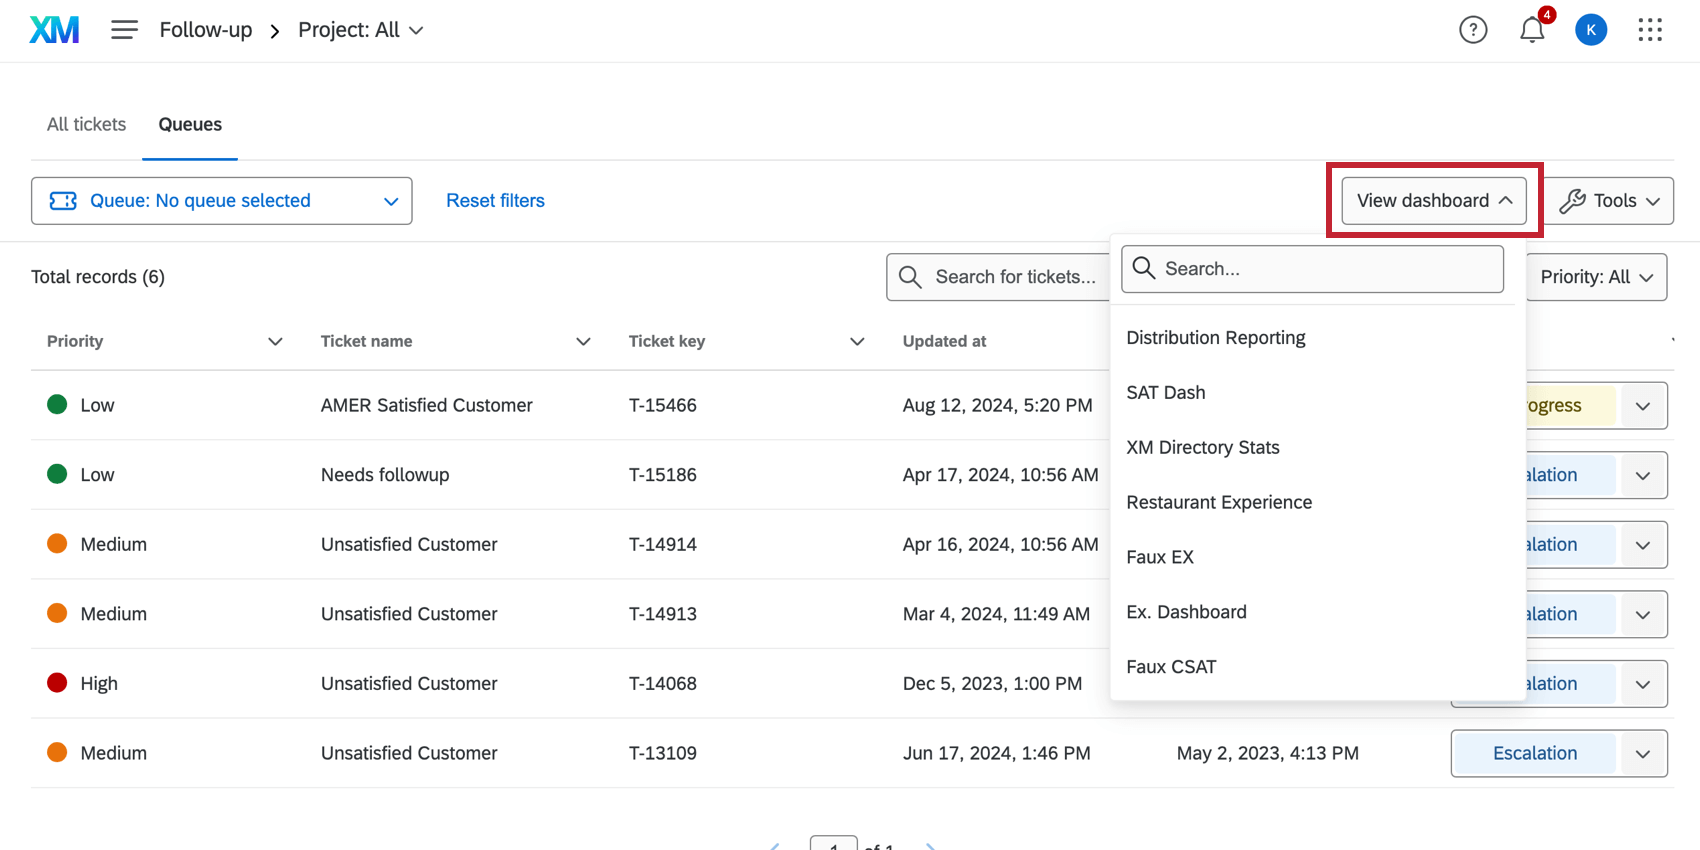
Navigating Between Tickets and Dashboards
There are times when following up on tickets that you may need to quickly navigate back to your dashboard.
When inside your ticket page, you can return to a CX dashboard by clicking the View Dashboard dropdown on the upper-right and choosing the dashboard by name.