
Creating Tickets Based On Discover Alerts
What's on this page
About Creating Tickets Based On Discover Alerts
This page goes over the steps to create XM Engage ticket workflows based on Discover Studio alerts.
Attention: Designer alerts are not supported with this feature. We recommend rebuilding any Designer verbatim alerts as interaction alerts in Studio to use in this workflow.
Step 1: Build Alerts in Discover
Once you have reviewed your current setup, it’s time to build alerts in Discover. These alerts will trigger workflows in XM Engage.
Attention: It is best practice to make new alerts and only connect them to Engage workflows, as opposed to reusing existing alerts for Engage workflows.
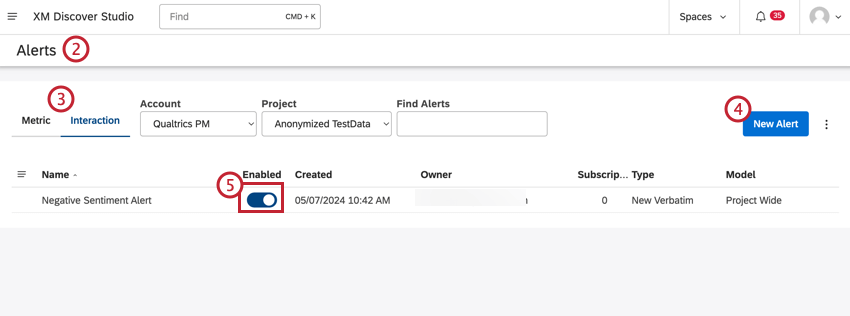
Qtip: If you do not have access to the Alerts page, reach out to your Qualtrics Account Team for assistance.
Qtip: Scorecard alerts are automatically created when a rubric is saved and enabled, so as long as the alert is enabled on the Alerts page, no further steps are required.
Attention: Designer alerts are not supported with this migration. We recommend rebuilding any Designer verbatim alerts as interaction alerts in Studio to use in this workflow. For more information, see Interaction Alerts.
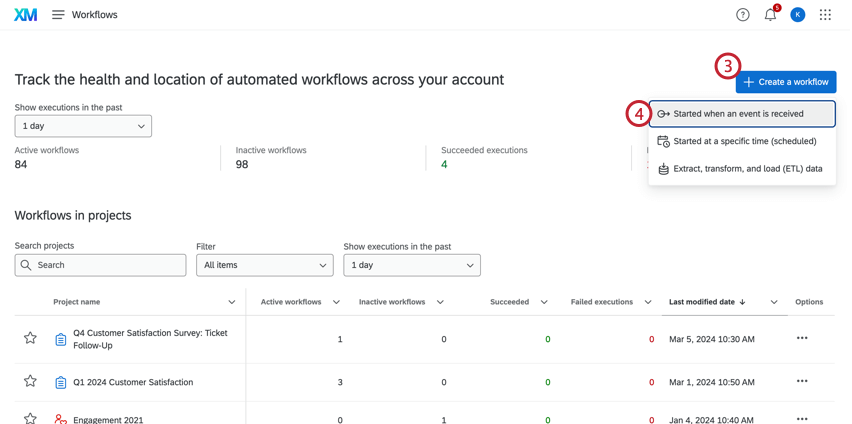
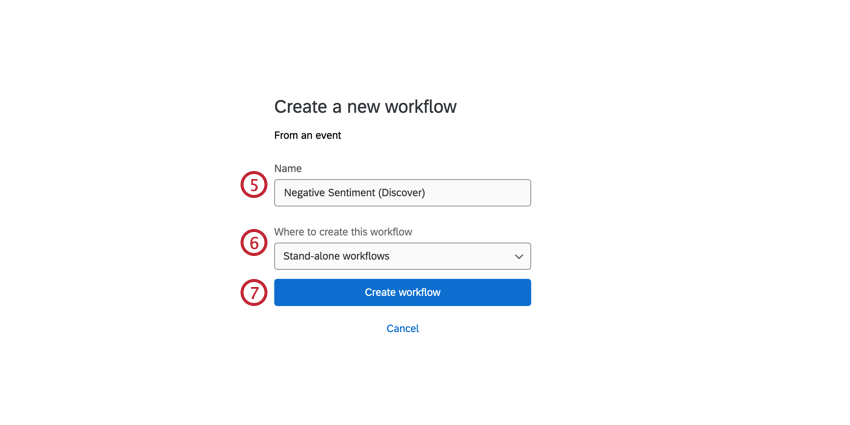
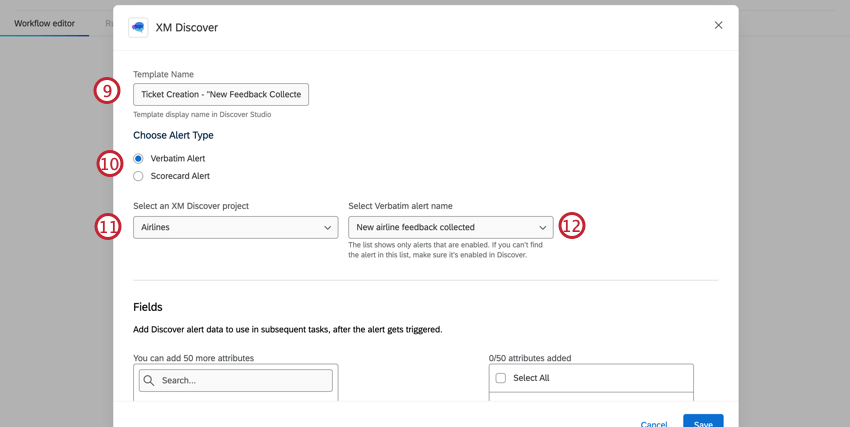
Step 2: Build Workflows in Engage
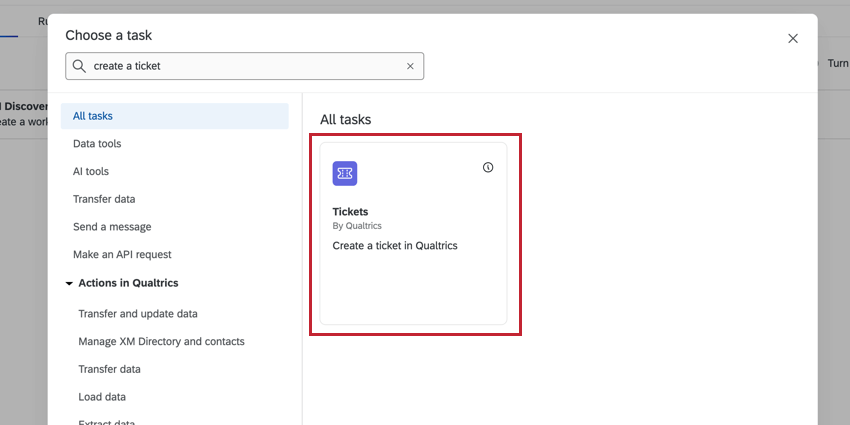
Use XM Engage workflows to trigger tasks based on the alerts you set up in step 1. For example, you can create a ticket every time a customer states that they want someone to follow up with them on an issue they had during checkout.
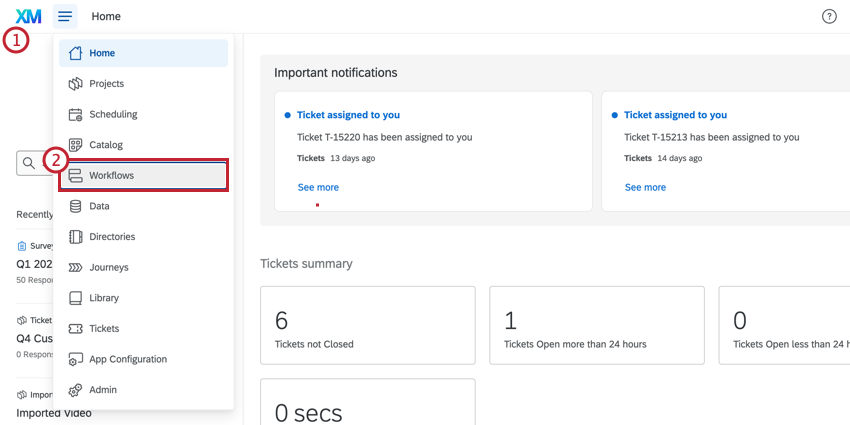
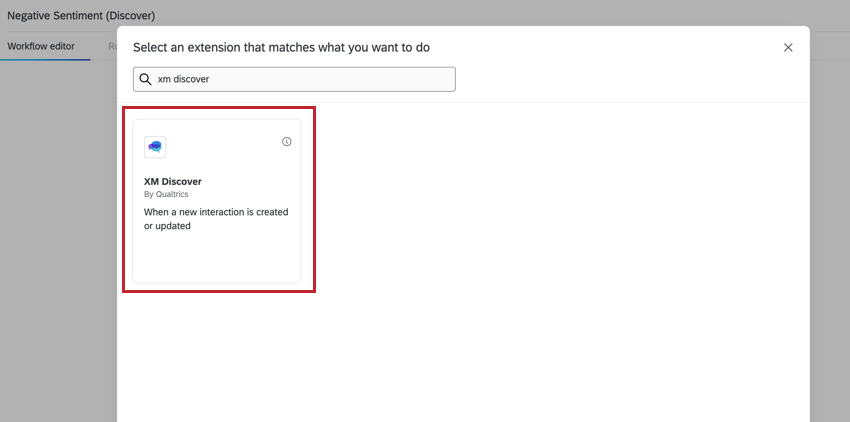
Qtip: If you don’t have access to the XM Discover event, reach out to your Brand Administrator for assistance.
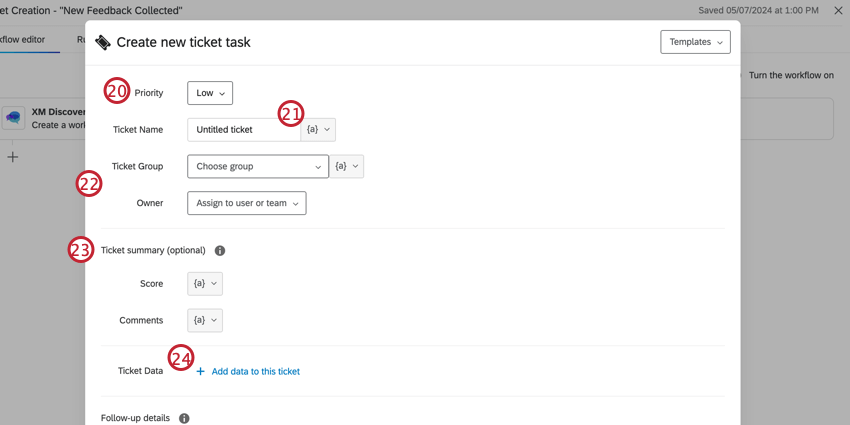
Qtip: The ticket group and owner will depend on your team’s specific use case.
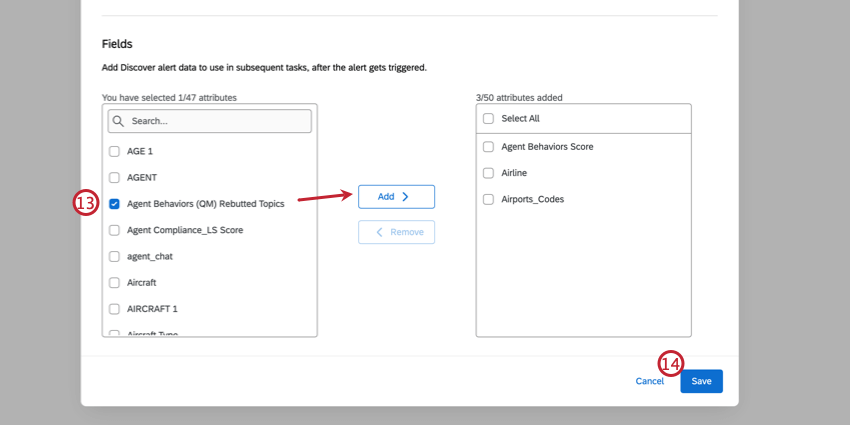
- Score: When connecting to a scorecard alert, you can add the Intelligent Score field by clicking the piped text ( { a } ) drop-down menu next to Score.
- Comments: Add the Notes field to bring in text added to the notes box in manually created tickets.
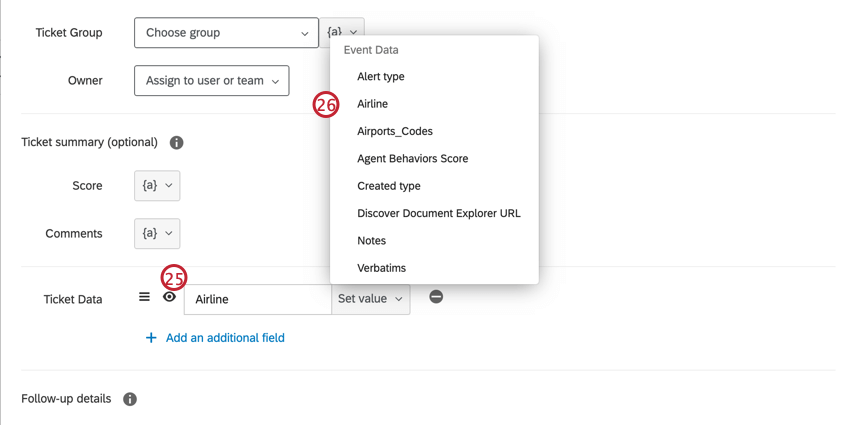
Qtip: The verbatim field is pulled in automatically and can be used to create a ticket data field to display the sentence that triggered the alert inside the ticket. To see the full verbatim, add the Document Explorer URL to open it in Studio.
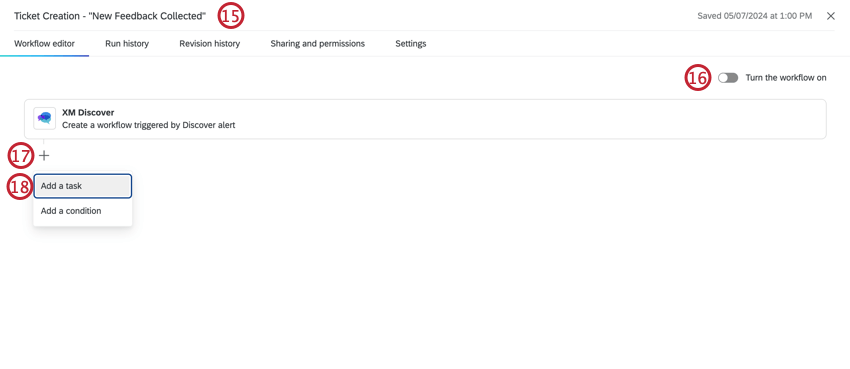
Step 3: Use Tickets in Engage
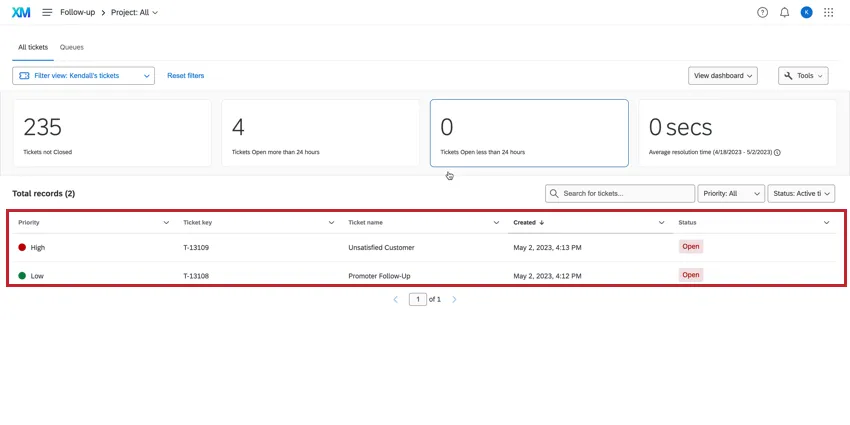
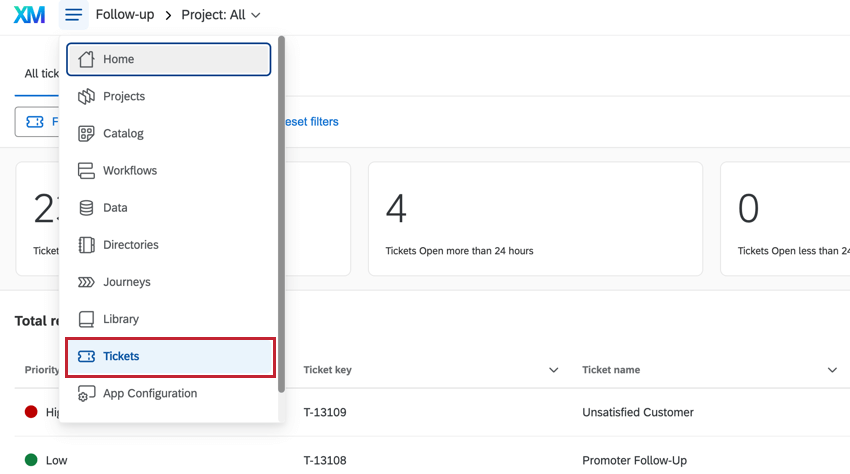
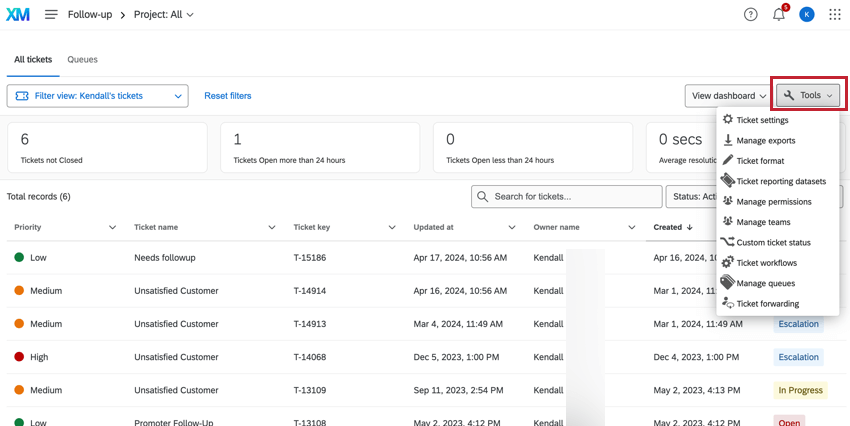
Once your alert is triggered, a new ticket will be created using the ticket task from Step 3. To view tickets, navigate to the Tickets Follow-Up Page.
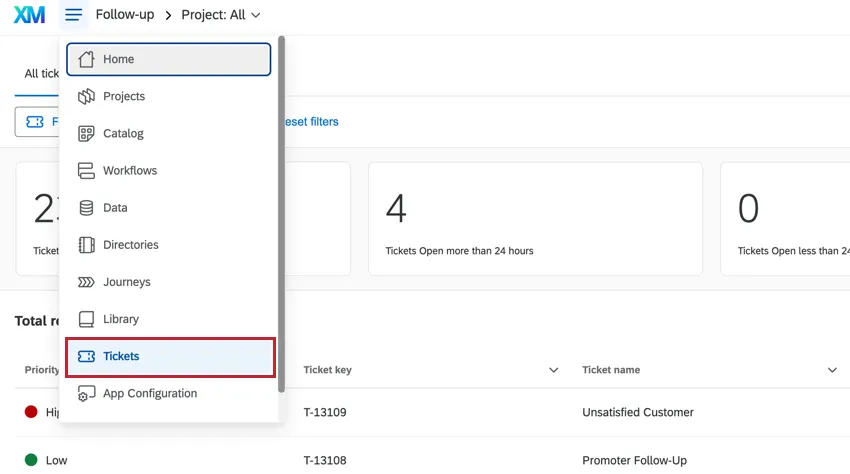
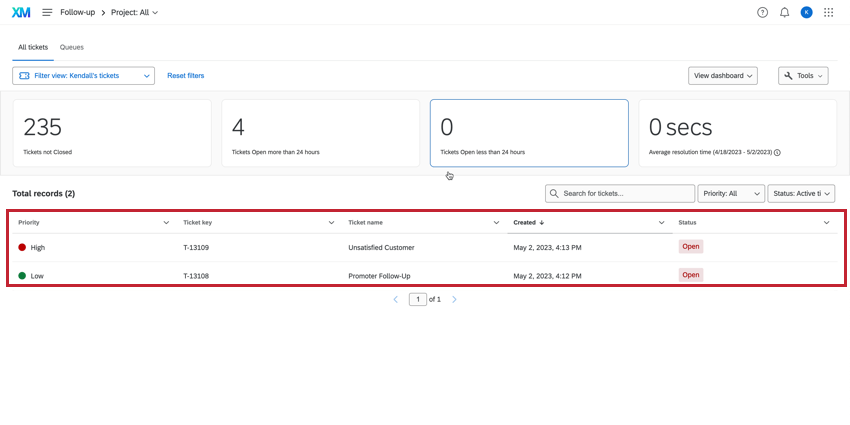
The follow-up page will display all of the tickets owned by you or your team. For more information on navigating the follow-up page, see New Ticket Owner Experience.
Qtip: If you’re a Brand Administrator, you will be able to view all tickets from the follow-up page.
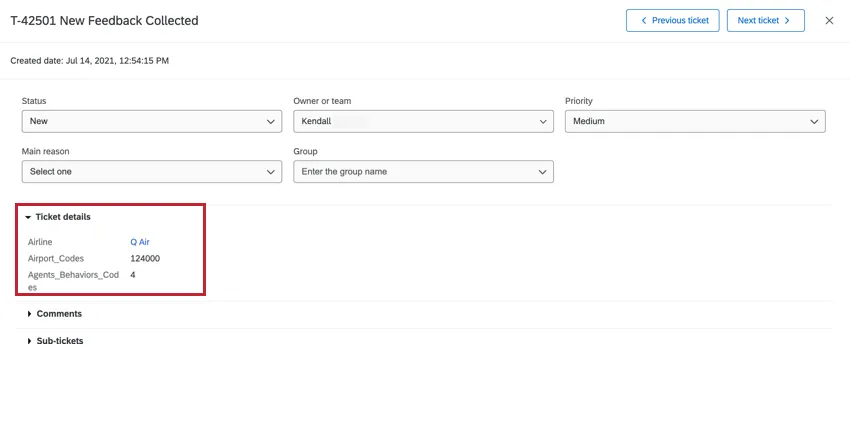
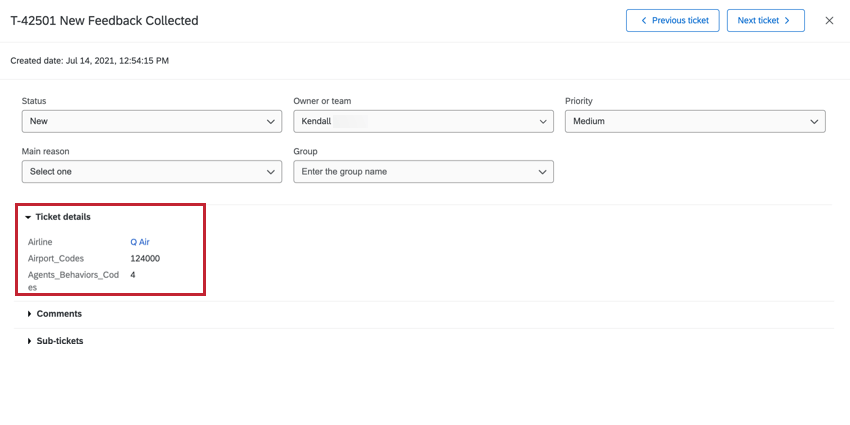
Select an open ticket to view the ticket that was generated by the tickets task. All attributes from Discover are displayed in the Ticket details section.
Configuring Tickets in Engage
Features in the Ticket Tools dropdown can be helpful for using tickets in Engage. For information on items that are particularly useful, check out the following support pages:
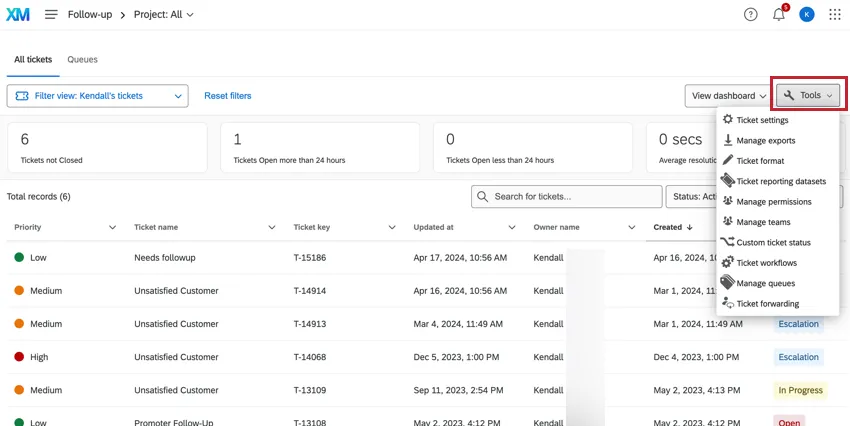
- Ticket settings: Various ticket management options. Qtip: Only Brand Administrators can access Ticket Settings.

- Ticket format: Modify the values that are displayed in the ticket activity to all users in the brand.
- Manage permissions: Manage ticket group permissions.
- Manage teams: Assign individuals to ticket teams, assign tickets to teams by default, and create ticket queues to assign tickets to teams.
- Manage queues: Manage ticket queues and queue settings.
GIVING USERS ACCESS TO TICKETS
Attention: Only Brand Administrators can give users access to tickets. To reach out to your Brand Administrator, see Contacting Your Brand Administrator.
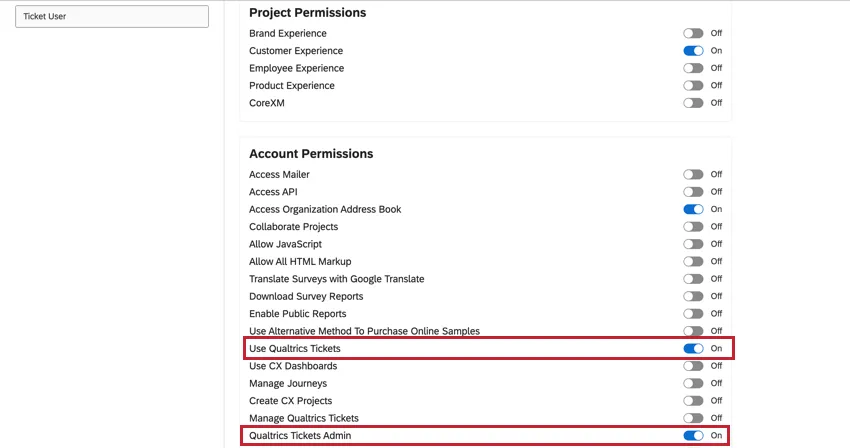
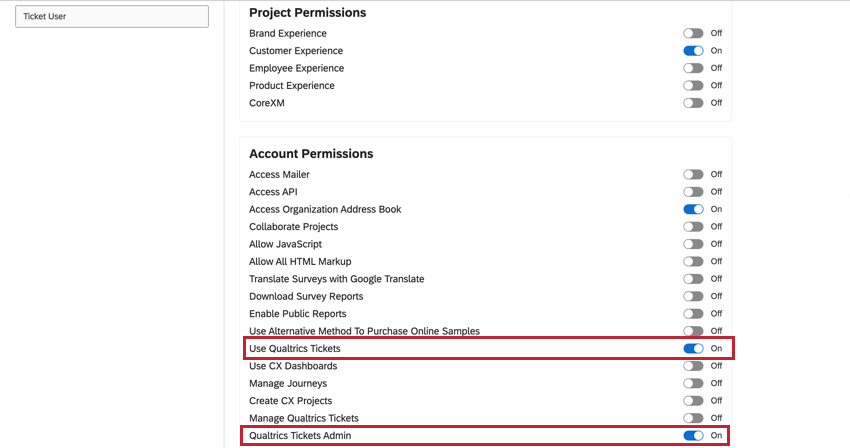
Users must have the Use Qualtrics Tickets permission enabled to be able to interact with tickets. You can utilize User Types to easily assign permissions to new users in your brand.
Example: Let’s say you want to create a “Ticket User” user type with limited access to the Engage platform. When creating the user type, only enable the: Customer Experience project permission, Access Organization Address Book, Use Qualtrics Tickets, and Use CX Dashboards account permissions. If you want to create a “Ticket Admin” user type, be sure to include the Qualtrics Ticket Admin permission. For a list of all permissions available when creating a user type, see User, Group, & Division Permissions.
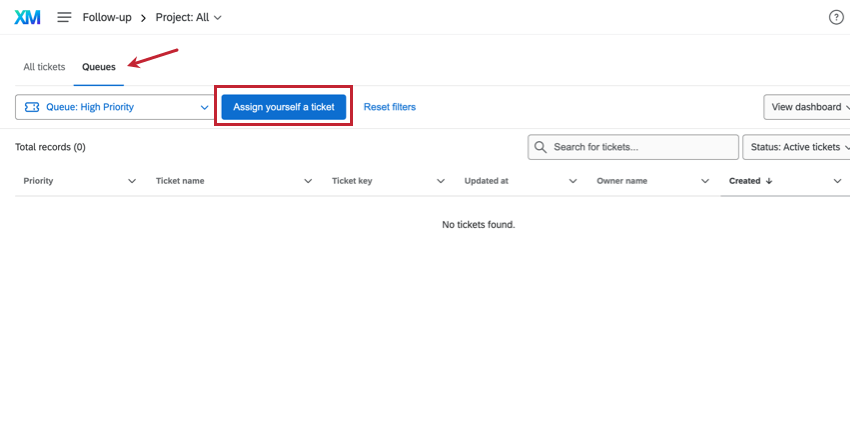
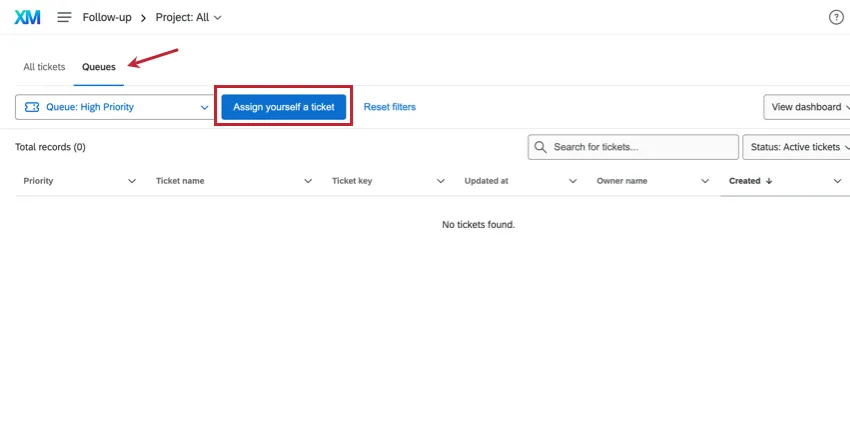
Using Ticket Queues
To take tickets in Engage, click the Queues tab in the Follow-Up page and select the appropriate queue from the dropdown. To take a ticket, click Assign yourself a ticket and you will be assigned as the owner to a ticket from this queue. For more information, see Ticket Queues.
Best Practices for a Discover-Engage Ticket Setup
This section goes over useful features in both Discover and Qualtrics Engage that can help support an integrated inbox setup.
| Goal | Feature |
|---|---|
| Organize tickets | Custom ticket statuses organize tickets into different stages of the triage process. Update the status of tickets to move them between stages instead of using tags. You can add a Root Cause to the ticket to add another classification, if needed. |
| Add notes to collaborate with colleagues | Comment on tickets. |
| Mention ( @ ) the user who created the ticket to let them know of the resolution. | Send a Follow-Up Email to close the loop or follow up on ticket details. Follow Up emails can be sent to the user who submitted the ticket, or to colleagues.
|
| Open the document associated with a ticket in Studio’s Document Explorer. | Add the “Discover Document Explorer URL” field to the ticket data while setting up the tickets task. This will provide a link in the ticket that users can click to open the Document Explorer in a new tab.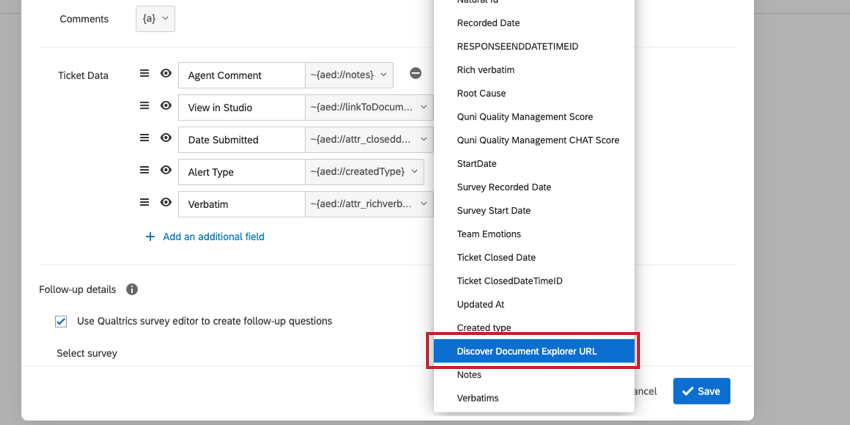
|
| Issue rebuttals. | Rebuttals can be done in Document Explorer, without having to create a ticket. Agents can submit rebuttal request tickets via the Manual Ticket Creation workflow in Document Explorer.
|
| Reassign tickets to a teammate if escalated. | Manually reassign tickets to another owner via the Assign To dropdown in the ticket, or set up a workflow to automatically reassign tickets based on certain criteria (e.g. older than 5 days).
|
| Assign an automatic owner to new tickets. | Tickets can be automatically assigned to individuals or teams. Additionally, admins can set up dynamic ticket assignments to assign owners based on conditions of the ticket data. |
| Access the list of closed/archived tickets. | Closed tickets remain in the ticket library. Filter and search for closed tickets on the follow-up page. |
FAQs
What is XM Engage?
What is XM Engage?
What is an interaction alert?
What is an interaction alert?
What happens to all of the cases left in the QSC Inbox?
What happens to all of the cases left in the QSC Inbox?
What does a typical workflow look like when I am assigned a new ticket?
What does a typical workflow look like when I am assigned a new ticket?
That's great! Thank you for your feedback!
Thank you for your feedback!