Stats iQ Variable Creation
About Variable Creation
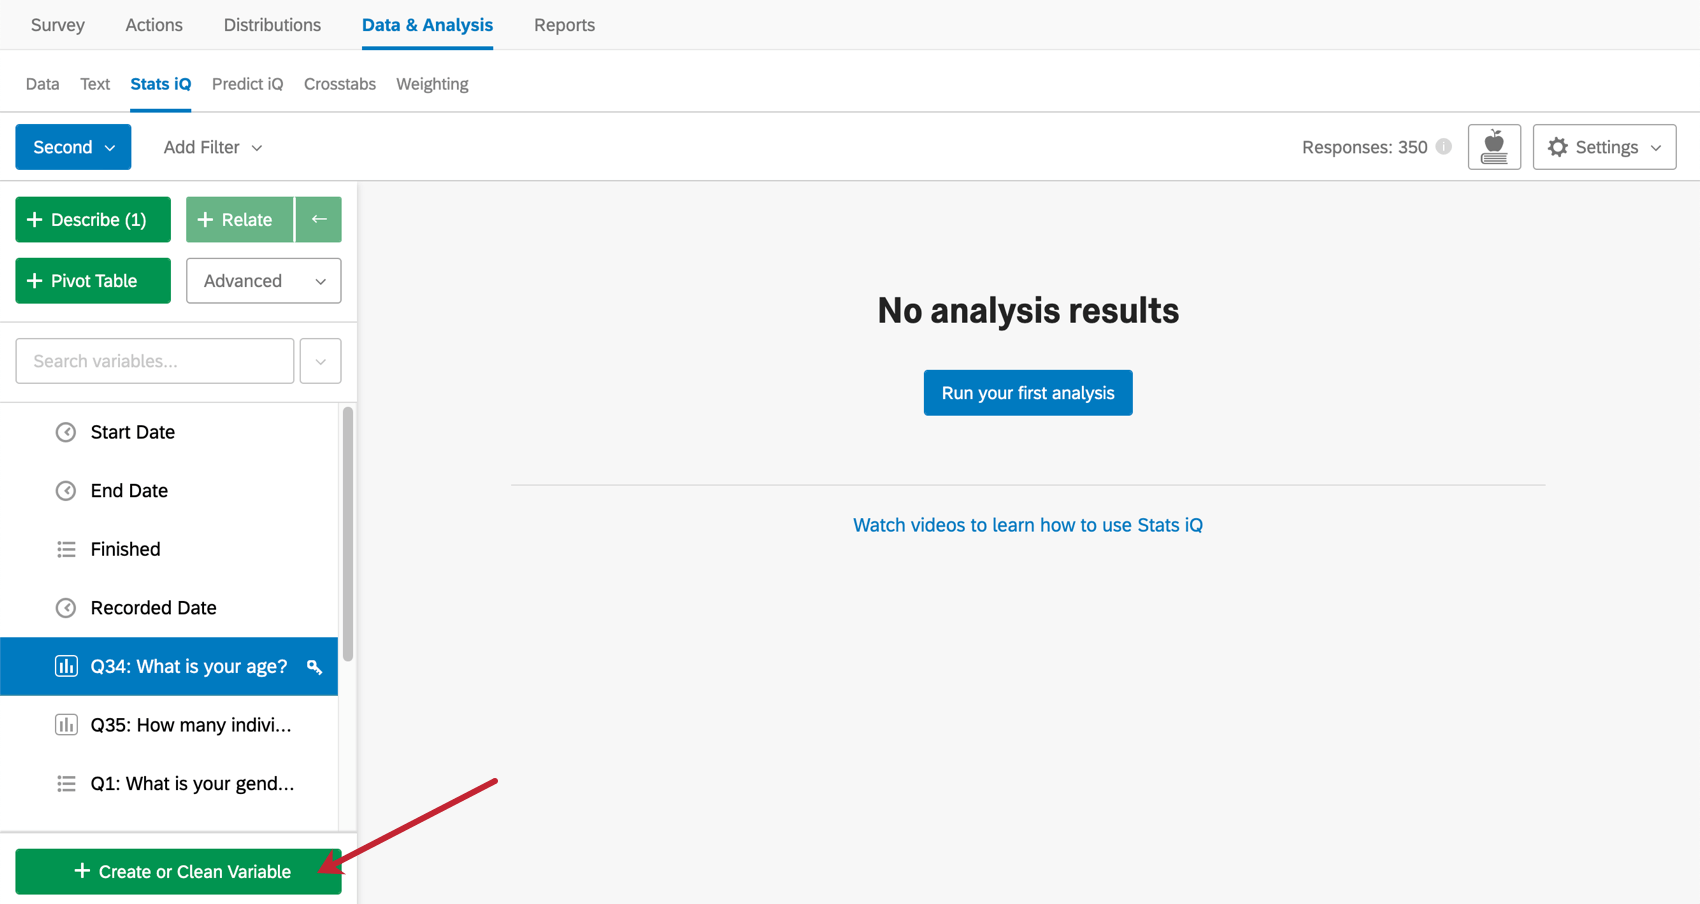
To create a new variable in Stats iQ, click Create or Clean Variable in the lower-left corner. This will open a menu where you can select from multiple methods for creating new variables.
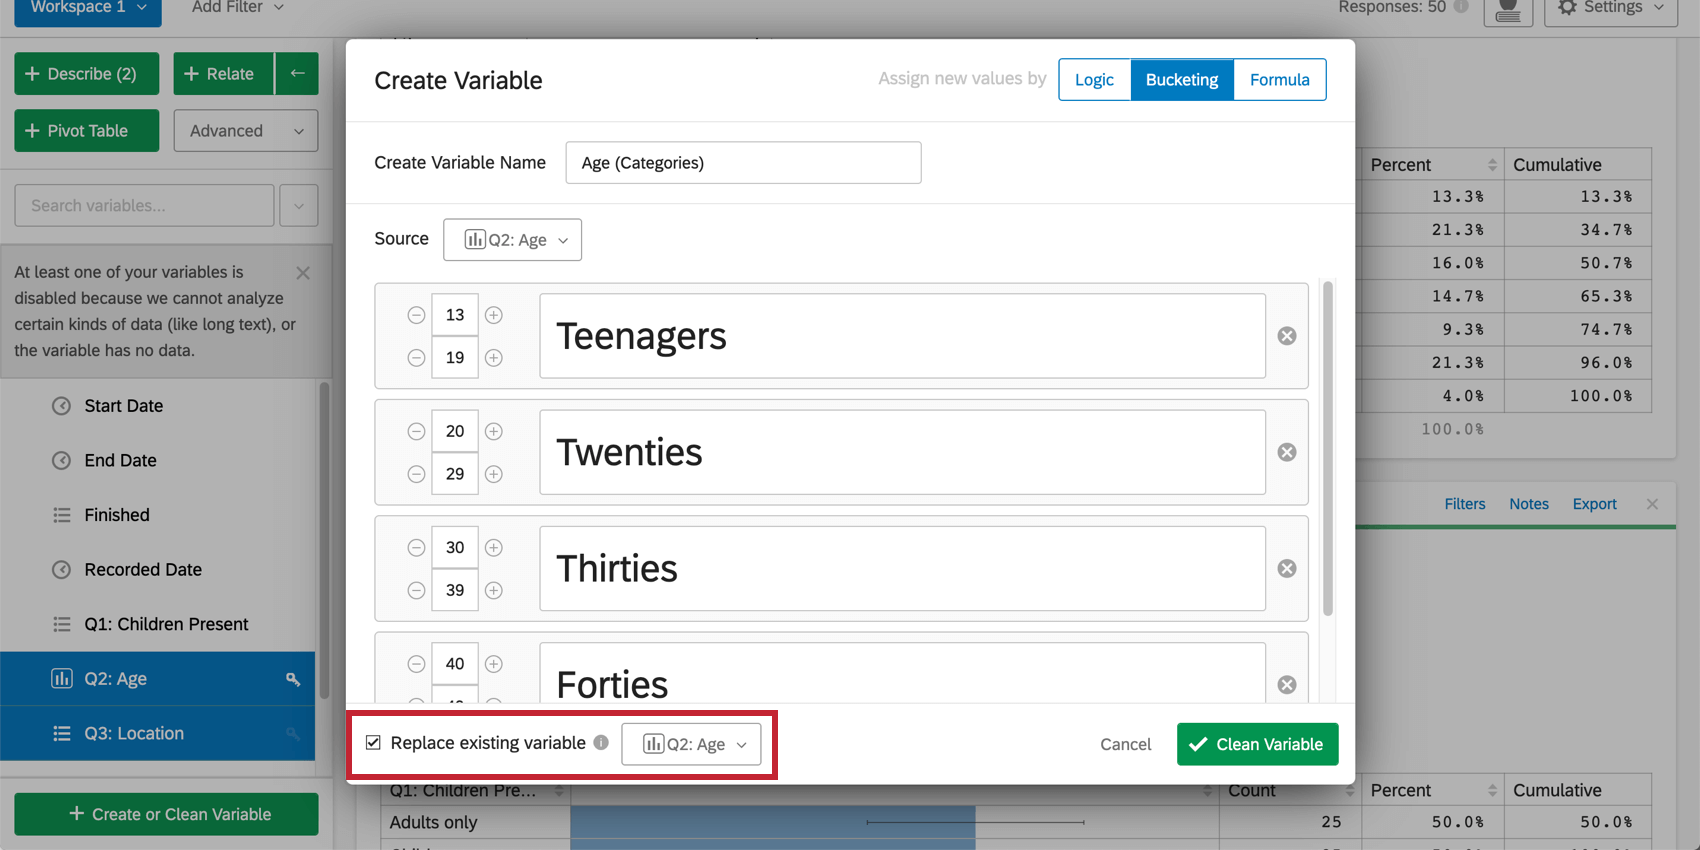
You can also use this menu to update an existing variable. To do this, check Replace existing variable in the lower-left corner and choose the variable you would like to replace with the updated version.
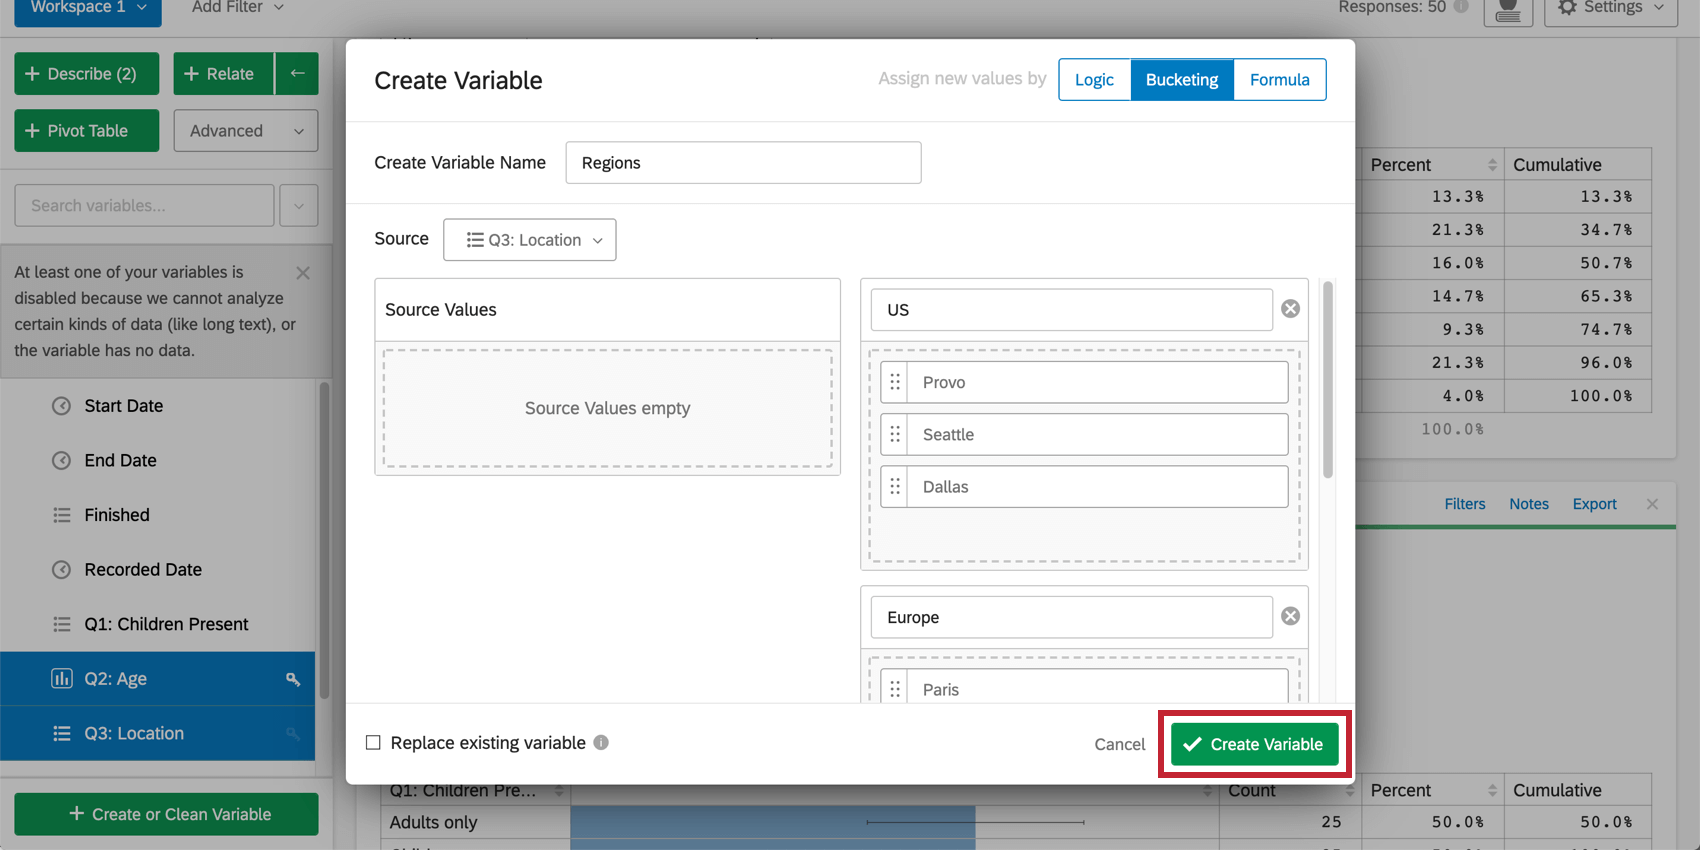
Once you have named the new or updated variable and set the conditions under which its value will be assigned, click Create Variable (or “Clean Variable”). The new variable will appear in the variable pane and can be selected for use in analysis.
Logic
The logic variable creation method allows you to create a new variable whose values are determined by filter conditions that are based on other variables in the dataset. The filters will determine if a particular value is assigned to the variable. The values themselves can be set from existing variables in the dataset, or can be manually specified.
To create a new variable using Logic:
- Choose the Logic tab in the Create Variable menu.
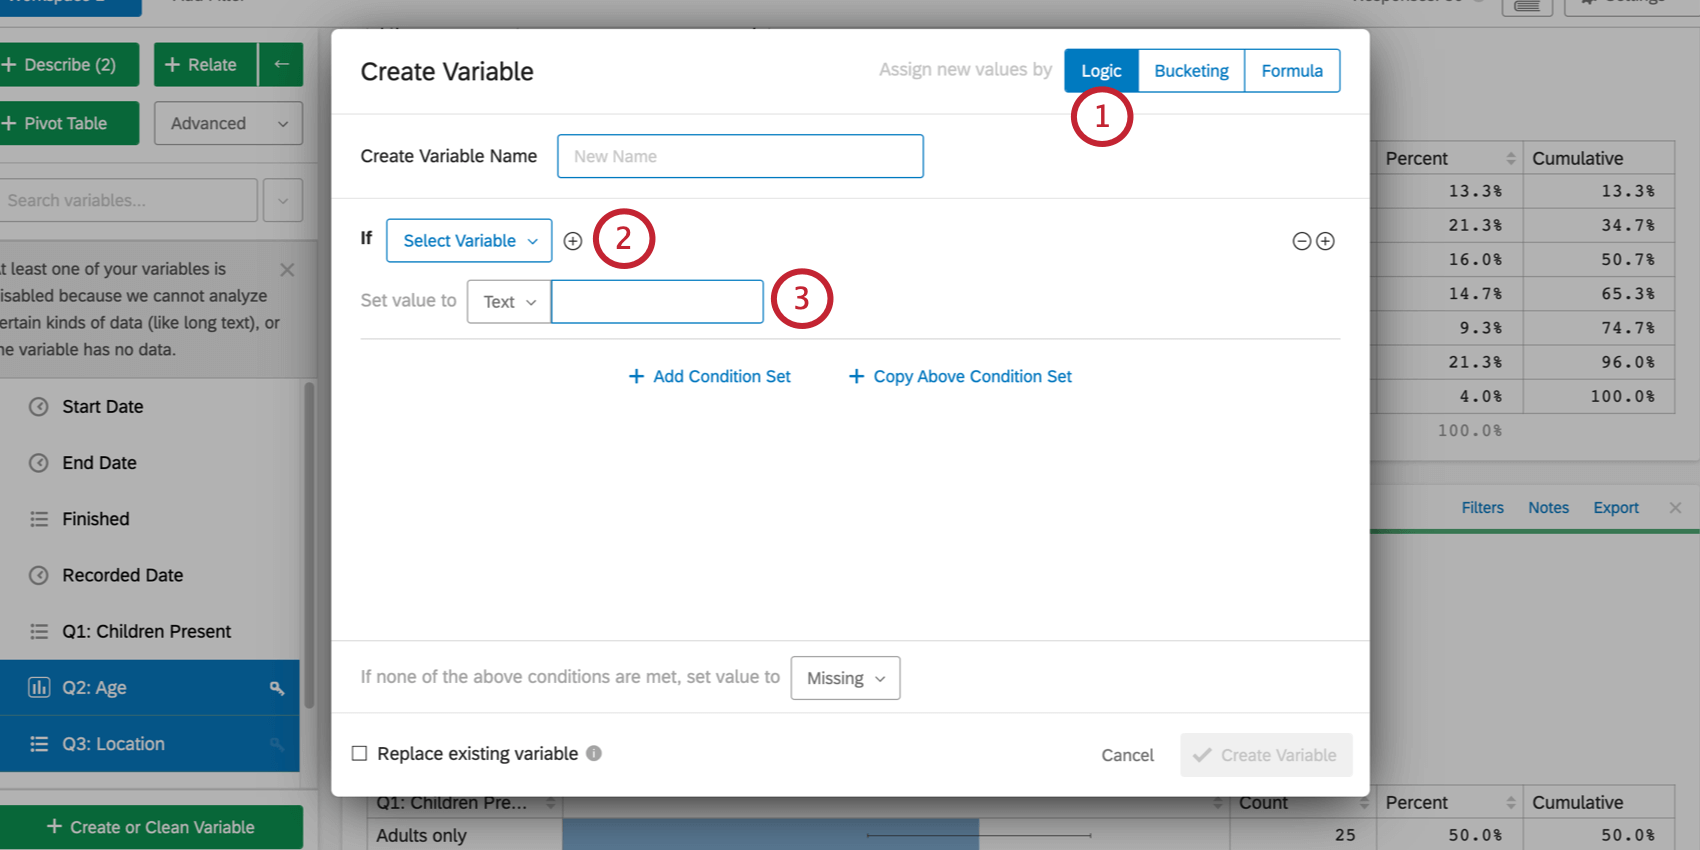
- Create a logic condition that specifies when the new variable should have a particular value. Logic conditions can be based on any existing variable and are set up in the same way as workspace and card filter conditions. You can add more than one condition by clicking the plus sign ( + ) to the right of the first condition.
- Enter the value that you would like the new variable to contain when the condition is true. You can either enter a value manually or set the value from an existing variable by choosing Variable in the dropdown and selecting the variable you would like to use values from. Choosing Text specifies that you would like the value to be a text value. Number specifies that you would like the value to be a number.
- Click Add Condition Set to add another value and associated logic condition for the new variable. You can also click Copy Above Condition Set if you have a lot of similar conditions to set and don’t want to start from scratch each time.
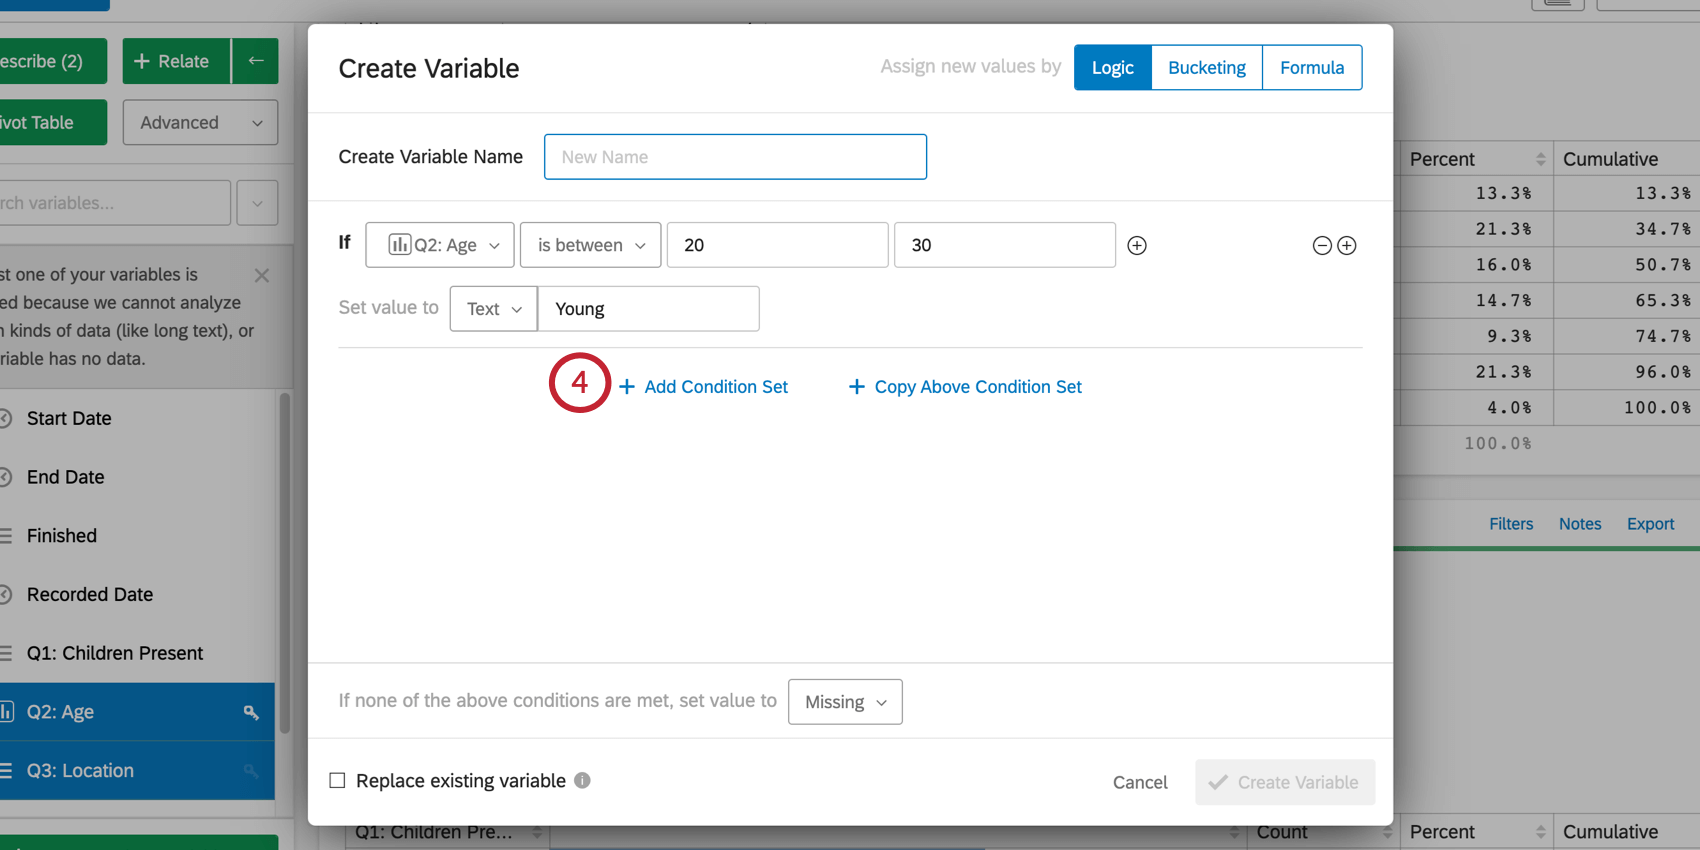
- Repeat this process until you have added all of possible values for the new variable.
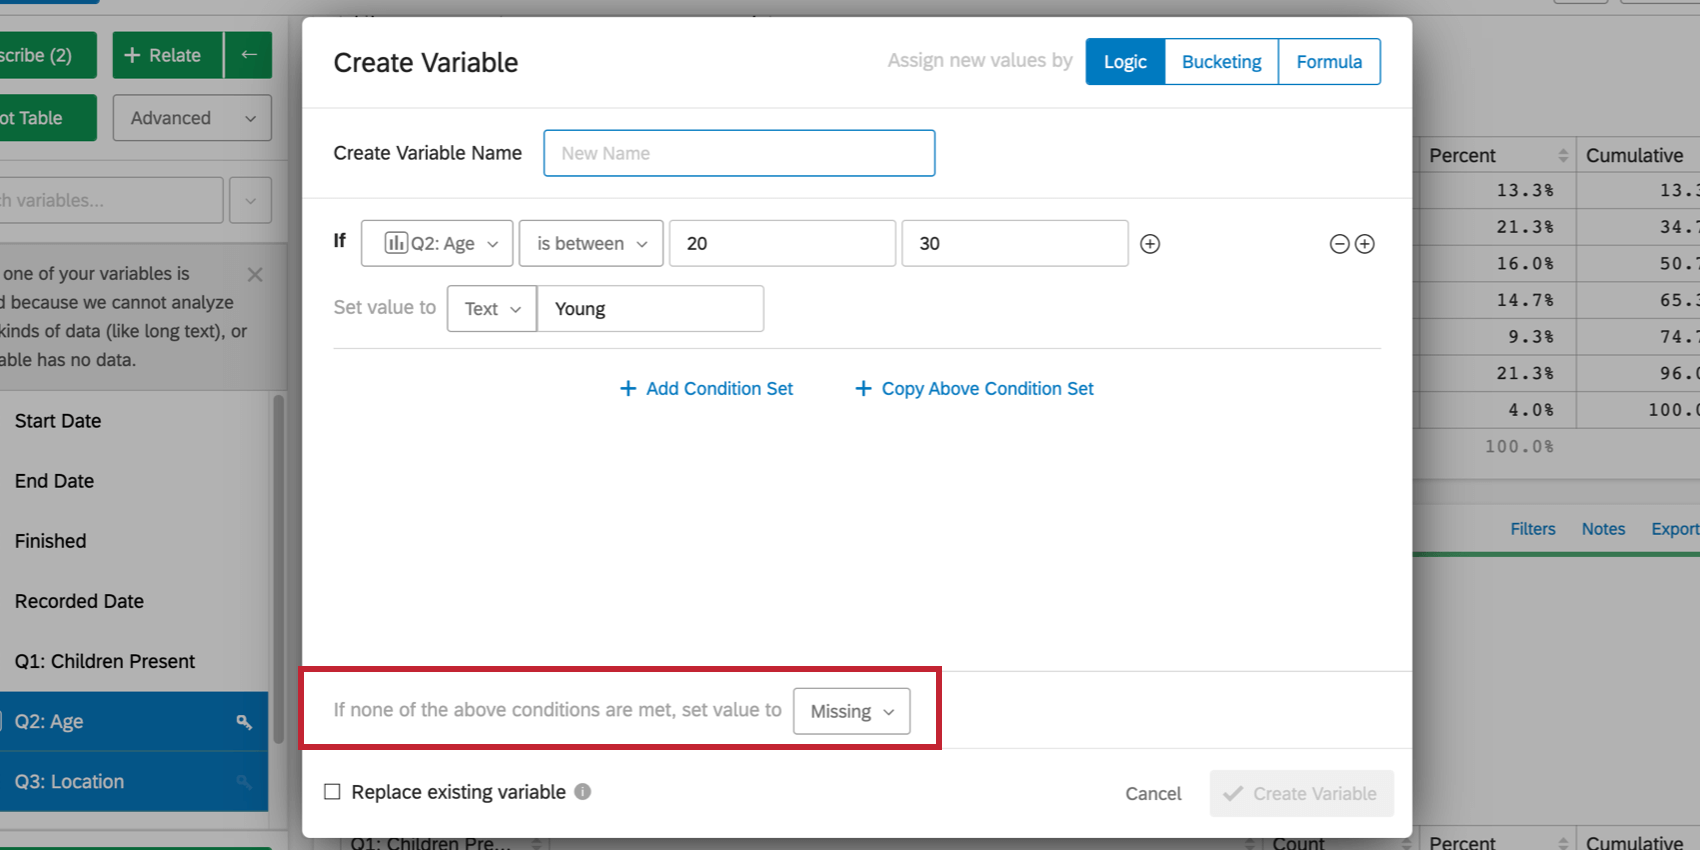
If you think that there will be cases where responses do not fall under one of the specified logic conditions, you can set a specific value for these cases by selecting an option next to If none of the above, set value to at the bottom of the menu. Like the other values for the variable, this value can be set manually or from an existing variable. By default, this is set to Missing, meaning that responses that do not fall under one of the logic conditions will be left blank for this variable.
Bucketing
Creating a variable using the bucketing option allows you to group values from an existing variable together. For example, you may wish to group specific age ranges into categories, such as 1-18 = Underage, 18-25 = Young, etc. A new variable will be created that contains these new groups.
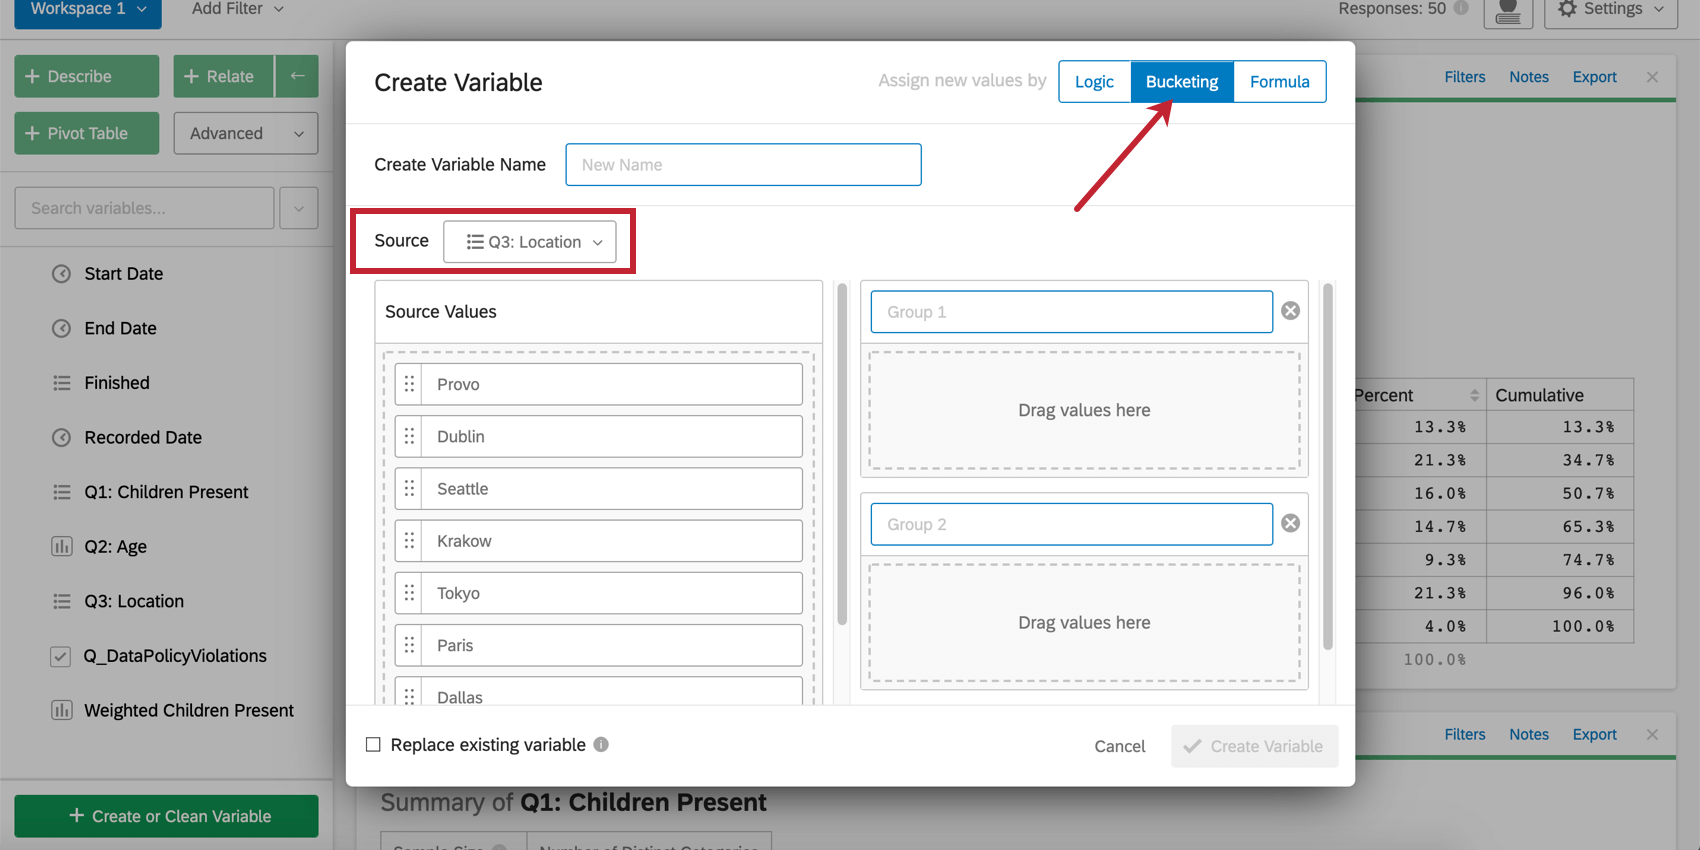
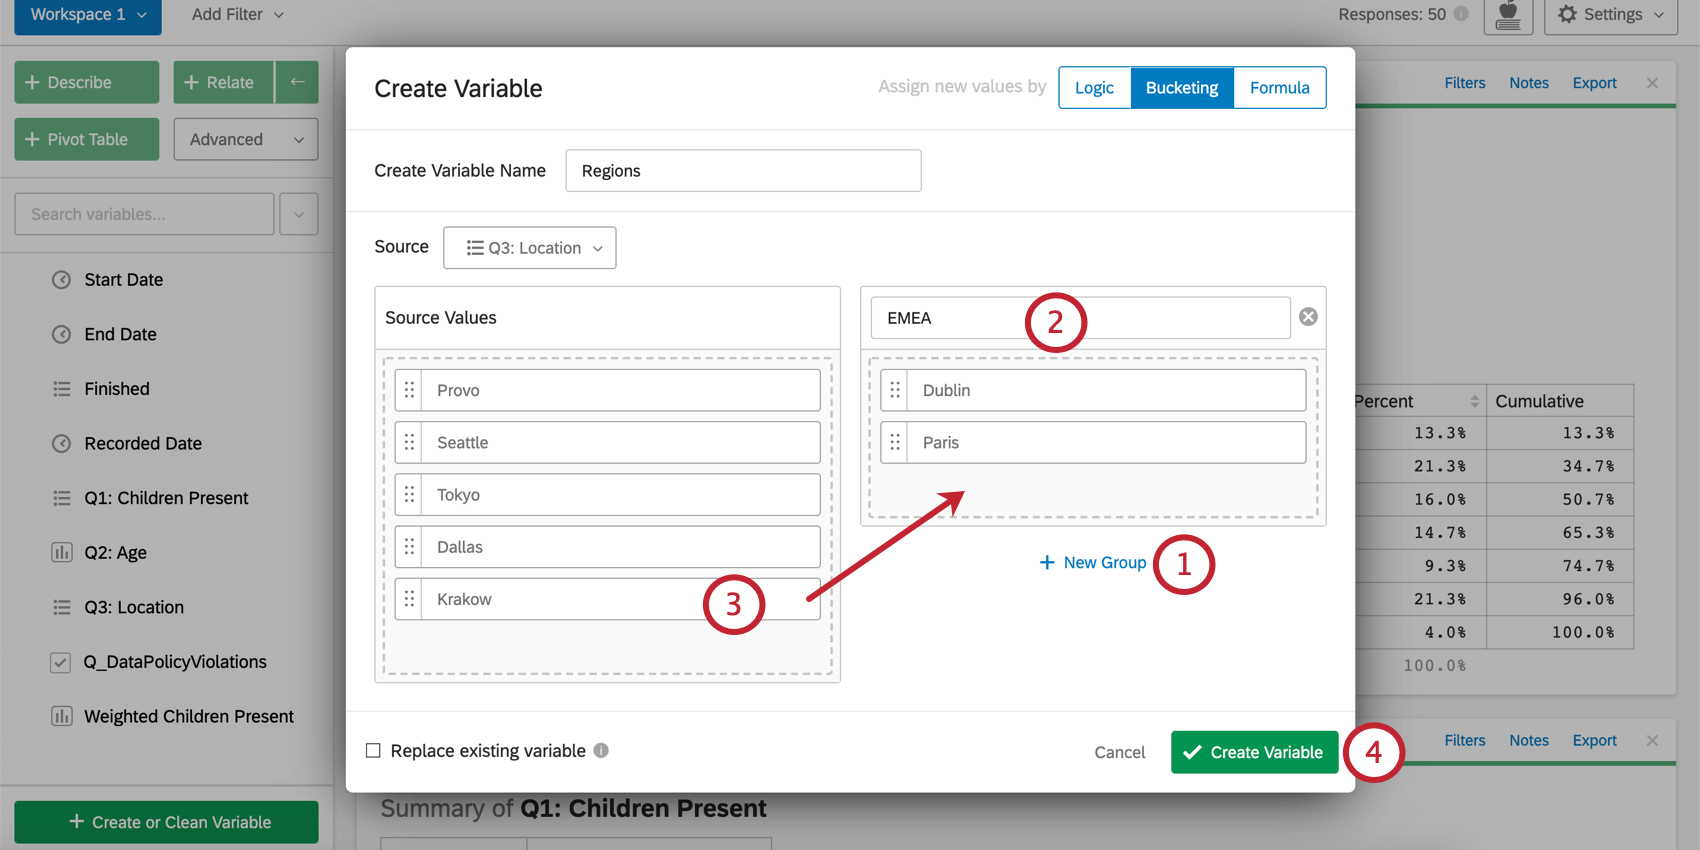
To bucket a variable, select Bucketing in the menu. Select the variable you would like to bucket from the Source dropdown.
For category variables:
- Add the desired number of buckets by clicking New Group. Buckets can be removed by clicking the “x” on the right side of the bucket.
- Name the buckets. The bucket names will be the values of the new variable.
- Drag the existing categories into the desired groups.
- When you’re finished, click Create Variable. The new variable will appear in the variable pane.
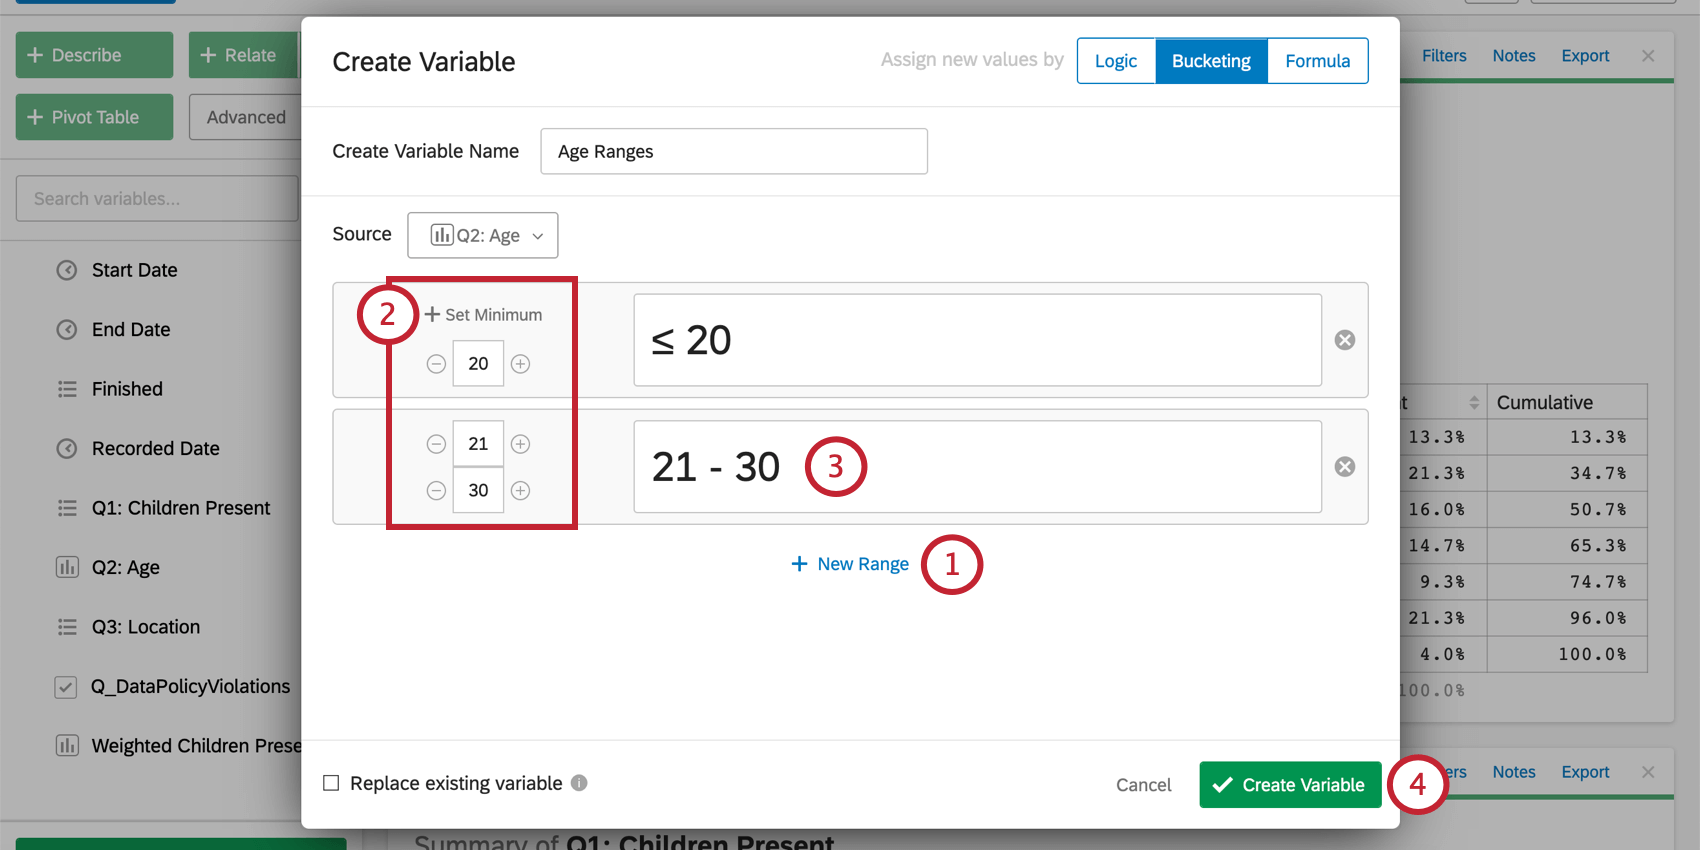
For number variables:
- Add the desired number of buckets by clicking New Range. Buckets can be removed by clicking the “x” on the right side of the bucket.
- Set the minimum and maximum numerical value for each bucket.
- The names of your bucket will adjust to match the numerical ranges, but you can also enter whatever name you’d like here. The bucket names will be the values of the new variable.
- When you’re finished, click Create Variable. The new variable will appear in the variable pane.
Formula
Selecting the Formula option in the Create Variable menu allows you to create or update variables based on a mathematical formula. For example, if you collected a survey participant’s weight and height, a formula could be used to calculate their BMI (Body Mass Index).
To create a new variable based on a formula:
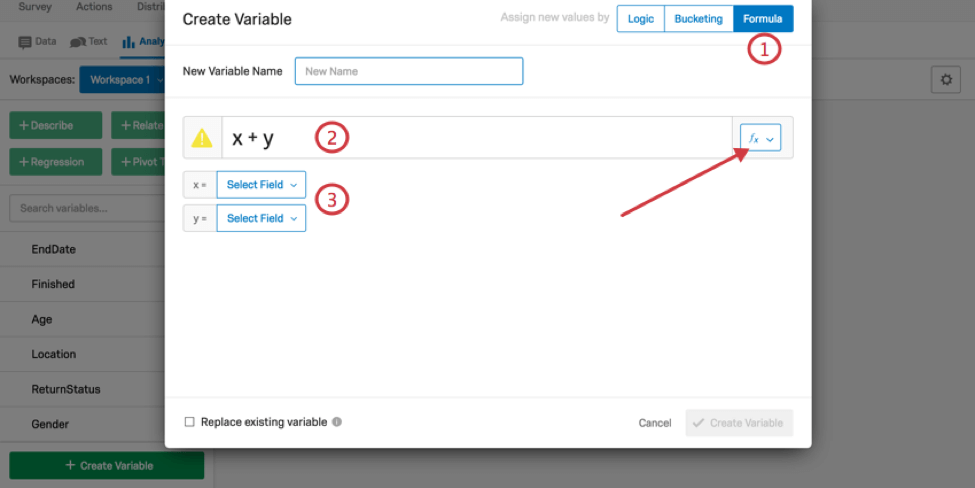
- Click Formula in the Create Variable menu.
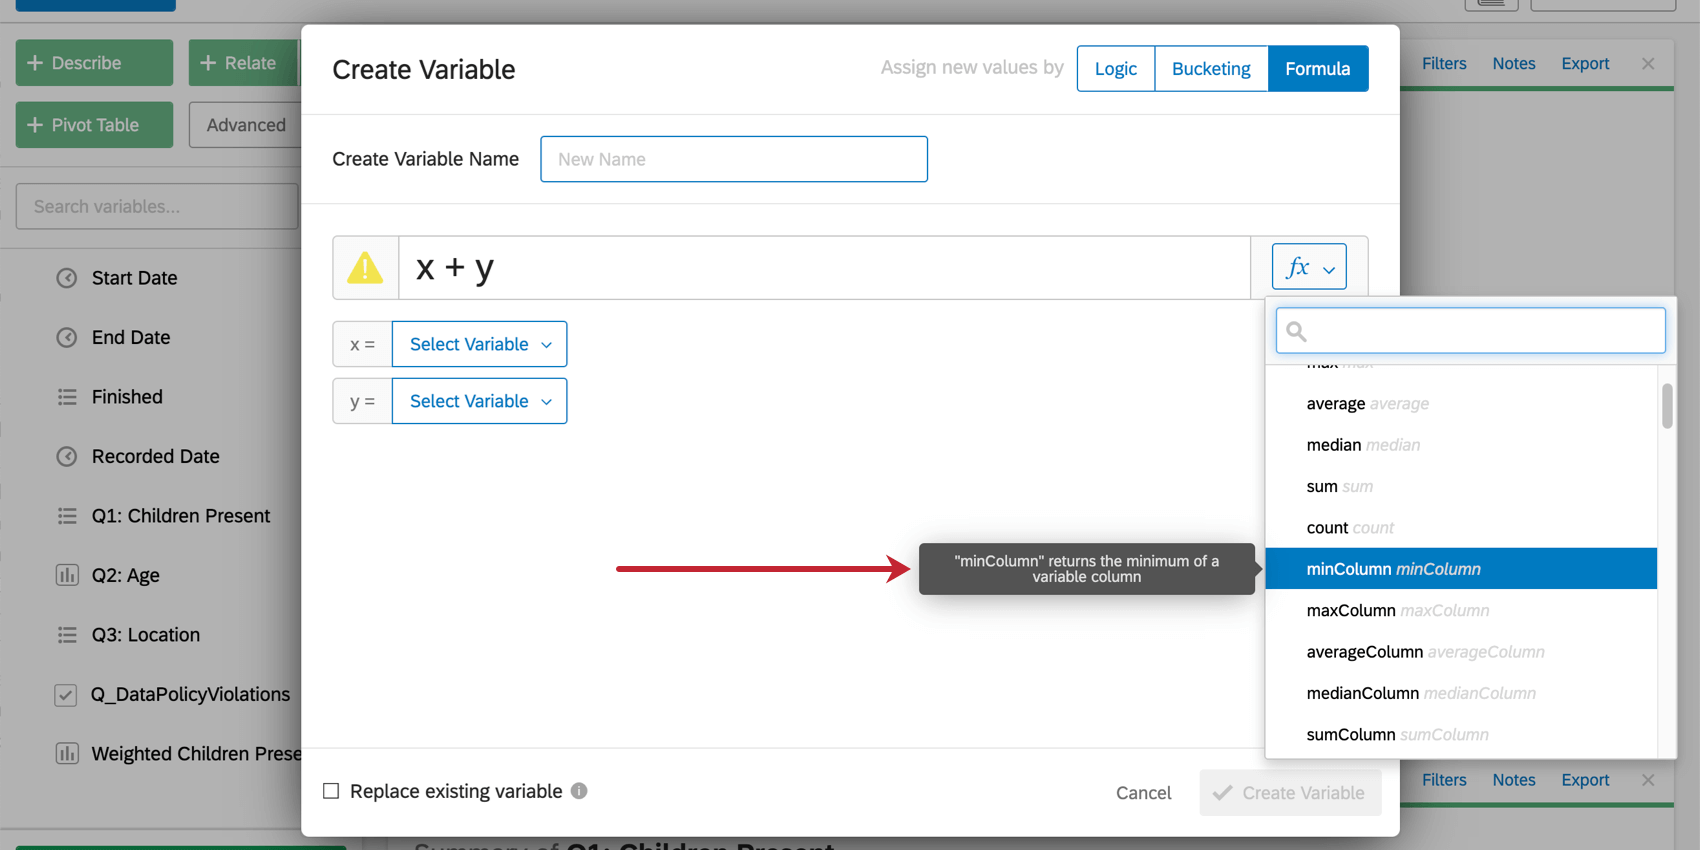
- In the formula box, input your desired formula (e.g., for BMI, the formula would read: X/(Y*Y)). Alternatively, click the f(x) function button to the right of the formula editor to add a built-in function.
- For each variable you created in your formula, select the variable from your dataset you would like to use (e.g., X = body weight and Y = height).
- When you’re finished, click Create Variable. The new variable will appear in the variable pane.
More details on the specific functions available in Stats iQ can be found in the next section.
Details on Formulas in Stats iQ
In addition to basic statistical and mathematical functions available in the Formula tab of the Create Variable window, Stats iQ includes a range of other specialty functions to help extract specific data from variables. This section is a reference that lists and briefly describes how some of the more advanced functions operate on the data.
- extract: This function extracts a whole number from the beginning of the variable, e.g. “1-Low” would become “1” when this function is applied.
- extractInner: This function extracts a whole number from the inside of a variable, e.g. “Detractor 5 – Cleanliness” would become “5” when this function is applied.
- extractContinuous: This function extracts a continuous number from the beginning of a variable, e.g “1.53 – Good” becomes “1.53” when this function is applied.
- extractGreedy: This function extracts a whole number from anywhere in a variable, e.g. “prefix 1 suffix” becomes “1” when this function is applied.
- parseDuration: This function parses the duration in seconds from an HH:MM:SS timestamp, e.g. “48:55:33” becomes “176,133 seconds” when this function is applied.
- fill: This function returns the specified variable where blank values are replaced with a specified value, e.g. fill(x,1) will replace blank values in x with 1. Values from other variables can also be used by creating a new identifier, e.g. fill(x,y) will replace blank values in variable x with values from variable y.
