Grouping Mentions in a Case
About Grouping Mentions in a Case
You can group related mentions together using a case. For example, if a customer contacts you about an issue on both Twitter and Facebook, you can group these messages together so that the agent resolving the customer’s issue has context about each time the customer reached out. The agent can then take actions on the case that apply to all mentions in the case.
You can create cases using 2 methods:
- Manually: Manually create a case based on mentions in your inbox.
- Automatically: Set up rules that automatically assign mentions to cases based on the criteria you define.
Manually Creating a Case
- While in the Inbox, click the dropdown menu next to the filter bar.
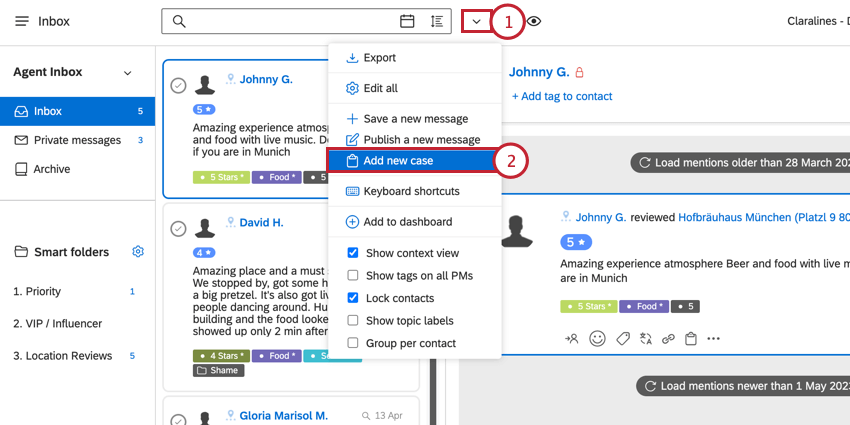
- Select Add new case.
- Choose the Topic to save the case in.
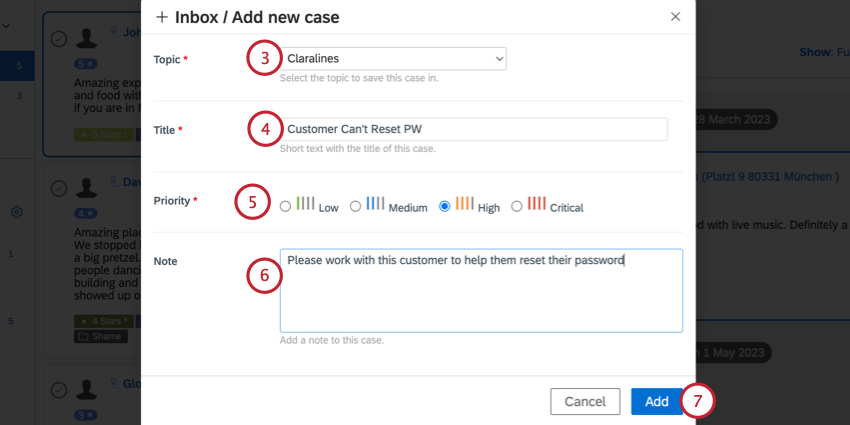
- Give the case a Title. A case number will be automatically added to the beginning of the case’s title to help differentiate similarly named cases.
- Choose the case’s Priority.
- If desired, add a note to provide context to the agent who will handle this case.
- Click Add.
Once you’ve created a case, you can find it in the Cases section of your Inbox.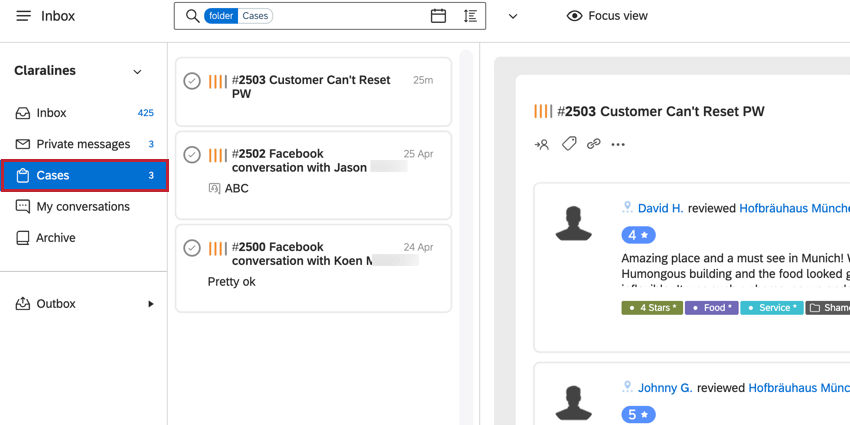
Automatic Case Creation
Account administrators can set up rules to automatically add mentions to cases when they appear in your inbox. There are a few considerations to keep in mind when deciding if you want to use manual or automatic case creation:
- Only private 1-on-1 conversations will be added to automatic cases (Facebook DMs, Twitter DMs, etc).
- A new case will be created for each unique author. If no new mention is added to an existing, unresolved case within 28 days, then new mentions received after that time period will be added to a new case.
- Resolving a case prevents new mentions from being added to that case. New mentions will create a new case instead.
- When replying to private messages, you will always reply to the most recent mention from the customer in that conversation.
To create your automatic case rule:
- Navigate to Account settings.
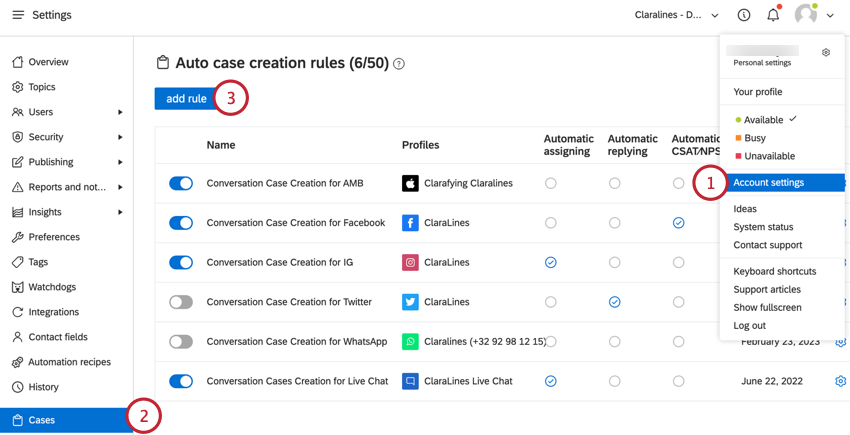
- Go to the Cases section.
- Click add rule.
- Give your rule a name so you can identify it.
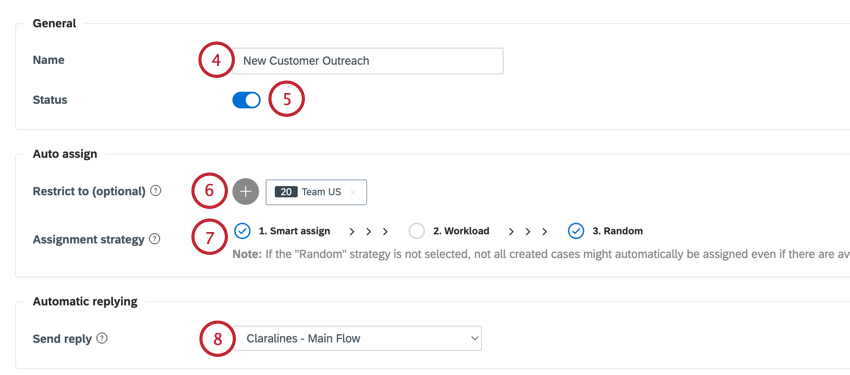
- By default, your rule will be active once you save it. If you want your rule to be inactive (so you can edit it later, for example), disable the Status toggle.
- If desired, you can restrict this rule so that cases are only assigned to certain teams or users. Click the plus sign ( + ) to select a team or user. You can have multiple users or teams here depending on your desired workflow.
- Choose the assignment strategy by checking the circle next to the strategies you want to use. Your assignment options include:
- Smart assign: If a user has previously handled a case by the same author, assign the case to that user.
- Workload: Assign the case to a user with the least amount of assignments.
- Random: Assign the case to a random user.
- Use the Send reply dropdown menu to choose a reply that will automatically be sent to the mention author when their case is created.
- Select a CSAT or NPS survey to send to the author when their case is resolved using the Send on case resolve dropdown.
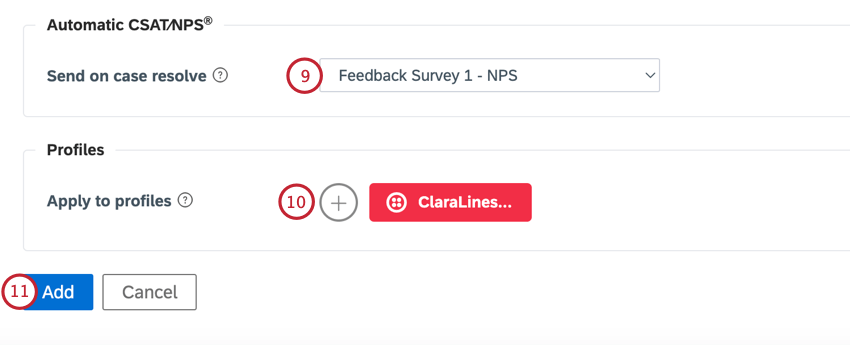
- Click the plus sign ( + ) to choose which profiles will apply for this case rule. Private message conversations from these profiles will automatically be grouped into cases. A case will be created per contact and profile, and new messages will be added to those cases as long as the case isn’t older than 28 days and hasn’t been resolved.
- Click Add.
Adding & Removing Mentions from Cases
To manually add a mention to a case, click the clipboard icon on the mention and then choose the case you want to add the mention to. The same mention can be added to multiple cases.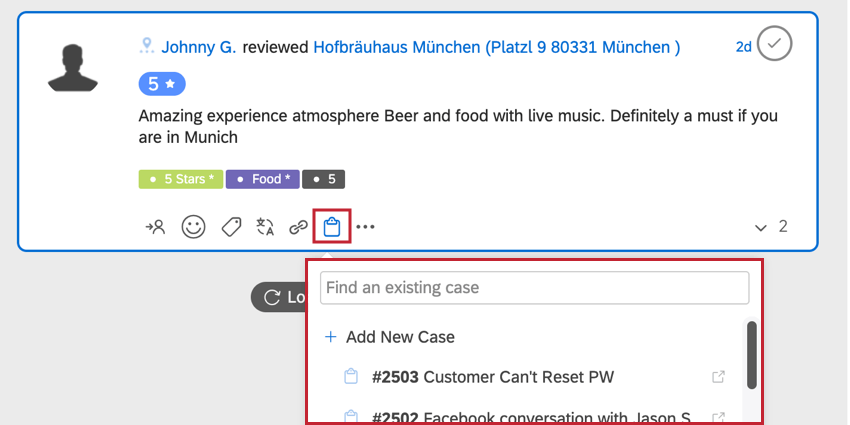
You can remove a case by clicking the clipboard icon and then unselecting the case from the list.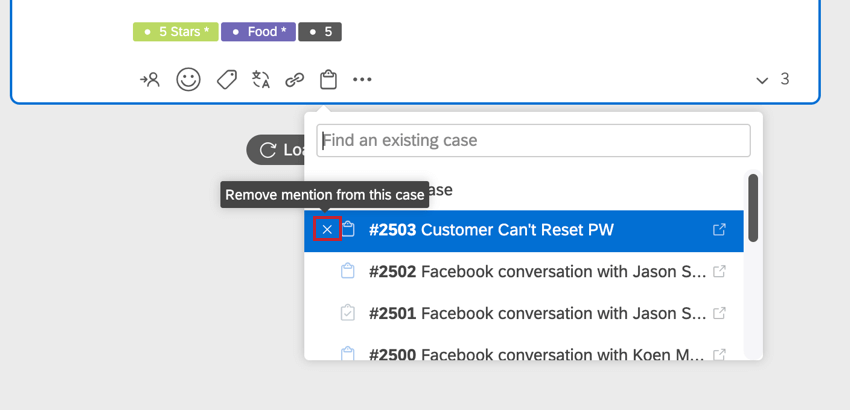
Taking Action on Cases
Click on a case in your inbox to open that case and take action on it. After opening a case, you can: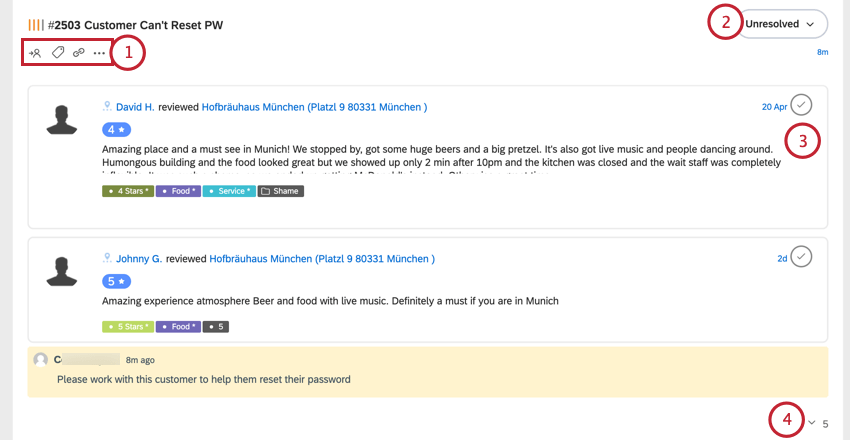
- Use the actions menu to take action on your cases. Any actions taken using this menu apply to all mentions in the case. From left to right, the options include:
- Assign: Assign the case to an agent.
- Tag: Apply or remove tags from the case.
- Permalink: Copy a link to this case. This is useful if you need to send the case to an agent or manager.
- Additional actions: Click the three dot menu to open additional actions. The actions in this menu include:
- Add note: Add a note to the case.
- Edit: Edit the details of the case, such as the associated topic, the case title, and case priority.
- Delete case: Deletes the case. Associated mentions are not deleted.
- Forward by email: Send an email with the details of the case.
- Change the status of the case. Your options include Resolved, Pending, and Unresolved.
Qtip: The status of your case does not have to match the status of the mentions in the case. A mention can be unresolved while the case is resolved, or vice versa.
- Change that status of individual mentions in the case.
- Click the arrow at the bottom of the case to see a historical log of actions taken on the case.