Date Ranges (QSC)
About Date Ranges
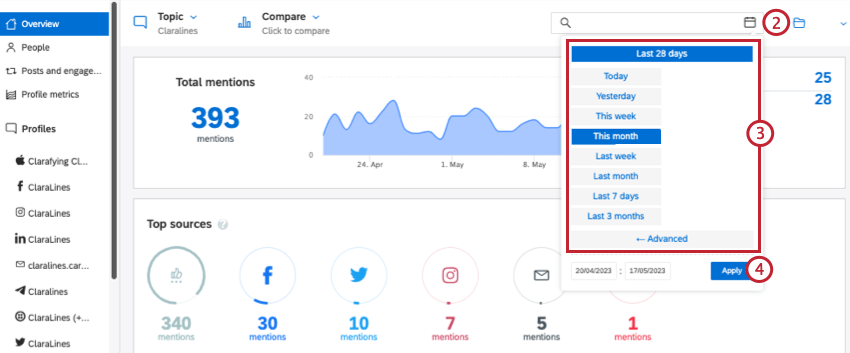
By default, Qualtrics Social Connect shows data from the last 28 days. You can change the date range within different parts of the platform, either to a preset or custom date range.
Example: Your agent mentioned a customer interaction that occurred yesterday that they want to review with you before responding to the customer. To find this mention you can adjust the date range on your inbox to “Yesterday”, so that only mentions published yesterday will show up in your results.
Selecting a Date Range
To change the date range of the data displayed in a specific page, follow these steps:
Custom Date Ranges
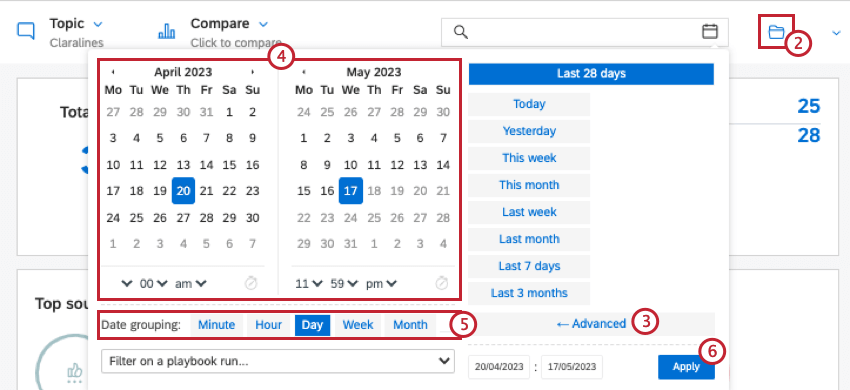
If none of the preset date ranges work for your data, you can set a custom date range.
- Navigate to the page you want to view.
- Click the calendar icon in the top right corner.

- Click Advanced.
- Configure your custom date range. You can select custom dates and hours.
- Select how you want to group your dates. You can group your data by month, week, day, hour, or minute.
Qtip: Date grouping in minutes can only be used when your date range is limited to a single day.
- Click Apply.
