Contact Fields (QSC)
About Contact Fields in Qualtrics Social Connect
Social Connect allows you to save information about the customers who contact you. You can create custom contact fields to store extra information about the customer. This page covers the default contact fields and how to create custom contact fields.
Viewing and Editing Contact Information
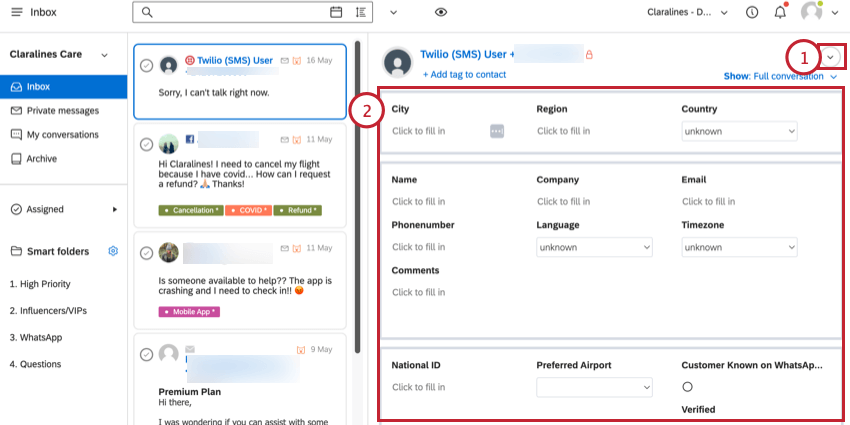
You can view and edit the contact information associated with a customer’s mention when viewing the mention in the inbox.
- Click the Contact details dropdown arrow in the top right corner of the mention.
- The contact’s information will appear. Change any values as needed.
Default Contact Fields
The following contact fields are included by default and cannot be modified (you can still edit a specific contact’s value for one of these fields):
- City
- Region
- Country
- Name
- Company
- Phone Number
- Language
- Timezone
- Comments
Custom Contact Fields
This section covers how to create your own custom contact fields.
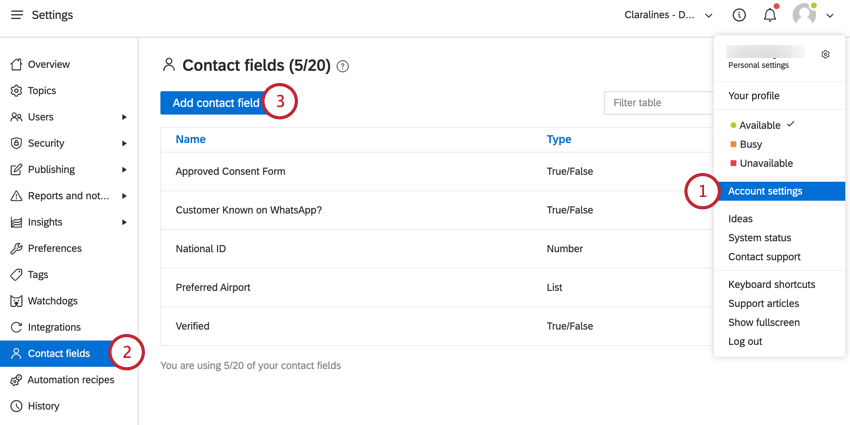
- Click the user icon in the top right corner and click Account settings.

- Go to Contact fields.
- Click Add contact field.
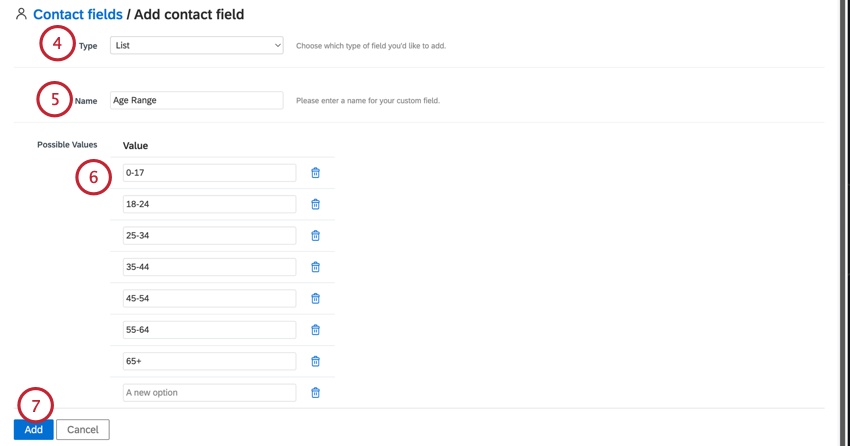
- Choose the Type of field you want to add. The field type determines what an agent needs to enter for the field when updating a contact. The available field types include:

- Text: Allows the agent to type a text value.
- Number: Allows the agent to type a numeric value
- List: Allows the agent to choose a value from a list of options.
- True/False: Allows the agent to check a box (if true) or uncheck a box (if false).
- Give your field a Name.
- If adding a list field, enter the Possible values that you want to be available in the list. Lines for additional values will be added as you type. Click the trash can icon next to a value to remove it.
- Click Add.
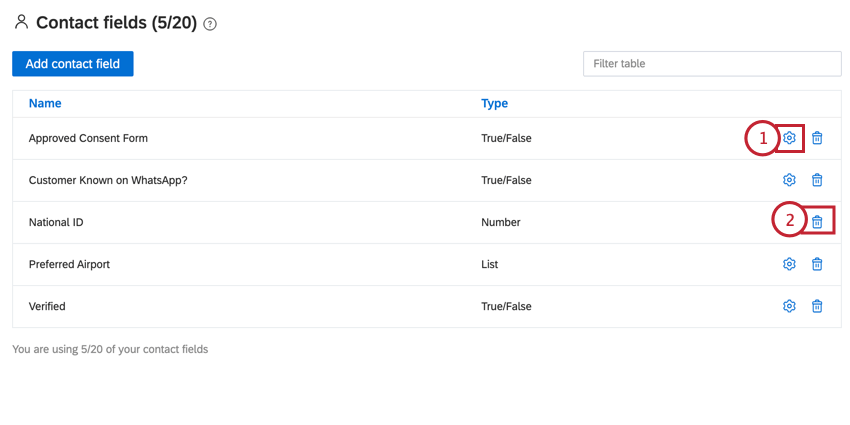
Editing & Deleting Custom Contact Fields
You can edit or delete a custom contact field at any time.


