Reports & Notifications Settings (QSC)
About Reports & Notifications Settings
You can be notified about a variety of actions that take place in Social Connect. The Reports and notifications section of account settings allows you to set up recurring dashboard reports, view notifications generated by automation recipes, and configure notification settings for publishing content.
To access these settings, go to Account settings and then click on the Reports and notifications tab.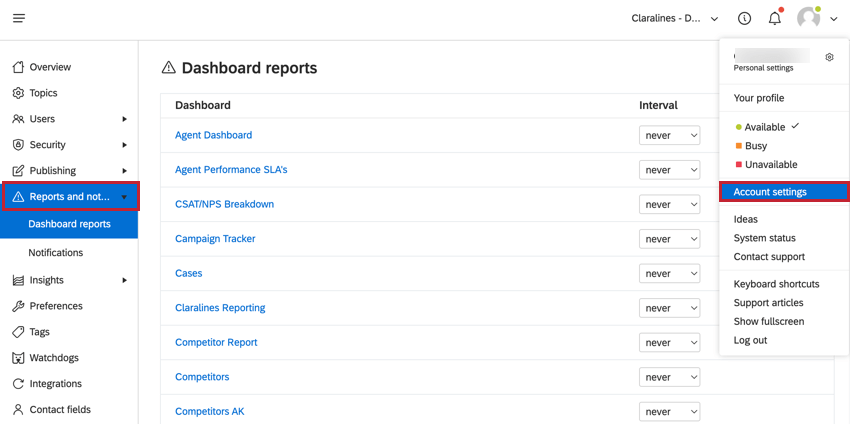
Dashboard Reports
You can receive a recurring email report about any of your custom dashboards. To set up the report:
- Go to the Dashboard reports section of Reports and notifications.
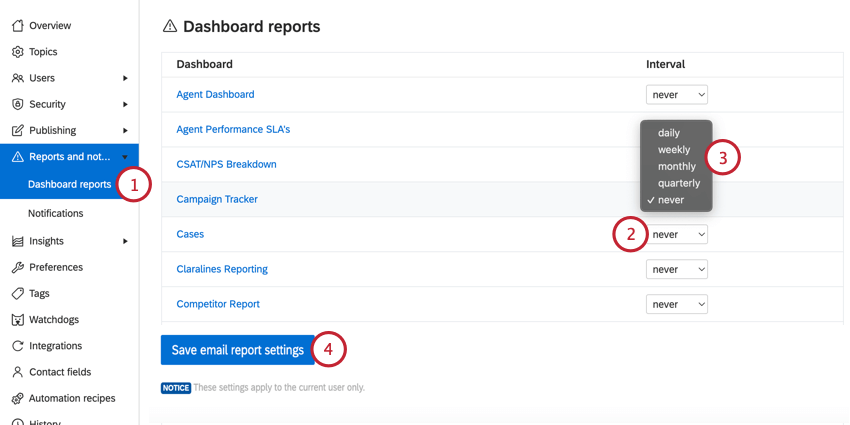
- Click on the dropdown menu in the Interval column next to the dashboard you want to add a report for.
- Choose how often you want to receive the dashboard report. Your options include:
- Daily: Receive an email report each day.
- Weekly: Receive an email report each week. You can choose what day of the week you receive the report.
- Monthly: Receive an email report each month. You can choose which day of the month you receive the report.
- Quarterly: Receive an email report once a quarter on the first day of the quarter (January 1, April 1, July 1, October 1).
- Never: Do not send an email report for this dashboard.
- Click Save email report settings.
Managing Dashboard Reports as an Administrator
If you are an account administrator, or have view and edit permissions for all dashboards in your user role, you can edit and review all of the report subscriptions for a given dashboard.
- Navigate to the Insights tab.
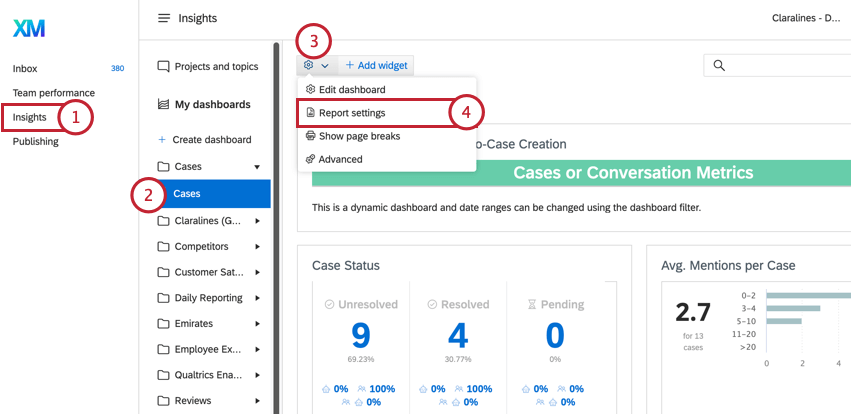
- Select the dashboard you want to manage.
- Click the gear icon.
- Select Report settings.
- To stop sending a report to a user, click the trash can icon next to the user.
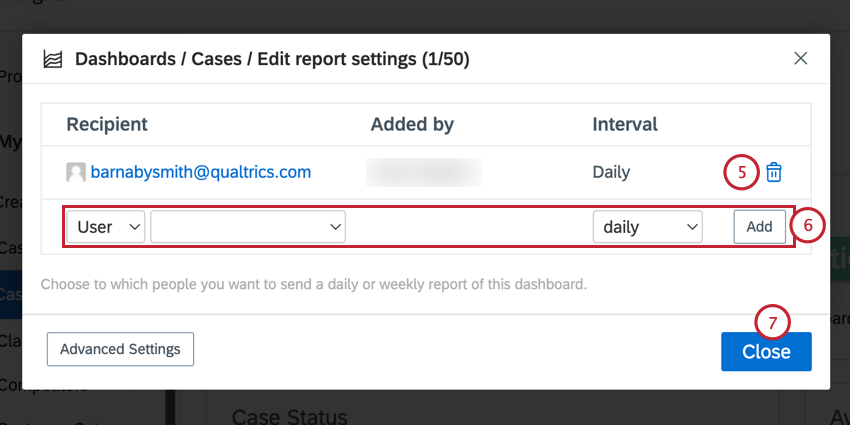
- To start sending a report to a user, either select User and then the user’s username, or select Email and enter their email address. Then, choose how often they should receive the report. Once finished, click Add.
- Click Close to save your changes.
Notifications
The Notifications section of Reports and notifications allows you to view notifications created by automation recipes and configure notifications for publishing events. This page is broken into 2 sections which are outlined below.
Automation notifications
The Automation notifications section shows you any notifications that are created as part of an automation recipe. Click the gear icon to edit the automation recipe. Click the trash can icon to delete the automation recipe.
Publisher notifications
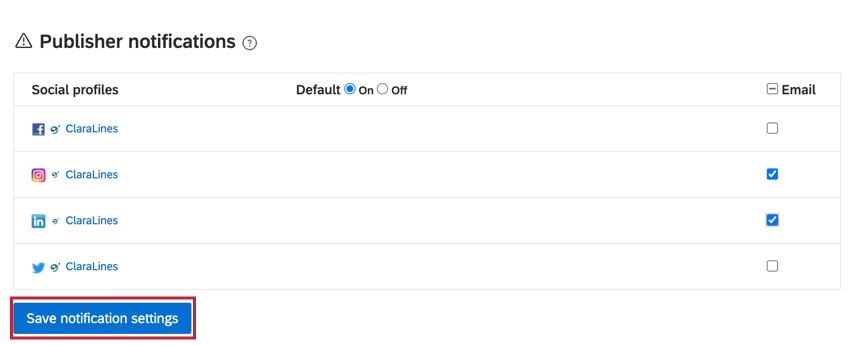
The Publisher notifications section allows you to configure notifications for publishing events for your different social profiles. A notification will be sent if a post is awaiting approval, or if a scheduled post failed to send.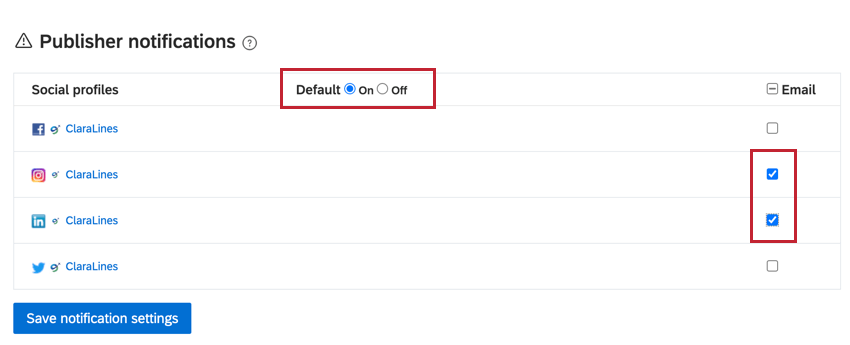
To enable publisher notifications, change the Default setting to On. Then, check the box next to the social profiles you want to be notified about.