Edição de campos personalizados
O que há nesta página
Sobre os campos personalizados
Você pode adicionar novas informações às respostas depois que elas já tiverem sido registrado. Você pode categorizar com base em itens como idade, datas ou determinadas respostas a perguntas, agrupar respostas em novas categorias, combinar respostas, calcular novas fórmulas e muito mais.
Qdica: para saber as etapas de criação desses campos, consulte as páginas de suporte vinculadas.
- Campos manuais: Adicione manualmente tags, datas, campos numéricos ou campos de texto às suas respostas.
- Campos com baldes: Classifique as respostas a uma pergunta em grupos diferentes, permitindo novas oportunidades de geração de relatórios e limpeza de dados.
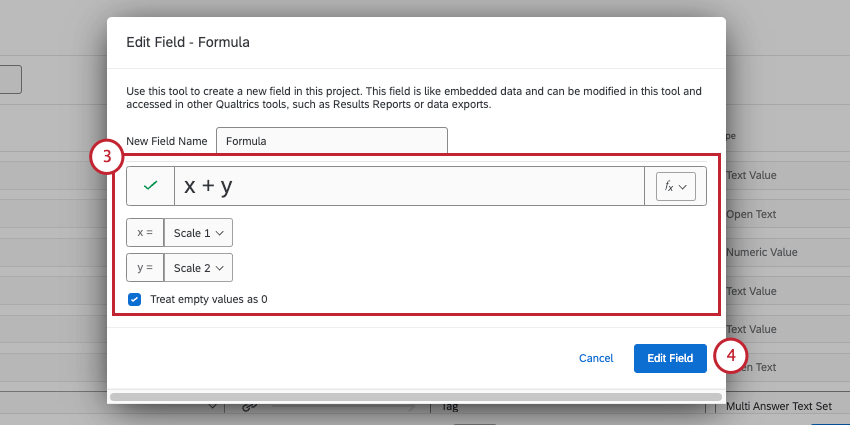
- Fórmulas: Calcule operações matemáticas com seus dados existentes.
- Combinado campos: Combinação de 2 ou mais campos em seu conjunto de dados, seja concatenando ou coalescendo respostas.
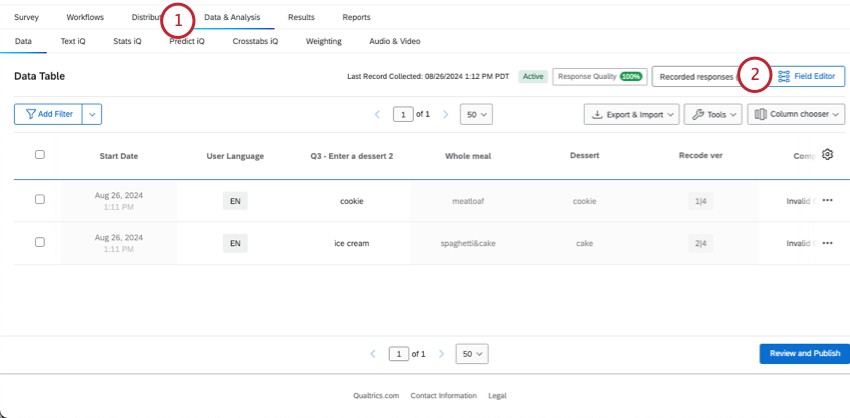
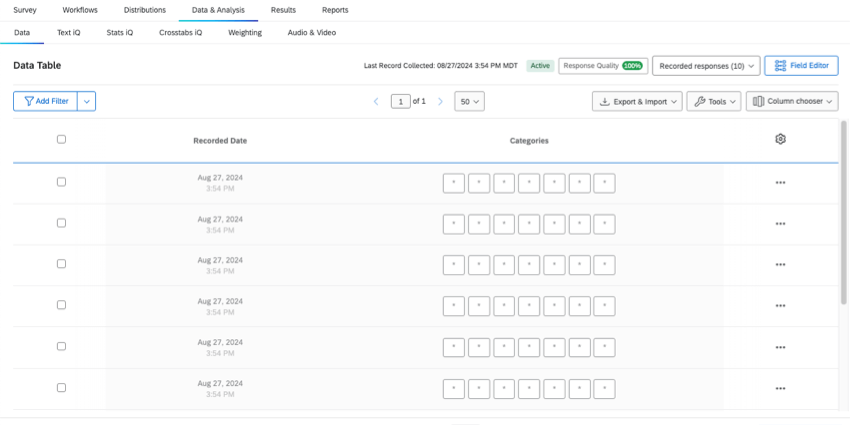
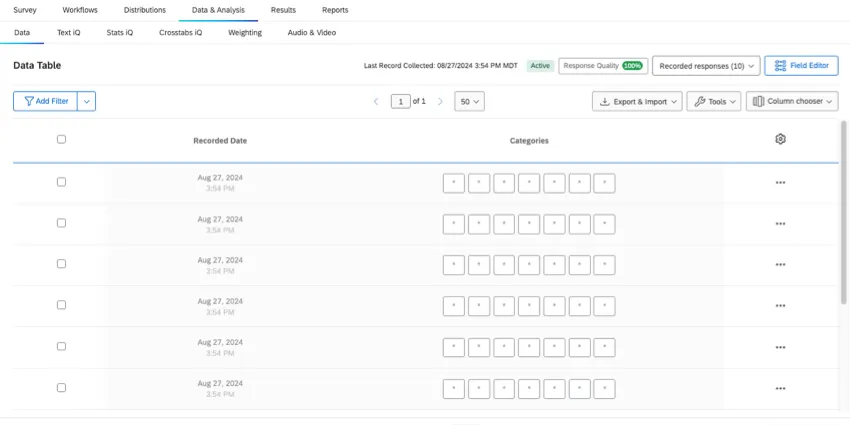
Os campos personalizados podem ser editados a qualquer momento no Field Editor em Data & amp; Analysis. No entanto, os tipos de edições que você pode fazer variam de acordo com o campo que você criou.
Qdica: os campos personalizados podem ser exportados com o restante de seus dados. Eles também podem ser usados em ponderação e relatórios. Se preferir a API, você poderá exportar seu conjunto de dados com campos personalizados incluídos se usar as chamadas Start Response Export, Get Response Export Progress e Get Response Export File.
Noções básicas sobre como editar campos
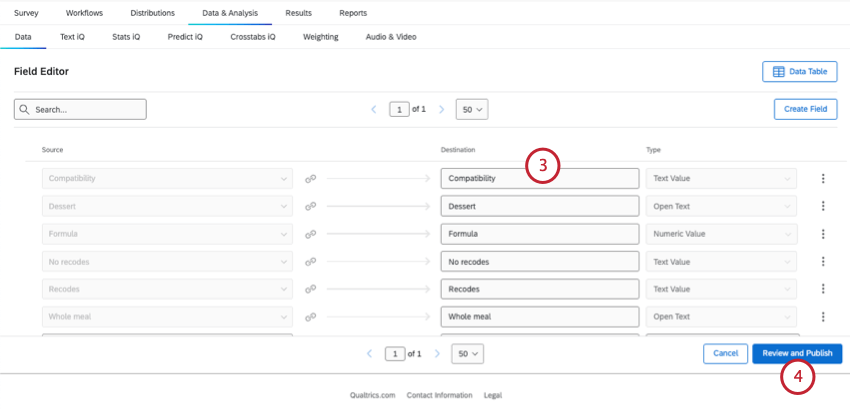
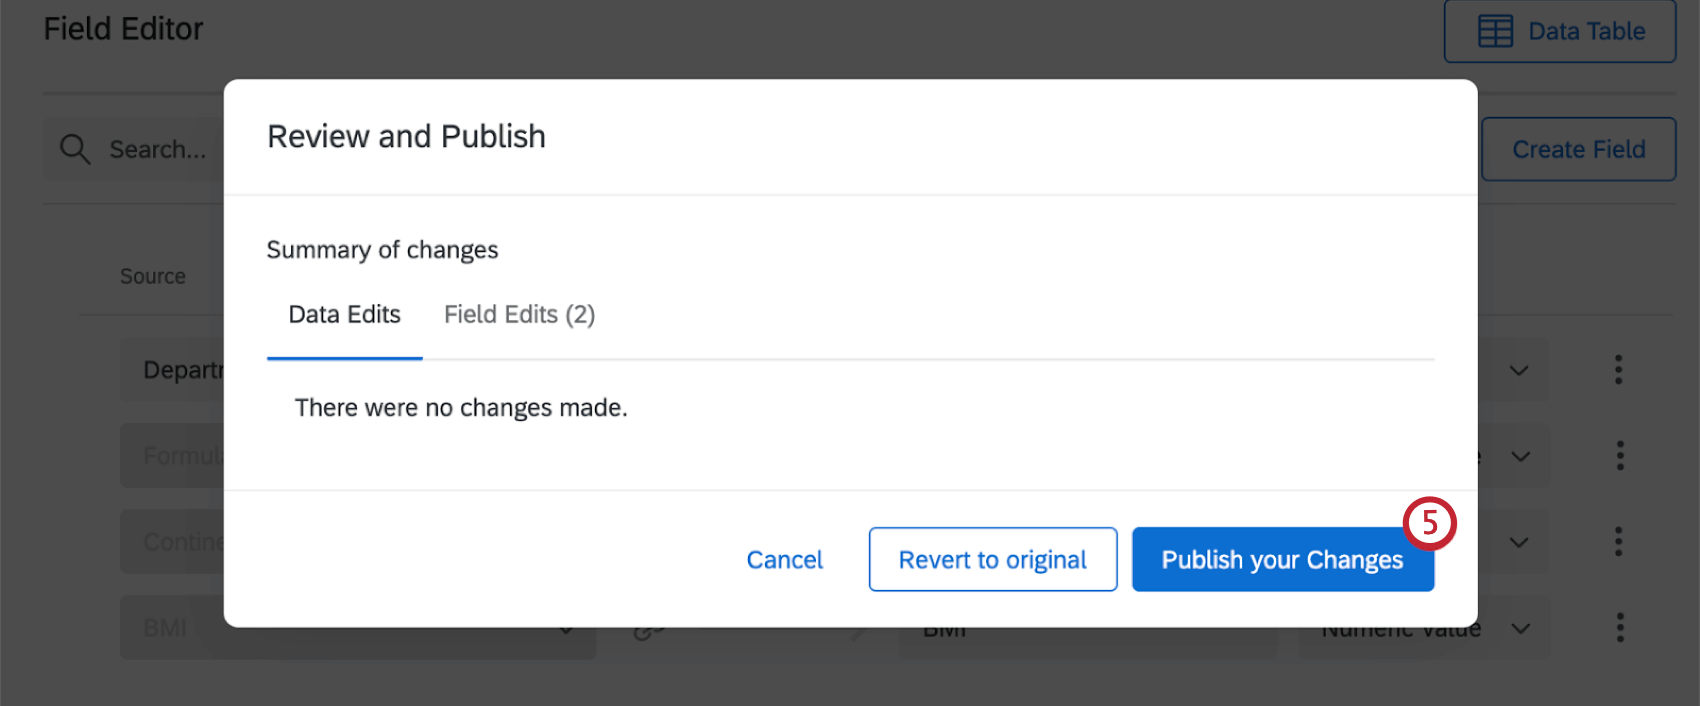
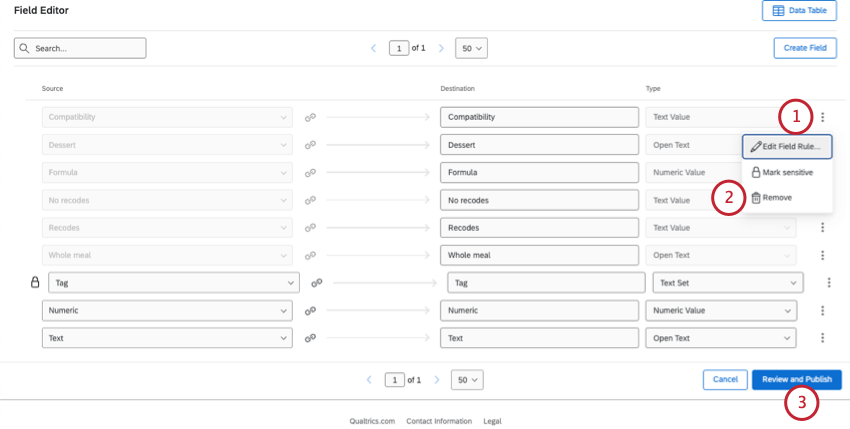
Independentemente do tipo de campo que estiver editando, você sempre poderá alterar o nome dele e deverá publicar suas edições.
Qdica: Lembre-se de que sempre é possível editar respostas do pesquisa depois que elas forem coletadas. No entanto, a edição da resposta com um link de retomada substituirá qualquer valor campo personalizado que você tenha adicionado.
Edições que você pode fazer em cada campo
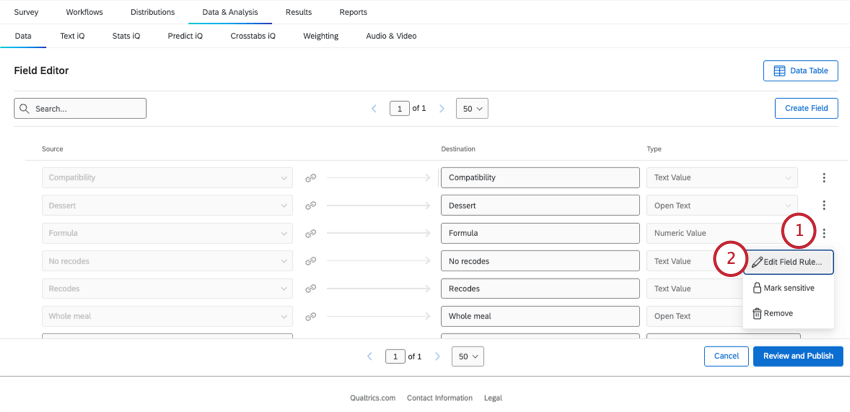
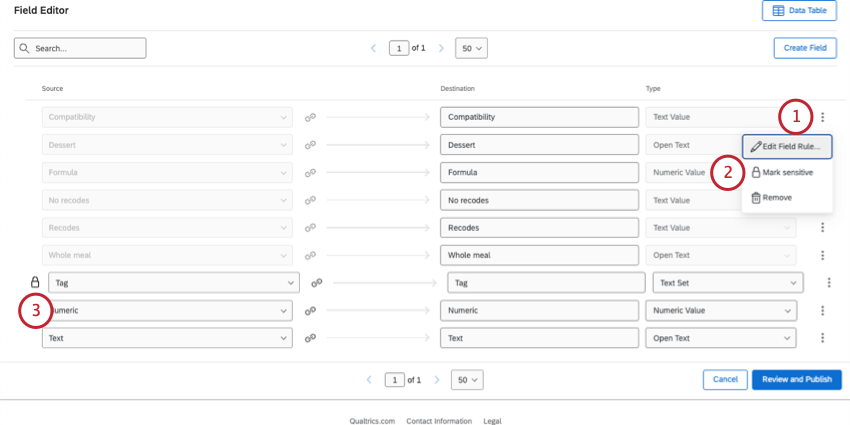
Para todos os tipos de campos personalizados, você pode:
- Editar o nome.
- Marcar um campo como sensível.
- Excluir o campo.
Somente para campos agrupados, de fórmula ou combinados, você pode alterar as regras.
Somente para campos manuais, você pode:
- Atribuir tipos de campo.
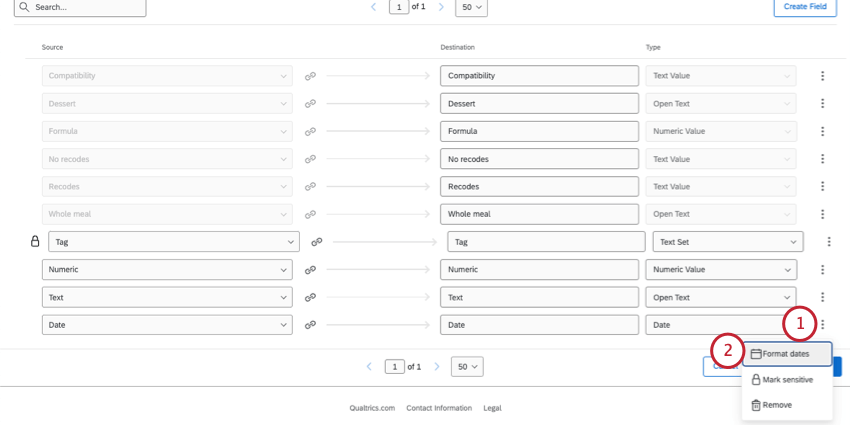
- Formatar datas( somentedatas ).
Modificação de regras para campos em blocos, de fórmula ou combinados
Você pode alterar a forma como os campos agrupados, de fórmula ou combinados calculam suas respostas.
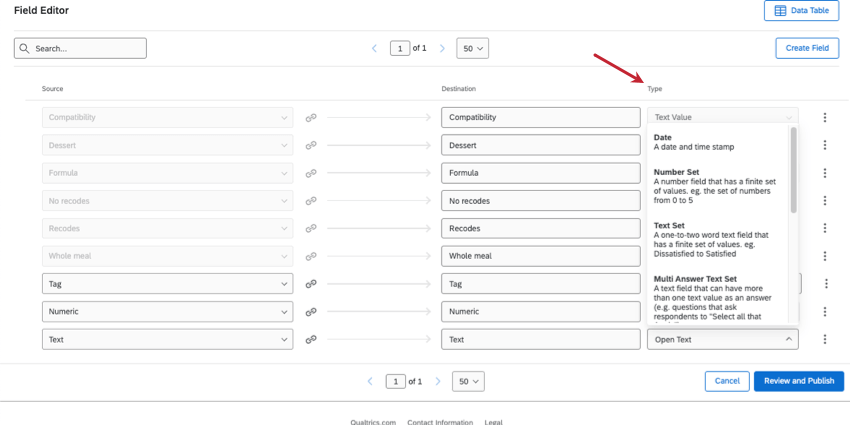
Atribuição de tipos a campos manuais
Atenção: Você só pode fazer essas edições em campos manuais, como data, numérico, texto e tags.
O “tipo” de um campo é o mesmo que seu formato de dados. Por exemplo, dados numéricos são muito diferentes de múltipla escolha, e ambos podem ser muito diferentes de feedback aberto. Por isso, o tipo de campo determina que tipo de edições você pode fazer nos dados e que widgets pode usar nos painéis de resultados.
Exemplo: Se o seu campo for um valor numérico ou um conjunto de números, você só poderá inserir números ao editar respostas a esse campo. Você pode tornar o campo Age numérico para garantir que todas as respostas estejam na forma de números.
Exemplo: Seu campo Age (Idade) está definido para o tipo de texto aberto. O texto aberto só é compatível com alguns widgets, como nuvens de palavras e marcadores de respostas; por isso, não é possível exibir as faixas etárias dos respondentes em um gráfico como a tabela simples.
- Esses tipos de campo são os mesmos que os do CX Dashboards. Para obter a definição de cada tipo de campo, consulte Tipos de campo.
- Para obter um guia sobre como combinar os widgets dashboard resultados com os tipos de campo, consulte Tipos de campo e compatibilidade de Widget.
Clique na coluna Type (Tipo ) para selecionar um tipo de campo diferente.

Formatação de datas
Para campos de data, você pode especificar um formato e um zona horário.
Qdica: se seus dados contiverem datas com formatos diferentes, você poderá adicionar vários formatos. Os formatos de data serão aplicados na ordem em que estão listados.

Qdica: você deve selecionar uma das opções de formato de data. Não é possível criar uma sintaxe de data personalizada.
Marcação de um campo como sensível
Às vezes, você pode querer ocultar alguns dados de relatórios ou painéis, como informações pessoais de entrevistados. Os campos marcados como confidenciais ficarão ocultos para os usuários com os quais você compartilha o pesquisa, desde que eles tenham a permissão Exibir Relatórios Exibir dados restritosdesativada. Veja mais sobre permissões de colaboração.
Quando os campos forem marcados como confidenciais, os usuários restritos não poderão ver esses dados no Data & Analysis.
Aviso: A marcação de campos sensíveis não afeta o que os usuários veem nos painéis ou relatóriosresultados. Se você não quiser que os colaboradores vejam determinados dados, recomendamos desativar completamente o acesso aos relatórios.
Você pode marcar qualquer tipo de campo personalizado como sensível.
Qdica: você pode marcar quantos campos forem sensíveis, conforme necessário.

Exclusão de um campo personalizado
Aviso: Depois que você excluir um campo, ele não poderá ser recuperado. Não exclua um campo a menos que tenha certeza absoluta de que deseja removê-lo permanentemente.
Perguntas frequentes
Posso editar ou adicionar informações a uma resposta depois de ela ter sido enviada?
Posso editar ou adicionar informações a uma resposta depois de ela ter sido enviada?
If you would like an individual to retake their response instead, you can find instructions for this on the Retake Survey Link support page.
Agora que tenho meu novo campo personalizado, como faço para adicionar respostas?
Agora que tenho meu novo campo personalizado, como faço para adicionar respostas?
Meus campos personalizados não têm dados e dizem "Inválido" O que aconteceu?
Meus campos personalizados não têm dados e dizem "Inválido" O que aconteceu?
Isso é ótimo! Obrigado pelo seu feedback!
Obrigado pelo seu feedback!