Message Triggers
About Message Triggers
Message triggers send out an email when a contact is added to a chosen mailing list. This email can go to any colleague you want, regardless of whether they have a Qualtrics account, or the contact themselves.
Setting Up Message Triggers
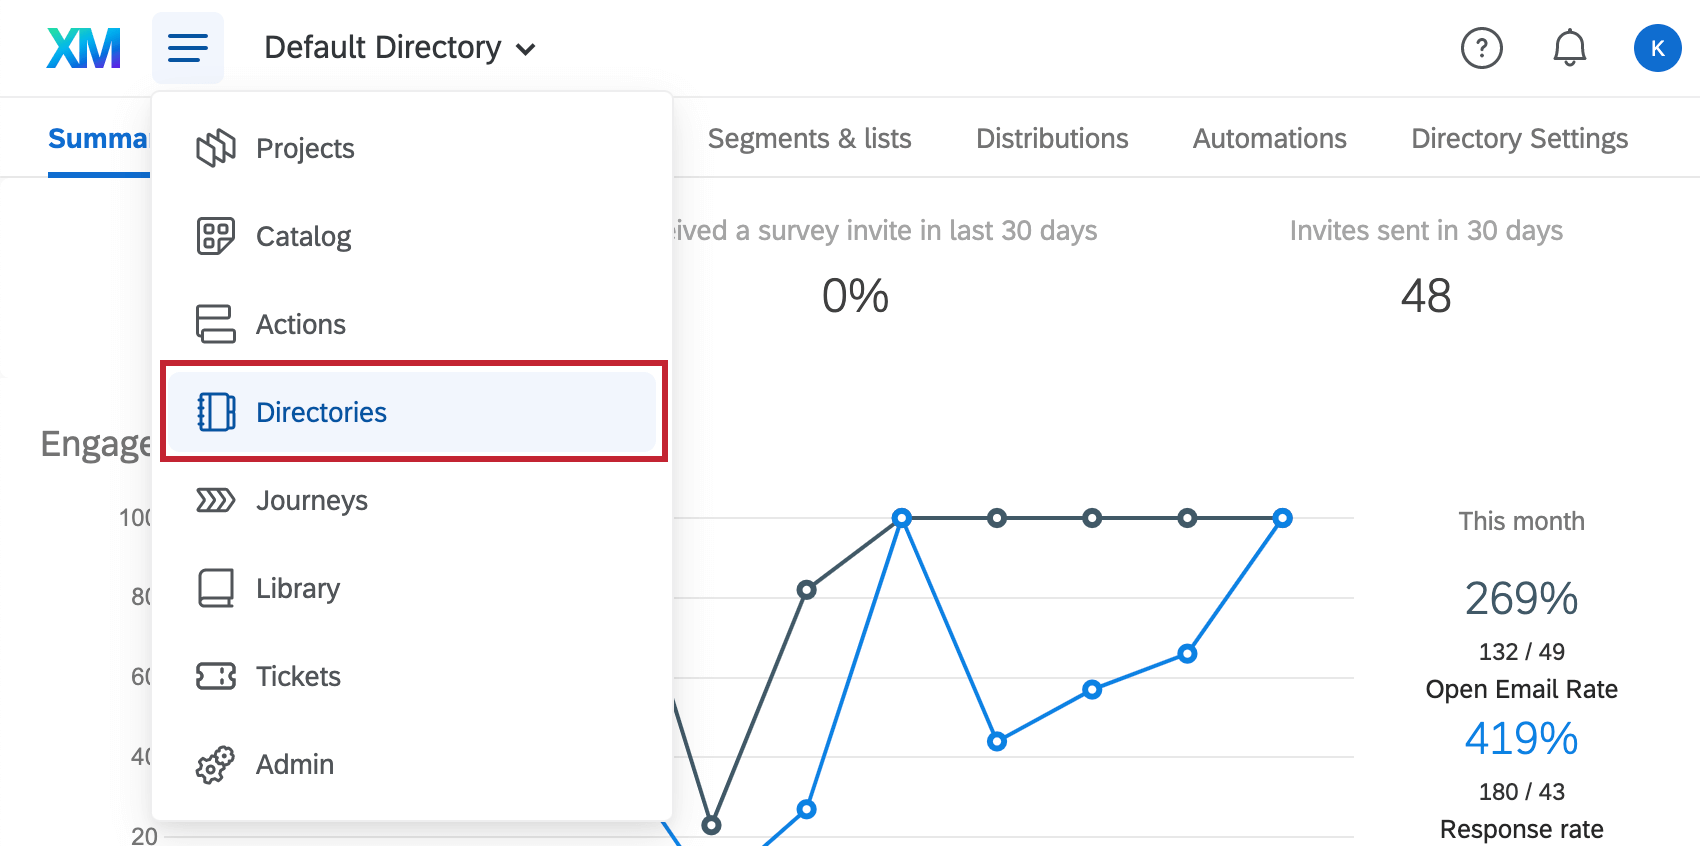
- Navigate to your Directories.
- Go to the Segments & lists tab.
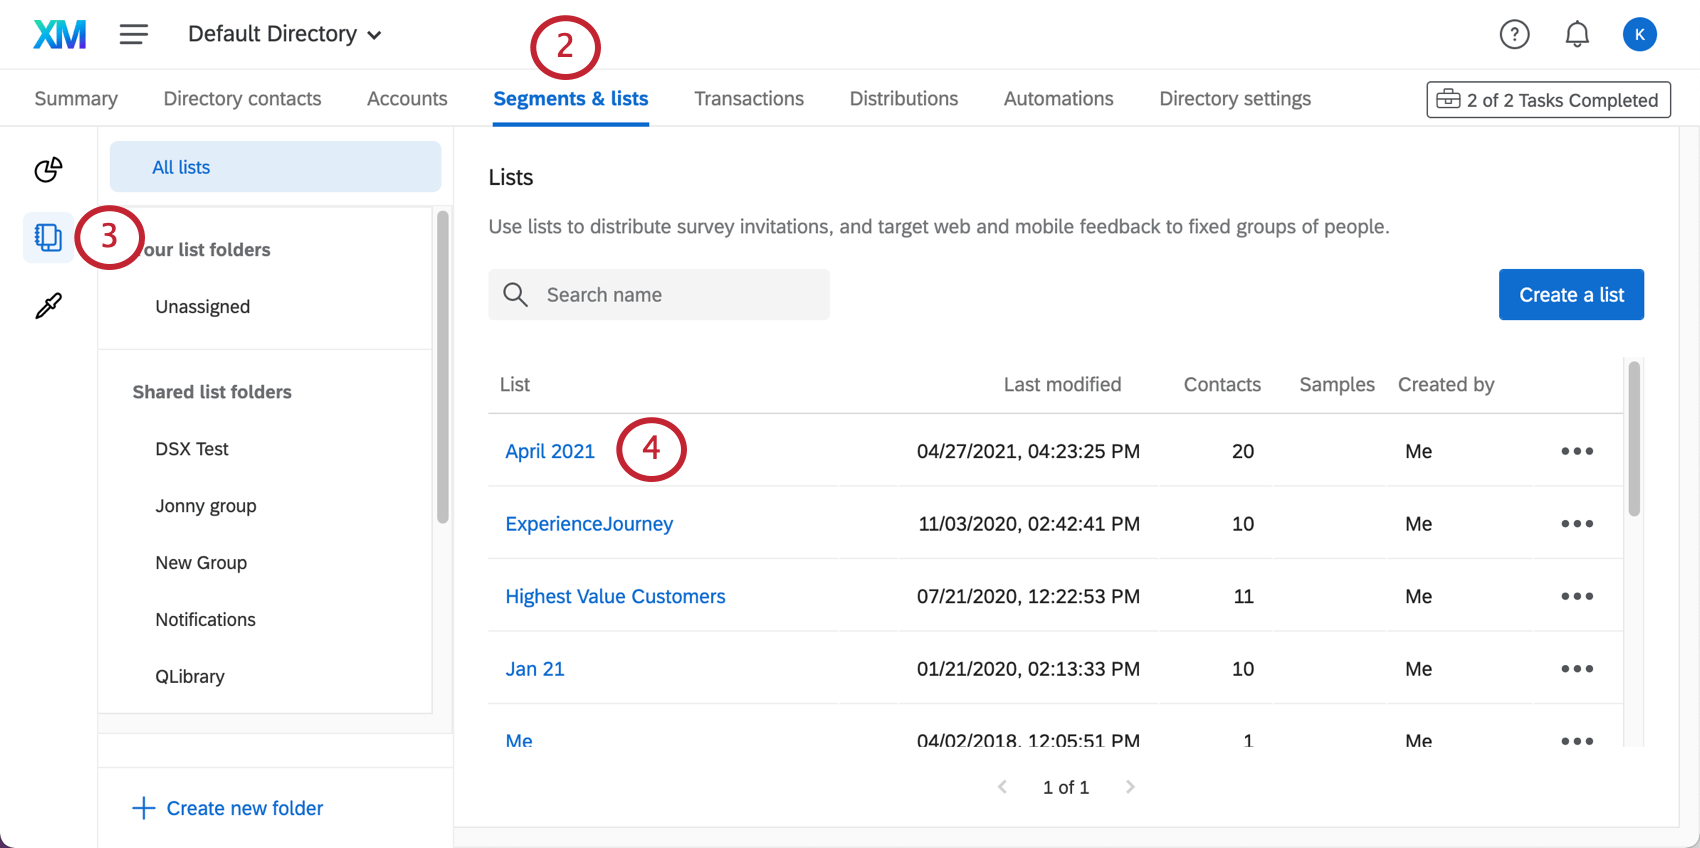
- Select Lists from the left.
- Choose a mailing list.
- Click List Options.
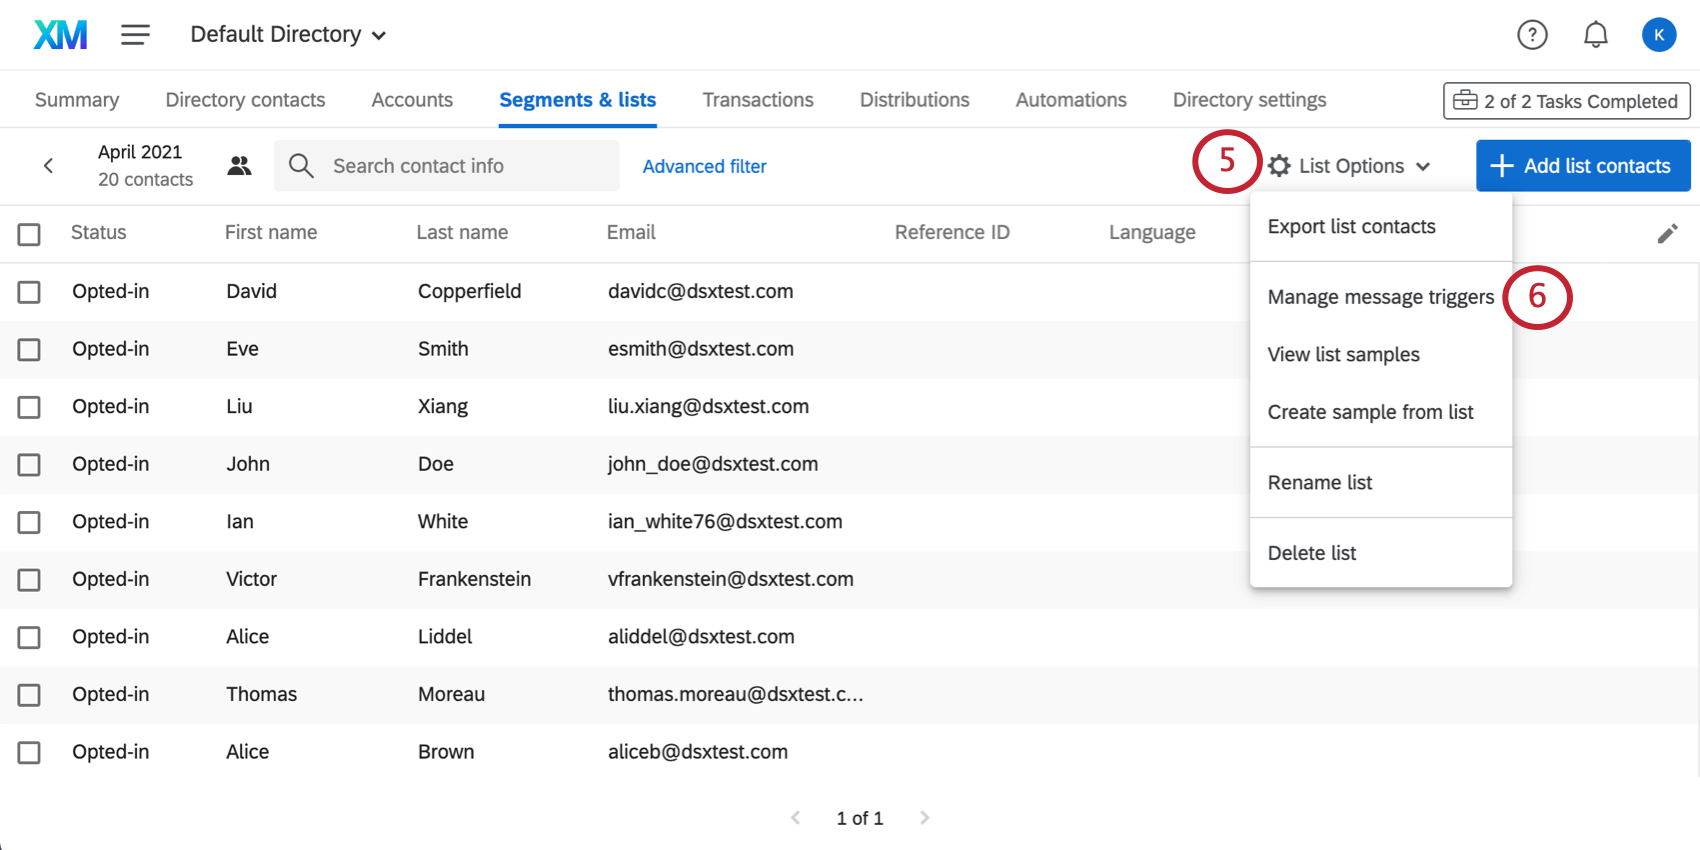
- Select Manage message triggers.
- Click Create New Trigger.
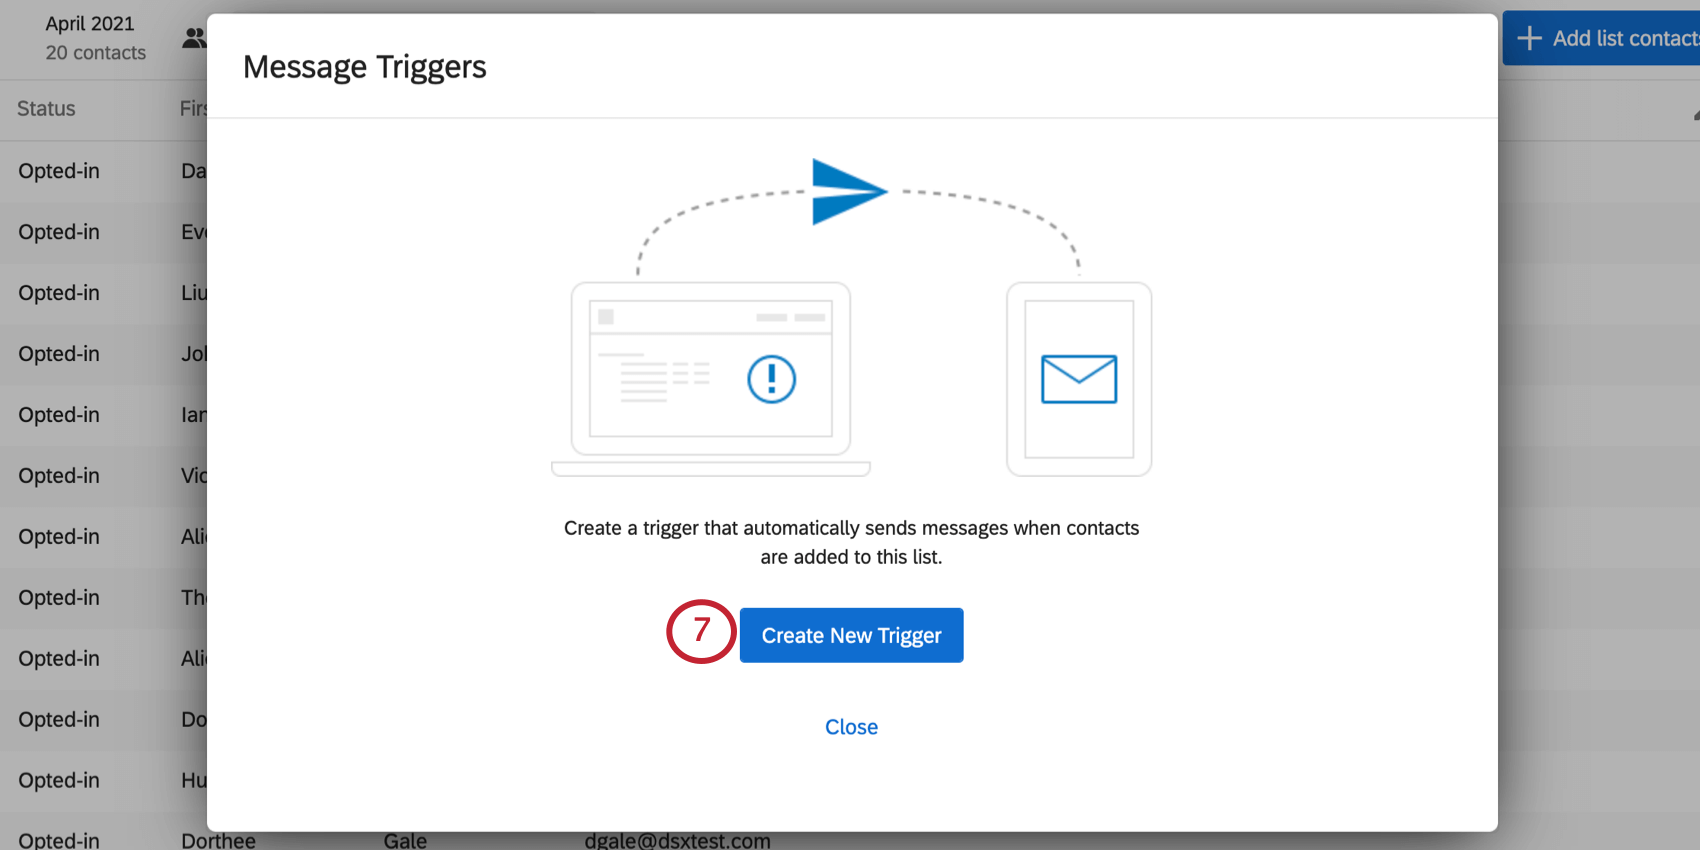
- Determine the condition that will trigger the message. At this time, only adding a contact to a list can be used.
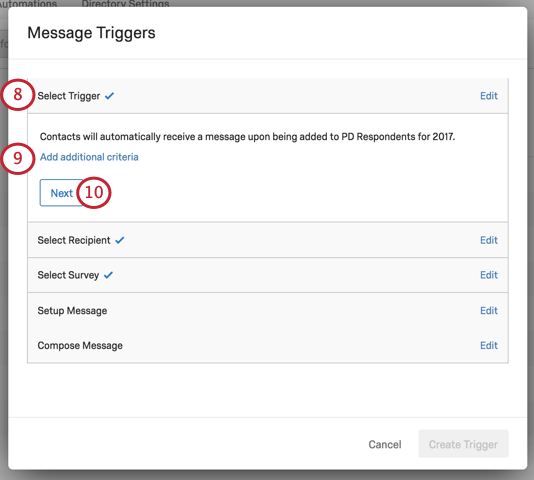
- If desired, add additional criteria.
Example: If someone belongs in more than one mailing list with message triggers set up, you probably don’t want multiple email alerts when they’re added to new lists. You can set criteria that specify you can only receive a notification if that user isn’t in one of your other mailing lists. See the Additional Criteria section below for more details.
- Click Next.
- Decide whether the contact will receive an email, or if another email address will.
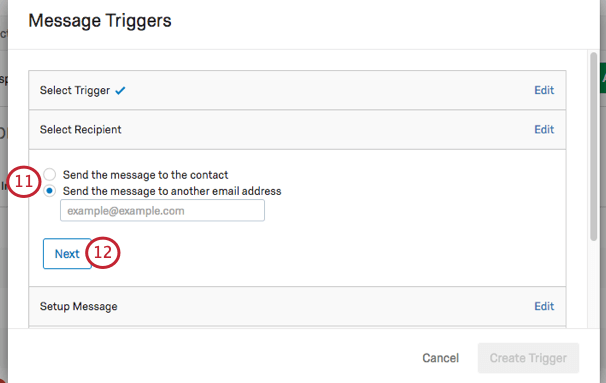
- Click Next.
- Determine whether or not to send a survey. If you select Send a survey, you will be able to select a survey, a link type, and when that link expires.
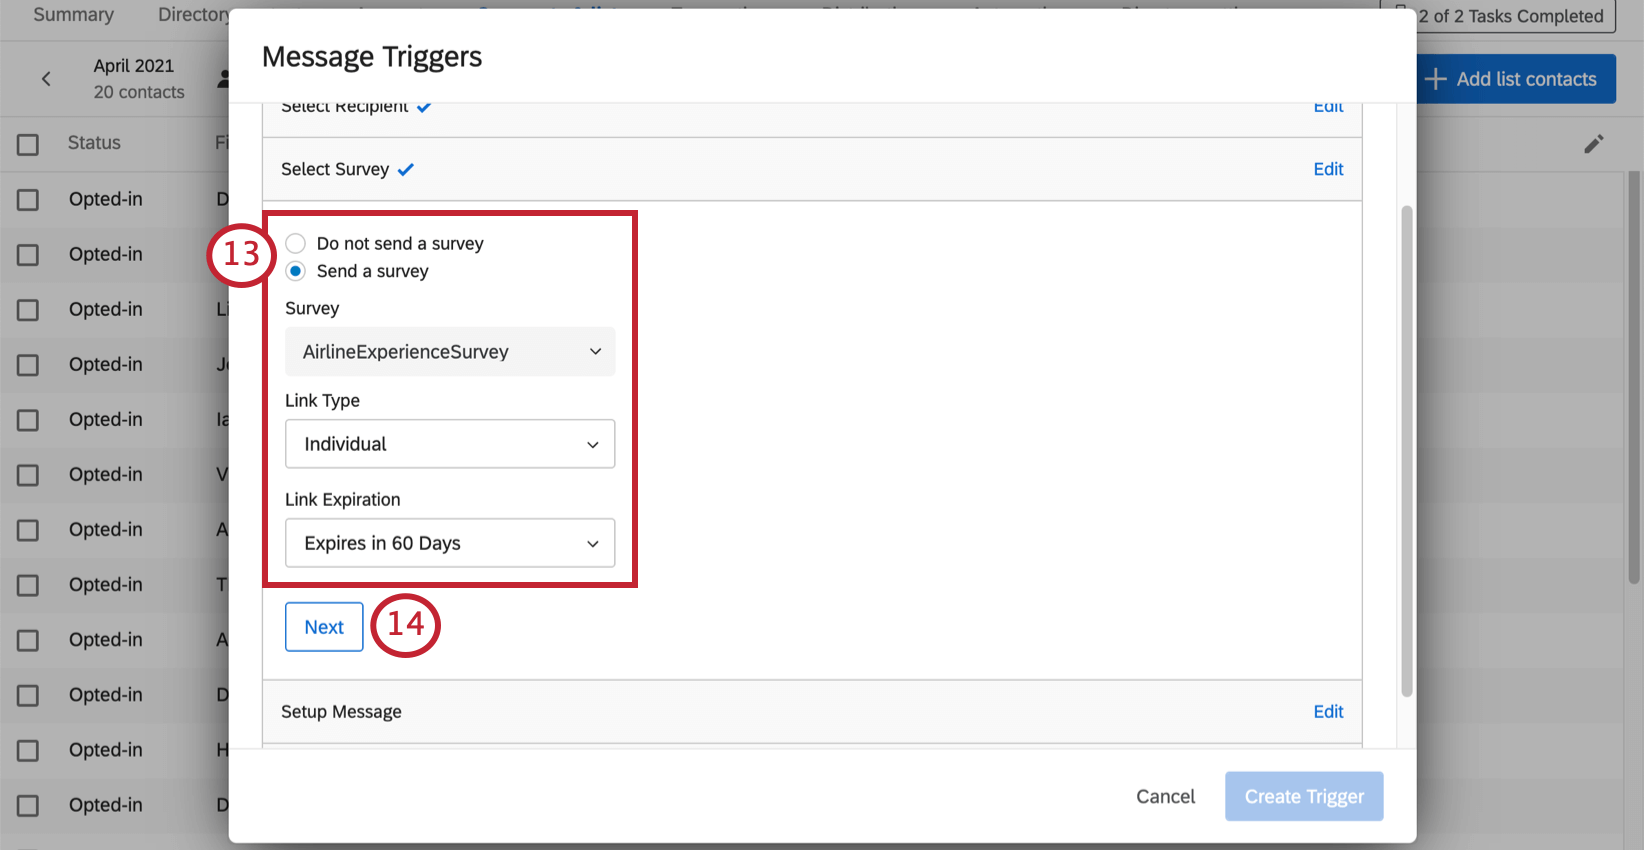
Qtip: If you chose to send the email to another email address in Step 11, you will not be able to send a survey. - Click Next.
- Under Message Delay, determine how soon after the criteria happens that the email should be sent out.
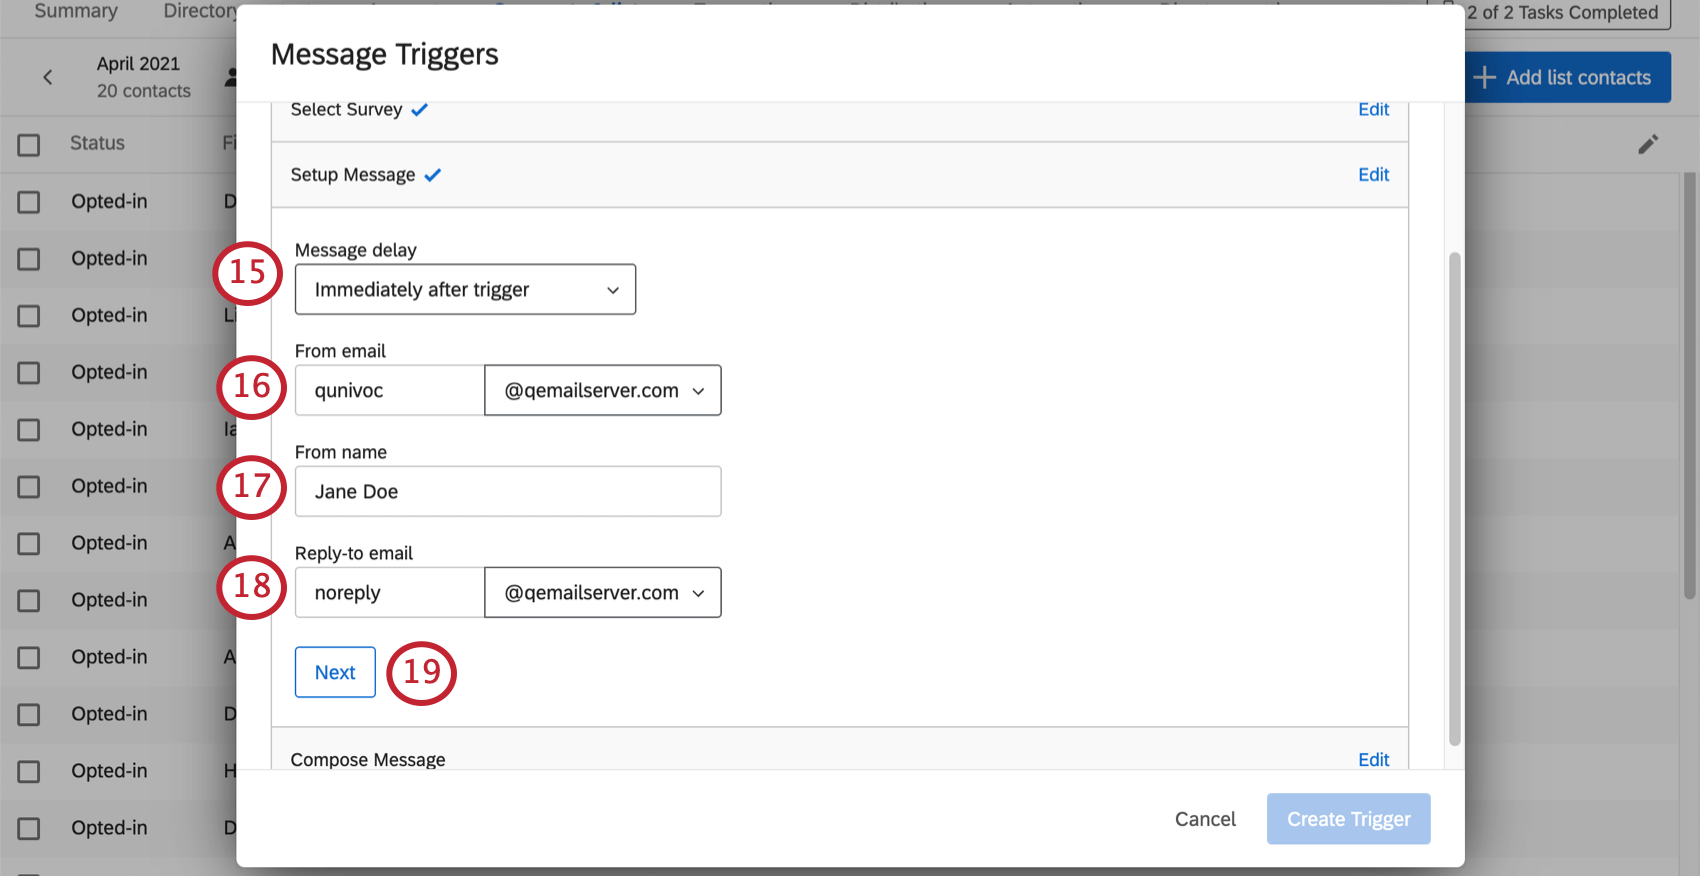
- Set a From email.
Qtip: If you don’t see a domain you’d like to use, check out our Using a Custom From Address support page to see how you can set more custom domains.
- Set a From name.
- Set a Reply-to email.
- Click Next.
- Compose your message.
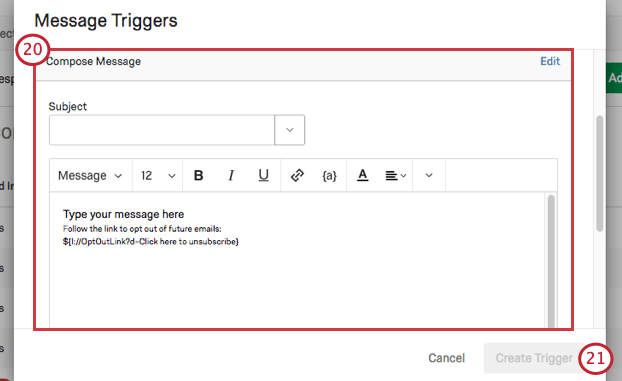 Attention: This email must contain an opt-out link.
 - Click Create Trigger to finish.
Managing Existing Triggers
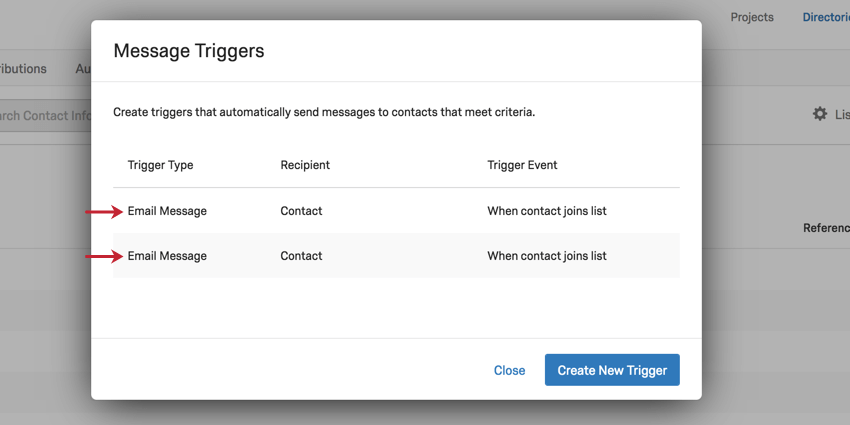
When you visit List Options and select Manage Message Triggers, you will be able to edit old Message Triggers. Just click on the name of a trigger to get started.
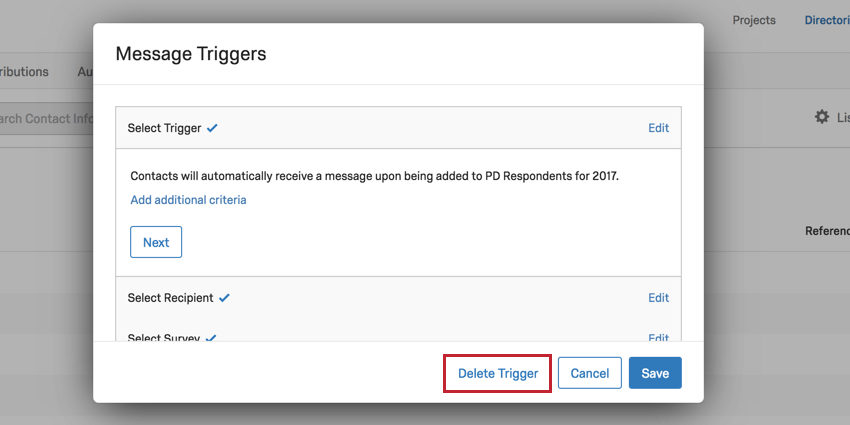
Once a trigger is selected, you can click Delete Trigger at the bottom to get rid of it.
Additional Criteria for Message Triggers
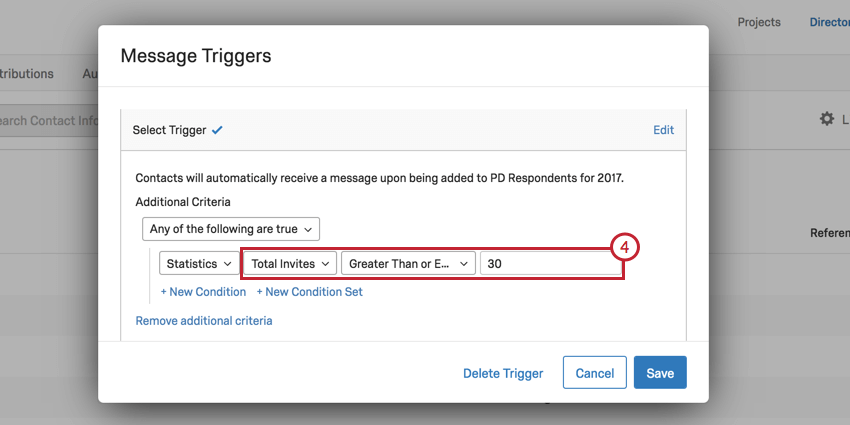
There’s a good chance you only want message triggers to go out in certain circumstances. For example, let’s say you want a special message to go out to customers who regularly fill out your feedback surveys. You can set a condition, called “additional criteria,” that contacts customers after submitting a certain number of responses.
Setting Up Additional Criteria
- Open your trigger.
- In the first section, Select Trigger, click Add Additional Criteria.
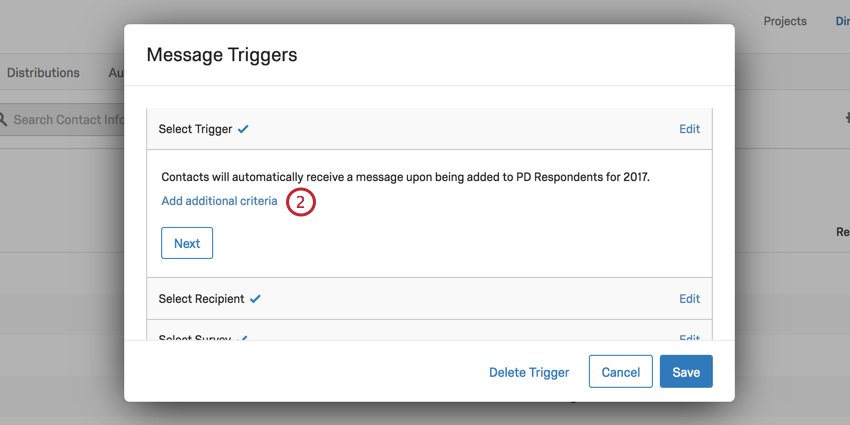
- In the first field, decide what kind of information you’d like to filter by.
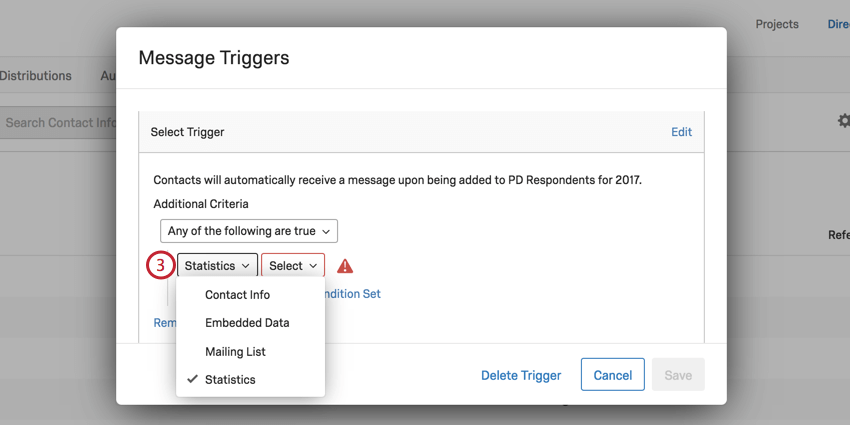
- Fill out the following fields according to your desired filter.
Available Criteria
- Contact Info: Filter by basic contact info such as name, email, External Data Reference, Language, or Phone.
- Embedded Data: Filter by embedded data in the directory.
Qtip: Date fields must be set to Date Embedded Data type and be in a YYYY-MM-DD or MM-DD-YYYY format to work.
- Mailing List: A mailing list the contact does or does not belong to.
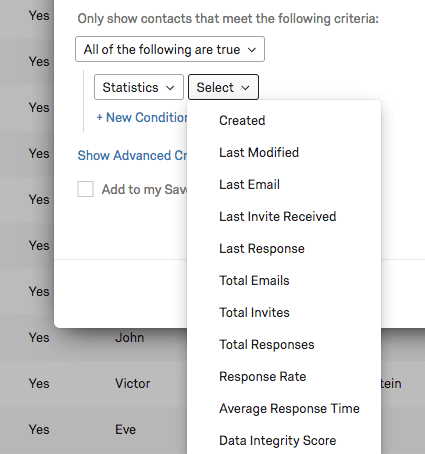
- Statistics: Filter by various statistics. Note that response rate is in percentages (0-100), but doesn’t require a percent ( % ) symbol.
