
Using the WhatsApp Self-Service Model
What's on this page
About the Self-Service Model
Before you can distribute your survey through WhatsApp, you will need to complete some preliminary setup steps. This page goes over those steps for customers on the self-service model. This model is recommended if your company has a pre-existing relationship with Twilio. See a comparison.
Creating and Verifying a Twilio WhatsApp Profile
Qtip: The following process may change. Please refer to Twilio’s guide for most up-to-date onboarding steps.
Step 1: Create a Twilio Account
If you don’t already have a Twilio account, you can sign up for free. If you already have a Twilio account for your business, proceed to the next step.
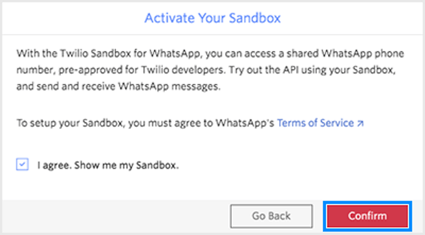
Step 2: Accept the WhatsApp Terms of Service and the WhatsApp Client Terms on Twilio
Qualtrics partners with Twilio to provide WhatsApp connectivity.
Qtip: Qualtrics cannot agree to terms of service on your behalf. A business that fails to independently agree to the WhatsApp terms of service will not be able to distribute Qualtrics surveys through WhatsApp.
Step 3: Create a Facebook Business Manager Account
Your organization must have its own Facebook Business Manager account in order to be approved for WhatsApp access. This is used by WhatsApp to identify your business and associate your phone numbers.
If your organization doesn’t already have a Facebook Business Manager account, you can create one at business.facebook.com. See Facebook’s instructions for setting up this account.
Find your Facebook Business Manager ID by following the steps listed here on Facebook’s support site and write it down. You need this for the next step, when you enable your Twilio numbers for WhatsApp use.
Step 4: Enable Your Twilio Account for WhatsApp Use
Follow the steps described in Twilio’s documentation to fill out Twilio’s Request Access form. This enables you to use your Twilio numbers for WhatsApp distributions.
Enter No for I wish to provision this account with a third party vendor and leave the Assign approval to alternate Account Sid field empty.
Wait for Twilio’s approval before proceeding to the next step. Once approved, you should get an email from Twilio.
Step 5: Submit a WhatsApp Sender Profile on Twilio
Follow the steps described in Twilio’s documentation to submit a WhatsApp sender profile.
Write down the phone number you’ve selected – you will need it later when you integrate with the Qualtrics WhatsApp extension.
When you receive notice that Twilio has submitted your WhatsApp Business display name and Twilio number to WhatsApp, you can proceed to the next steps.
Step 6: Allow Twilio to send messages on your behalf
Follow the steps described in Twilio’s documentation to approve Twilio in Facebook Business Manager, allowing them to send messages on your behalf.
Step 7: Verify your Facebook Business Manager account
Qtip: We recommend starting the verification process as soon as you can, as this can take more than one week for Facebook to complete.
If you have not already verified your Facebook Business Manager account, see Twilio’s documentation.
Wait until Twilio completes the registration process. This usually takes a few days. You will receive an email confirmation that Twilio has finalized the registration of your profile.
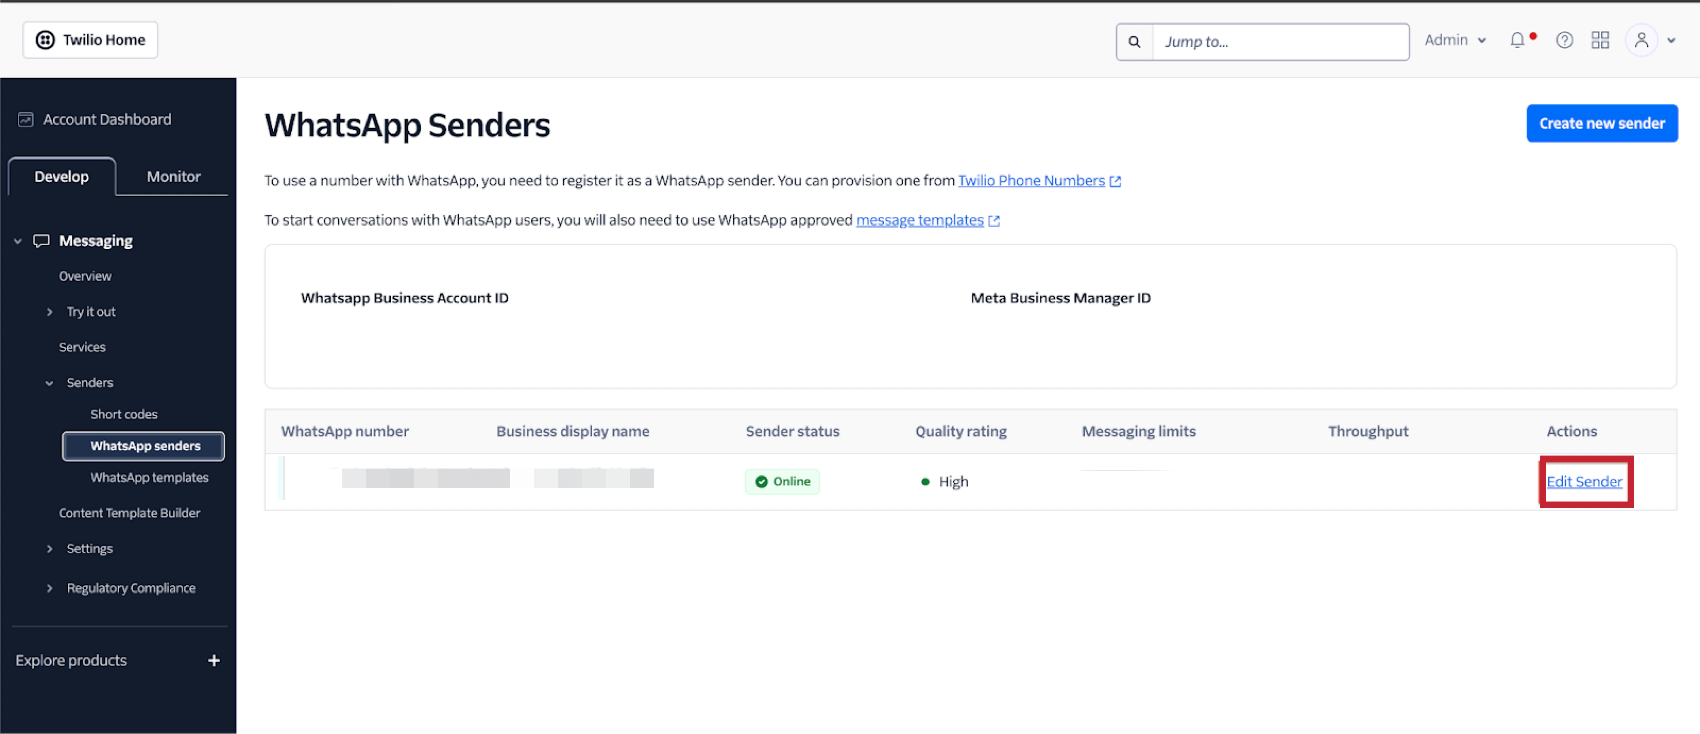
When that happens, you should see Approved next to your profile in Programmable messaging > Senders > WhatsApp Senders.

Integrating Your Twilio Account with Qualtrics
Once Twilio has confirmed your WhatsApp Business Profile registration is complete, you can integrate it with Qualtrics.
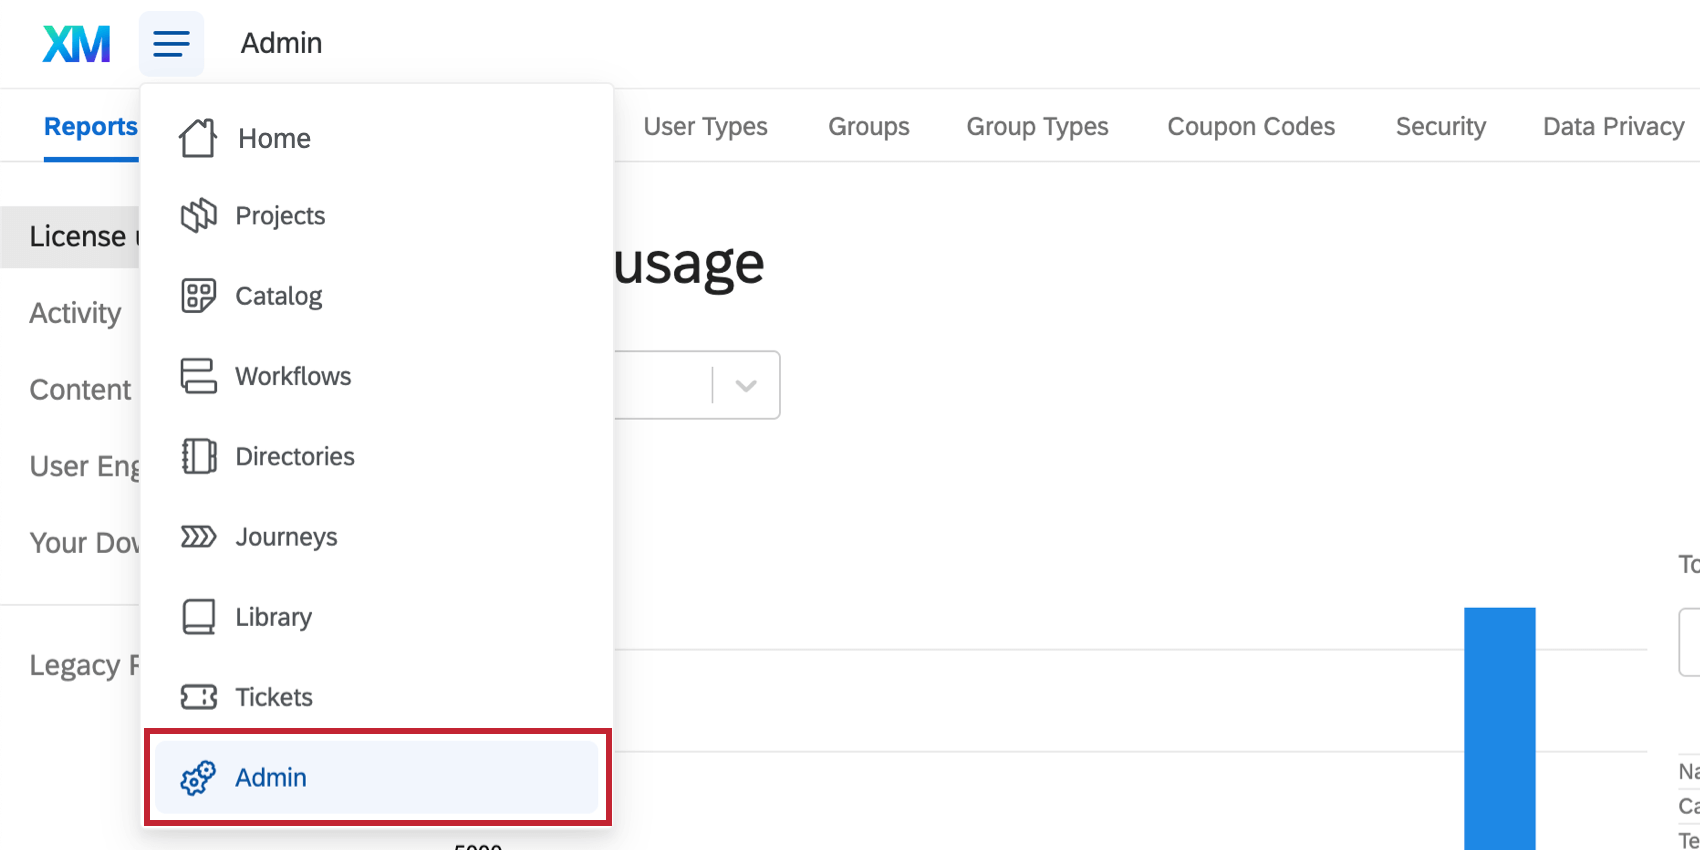
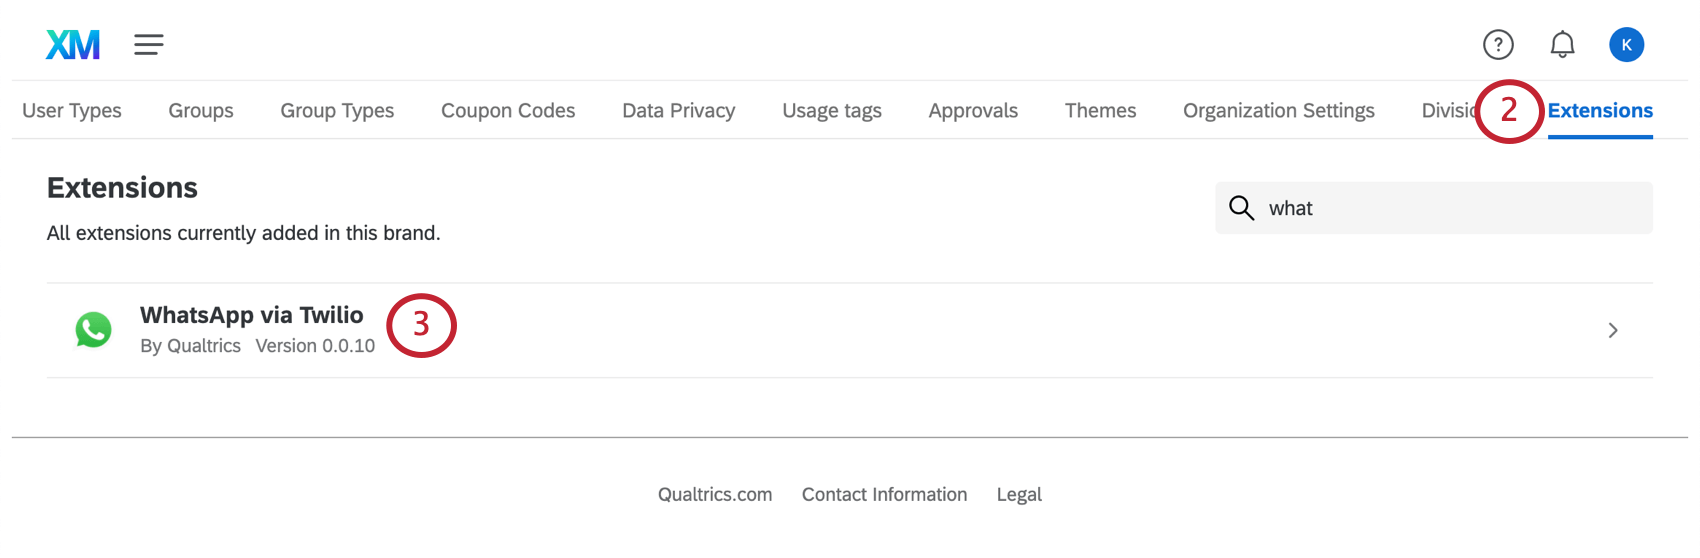
Step 1: Connect to the Qualtrics WhatsApp Extension
Qtip: This step will need to be completed by a Brand Administrator.
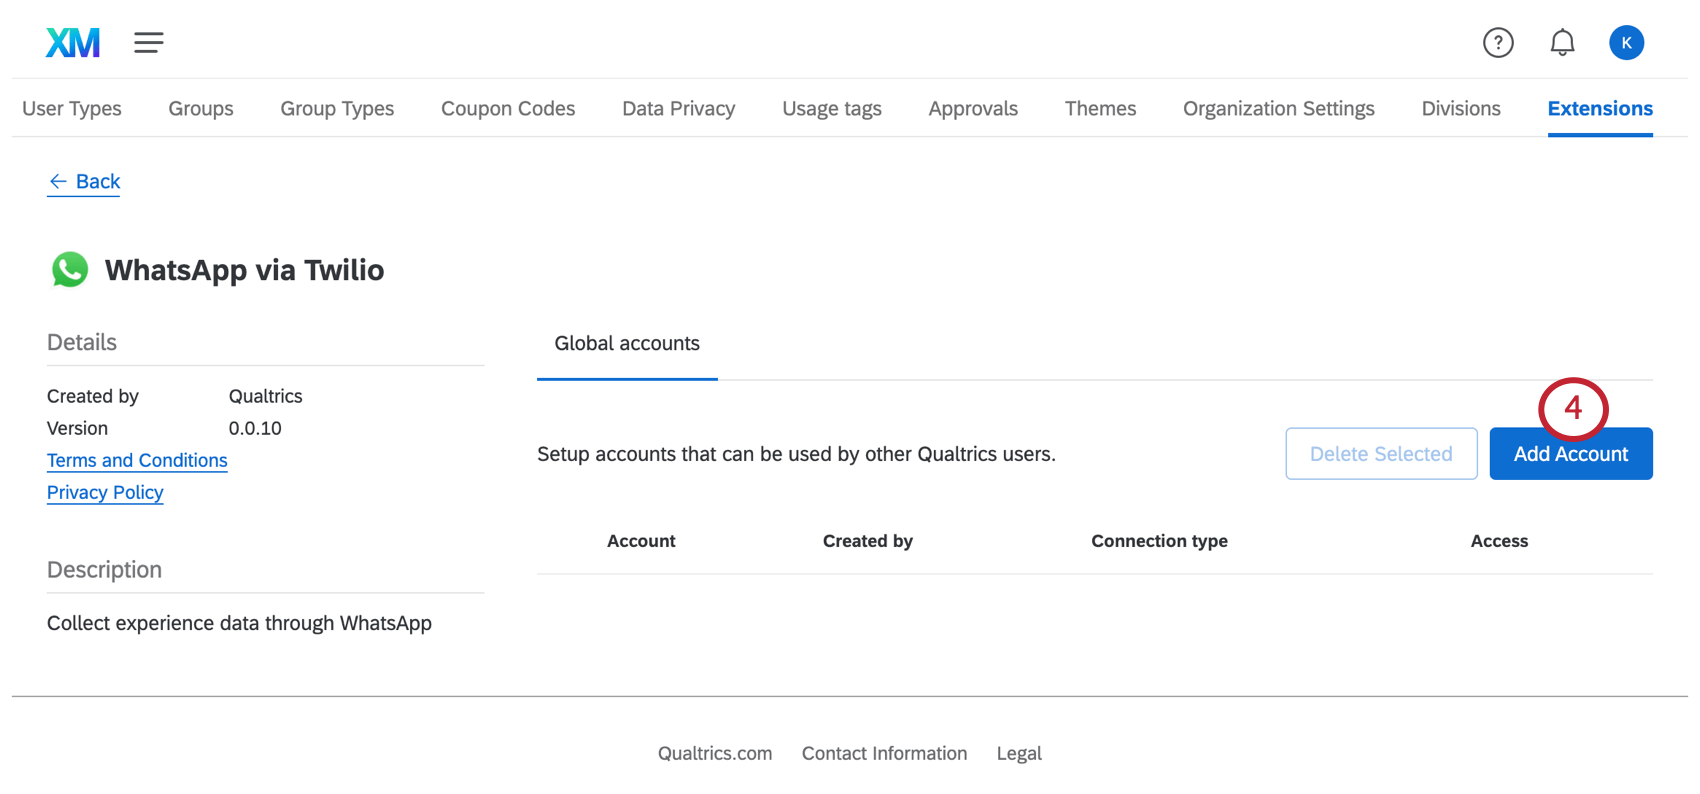
Qtip: Only add one account at a time. Right now, we do not support configuring multiple phone numbers or multiple Twilio accounts.
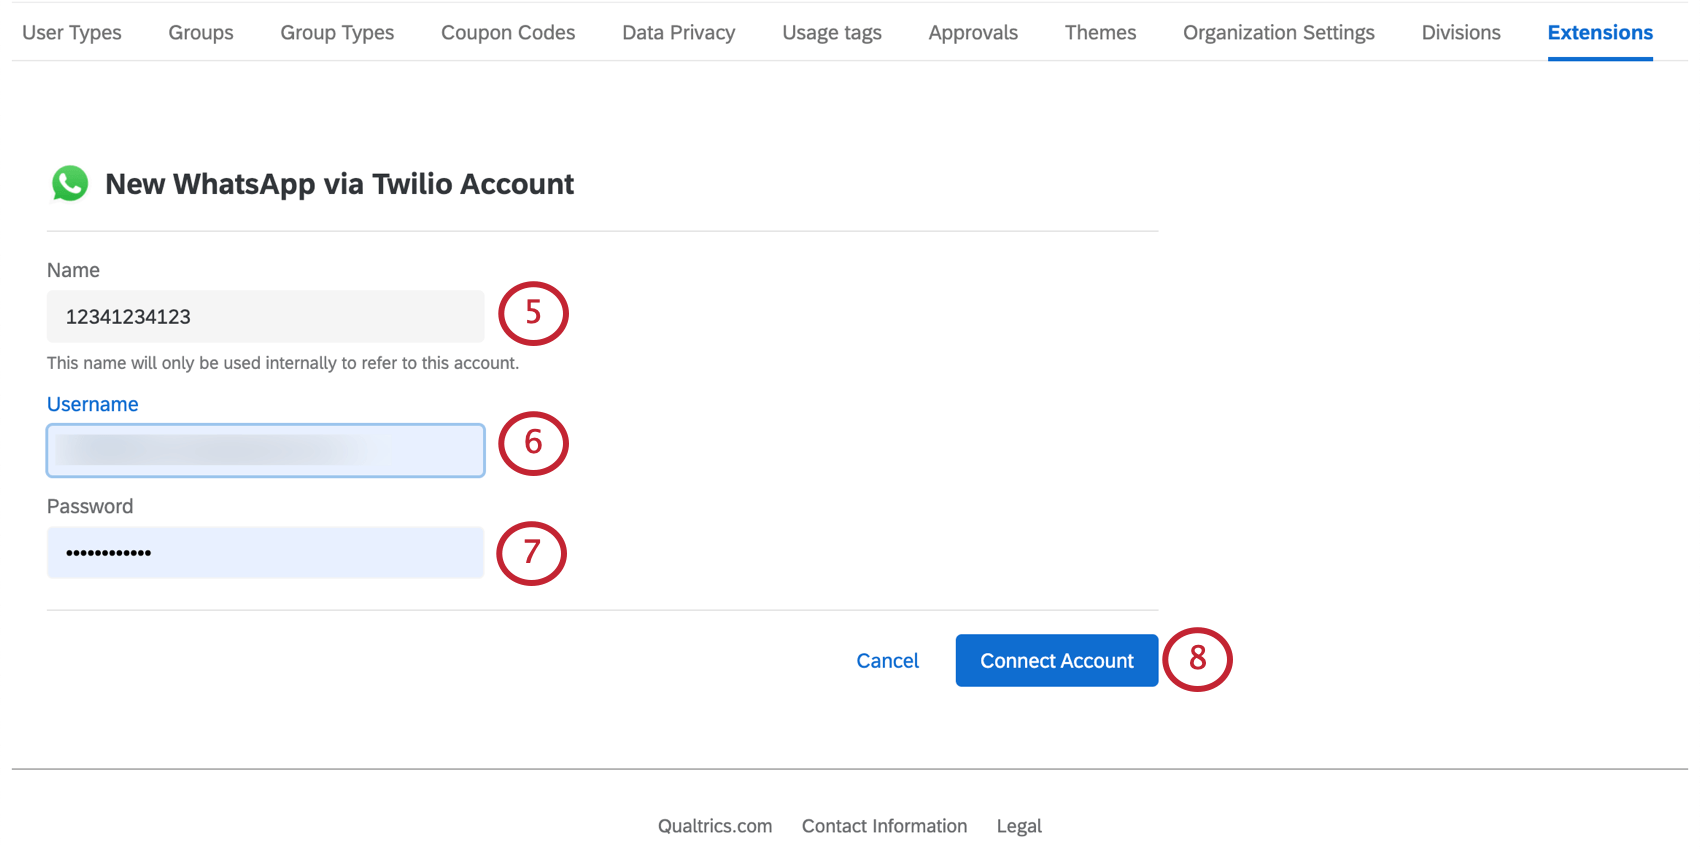
Qtip: There should be only numbers in this field, no plus sign ( + ), dash ( – ), or spaces. For example, 12341234123 (US Number), 48123123123 (Polish number). Note the inclusion of the country code.
Qtip: You must give access to all users in the steps described here. If you’d like to restrict access for certain users in your license, try editing user or group permissions. The permission “Use WhatsApp Distributions” controls who can distribute through SMS.
If you have additional questions about adding extensions to your Qualtrics license, see the Extensions support page.
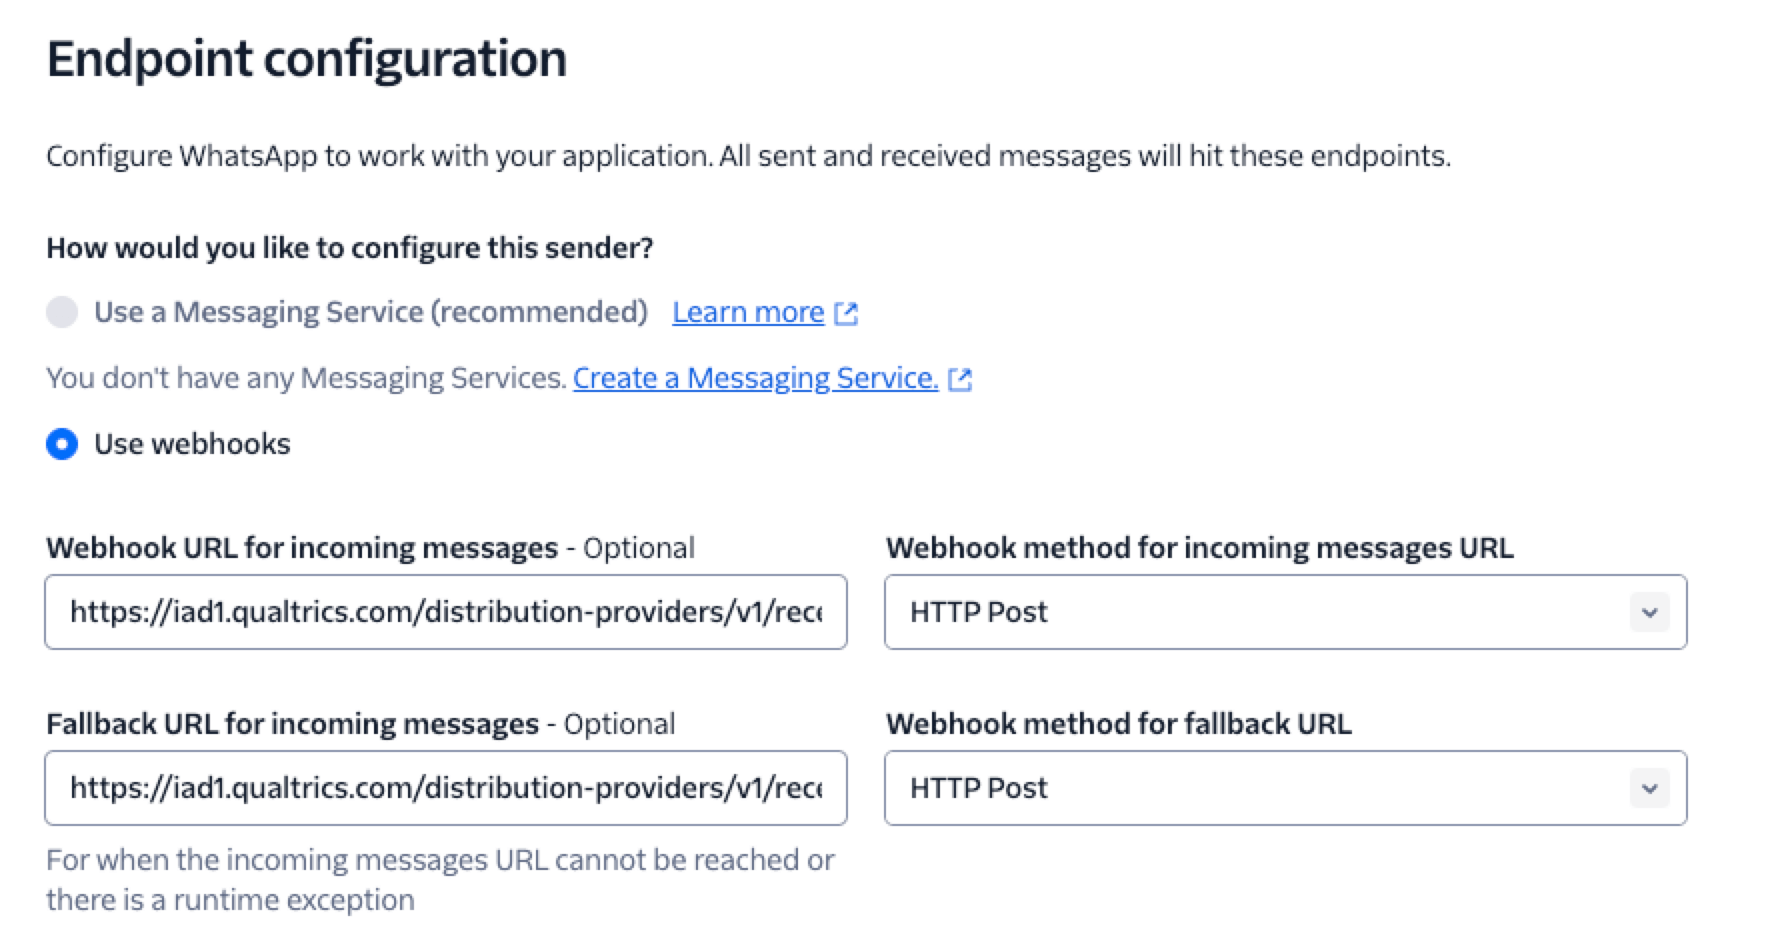
Step 2: Configuring the Qualtrics Callback URL in Twilio
In order for the integration between Twilio and Qualtrics to work, you need to set up the callback in Twilio with a Qualtrics HTTP endpoint.
Upgrading to a WhatsApp Official Business Account
Although not required, we recommend this step because it adds legitimacy to your WhatsApp distributions and lets respondents know your business can be trusted. For specific steps, see Upgrading to a WhatsApp Official Business Account.
Distributing through WhatsApp
Once you have completed the steps on this support page, you are ready to distribute your survey through WhatsApp. Please see WhatsApp Distributions for more details on how to import WhatsApp numbers, 2-way and survey link distributions, viewing past distributions, and more.
FAQs
How can I tell the difference between first party and third party extensions? Where do I go for support for either kind?
How can I tell the difference between first party and third party extensions? Where do I go for support for either kind?
How do I add or remove an extension from my Qualtrics account?
How do I add or remove an extension from my Qualtrics account?
That's great! Thank you for your feedback!
Thank you for your feedback!