
Migrating XM Directory Automations to Workflows
What's on this page
About Migrating XM Directory Automations to Workflows
Workflows are the new and improved way to automate tasks in XM Directory, and have fully replaced automations. This page provides instructions on how to recreate common automations as workflows.
Qtip: In addition to replacing the functionality of automations, workflows allow you to create more types of automated jobs for your XM Directory. You can schedule workflows to run based on changes to XM Directory contacts with the Experience ID Change Event, create workflows based on XM Directory segments, and more.
Workflows for XM Directory
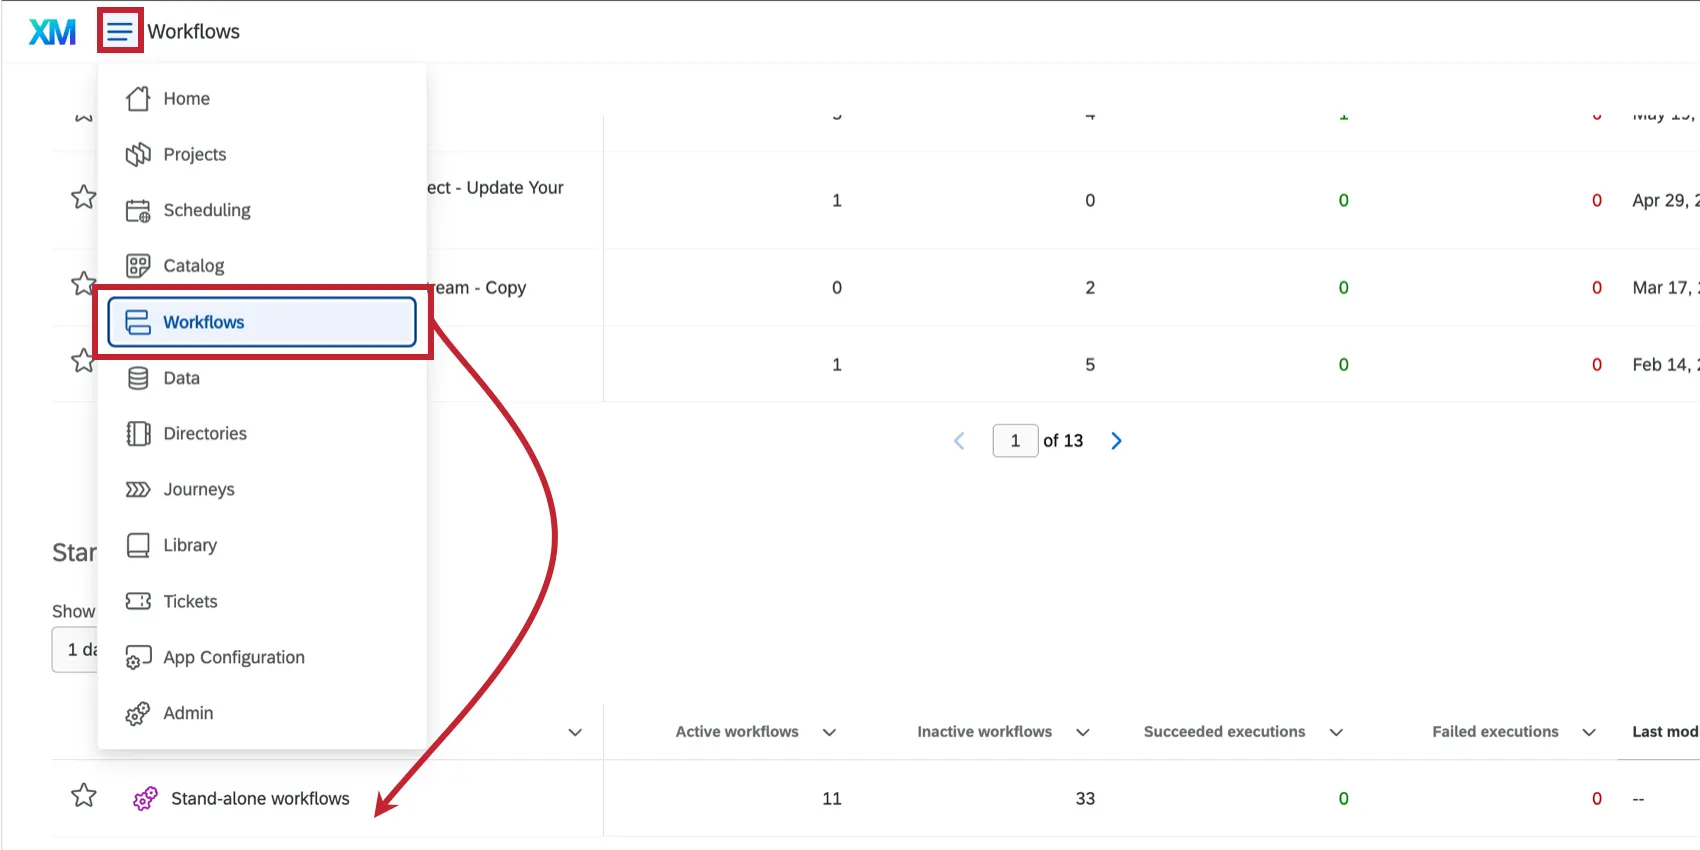
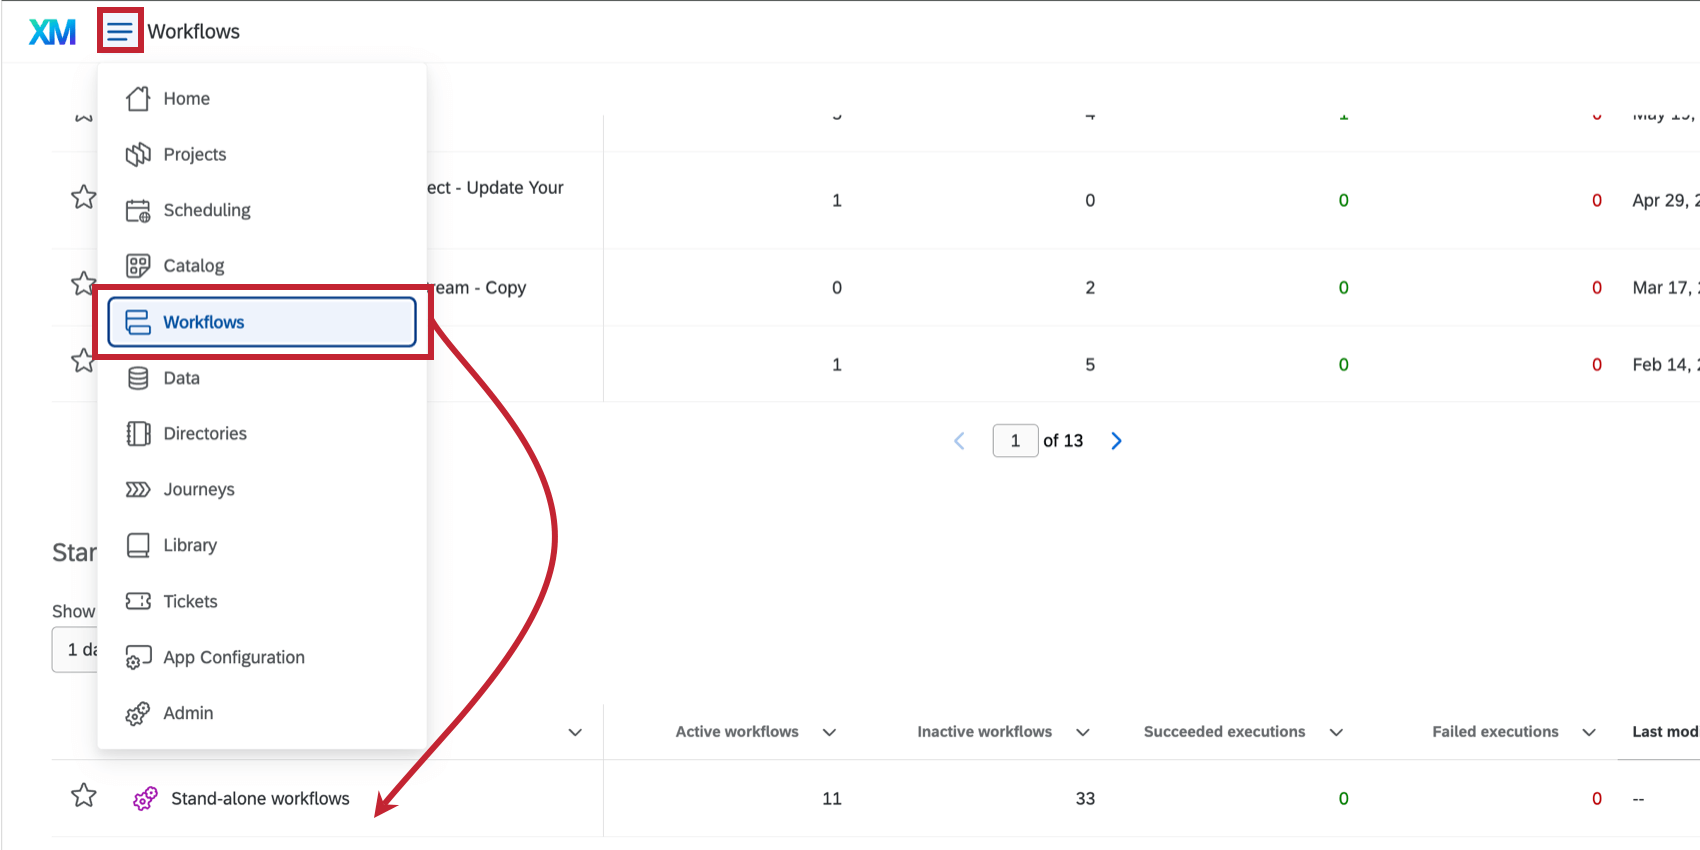
The standalone Workflows page is where you can create, edit, and manage all types of workflows. When replacing your legacy automations, this can be an easy, one-stop location to find all of your XM Directory workflows.
Standalone workflows are only available to the user who creates them, which is the same as XM Directory automations. If desired, you can share the workflow with other users in your license.
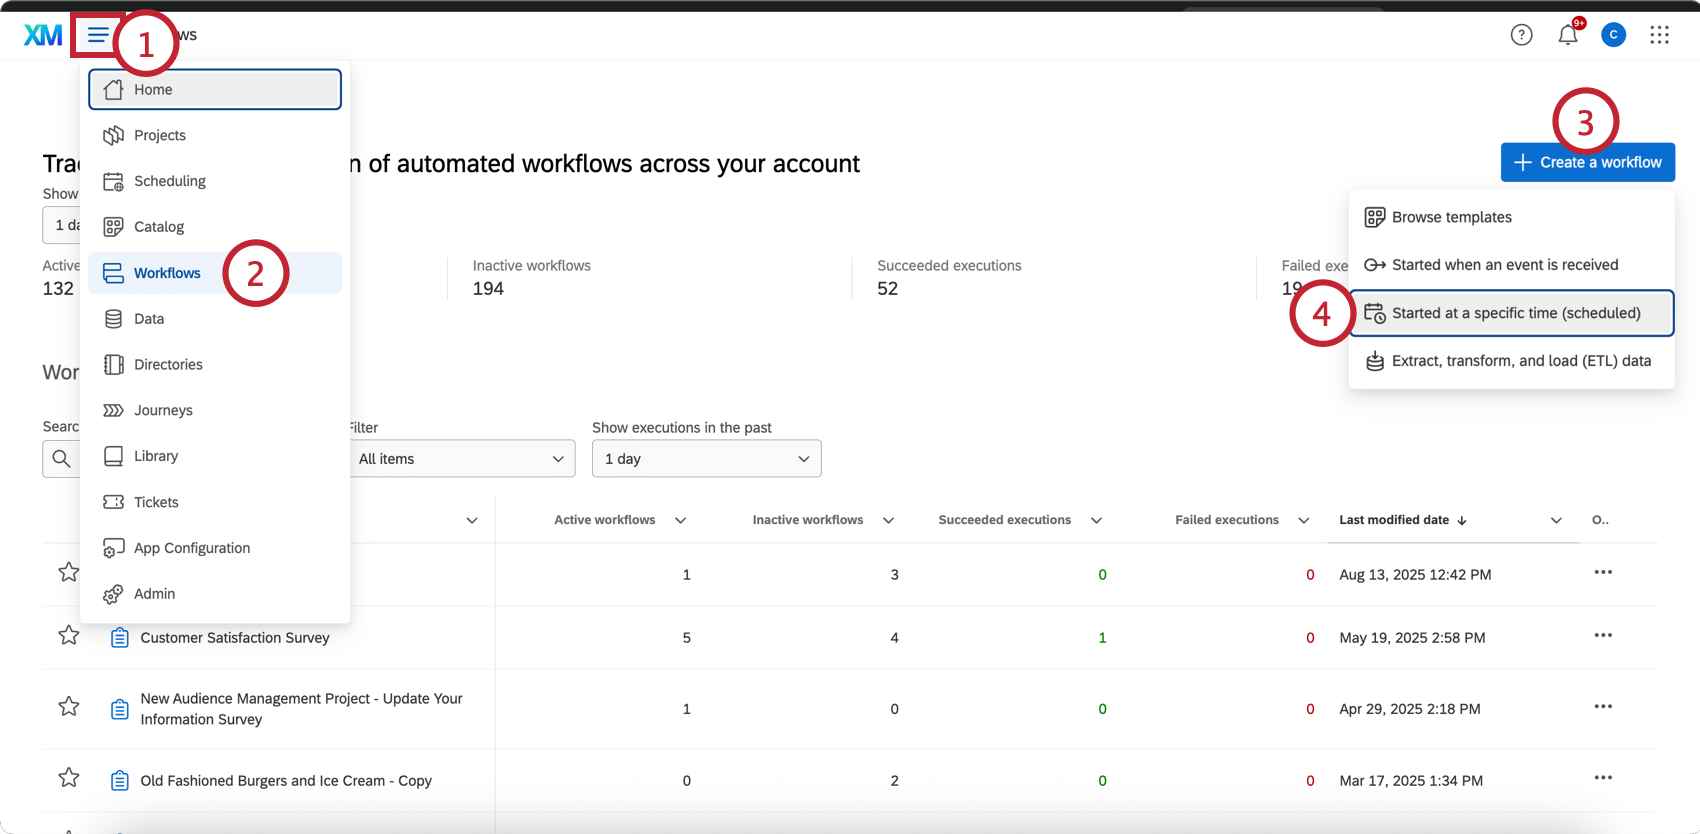
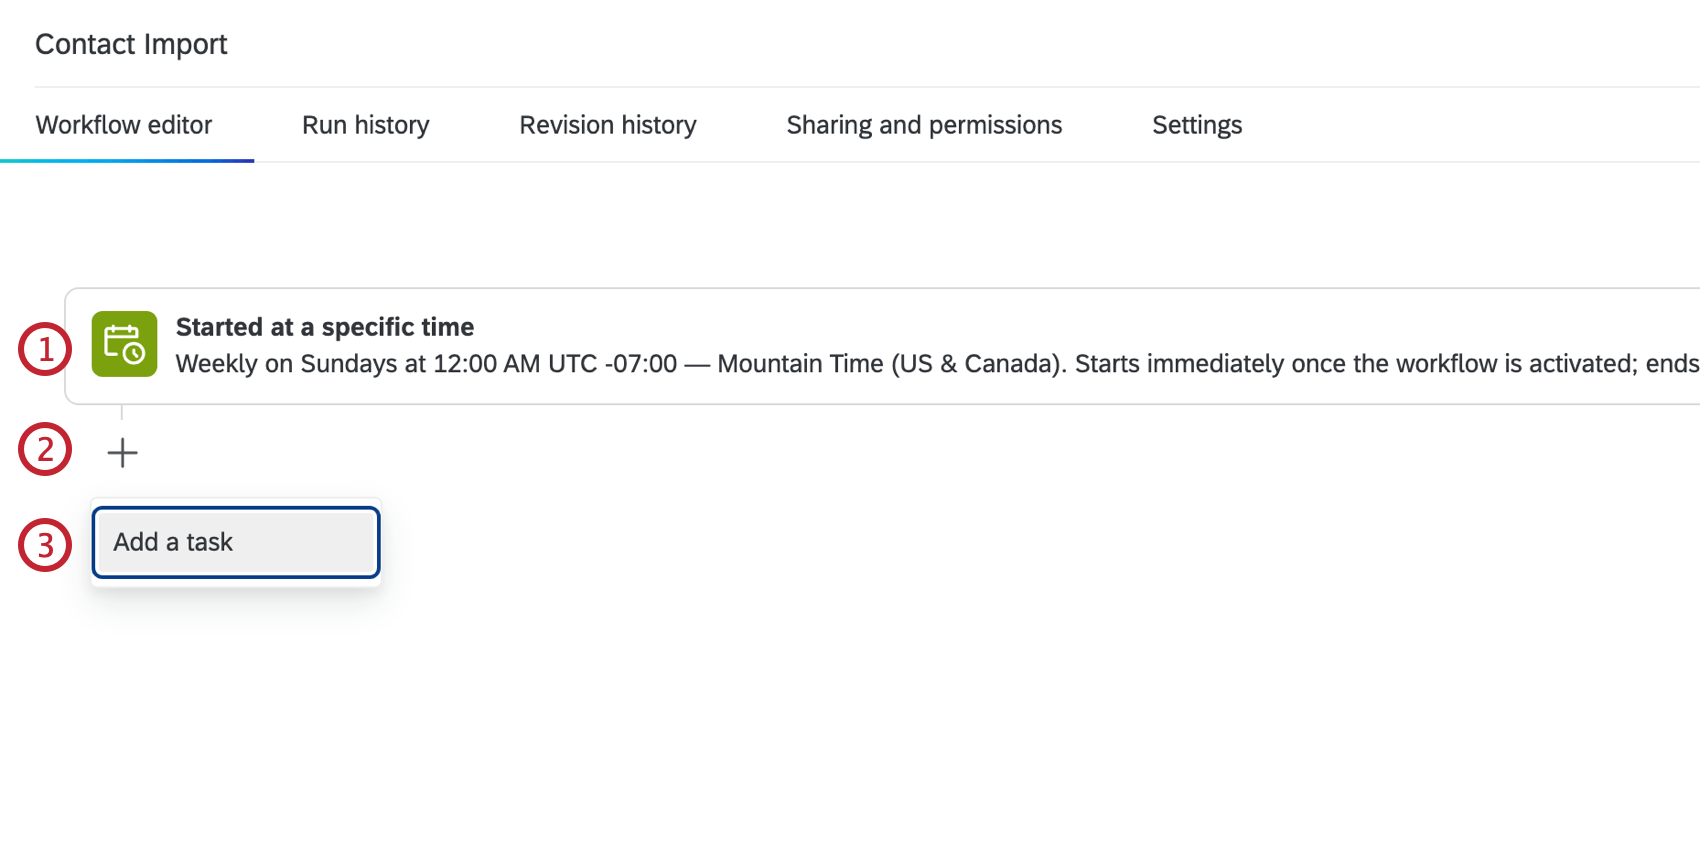
Workflow Schedules
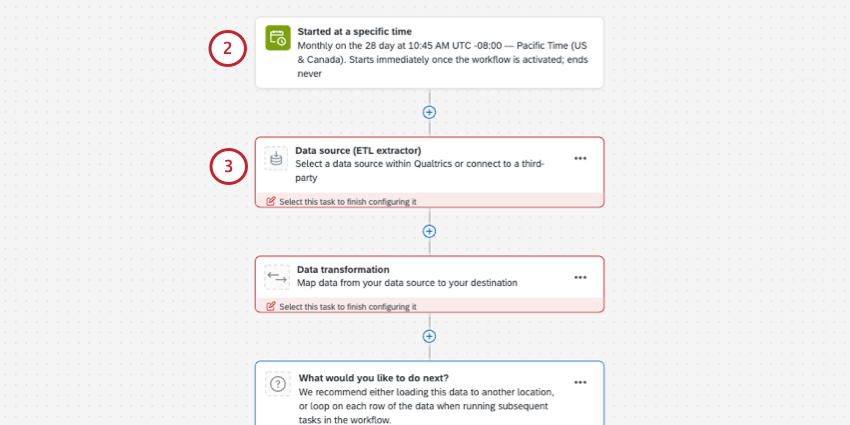
All XM Directory automations are scheduled at regular intervals. Thus, the first step to replacing your automation is to create a scheduled workflow.
Qtip: Workflow notifications are replacing run reporting in Automations. Follow the instructions on the linked page to be notified when your workflow succeeds or fails.
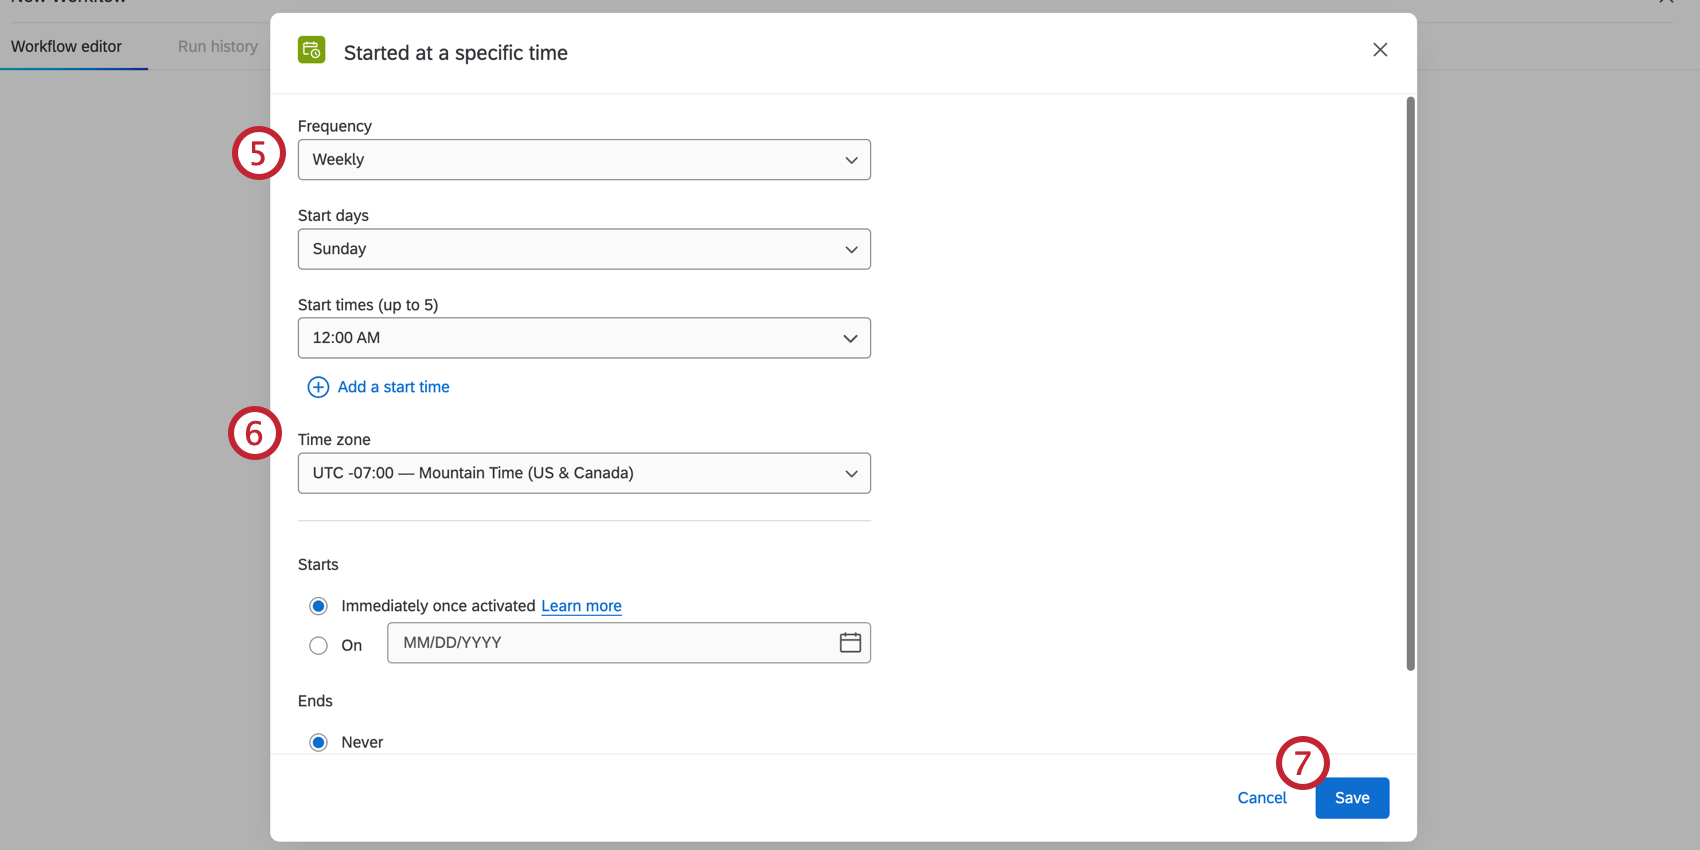
Qtip: Scheduled workflows allow you to choose a timezone with or without Daylight Saving Time. This offers increased flexibility over legacy XM Directory automations, which used a fixed UTC clock regardless of local time changes.
Contact Import Automations
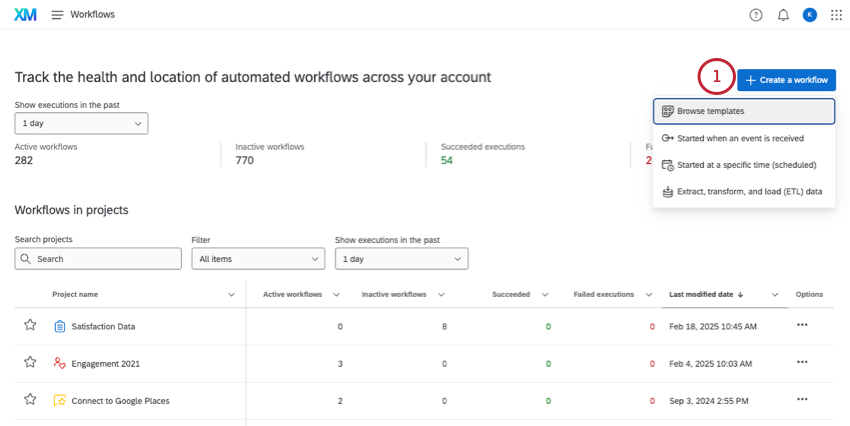
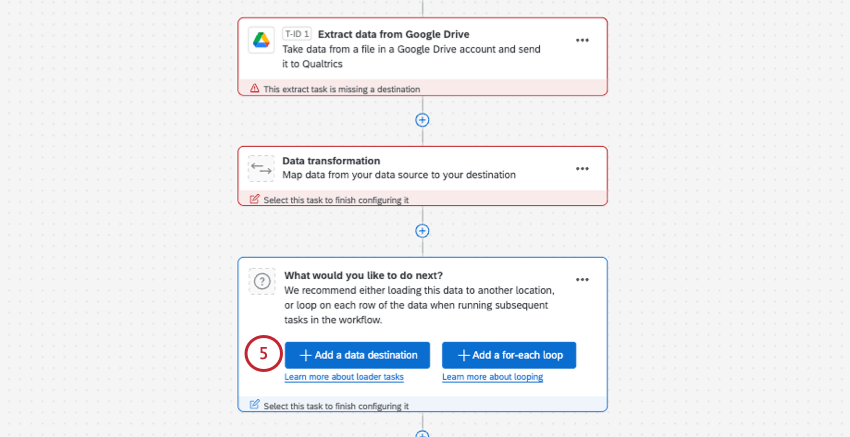
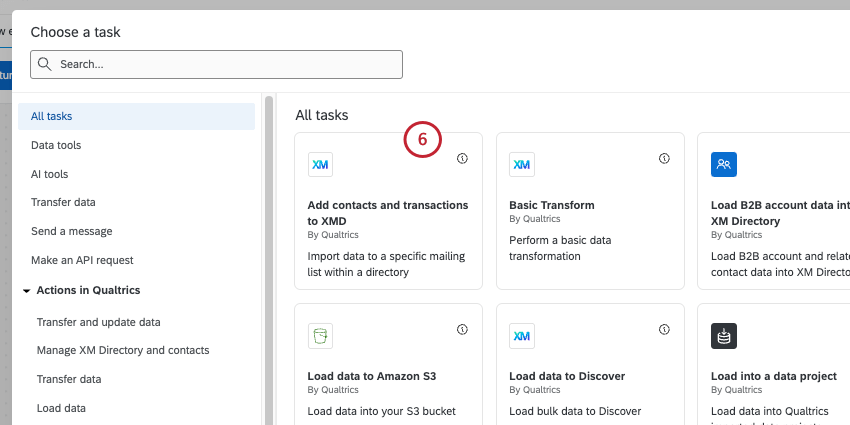
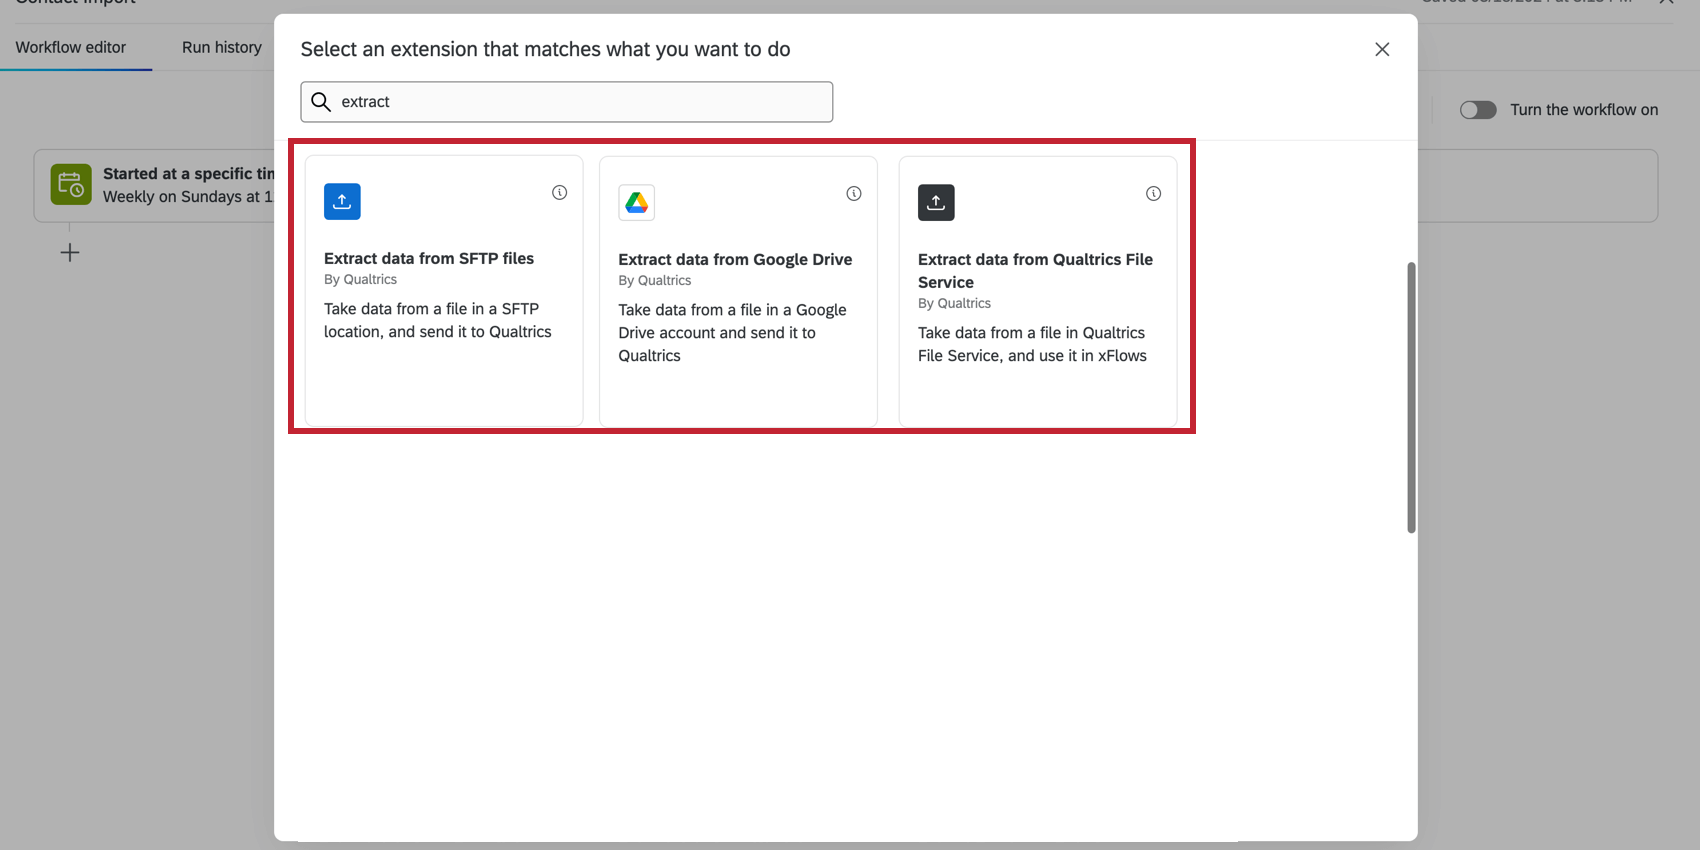
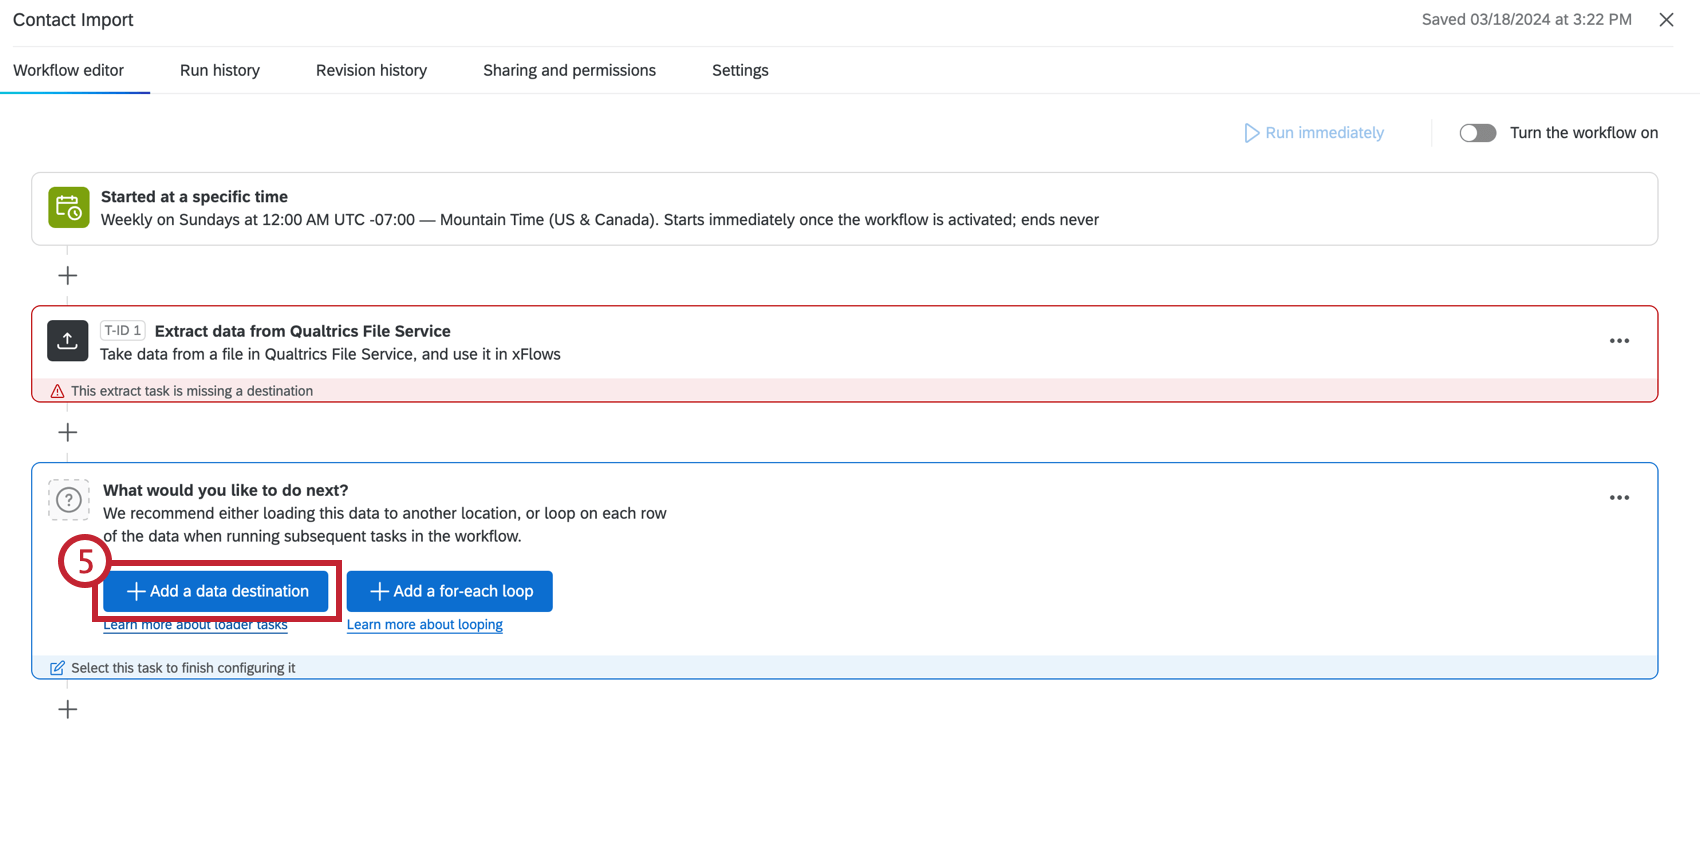
Legacy contact import automations allowed you to automatically upload files of contacts from a source of your choice to XM Directory. Contacts came from a Secure File Transfer Protocol (SFTP) server, the Qualtrics File Service, or Google Drive. Workflows achieve this same functionality using ETL workflows, while also supporting several more sources, such as Amazon S3, Snowflake, and Salesforce. Follow the steps below to create a workflow that automatically uploads contacts.
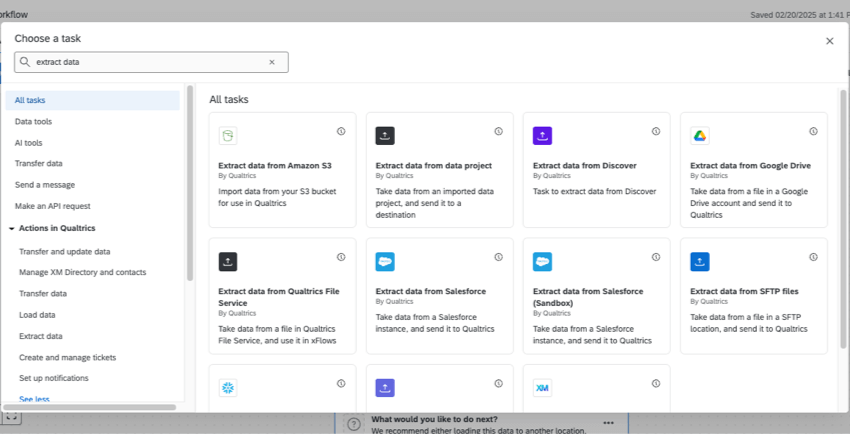
- Extract data from Google Drive
- Extract data from Qualtrics File Service
- Extract data from SFTP files (supports SSH key)
Qtip: Workflows also supports other import sources, like Amazon S3, Snowflake, and Salesforce. For more information, see Building ETL Workflows.
Qtip: Workflows do not support Gigya or Dropbox as data sources.
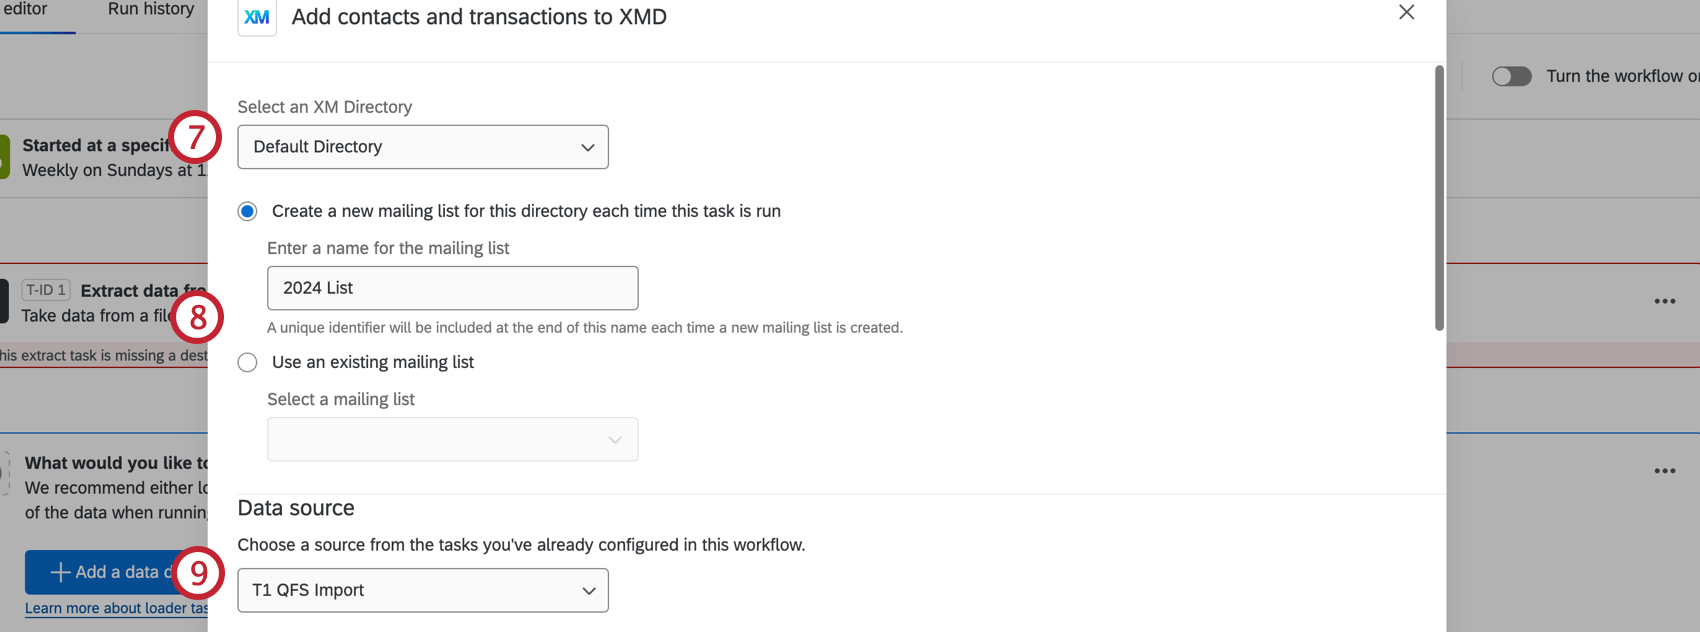
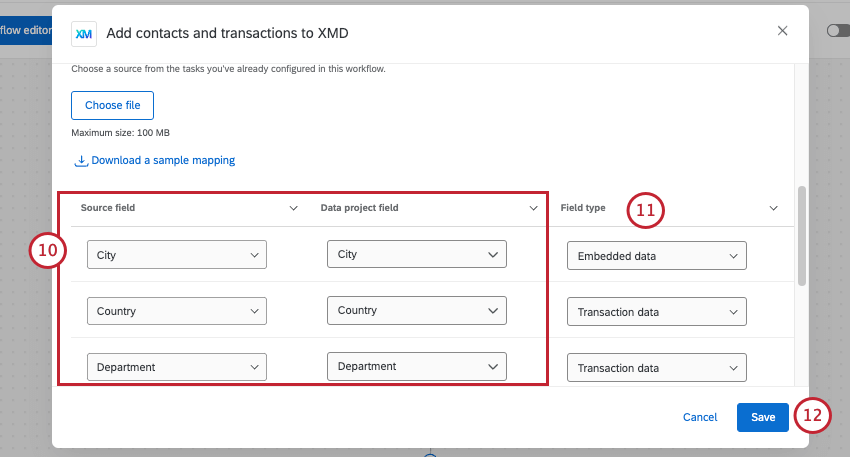
Qtip: If you want to make changes to field mappings, you can make individual edits or upload a file. See Mapping Field Values.
Qtip: See Setting Up an Add Contacts and Transactions to XMD Task for more details, including differences between field types, and proper transaction date formats.
Qtip: If you don’t map a transaction date field, the system will automatically map the workflow’s execution date as the transaction date.
Qtip: To create and distribute to a sample population, add a Create an XM Directory Sample task after your contact import task. Select Use a transaction batch generated from a previous task as the sample source.
Qtip: You can add a Basic Transform Task to your workflow to modify the values of the input data before importing it into your XM Directory.
Survey Distribution Automations
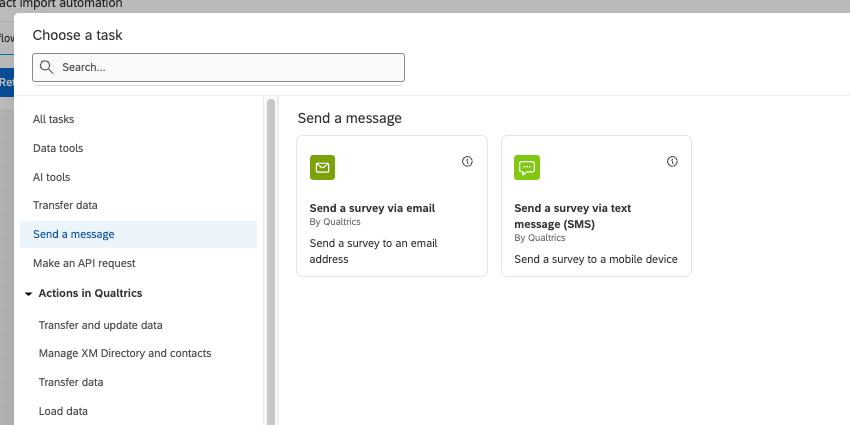
Legacy survey distribution automations allowed you to set up a scheduled survey distribution to a mailing list or a sample of a mailing list. This same functionality can be achieved with the Email task or Send Survey via Text Message (SMS) task within workflows. Follow the steps below to create a workflow that automatically distributes a survey to your contacts.
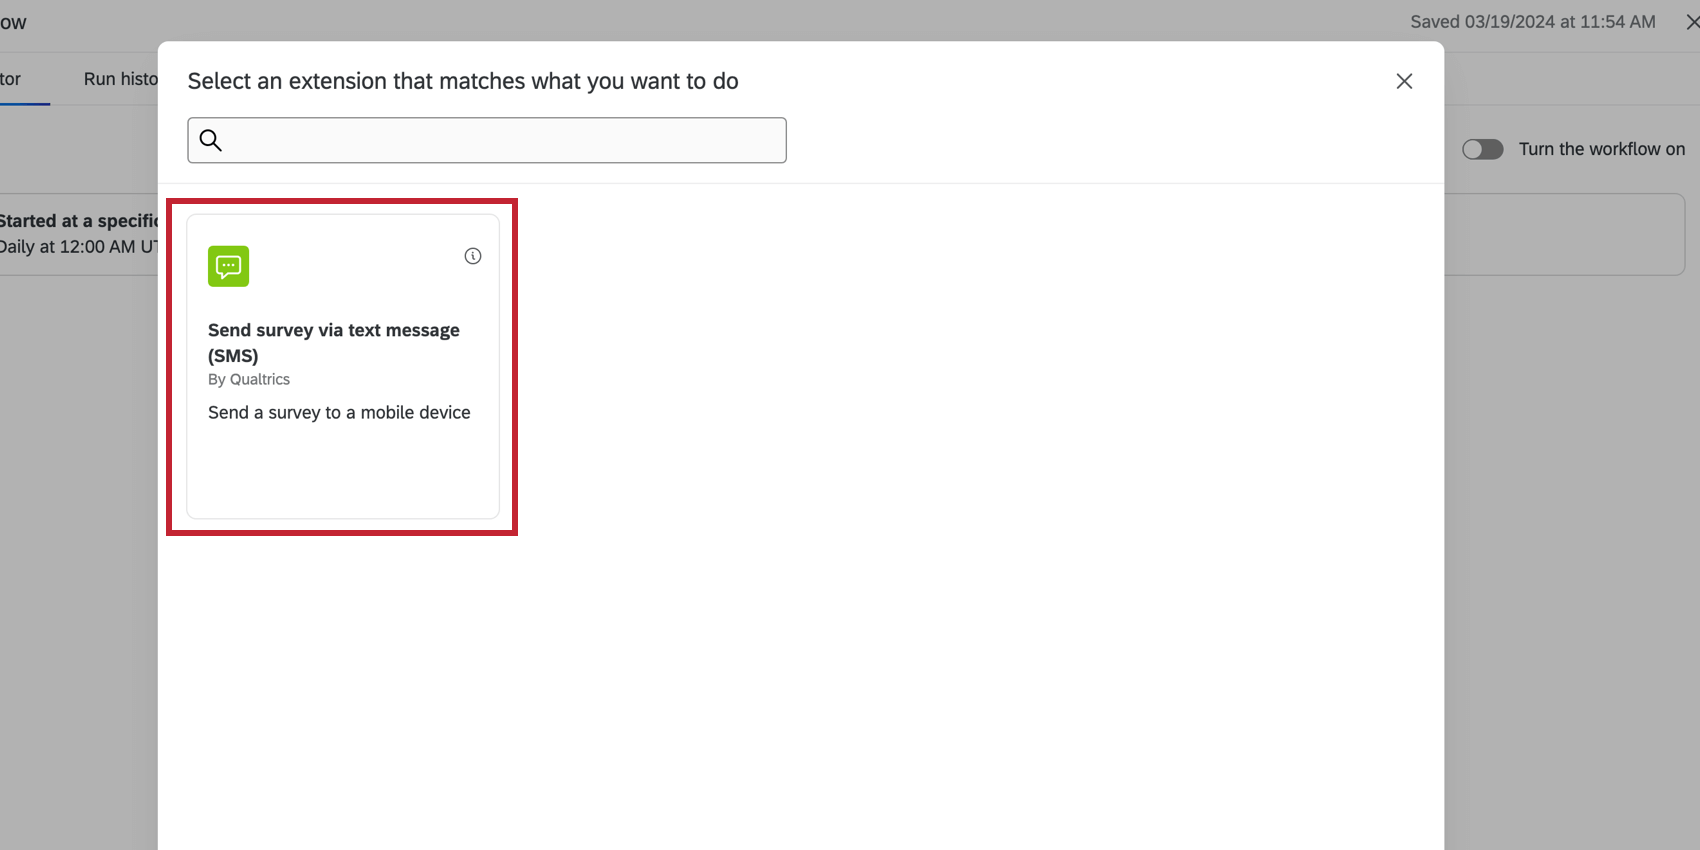
Attention: Do not use the XM Directory task, as it will eventually be deprecated. The Send Survey via Email Task offers enhanced functionality and should be used instead.
Linking Contact Import and Survey Distribution Automations
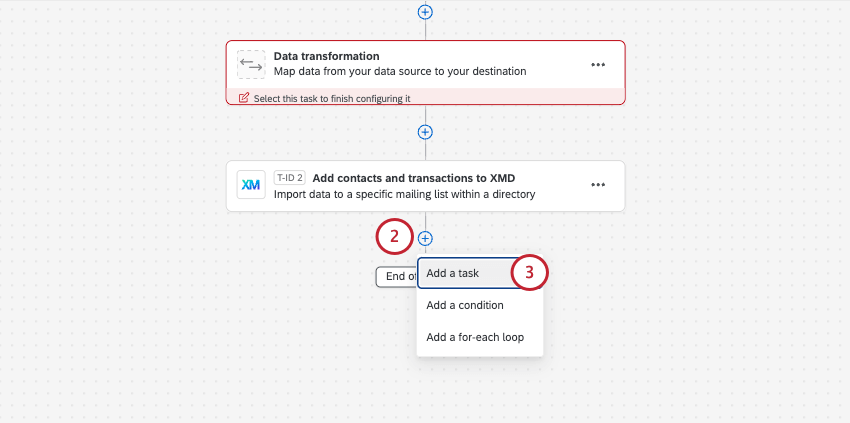
In legacy automations, you could link contact import and survey distribution automations together to send survey distributions to the contacts that were most recently imported. In Workflows, you can add the import and distribution tasks to a single unified workflow.
It is also possible to add multiple survey distribution tasks to the same workflow, so you can have multiple distributions sent after a single contact import task.
Attention: Do not use the XM Directory task, as it will eventually be deprecated. We recommend using the Send Survey via Email Task instead, since it offers not only the same email distribution capabilities, but a number of enhanced features.
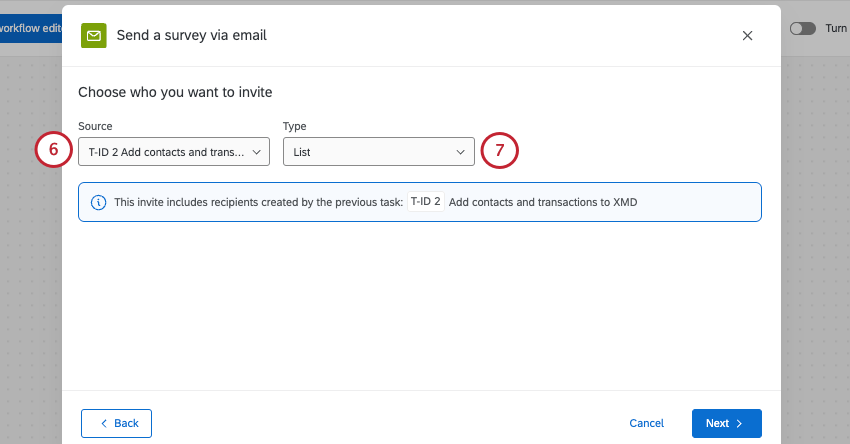
Attention: If you select List, the entire mailing list will be invited. If you select Transaction Group, only the newly added contacts in this workflow execution will be invited. If you don’t create a new mailing list every time the contact import runs, you should select Transaction Group.
Warning: Workflows only supports linking up to 8 distributions to your contact import automation. If you have a legacy automation that goes beyond this number, talk to your Technical Success Manager about alternate migration solutions. This limit is applicable when manually creating the new workflow.
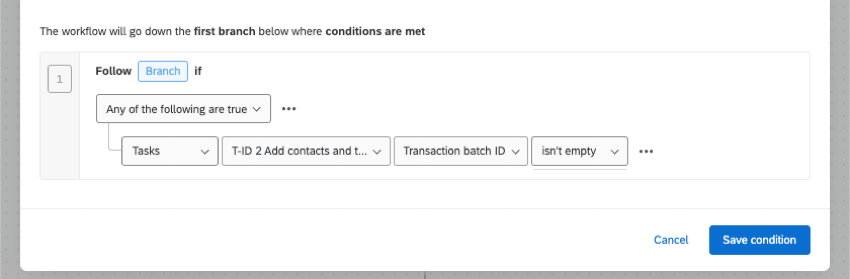
Qtip: If you schedule your workflow to run on a frequent basis, but there isn’t a new file to extract from your chosen source, the workflow will not send the distribution, and mark it as failed. This is intended behavior, since if there isn’t a group of contacts to message, the message can’t go out. If you have workflow failed notifications turned on and want to avoid receiving too many, add a condition to your workflow between your contact import and the distribution. As seen below, you can set a condition so the distribution’s only sent if the file is not empty, thus eliminating the failures described.


Qtip: To create and distribute to a sample population, add the Create an XM Directory Sample task after your contact import task, but before your distribution task. Select Use a transaction batch generated from a previous task as the sample source.
Run Summary Reports
Email tasks allow you to send a general email message with no survey link included. Because of this, email tasks are a great options if you want to create run reports, keeping your stakeholders updated on how many contacts were processed in each run.
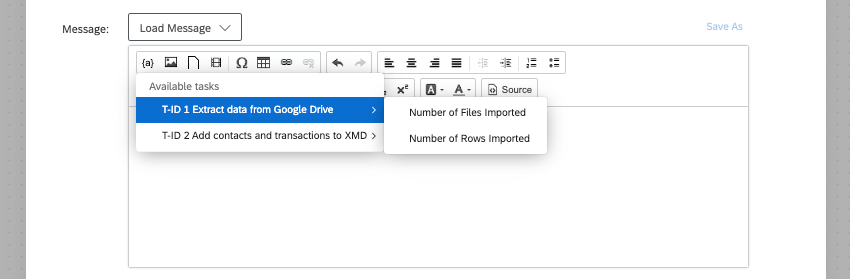
- Extract data from (source): You can show email recipients the number of files or rows in all files imported. Number of rows can be a great way to show the number of contacts generated.
- Add contacts and transactions to XMD: Display information such as the directory where the new contacts were uploaded, the list ID, or the transaction ID.
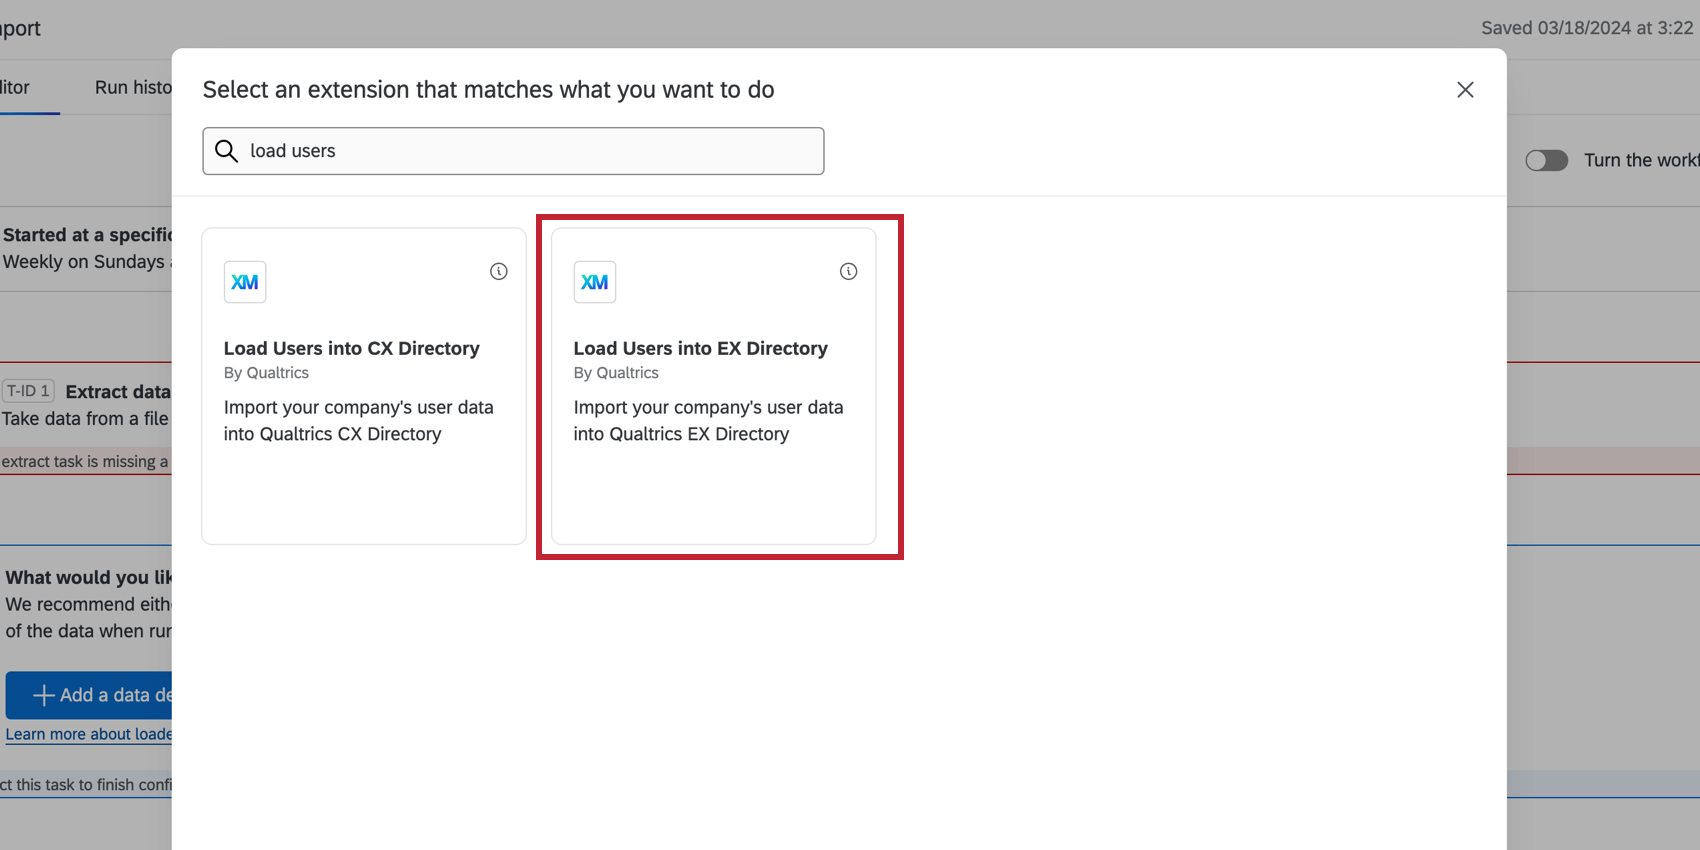
People Import Automations (EX)
In this section, we’ll discuss an automation that’s only available for Employee Experience customers, and is disconnected from XM Directory.
People import automations allowed you to automatically pull lists of employees from a source of your choice to your employee directory. In legacy automations, employees can come from a Secure File Transfer Protocol (SFTP) server, the Qualtrics File Service, or Google Drive. Workflows achieve this same functionality using ETL workflows, while also supporting several more sources, such as SuccessFactors, Workday, and more.
- Extract Employee Data from SuccessFactors
- Extract data from Google Drive
- Extract data from Qualtrics File Service
- Extract data from SFTP files (supports SSH key)
- Extract Employee Data from HRIS (connects to many popular HRIS, such as Workday)
Qtip: Workflows also supports other import sources, like Amazon S3, Snowflake, and Salesforce. For more information, see Building ETL Workflows.
Changes to Automations After Migrating to Workflows
Active XM Directory and EX automations were automatically migrated to Workflows beginning in Q3 2025.
Some automation configurations will change when they are migrated to Workflows. If your automations have at least one of the following features, there will be slight changes to your workflow:
- Automations set to “on demand” that run every 15 minutes will change to run every hour. This is the most frequent setting available for scheduled workflows. Qtip: If you need your workflow to run every 15 minutes, you can log into the Customer Success Hub and contact Technical Support with your request.

- Automations with linked distributions will be migrated as a single workflow that imports contacts and distributes surveys. If your automation exceeds 20 linked distributions, then your migrated workflow will exceed the 20 tasks in a workflow limit. You can edit your workflow as needed to remove extra tasks and consolidate distributions. This applies for existing automations that are eligible for automatic migration. Qtip: We recommend splitting your import and distribution workflows before the auto-migration period to ensure scale and performance optimization.
- Automations with survey and reminder expiration in hours will have their expiration migrated to daily.
FAQs
My mailing list/directory contacts file won't upload at all in XM Directory. What's happening?
My mailing list/directory contacts file won't upload at all in XM Directory. What's happening?
How can I manually run my automation?
How can I manually run my automation?
What is the difference between embedded data and transaction data?
What is the difference between embedded data and transaction data?
How quickly can I expect workflows to run?
How quickly can I expect workflows to run?
Is there a maximum size workflows can be?
Is there a maximum size workflows can be?
When you import updates to existing contacts, how are empty / blank fields treated?
When you import updates to existing contacts, how are empty / blank fields treated?
My workflow failed! How do I figure out what happened?
My workflow failed! How do I figure out what happened?
With my XM Directory automations, I used prefixes and suffixes to identify files. Can workflows support that?
With my XM Directory automations, I used prefixes and suffixes to identify files. Can workflows support that?
Are there character limits I should be aware of for my XM Directory workflows?
Are there character limits I should be aware of for my XM Directory workflows?
What custom delimiters can I use to upload contacts to XM Directory with workflows?
What custom delimiters can I use to upload contacts to XM Directory with workflows?
~
&
*
"
_
Can I see a list of my pending contact files in workflows?
Can I see a list of my pending contact files in workflows?
Can I set when my survey expires in this workflow?
Can I set when my survey expires in this workflow?
Are carriage returns supported in CSV files processed through workflows?
Are carriage returns supported in CSV files processed through workflows?
That's great! Thank you for your feedback!
Thank you for your feedback!