-

Qualtrics Platform -

Customer Journey Optimizer -

XM Discover -

Qualtrics Social Connect
Update ArcGIS Task
About the Update ArcGIS Task
The Update ArcGIS task allows you to pass location data from Qualtrics to ArcGIS. This data must be captured using the ArcGIS Map question type within a survey. Once your location data is sent to a layer in ArcGIS, you can create further visualizations and analyses.
Setting Up the Update ArcGIS Task
- Navigate to the Workflows tab of a survey or the stand-alone Workflows page.
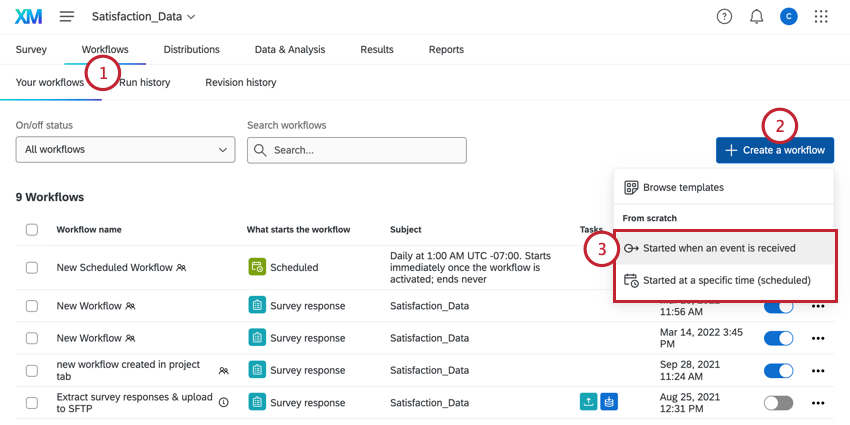
- Click Create a workflow.
- Choose whether you want your workflow to be Scheduled or Event-based. See Scheduled Workflows vs. Event-based Workflows for more information about each option.
- Set up the event for your workflow (if event-based) or determine the schedule (if scheduled).
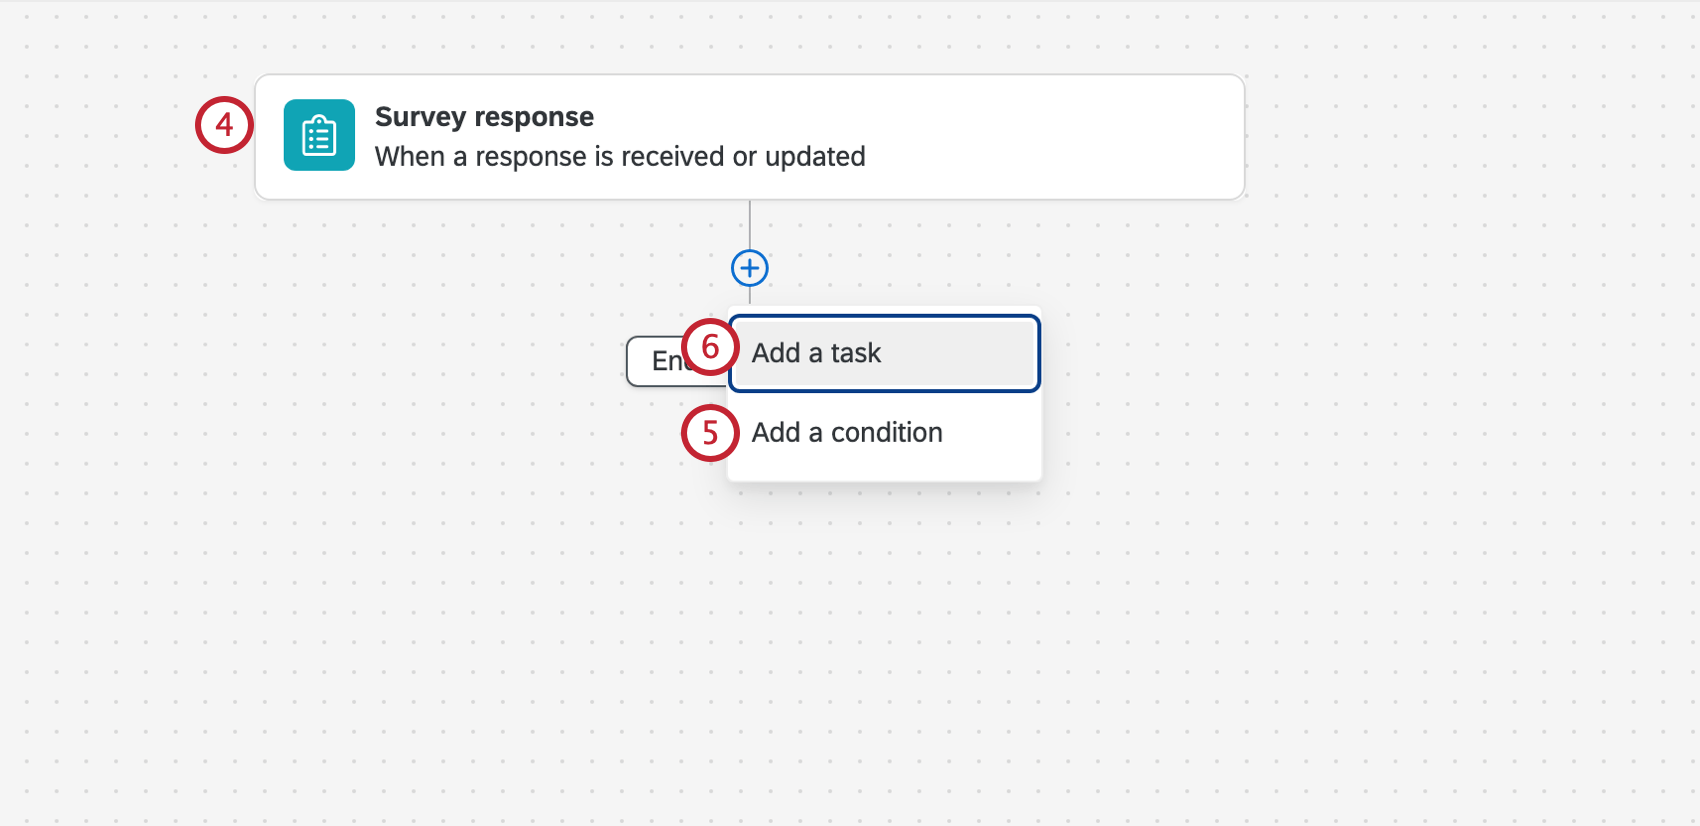 Qtip: To trigger the workflow based on geospatial data collected using an ArcGIS Map question in a survey, select Survey Response as the event.
 - If desired, click the plus sign ( + ) and then Conditions to set conditions under which the workflow is triggered.
- Click the plus sign ( + ) and then Task.
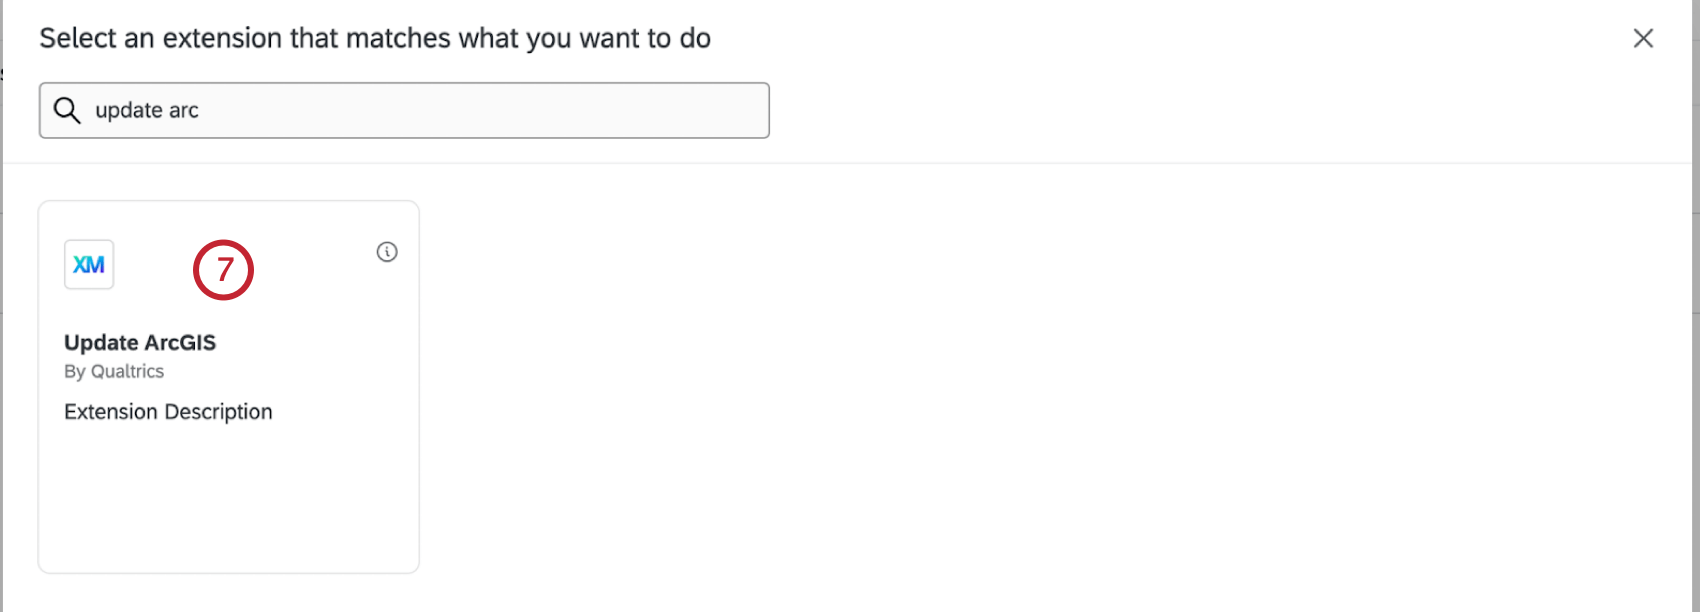
- Select Update ArcGIS.
- Select the account you’d like to connect to. If you’d like to add a new account, select Add a user account.
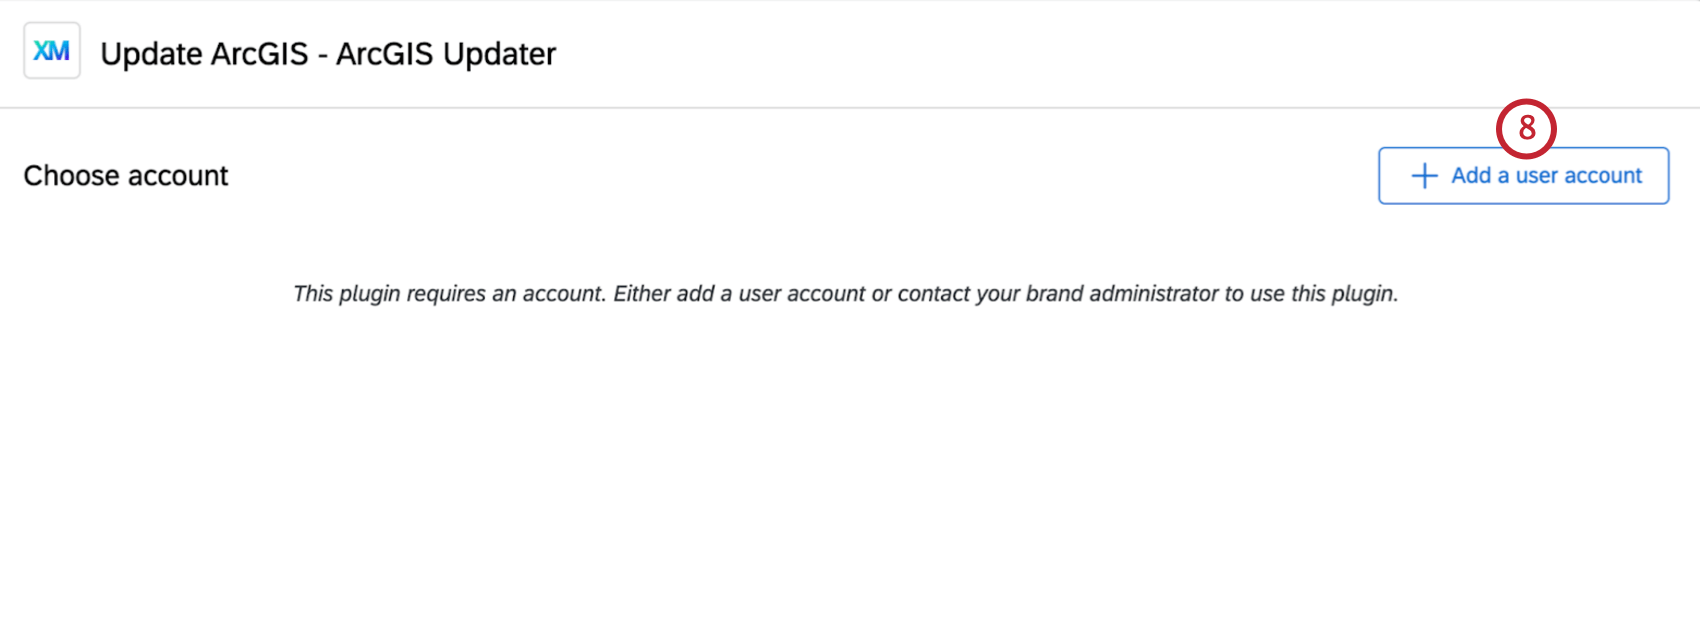 Qtip: Any accounts you add here will only be accessible to you. Accounts added by Brand Administrators on the Extensions page can be used by the whole brand.
 - If you are adding a new account, enter the account name.
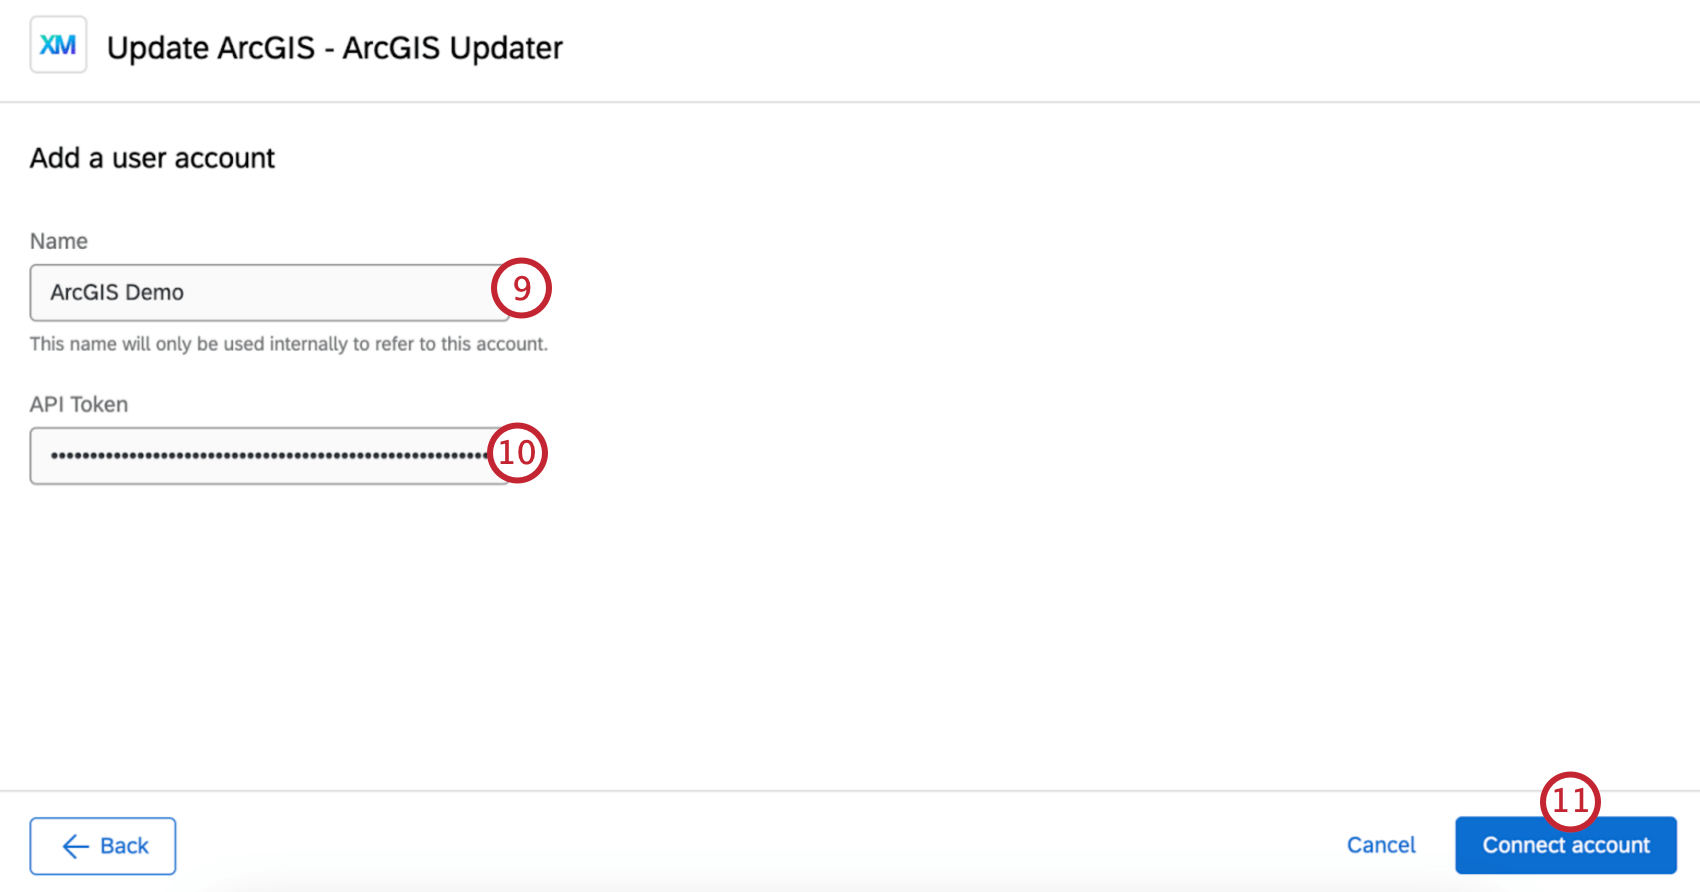
- If you are adding a new account, enter the API key you generated when setting up the ArcGIS extension.
- Select Connect Account.
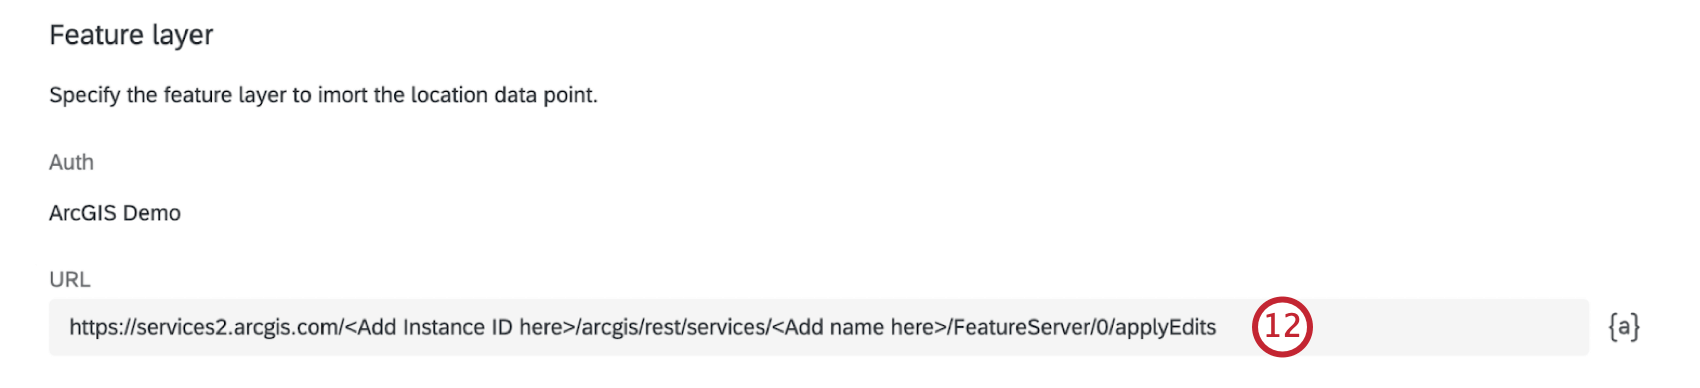
- Enter the URL for the feature layer. Replace the text in the angle brackets with your instance ID and layer name.
- Select the coordinate input format for the location data that will be sent to ArcGIS.
- Lat/Long Coordinates: Enter latitude and longitude coordinates.
- ArcGIS Map Question: Enter location data collected from the ArcGIS Map Question.
- Set the value of the location data. You can enter the value manually or use the piped text button ( {a} ).
- Click Add Fields if you want to define another column of data in your ArcGIS Layer. Repeat these steps for every field you want to add.
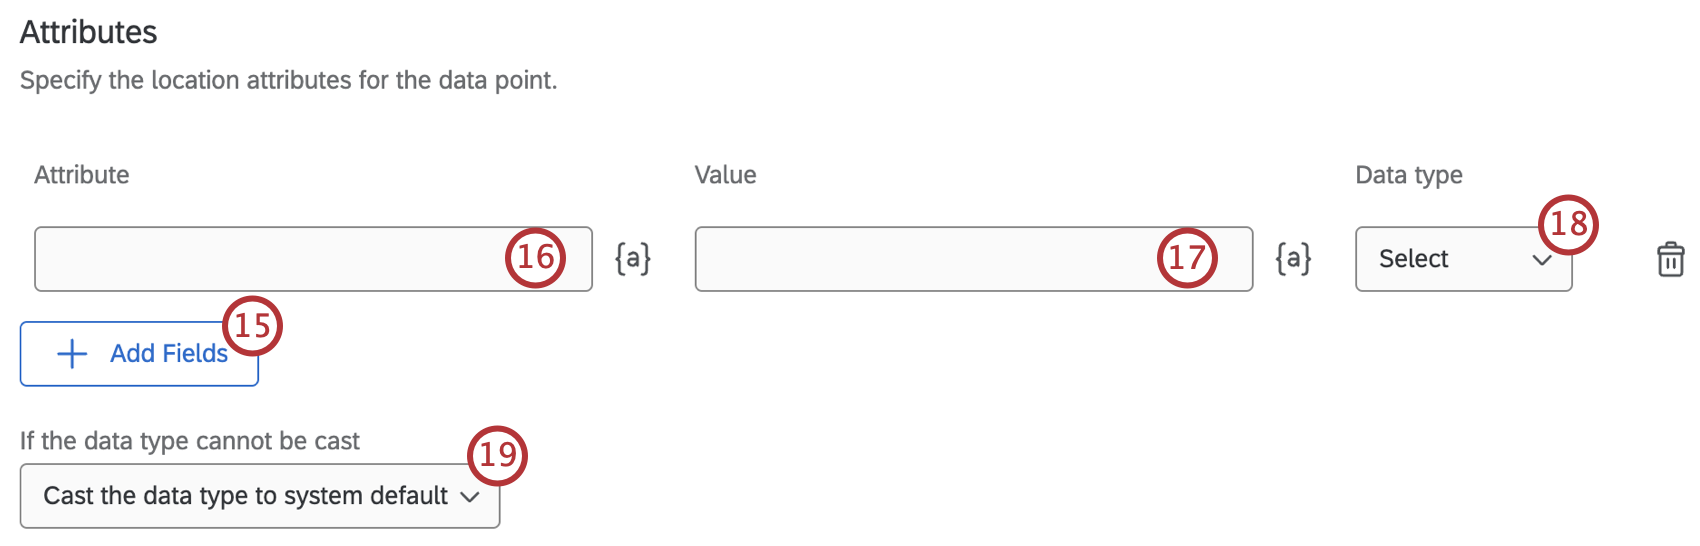
- Within the Attribute field, type the name of the field.
- Within the Value field, enter the input value for that field.
Qtip: Use the piped text button ( {a} ) to use values from respondents’ answers. For more information, see Tips for Mapping Piped Text to Columns.
- Select a Data type from the dropdown to determine the type of data for the field.
- Use the dropdown to select what happens to the data type if it cannot be cast.
- When you’re finished adding all your fields, click Save.