Edición de campos personalizados
Acerca de los campos personalizados
Puede agregar nueva información a las respuestas después de que ya hayan sido enviadas. grabado. Puede categorizar según elementos como edad, fechas o ciertas respuestas a preguntas, agrupar las respuestas en nuevas categorías, combinar respuestas, calcular nuevas fórmulas y más.
- Manual campos: Agregue manualmente etiquetas, fechas, campos numéricos o campos de texto a sus respuestas.
- En cubos campos: Ordene las respuestas a una pregunta en diferentes grupos, lo que permite nuevas oportunidades de informes y limpieza de datos.
- Fórmulas : Calcula operaciones matemáticas con tus datos existentes.
- Conjunto campos :Combine 2 o más campos en su conjunto de datos, ya sea concatenando o fusionando respuestas.
Los campos personalizados se pueden editar en cualquier momento en el Editor de campo en Datos y Análisis. Sin embargo, los tipos de ediciones que puedes realizar varían según el campo que hayas creado.
Conceptos básicos de edición de campos
Independientemente del tipo de campo que estés editando, siempre puedes cambiar su nombre y debes publicar tus ediciones.
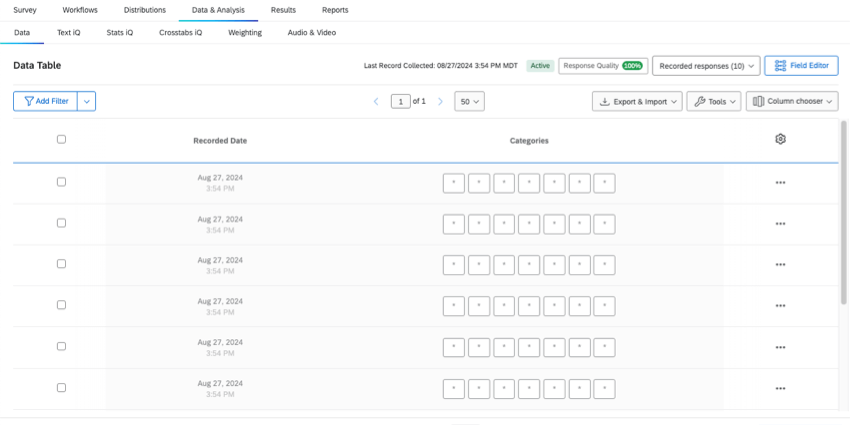
- Ir a Datos y análisis.
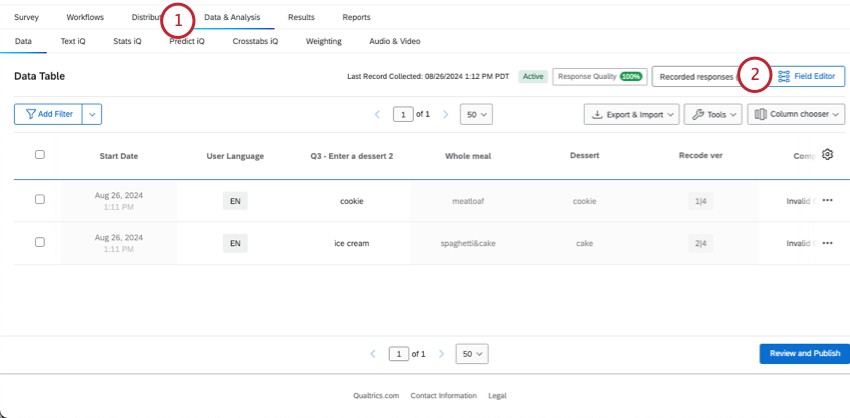
- En Datos, seleccione Editor de campo .
- Para cambiar el nombre de un campo, edite el Destino .
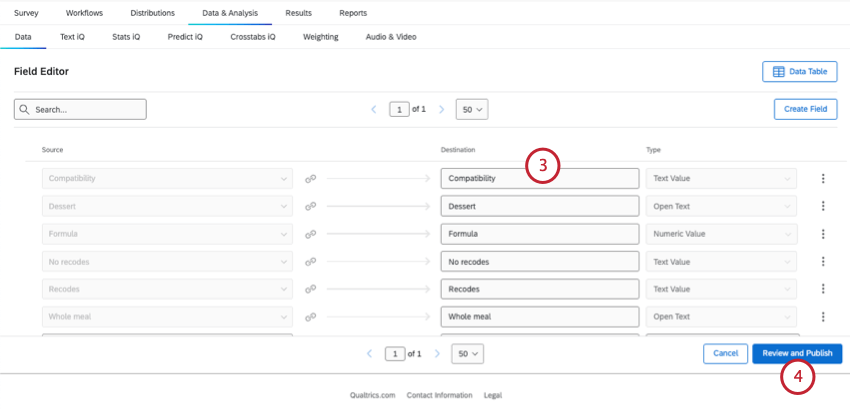
- Una vez que haya terminado, haga clic en Revisar y Publicar .
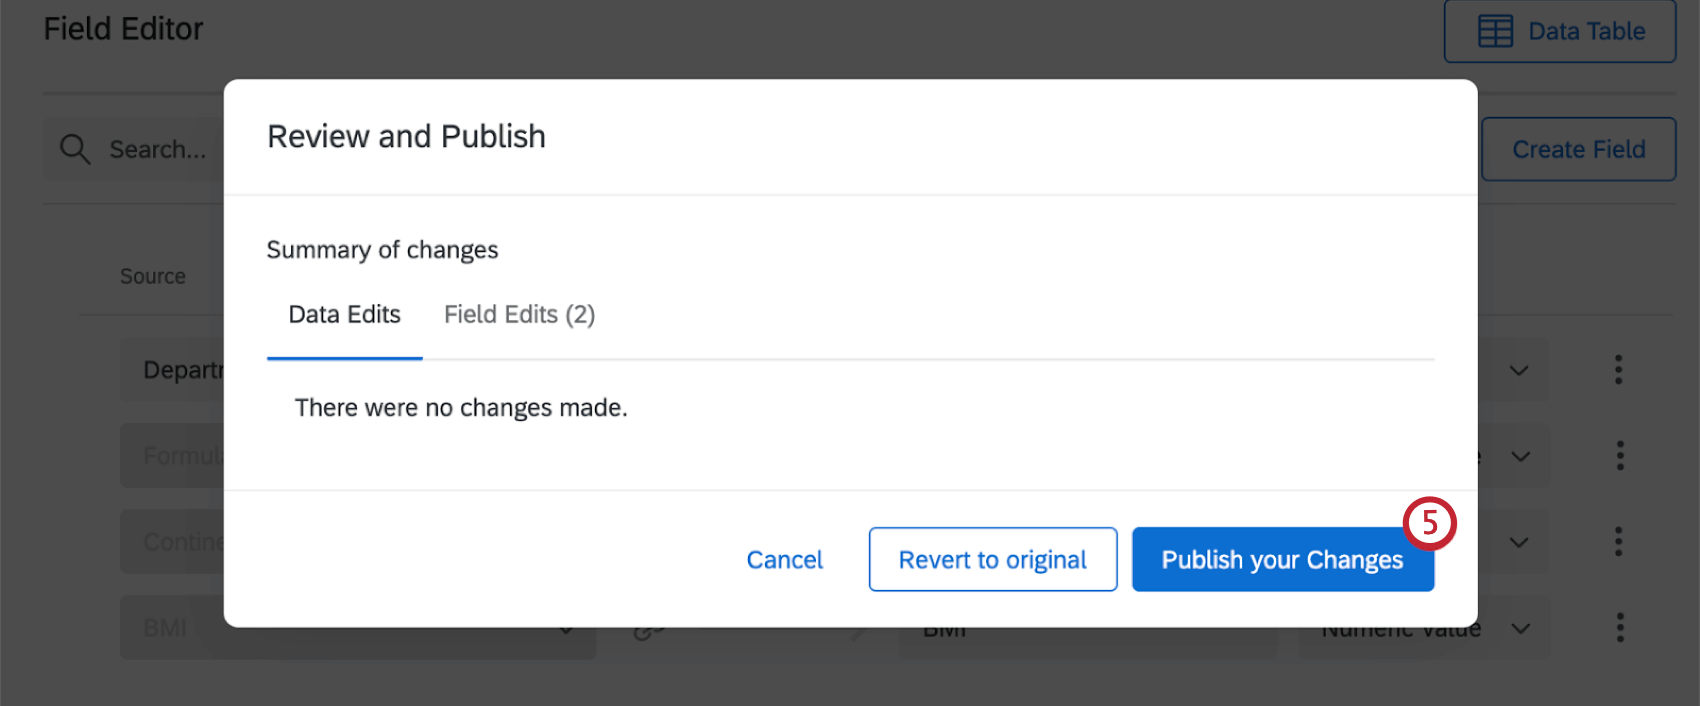
- Hacer clic Publicar tus cambios .
Ediciones que puedes realizar en cada campo
Para todo tipos de campos personalizados, puedes:
- Editar el nombre.
- Marcar un campo como sensible.
- Eliminar el campo .
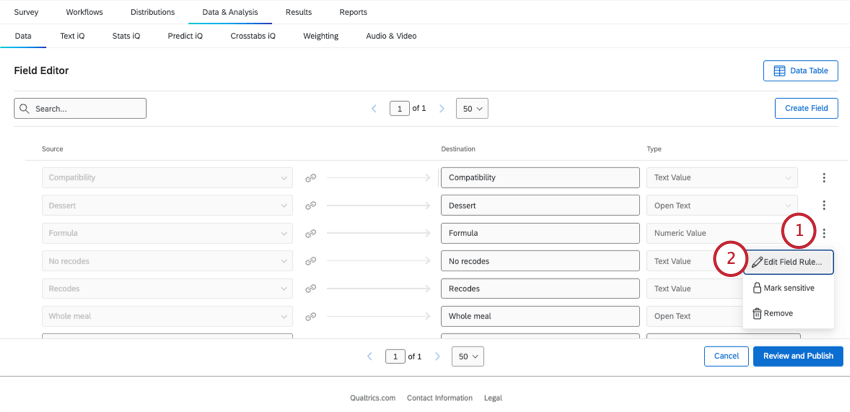
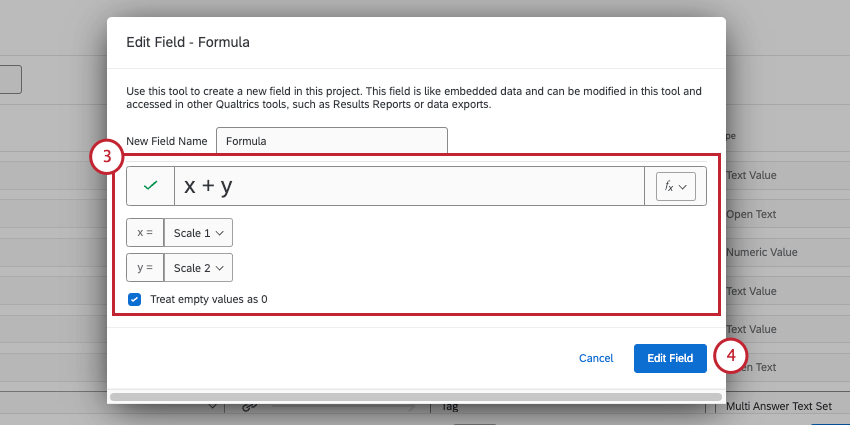
Para en cubos , fórmula , o conjunto campos solo, puede cambiar las reglas .
Para campos manuales solo , puede:
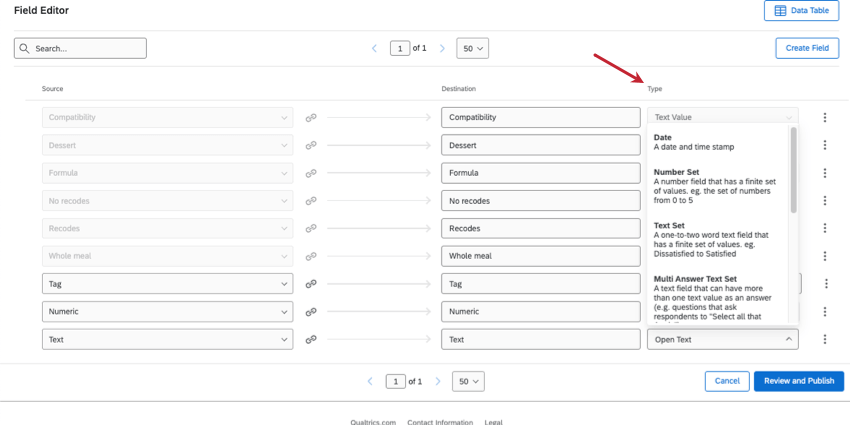
- Asignar tipos de campos .
- Formato de fechas ( Fechas solo).
Cambiar reglas para campos agrupados, de fórmula o combinados
Puedes hacer cambios en la forma en que tu en cubos , fórmula , o conjunto Los campos calculan sus respuestas.
Asignación de tipos a campos manuales
El “tipo” de un campo es el mismo que su formato de datos. Por ejemplo, los datos numéricos son muy diferentes de las opción múltiple, y ambas pueden ser muy diferentes de la opinión abierta. Debido a esto, el tipo de campo determina ¿Qué tipo de modificaciones puedes hacer a los datos? ¿Y qué widgets puedes usar en? Paneles de resultados .
- Estos tipos de campos son los mismos que los de CX Dashboards. Para la definición de cada tipo de campo, consulte Tipos de campos .
- Para obtener una guía sobre cómo hacer coincidir los widgets del Tablero de resultados con los tipos de campos, consulte Tipos de campos y compatibilidad de Widget .
Haga clic en el Tipo columna para seleccionar un tipo de campo diferente.
Formato de fechas
Para campos de fecha , puede especificar un formato y una zona horaria.
- Haga clic en los 3 puntos siguiente al campo de fecha.
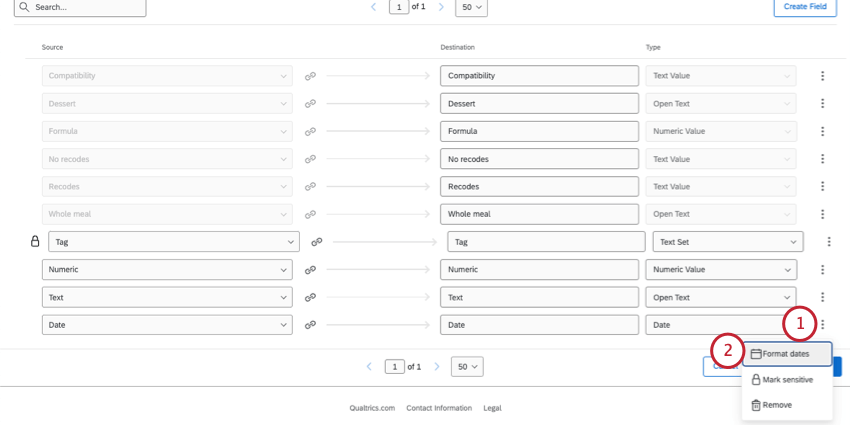
- Seleccionar Formatear fechas.
- Seleccione un formato de fecha en el menú desplegable. Ver Sintaxis del formato de fecha para obtener más información sobre los formatos de fecha disponibles.
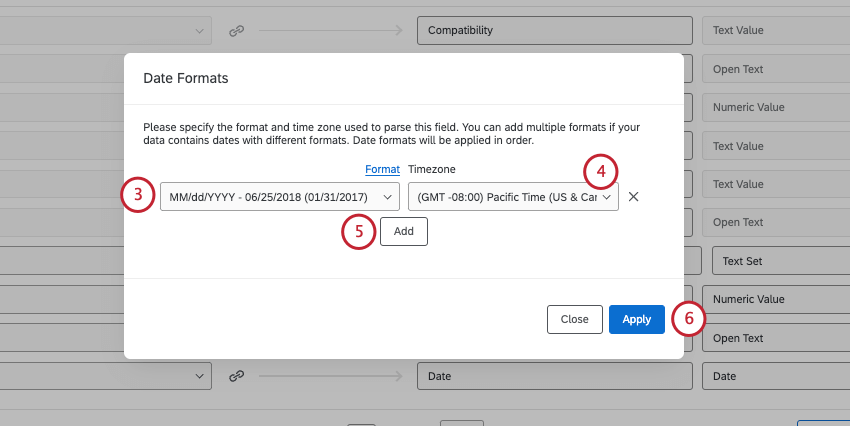 Consejo Q: Debe seleccionar entre las opciones de formato de fecha. No es posible crear una sintaxis de fecha personalizada.
 - Seleccione una zona horaria .
- Si las respuestas pueden venir en más de un formato, haga clic en Agregar para definir más.
- Cuando haya terminado, haga clic en Aplicar.
- Publique los cambios.
Marcar un campo como sensible
A veces es posible que desees ocultar algunos datos de los informes o paneles, como la información personal de los encuestados. Los campos marcados como sensibles se ocultarán a los usuarios. Comparte la encuesta con , siempre que tengan el permiso Ver Informes Ver datos restringidos transformado apagado . Ver más en permisos de colaboración .
Una vez que los campos se marcan como sensibles, los usuarios restringidos no podrán ver esos datos en Datos y análisis.
Puede marcar cualquier tipo de campo personalizado como sensible.
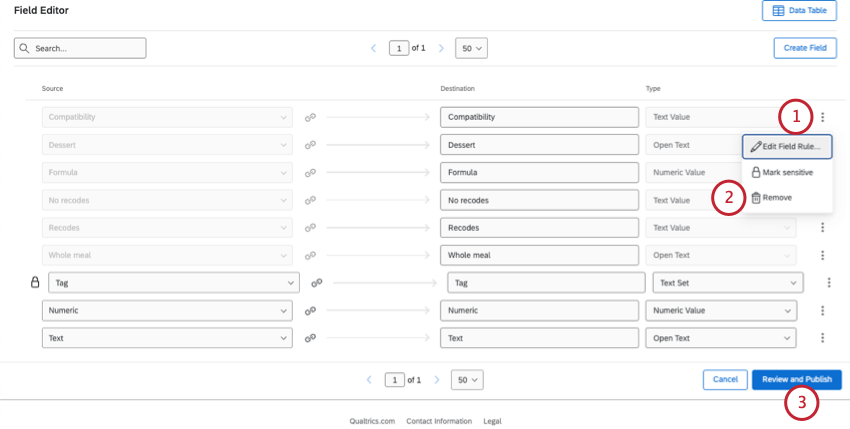
- Haga clic en los 3 puntos siguiente al campo.
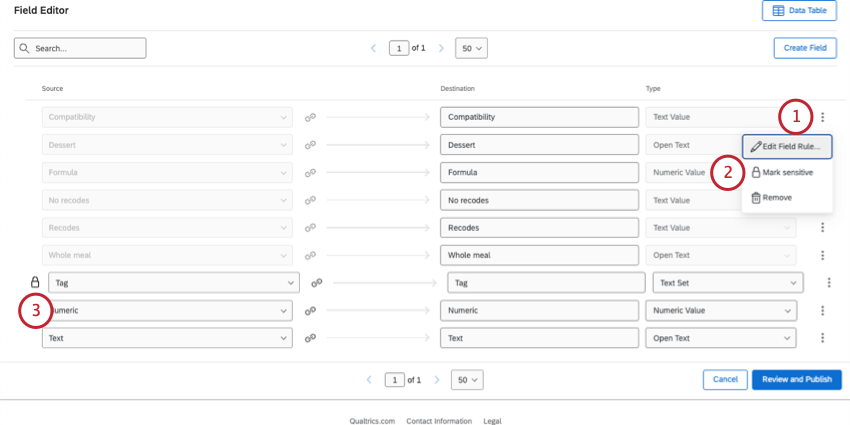
- Seleccionar Marcar como sensible.
- Aparecerá un icono de candado siguiente a los campos que estén marcados como sensibles.
Consejo Q: Puedes marcar tantos campos como sensibles necesites.
- Para deshacer estos cambios, haga clic en los 3 puntos y seleccione Marcar como insensible .

- Cuando hayas terminado, publicar tus cambios.
Eliminar un campo personalizado
