-

Qualtrics Platform -

Customer Journey Optimizer -

XM Discover -

Qualtrics Social Connect
Distribution Templates (Pulse)
About Distribution Templates
You can set a message template for your pulse’s invitation and the reminder. You can also create messages in your library that can be used as message templates for your pulse program. Pulse supports both email and SMS (text message) distributions. Your message templates will be used in each of your pulse surveys as they are created.
To start creating message templates:
- Go to Schedule and content.
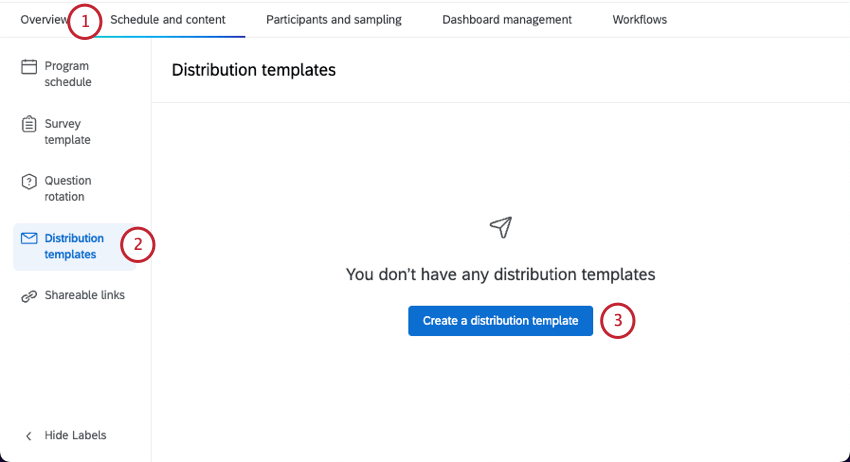
- Open Distribution templates.
- Click Create a distribution template.
Compatible Message Types
If you’re using a message you saved to your library, here’s a list of message types you can use:
- Subject lines are compatible with Employee Experience “Subject Line” messages.
- Invites are compatible with Employee Experience “Evaluator / Participant Invite” messages.
- Reminders are compatible with Employee Experience “Evaluator / Participant Reminder” messages.
- SMS Invites are compatible with Employee Experience “SMS Invite” messages.
- SMS Reminders are compatible with Employee Experience “SMS Reminder” messages.
Creating an Email Message Template
- Select Email.
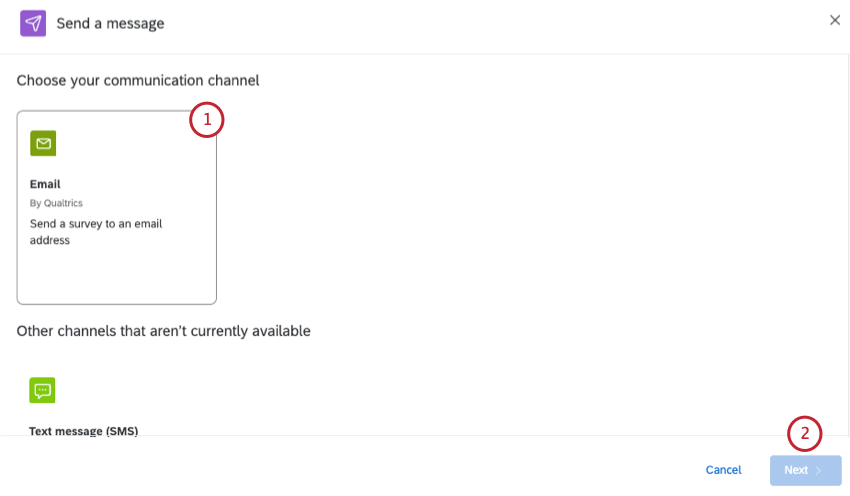
- Click Next.
- Choose who you want to invite:

- All participants in pulse projects: Send the email to every participant you added to the program.
- Only participants that match the following criteria: Filter recipients by name, email, last name, first name, metadata, or role. You can add multiple conditions.
Qtip: Conditions can only be joined by “any,” which means participants only have to match 1 criteria to be included in the distribution.
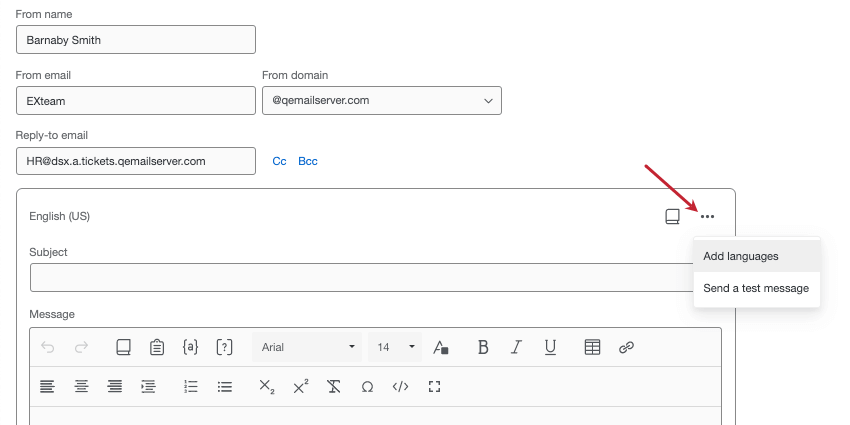
- Set a From name. This can be anything.
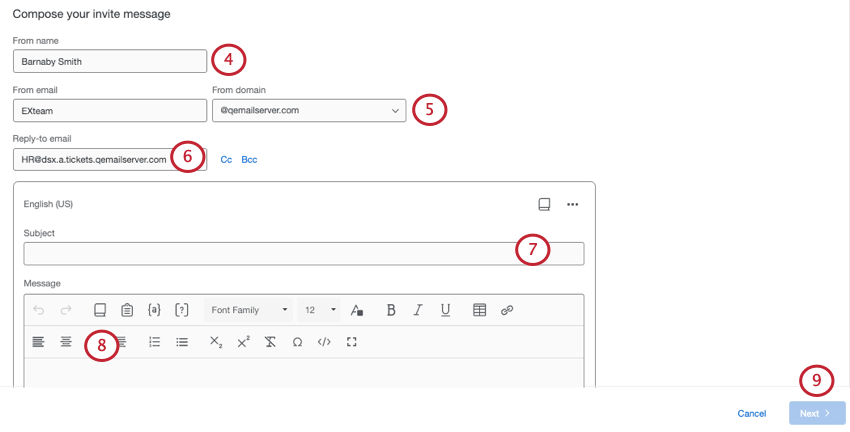
- Set a From email. You can only choose from approved domains, but the username can be whatever you want.
- Add a Reply-to email. This is the email that will receive messages if participants reply to the invite. This can be set to whatever email address you want.
Qtip: You can also choose email addresses to CC or BCC on replies.
- Write a subject line, or select one from the library using the book icon.
- Write a message, or select one from the library using the book icon in the message editor.
Qtip: You can include a pulse survey question right inside your invite by clicking the inline email question icon ( [?] ).Qtip: Click the options to add languages (translations) to your message, or to send a test message.
 Qtip: You can test out your email by clicking Send a test message in the email message editor. Be careful to not forward the preview email on to your participants as it contains the preview survey link instead of the individual link. Preview survey links will always be active, regardless of whether or not a survey is closed. For more information about these link types, visit the Preview Survey page. Please note that piped text will not populate for preview emails.
 - Click Next.
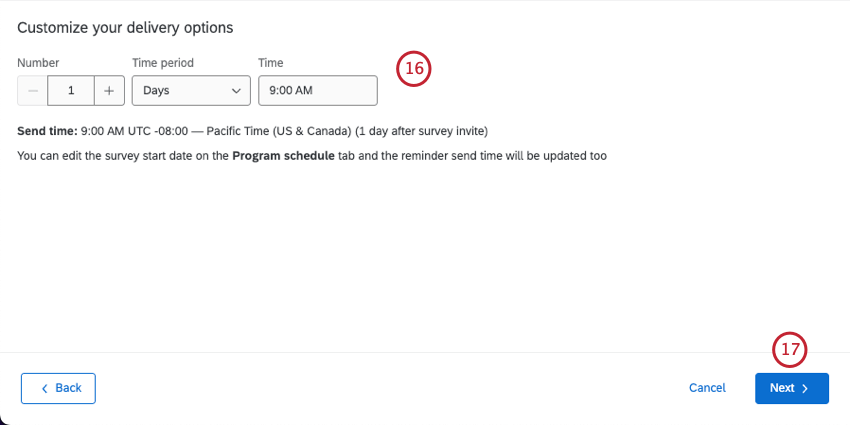
- Customize your delivery options:
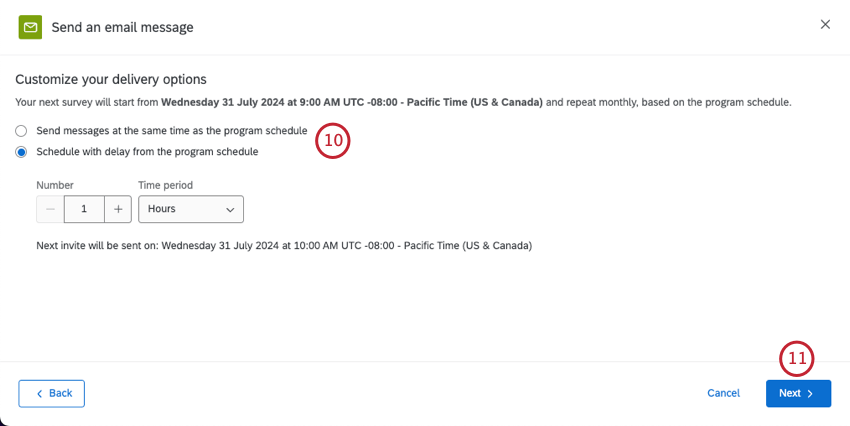
- Send messages at the same time as the program schedule.
- Schedule with delay from the program schedule.
Qtip: If you schedule with a delay, you get to set the specific number and time period. You’ll see an estimate of when the first invite will be sent.
- Click Next.
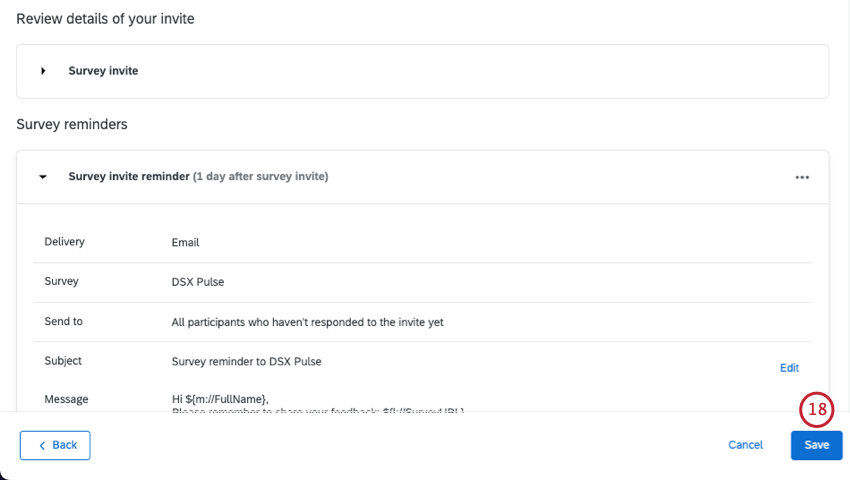
- Review your changes. You can click Edit if you want to change anything.
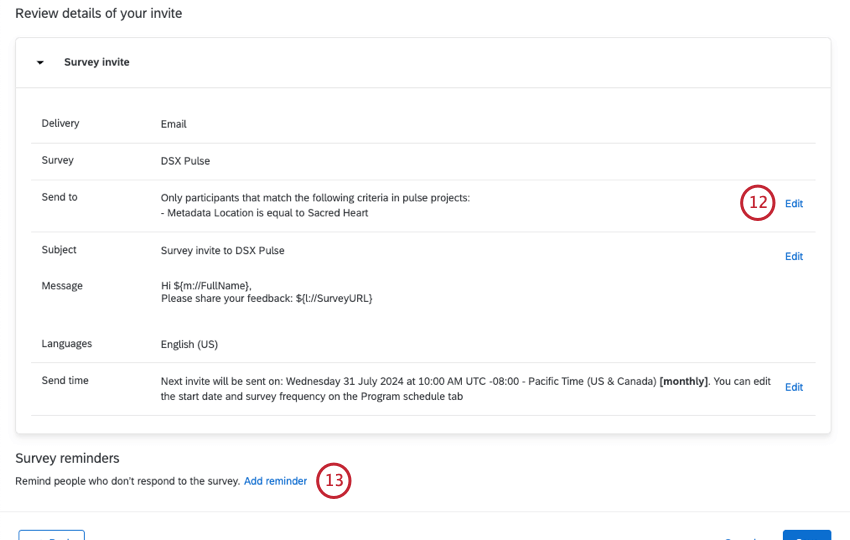
- If you want to add a reminder, click Add reminder.
- Set up your reminder message.
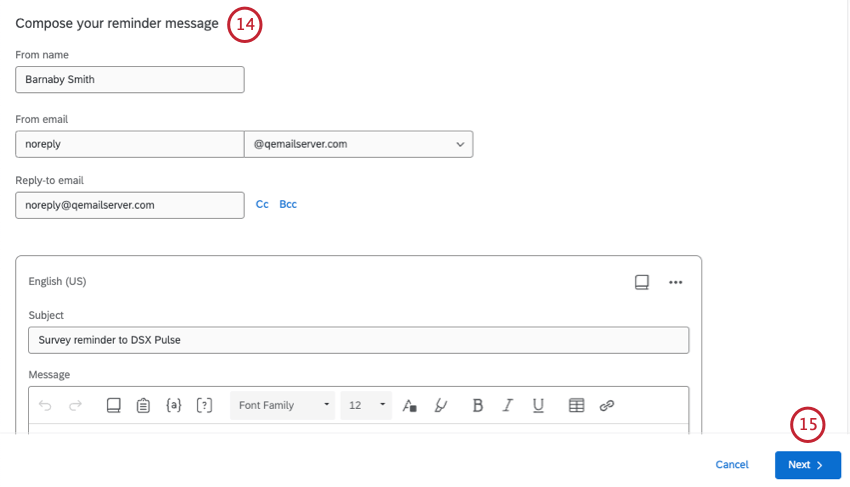
- Click Next.
- Choose how long after the initial invite that you’d like to send the reminder.
- Click Next.
- You can add more reminders or make edits to messages as needed. When you’re done, select Save.
Creating a Text Message (SMS) Template
You can send pulse invitations through text message (SMS). Participants will receive a link and open it on a browser on their mobile devices.
Pulse projects are only compatible with 1-way SMS, also called survey invite texts. You cannot use 2-way interactive SMS.
- Select Text message (SMS).
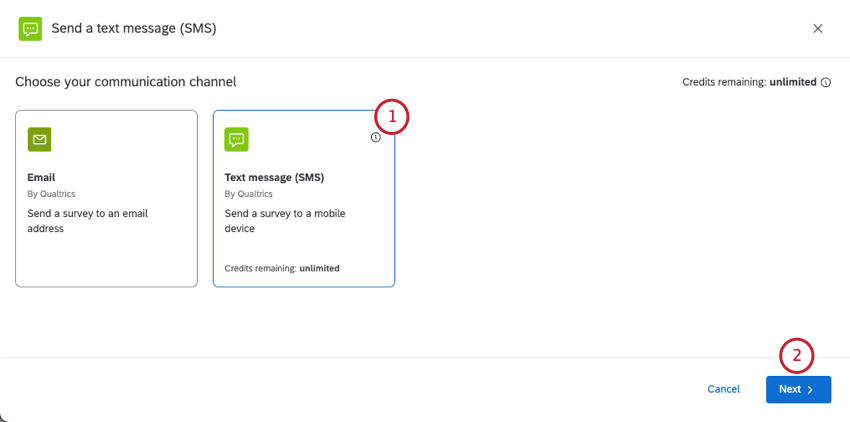
- Click Next.
- Choose who you want to send your text message to:
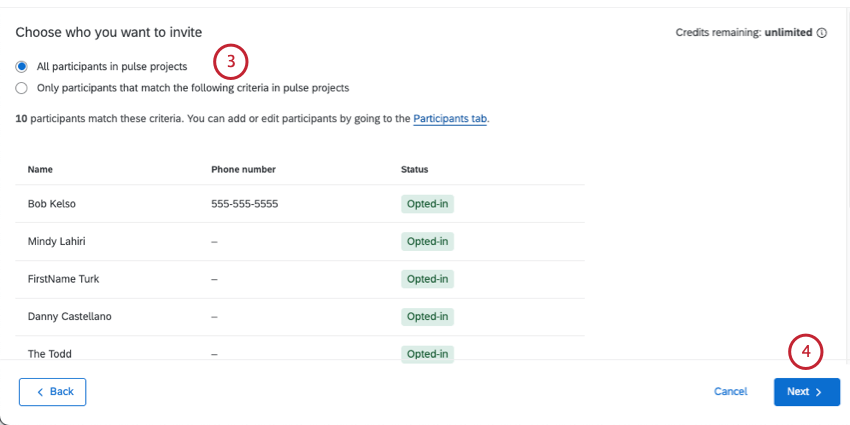
- All participants in the pulse project: Every participant included in the Pulse program.
- Only participants what match the following criteria in pulse projects: A limited set of participants based on criteria you set. See Limiting Who Receives Text Messages for more information.
Qtip: This support link takes you to another product’s page. While filtering participants works the exact same in Pulse, bear in mind that other sections may not reflect the same SMS behavior.
- Click Next.
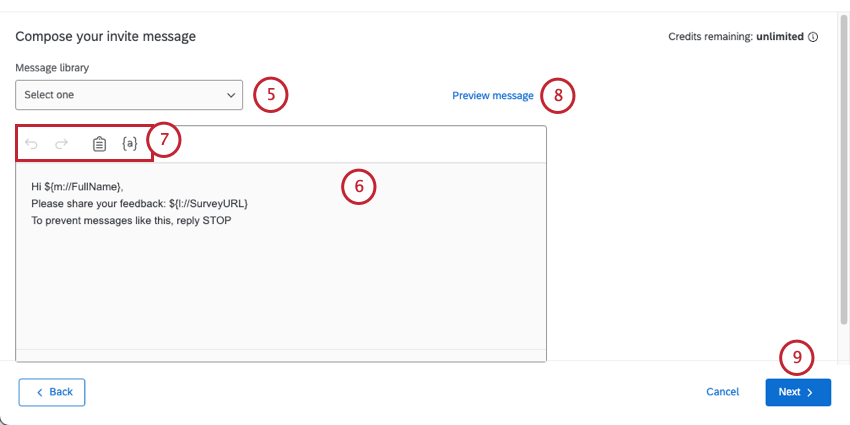
- Begin creating your text message. If you have a premade library message, you can load it using the dropdown above the message editor.
 Qtip: Library messages allow you to add translations for multi-language distributions.
 - Edit your message by typing in the box.
- Use the tools at the top of the message editor to help you create your message. These tools are:
- Backward Arrow: Undos the previous edit.
- Forward Arrow: Redos the previous undo.
- Clipboard: Inserts your survey link. By default, your survey link will already be in the message.
- {a}: Inserts piped text. You can pipe in your participant’s personal information and any metadata they have in the project.
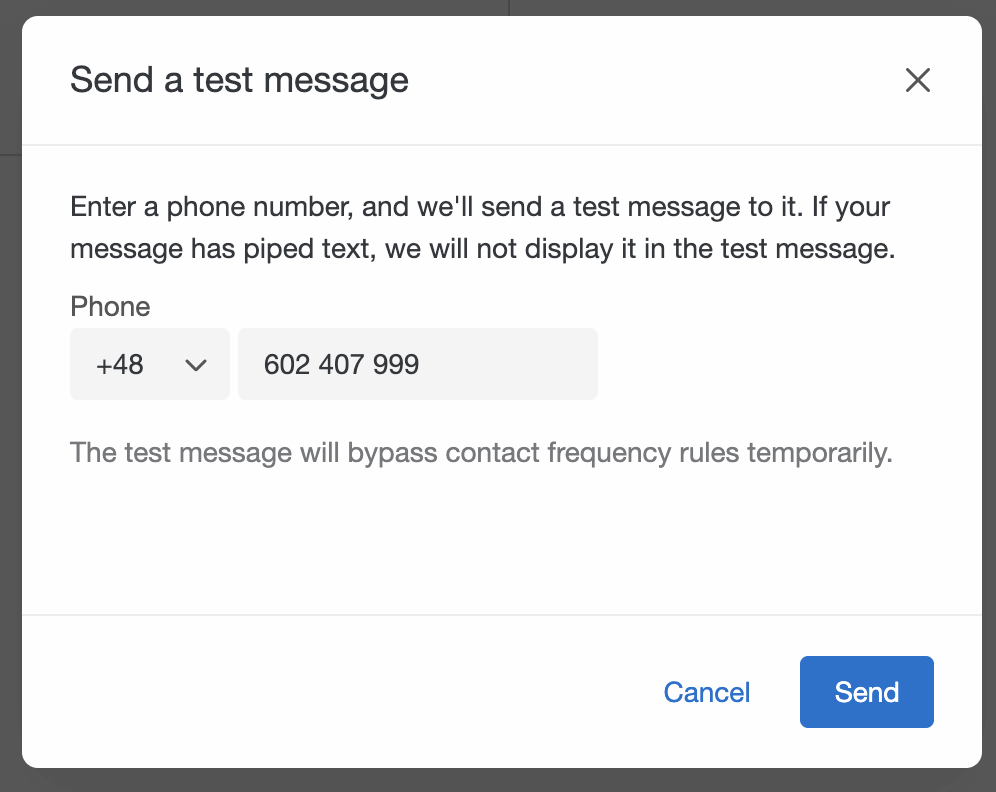
- To test your message before sending it officially, click Preview message.
Qtip: To send the test, choose the country code and enter the phone number before clicking Send.
- Click Next.
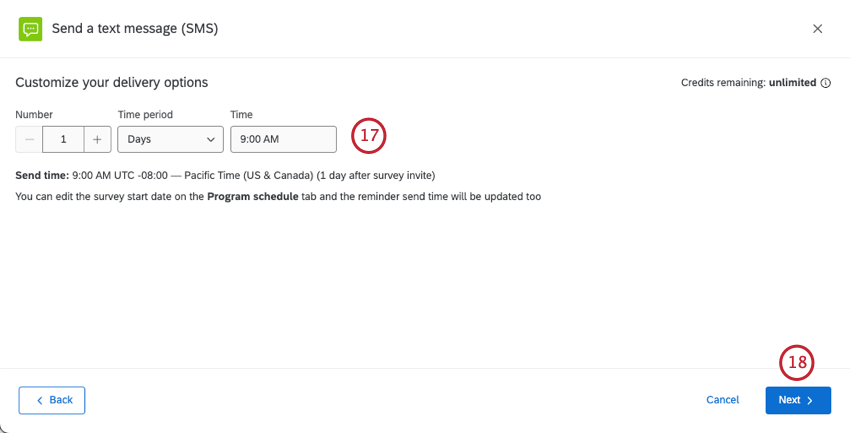
- Choose when you want to send your message:
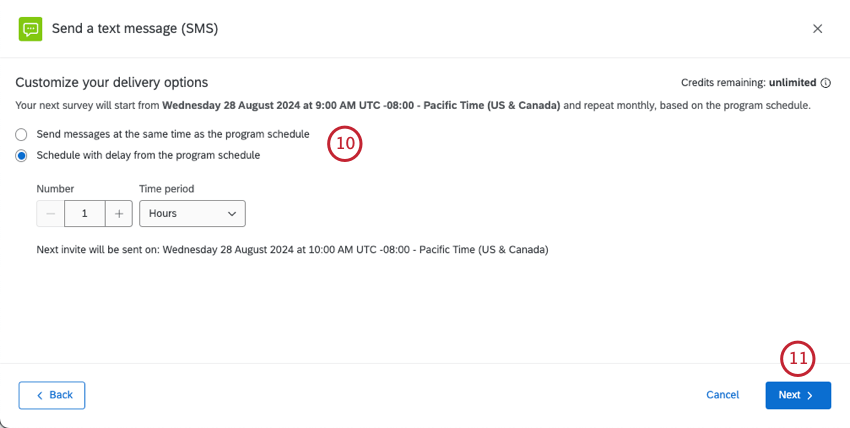
- Send messages at the same time as the program schedule: SMS messages will be sent as new surveys are activated in the pulse project. To see your program’s schedule, see Program Schedule.
- Schedule with delay from the program schedule: Send the SMS invites a set amount of time after the each survey in the program is scheduled to start. You can set a specific number of hours or days. Underneath, you’ll see an estimate of when the next invite will be sent, complete with time zone.
- Click Next.
- Review your distribution to make sure it is correct.
- If you need to edit any settings, click Edit to be brought to those settings.
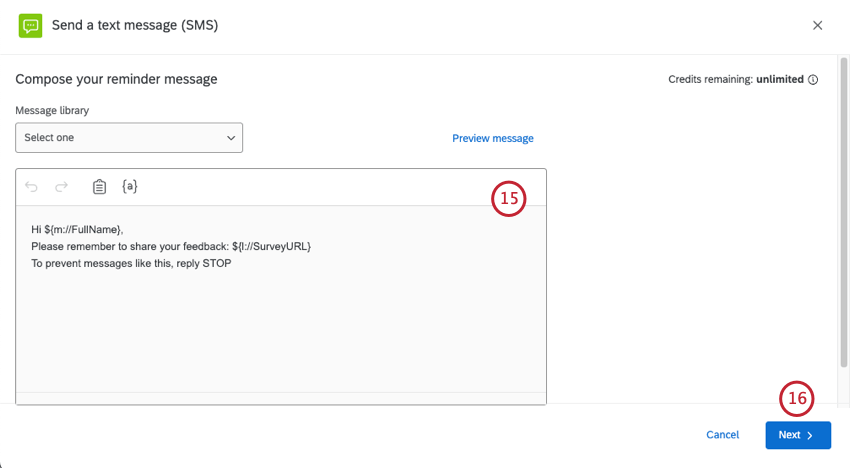
- If you want to add a reminder SMS message, click Add reminder.
- Customize your reminder message.
- Click Next.
- Choose how long after the invite is sent that the reminder should be sent.
- Click Next.
- Review your changes and make edits where needed.
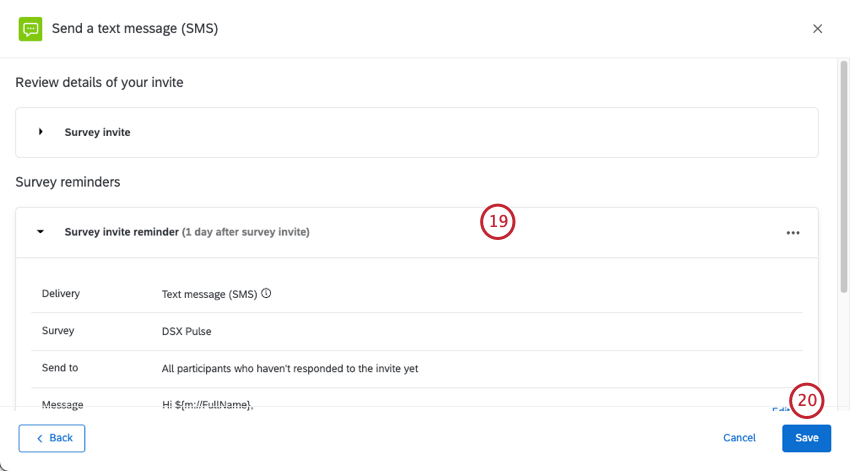
- When you’re finished, click Save.
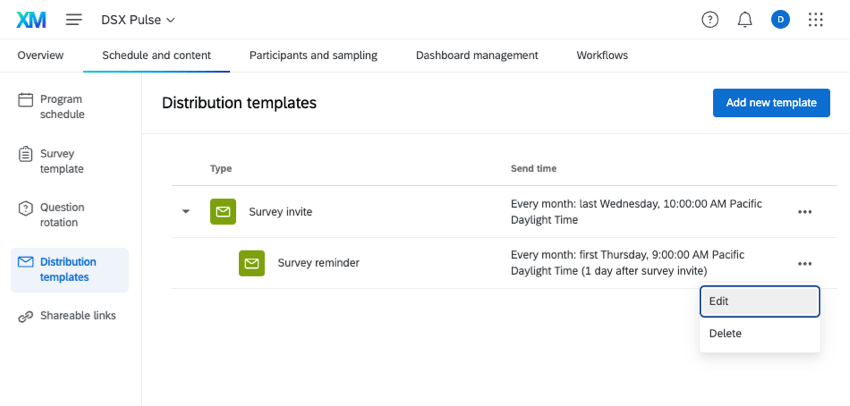
Managing Distribution Templates
You can edit or delete your invite or reminder(s) any time. Click the 3 dots next to a distribution to see these options.