Manually Adding Participants to Pulse Surveys
About Manually Adding Pulse Participants
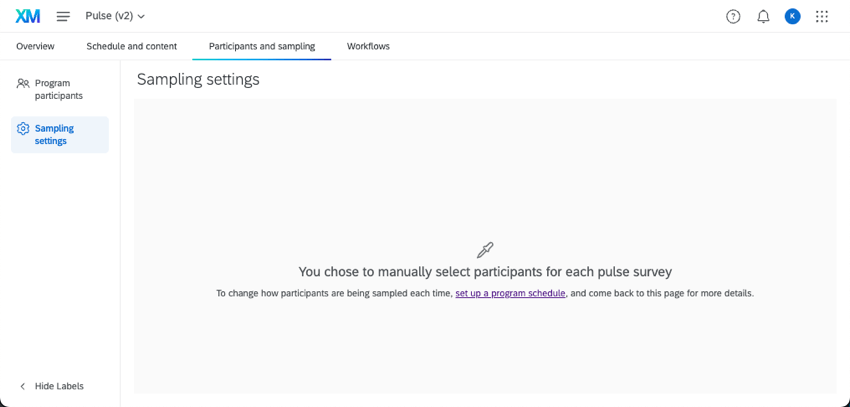
In addition to randomly sampling from a larger pool of program participants, you can decide to manually select the participants you want to include in each survey of your pulse. You still start by creating a larger pool of program participants, then select from those participants in each survey. You can use metadata to speed up the selection process, or you can choose specific individuals.
This method of adding participants can also be called custom sampling.
Enabling Custom Sampling
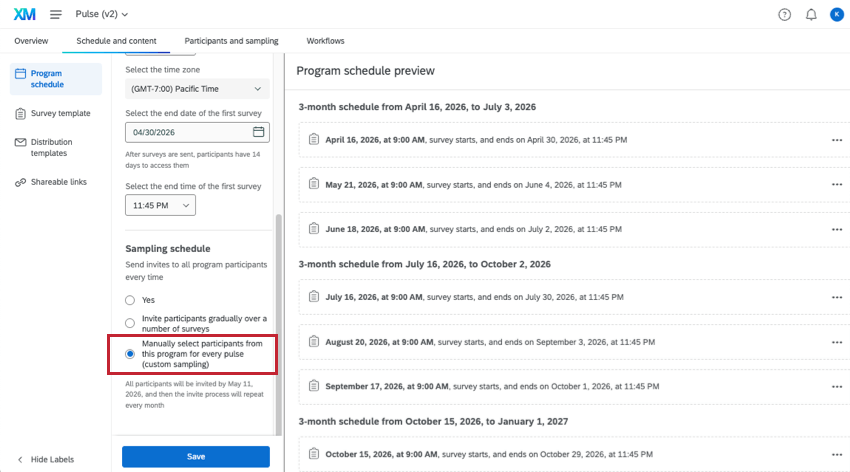
Before you can manually add participants to a pulse survey, you need to configure your program schedule accordingly.
Under Sampling schedule, select Manually select participants from this program for every pulse (custom sampling).
Next, you need to make sure your surveys for the program are generated so you can add participants to them. To start generating Pulse surveys, complete your program setup.
- Set up your survey template.
- Add invite and reminder distribution templates.
- Add participants to the program.
Qtip: The program participants act as the pool you can select survey participants from. Make sure every participant you want to eventually include is here.
- Set up any optional features you’d like to include, like hierarchies or workflows.
- Start your program.
Manually Adding Participants to a Pulse Survey
- Go to the Overview tab.
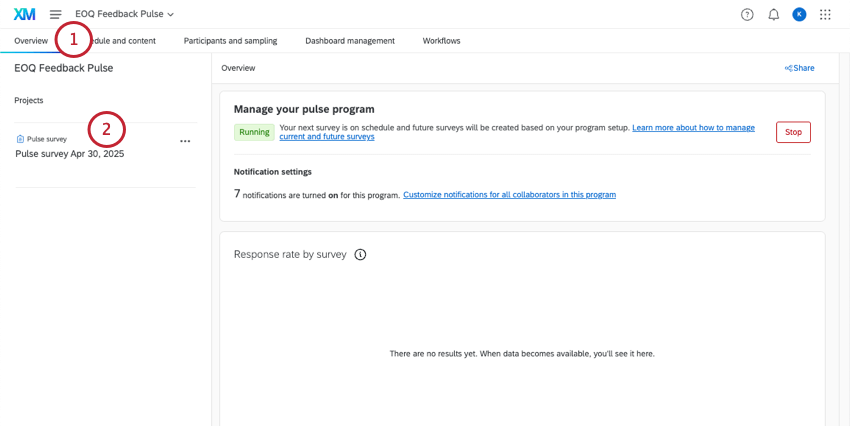
- Select a survey from the left Projects list.
- Select Participants.
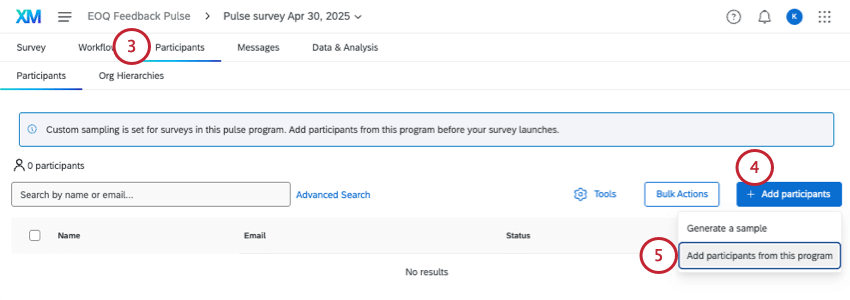
- Click Add participants.
- Select Add participants from this program.
- Select a method:
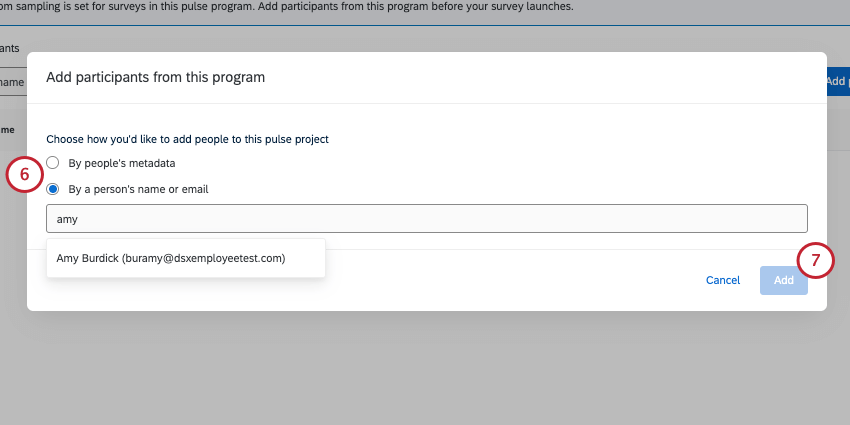
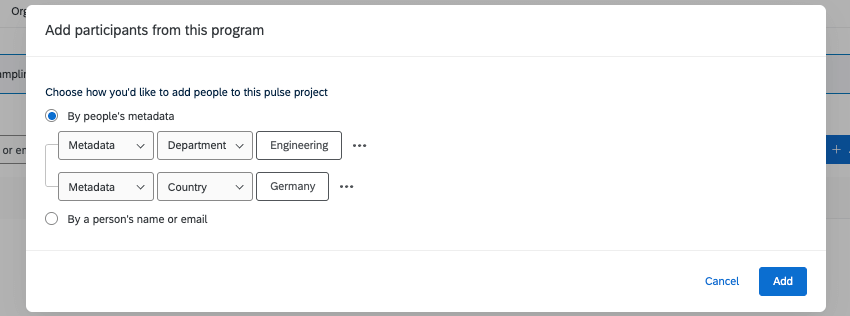
- By people’s metadata: Add any participants that meet the metadata you’ve configured. You can add multiple metadata conditions. See more on Creating Metadata conditions.
- By a person’s name or email: Search a participant by name or email and add them to the survey. You can only add 1 person at a time using this method.
- Click Add.
Creating Metadata Conditions
In this section, we’ll cover hope to make metadata conditions and how those conditions are joined.
- Select By people’s metadata.
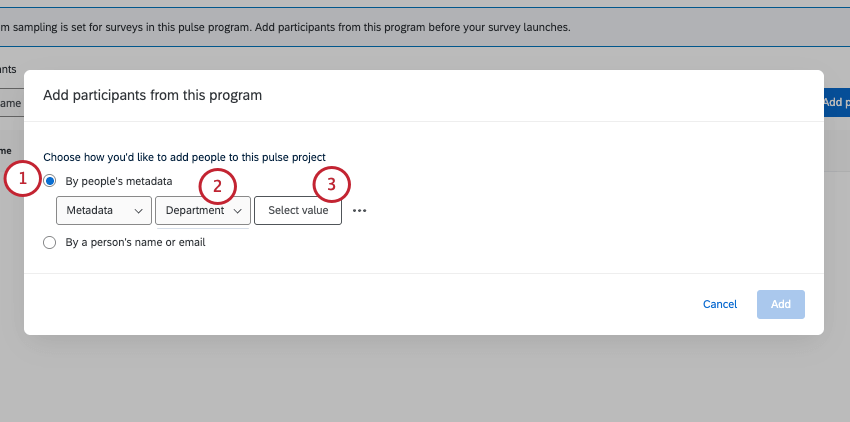
- Select a field.
- Click Select value.
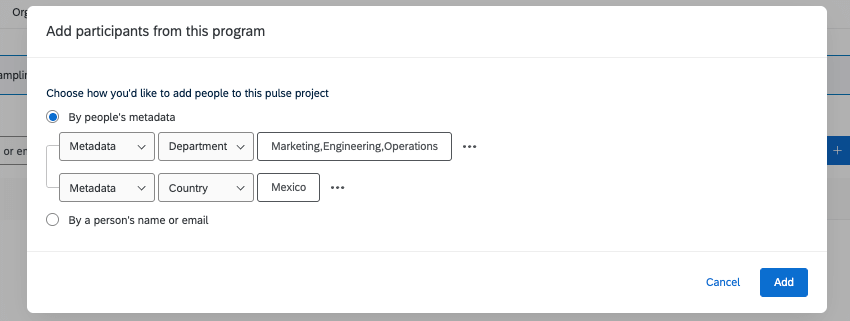
- Select all the values you want to include. A participant can match any of these values to be included in the results.
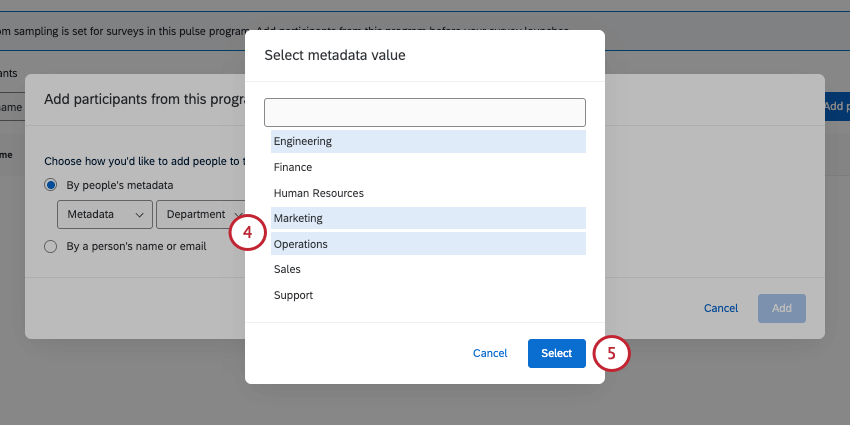 Example: For department, you select engineering, marketing, and operations. That means the participants included in this pulse survey will belong to either the engineering, marketing, or operations departments.
 - Click Select.
- To add more criteria, click the 3 dots and select Add condition below.
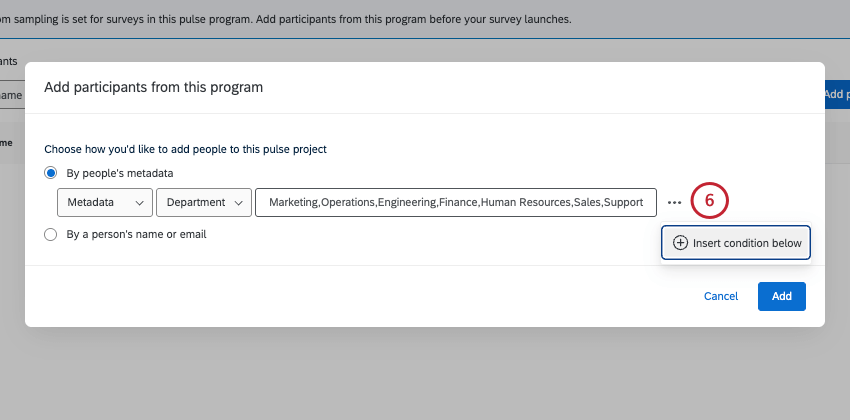 Qtip: You can add up to 8 total conditions.
 - Create your next condition. Your participants must match this condition and the previous one to be included in results.
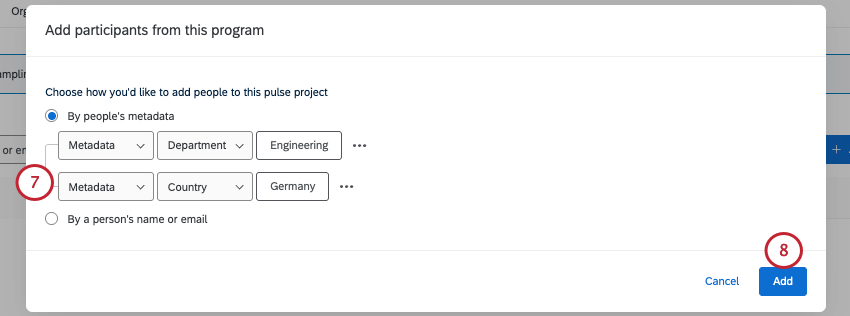 Qtip: In other words, your participants must match all conditions to be included in the survey.
 - Click Add to finish adding participants to your pulse survey.
