Managing Pulse Surveys
About Managing Pulse Program Surveys
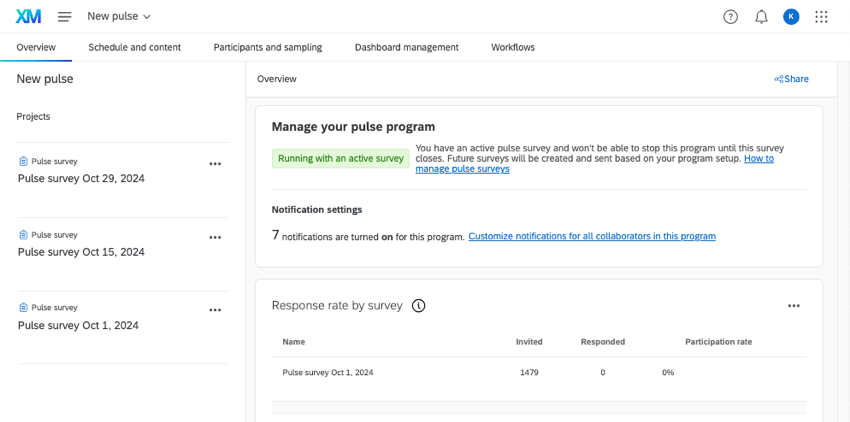
The pulse program will automatically send surveys on a regular basis. You can independently access each of these surveys to give them unique questions or look at their data. This page explains how to manage the individual surveys in your pulse program.
All surveys can be found in the program’s Project list. Upcoming surveys will be created 30 days before they’re distributed to provide adequate time for any necessary ad-hoc changes. The date of distribution will be in the survey name.
Survey Builder
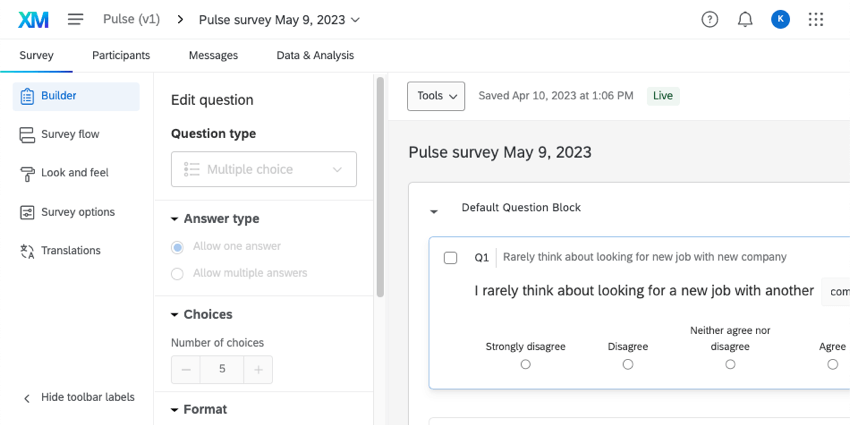
In the Survey tab, you can make edits to your survey’s questions, functionality, appearance, and translations. Any changes that you make to this survey will only apply to this specific survey.
This can be a great way to add one-off questions. For example, if your company is experiencing a merger or acquisition, you can ask questions specific to that event that won’t need to be asked again in future pulses.
A pulse’s survey builder works just like it does in any other project. See Features Available in Pulse Surveys.
Survey Participants
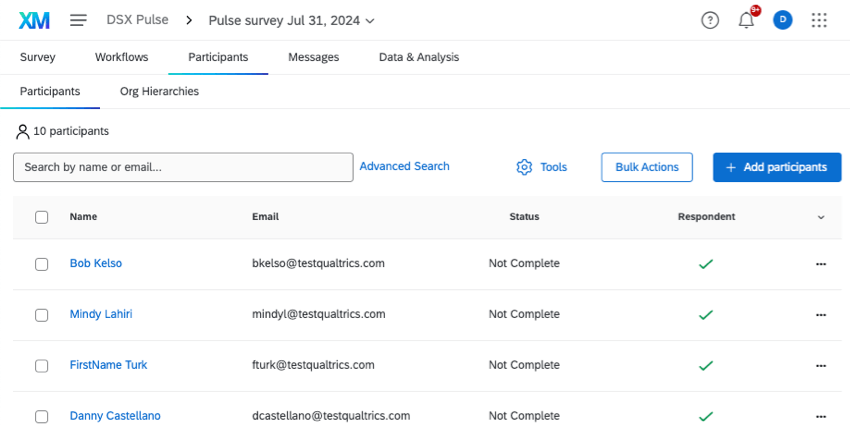
Each individual survey has its own participant list, located in the Participants tab.
The participants in each survey project will be populated automatically 3 days before that project’s distribution date. Participants will come from the pulse program’s sampling settings. If no sampling has been added, all of the pulse participants will be added to the survey.
If you want to create a sample earlier than 3 days before the survey start, you can generate the participant list early, or select program participants based on metadata.
Generating a sample
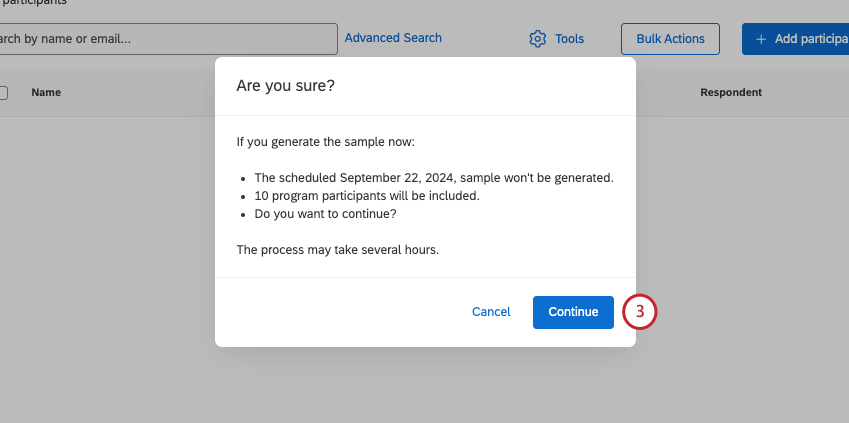
You can generate the survey’s participant list early with the “Generate sample” option. This button triggers the automatic participant selection that would usually take place 3 days before survey launch. Once this sampling takes place, the scheduled sampling will not be completed.
Thus, this is a great option if you know your program participants are already up-to-date, and you’d like to generate survey participants early so you can check their information.
- Click Add participants.
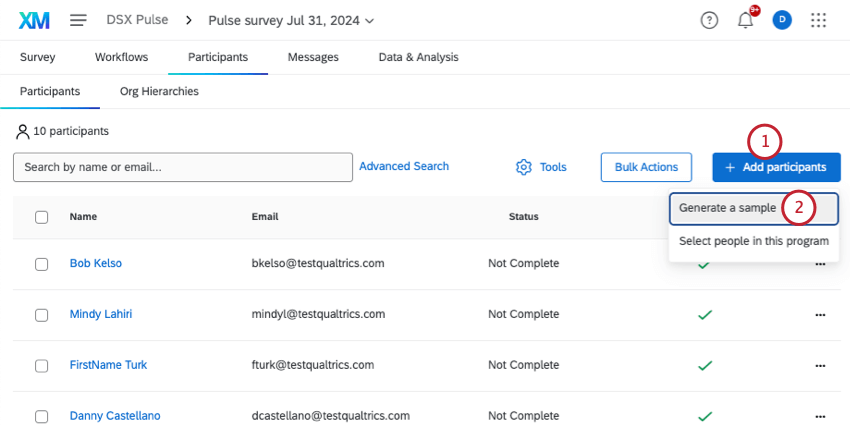
- Click Generate sample.
- If you’re sure you want to take this action, click Continue.
Select people in this program
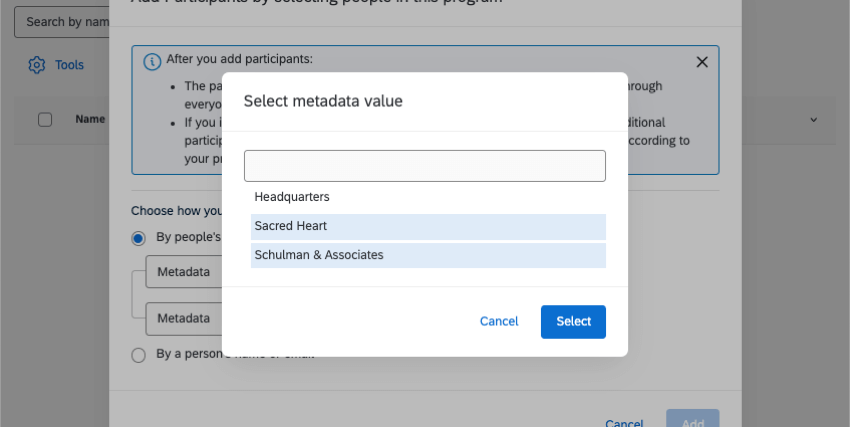
This option lets you add participants from the program by using metadata, name, or email to find them. Thus, this is a great option for finding groups of participants or even specific individuals you want to add to your survey.
- Click Add participants.
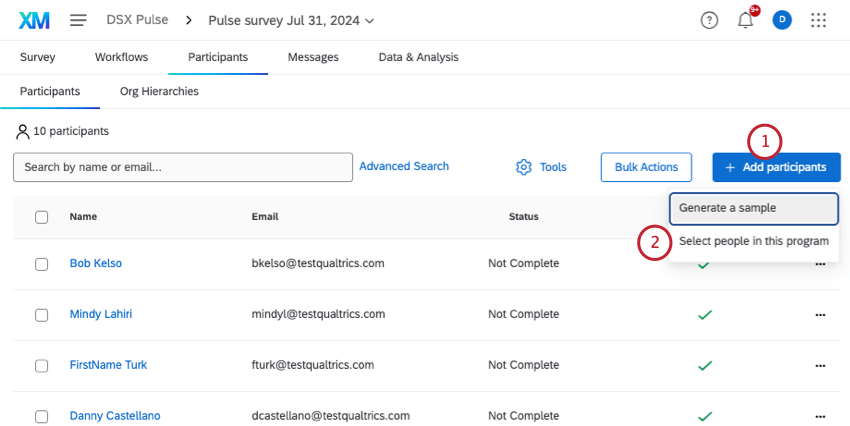
- Click Select people in this program.
- Choose from the following:
- By people’s metadata: Filter for participants by metadata. You can add more metadata conditions by clicking the 3 dots, then Insert condition below. Participants must match all of the conditions to be included in your results.
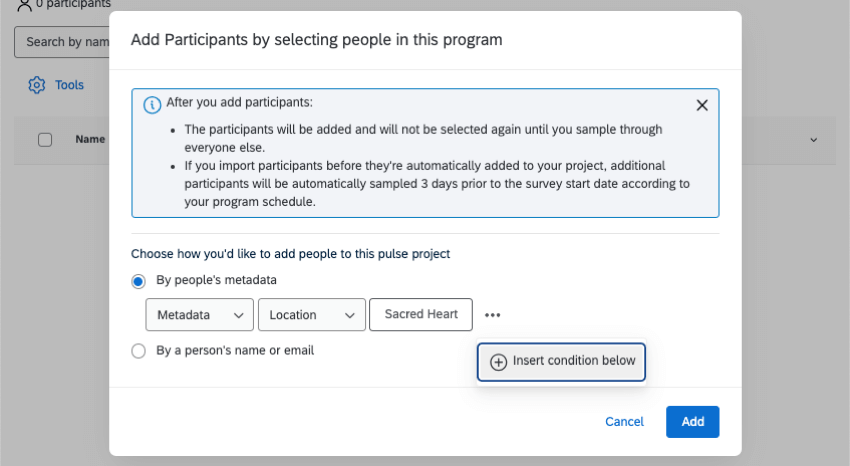
- By a person’s name or email: Search for a participant by typing parts of their name or email. You can only select 1 participant.
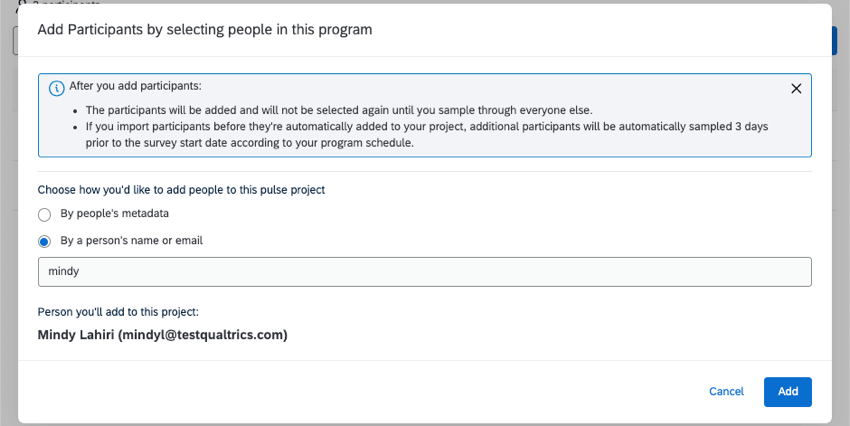
- By people’s metadata: Filter for participants by metadata. You can add more metadata conditions by clicking the 3 dots, then Insert condition below. Participants must match all of the conditions to be included in your results.
- When you’re finished, click Add.
Update Participant Metadata
You can create or edit participant metadata in bulk by uploading a file of your changes.
- Go to your Pulse survey.
- Go to Participants.
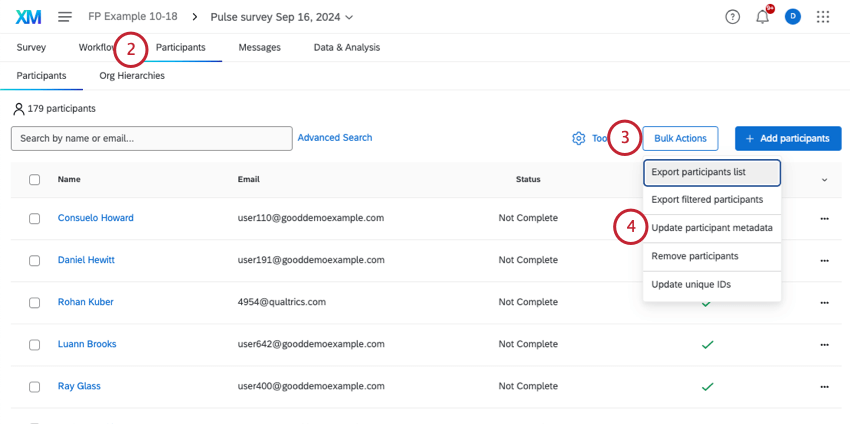
- Click Bulk Actions.
- Select Update participant metadata.
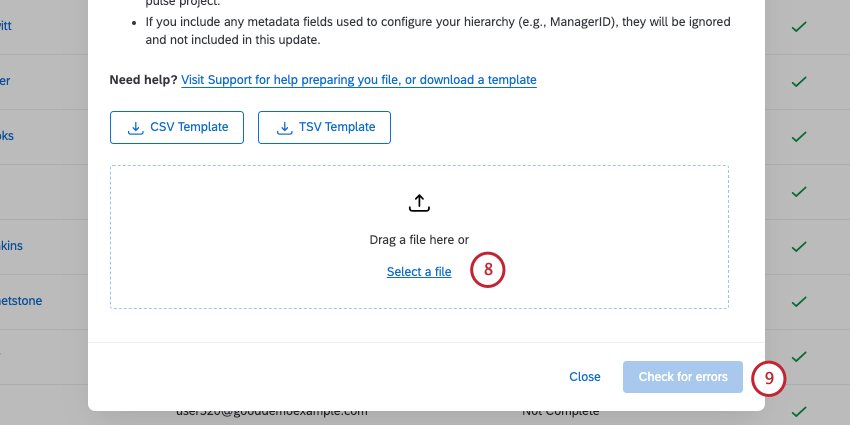
- Download either the CSV template or the TSV template.
- Edit your file for import. Some rules to keep in mind:
- Each row is a participant, and each column is different information about that participant. You can add and edit columns to change your participants’ metadata.
- Unique Identifier is the only identifying field required in this file. If you include any other identifying fields (participant’s first name, last name, email, user name) or Qualtrics-specific person metadata (respondent, user type, language and password), they will be ignored and not included in the update.
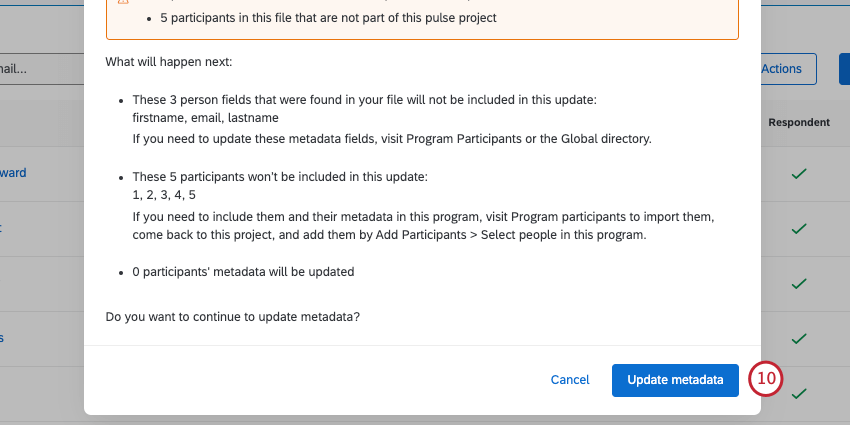
- If you include any participants that are not part of this pulse program’s participants, these participants will not be added to this pulse project.
- If you include any metadata fields used to configure your hierarchy (e.g., ManagerID), they will be ignored and not included in this update.
- Save your file as a UTF-8 encoded CSV or TSV.
Qtip: See more on CSV and TSV Troubleshooting.
- Upload your file.
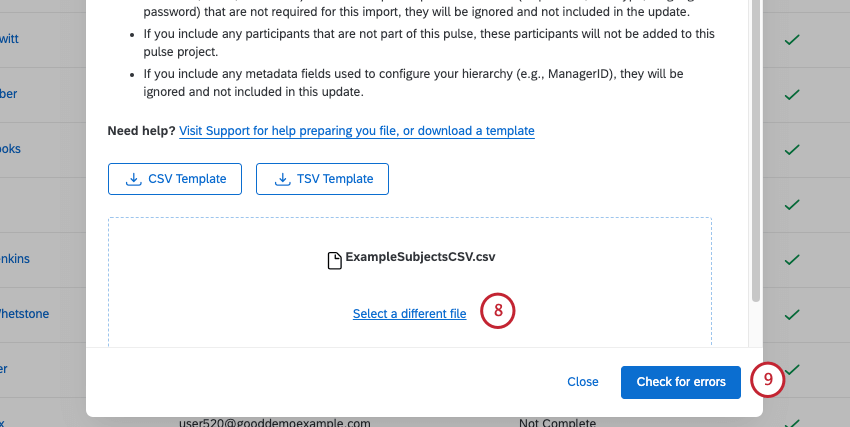
- Check for errors.
Qtip: See a guide to common participant upload errors.
- Confirm your upload.
Survey Participant Management
Once your participants are uploaded, you may want to make changes, view information about them, and more. Check out the following pages for different actions you can take in the Program participants tab.
Org Hierarchies
Hierarchies provide a way for you to upload your organization’s employee structure into Qualtrics. When employees and managers log into the dashboard, they’ll see data appropriate for their level and role.
With Pulse programs, hierarchies tend to be created and mapped automatically based on what’s set in the program participants. That doesn’t mean you can’t make edits in a specific survey’s hierarchy, but there are certain things to consider first.
Before you edit a survey’s hierarchy, see Changing or Updating Hierarchy Mappings and Effects of Participant Changes on Hierarchies for important information.
Messages
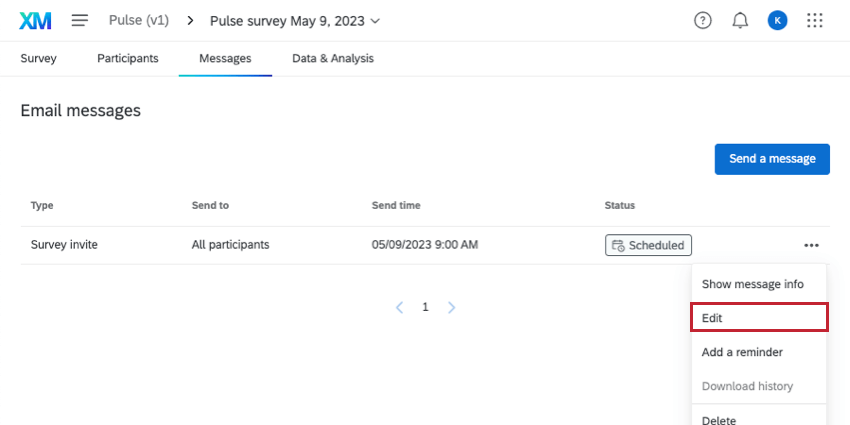
When you enter the Messages tab, you’ll see the distribution (and reminder if applicable) that is planned for this survey. The message will be based on the message template you set for the program. However, if you’d like to edit this message specifically for this survey, click the dropdown, and click Edit.
Data & Analysis
The Data & Analysis tab lets you browse, filter, and clean your response data. This tab is where you can export data from your survey.
Otherwise, this Data & Analysis tab works just like in the survey platform. See Recorded Responses for more functionality. Additional data analysis features can be found in the support site’s menu on the left under Data.
