Managing a Pulse Program
About Managing a Pulse Program
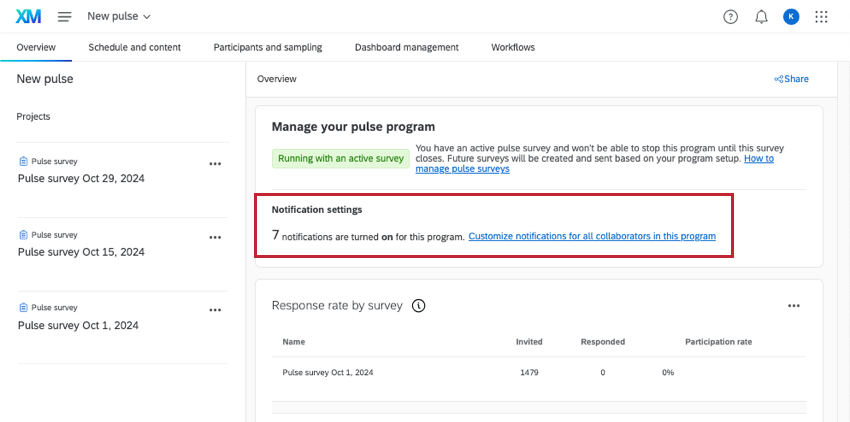
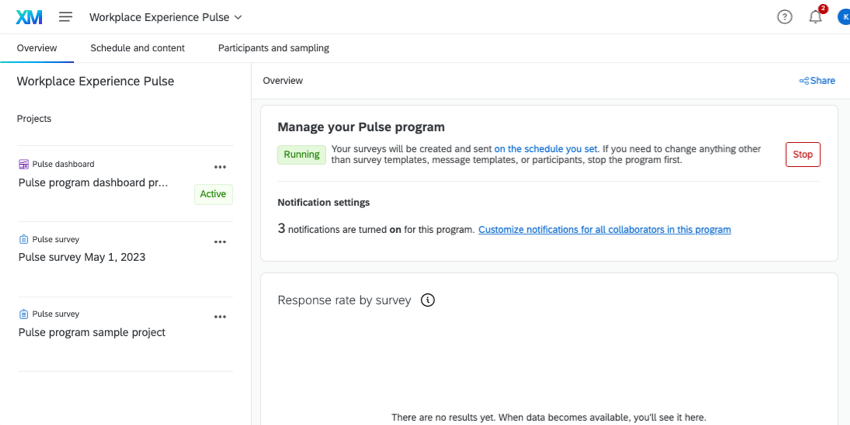
At first, the Overview tab will guide you through the creation of your pulse. But after everything’s set up, the Overview tab becomes the place where you can access all of the projects in your program, stop your program, share your program, and see response rates for your program.
Sharing the Pulse Program
You can share your pulse program with another pulse user so they can edit it, too. Sharing with another user will allow them to do the following:
- Edit the entire program
- Stop the program
- Schedule the program
- Edit schedule, content, participants, and sampling
- Access the dashboard and all surveys
A user has to have the Pulse user permission (under Employee Experience) in order to collaborate on a pulse. If users don’t have the correct permissions before you share with them, they will not be able to access everything in the pulse.
- Go to the Overview tab of your pulse.
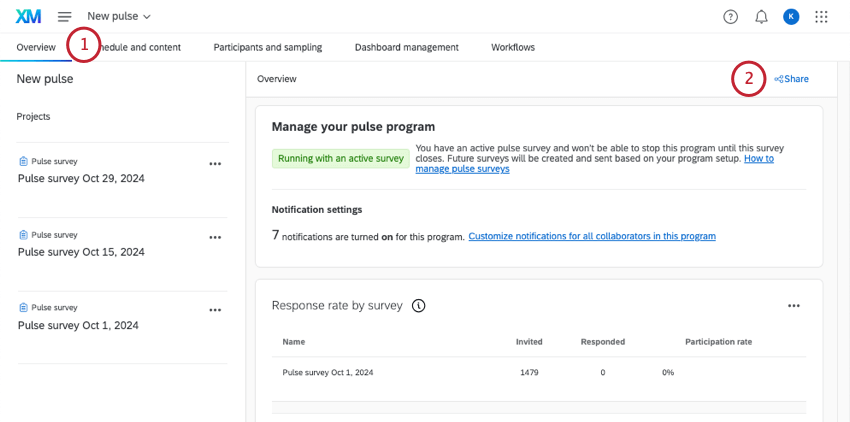
- Click Share.
- Search the user you want to share with. Select them.
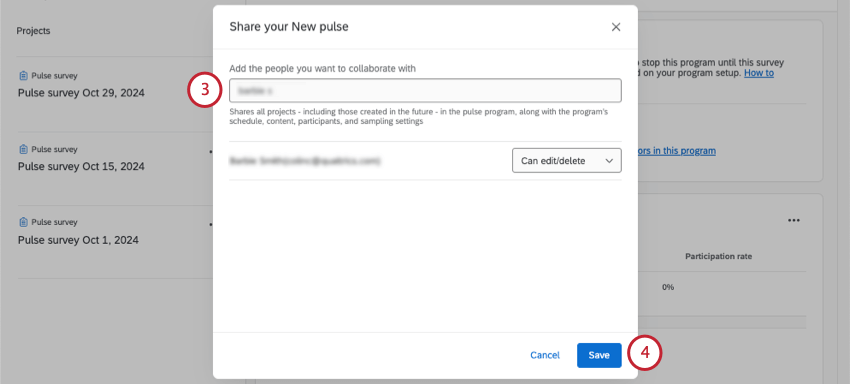
- Click Save.
Customizing Program Notification Settings
You can customize notification settings for all admins and collaborators in your pulse program. Notifications go out to anyone you shared the program with in-product and over email.
- Go to the Overview tab.
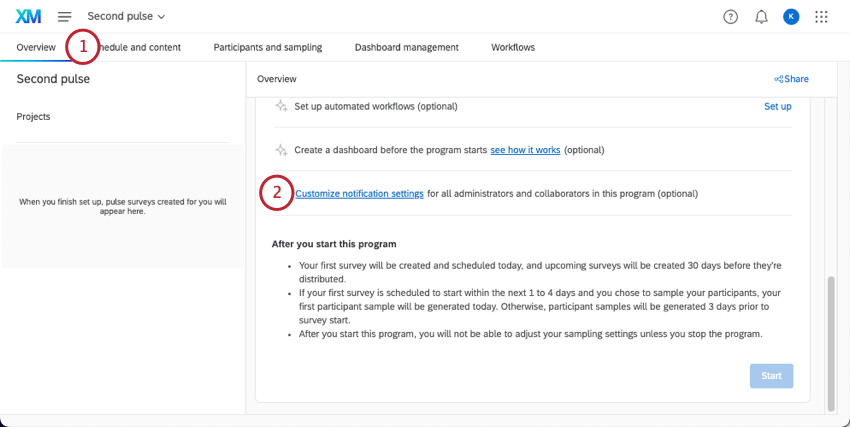
- Click Customize notification settings.
- Program or pulse project notifications include:
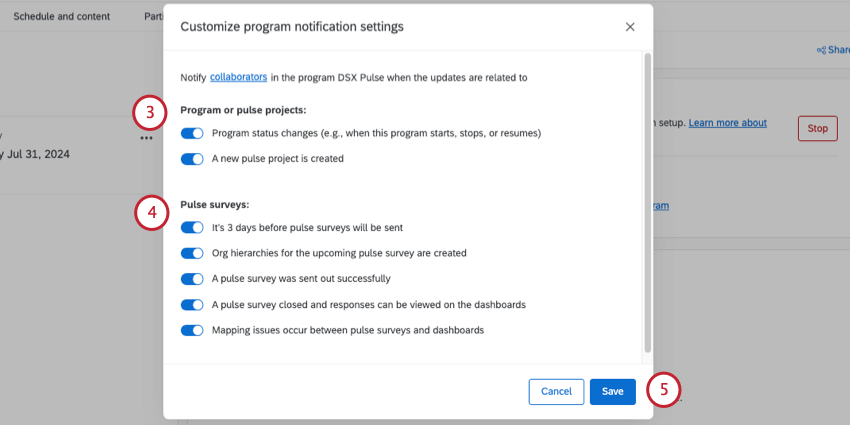
- Program status changes (e.g., when this program starts, stops, or resumes)
- A new pulse project ((i.e., individual survey) is created
- Pulse survey notifications include:
- It’s 3 days before pulse surveys will be sent
- Org hierarchies for the upcoming pulse survey have been created
- A pulse survey was sent successfully
- A pulse survey was closed and responses can be viewed on the dashboards
- Mapping issues occur between pulse surveys and dashboards
- To save changes, click Save.
Stop Sending Pulses
Pulses will continue to send on the schedule you chose unless you manually stop them. You may also want to stop your pulse program if you want to change the pulse schedule or sampling settings.
- Go to the Overview tab of your pulse.
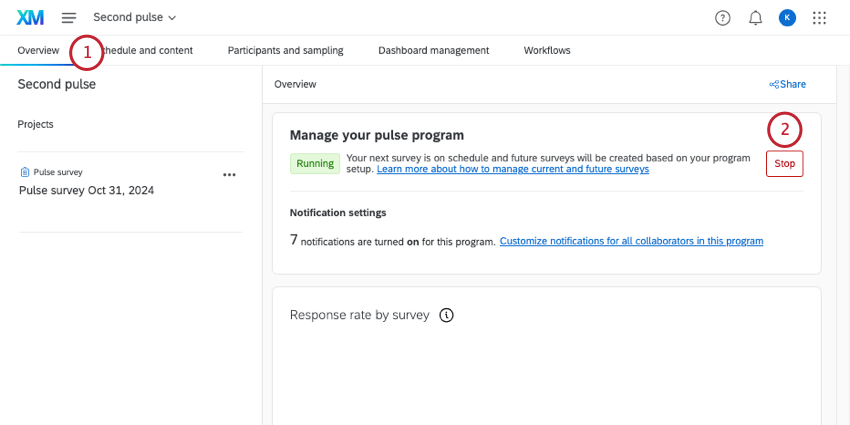
- Click Stop.
- Read the warning. Keep in mind all unsent surveys will be deleted, and no more pulses will be sent out. You will still be able to access previously sent pulses and the dashboard.
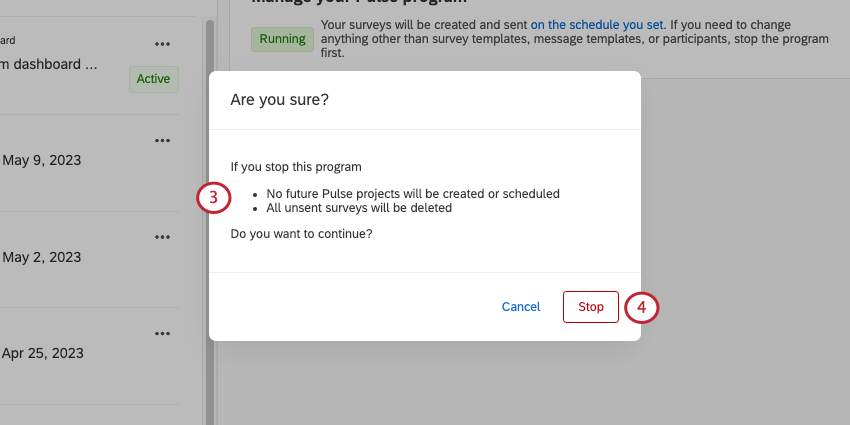
- Once you’re ready, click Stop to confirm.
What can be edited while the pulse is running
What cannot be edited until you stop the pulse
Response Rate by Survey
Response rates for each survey will appear on the Overview tab as data is collected. You’ll be able to see how many people were invited, how many people responded, and the resulting percentage of people who completed their responses (participation rate).
Managing Surveys within a Pulse
All of your surveys can be found in the Projects list of your Overview tab. Click on a survey to edit that individual survey.
For more information on editing the survey itself, see Features Available in Pulse Surveys.
For more information on editing individual surveys’ participants and messages, or exporting data from a survey, see Managing Pulse Surveys.
Managing the Pulse Dashboard
When you’re ready to report on your results, you’ll go to the Dashboards management tab. For a comprehensive guide, see Pulse Dashboards Basic Overview.
