Step 1: Preparing for Your Employee Engagement Survey
Before we log into Qualtrics to build our Employee Engagement project, we need to prepare our survey questions, participant list, and email messages. This section will guide you through preparing your content.
Developing Your Project Content
The first step to building your Employee Engagement project is to determine the questions you would like to ask. When developing your engagement survey content, keep in mind that it is a best practice to keep the survey as concise and simple as possible and to focus questions on specific behaviors that you can take action on to better the employee experience. There are generally three question groups that are used: questions that measure engagement or other behaviorally-anchored indices you wish to take action on, free response feedback questions, and demographic questions (if necessary).
- Scaled questions: These questions should form the bulk of your engagement survey. These surveys are typically comprised of 30-50 statements that focus on the employee experience and ask participants to rate their level of agreement. All statements should be clustered into specific categories or themes that form a holistic view of the employee’s experience. Some categories might include “Communication,” “Recognition,” “Company Leadership,” etc. You’ll also want to ensure that the survey includes 3-5 questions that specifically measure employee engagement.
- Text entry questions: Text entry questions allow you to collect open-ended comments from evaluators. We’ve found that the most effective employee engagement surveys use text entry questions to collect specific feedback that allows them to dive deeper into their engagement survey results.
- Demographic data: There are two ways to incorporate demographic data into your Employee Engagement project:
- Obtain demographic data from your HRIS database, or human resources information system, and include it with your participant list upload. It is recommended that you only ask demographic questions in your survey if you cannot obtain the data from your HRIS system.
- Include questions to collect demographic data within the survey. Demographic questions are most commonly set up as multiple choice questions and collect information such as length of tenure, office location, language, and gender.
Click here to download some example questions. Click here for some best practice recommendations from our Subject Matter Experts.
Determining the Right Hierarchy For Your Project
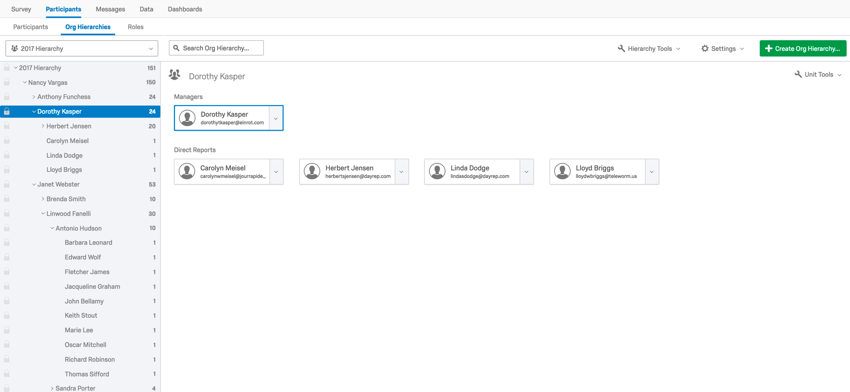
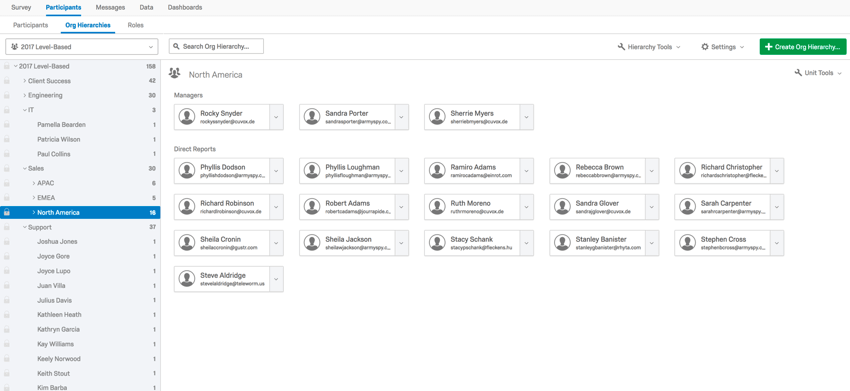
Creating your organization’s hierarchy in the Qualtrics platform is the key to getting the most out of reporting with our dashboards. An accurate hierarchy allows for easy dashboard permissioning and response filtering for your engagement survey. You’ll either use a Parent-Child or Level-Based hierarchy to structure your organization chart.
| Parent-Child | Level-Based | |
| How often used: | Used most frequently | Used sometimes |
| When recommended: | When your HR data is formatted so each employee has a unique ID and their manager’s unique ID saved | When your HR data is organized more by location or functional breakout |
| Required for setup: | Employee ID & Manager ID | Cascading levels of organization structure |
Once you have selected the hierarchy type that best suits the data available to your organization, you will want to start compiling the data necessary to input the hierarchy into Qualtrics. Download the template below for the style of hierarchy you would like to use.
Example Parent-Child Hierarchy:
Click here to access the Parent-Child hierarchy file template. Note that the Unique Identifier column can act as your Employee ID.
Example Level-Based Hierarchy:
Click here to access the Level-Based hierarchy file template. The Unique Identifier column is provided in case your license has access to this feature.
Formatting Your Participant Upload Data File
When setting up your participant data files, each participant is listed on a row of the file. The first three columns of the file will list the participant’s first name, last name, and email address. Additional columns in the file will list Metadata, or additional variables of participant information. This Metadata can be used to create your organization’s hierarchy or be used for filters in the dashboard.
- Parent-Child Hierarchy Specific Metadata: Each employee row should include both that employee’s “Employee ID” and his/her manager’s employee ID (“Manager ID”). These two IDs are captured in two separate columns, but work together to create the hierarchy.
- Level-Based Hierarchy Specific Metadata: This Metadata will vary from organization to organization. The values in the columns will get more diverse as more columns are added. Most commonly the first level column will designate the employee’s division information, with a second level indicating department names within the divisions, and another level with team names within those departments.
- Additional Metadata: Metadata values commonly added to the participant data file for use with dashboard filters include location, tenure, age group/generation, and gender.
For more detail on formatting the participant data file, visit Creating and Uploading Your Participant File in Step 3 here. For additional information, visit the Preparing Your Participant File For Import support page.
Developing Survey Communications
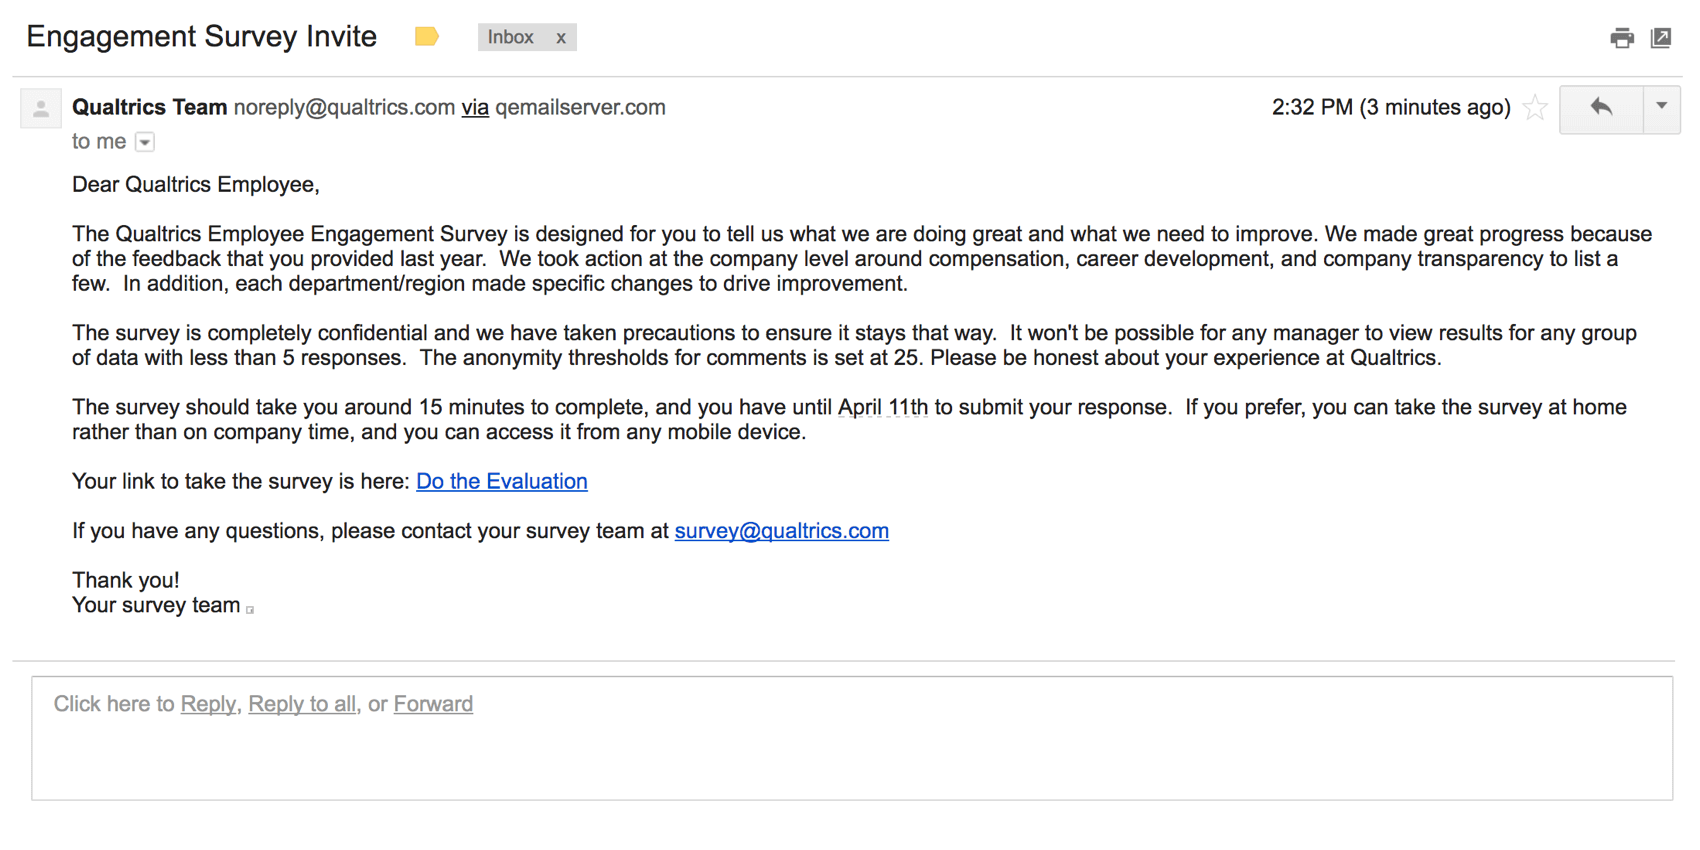
After creating your survey questions and preparing your hierarchy template, you will need to draft messages to invite employees to participate in your Employee Engagement project. Most projects will feature an invitation email and two reminder messages.
When drafting your project communications, we recommend including a few key elements to make sure your employees know what to expect when participating in the Employee Engagement project. Use the checklist below to make sure your emails are thorough.
Checklist of Things to Include in the Messages
- The expected project duration
- The project close date
- A short statement on the purpose of the project and key results from past programs
- A statement on the project anonymity threshold and project confidentiality
- A link to the project
- An internal email address and contact details for any project questions
Click here to download some example engagement project invitation and reminder messages. For additional information regarding messages, visit the Email Messages Overview support page.
Identifying Dashboard Users and Their Data Goals
Even before we build our dashboards, it’s important to think about who our dashboards are for, and what our users need to be able to accomplish with these dashboards. Your findings here will not only drive decisions on what data to include on your dashboard and how to present it, but will help you even before that, when you are determining what information you should include in your participant file.
| Audience (user or group of users) | Objectives | Data Restrictions |
| Line Manager | Visualize feedback from their own unit and all other units within their hierarchy | Access to all data for his / her team and the ability to drill down |
| Senior Leader | Visualize higher level feedback only | Access to all data for his / her business area, but not the ability to drill down into other units |
| Core Project Team | Access to all data including editing pages | No restrictions |
Dashboards allow different audience to view data in different ways, without having to create multiple dashboards. The primary view of data in dashboards is based on the hierarchy, and allows managers to drill down the hierarchy and analyze results for the unit they belong to. However, roles can also be created for those instances where a user’s primary needs deviate from the hierarchy. The table above can help you determine if you need to make roles, and what kind.
Creating a Project Timeline
The final step in preparing your Example Engagement project is to create a timeline for your project launch. Use the table below to help you outline your engagement project tasks, assign target dates, and track completion.
| Project Task | Date | Suggested Task Duration |
| Finalize project questions and categories | Finalize 4 weeks prior to project launch | Typically takes 2-5 hours |
| Finalize content for project email messages | Finalize 4 weeks prior to project launch | Typically takes 1-2 hour(s) |
| Build your survey, email messages, and corresponding translations | Finalize 2 weeks prior to project launch | Typically takes 2-4 hour(s) |
| Import your participant list and configure your hierarchy | Finalize 2 weeks prior to project launch | Can take up to 5-8 hours |
| Deliverability test: send out test invites | Finalize 2 weeks prior to project launch | Typically takes an hour or less |
| Quality assurance review of your project, messages, and hierarchy | Complete QA 1 week before launch | Typically takes an hour or less |
| Dashboards QA and configuration of roles | Finalize 2 weeks before dashboard launch | Typically takes 1-3 hours |
| Project invitations sent | Project launch date | |
| Project reminder sent | Most clients send 2-3 reminders during the survey period | |
| Dashboard constructed | Finalize 1 week before survey close | Typically takes 4-7 hours |
| Project Closed | Most clients close surveys 2 weeks after project launch | |
| Dashboards Released/Shared | Most clients share dashboards shortly after the project closes, usually within 2 weeks |


