Org Hierarchies Export & Import Options (EX)
About Org Hierarchies Export & Import Options
In the Org Hierarchies section under Hierarchy Tools, there are several options for importing and exporting different information into your hierarchy. You can change your hierarchy with an imported CSV, and more.
Export Units
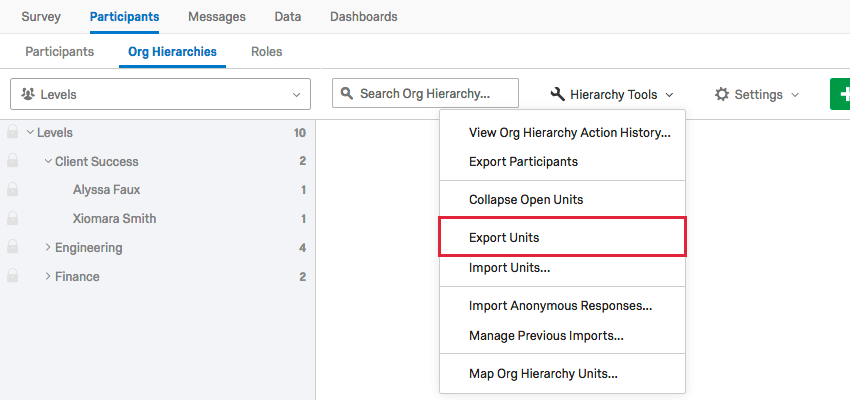
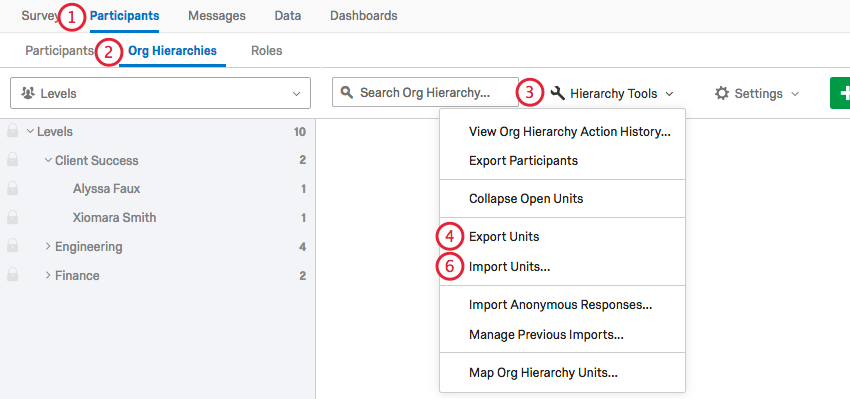
When you click Hierarchy Tools and select Export Units, you will get a CSV containing information about your hierarchy.
Every row is a different unit, and the columns are as follows:
- UnitName: The name of the unit. This can often be a manager or level’s name, or your Org Unit Description, if you used this column.
- UnitID: The internal ID of the unit. This is generated by Qualtrics and is not the same as Org Unit ID metadata, which you define.
- ParentUnitID: The internal Qualtrics ID of the unit above the unit defined by the UnitID column.
- Manager1: The email address of the participant who is manager for this unit. Your CSV may have many Manager columns, such as Manager2, Manager3, etc.
- Manager1Name: The full name of the participant who is manager for this unit. Your CSV may have many ManagerName columns, such as Manager2Name, Manager3Name, etc. This should correspond to the appropriate Manager column, eg, with Manager1 being the email address of the person whose full name is given in Manager1Name.
- Manager ID: If you built a Parent-Child hierarchy, your Manager ID metadata will appear here.
- Level 1, Level2, etc.: If you built a Level-Based hierarchy, your level metadata will appear here.
Import Units
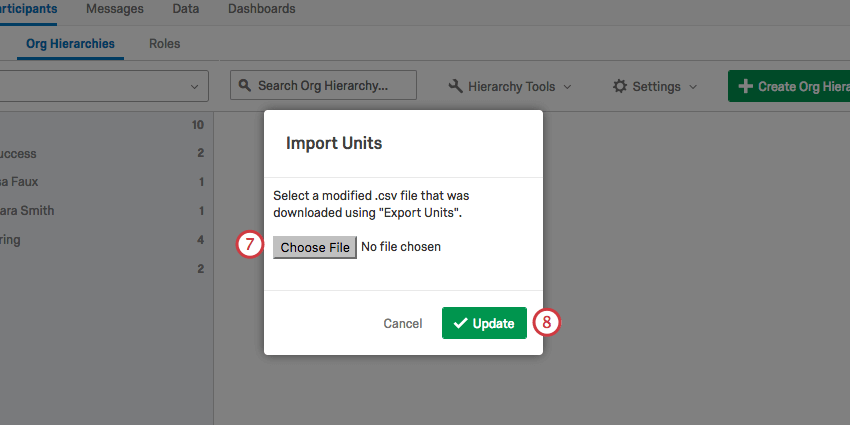
Once you have exported your units, you can make edits to this CSV and re-import it to change your hierarchy. Each row of the spreadsheet is an individual unit, identified by a unique unit ID. Below, we’ll explain what each column of info represents for each unit.
ManagerName and Manager
Under the ManagerName and Manager columns, you can add or change the manager for the unit. Copy and paste the participant’s email under the Manager columns and enter the same participant’s full name under ManagerName. Any participant can be assigned as manager of any unit, but making a participant manager of a unit they don’t already belong to will create duplicates of that participant. Removing a manager from these columns makes them a direct report of that unit.
Following the Manager#, Manager#Name formula, you can add as many managers as you need to a unit. For example, if I have 3 managers, I can have Manager1, Manager1Name, Manager2, Manager2Name, Manager3, and Manager3Name columns.
UnitName
Rename units in the UnitName column.
UnitID and ParentUnitID
The UnitID identifies the unit you are editing. It is the same unit identified by the UnitName. The ParentUnitID identifies the unit above the unit you are editing, and determines where the unit is placed in the hierarchy.
Switching the UnitID listed in the ParentUnitID column allows you to change a unit’s place in the hierarchy. Copy the UnitID you wish to nest a unit under and paste it into the ParentUnitID column.
Other Edits
When you turn on the Anonymous link under Survey Options, you will be asked for an Expected Count for a unit when navigating and restructuring your units. This is because when an anonymous link is used, the hierarchy doesn’t know how many people will be responding per unit, unlike when you upload participants and only invite them. Add a column called ExpectedCount to your CSV to upload the expected number of participants, not including the manager. For example, if a unit is five people, one manager and four direct reports, the ExpectedCount should be 4. Any direct reports those direct reports have are not included in the count.
You cannot use this file to delete units. Removing a row from the CSV does not affect the unit.
You cannot use this file to add brand new participants or units. All participants and units mentioned in this file must already be in the hierarchy, so you cannot use the CSV to add new users to your Ad Hoc hierarchy, or to make up units that don’t exist yet.
You cannot make adjustments by editing the ManagerID, Level, or other hierarchy-specific metadata fields in this file.
Importing Units
Manage Imports / Exports
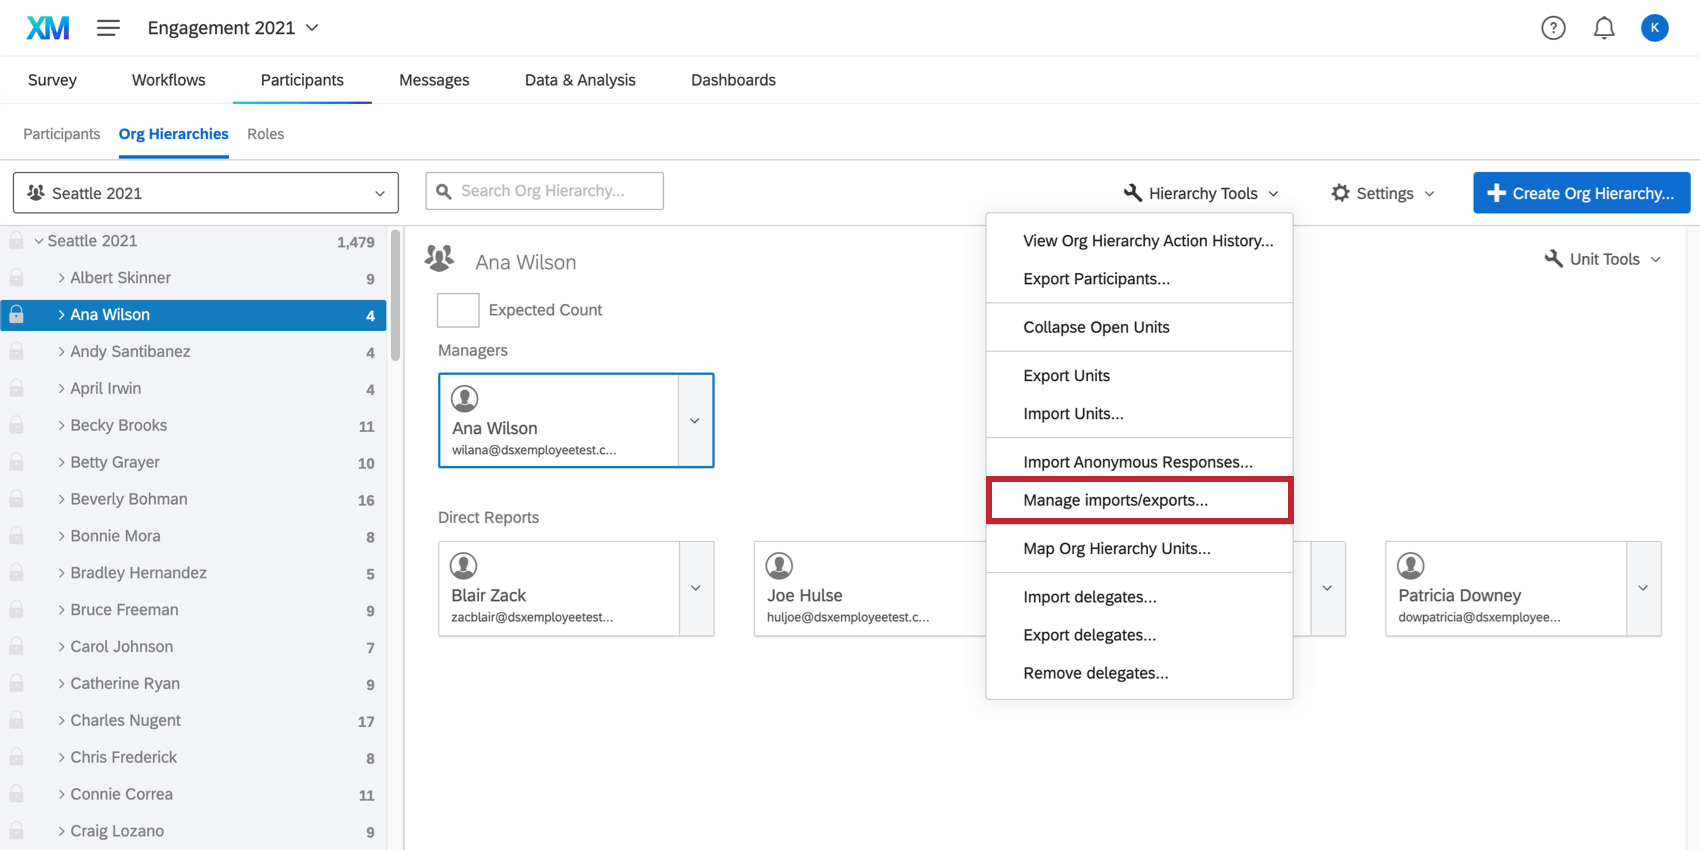
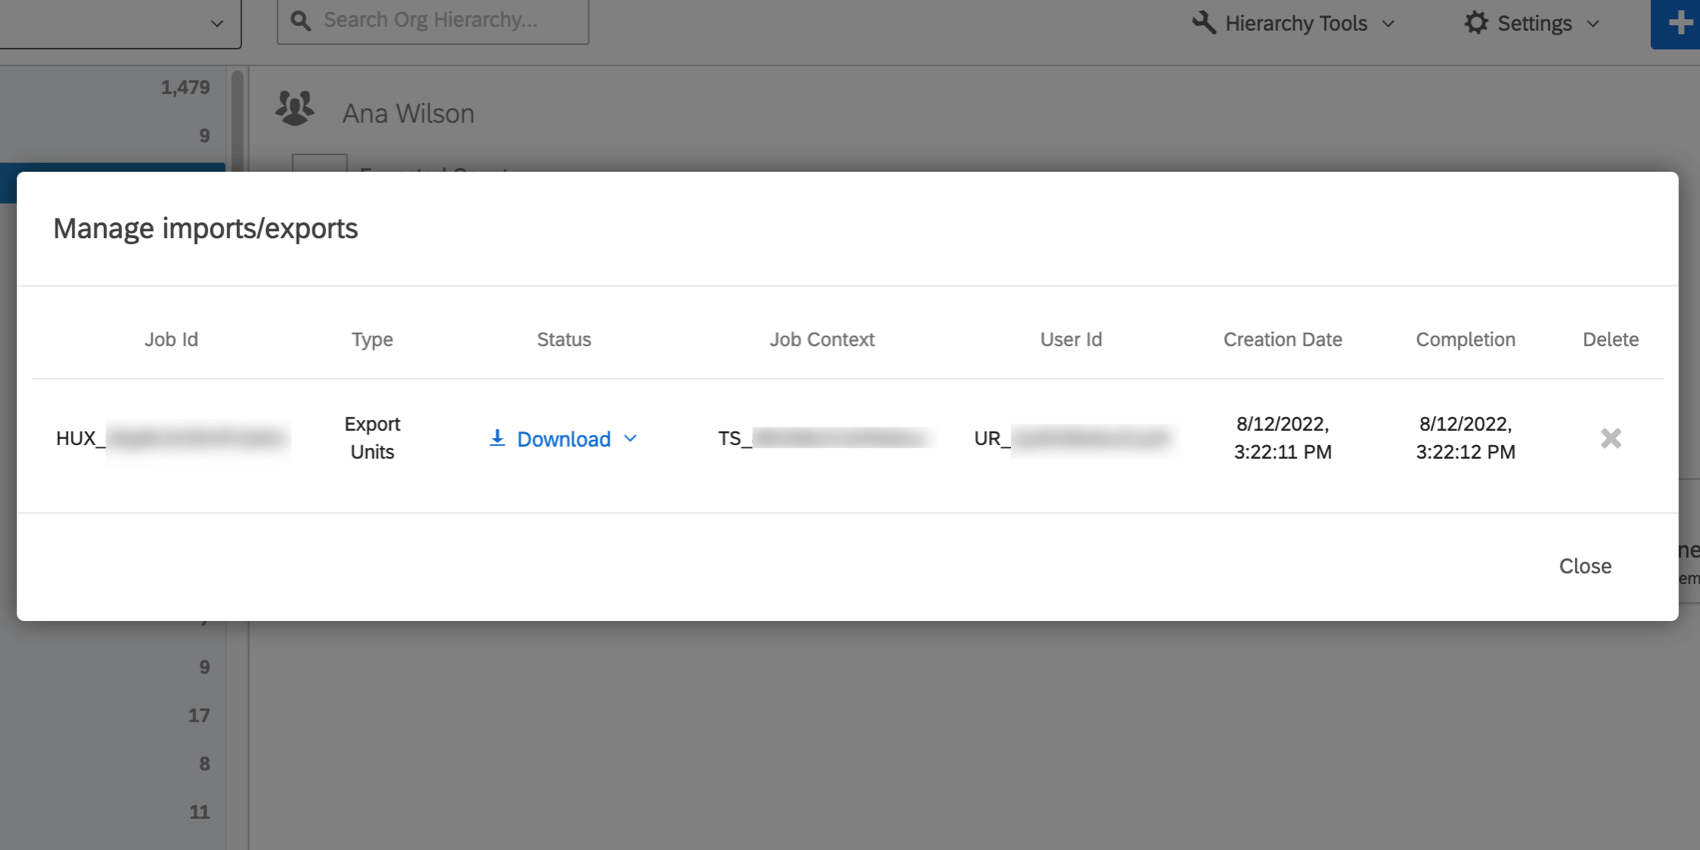
Under Hierarchy Tools, if you select Manage imports/exports, you will be able to see a history of your unit imports and exports.
A column is provided for the Job ID, Type (e.g., import or export), Status (where you can also re-download the file), Job Context (the engagement project ID), the user ID of the person who exported it, the date the file was created, the date the job was completed, and the opportunity to delete the import from your history.
