-

Qualtrics Platform -

Customer Journey Optimizer -

XM Discover -

Qualtrics Social Connect
Microsoft Teams Distributions (EX)
About Microsoft Teams Distributions
You can send a personalized EX survey to your teammates via Microsoft Teams from directly inside the Qualtrics platform.
Integrating with Microsoft Teams
The steps in this section should be done with your Microsoft Teams Administrator and IT team. You will need to work with them to make sure you have the proper setup in Microsoft Teams to use this feature.
Installing the Qualtrics App in Microsoft Teams
In order for Qualtrics to distribute to a Microsoft Teams recipient, that user must have the Qualtrics app installed for their Microsoft Teams account. You have two options for installing the app:
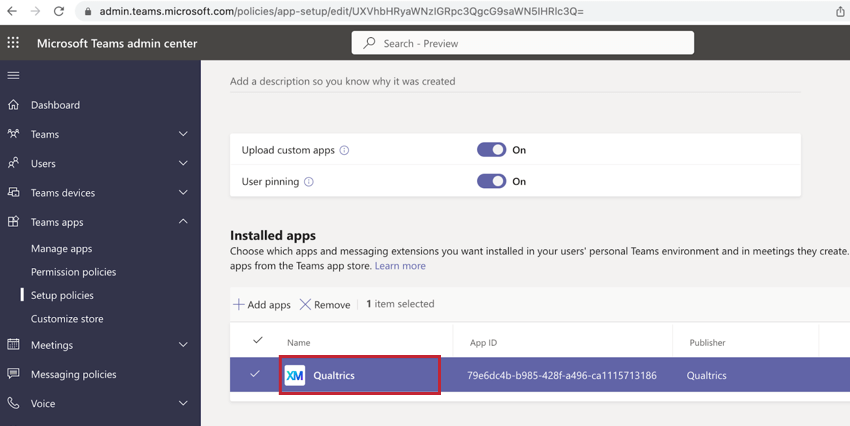
- Recommended Approach: The app can be automatically installed for each user using App Setup Policies. Using this method allows your Team’s admin to automatically install the Qualtrics app for every user within your Team. More Information can be found on this Microsoft Teams support page.
- The app can be manually installed by each user directly from the Microsoft Teams App store. This approach is generally not recommended since it is not scalable for growing organizations. For information on how to download the app for a single user account, see Downloading the Qualtrics App for Microsoft Teams.
Permissions in Microsoft Teams
Regardless of your integration method, a user will need the follow Microsoft Teams permissions to use this feature:
- offline_access
- Team.ReadBasic.All
- TeamsActivity.Send
- User.ReadBasic.All
- ChannelMessage.Send
- Chat.Create
- ChatMessage.Send
Setup in Qualtrics
Regardless of your setup in Microsoft Teams, you must complete the below setup in Qualtrics to use this integration. The steps in this section must be completed by a Brand Administrator.
- Navigate to the Admin page.
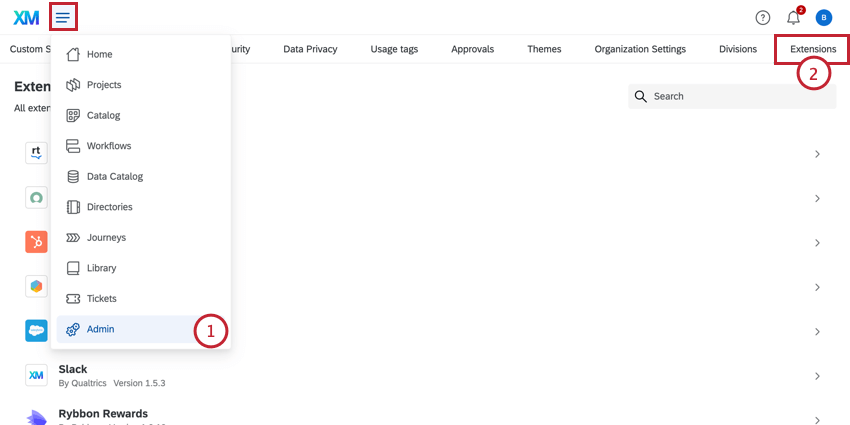
- Go to the Extensions tab.
- Use the search bar to search for Microsoft Teams.
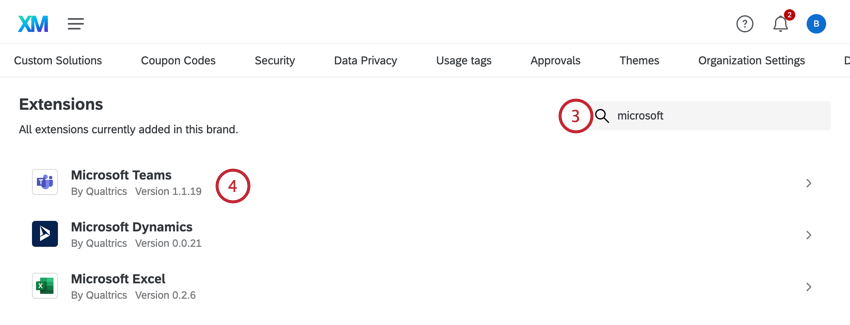
- Select the Microsoft Teams extension.
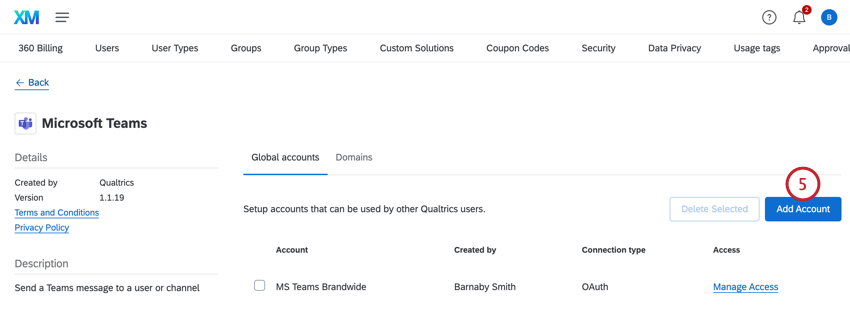
- Click Add Account.
- Give your account a display name. This name is for your own organizational purposes.
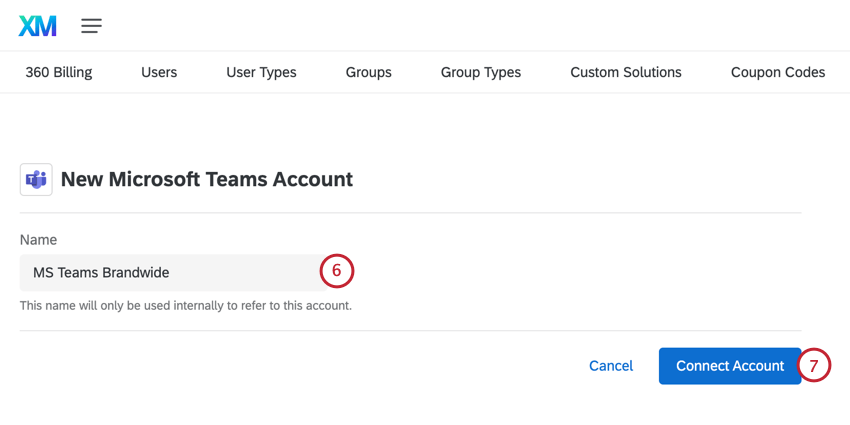
- Click Connect Account.
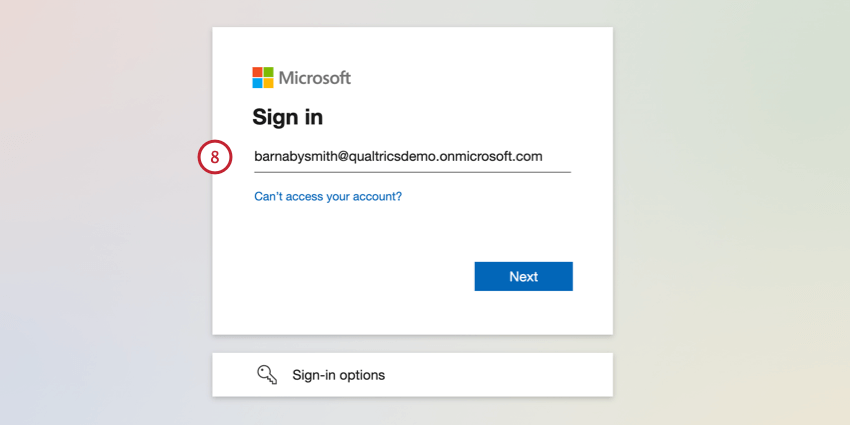
- You will be redirected to the Microsoft Teams login page. Log in to your Microsoft Teams account.
- Accept the terms and conditions for connecting Qualtrics and Microsoft Teams.
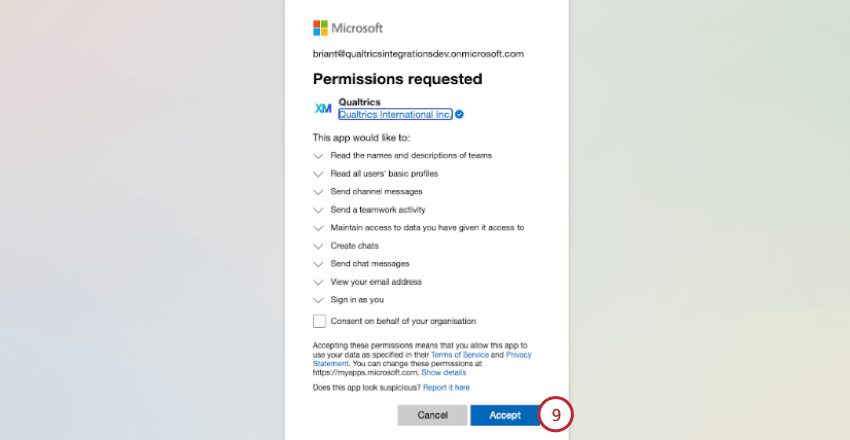 Qtip: Depending on your permissions setup, you may need approval for your Teams or Azure admin before the Qualtrics app can be fully enabled.
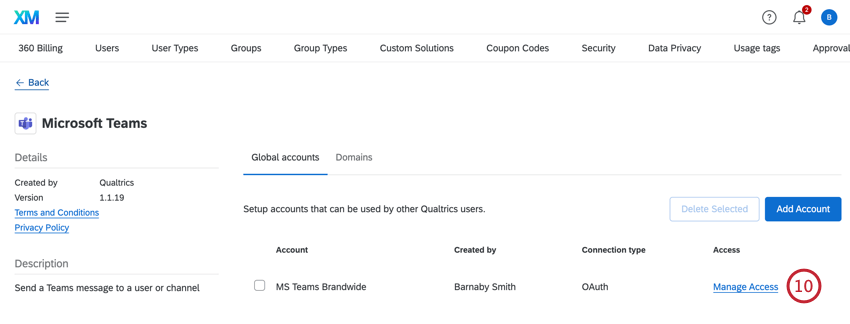
 - You will be redirected back to the Extensions page in Qualtrics. Your newly added Microsoft Teams account will appear on this page. Click Manage Access next to your account.
- Navigate to the Users tab.
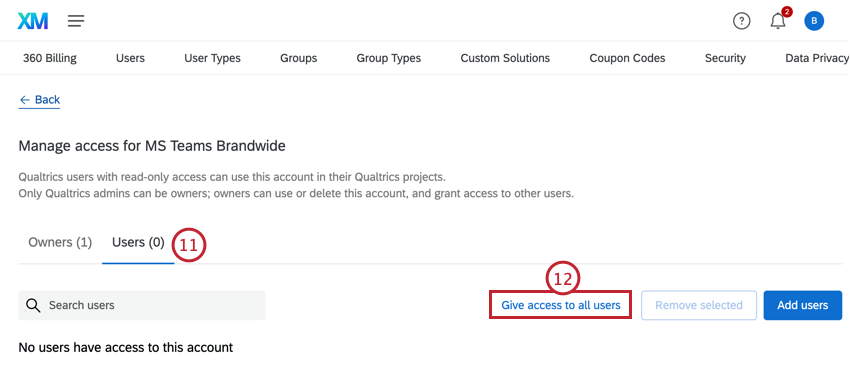
- Click Give access to all users.
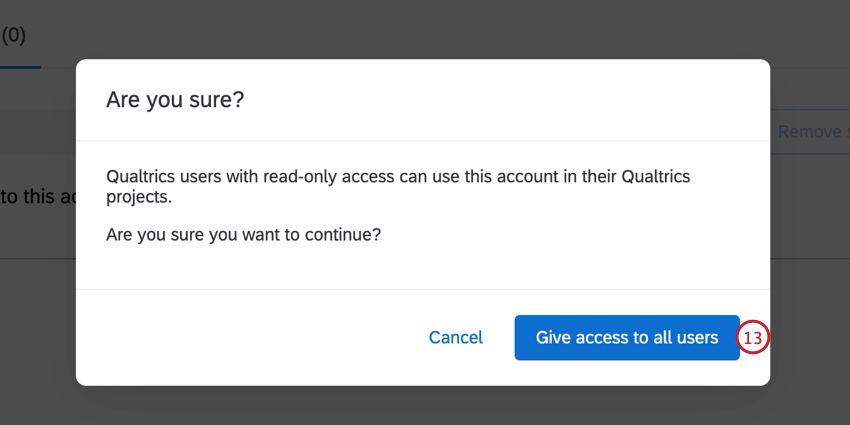
- Confirm that you would like to Give access to all users.
Downloading the Qualtrics App
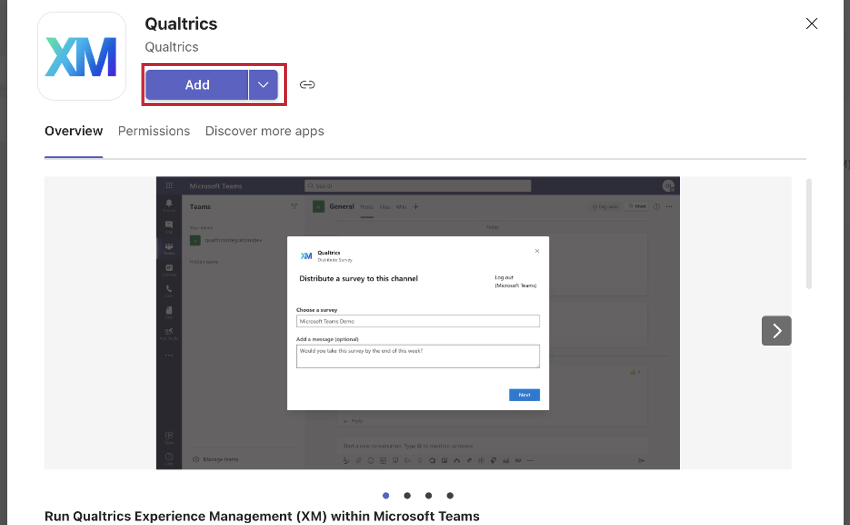
- In Microsoft Teams, go to Apps.
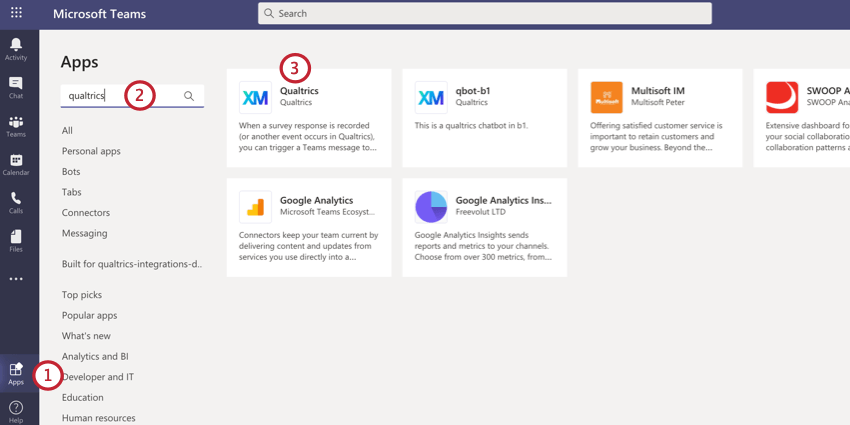
- Search for Qualtrics.
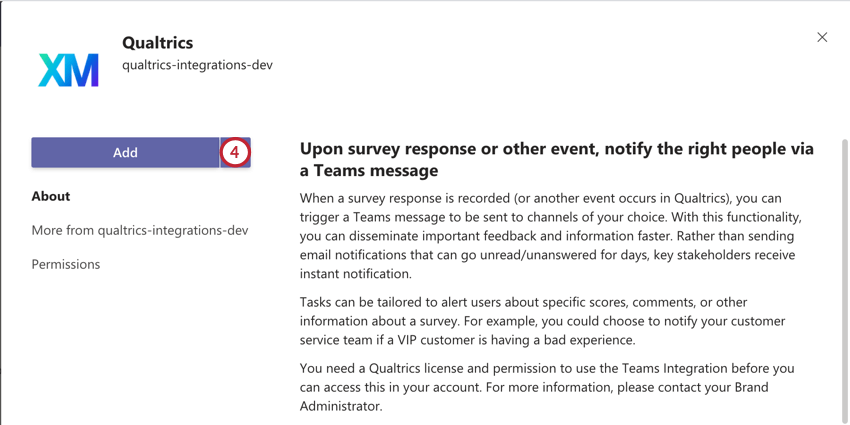
- Select the Qualtrics app.
- Click Add.
Adding the Qualtrics App to a Team
Before you can distribute a survey to a team, you need to add the app to the team you want to survey. If you have not added the app to any teams, you will see the below message in your Qualtrics app: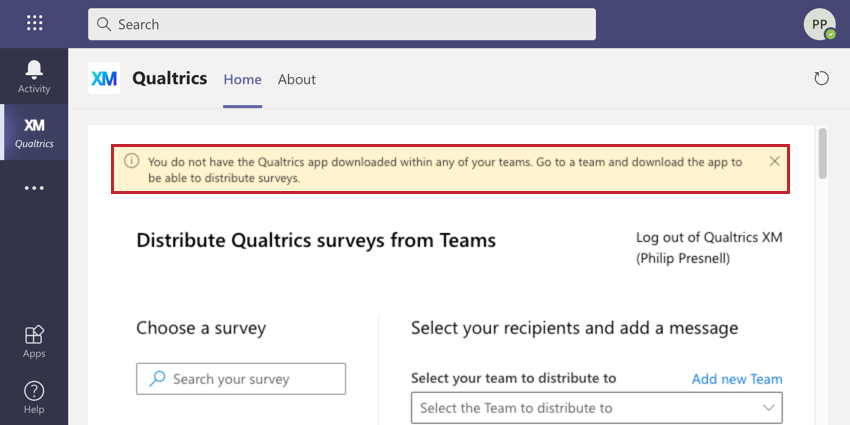
For a guide on how to add an app to a team, check out this Microsoft Teams support page. You can also click the Add new Team link above the team selection dropdown to add the app to a team.
Preparing Participants for Microsoft Teams
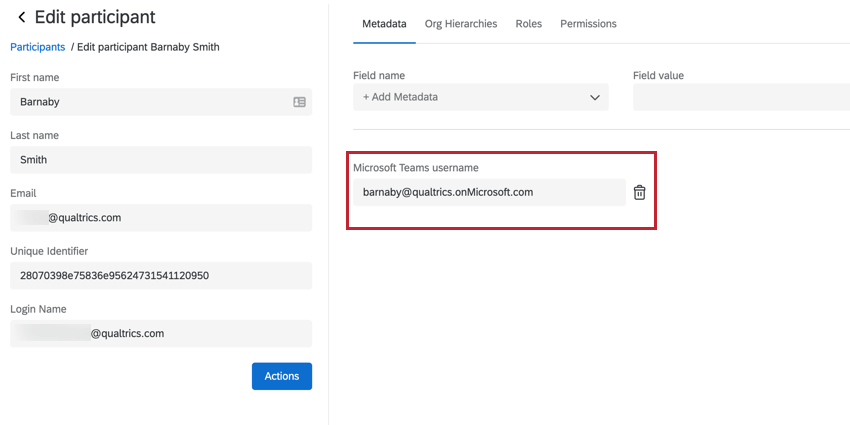
Before you can distribute to Microsoft Teams, you need to make sure the participants in your project have metadata that links them to a user in Microsoft Teams. Participants must have a Microsoft Teams username metadata field that contains their Microsoft Teams username. This field name is not case sensitive.
To update your project’s participants with their Microsoft Teams username, see Updating Participants. We recommend updating your participants with a file upload instead of updating them manually unless you only have a few to update.
Sending Survey Invites to Microsoft Teams
- In the Messages tab of your project, go to Microsoft Teams.
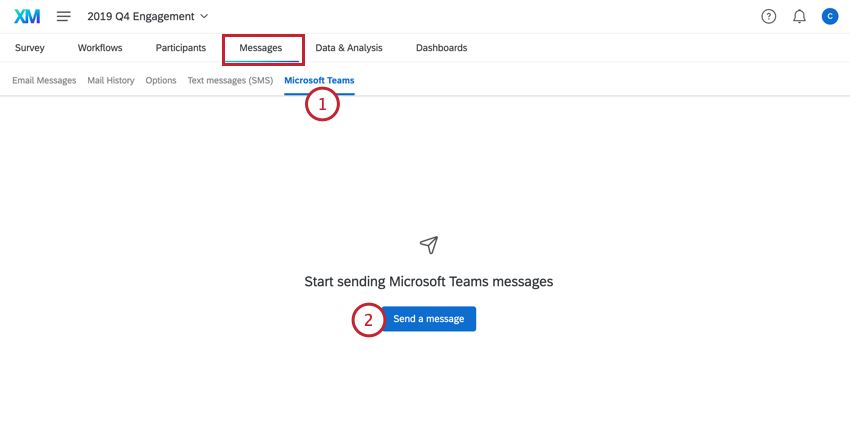
- Click Send a message.
- Choose Survey invite.

- Click Next.
- Choose whether you’d like to send the survey to All participants in your project, or a set of custom participants based on criteria you set.
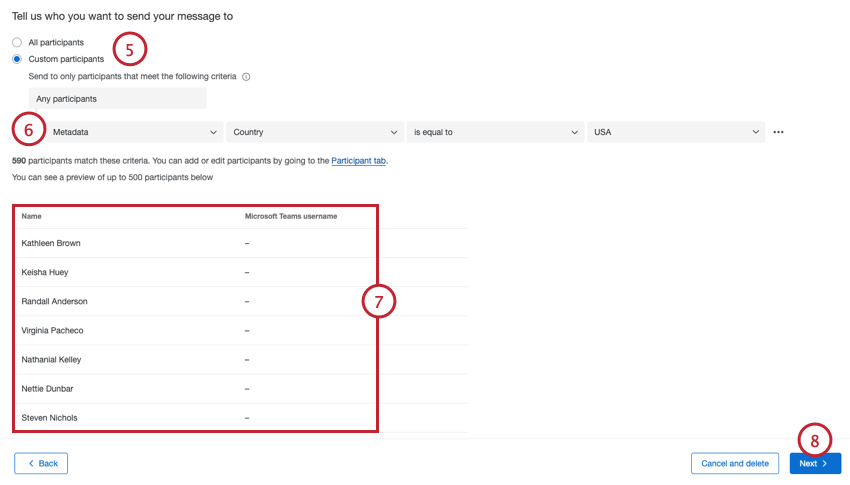
- If sending to a set of participants, create the criteria that determines if the participant should receive the invite. You can create criteria based on the participant name, email, metadata, or roles.
Example: Let’s say you have a global Engagement program, but only your employees in the U.S. use Microsoft Teams. You can filter your participants by the “Country” metadata field to send your survey only to the employees based in the U.S.
- Review the list of participants who meet your criteria.
Attention: If a user does not have a username listed for their Microsoft Teams username, then they will not receive your Microsoft Teams distribution. See Preparing Participants for Microsoft Teams for more information.
- Click Next.
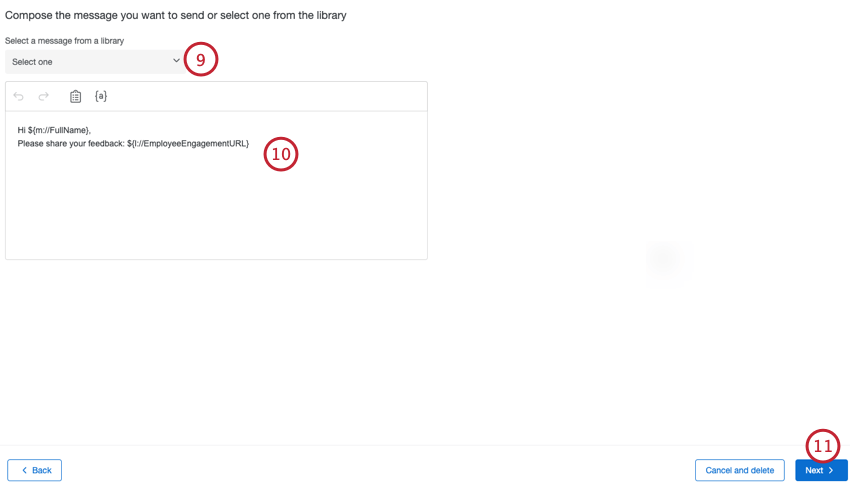
- If desired, use the dropdown to select a library message to use in your invite.
 Qtip: Make sure your message is saved as a Survey Platform – Microsoft Teams Invites message type.
 - Make any changes to your message as needed.
Qtip: Click the clipboard icon to insert the link to your survey. Click the piped text icon, {a}, to insert information about the participant such as their name or metadata.
- Click Next.
- Choose when you want to send your message. You can send your message Immediately or Schedule for later. If scheduling for later, choose the date, time, and timezone for when the survey should be sent.
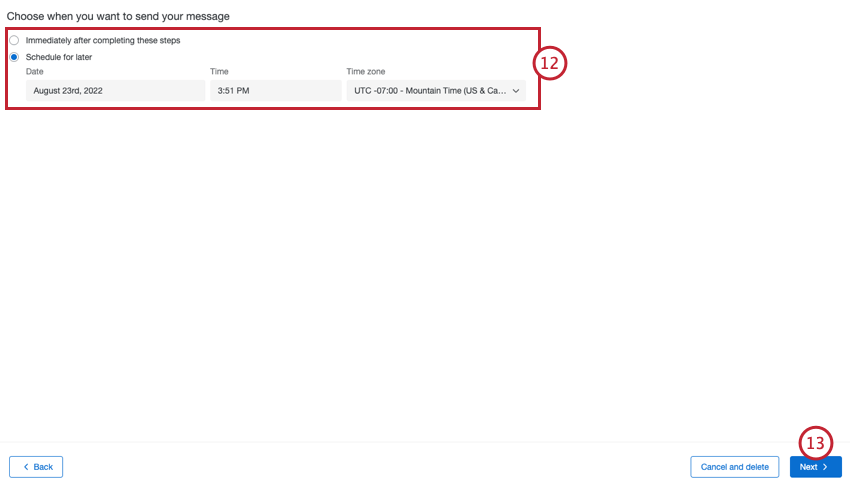
- Click Next.
- Review the details of your distribution. Click Edit next to a section to edit the details of that section.
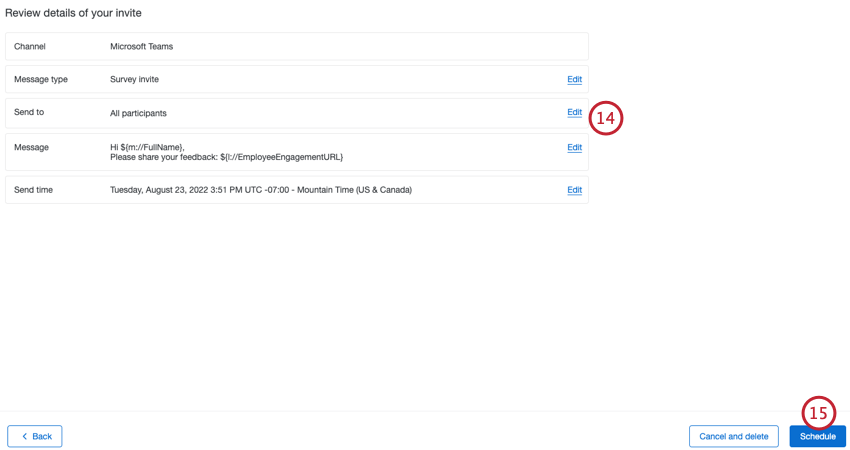
- When finished, click Schedule.
Sending Reminders to Microsoft Teams
- In the Messages tab of your project, go to Microsoft Teams.
- Click Send a message.
- Choose Survey reminder.
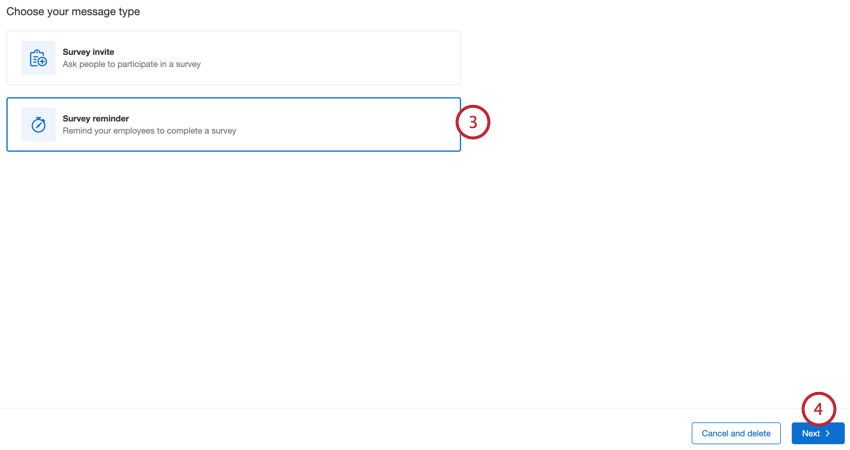
- Click Next.
- Choose whether you’d like to send the survey to All participants who haven’t responded to the survey yet, or a set of custom participants based on criteria you set.
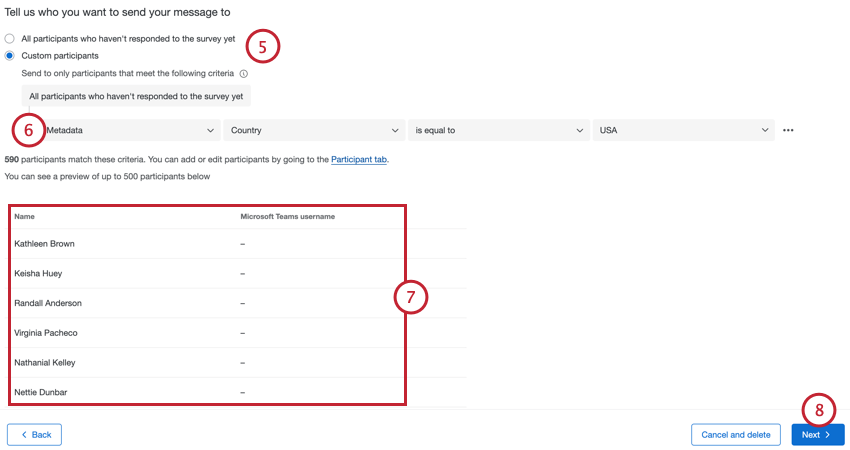
- If sending to a set of participants, create the criteria that determines if the participant should receive the reminder. You can create criteria based on the participant name, email, metadata, or roles.
Example: Let’s say you have a global Engagement program, but only your employees in the U.S. use Microsoft Teams. You can filter your participants by the “Country” metadata field to send your survey only to the employees based in the U.S.
- Review the list of participants who meet your criteria.
Attention: If a user does not have a username listed for their Microsoft Teams username, then they will not receive your Microsoft Teams distribution.
- Click Next.
- If desired, use the dropdown to select a library message to use in your invite.
Qtip: If you want to use a library message, make sure your message is saved as a Survey Platform – Microsoft Teams Reminders message type.
- Make any changes to your message as needed.
Qtip: Click the clipboard icon to insert the link to your survey. Click the piped text icon, {a}, to insert information about the participant such as their name or metadata.
- Click Next.
- Choose when you want to send your message. You can send your message Immediately or Schedule for later. If scheduling for later, choose the date, time, and timezone for when the reminder should be sent.
- Click Next.
- Review the details of your distribution. Click Edit next to a section to edit the details of that section.
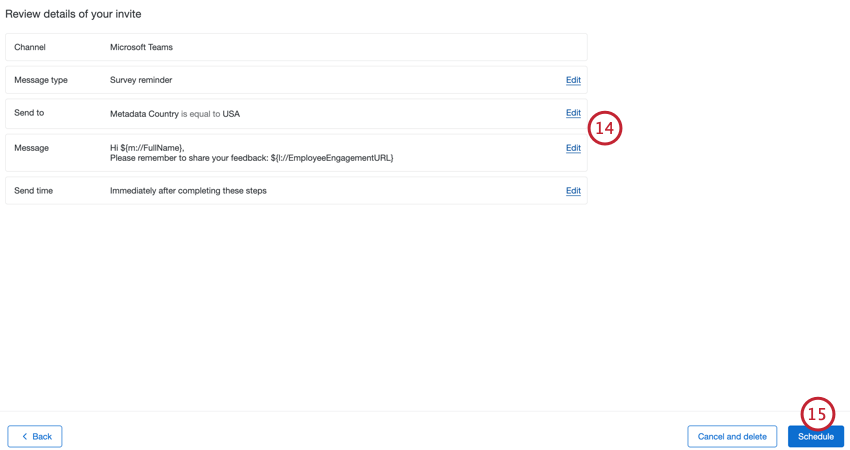
- When finished, click Schedule.
Scheduling a Reminder After an Invite
If you’ve sent survey invites via Microsoft Teams, you can schedule reminders based on the initial invite. A reminder scheduled via this method will be sent to the same group of participants as the original invite. Participants who already completed the survey will not receive a reminder.
- In the Microsoft Teams tab, click your original invite.
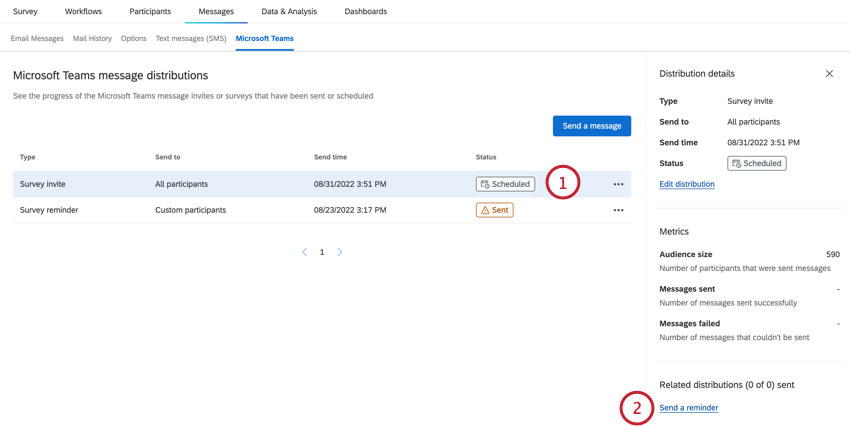
- Select Send a reminder.
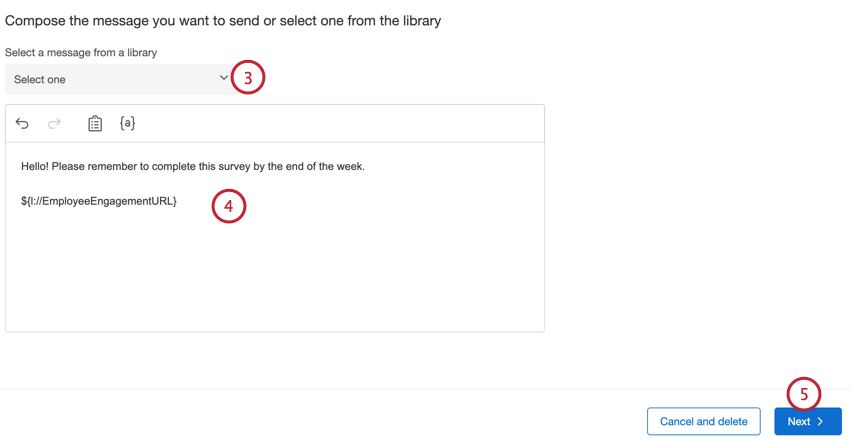
- If desired, use the dropdown to select a library message to use in your invite.
 Qtip: Make sure your message is saved as a Survey Platform – Microsoft Teams Reminders message type.
 - Make any changes to your message as needed.
Qtip: Click the clipboard icon to insert the link to your survey. Click the piped text icon, {a}, to insert information about the participant such as their name or metadata.
- Click Next.
- Choose the time period between the initial invite and the scheduled reminder. The date and time the reminder is scheduled to send will be displayed to you so you can make any changes as needed.
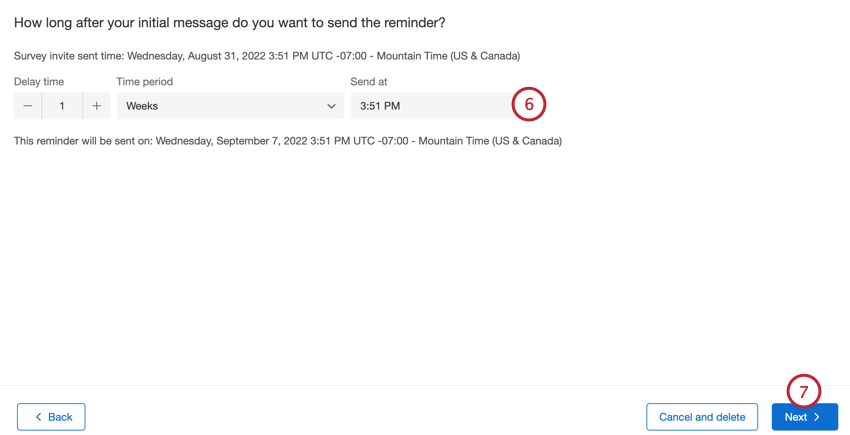
- Click Next.
- Review your distribution details. You can click Edit to revisit a section and make changes. Note that you cannot change the message type or message audience for a reminder that is based on an invite.
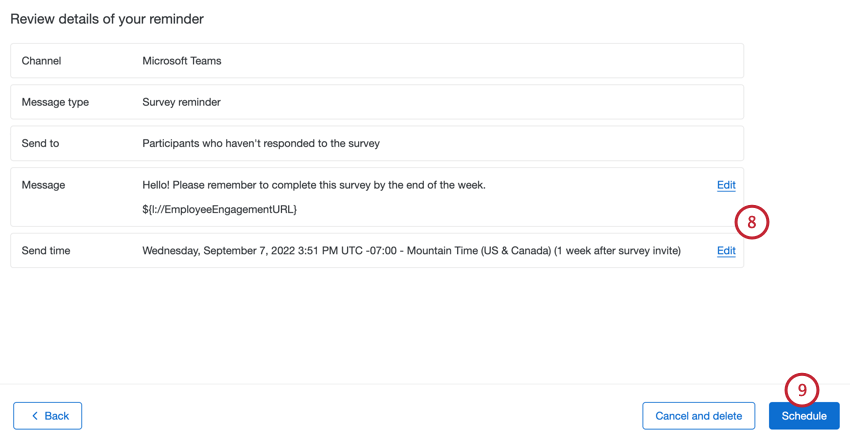
- Click Schedule.
Note that reminders scheduled via this method are called “Survey invite reminders” to differentiate them from reminders that are not tied to a specific invite.
Managing Microsoft Teams Distributions
The table in the Microsoft Teams tab displays key information about your Microsoft Teams distributions:
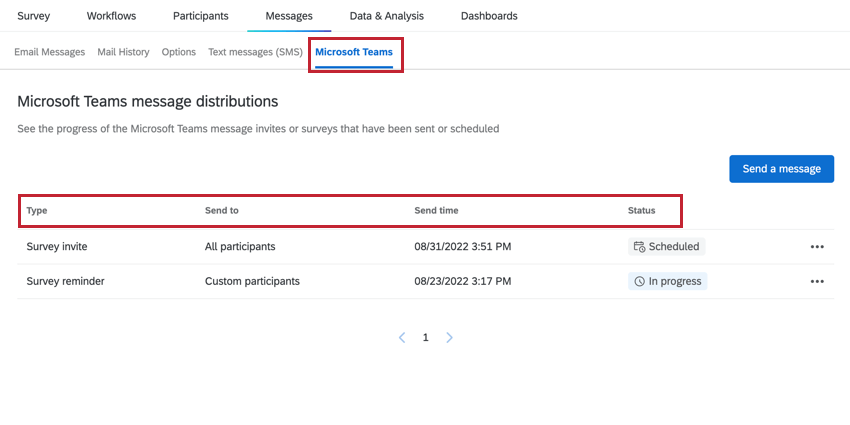
- Type: The type of distribution: survey invite, survey reminder, or survey invite reminder.
- Send to: Who received the distribution, either all participants or a set of custom participants.
- Send time: When the distribution was sent or is scheduled to send.
- Status: The distribution’s status. Possible values include Scheduled, In progress, Sent, and Failed.
Distribution Options
Click the three dots to the right of a distribution to see the options for that distribution. The options that appear in this menu depend both on the type of distribution and the distribution’s status.
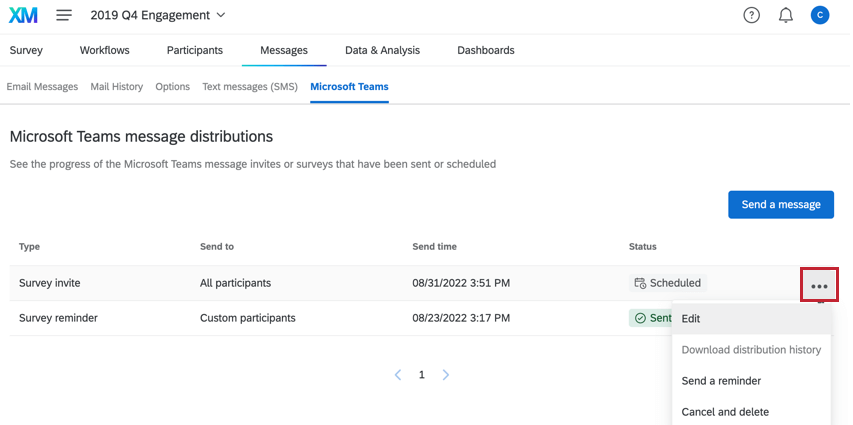
- Edit: If the distribution is scheduled to send, you can edit the details of the distribution.
- Send a reminder: If the distribution is an invite, you can send a reminder to the participants who received the invite but did not complete the survey. When scheduling a reminder in this way, you will choose how long after the initial invite the participants should receive the reminder. See Scheduling a Reminder After an Invite for more information.
- Cancel and delete: If the distribution is scheduled to send, you can cancel the distribution and delete it from your project.
- Preview: If the distribution has already been sent, you can view the details of the distribution.
- Download distribution history: If the distribution has already been sent, you can download a file that contains information about each participant, including the delivery status of each individual message. Downloading the distribution history can be a useful troubleshooting tool if participants are having trouble receiving the distribution.
Viewing a single distribution
Click on a distribution to pull up a panel with key information about that distribution:
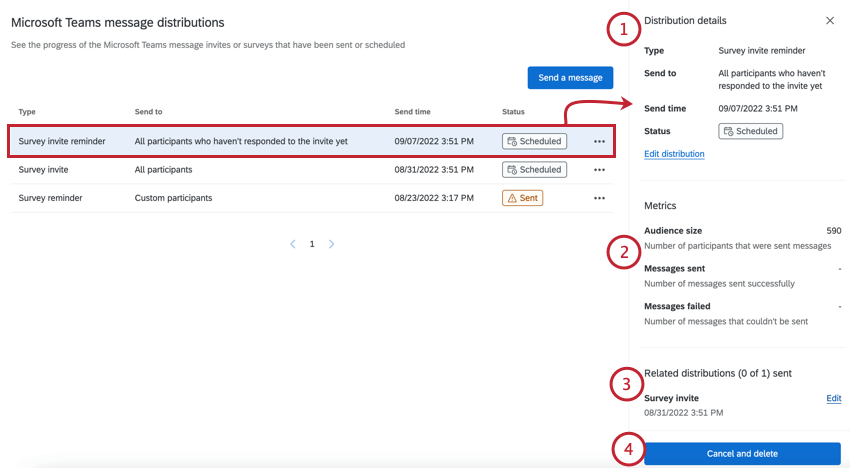
- Distribution details: This section contains information about who received your distribution, when it was sent, and its status:
- Type: The type of distribution sent.
- Send to: A description of who the distribution was sent to.
- Send time: The date and time that the distribution was sent.
- Status: The distribution’s send status.
- Edit or Preview link: If your distribution has not already been sent, you can click the Edit distribution link to make any changes. If the distribution has sent, you can click the Preview distribution link to see specifics about the distribution.
- Metrics: This section contains statistics about your distribution:
- Audience size: The number of participants who were sent messages.
- Messages sent: The number of messages that were successfully sent.
- Messages failed: The number of messages that could not be sent.
- Related distributions: Lists any distributions that are linked to your selected distribution. If you’ve scheduled any reminders based on an invite, they will be listed in this section. You can click Edit next to any distribution that has not yet been sent to modify it.
- Cancel and delete / Download history: At the bottom of the panel is a blue button that lets you take action on your distribution. What this button does depends on if the distribution has already been sent:
- Cancel and delete: If the distribution is scheduled to send, you can click this button to cancel and delete the distribution.
- Download history: If the distribution has already been sent, you can click this button to download a file that contains information about each participant, including the delivery status of each individual message.
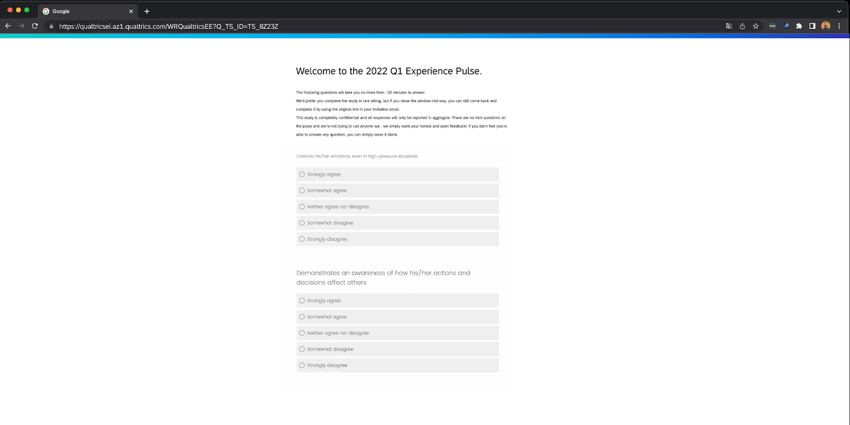
Microsoft Teams Respondent Experience
This section covers the experience of receiving an EX survey via Microsoft Teams.
- In Microsoft Teams, you will receive a direct message from a Microsoft Teams User Account that contains a personalized link to the survey. Click this link to open the survey in a new tab.
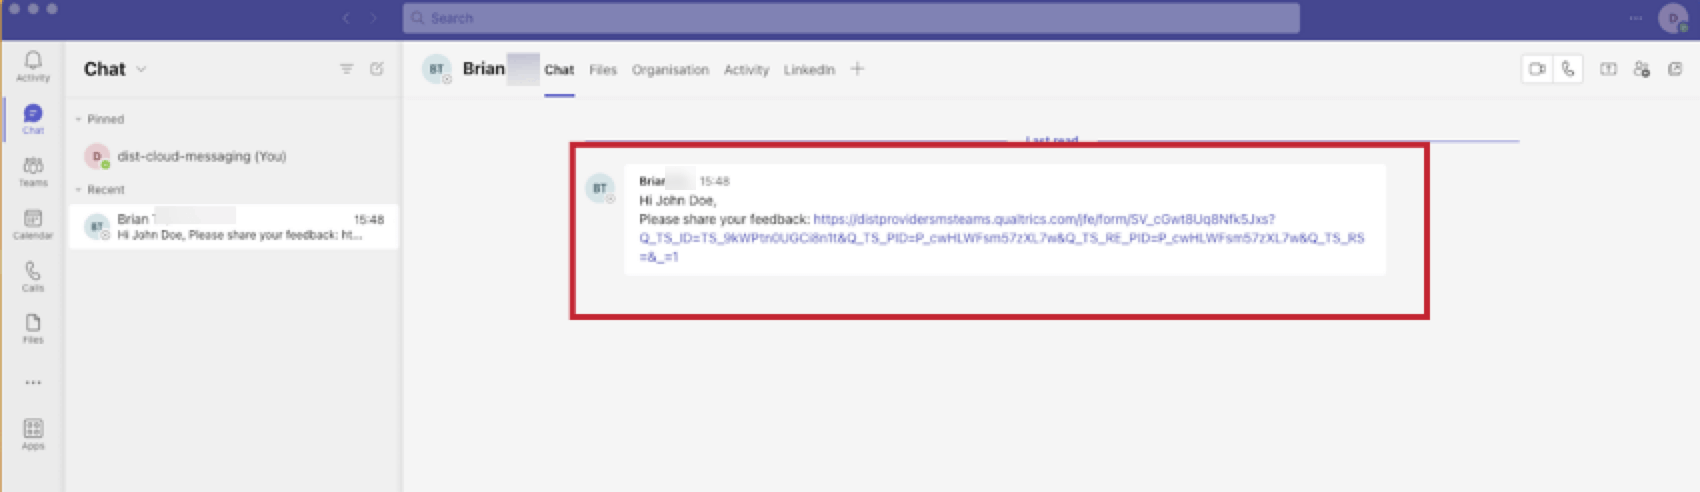 Qtip: Do not share this link with others.
 - The survey will load in a new tab in your browser for you to take. See Information for Survey Takers for more information.