Participants Tools (360)
About Participant Tools
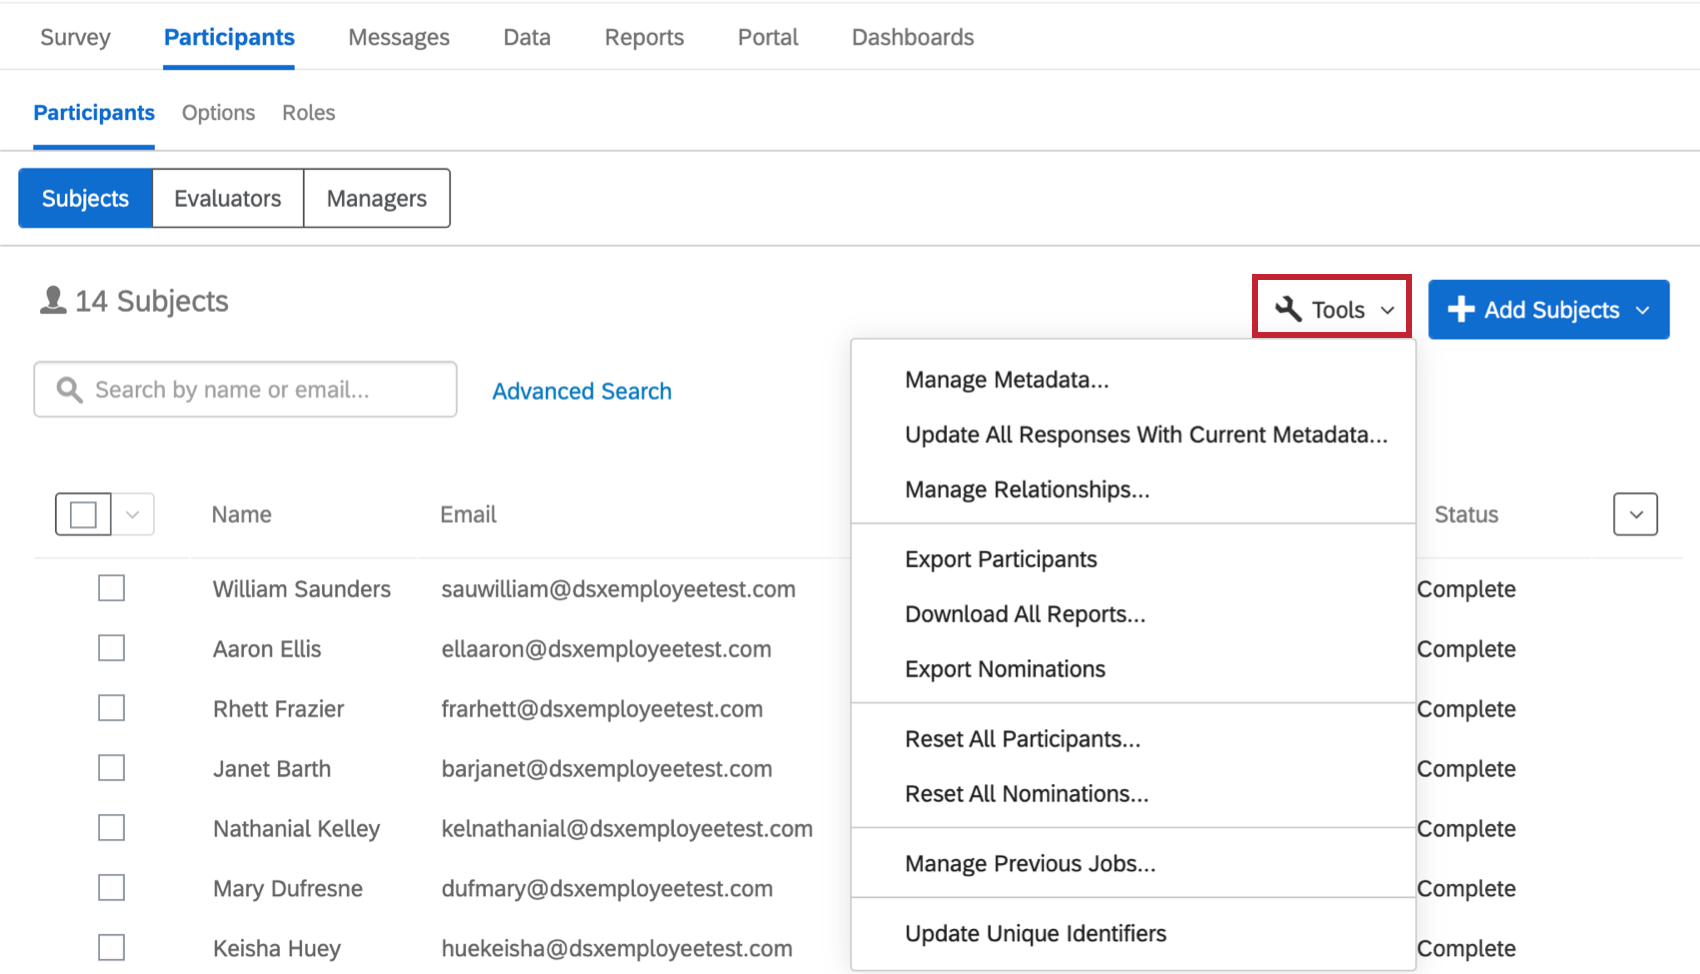
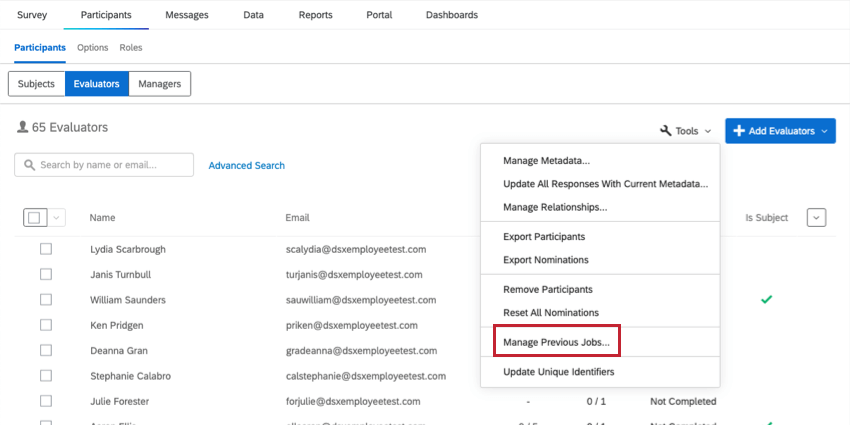
In every 360 project, you have access to tools that you can use to manage the participants uploaded into your project. To get to these tools, navigate to the Participants section of the Participants tab, then select Tools.
Manage Metadata
You can manage the all the metadata for your 360 project using the Manage Metadata tool. Editing metadata here won’t affect metadata in the directory, but it will affect metadata for the whole 360 project.
- Navigate to the Participants section in the Participants tab.
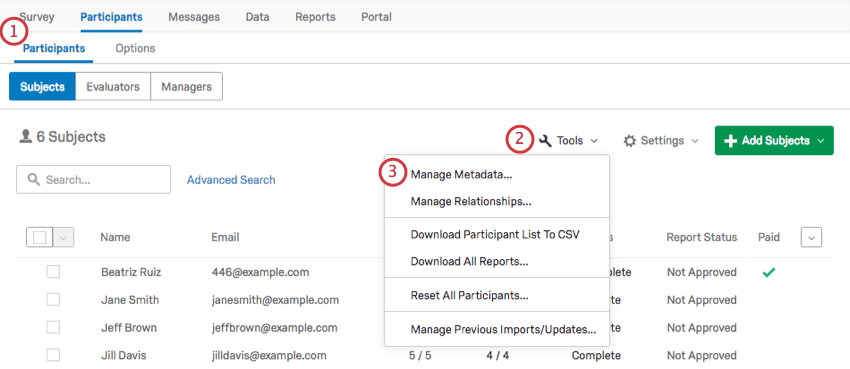
- Click Tools on the top-right.
- Select Manage Metadata.
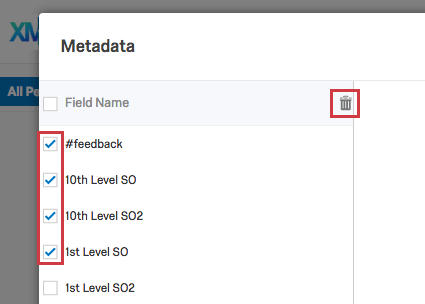
- Click on a metadata field so it is highlighted in blue.
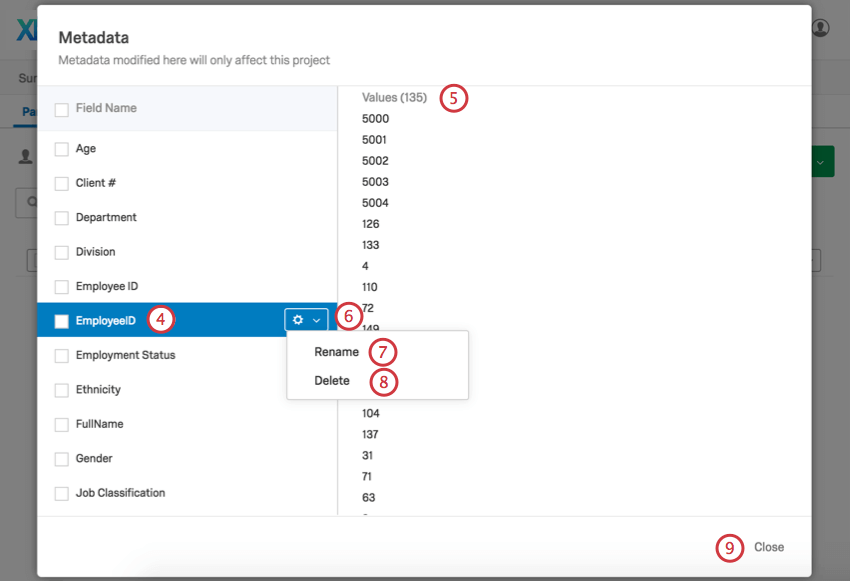
- For the selected metadata field, note the possible Values listed to the right. Only the first 500 are displayed.
- Hover your mouse over a field to get the gear button. Click this.
- Click Rename to change the name of the selected metadata.
- Click Delete to permanently delete the selected metadata from your brand.
- Click Close when you’re done making changes.
Update All Responses With Current Metadata
If you have made changes to your participants’ information by importing the same participants with new metadata (be careful to include the correct unique identifiers for each subject and evaluator) or through the participant information window, you will want to make sure these updates are reflected in your responses, reports, and dashboards. Update All Responses With Current Metadata updates this information for every single one of your participants.
Manage Relationships
Manage Relationships allows you to manage all the custom relationships in your 360 project. You cannot edit the built-in relationships. This includes Peer (subject to subject) and Manager (direct report to manager).
Adding and Removing Relationships
- Click Tools on the top-right.
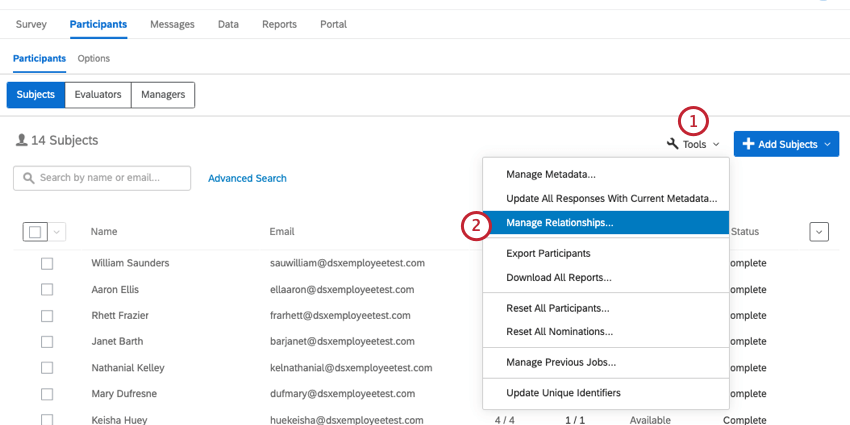
- Select Manage Relationships.
- Click Add Relationship.
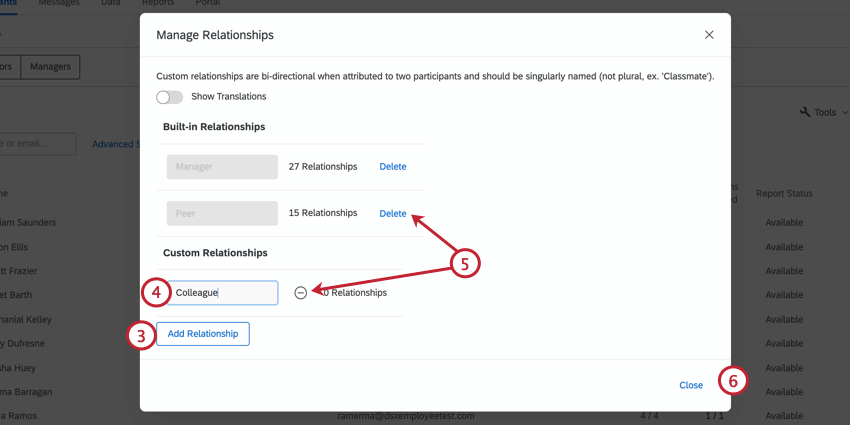
- Type the relationship name in the block.
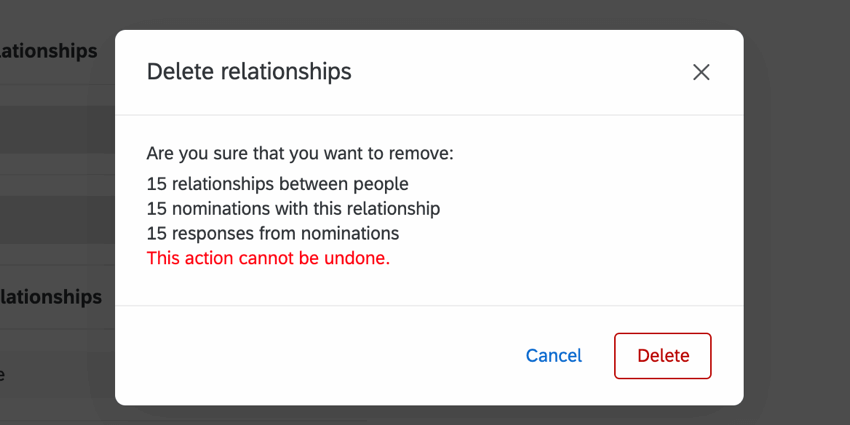
- Click the minus (–) sign to remove a relationship with zero participants, or Delete to remove a relationship with participants.
- When finished with your edits, click Close.
Translating Relationships
- Click Tools on the top-right.

- Select Manage Relationships.
- Switch Show Translations to On.
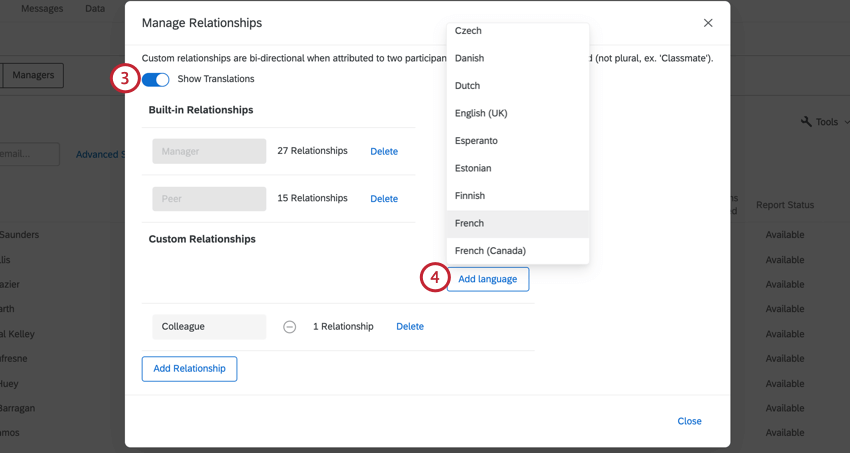
- Click Add language and select your desired language. You may repeat this for as many languages as you need.
- In the fields, enter the translated names of the relationships.
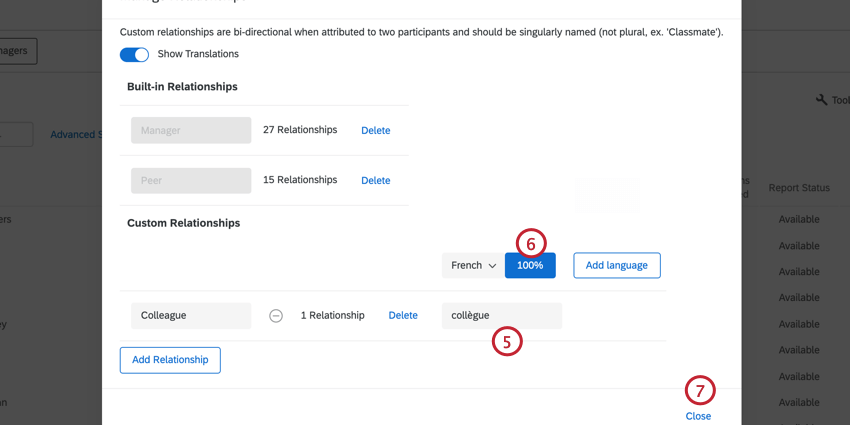
- If desired, click the percentage to automatically translate the relationships. This translation is from Google Translate.
- When you’re finished, click Close.
Translation Options
If you click on the header of any of your translation columns, you will have several options for managing your translations.
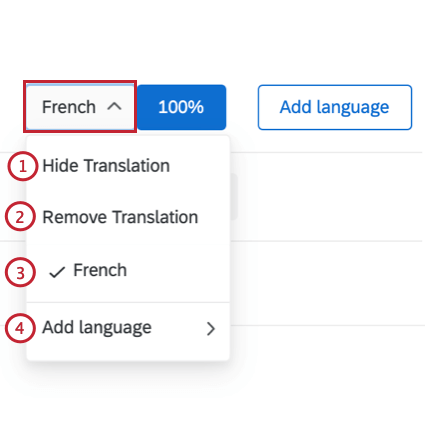
- Hide Translation: Hide the translation. This can be helpful if you have many translations and need to create more room on the page.
- Remove Translation: Delete the translation altogether.
- Select which language displays in the column.
- Add language: Add another language to your list of custom relationship translations.
Export Participants
You can download a file containing the project’s subjects, evaluators, or managers. This file will be in a CSV format.
- In the Participants section, choose the type of participants (subject, evaluator, or manager) that you’d like to export.
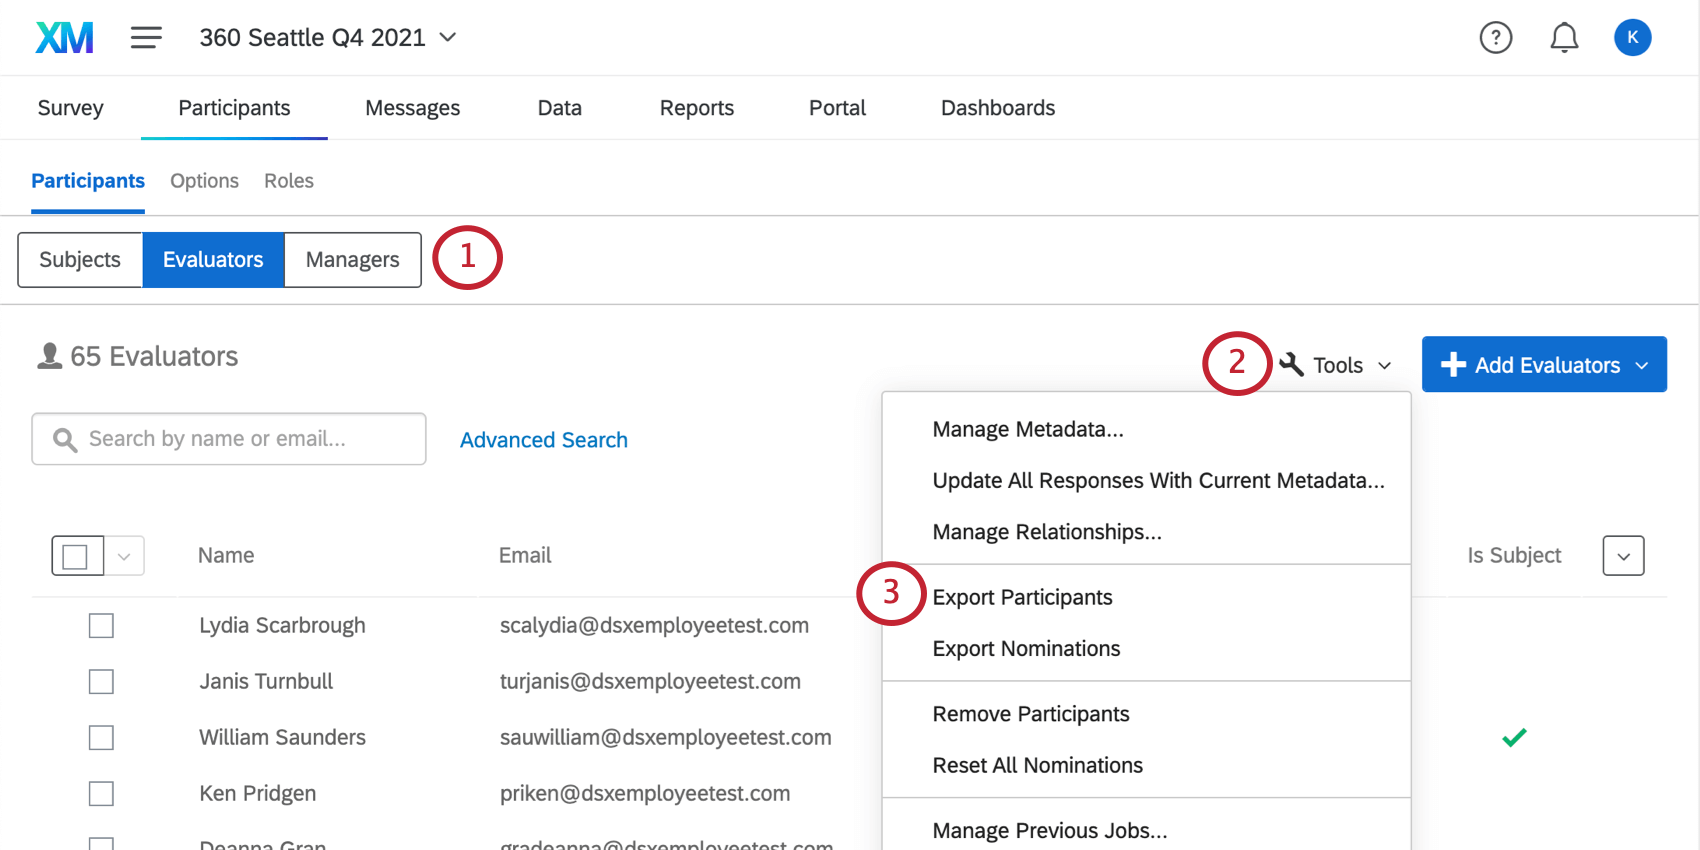
- Click Tools.
- Select Export Participants.
- The export will download as a CSV file on your computer.
Understanding your exported participants list
Here’s a guide to the columns you’ll see in your exported file.
- Status: Whether the participant has completed their response, or if you are still waiting for them to respond.
- Nominations Received: How many people (excluding the self) the participant has been asked to evaluate.
- Nominations Sent: The number of evaluators assigned to the subject, excluding the self.
- Evaluations Received: The numbers of evaluations completed of this subject, including the self-evaluation. This should be 0 for external evaluators because they are not subjects.
- Completed Evaluations: How many evaluations (excluding the self) the participant has completed.
- Self-Evaluation Complete: Whether a self-evaluation still needs to be completed. This field will have a value of 0 if the subject did not complete the self-evaluation and a value of 1 if they did complete the self-evaluation. External evaluators will always have a value of 1 because they do not need to complete a self-evaluation.
The export will also include each participant’s first and last name, unique identifier, username, user type, last login date and time, and metadata.
Download All Reports
When selected, Download All Reports will download a PDF of every subject’s report.
Use the Search bar or select specific participants if you only want to download a few PDFs at a time.
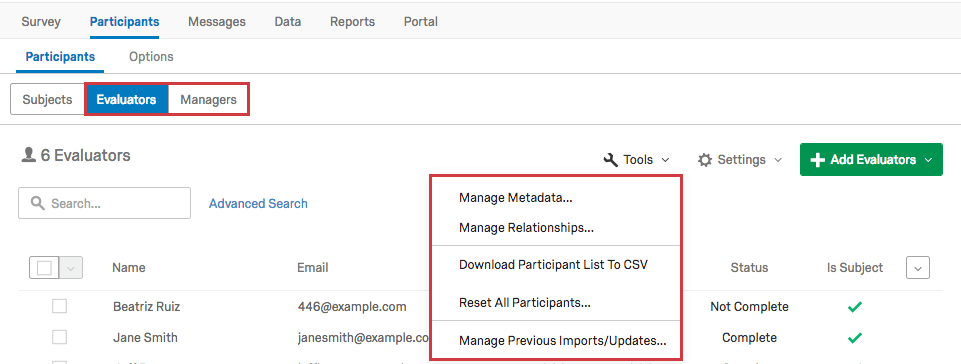
This option does not display on the Evaluators subsection because evaluators don’t have reports. This option also doesn’t display on the Managers subsection because not all managers are subjects, although they can be.
Export Nominations
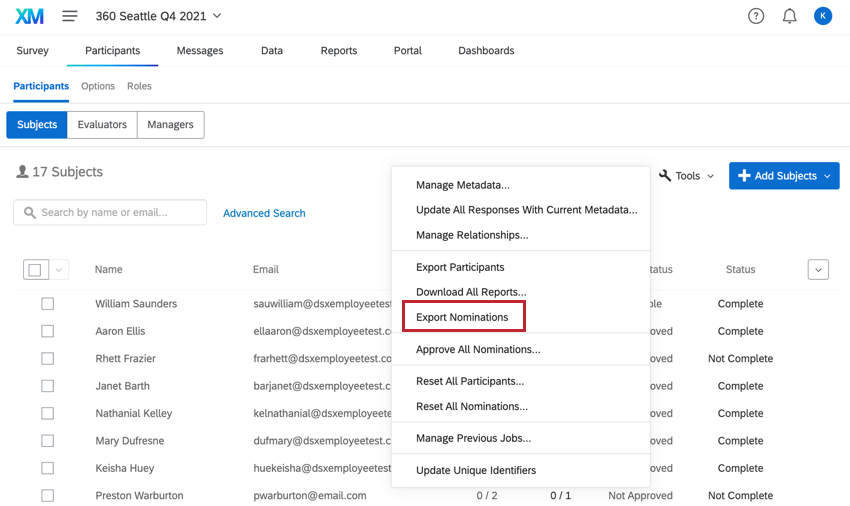
You can export a list of all nominations by selecting Export Nominations under the Tools menu.
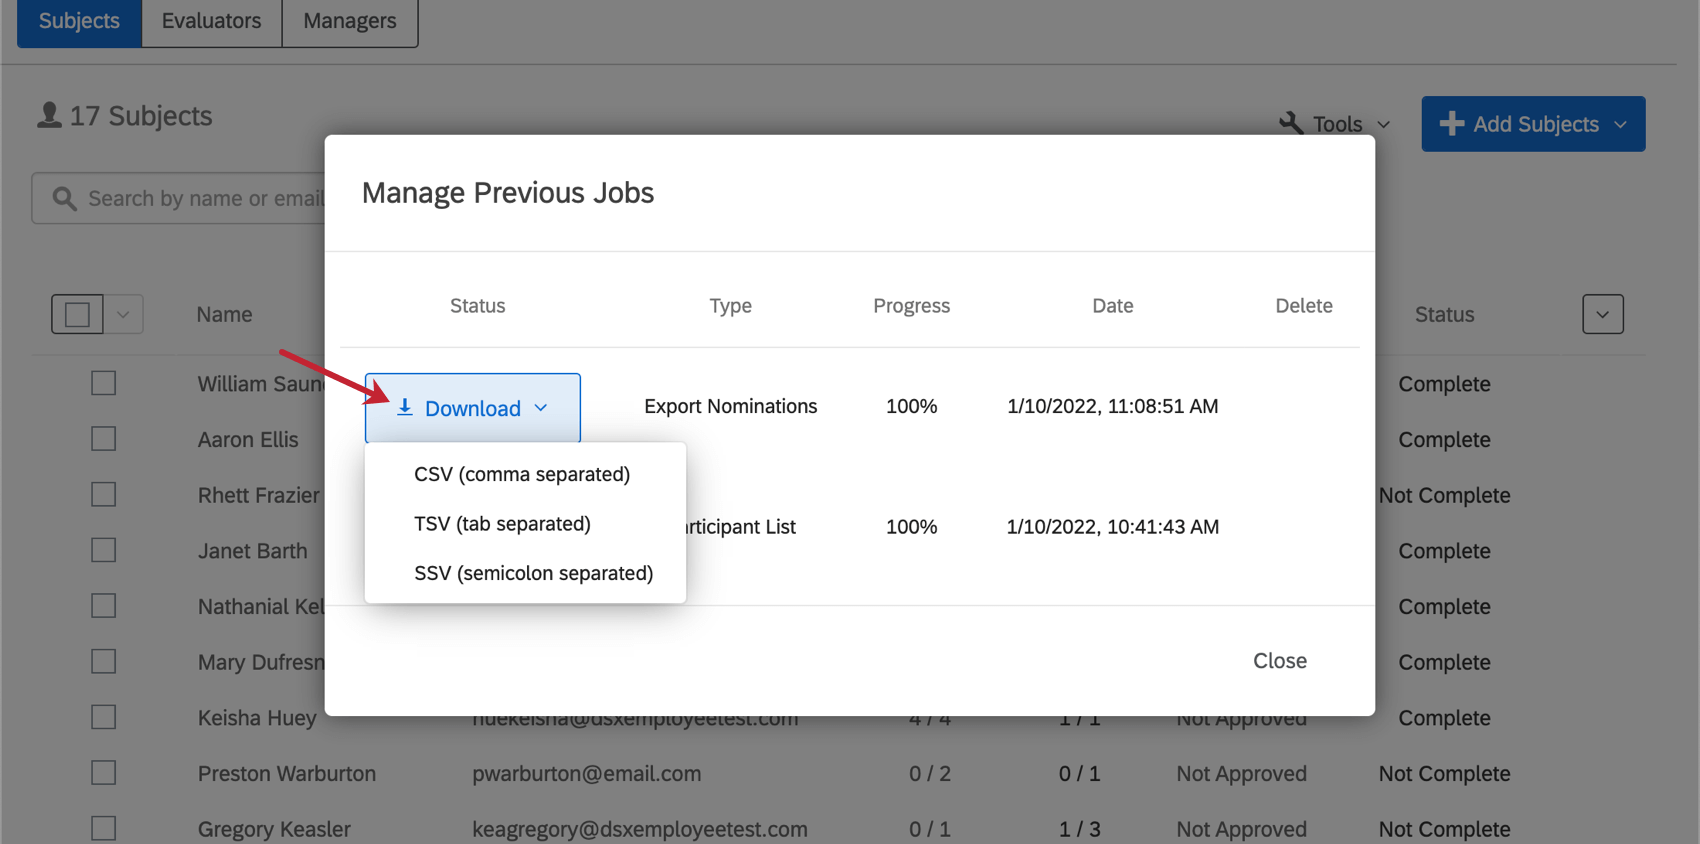
You can decide whether you’d like this file in CSV (comma separated), TSV (tab separated), or SSV (semicolon separated) format.
Columns in the exported file
- FirstName, LastName: The first and last name of the evaluator who was nominated.
- EvaluatorEmail: The evaluator’s email.
- EvaluatorUniqueIdentifier: The unique identifier of the evaluator.
- SubjectUniqueIdentifier: The unique identifier of the subject they were nominated to evaluate.
- Relationship: The relationship of the evaluator to the subject.
- Solicited: “TRUE” if the nomination was solicited and “FALSE” if it was not solicited. Whether or not a project allows unsolicited nominations is configured in Participants Options.
- NominatedByUniqueId: The unique identifier of the person who made the nomination. This can be the subject themselves, but it may also be the administrator who created the project or a manager, depending on who you allow to make nominations.
- NominatedOn: The date and time the nomination was made.
- Method: How the nomination was made. These include,
- Imported: The nomination was imported.
- Added using automatically add evaluators option: When adding subjects and evaluators manually, the nomination was created due to the “automatically assign evaluators based on relationships” option.
- Added unsolicited: The nomination was an unsolicited nomination.
- Added during response import: The nomination was created as a result of an imported response.
- Added by subject: The nomination was added by the subject.
- Added by admin: The nomination was added by a manager.
- Automatically generated: The nomination was created automatically; it is either a round-robin nomination or a self-evaluation.
- Status: Indicates if the nomination was approved or declined. Statuses include approved, waiting, denied, and denied by evaluator. See Participant Options for more information about declining nominations.
- ResponseId: If a response has been submitted, the response’s ID.
- SubjectFirstName:The first name of the subject they were nominated to evaluate.
- SubjectLastName: The last name of the subject they were nominated to evaluate.
Reimporting Exported Participant Lists
You can import participant lists that have been exported, making updating many participants quick and easy. When reimporting an exported participant list, make sure to remove the columns listed below. These columns represent internal Qualtrics fields. If these columns are included in a participant import, then these fields will be saved as participant metadata. Usually, these fields aren’t useful for reporting purposes, so we recommend removing the columns from your import. The columns to remove are:
- Solicited
- NominatedByUniqueId
- NominatedOn
- Method
- Status
- ResponseId
Updating Participants
You may want to update, add, or delete participant metadata values for your 360 project. You can do so by importing an updated file.
- In the Participants tab, click + Add Subjects.
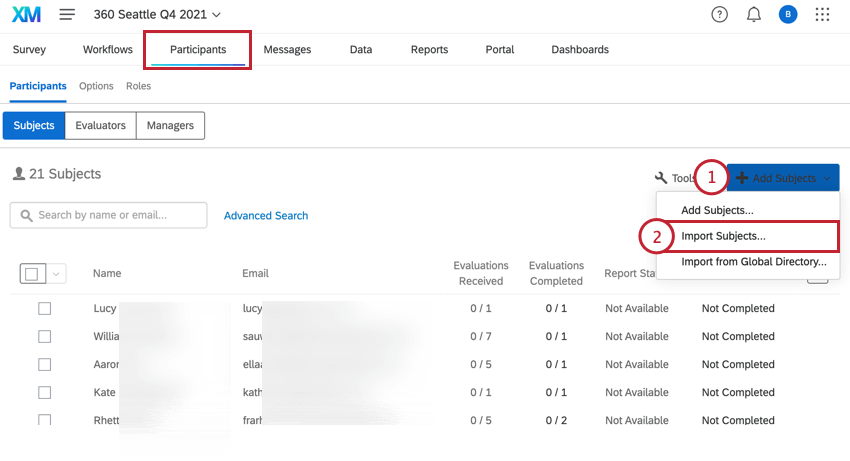
- Select Import Subjects.
- Click Example CSV to download a template file.
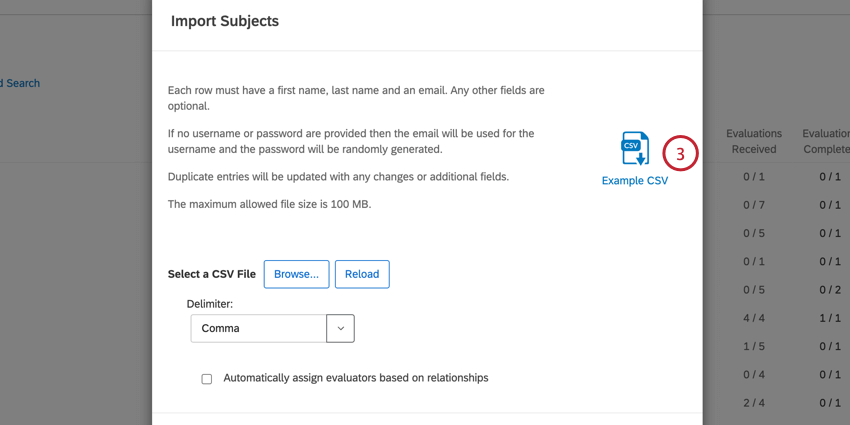
- Open the template in a spreadsheet editor on your computer, such as Excel.
- Enter the FirstName, LastName, Email, and Uniqueidentifier fields for the participants you’d like to update. See Preparing Your Subject File for more information about these fields.
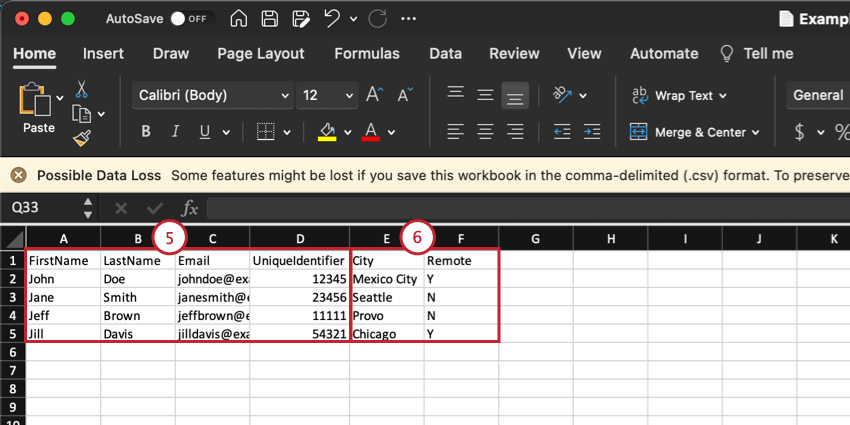
- Include Metadata columns containing the metadata you want to update. See Metadata for more information about participant metadata.
- Save this file as a CSV file.
- Return to Qualtrics and click Browse on the subject import screen.
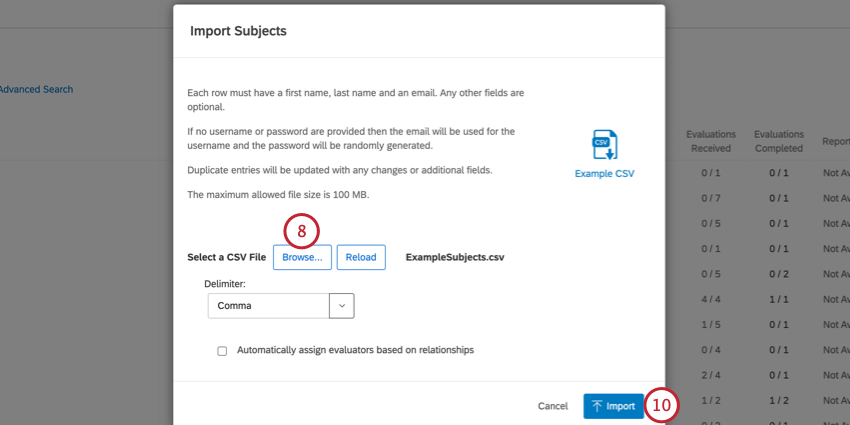
- Select the CSV file you edited earlier.
- Click Import.
Qtip: Check out CSV & TSV Upload Issues for help troubleshooting your import.
Remove Participants
There are a couple different ways to remove participants. One is a manual approach where you select participants and remove them by pages of the Participants tab. The other is a convenient import process where you can upload a list of Unique IDs for the participants you’d like to remove.
Manual Removal
See also Managing Participants.
- Make sure the section of the Participants tab that you’re in (Subjects, Evaluators, or Managers) corresponds to the participants you want to remove.
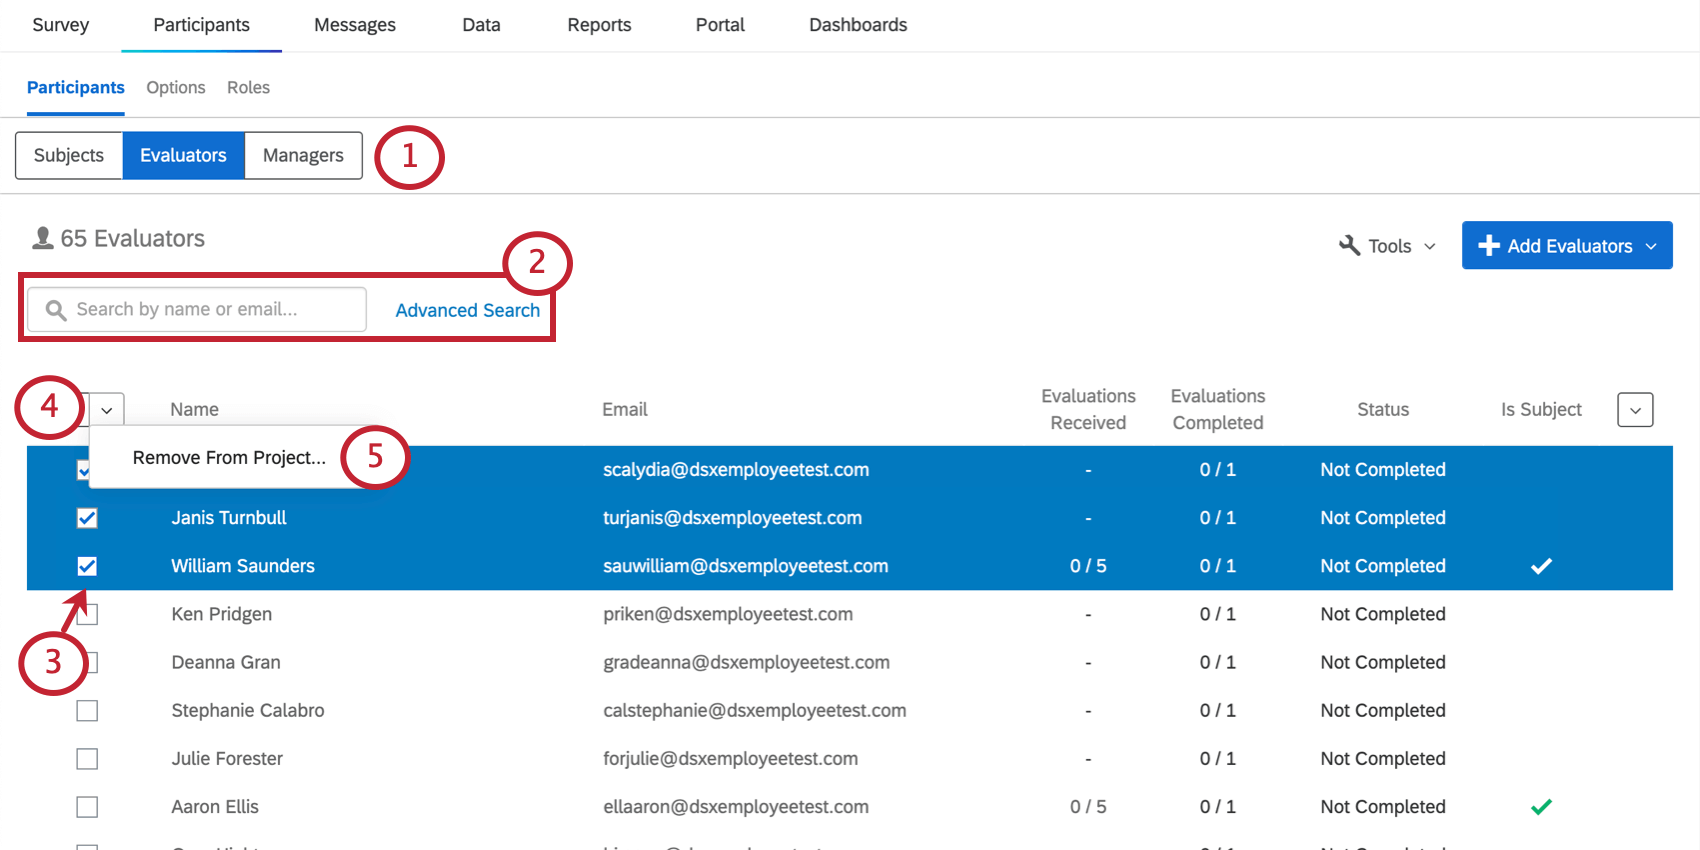
- If desired, search to narrow down the participants you see.
- Select users you’d like to remove.
- Click the dropdown in the upper-left.
- Select Remove from Project.
- Type “remove.”
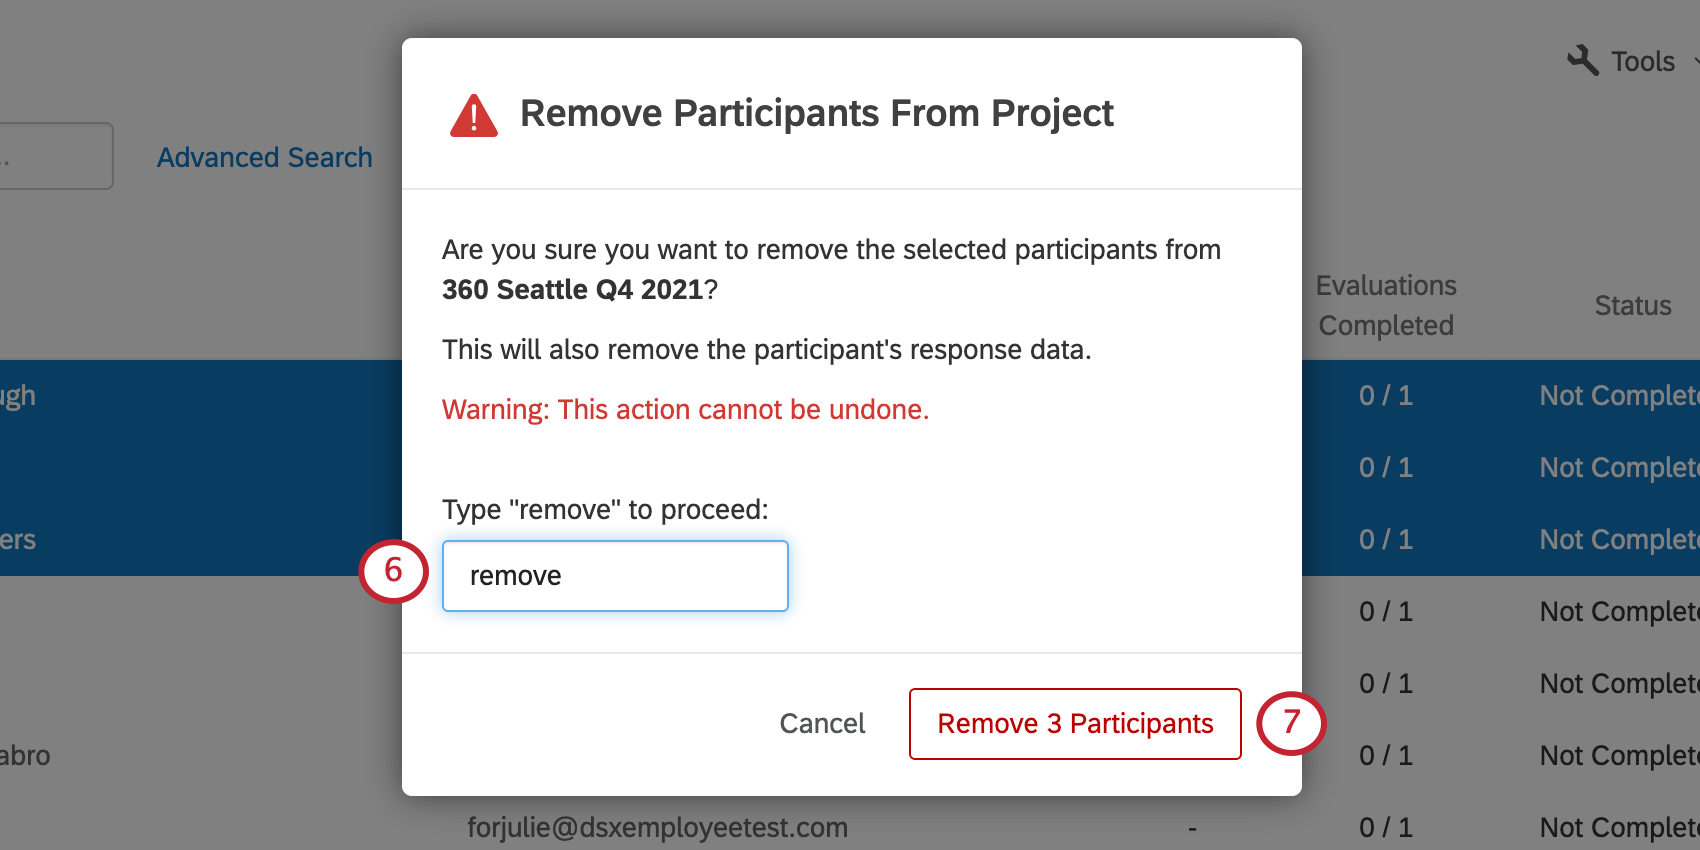
- Click Remove Participant(s).
Bulk Removal Through Import
- Go to the Participants section of the Participants tab.
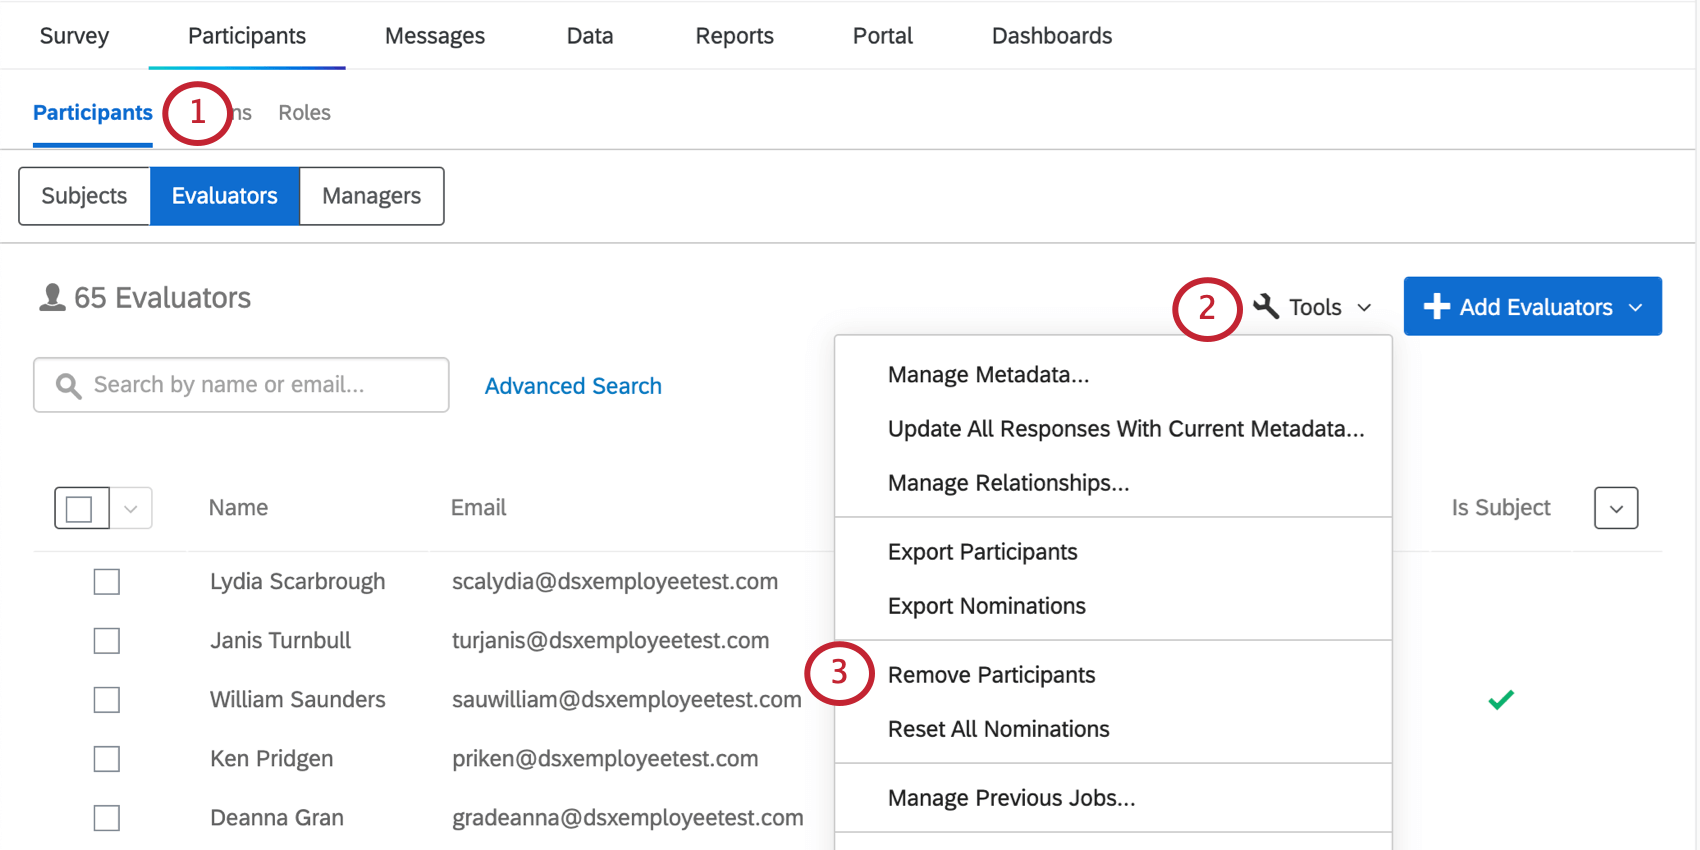
- Go to Tools.
- Select Remove Participants.
- Click Example CSV to export a template CSV for import.
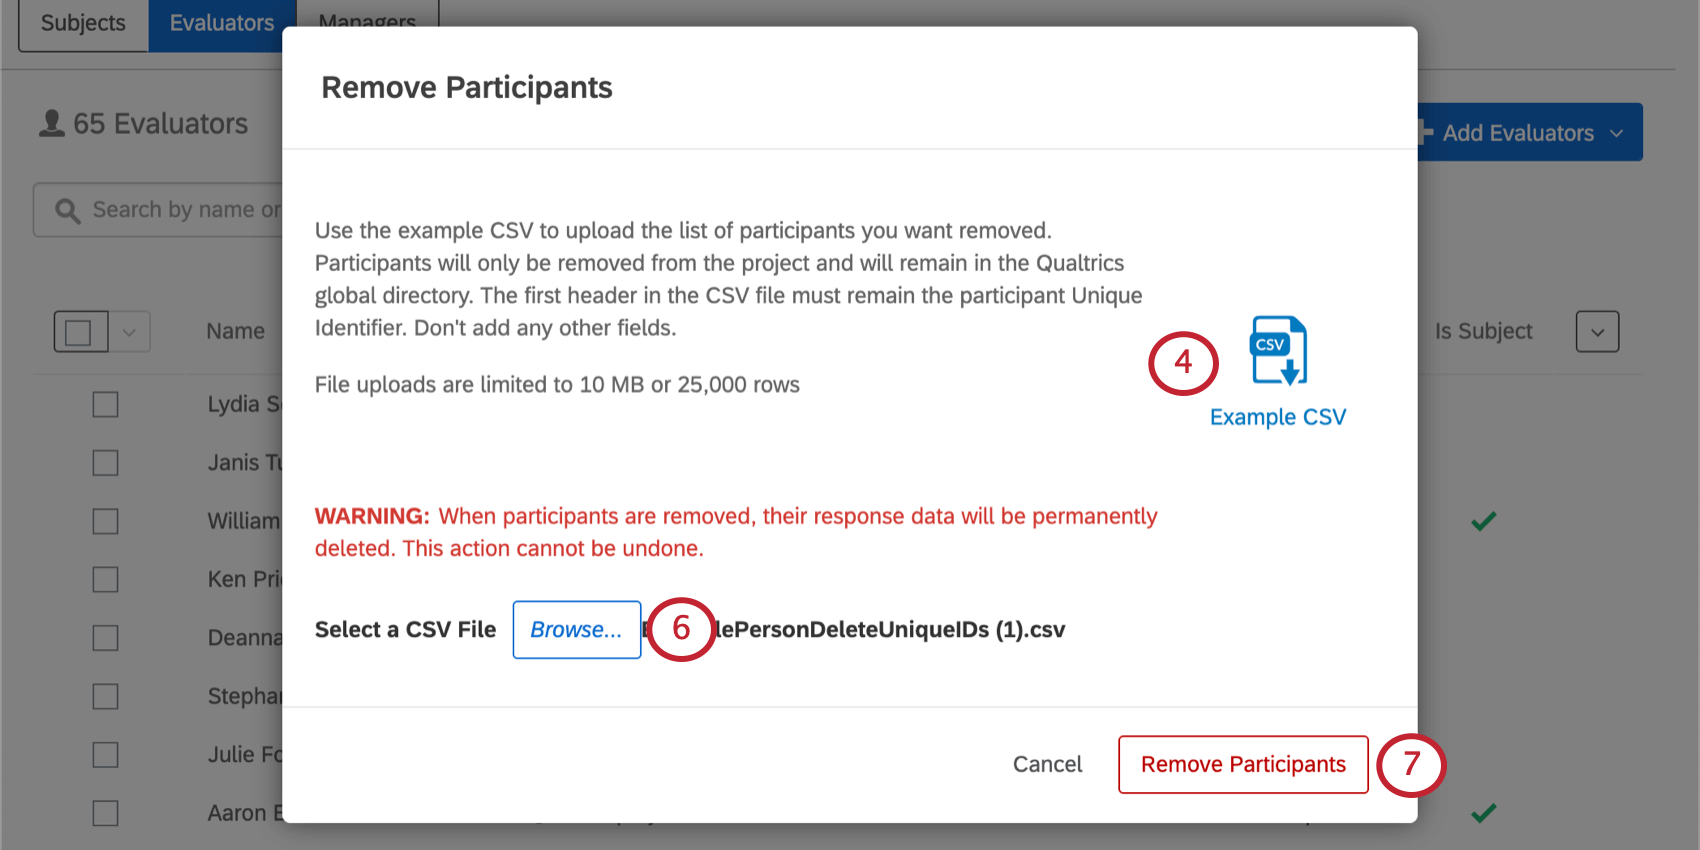
- Enter the corresponding IDs in the Unique Identifier column. Save your file.
Qtip: If you’re not familiar with your participants’ unique IDs, you may want to export your participants list.
- Click Browse and select the file you just created.
- Click Remove Participants.
Reset All Nominations
Reset All Nominations will let you remove all the evaluation relationships from the project. This does not just count for nominations that subjects set for themselves, but all evaluators set for the subject.
Manage Previous Jobs
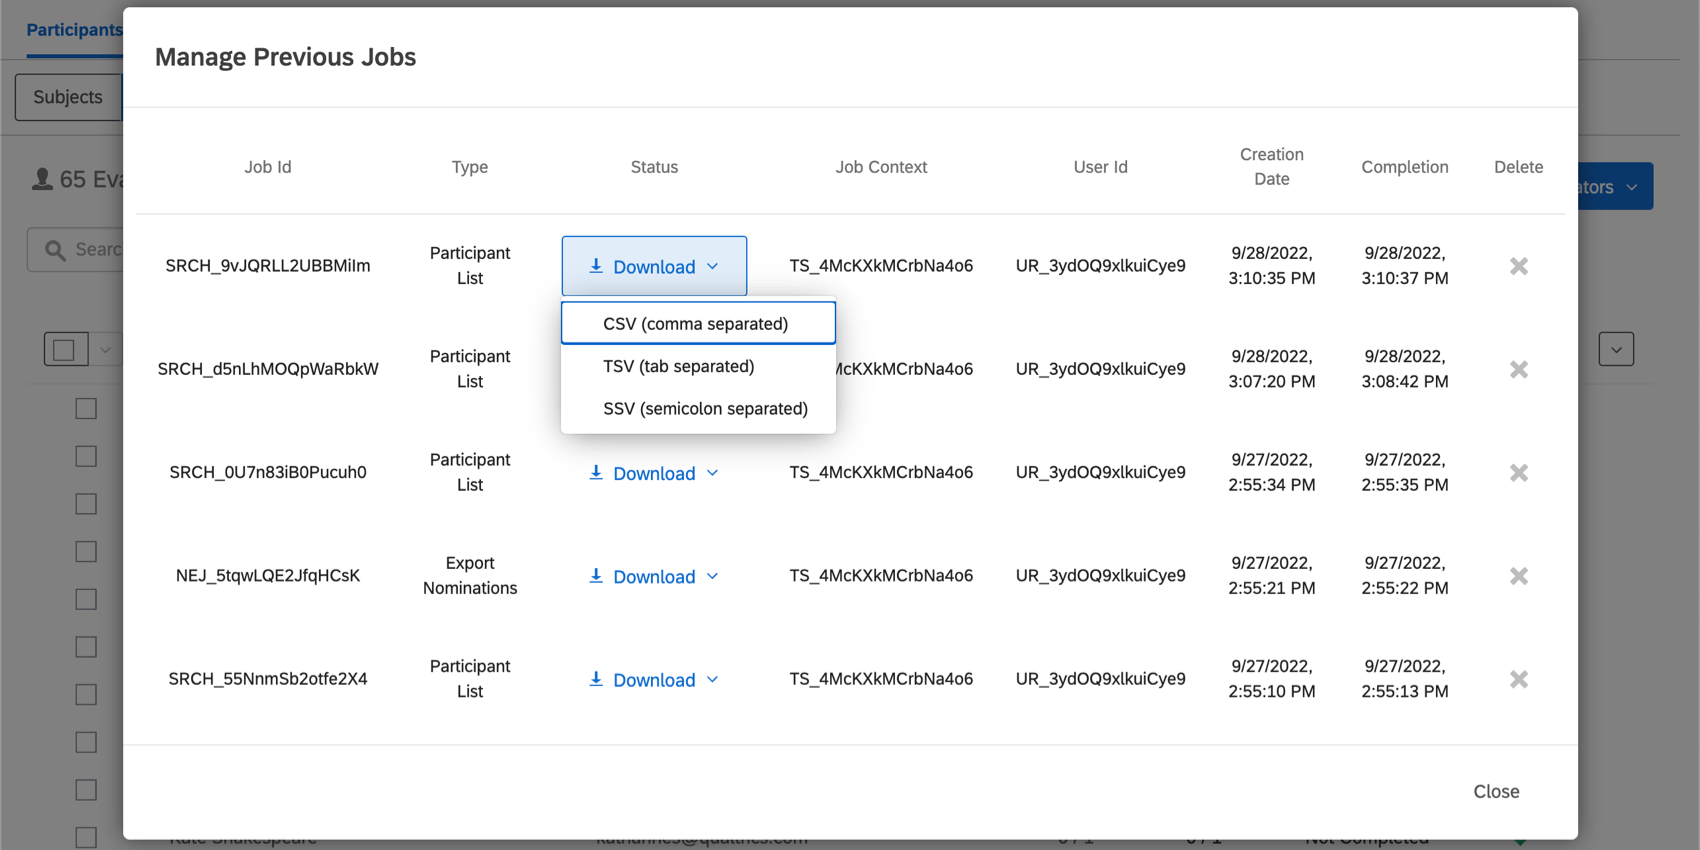
If you have recently imported your participants or chosen to Update All Responses With Current Metadata, the Manage Previous Jobs tool will allow you to look back on a history of your imports. This history shows the same content regardless of whether you are in the Subjects, Evaluators, or Managers section.
You can re-download any previously exported files from this menu by clicking Download next to a job. Exports are available in CSV (comma separated), TSV (tab separated), or SSV (semicolon separated) format.
Otherwise, “Manage Previous Jobs” works exactly the same in 360 as “Manage Imports/Updates/Exports” does in other Employee Experience projects. See also Job Queueing.
Update Unique Identifiers
Update Unique Identifiers allows you to change the unique identifiers of the participants in your project. To do so, you need to know the participants’ current unique identifiers. If you’re unsure of this information, try looking up the participant you want to change or exporting your participants list.
