Employee Led 360 Projects
About Employee Led 360 Projects
A 360 project is used to conduct a “360 assessment” where employees give each other feedback. Relationships are established between employees and each participant receives a personalized report with feedback to help with their professional development.
Employee led 360 projects are a type of 360 project that allow employees to take control of their own 360 feedback. Instead of an administrator beginning 360 assessments for many employees at the same time, each individual employee can initiate their own 360 when it fits their development goals.
Employee led 360 projects enable individual employees to:
- Opt-in to receiving 360 feedback
- Choose who they want to receive feedback from
- Determine when to start the 360
Differences Between 360 Project Types
There are some key differences between employee led 360 projects and standard 360 projects.
Project Administration
Project administrators no longer determine the project’s subjects and evaluators, nor do they choose when feedback collection starts. Instead, they only control the questions asked in the assessment and how long the feedback window is open once started.
Once the project is configured, individual employees can opt-in to the project and add other employees to evaluate them.
Locked Settings
Some settings in employee led 360 projects are pre-configured and locked so they cannot be changed. This includes:
- Report Options:
- The Assessment Completion Window is set to close 2 weeks after the assessment is started. You can change the timeframe for closing the assessment, but you cannot remove it.
Qtip: This option is called “Report Availability” in standard 360 projects.
- The option to Email subject when report becomes available is enabled and cannot be changed.
- The Assessment Completion Window is set to close 2 weeks after the assessment is started. You can change the timeframe for closing the assessment, but you cannot remove it.
- Messages Options:
- The Automatically send invites to new evaluators option is disabled and cannot be changed.
- Participant Options:
- The Opt-in link option is enabled and cannot be changed. You can still change the other settings associated with this option.
- The Subject nominates evaluators option is enabled and cannot be changed.
Steps to Set Up an Employee Led 360 Project
Employee led 360 projects mostly function the same as standard 360 projects. This section contains the general steps to create and launch a 360 project, but links out heavily to other support pages for more detailed information.
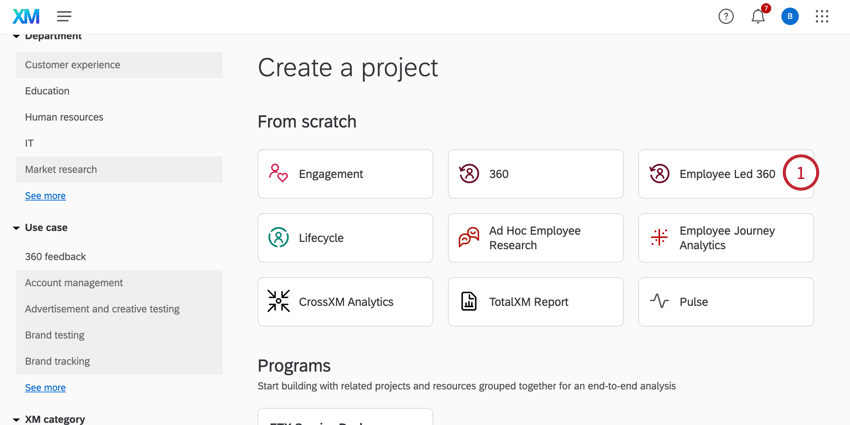
- Follow the steps on Creating a Project to build a new project. Choose EmployeeXM for the project category and then select the Employee Led 360 project.
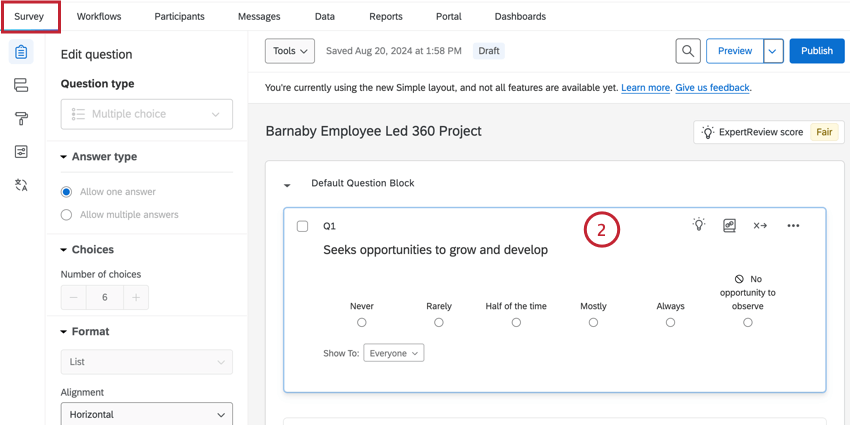
- Build the questions for the assessment. See Creating & Editing Questions (360) for more information.
- Navigate to the Options section of the Reports tab.
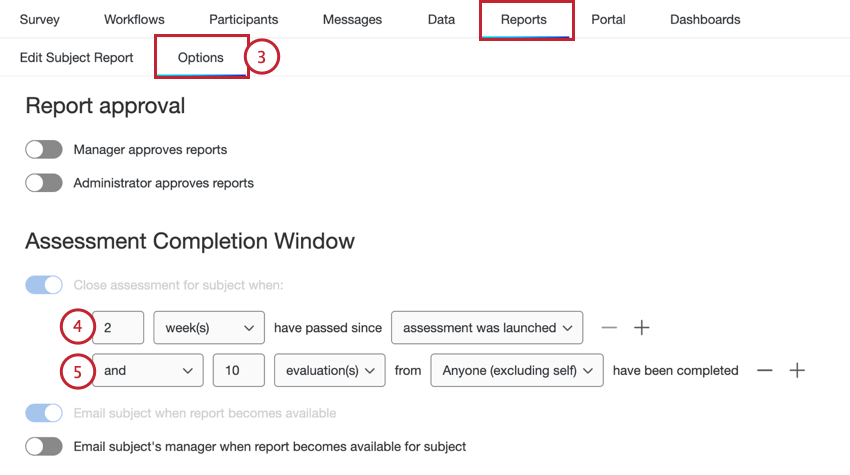
- If desired, change the Assessment Completion Window. By default, this is set to close 2 weeks after the assessment is started. You can change the timeframe for closing the assessment, but you cannot remove it.
Qtip: See the “Report Availability” settings on the Report Options (360) page for more information about these settings.
- You can add additional criteria by clicking the plus sign ( + ) or remove the criteria using the minus sign ( – ). If this criteria is not met, then the participant will not have an available subject report when their assessment closes.
Qtip: The option to email the subject when their report is available is enabled and locked by default.
- Navigate to the Evaluator Invite section of the Messages tab.
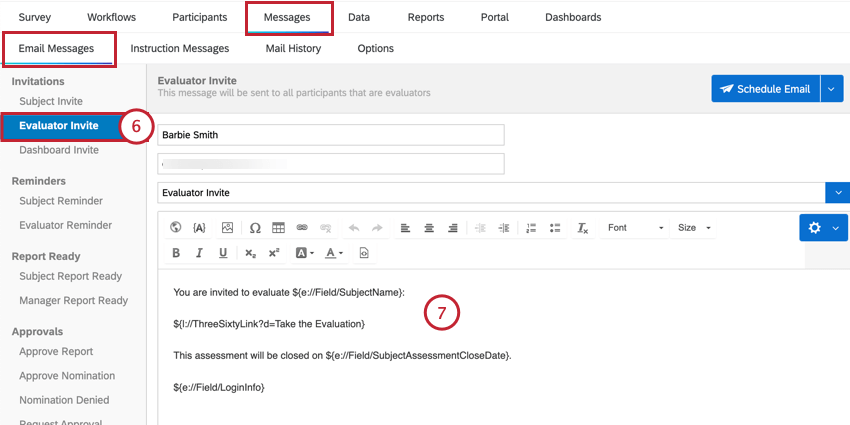
- If desired, you can edit the message that is sent to evaluators when a subject adds them to this project. By default, this message contains custom piped text for assessment close date.
- Navigate to the Options section of the Participants tab.
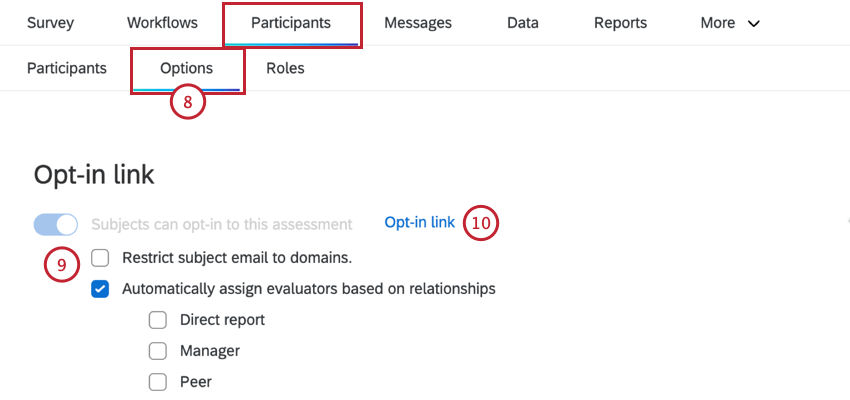
- The Opt-in link is enabled and locked by default. You can customize the opt-in link behavior using the additional settings below.
- To view the link, click the Opt-in link hyperlink to open it in a pop-up window. You can copy this link and then send it to your employees so they can enroll in the assessment.
Participant Portal Tasks
This section covers the experience for subjects and evaluators in the Participant Portal.
Subject Tasks
Once a subject is added to the project by clicking the opt-in link, they can log into the Participant Portal. From here, they can add evaluators, do a self-evaluation, and launch their assessment:
- You can evaluate yourself by clicking Complete next to Complete your self evaluation.
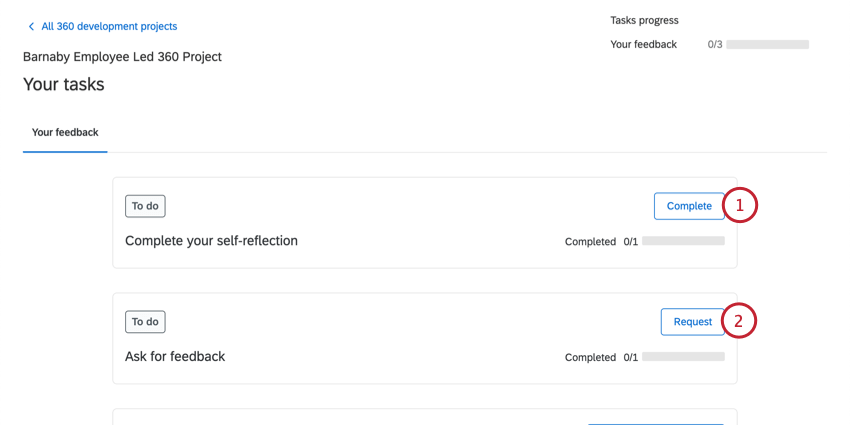 Qtip: You can do your self-evaluation before or after adding other evaluators.
 - To add colleagues as evaluators, click Request next to Ask for feedback
- Search for an evaluator by typing their name and then choosing them from the results.
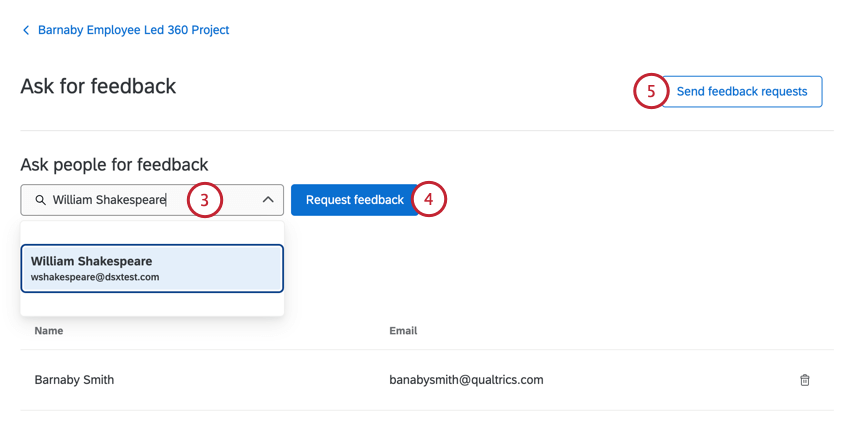 Qtip: Depending on the project’s setting, there may be an additional dropdown for you to define your relationship to the evaluator.
 - Click Request feedback to add them to your list of evaluators.
Qtip: Your evaluators will not see this nomination nor receive an invitation email until you launch the assessment.
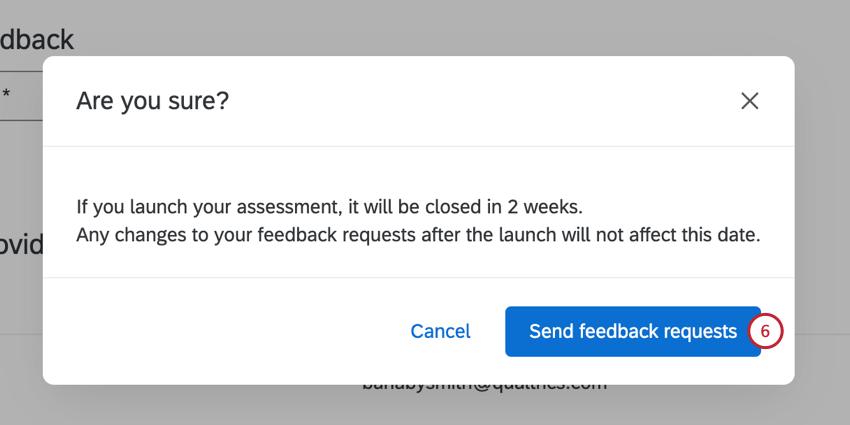
- Once you’re ready to begin the assessment, click Send feedback requests.
- In the confirmation window, click Send feedback requests. This will send invites to your evaluators and the assessment will be available for them in their participant portal.
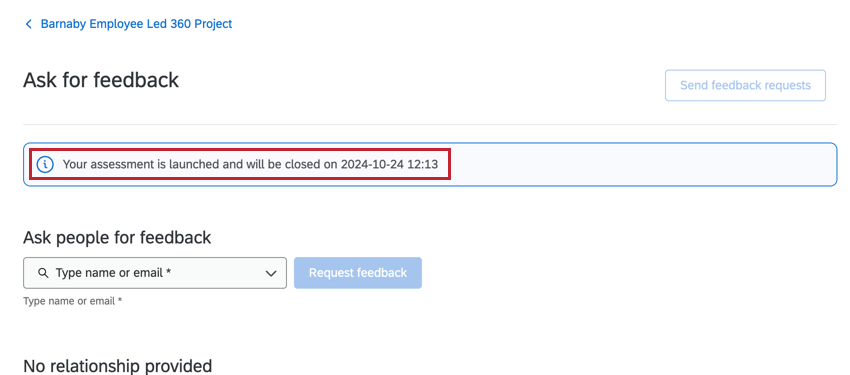
After the assessment has been closed, you can view your subject report via the Participant Portal.
Evaluator
Once a subject adds nominations and launches their assessment, evaluators will be invited to take the assessment.
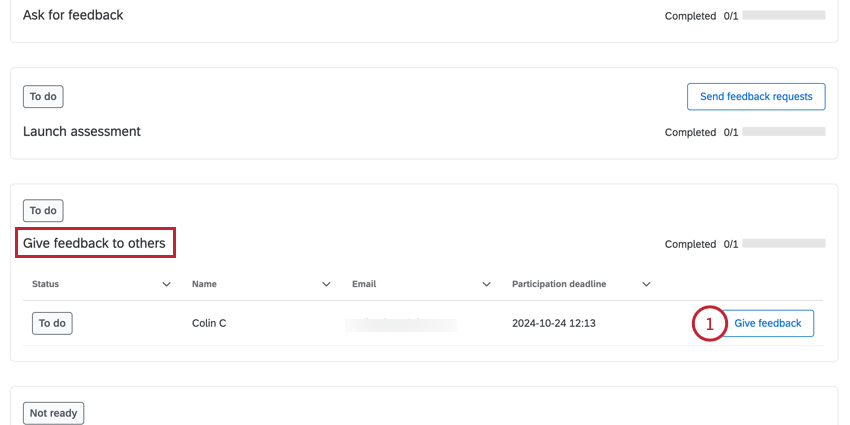
- In the Give feedback to others section, click Give feedback next to the person you want to evaluate. This will open the assessment survey.
- Once you’ve completed the assessment, the task will be marked as Done.
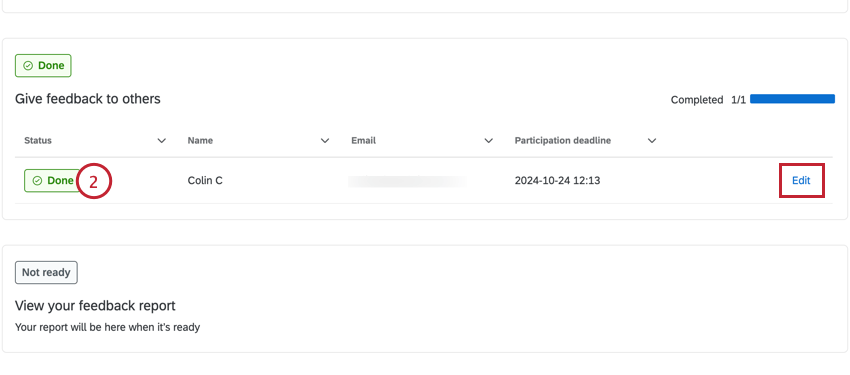 Qtip: If the assessment is still open and you need to change your response, you can click Edit.